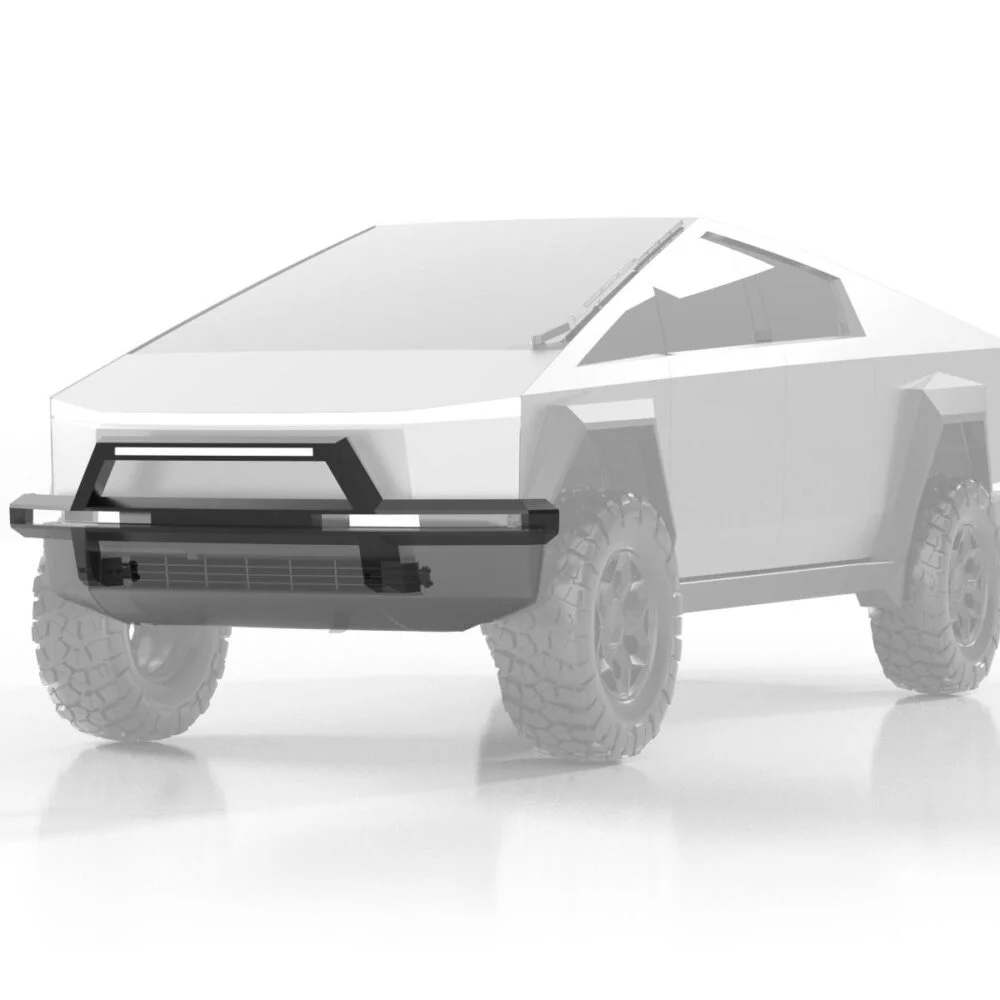
TESLA CYBERTRUCK UP INVINCIBLE®
HD Front Bull Bar
INSTALLATION GUIDE
- UP INVINCIBLE Front Bull Bar
- UP INVINCIBLE Front Bull Bar Mount (x2)
- UP INVINCIBLE Bull Bar Light
NOTE: Most factory hardware will not be re-used unless specified. However, be sure to keep all factory hardware until the final install is complete. Preliminary Steps: Power-Off
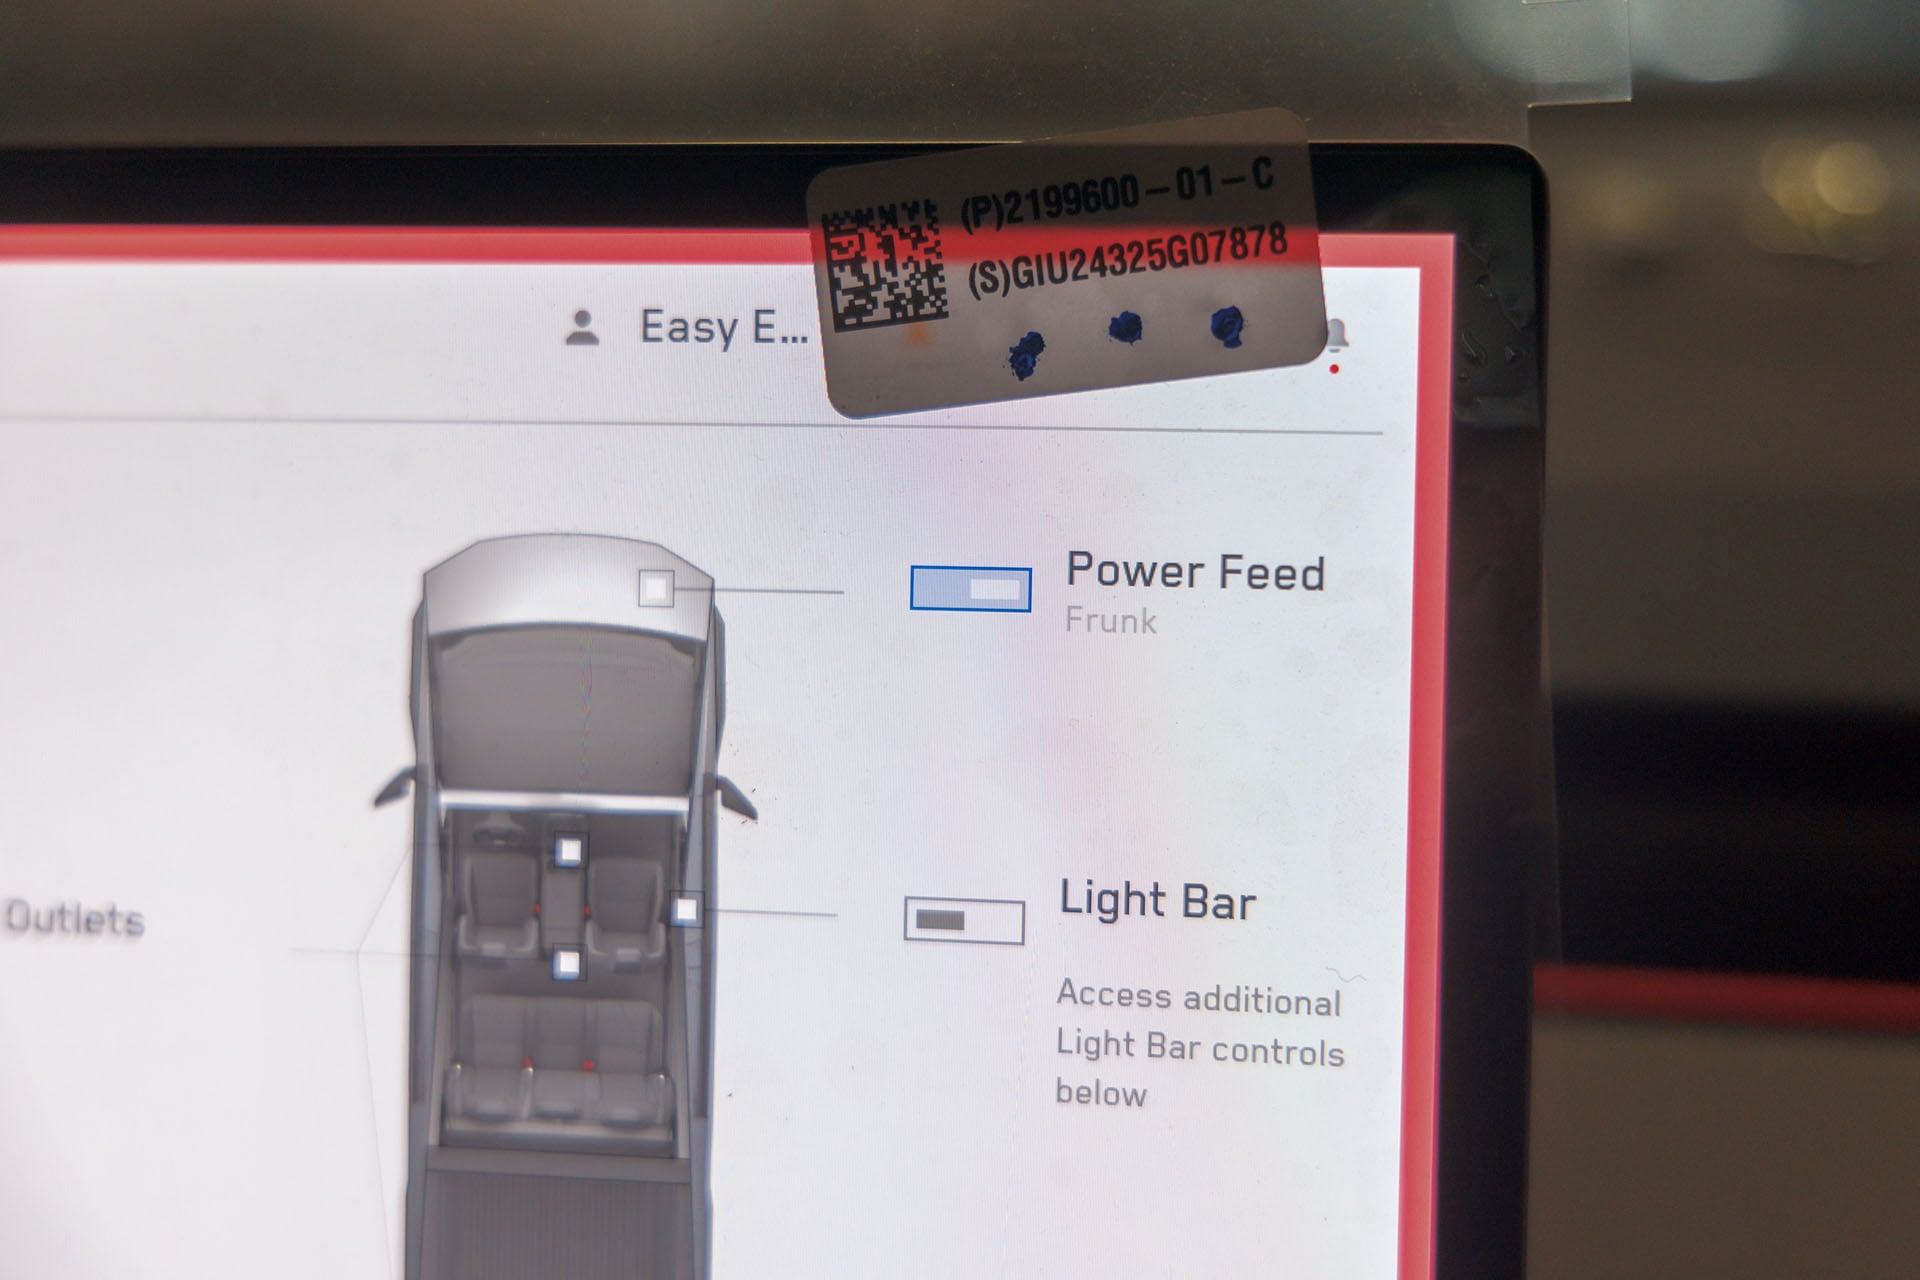
IMPORTANT: Before you begin installation, be sure that external power is turned off. On the bottom left of your screen, select the vehicle icon.
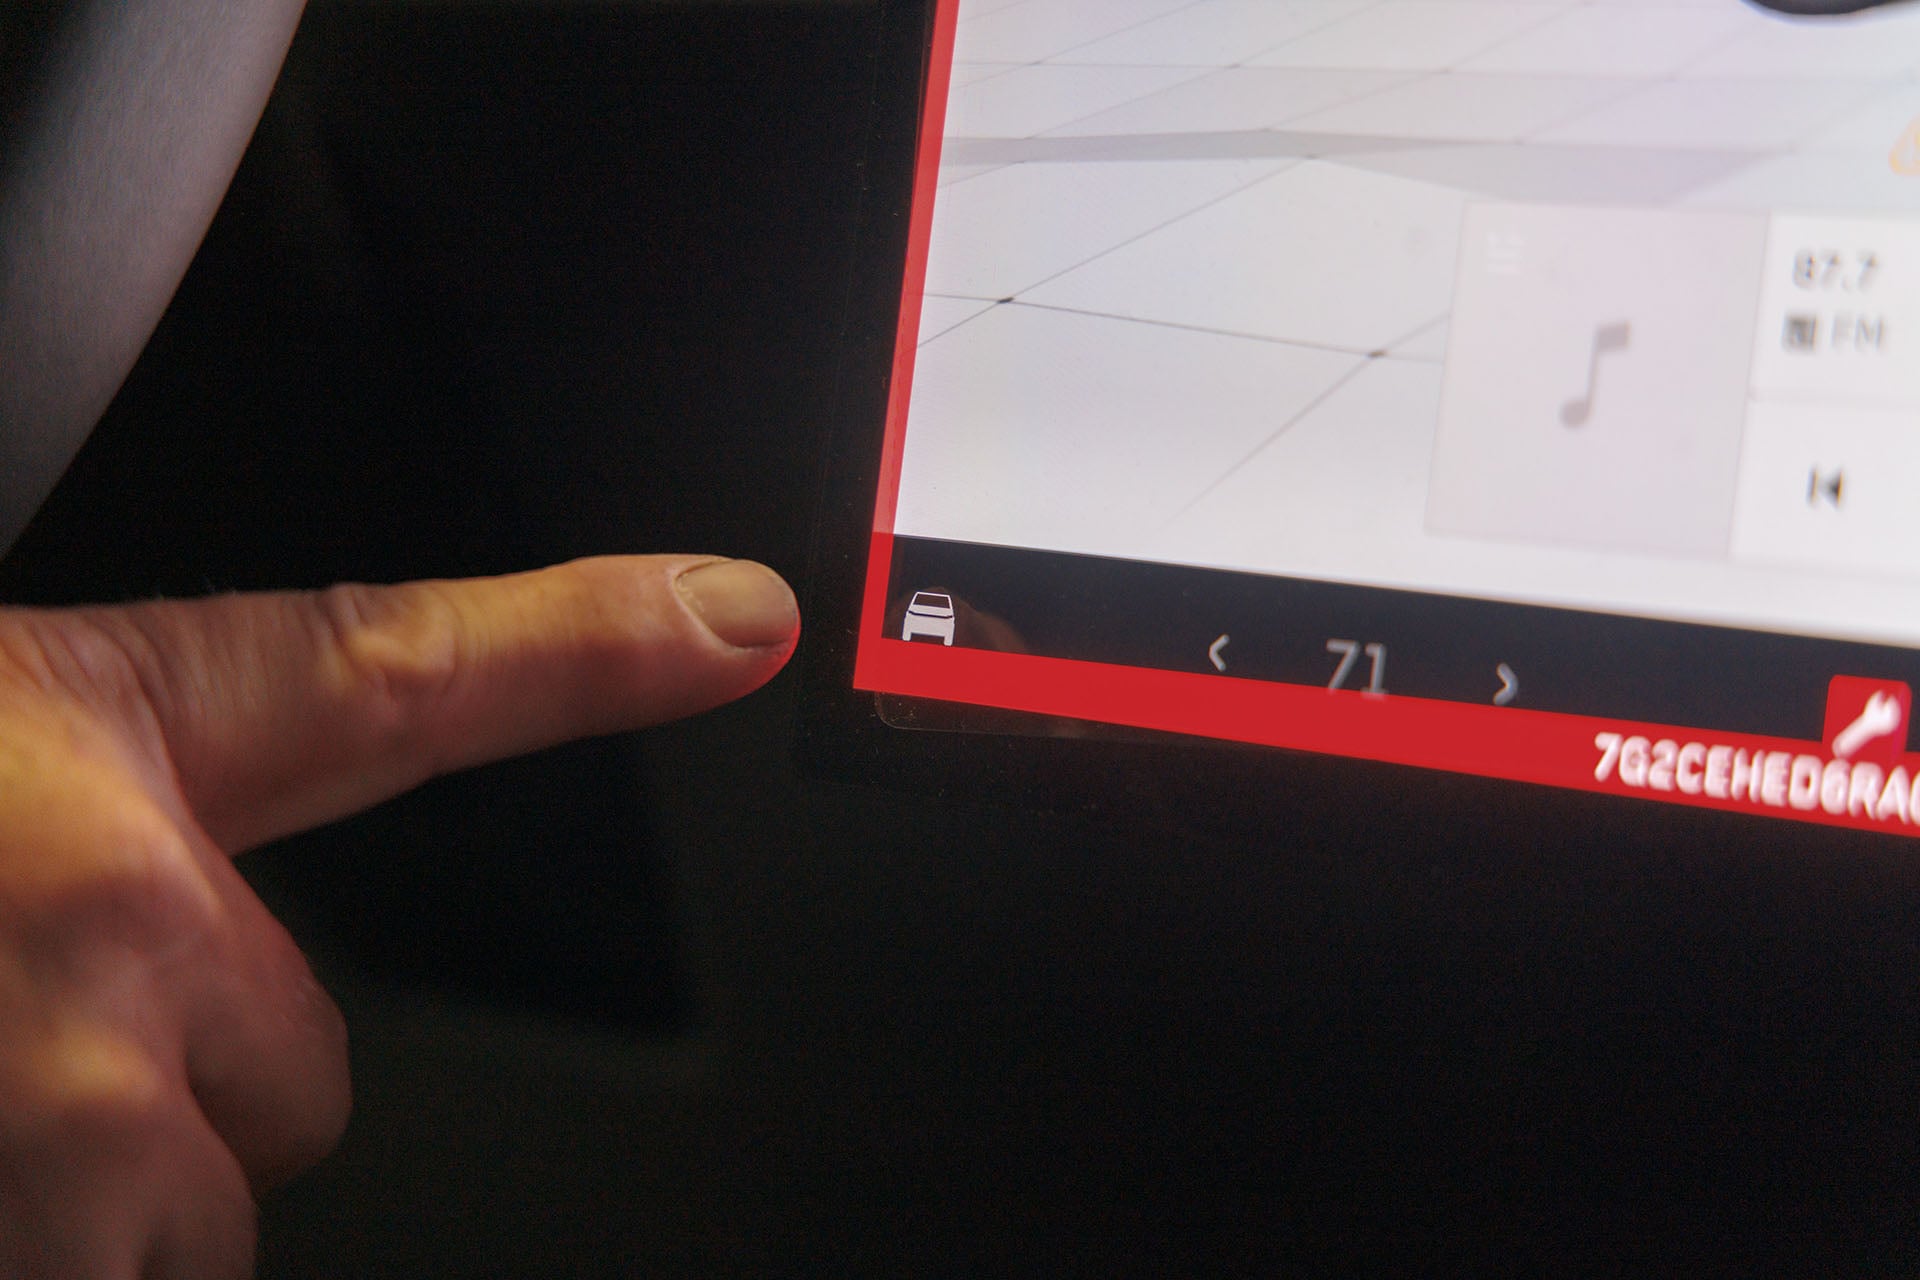
Next, select “Outlets & Mods”.
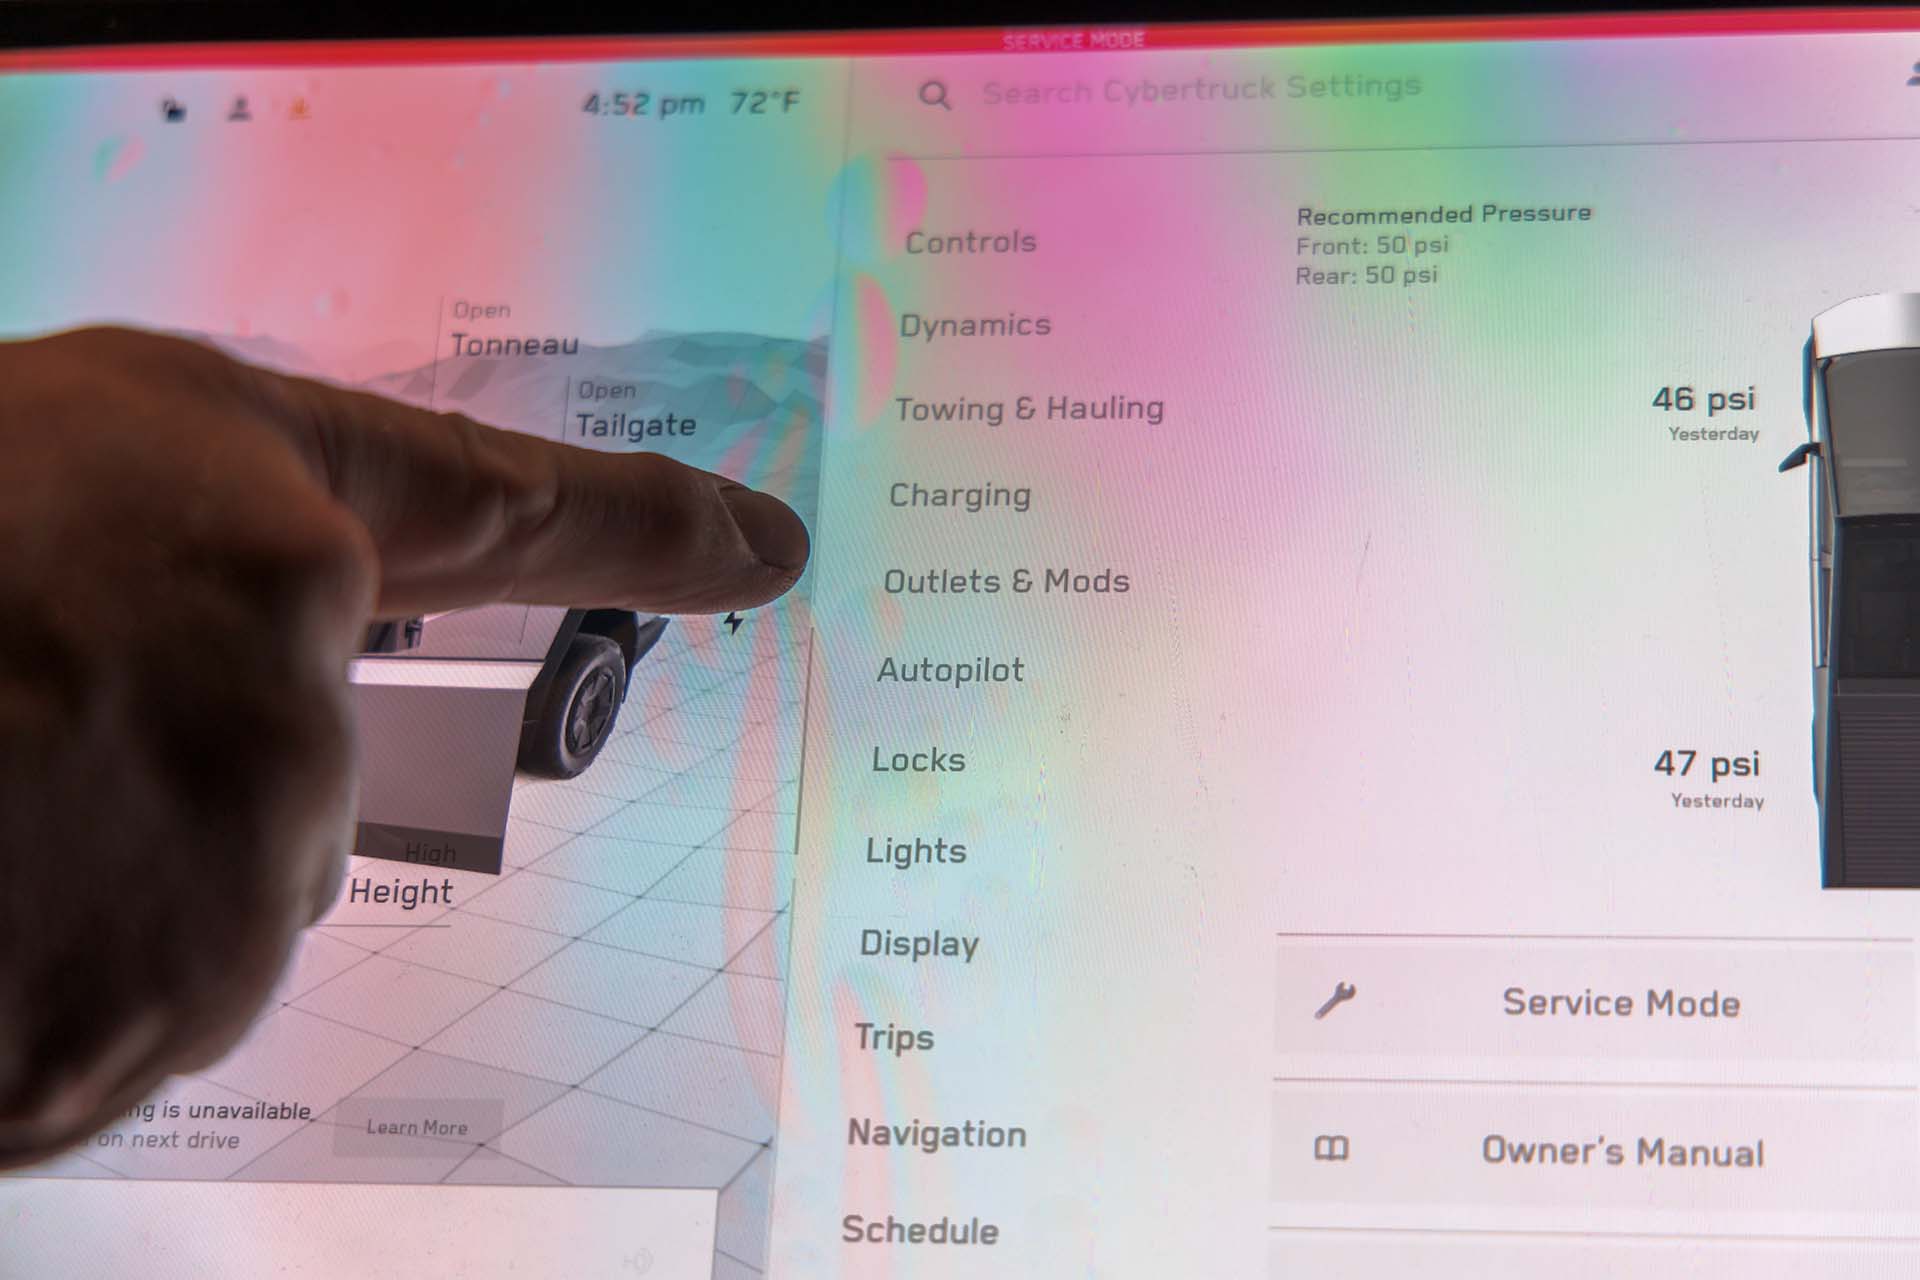
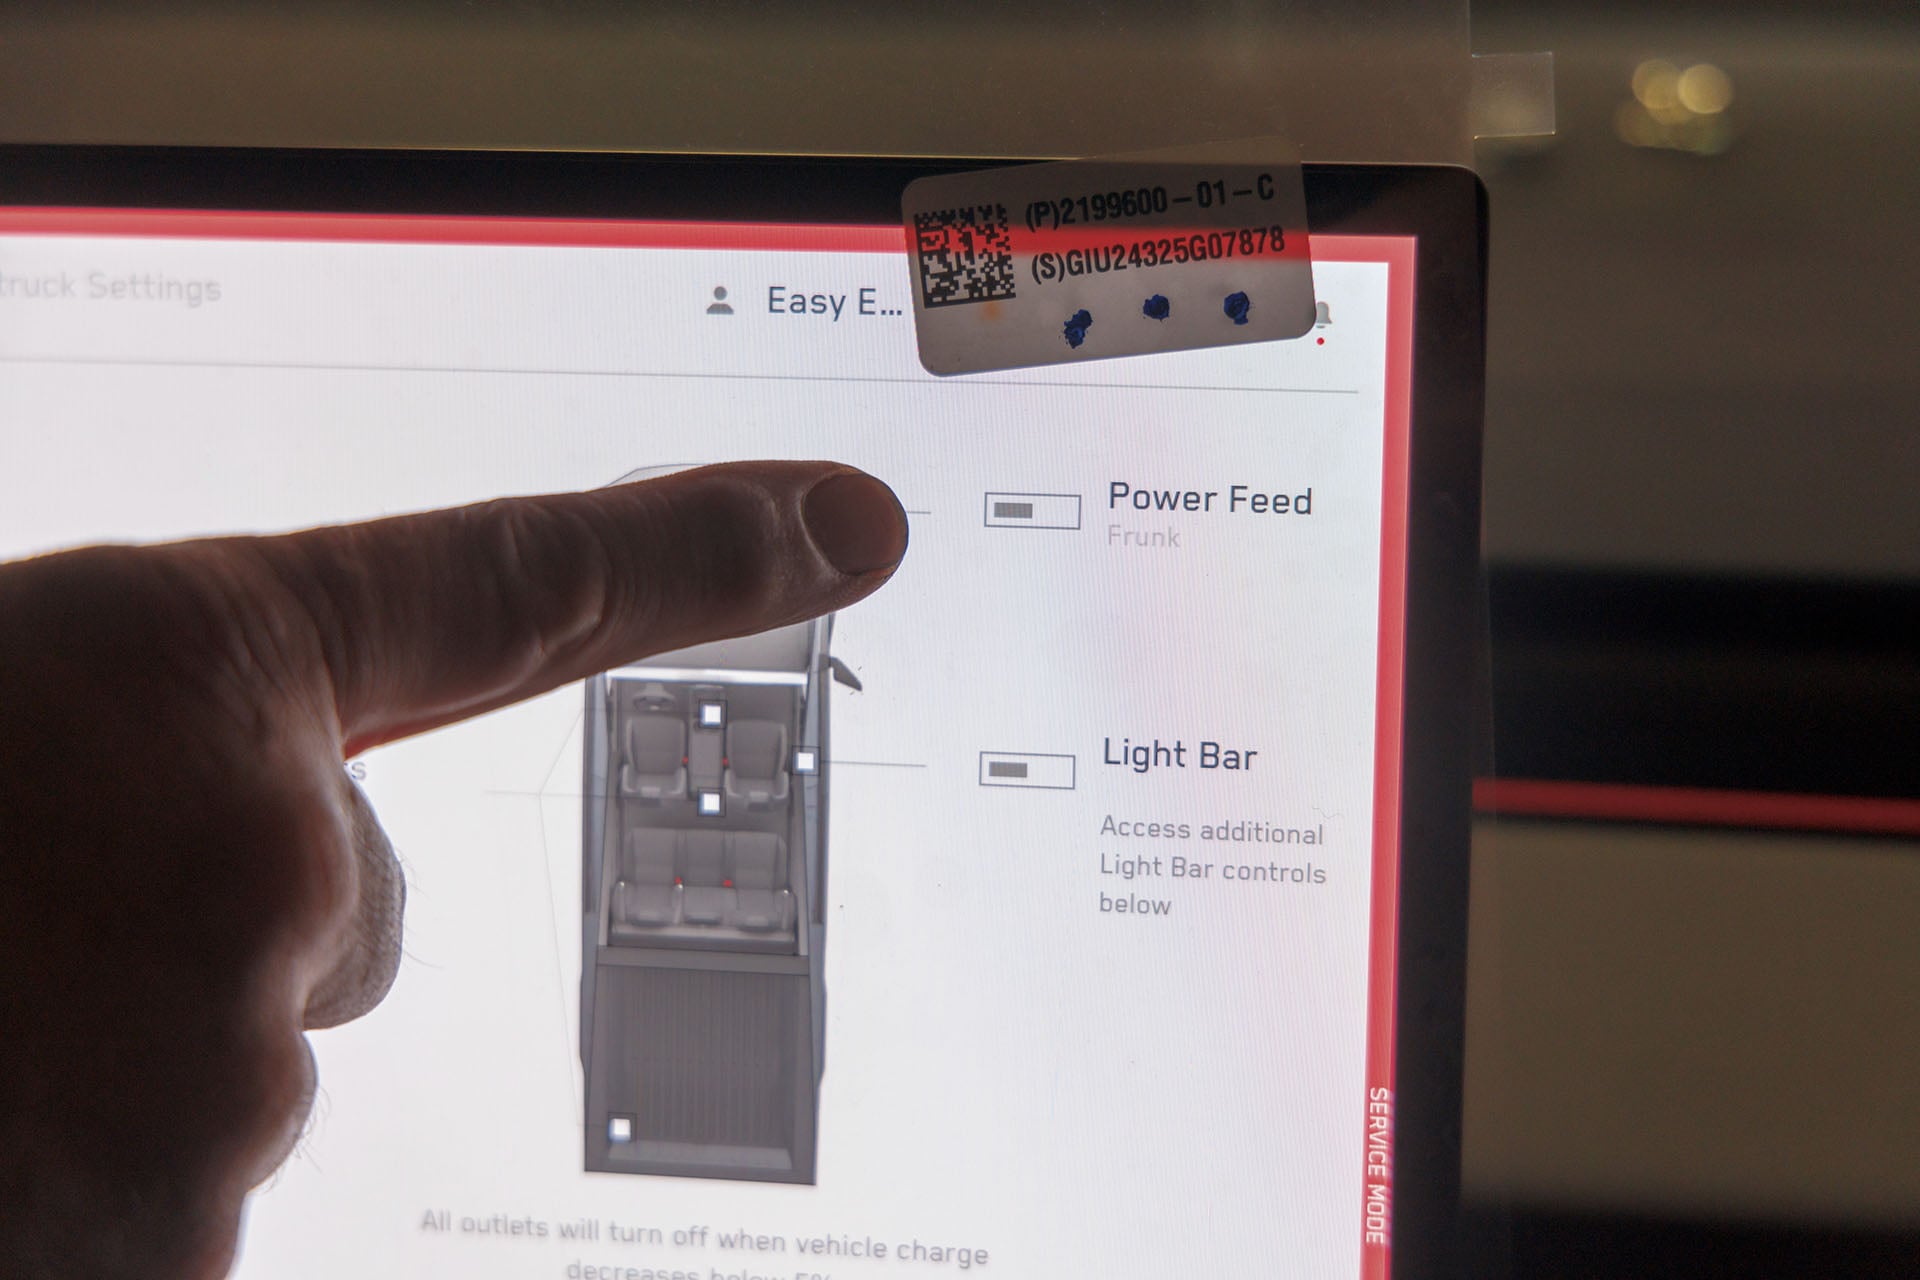
On the infotainment screen, ensure that “Power Feed – Frunk” is in the “OFF” position.
- Pry Tool / Plastic Trim Tool: For removing panels and covers.
- Clip Removal Tool: For removing fender liner clips and tow hook covers.
- Sockets: 10mm, 15mm, and 18mm.
- 3mm Hex Socket (Allen Key): For light bar and backing plate hardware.
- 13mm Ratcheting Wrench: For light bar mounting.
- Torque Wrench: Capable of measuring 15–60 lbs-ft.
- Wire Strippers & Cutters: For light bar wiring.
- Paint Marker: For marking the bumper trimming area.
- Plastic Trim Cutting Tool: (e.g., Dremel or heavy-duty shears).
- Small Hammer: For seating shims.
- Medium Strength Thread Locker: (e.g., Blue Loctite).
- Bull Bar Mounts (Factory Bolts): 58 lbs-ft.
- Light Bar Mounting Bolts: 15 lbs-ft.
- Bull Bar Lock Nuts: 38 lbs-ft.
By installing or using this product, you understand and agree with the following: If you do not agree, do not proceed with the installation and return this product within 30 days for a full refund of the purchase price from the company from which you have purchased it.
- I understand and agree that this product is intended to be installed for use on private roads and in jurisdictions where the use of this product is deemed legal by the local authorities. Furthermore, I understand and agree Unplugged Performance does not have any knowledge or control of regulations in my local jurisdiction, and it is up to me to determine if the product is acceptable for use with my vehicle.
- I understand that Unplugged Performance has done testing of this product on road and on closed racetracks but does not have the ability to test the vehicle for localized standards and regulations.
- I understand and agree that if the vehicle manufacturer determines that any Unplugged Performance products have contributed to a problem with the vehicle it may affect the vehicle’s warranty. Furthermore, I understand and agree that Unplugged Performance has no duty nor ability to be involved in internal manufacturer decisions.
- I understand and agree that if this product is given to an installer for installation on my vehicle, I have read and agreed with all the previous, even if I am not personally installing these parts on my vehicle. Furthermore, I understand and agree that this product should be installed by a trained professional that is familiar with both the vehicle as well as this product. Furthermore, I understand and agree that I and/or my chosen installer will follow the installation instructions carefully and dutifully test the vehicle post-installation in a safe and controlled environment to ensure proper operation.
- I understand and agree that by installing this product Unplugged Performance and all associated persons and entities as well as the vehicle manufacturer and all associated entities must be held harmless in the event of any suit, damages, or other legal action. Furthermore, I hereby release Unplugged Performance and any associated entities from any and all liability for any potential claim or claims.
If you do not agree with any of the above statements, you should return the product immediately. For more information please see our Terms and Conditions
Conditional Start: If you already have a UP INVINCIBLE front bumper installed on your vehicle with the Bull Bar Specific Mounts, proceed to Step 9 (if installing a light bar) or Step 12 (if not). If you have the UP INVINCIBLE front bumper with D-ring Mounts, then you will need to remove the UP INVINCIBLE front bumper to replace the mounts with the Bull Bar specific mounts.
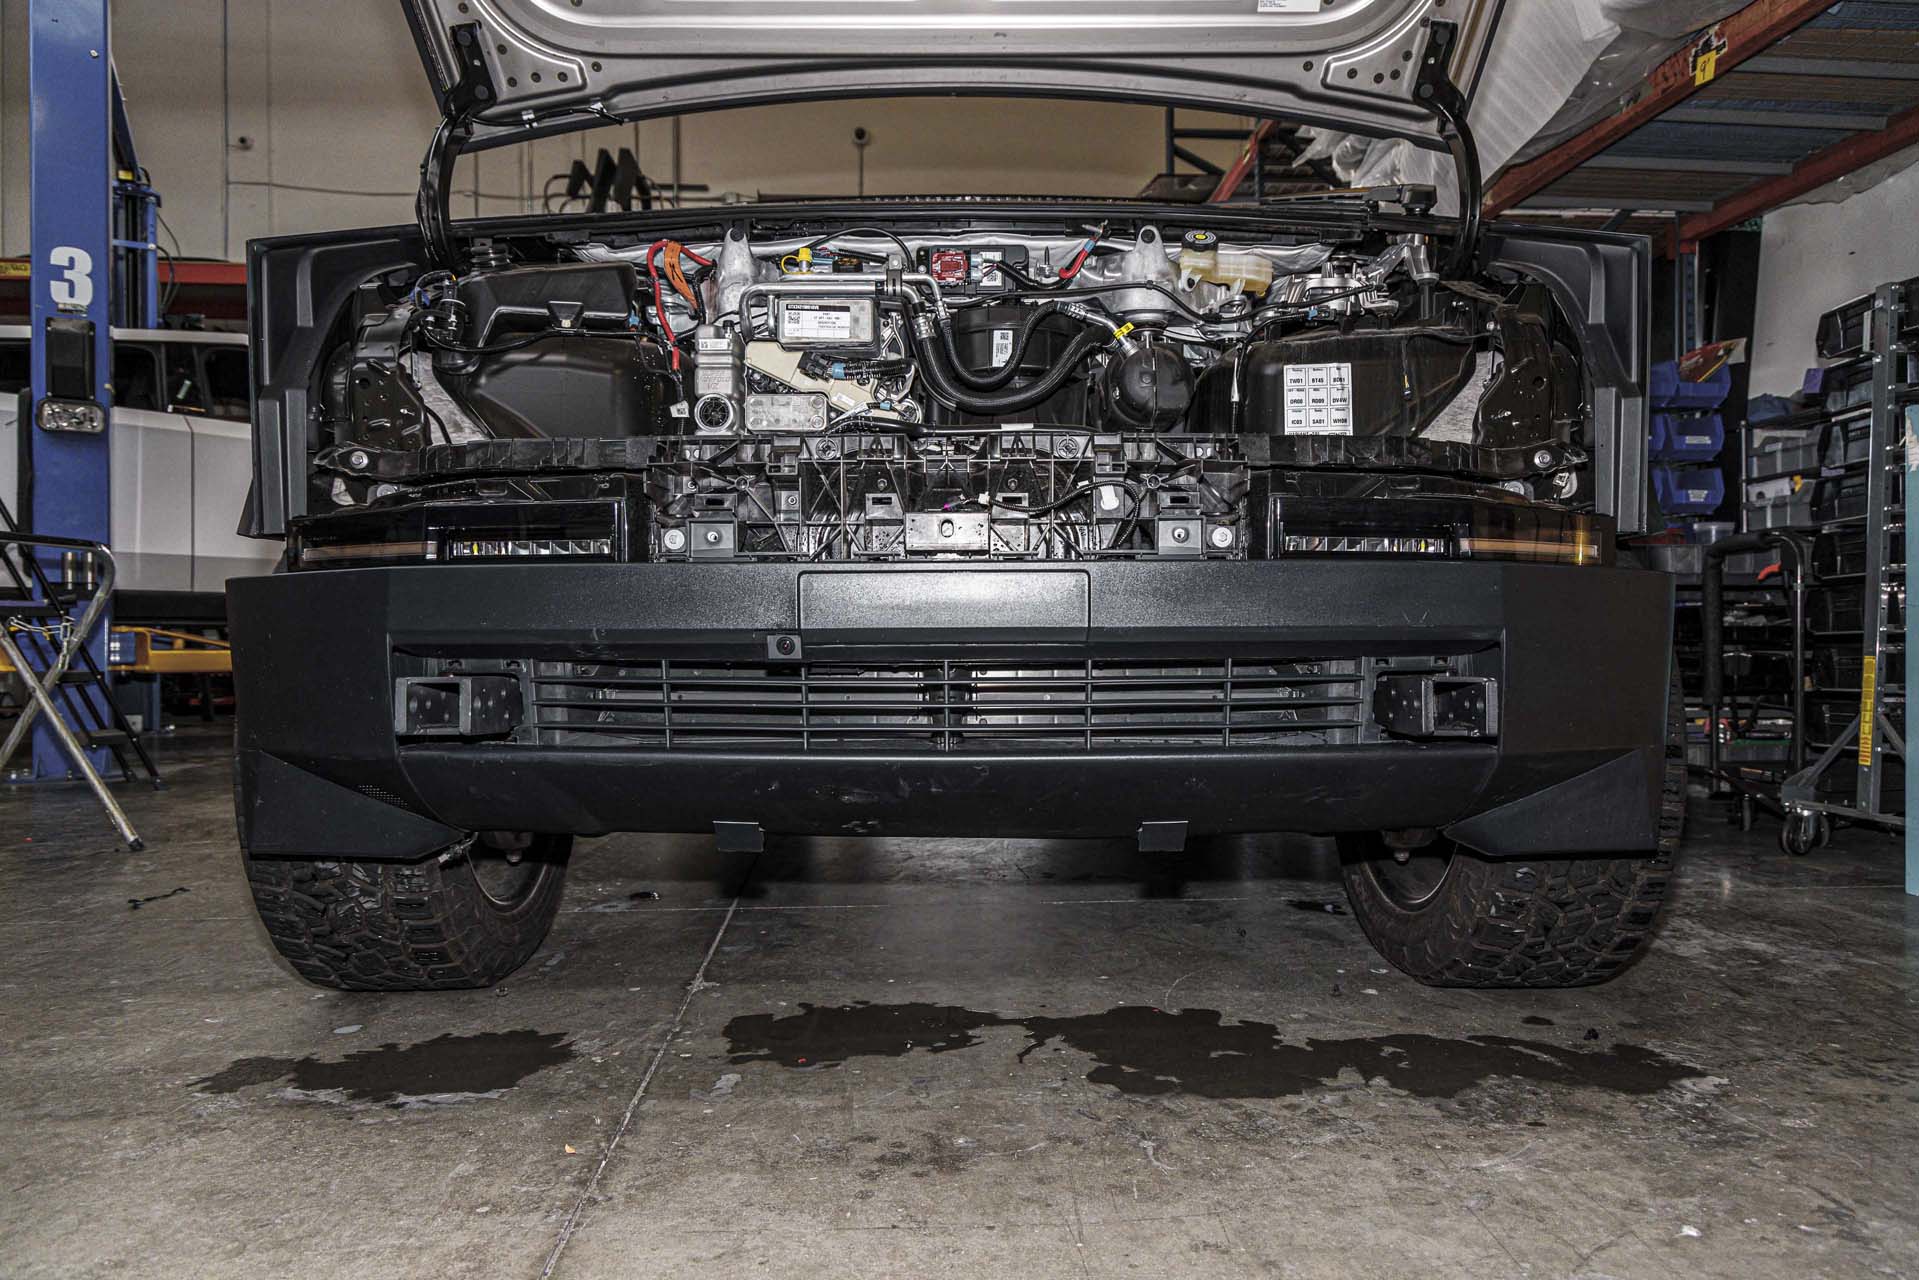
Now you may proceed to disassemble the front bumper assembly. First, open the frunk.
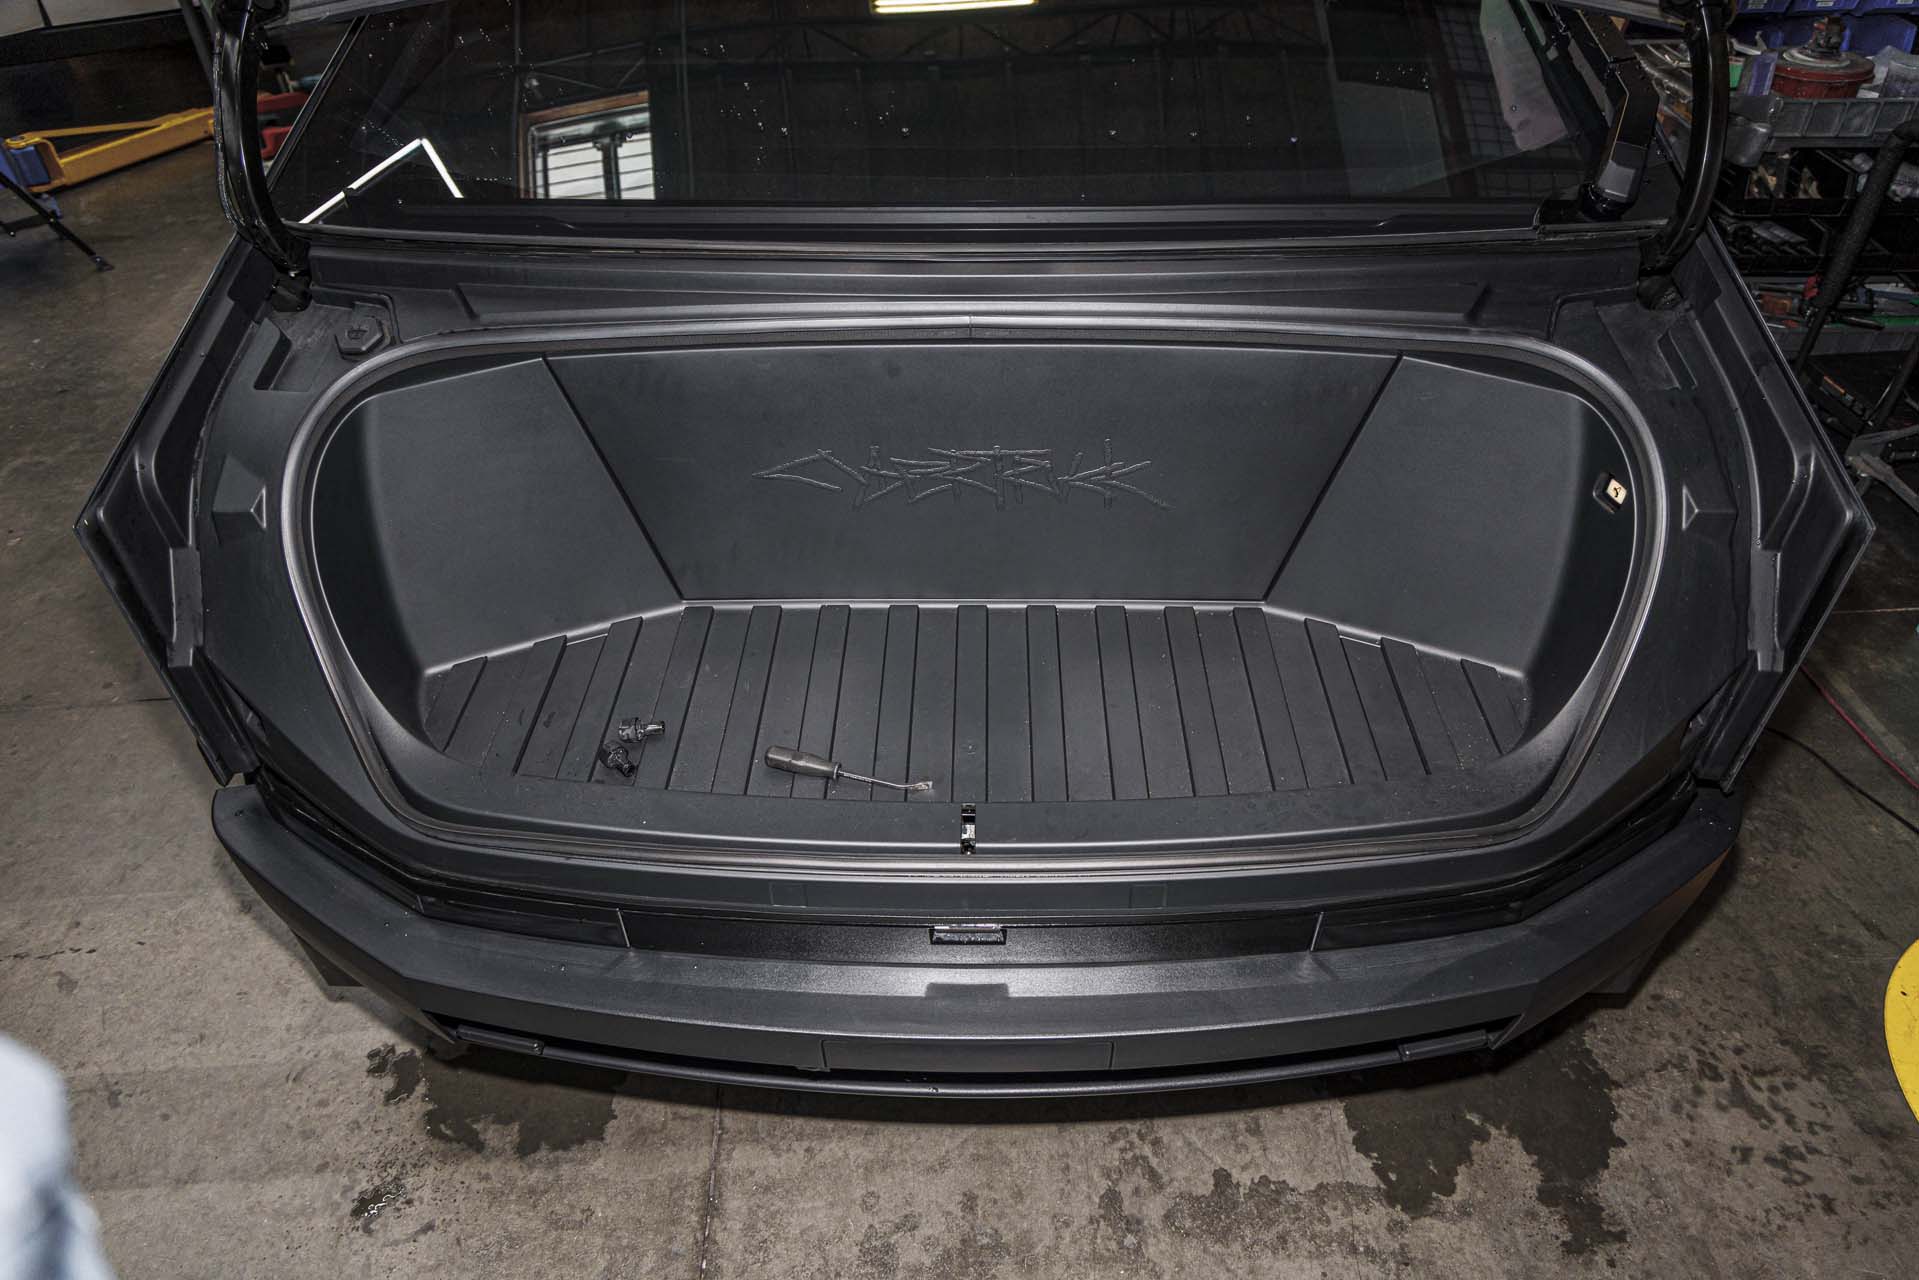
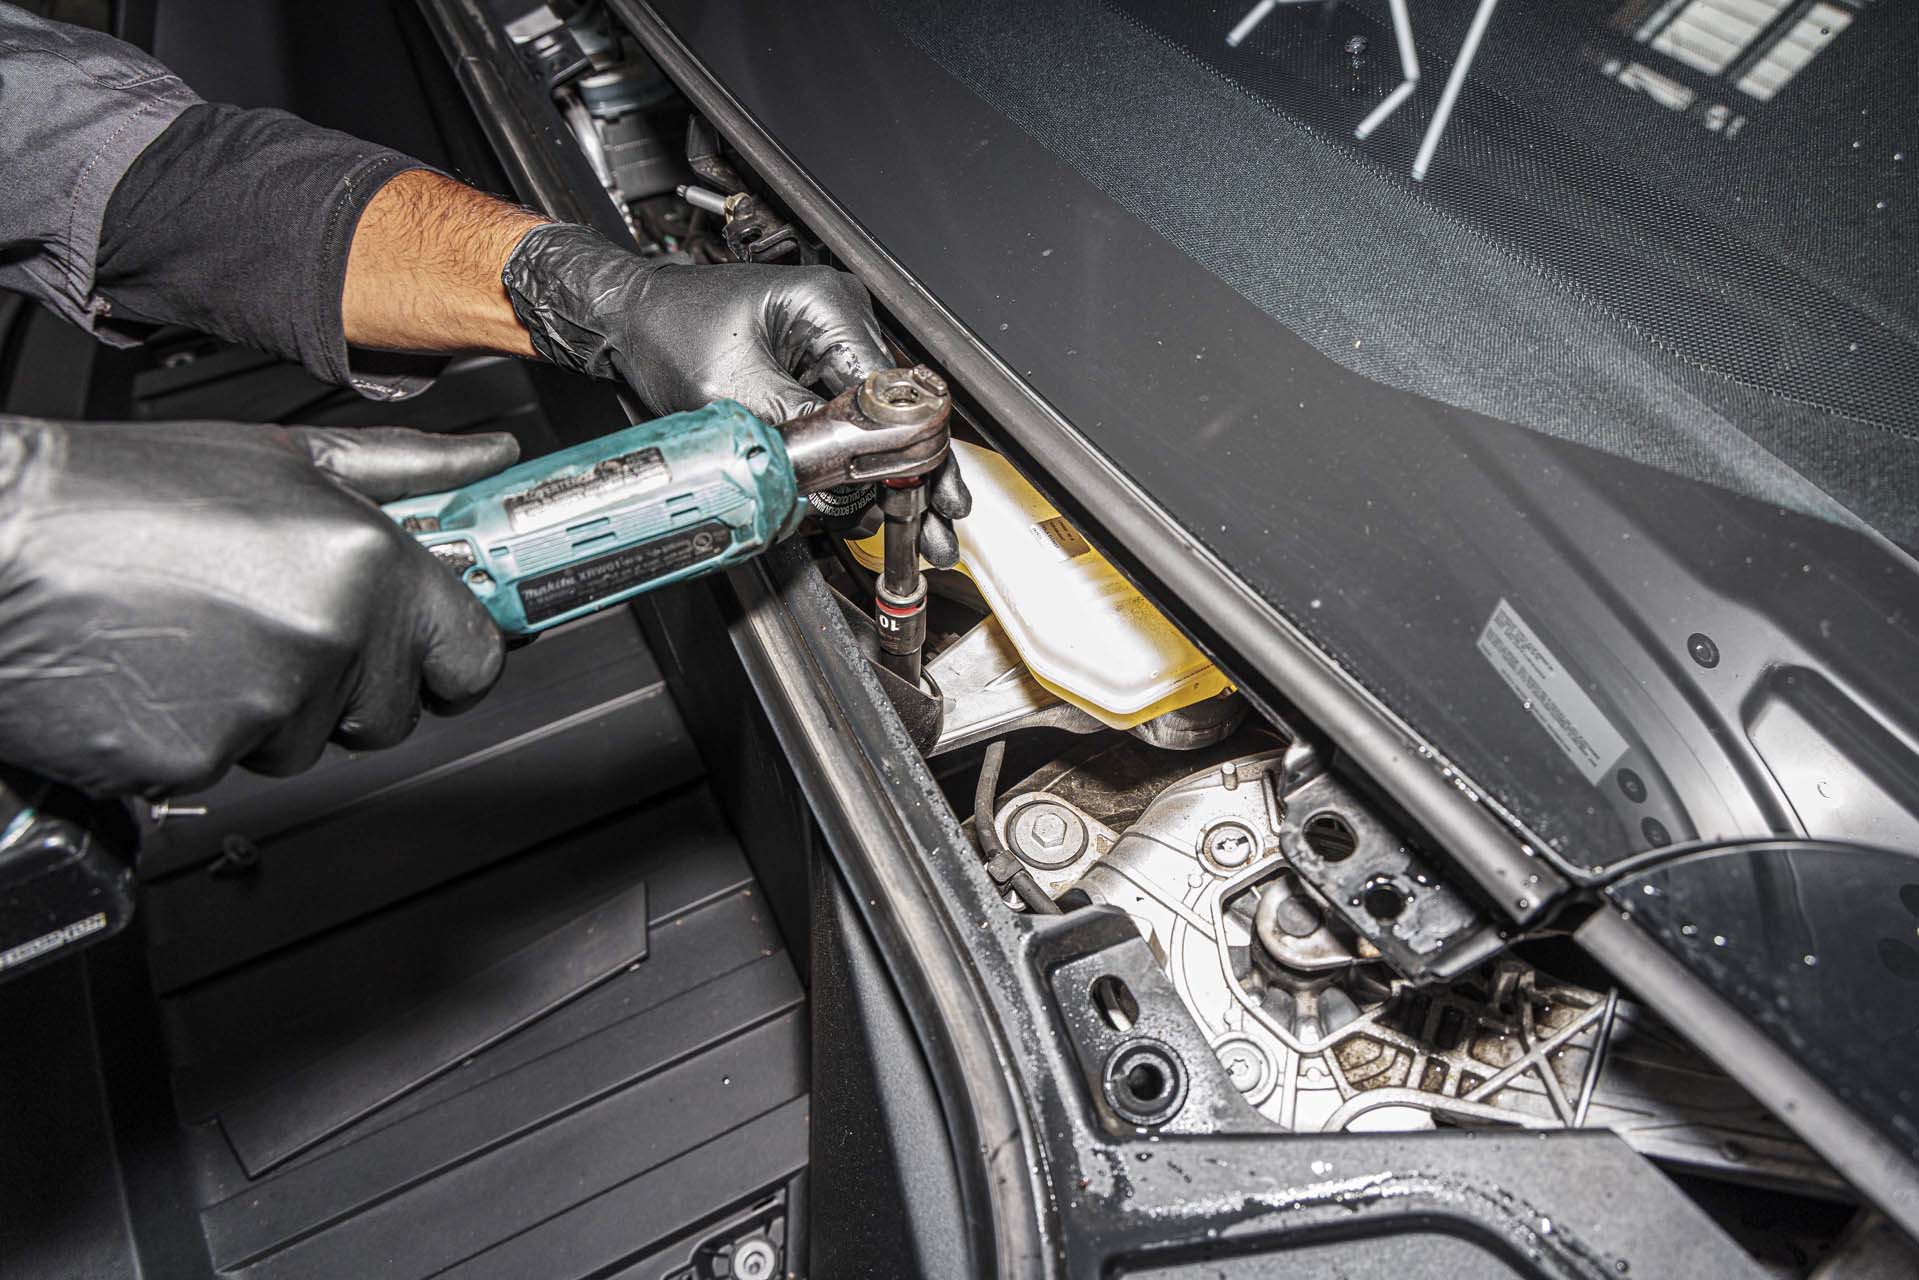
Using a pry tool, remove 2 cover panels to access the 10mm bolts that secure the frunk tub to the vehicle as shown below.
Using a 10mm socket, remove all 4 bolts that secure the bottom of the frunk to the vehicle.
Next, remove both hood bump stops by turning in a counterclockwise motion.
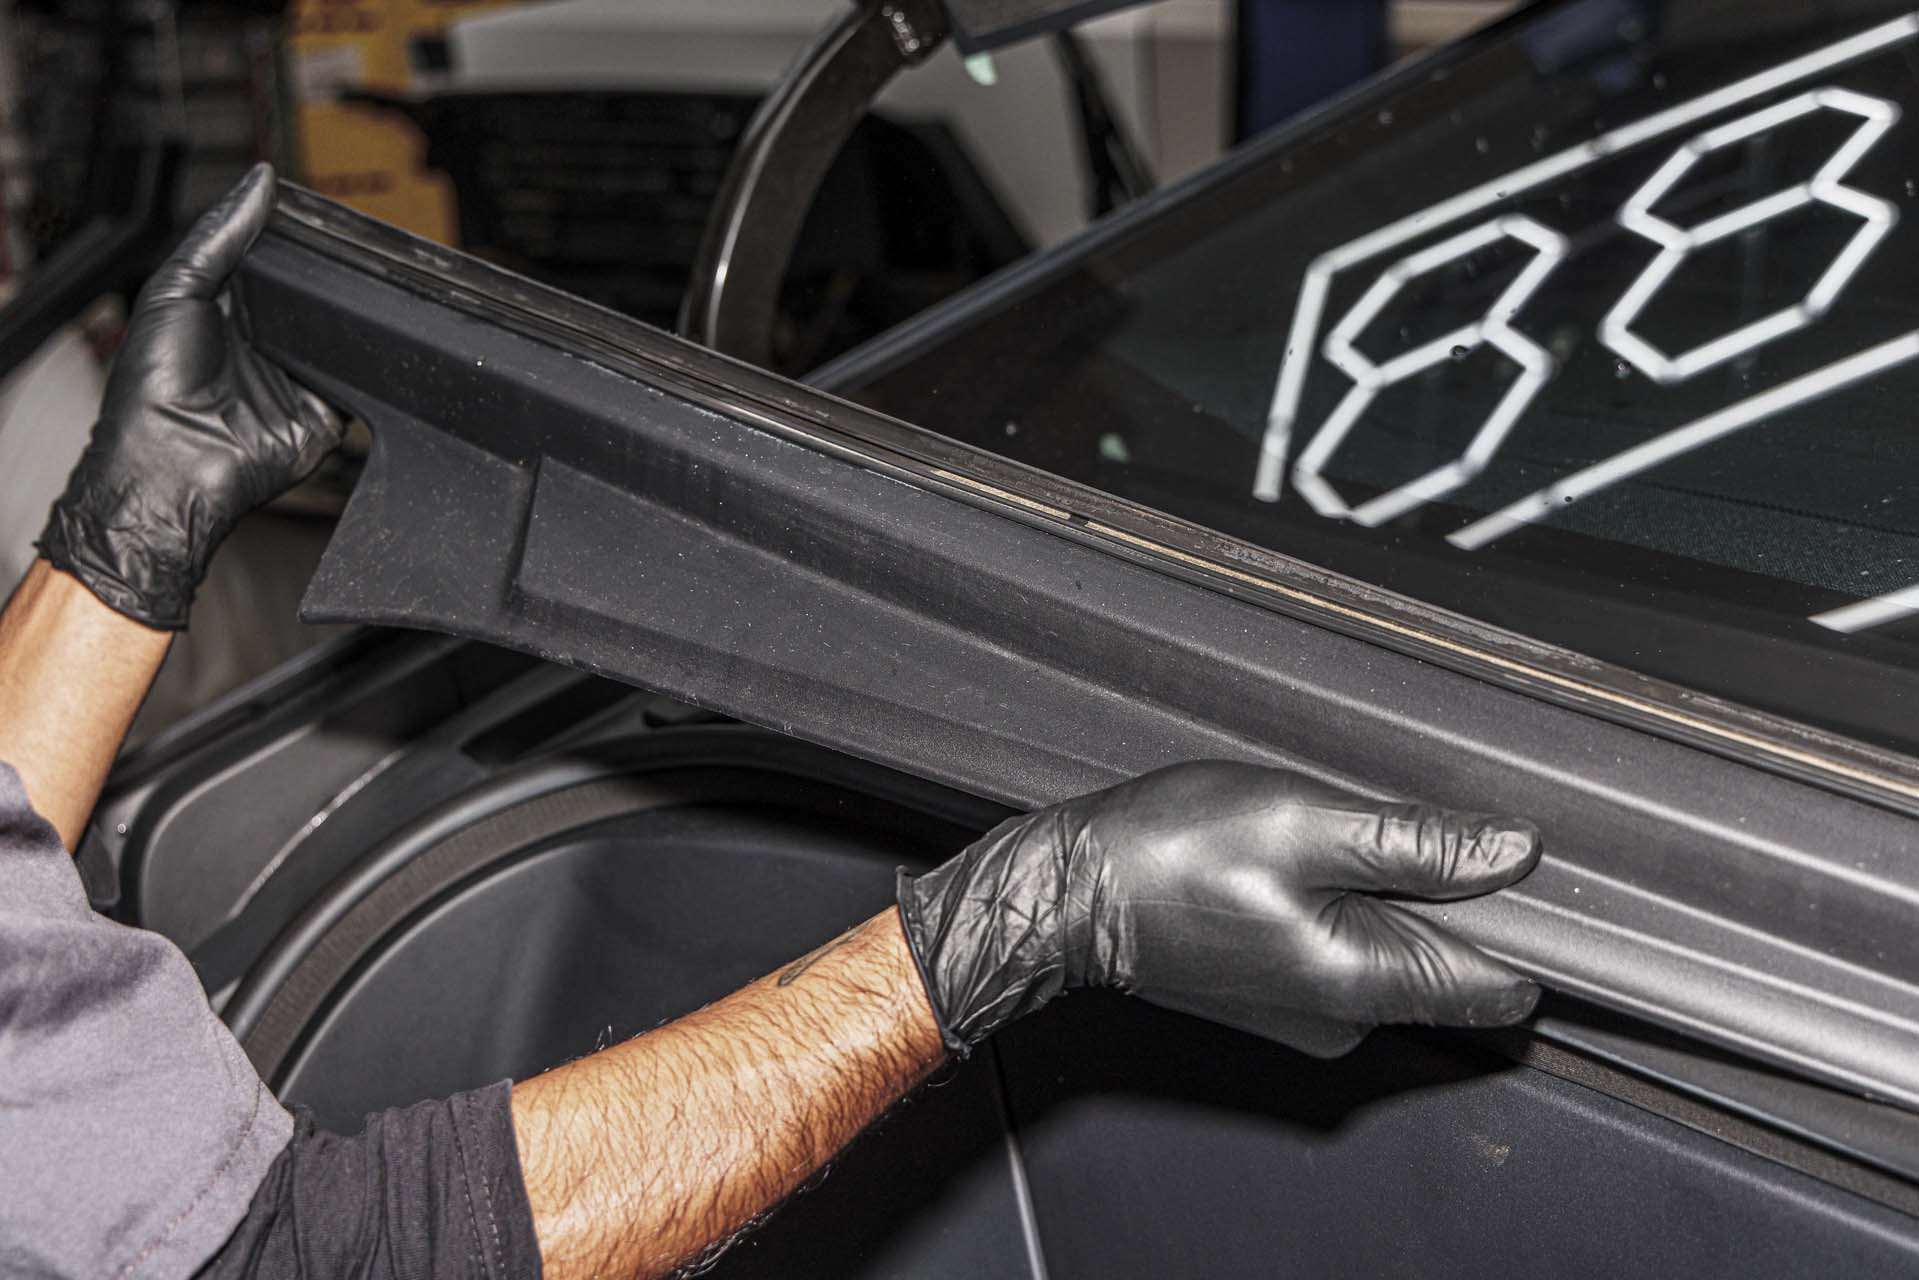
Next, remove the upper cowling by pulling upward in a swift motion. Remove the cowling from the vehicle.
Using a 10mm socket, remove the 2 bolts that secure the upper portion of the frunk to the vehicle.
Now that all fasteners have been removed from the frunk, pull up the driver side of the front tub and disconnect the emergency latch release power cable.
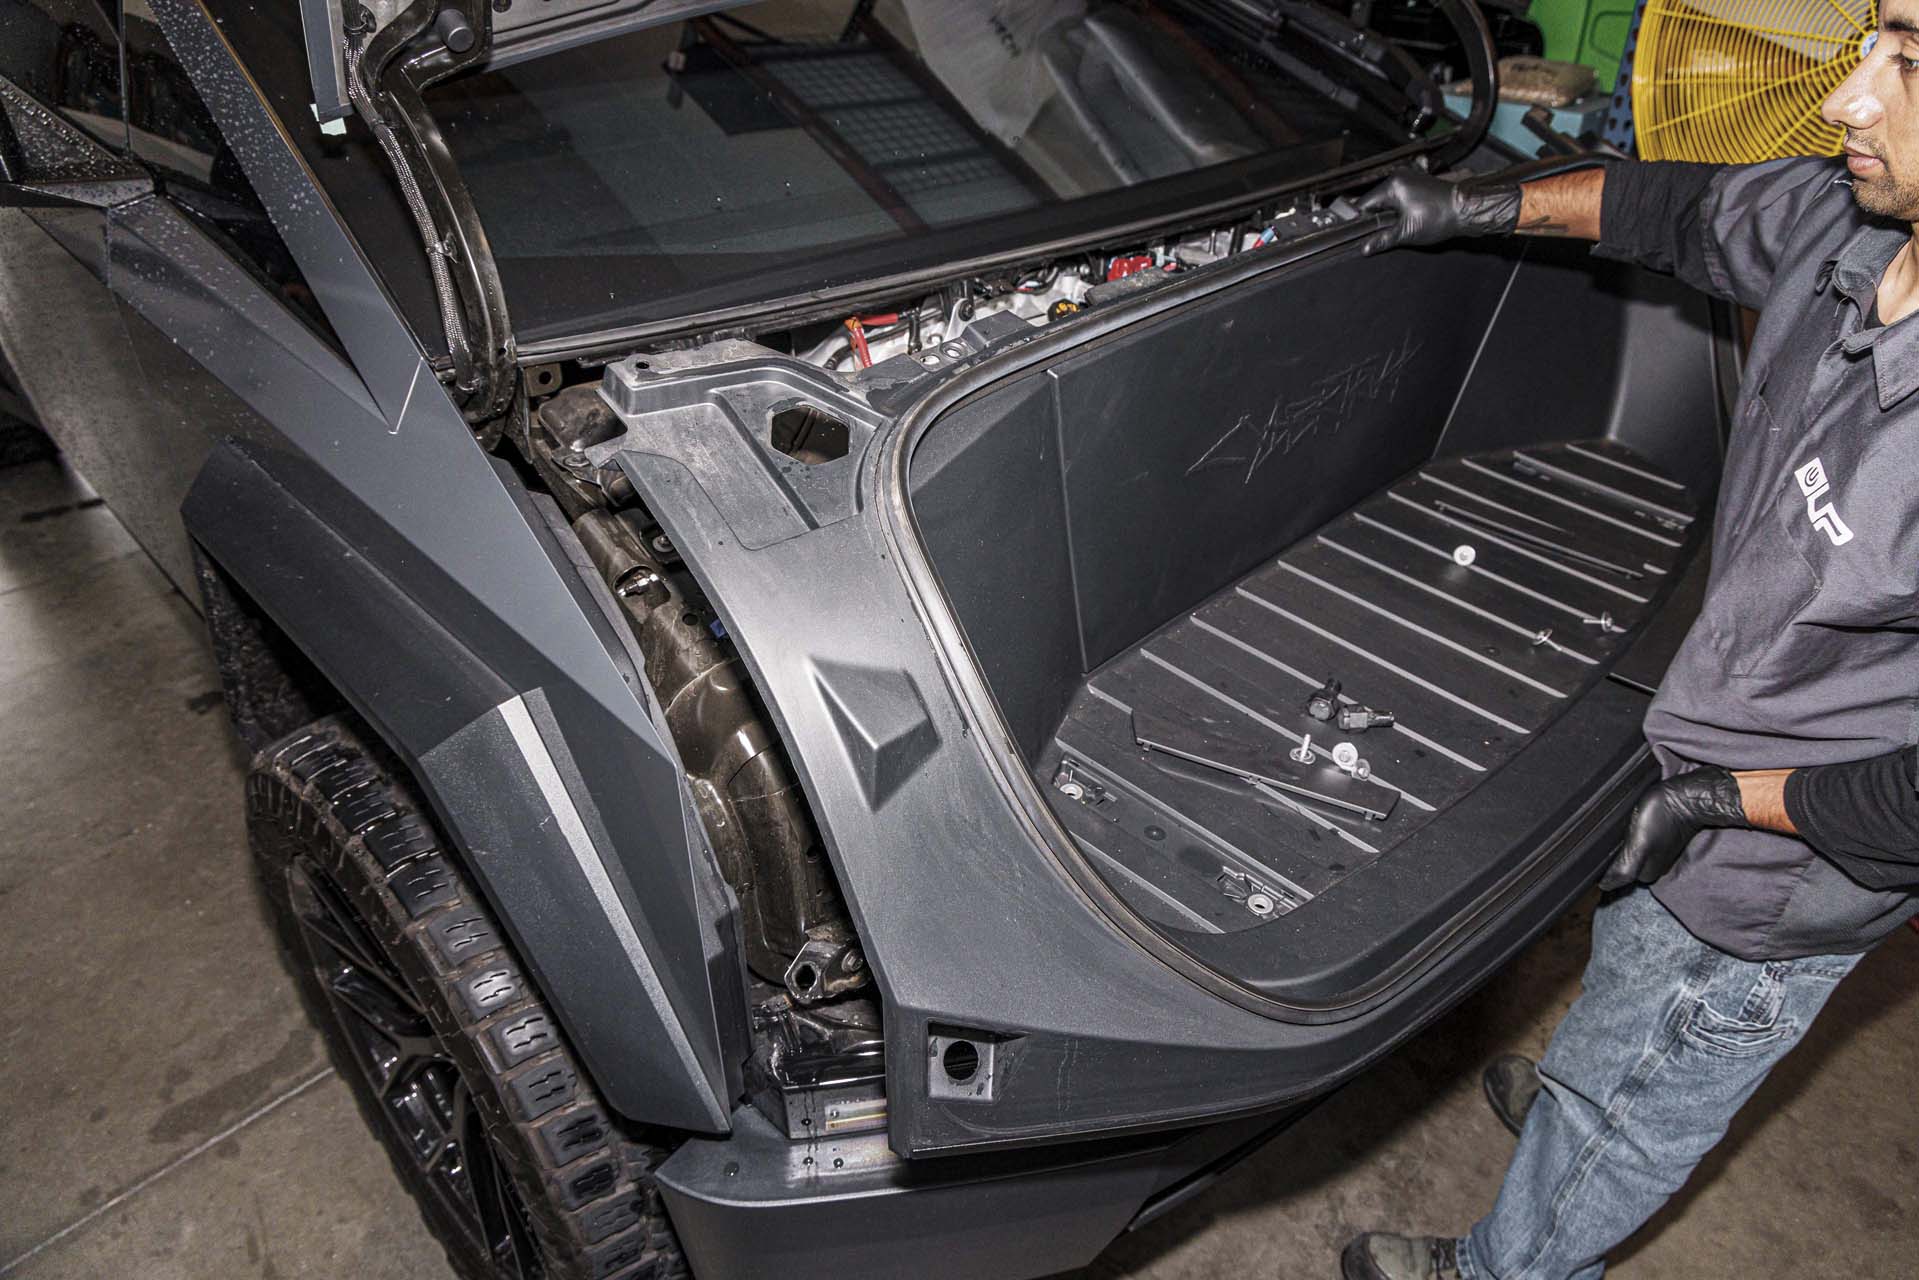
Remove the front tub from the vehicle.
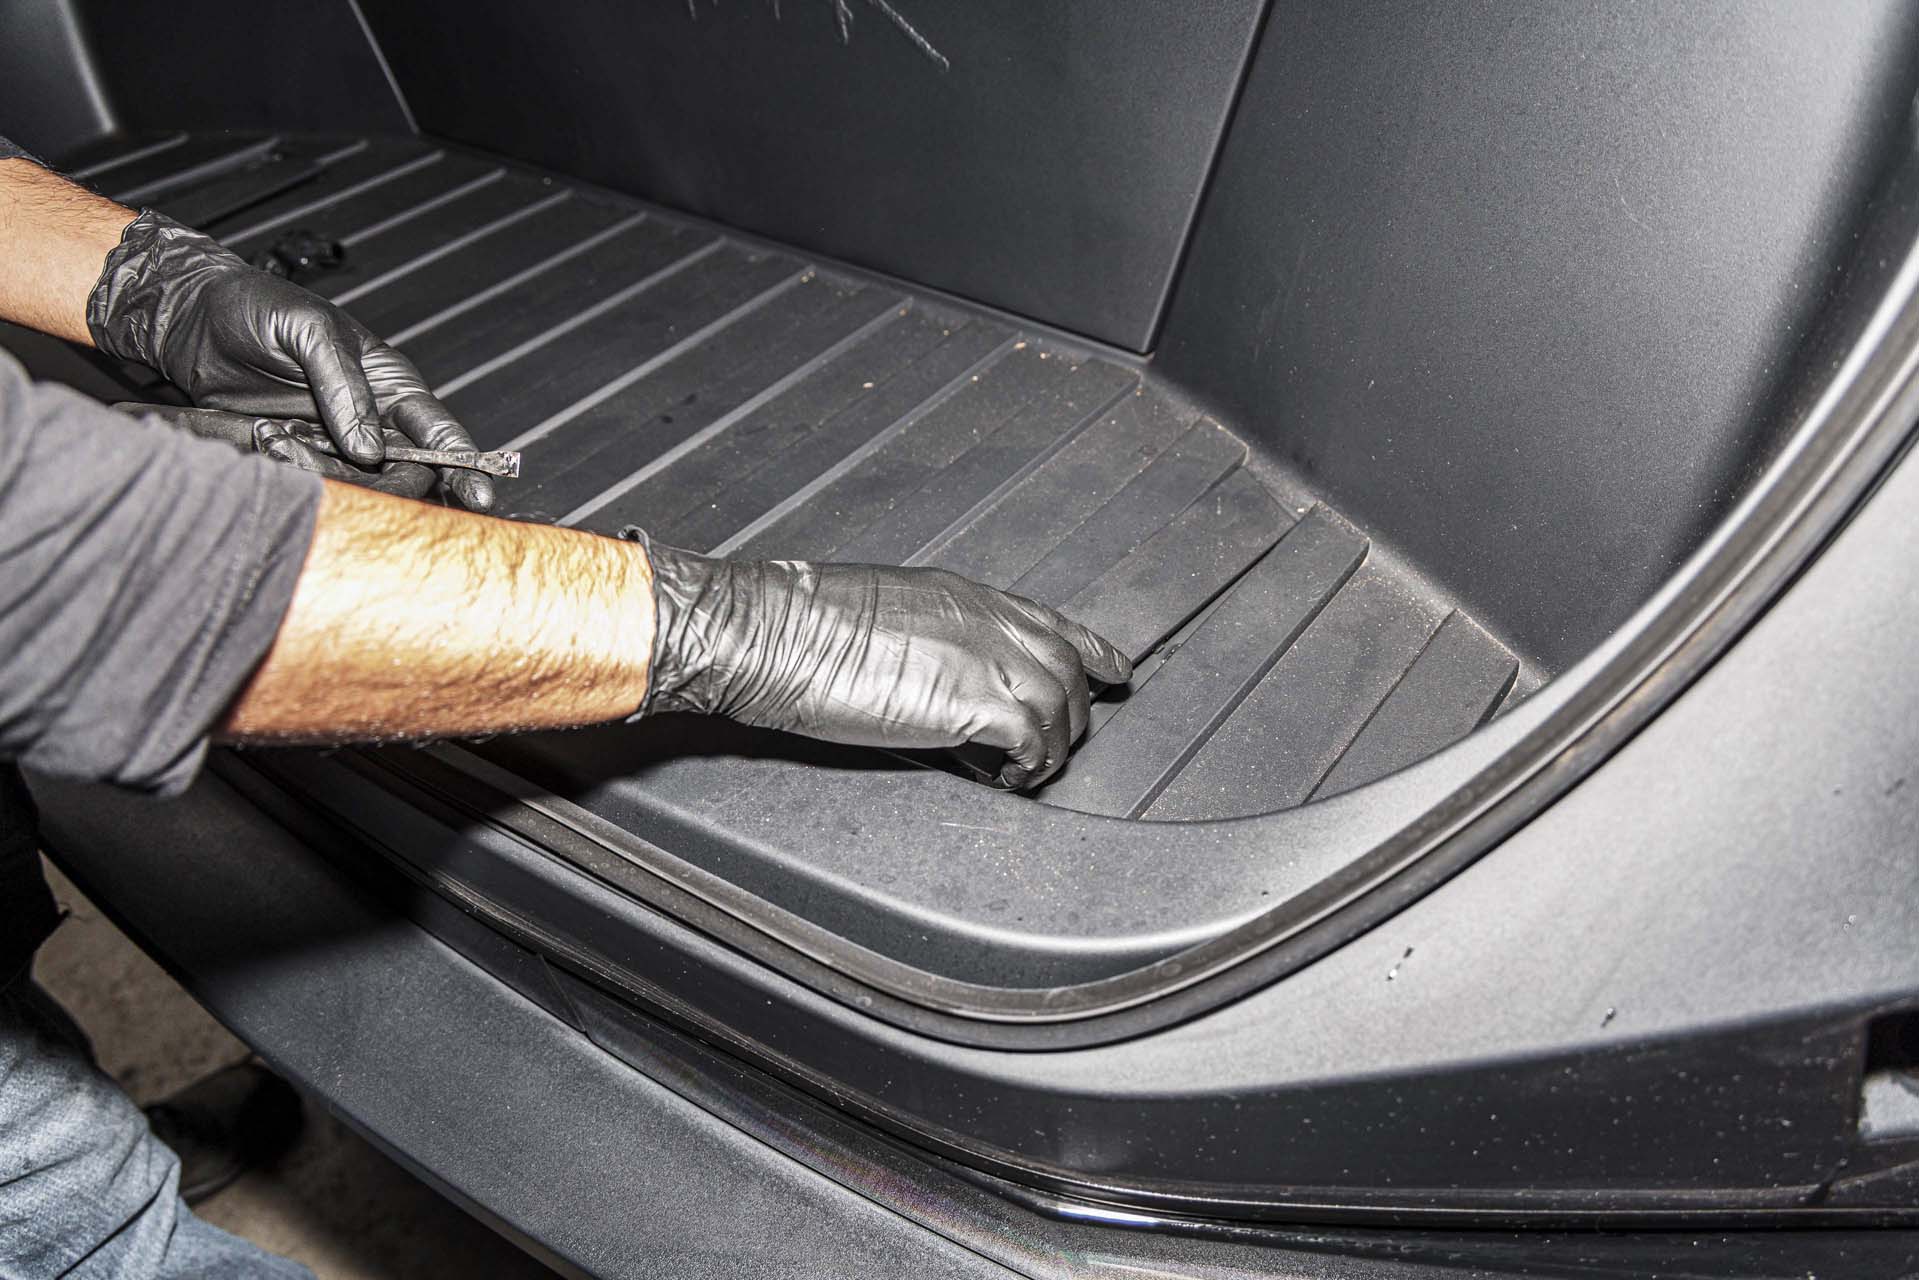
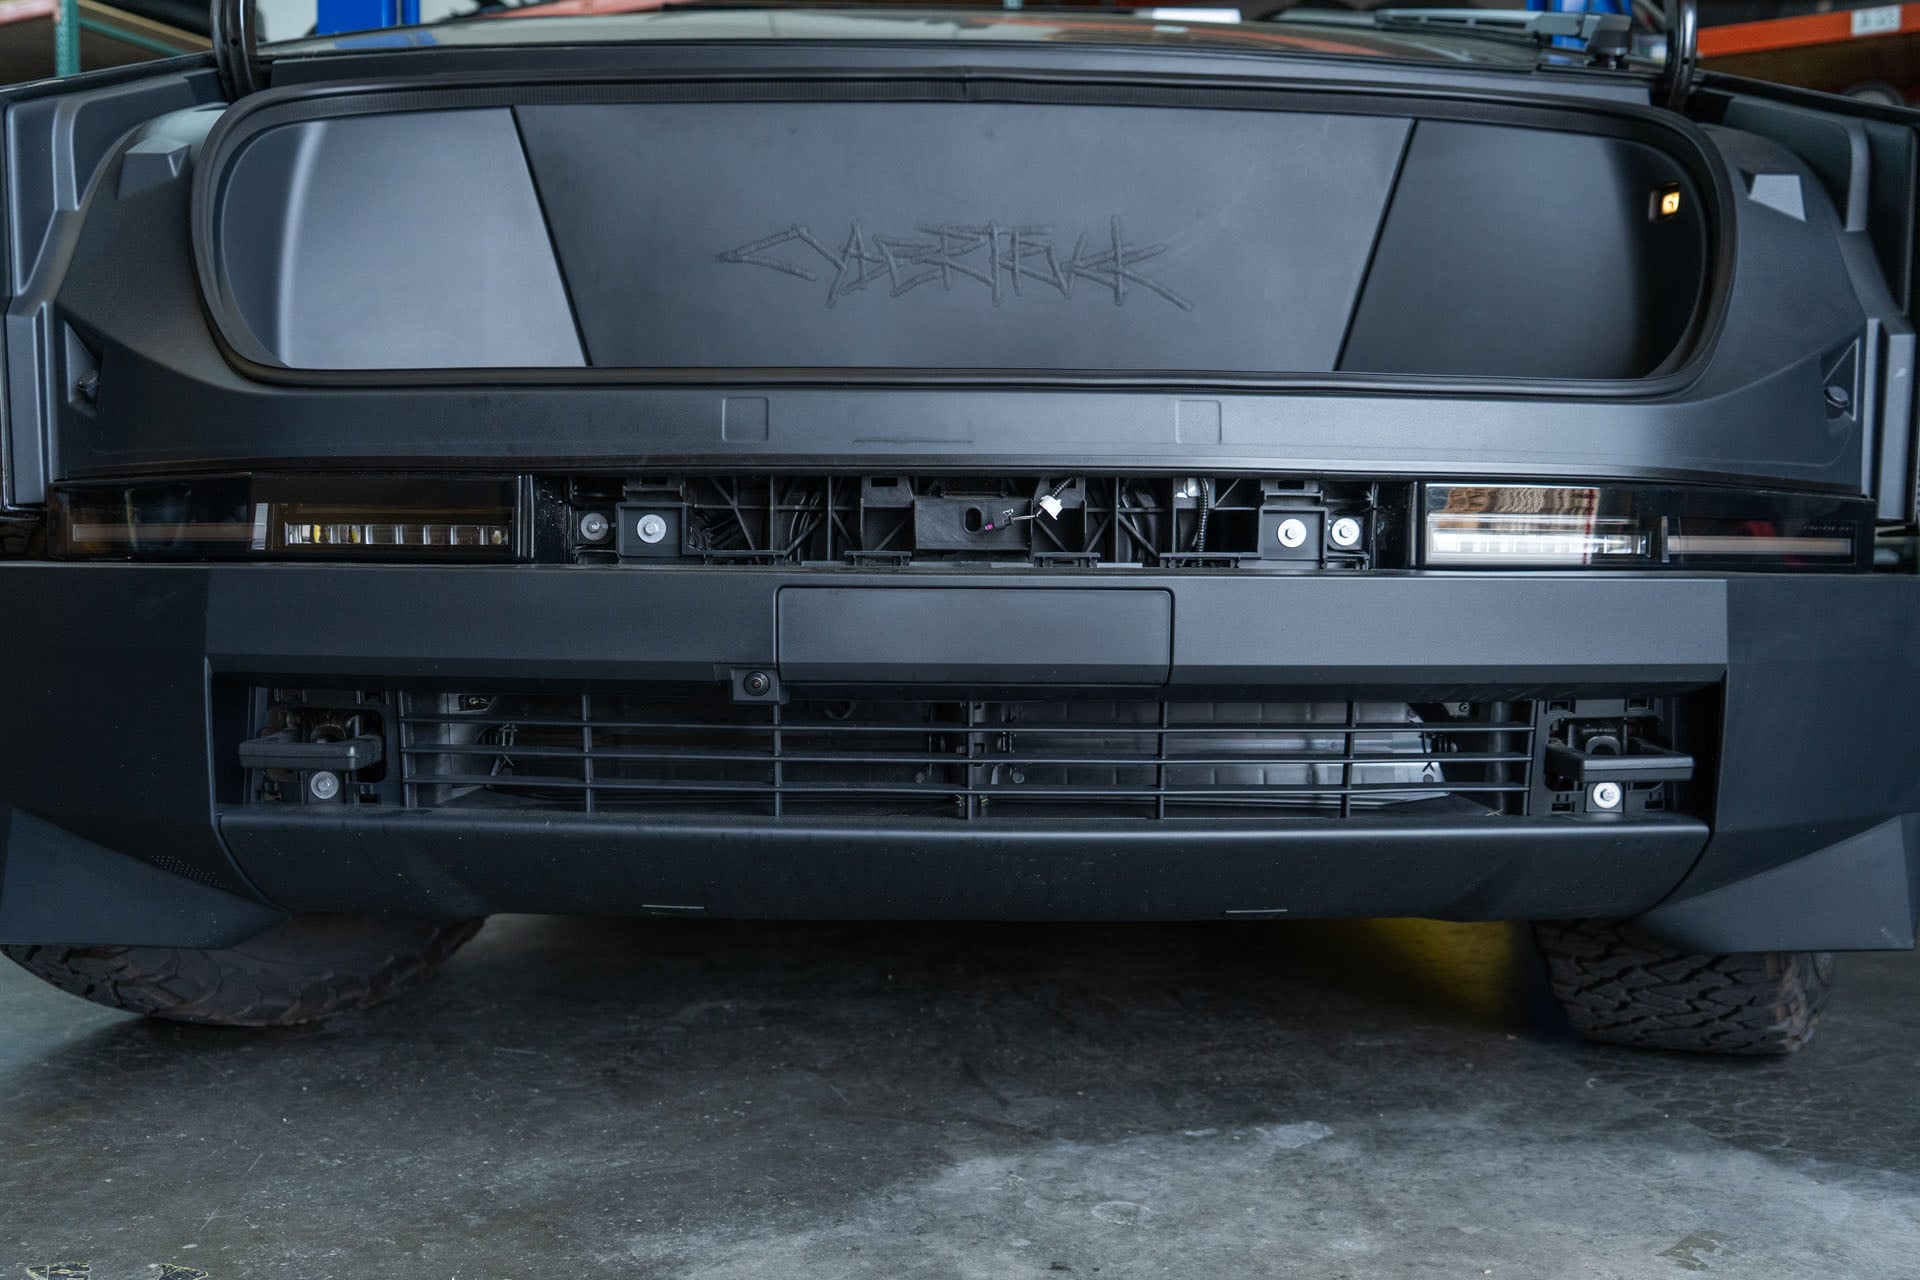
Using a pry tool, remove 5 push clips that secure each liner to the front bumper.
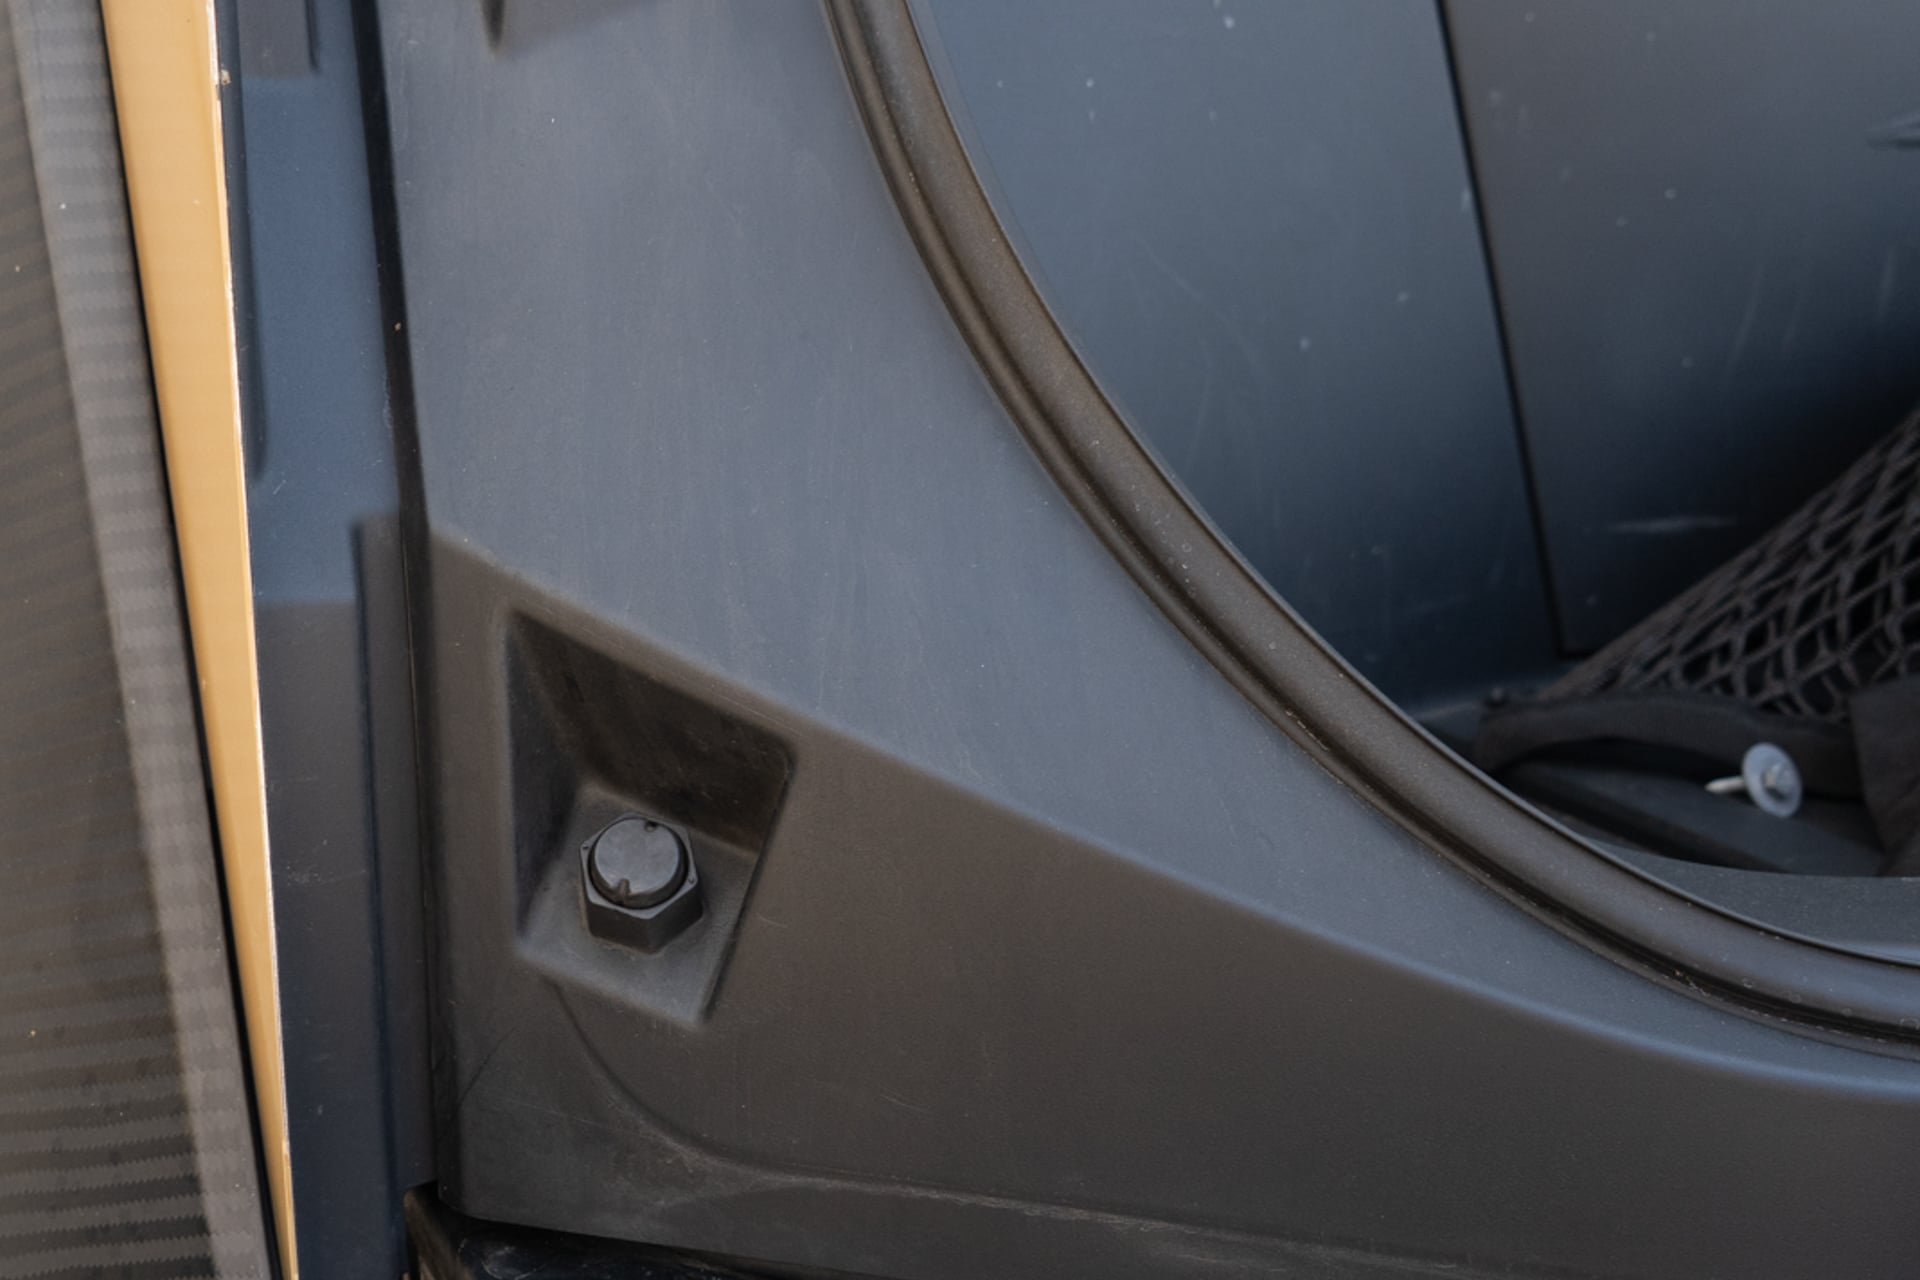
Using a clip removal tool, remove the front tow hook covers by pulling away in a swift like motion.


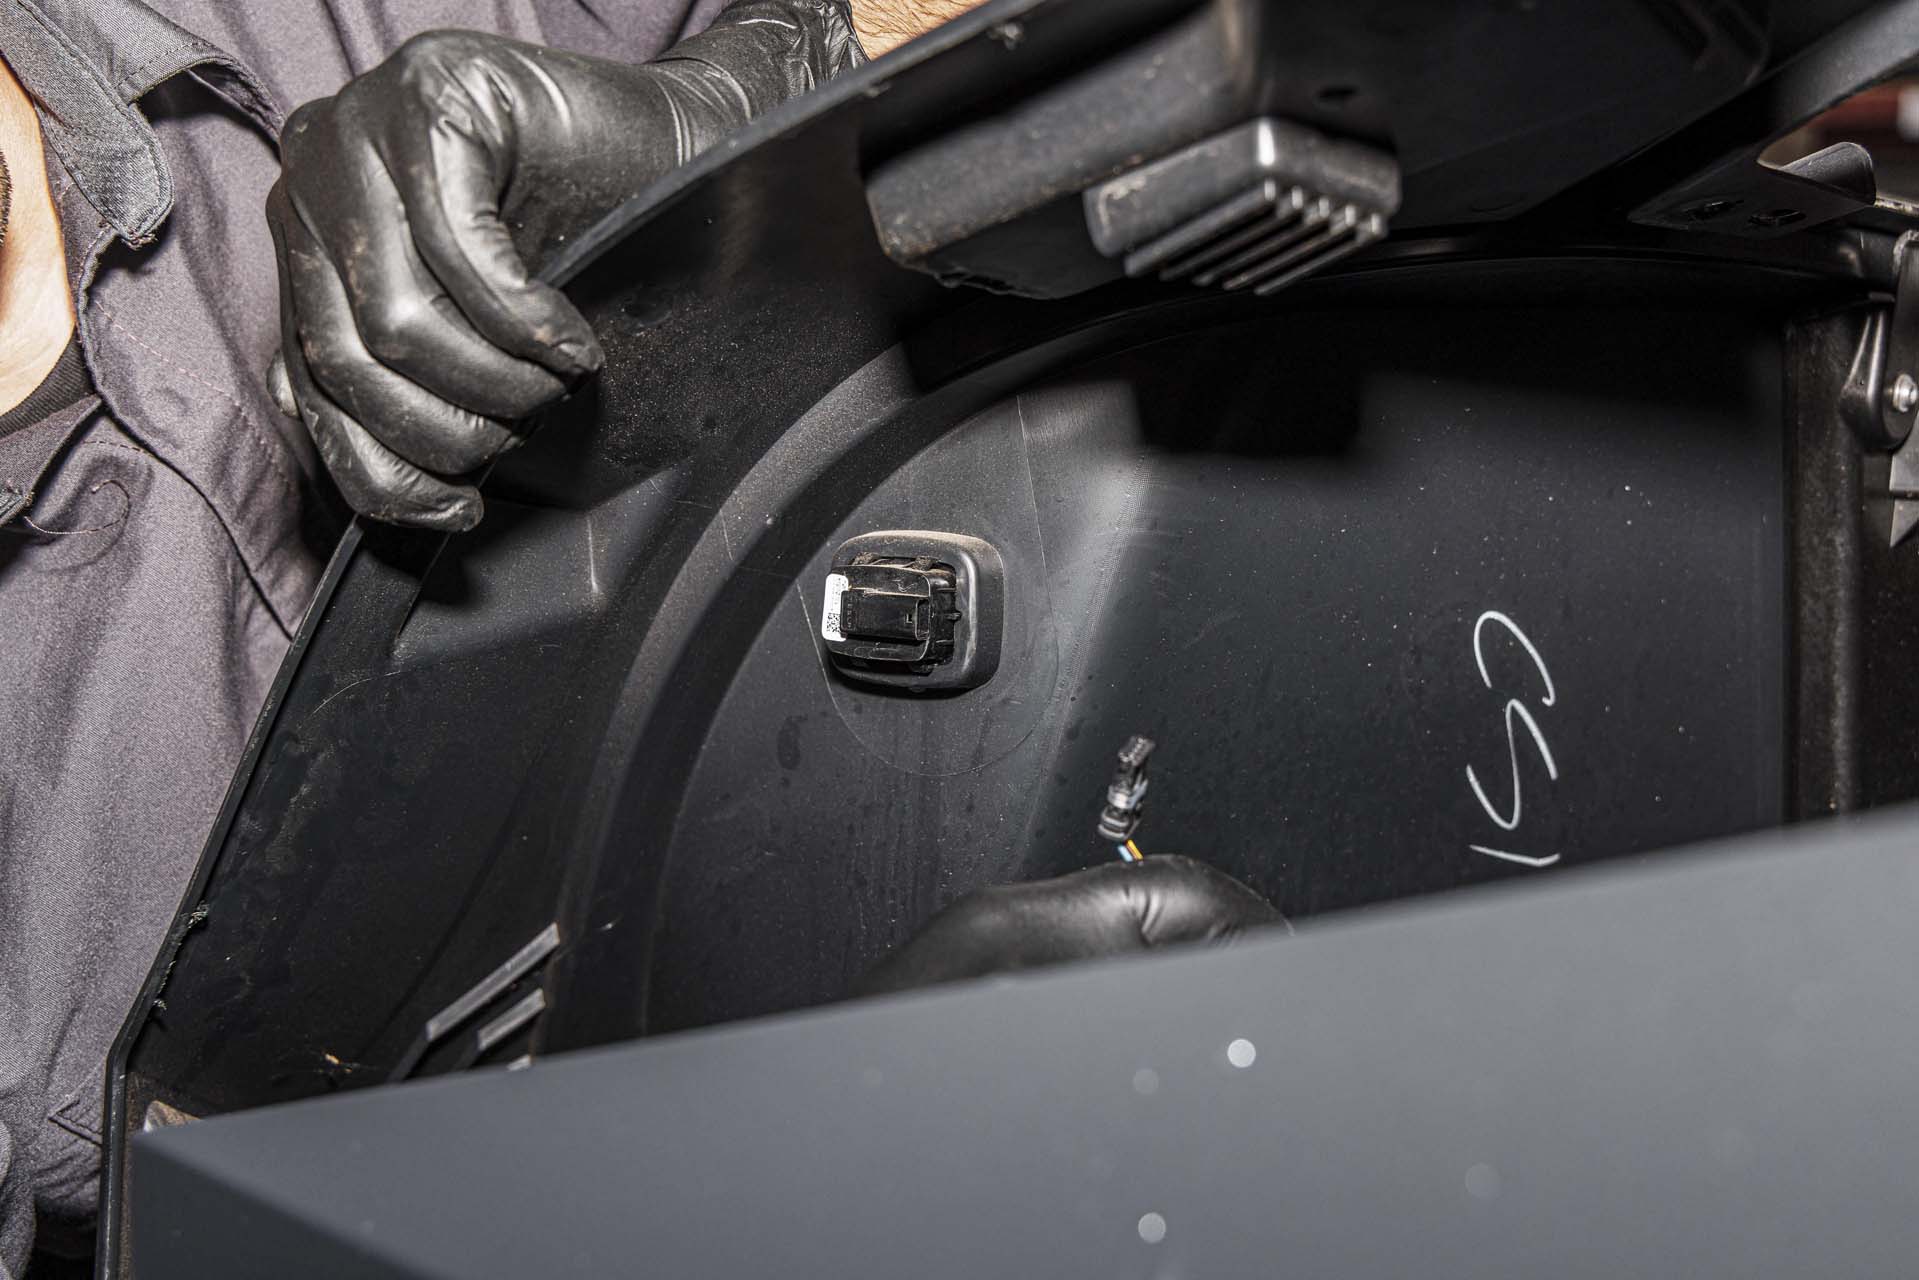
Open the frunk. Using a pry tool, press down on all 4 tabs on the top and bottom of the frunk latch release housing and remove it from the vehicle.
Pull the retainer clip on the frunk release power cable, and disconnect the frunk release power cable.
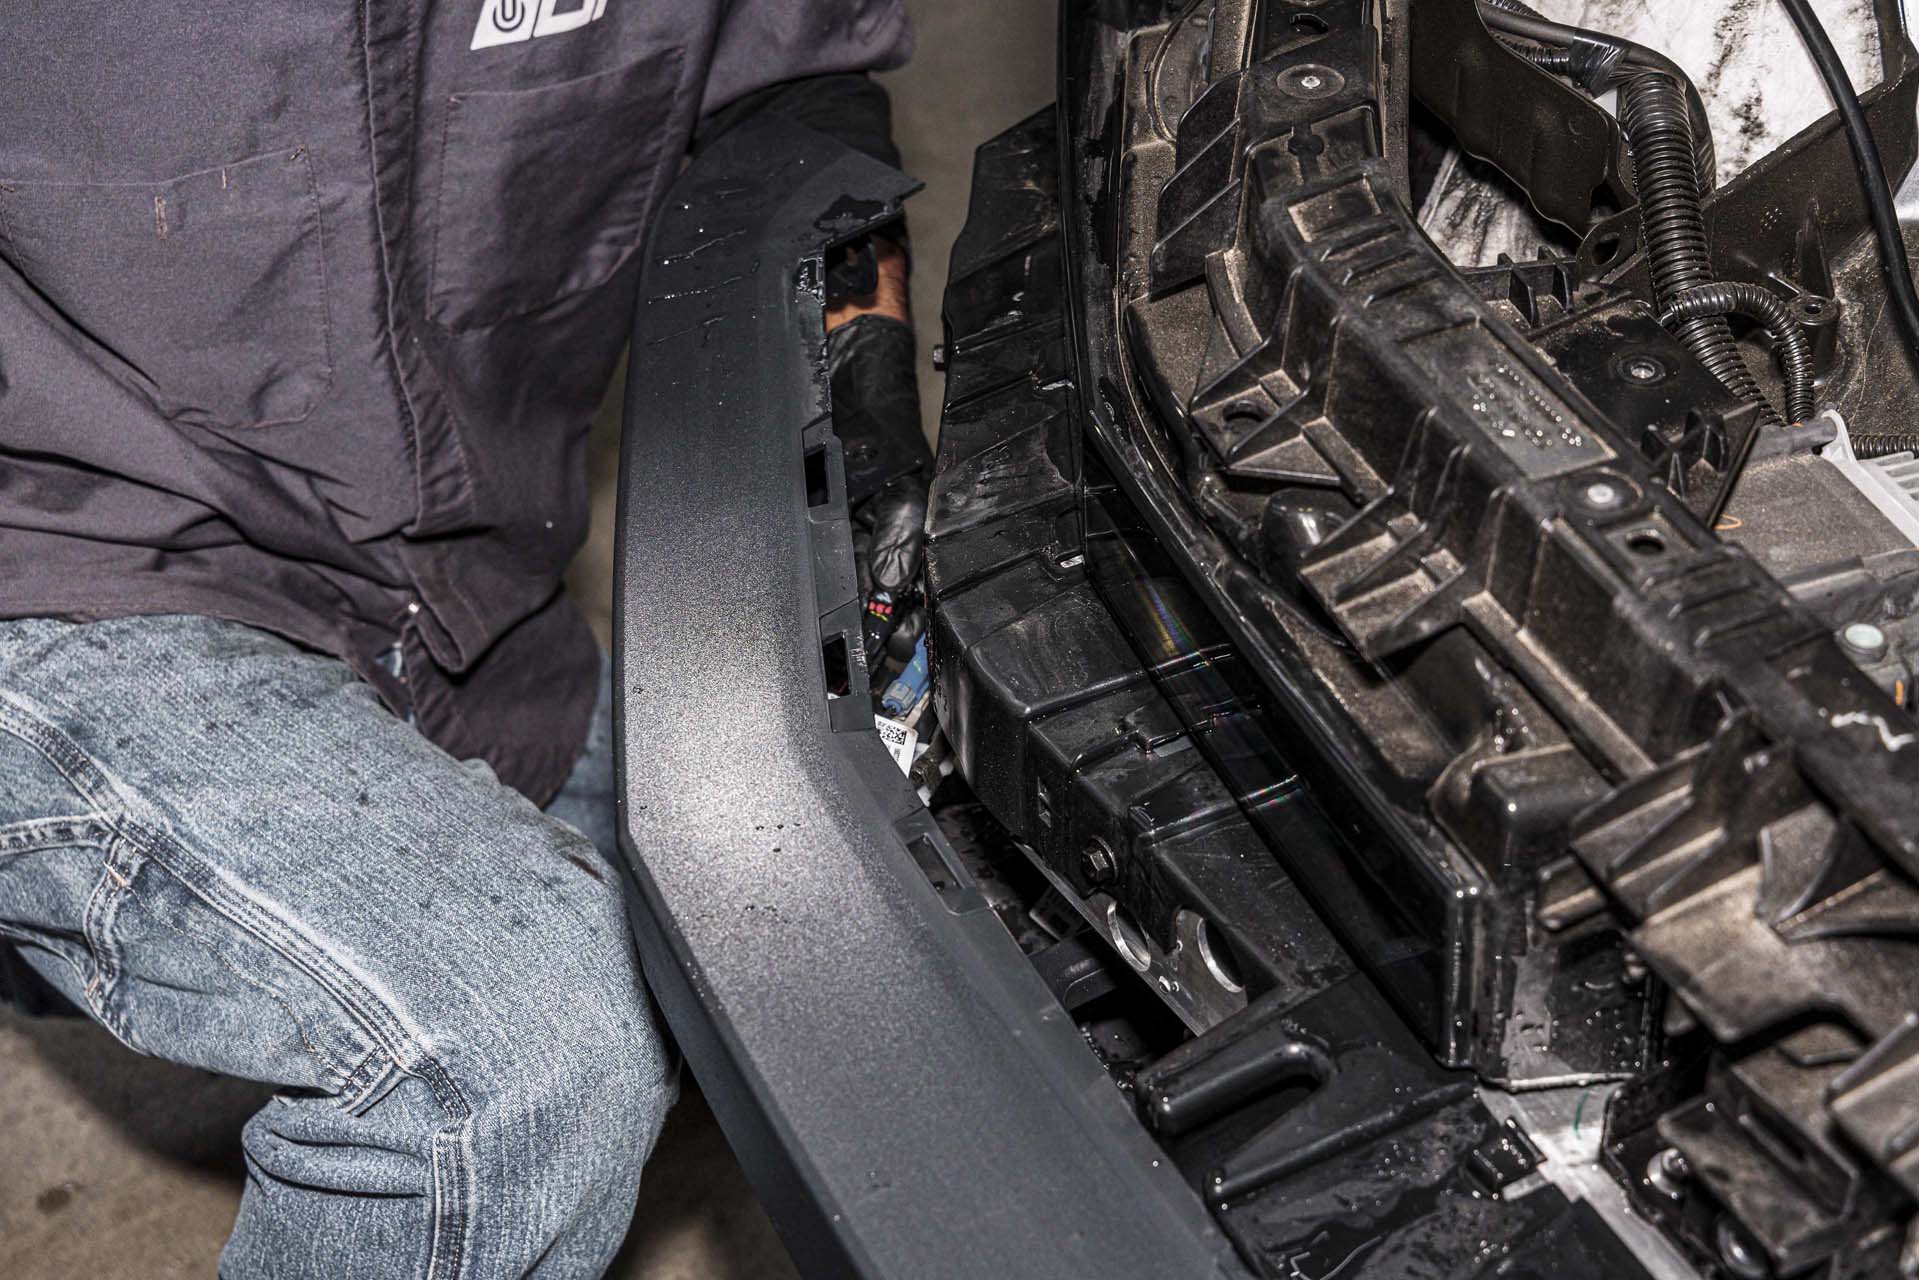
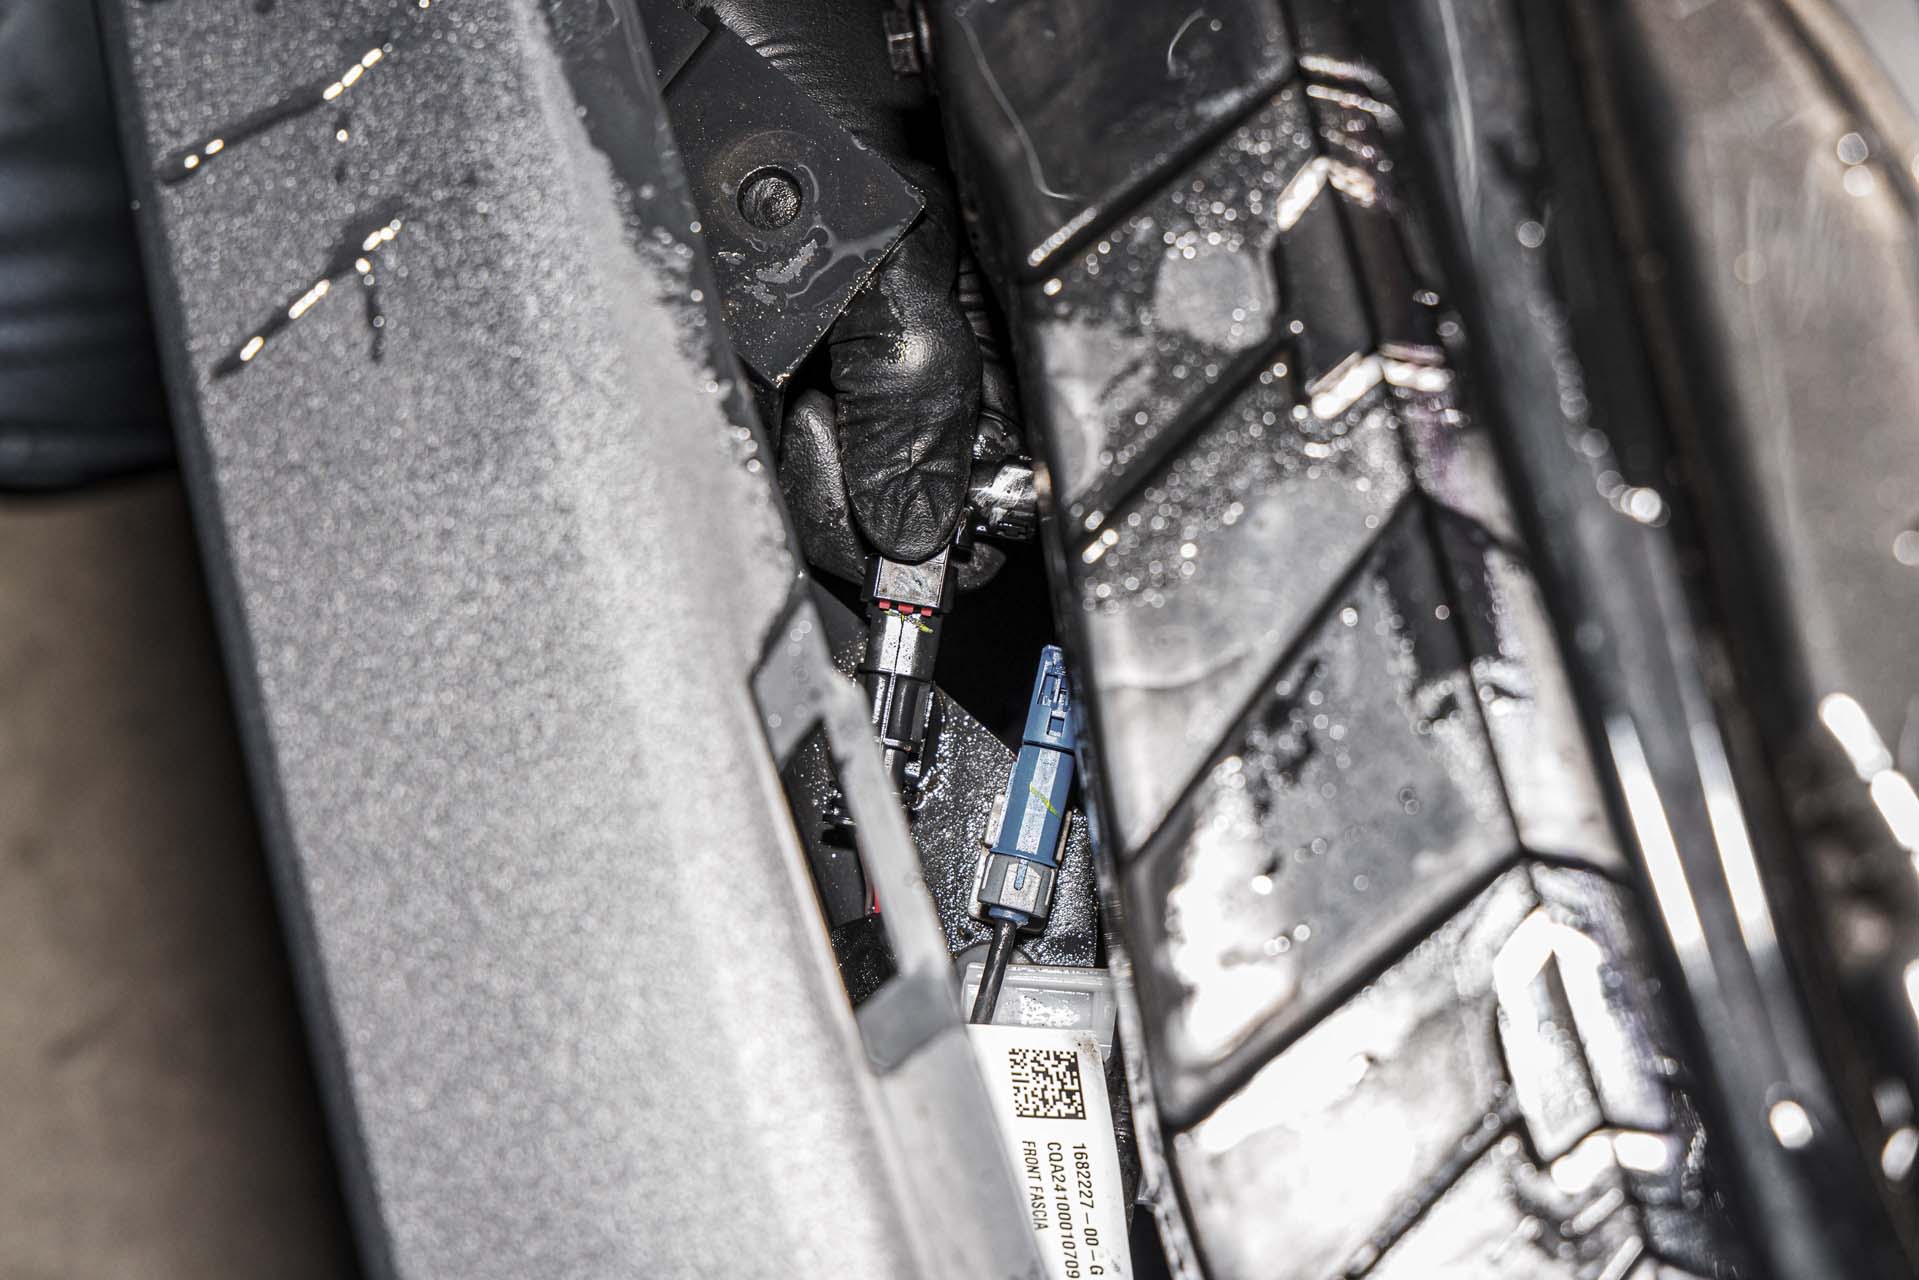
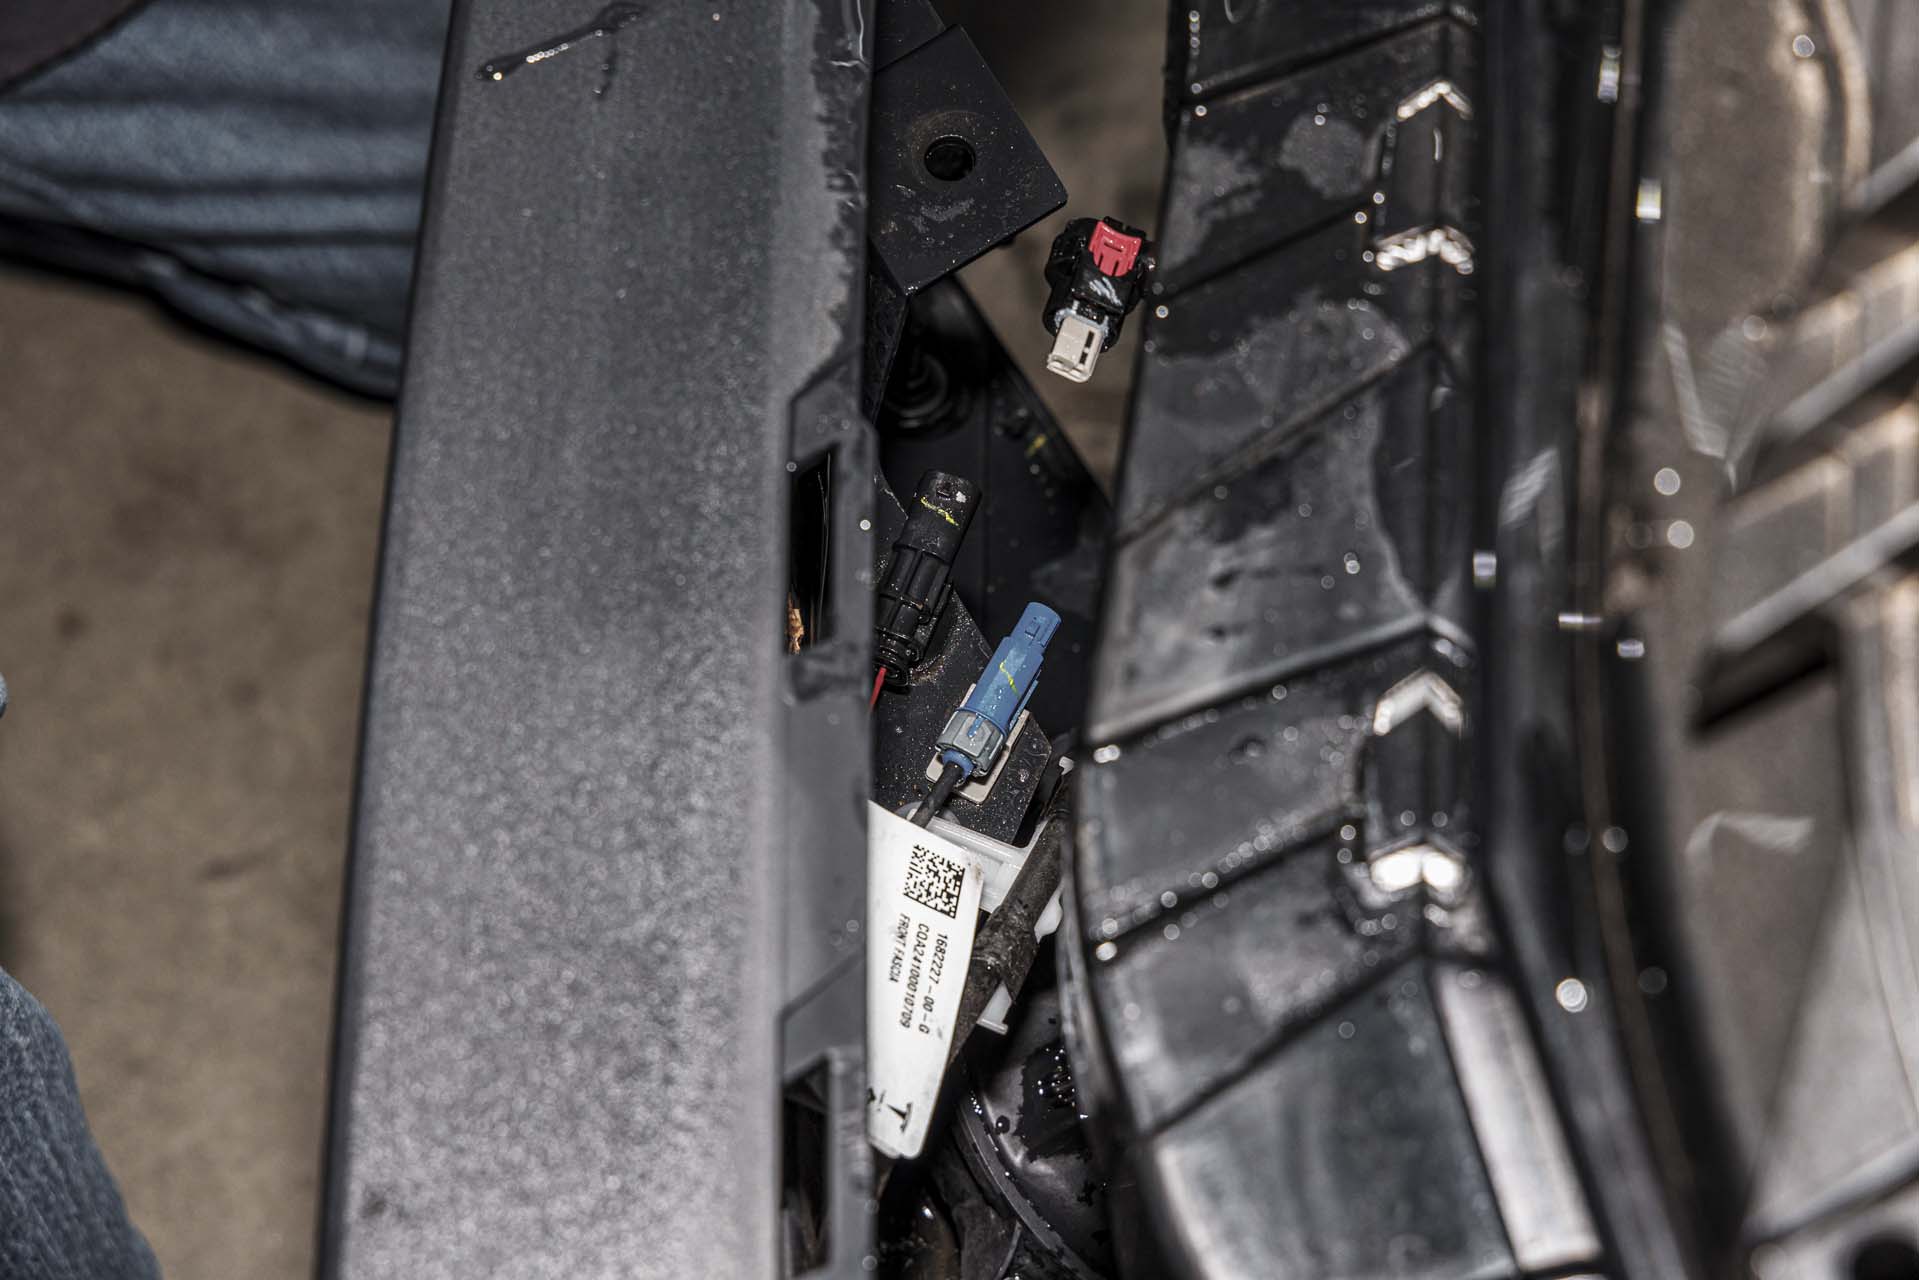
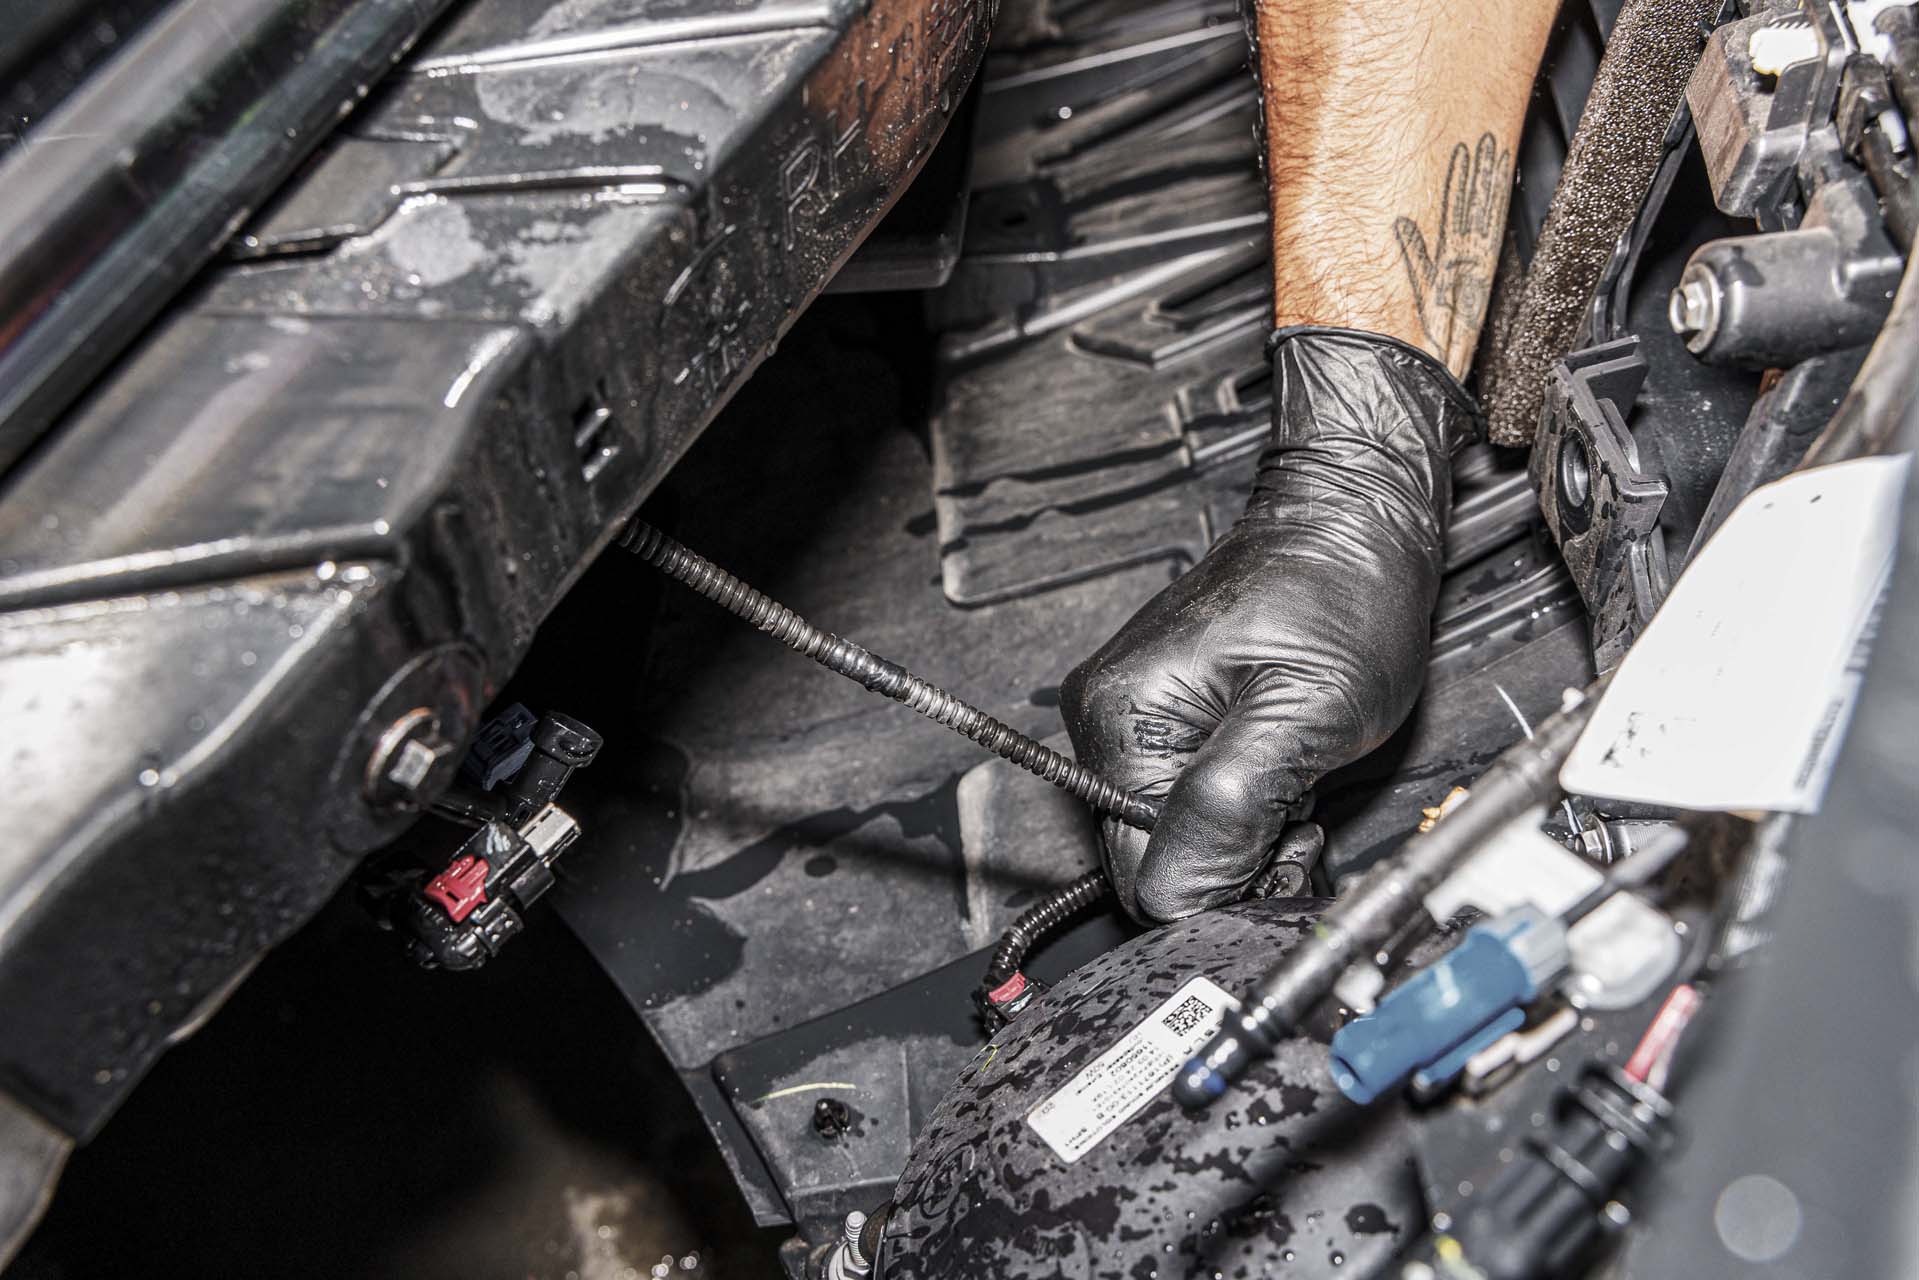
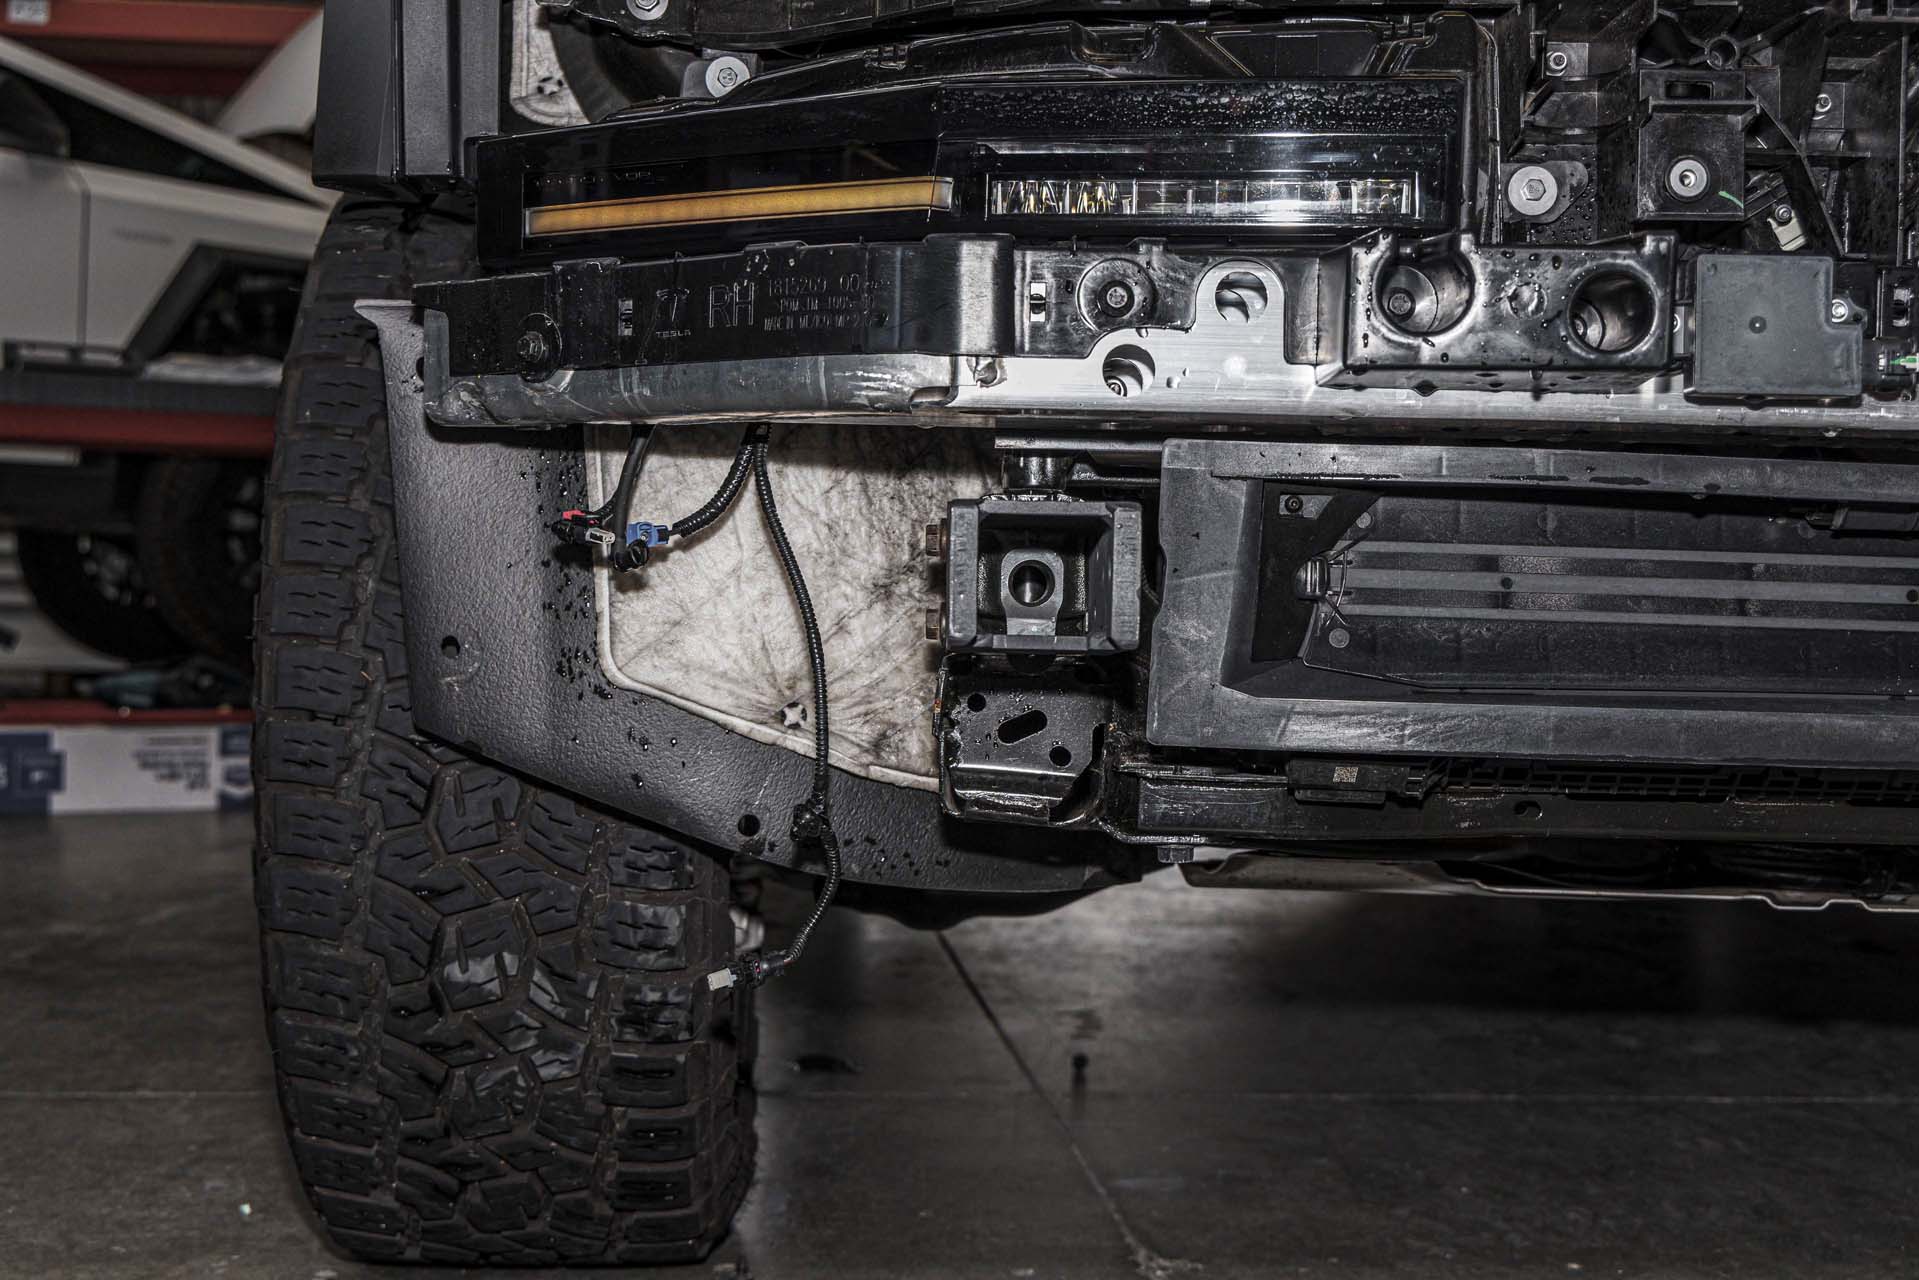
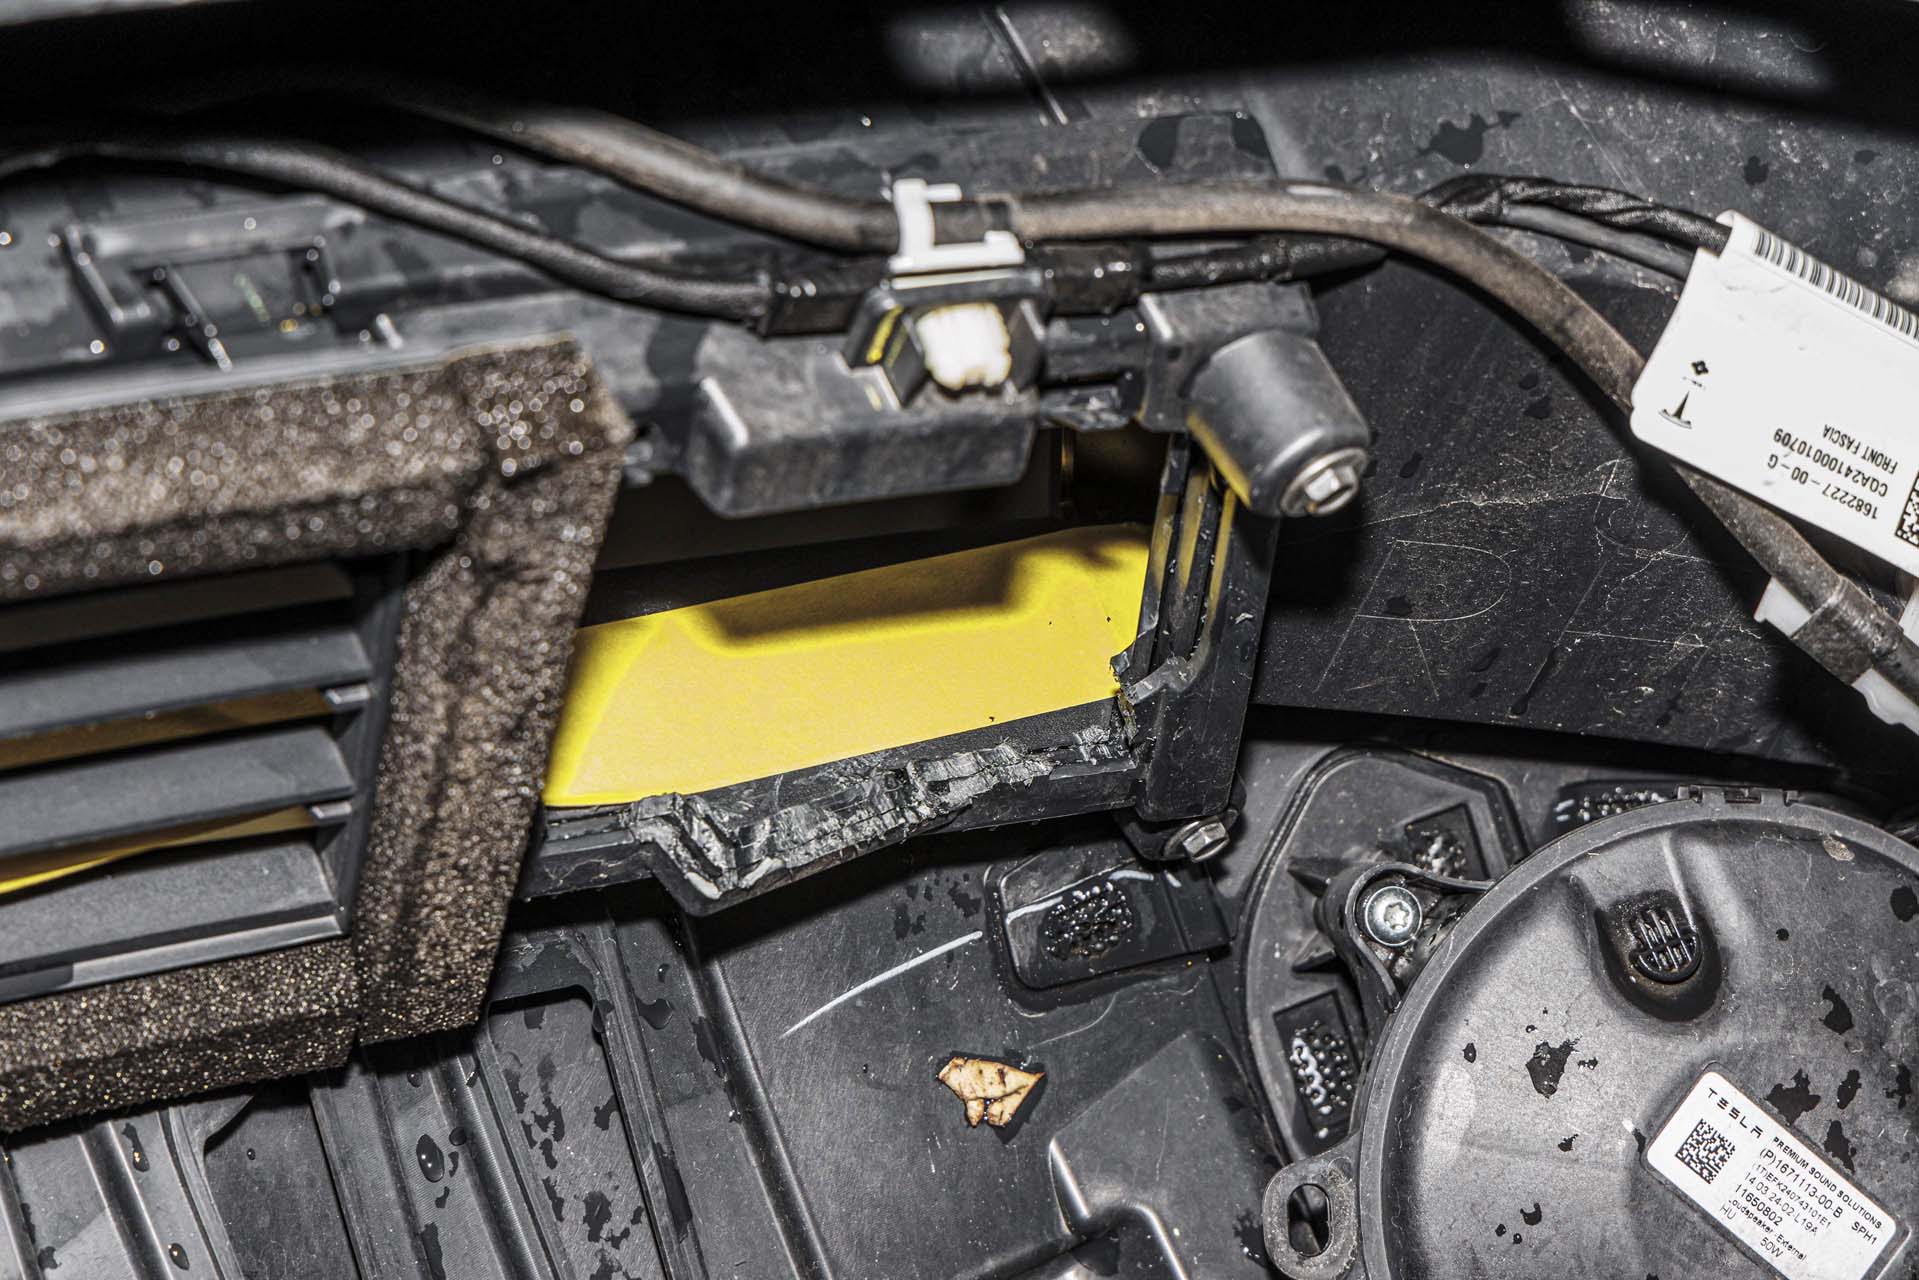
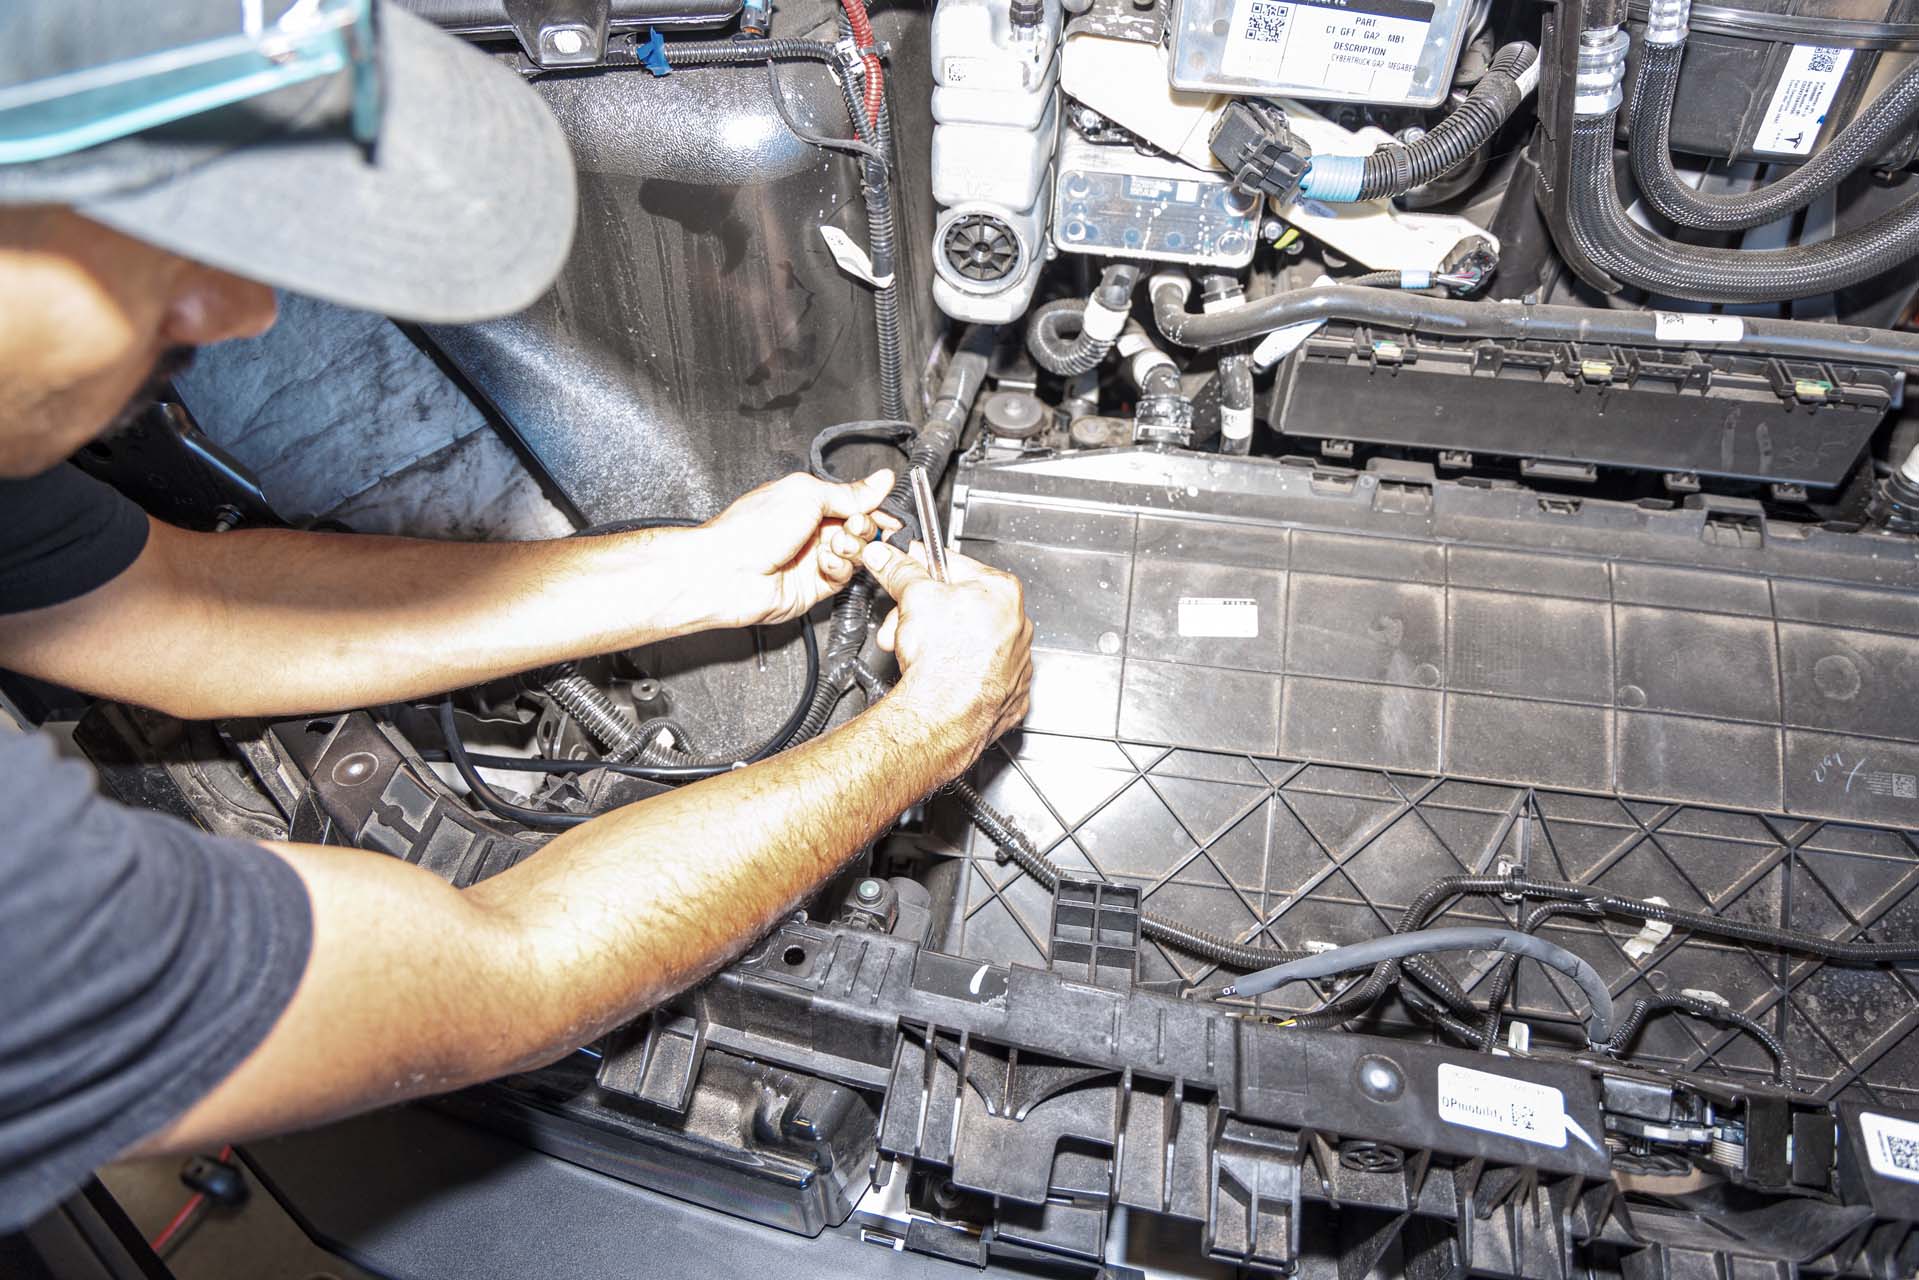
On the passenger side, pull the fender liner back to access the front accessory electrical harnesses. Disconnect all 4 bus connectors shown in the following photo to ensure they are not damaged when removing the factory bumper cover from the vehicle.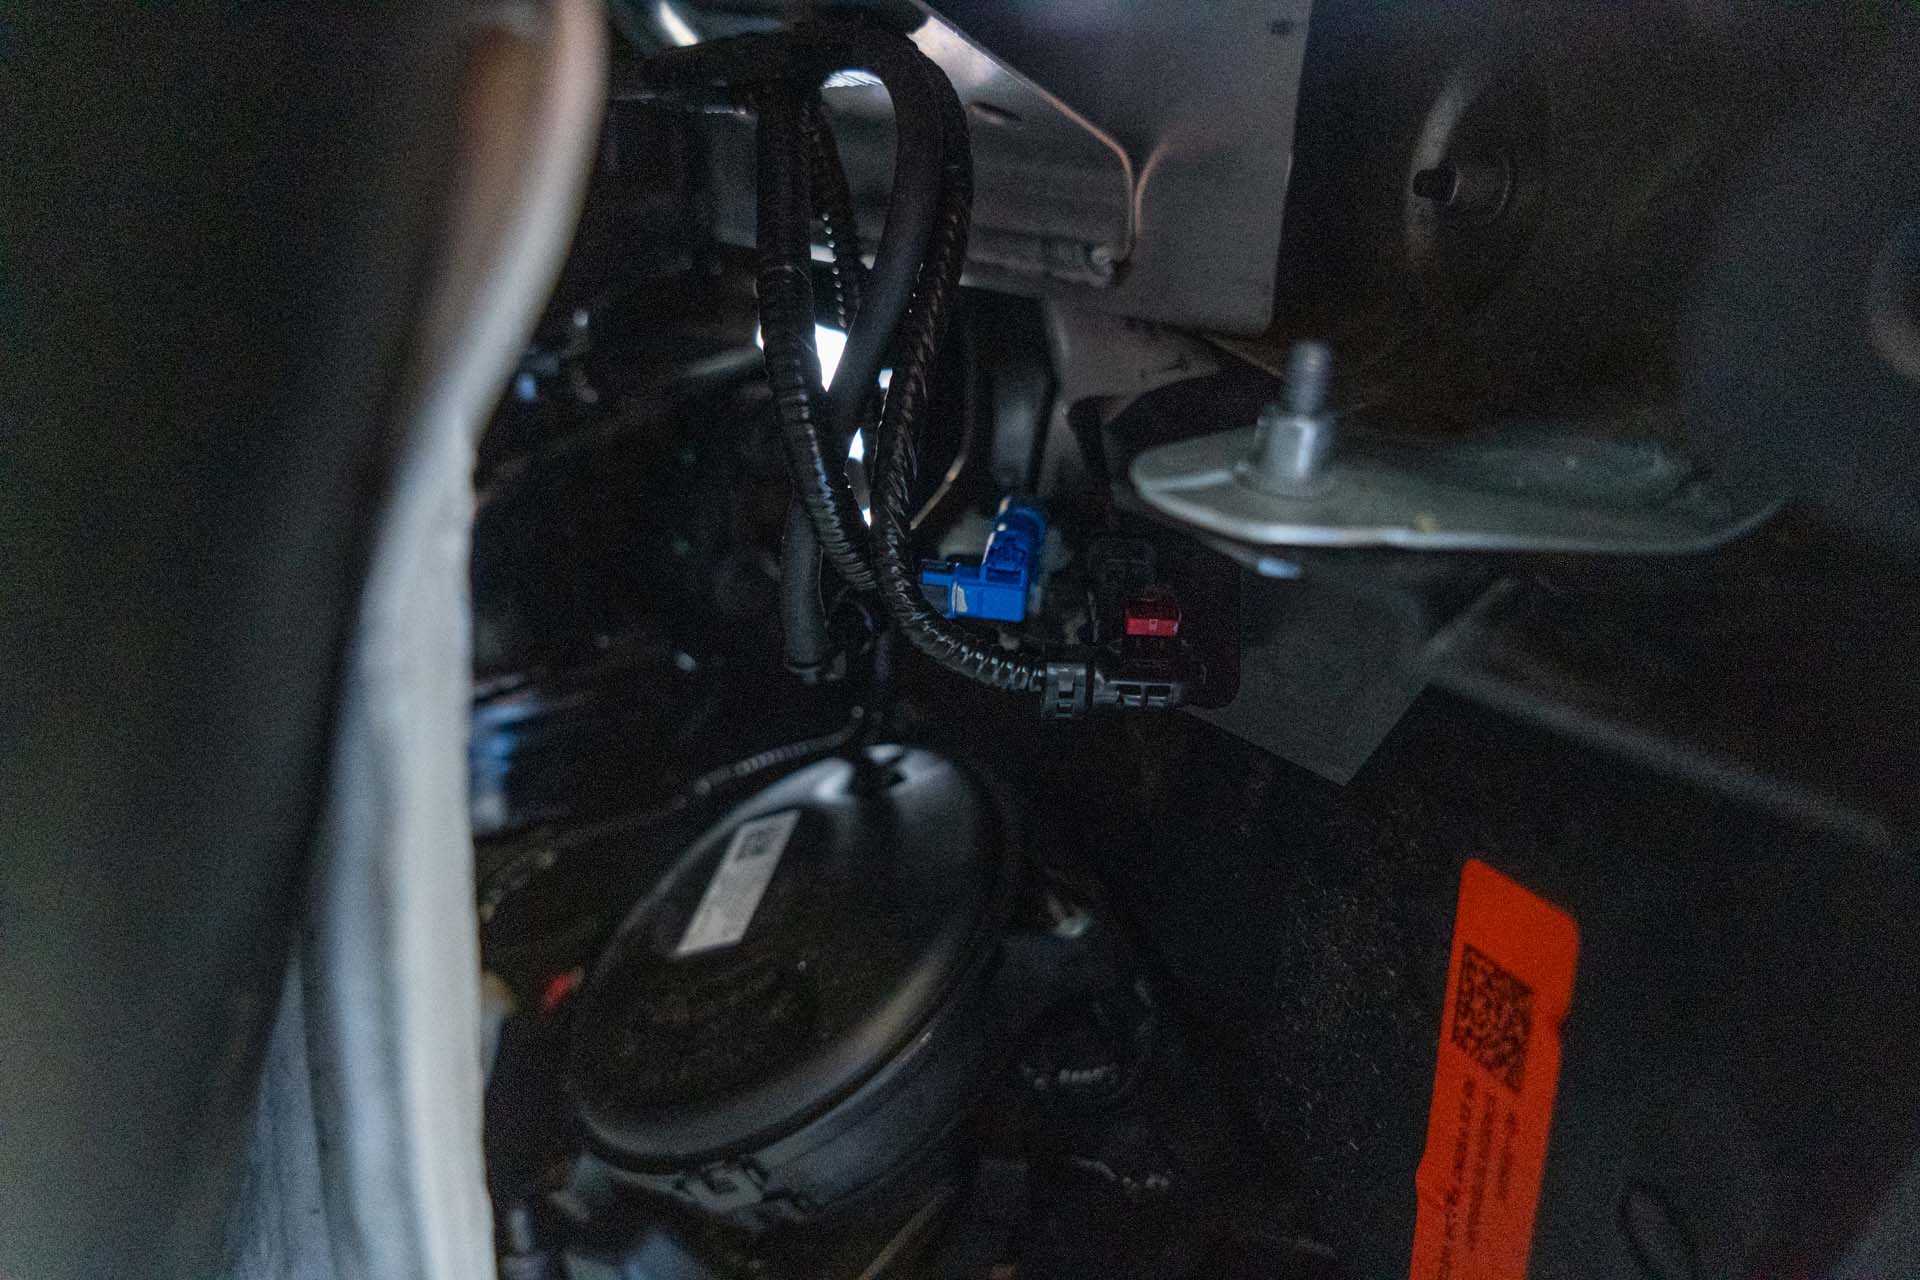
Using a 10mm socket, remove each retainer bolt securing the factory bumper cover to the factory crash beam. Start with the bolts located behind each front fender liner. Consider turning the steering wheel if additional space is needed.
Using a 10mm socket, remove 4 bolts securing the front of the factory bumper cover to the factory crash beam. There are 4 bolts near the factory light housings, and 1 bolt near each factory tow hook.
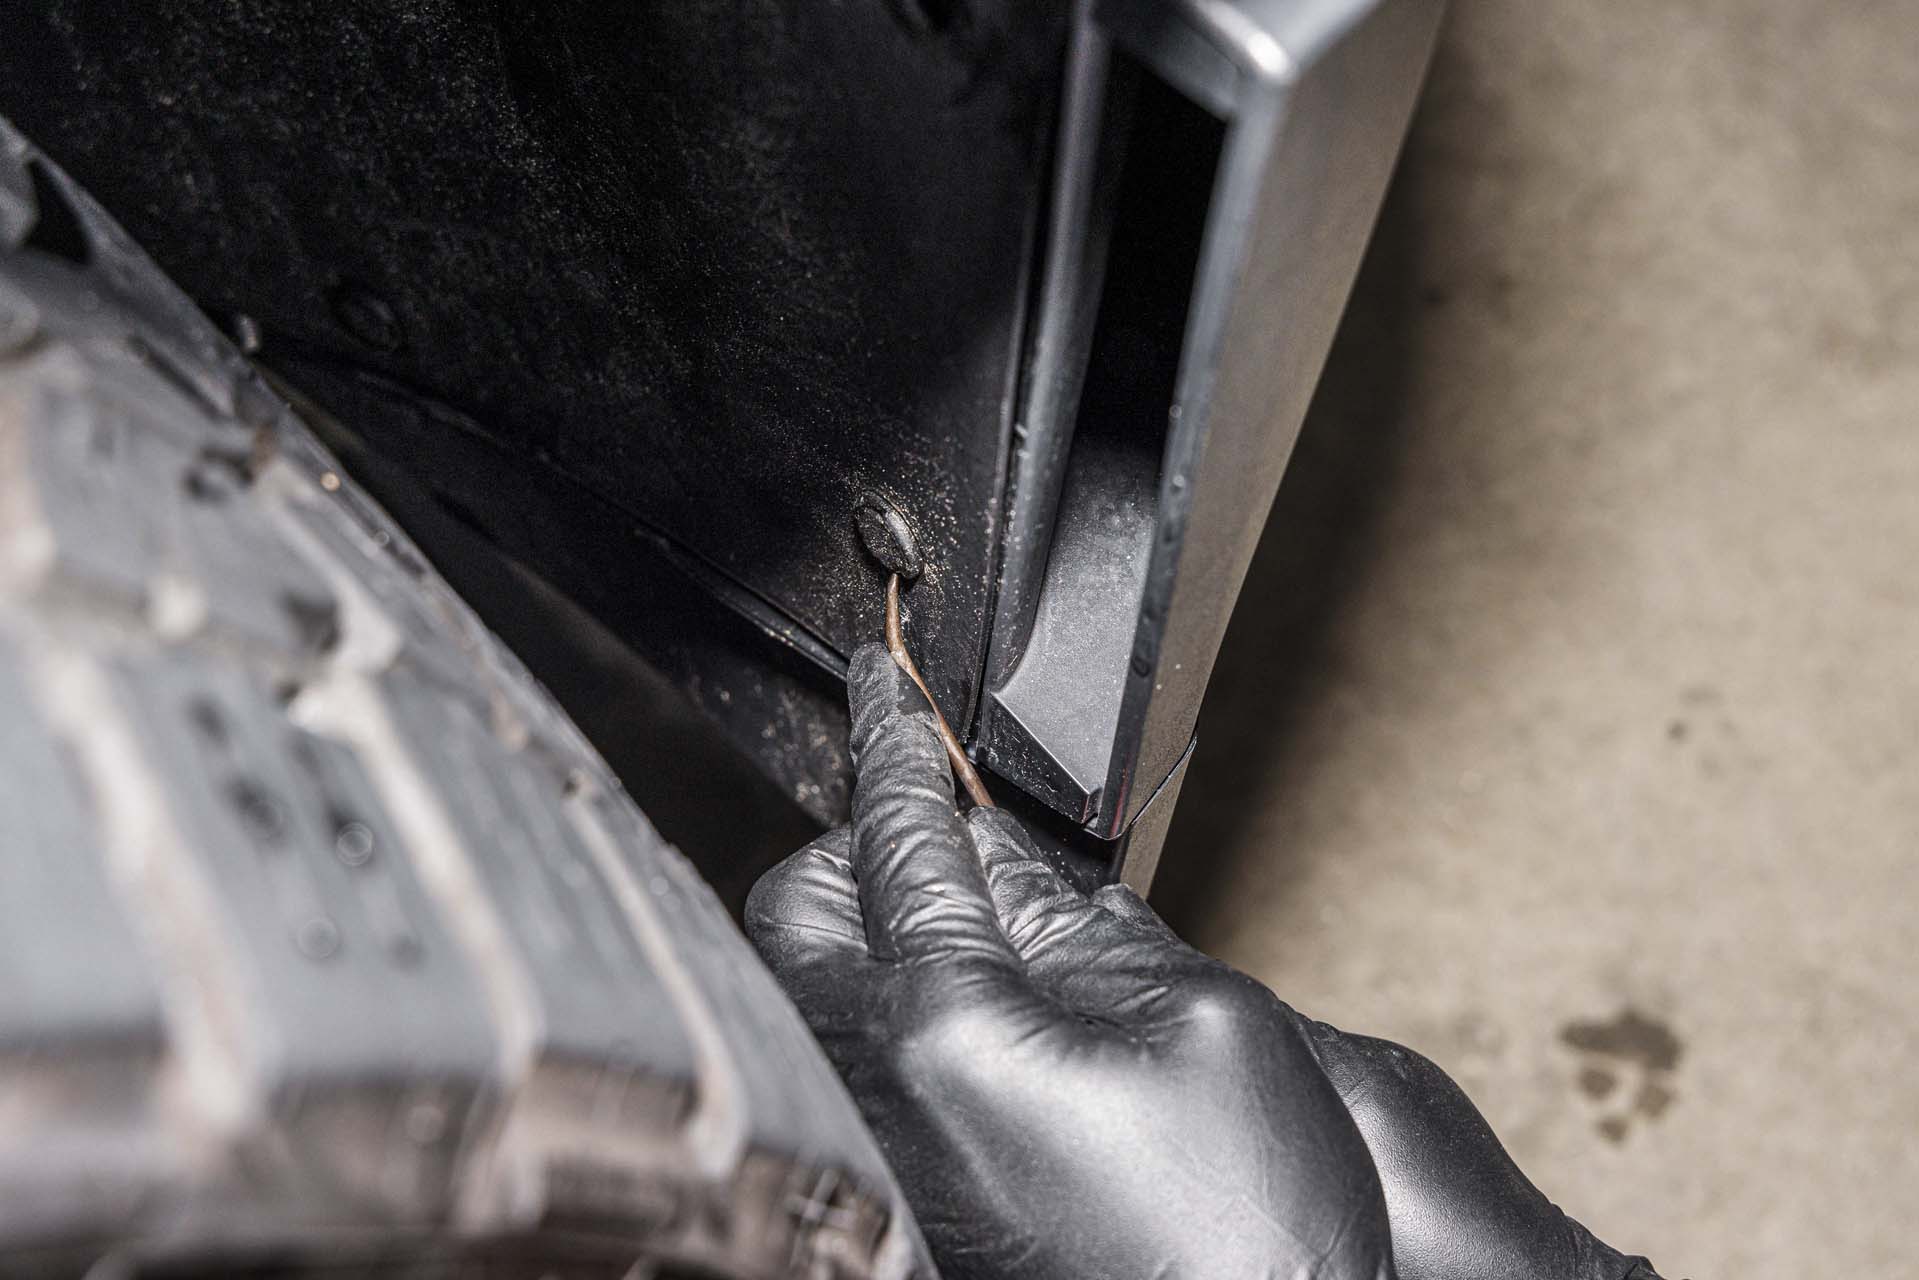
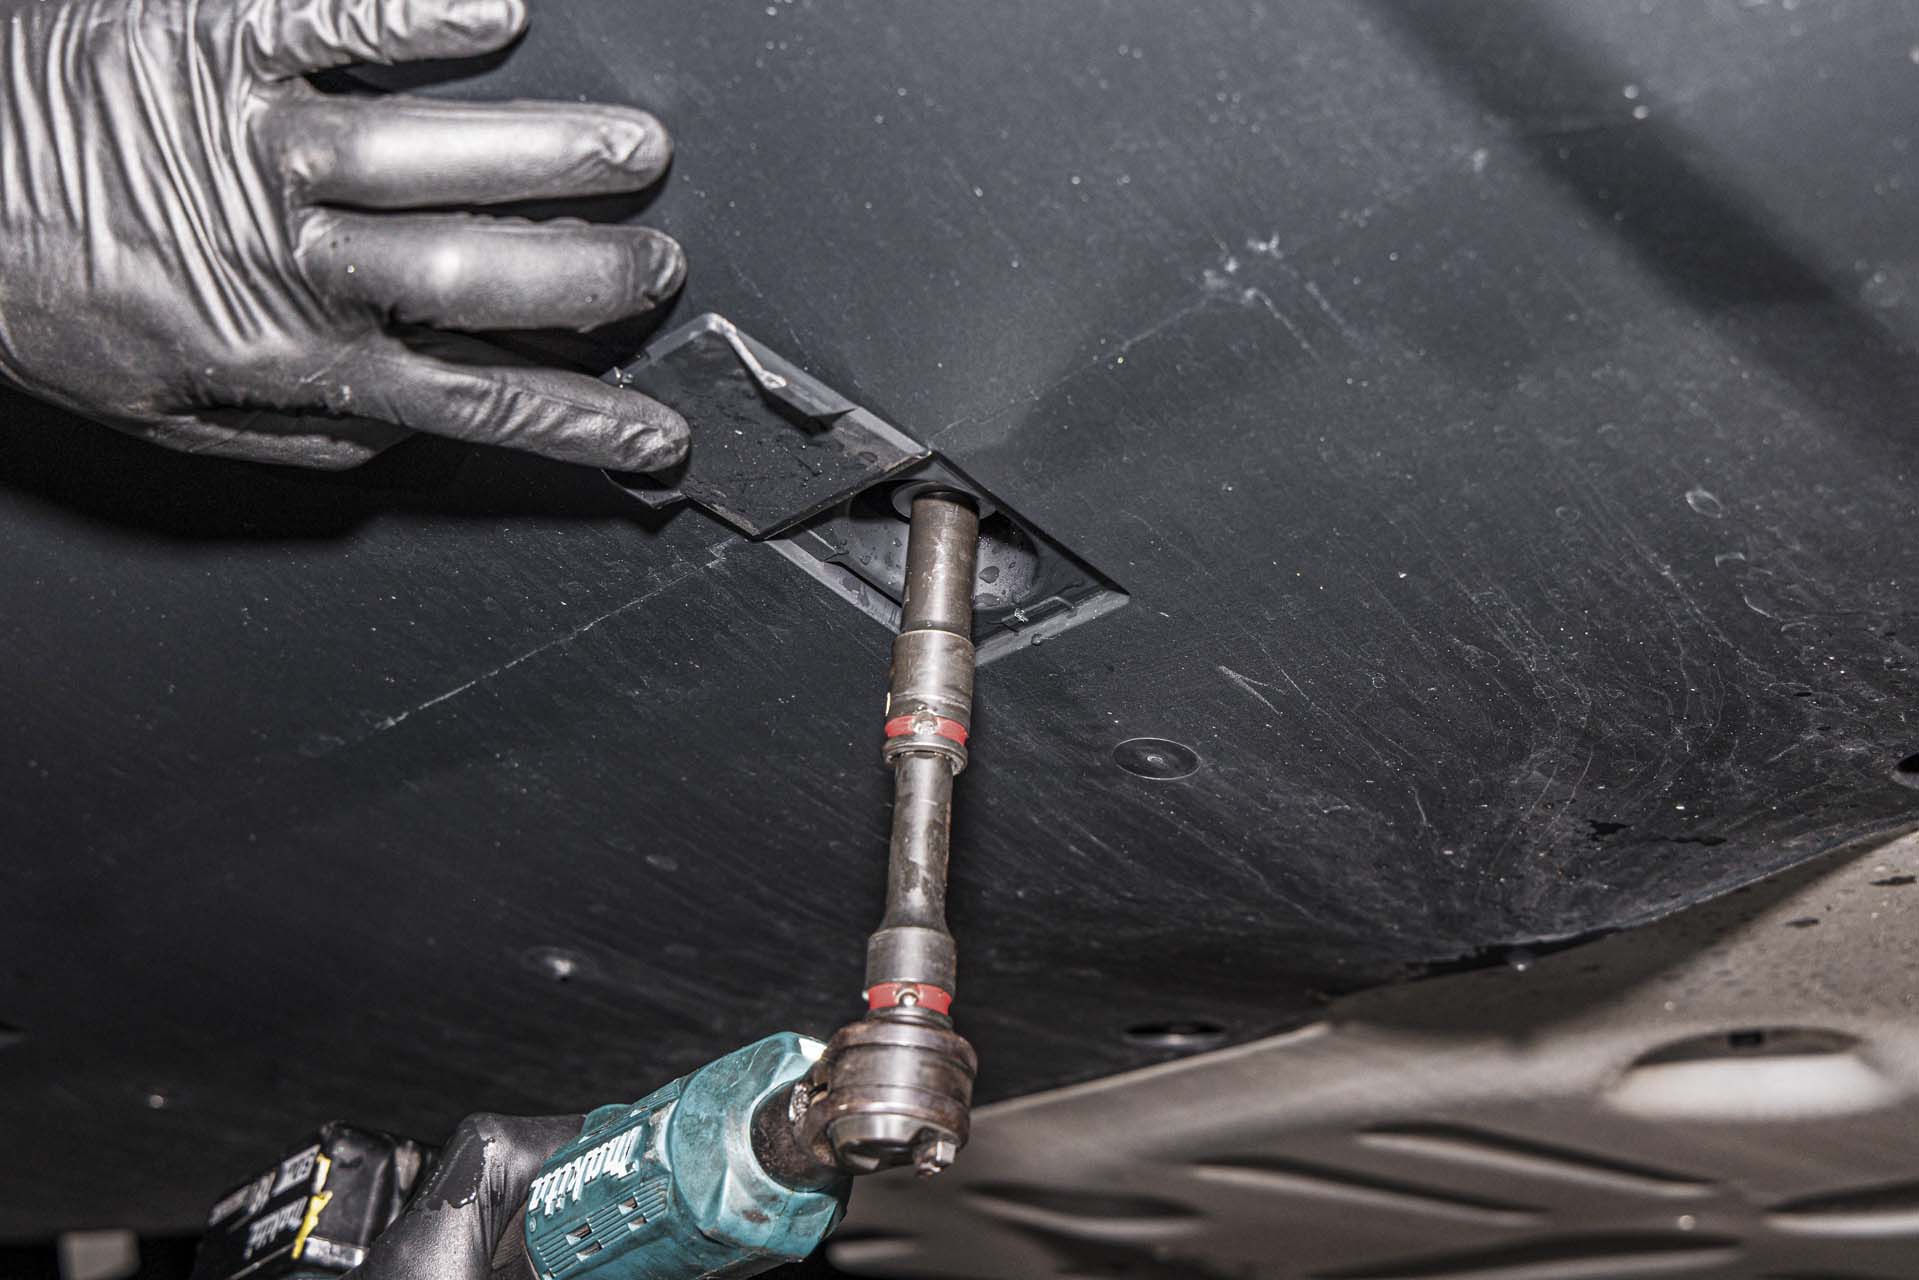
Using a pry tool, open the 2 tabs underneath the front bumper where the factory bumper cover and the factory splash guard meet.
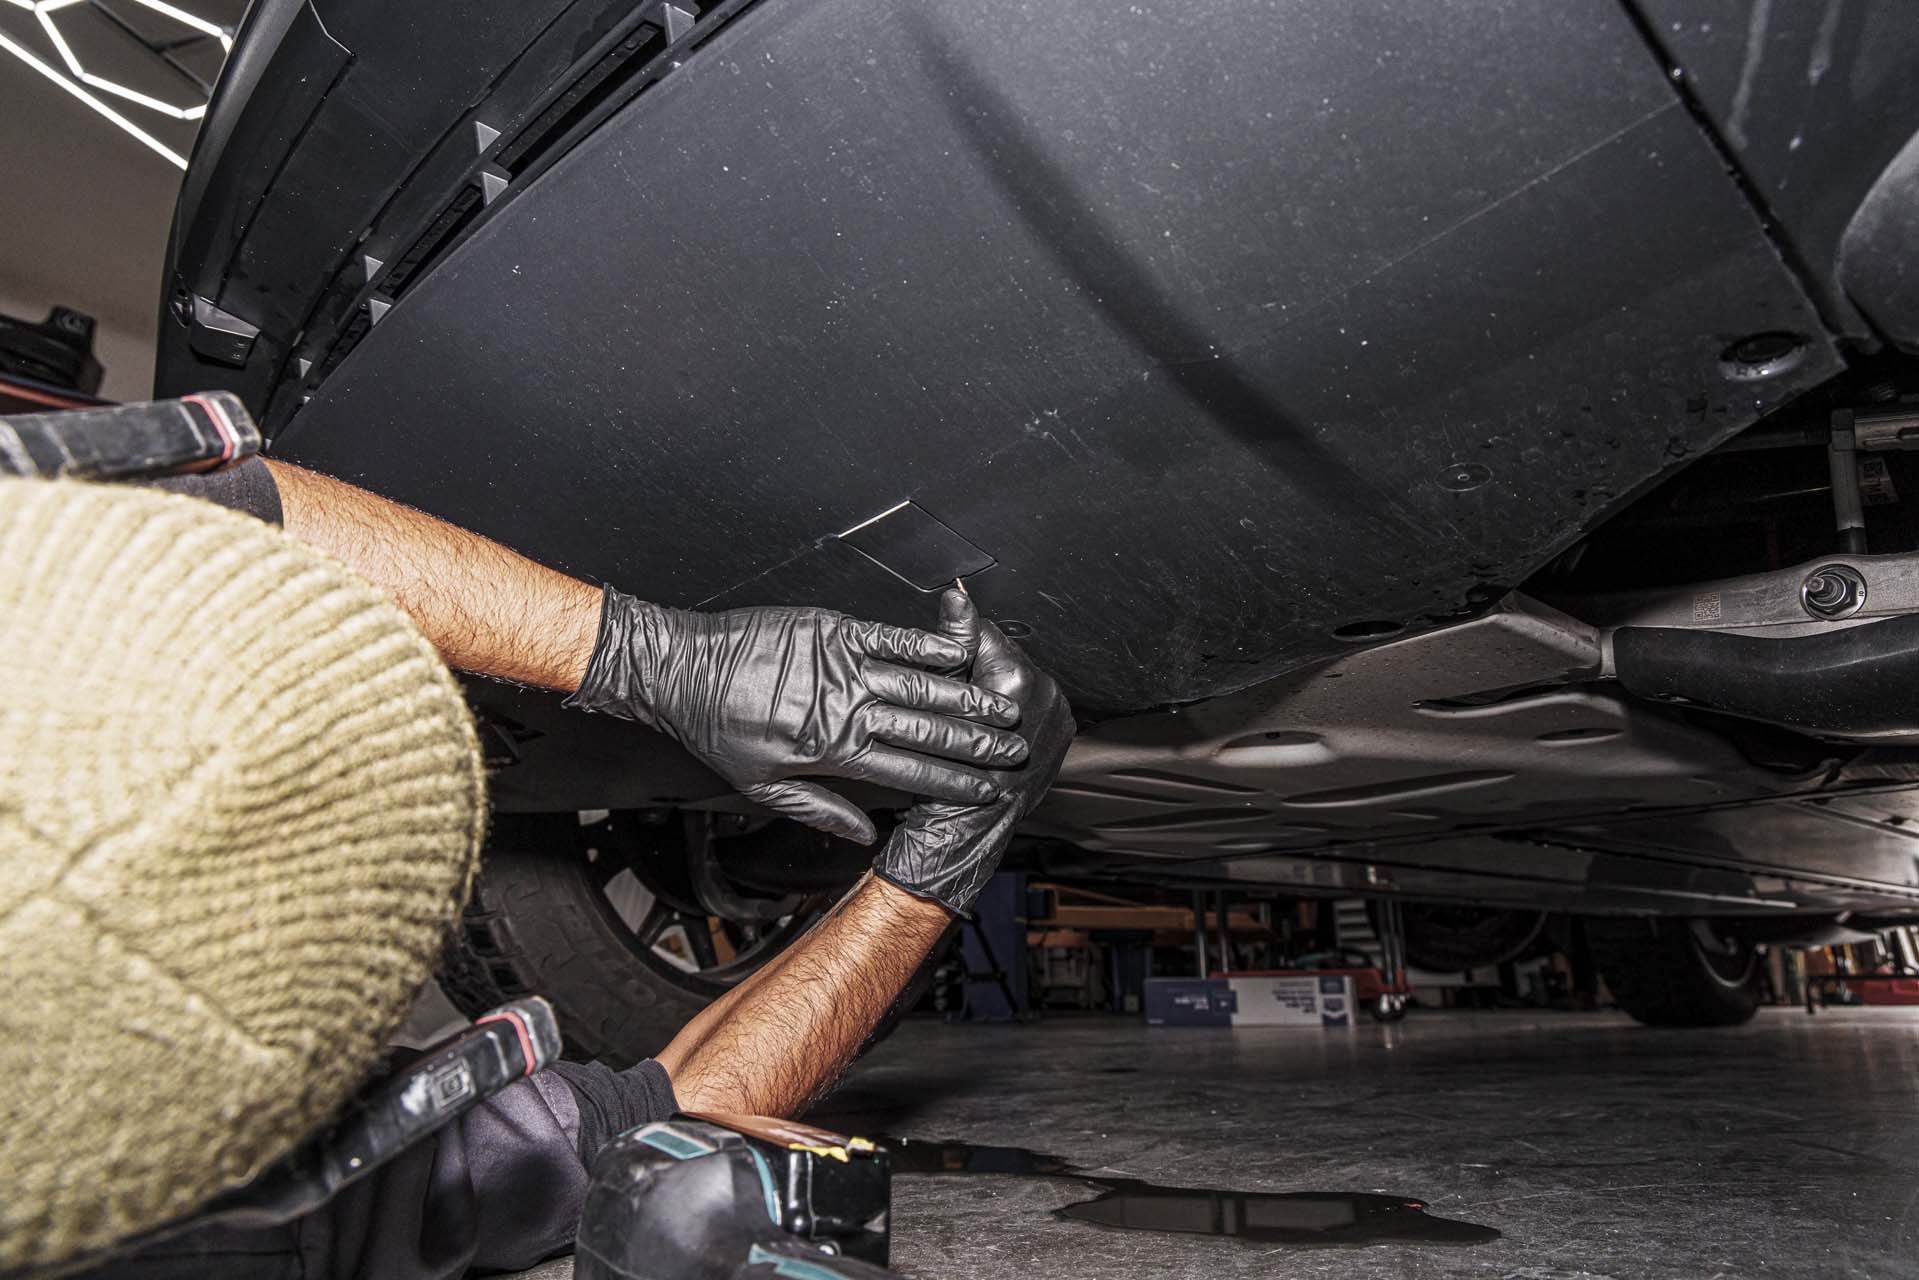
Using a 10mm socket, remove all 6 bolts securing the factory bumper cover to the factory splash guard. 1 bolt is located under each flap cover, and 4 bolts are located further back securing the factory bumper cover to the factory mid panel.
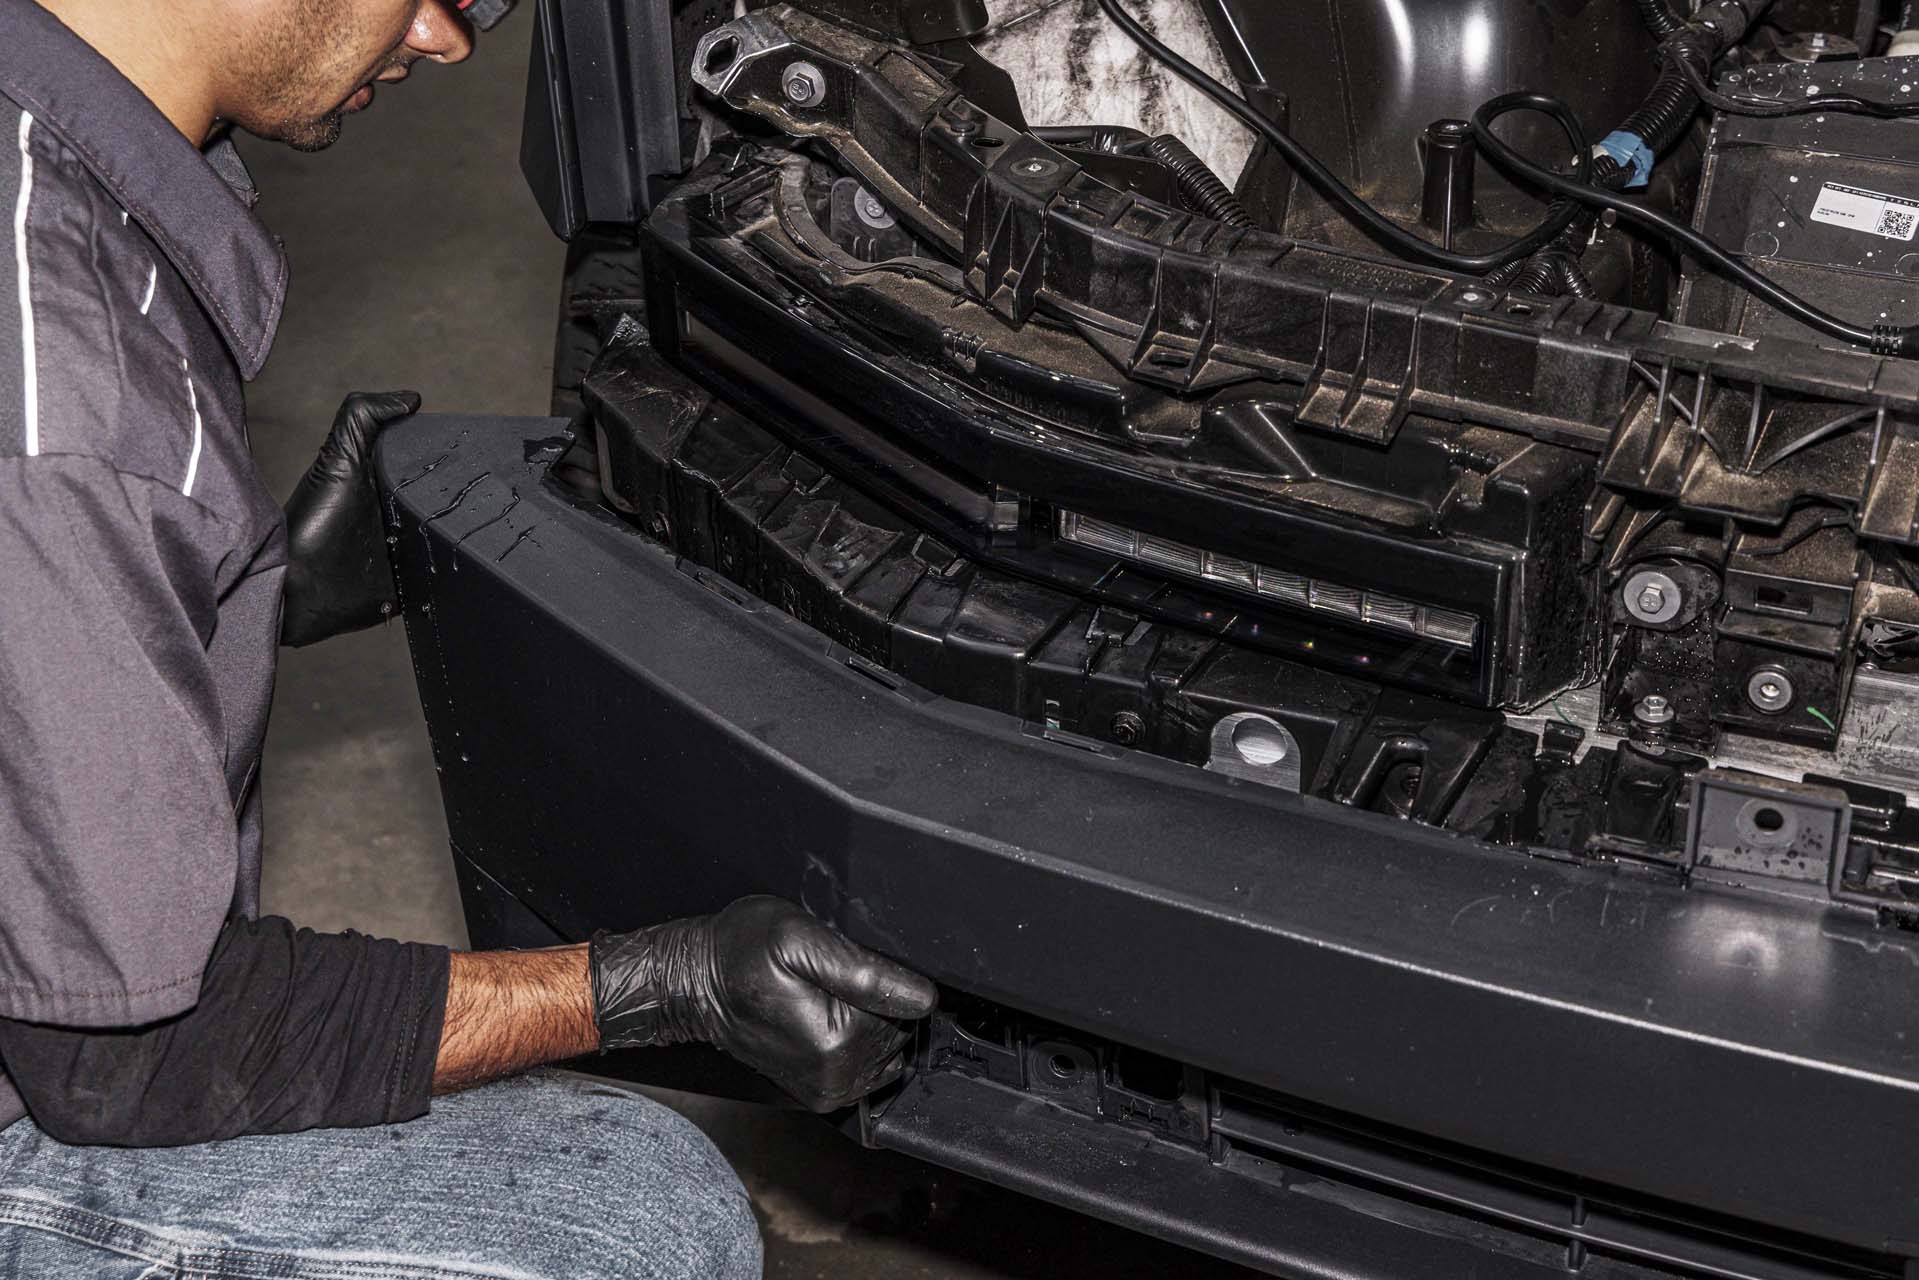
Next, pull the factory bumper cover away from the vehicle in a swift motion to disengage the retainer tabs. Note that the speaker has a push clip securing the wiring harness that needs to be removed.
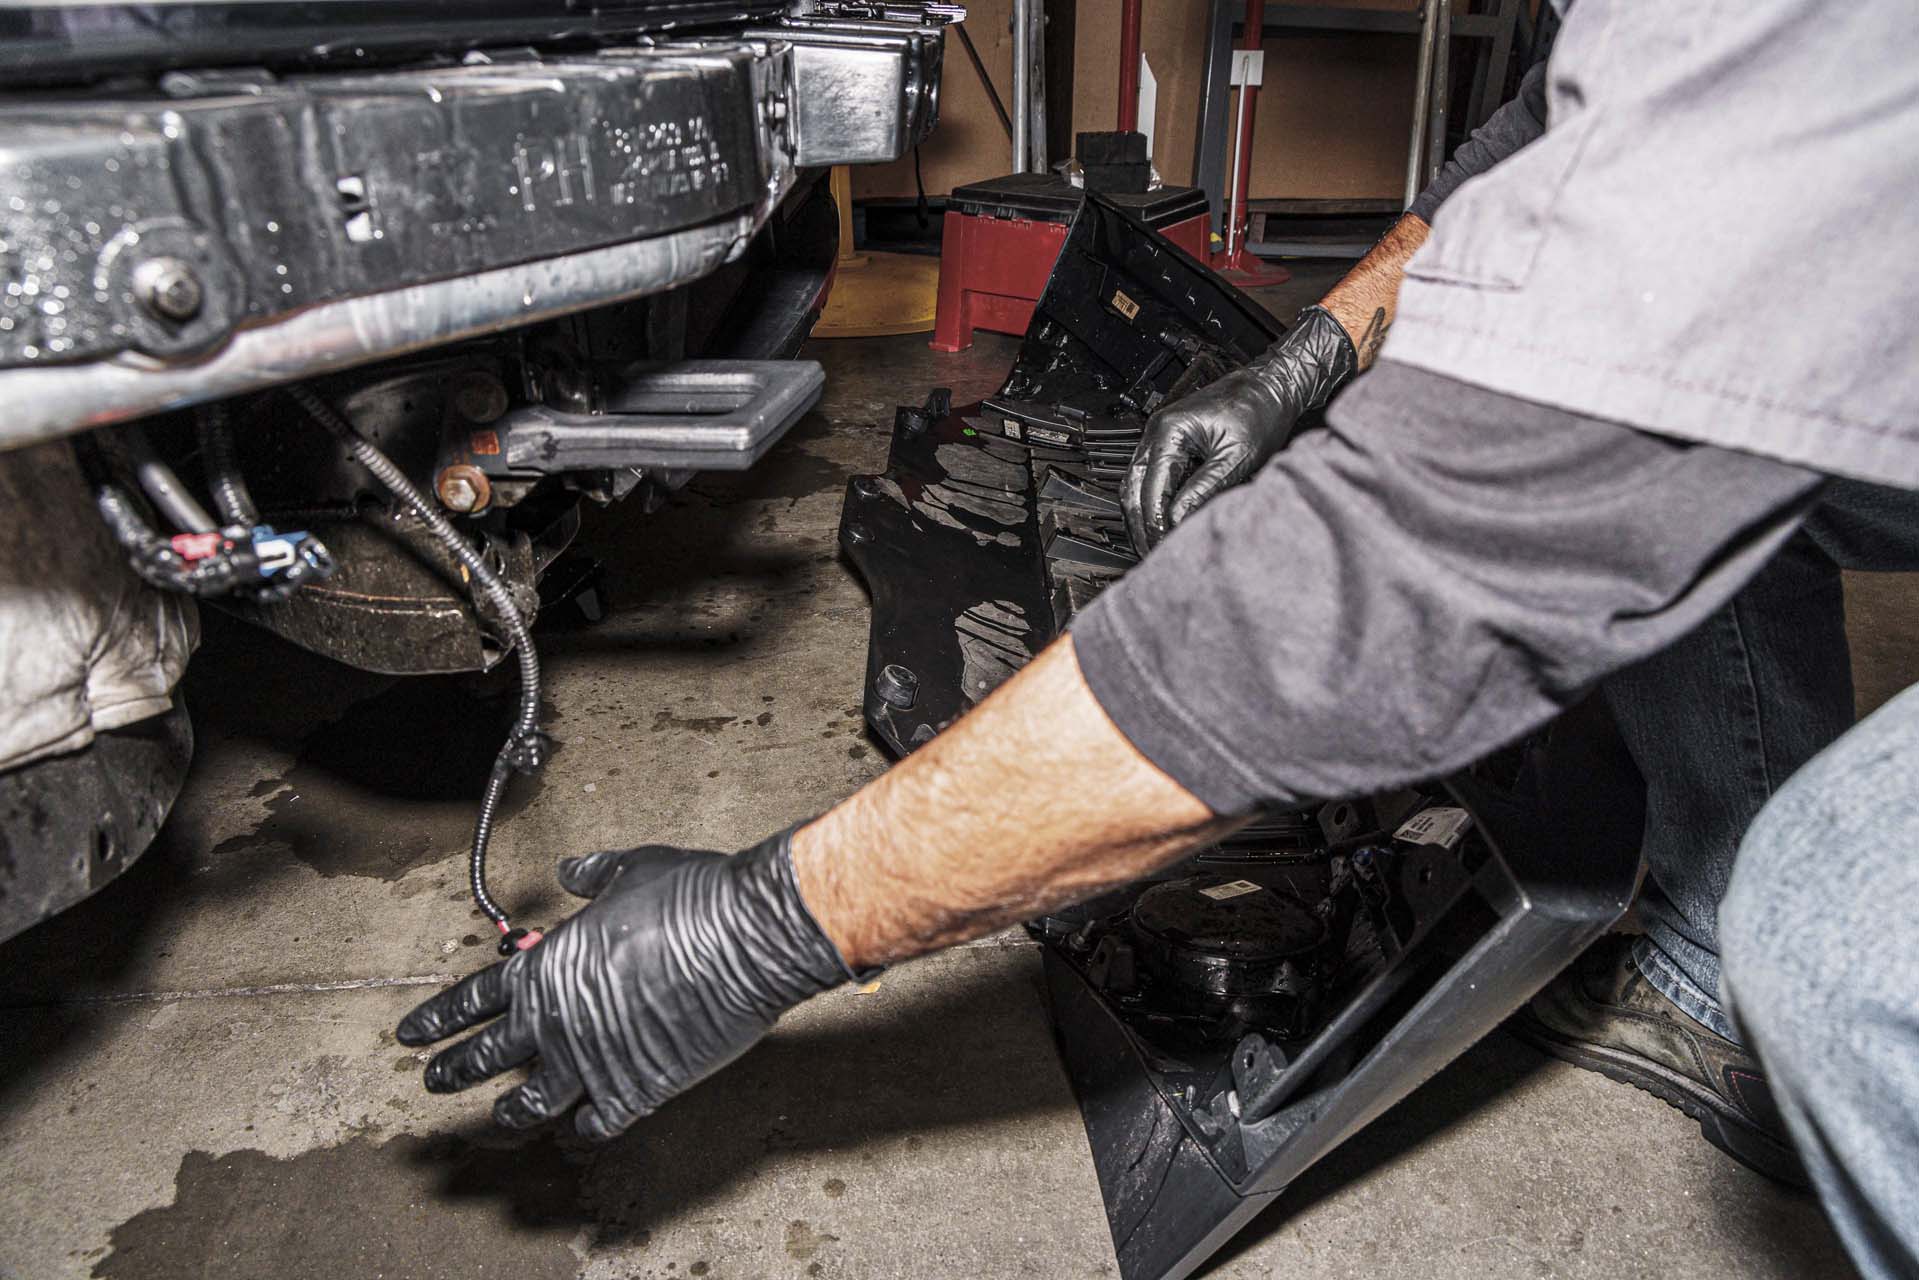
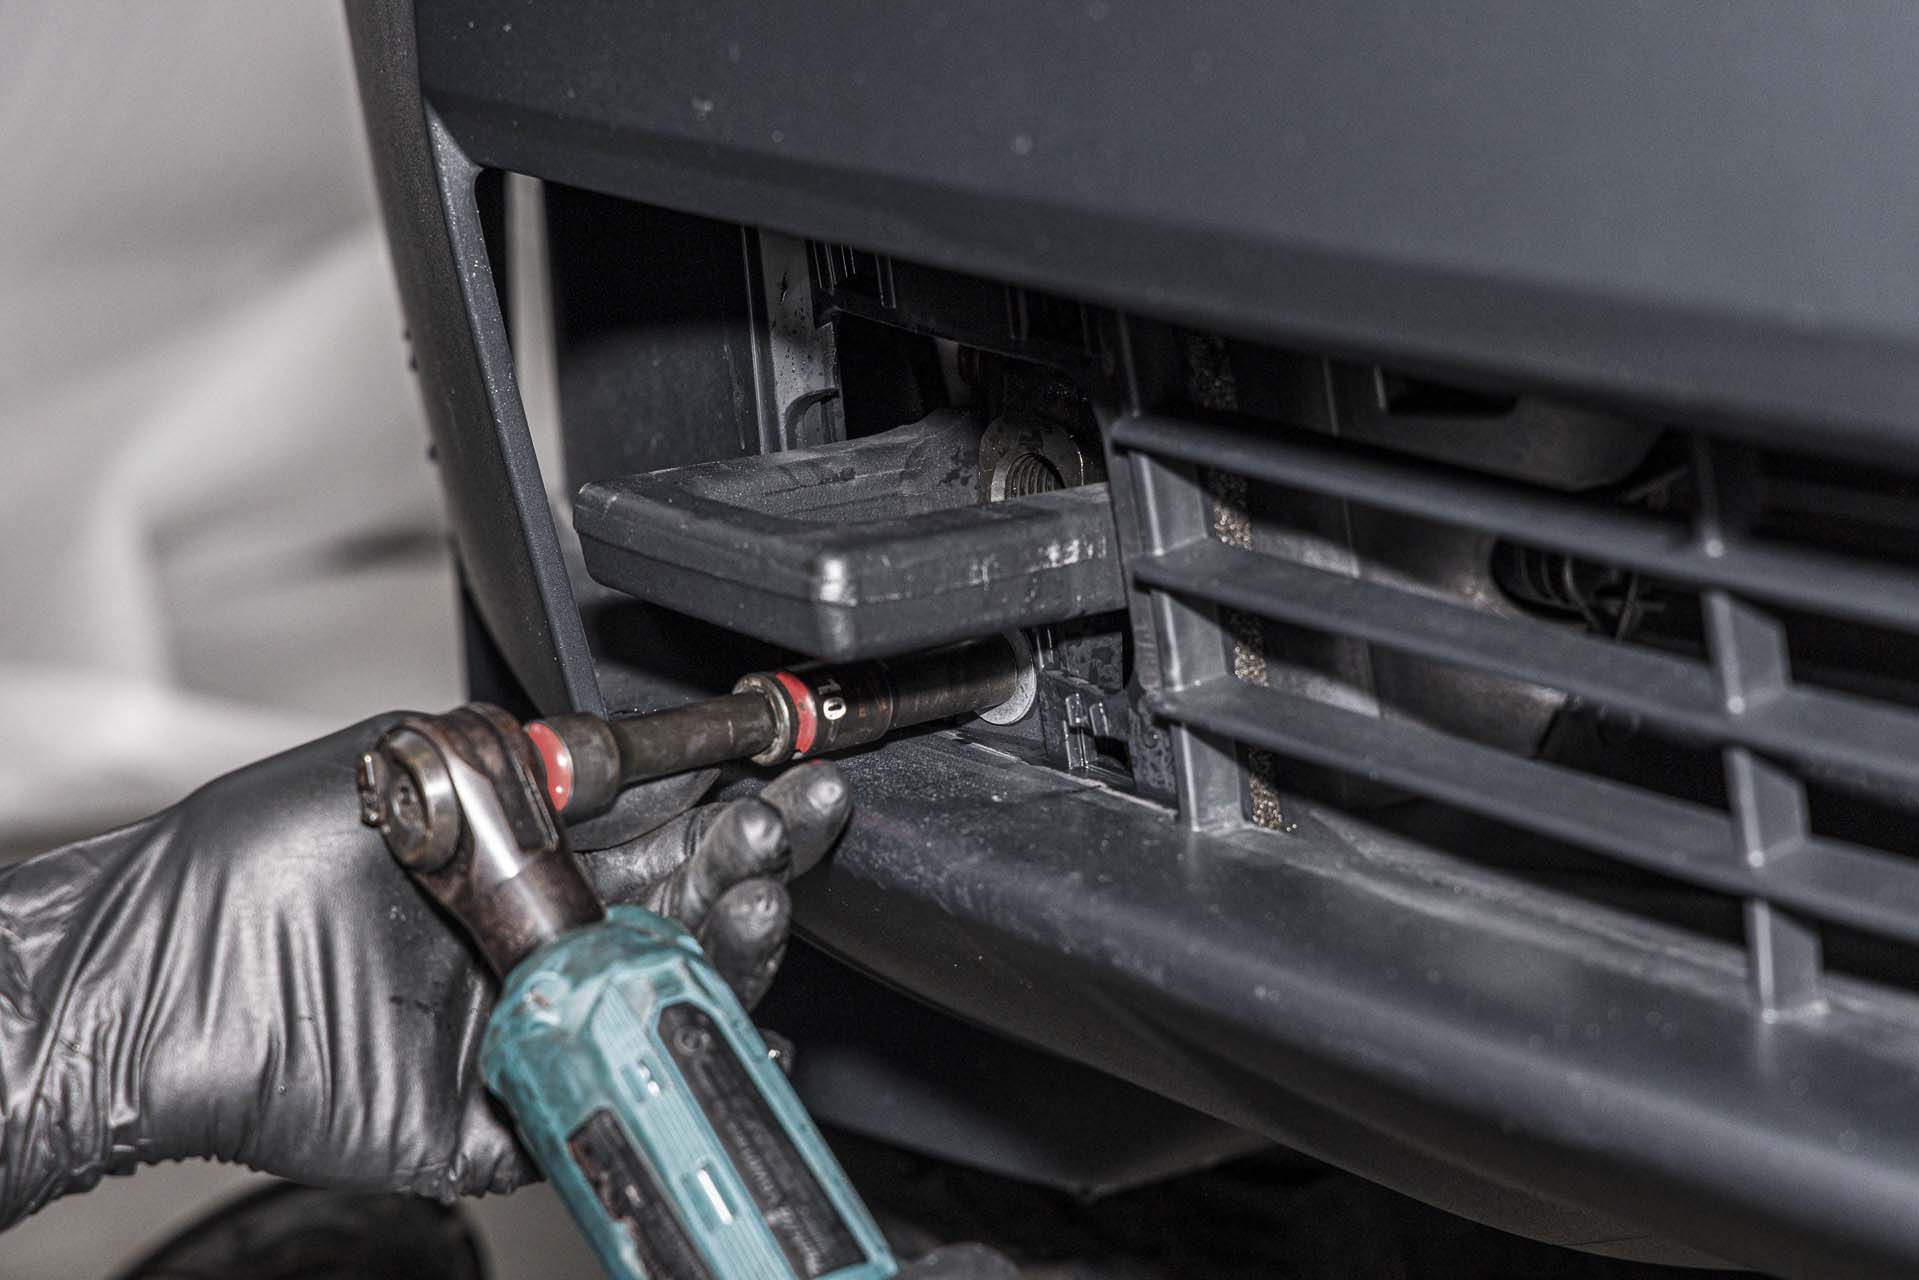
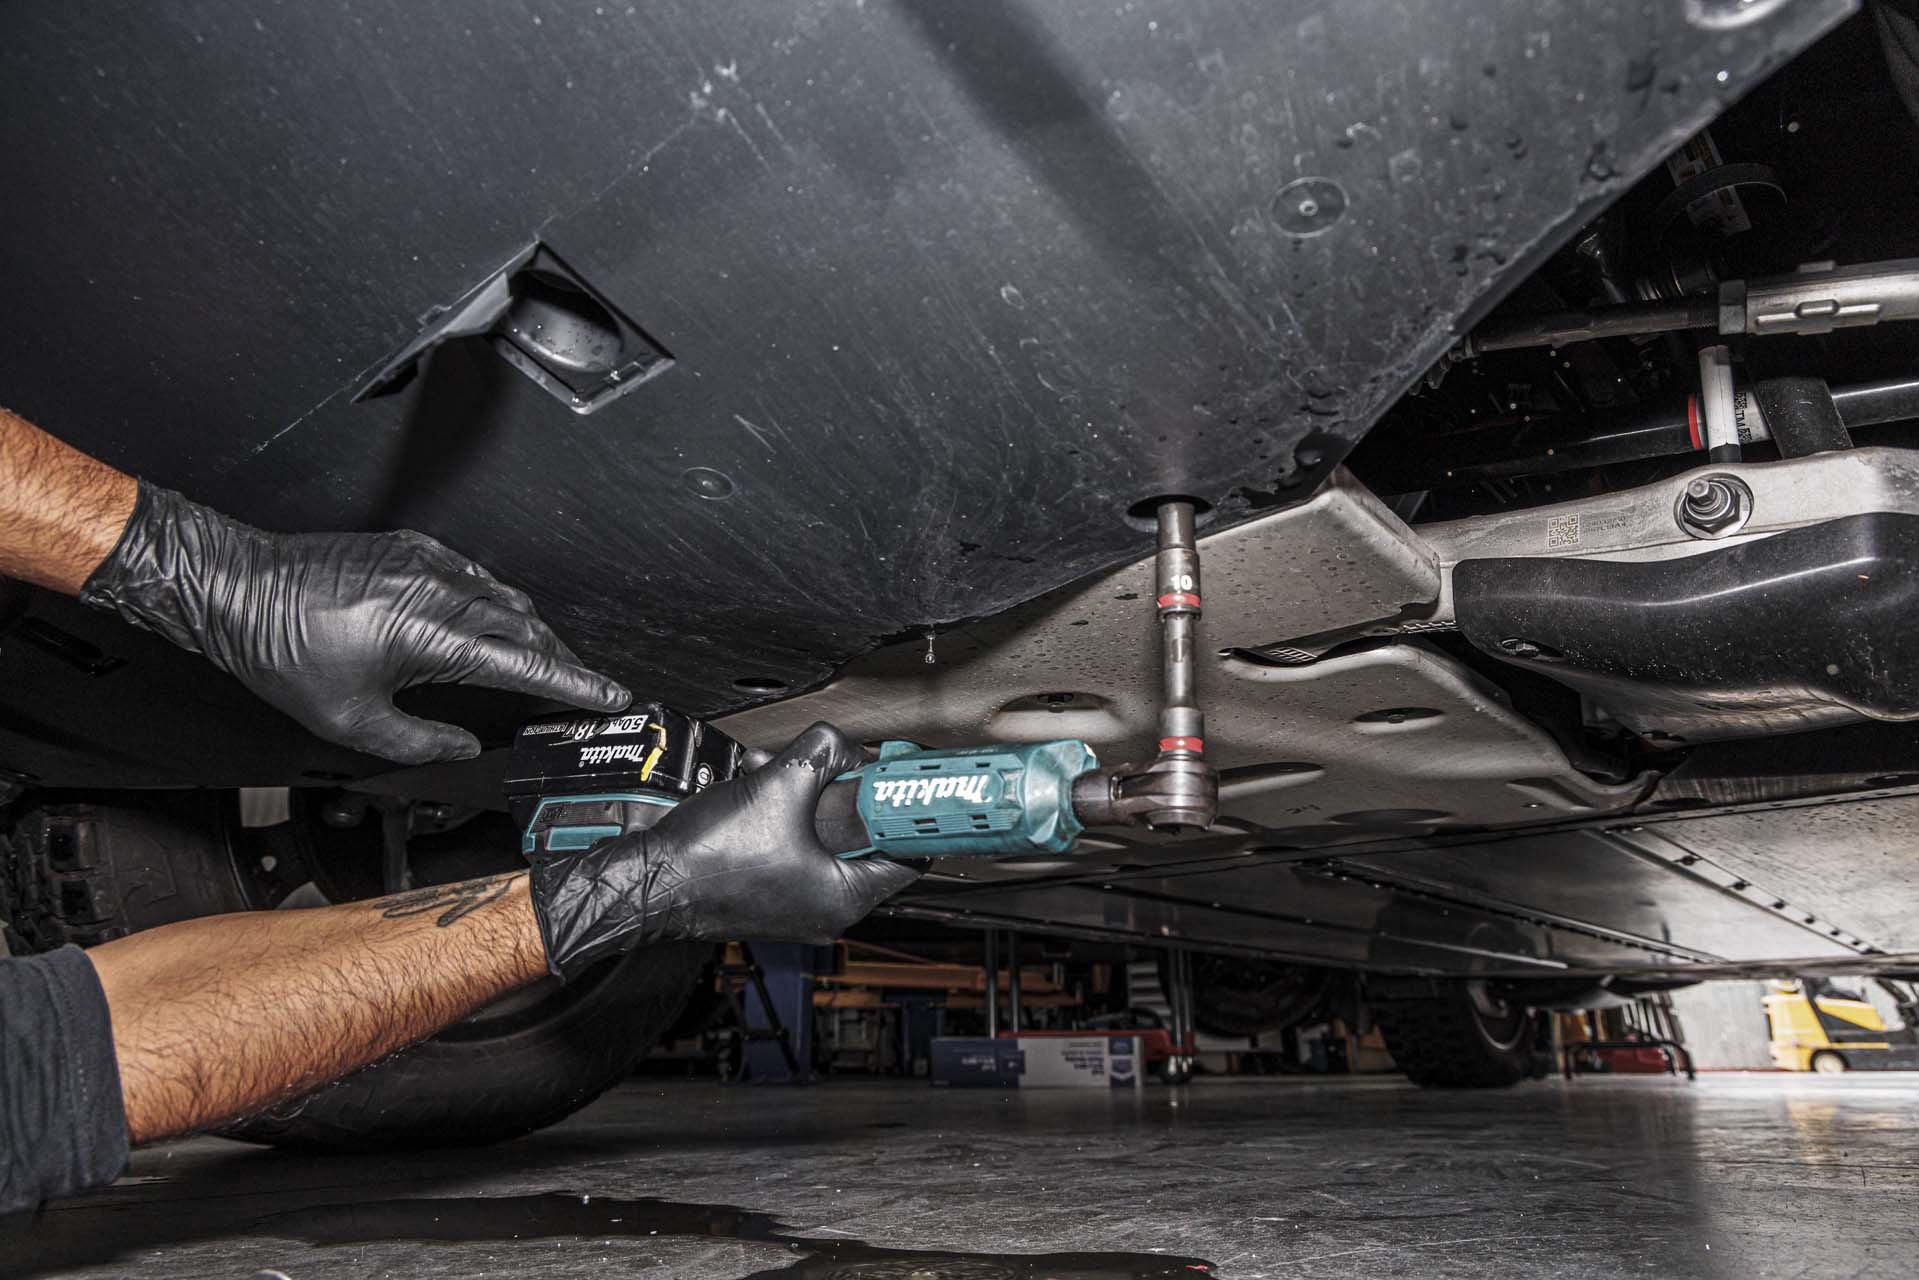
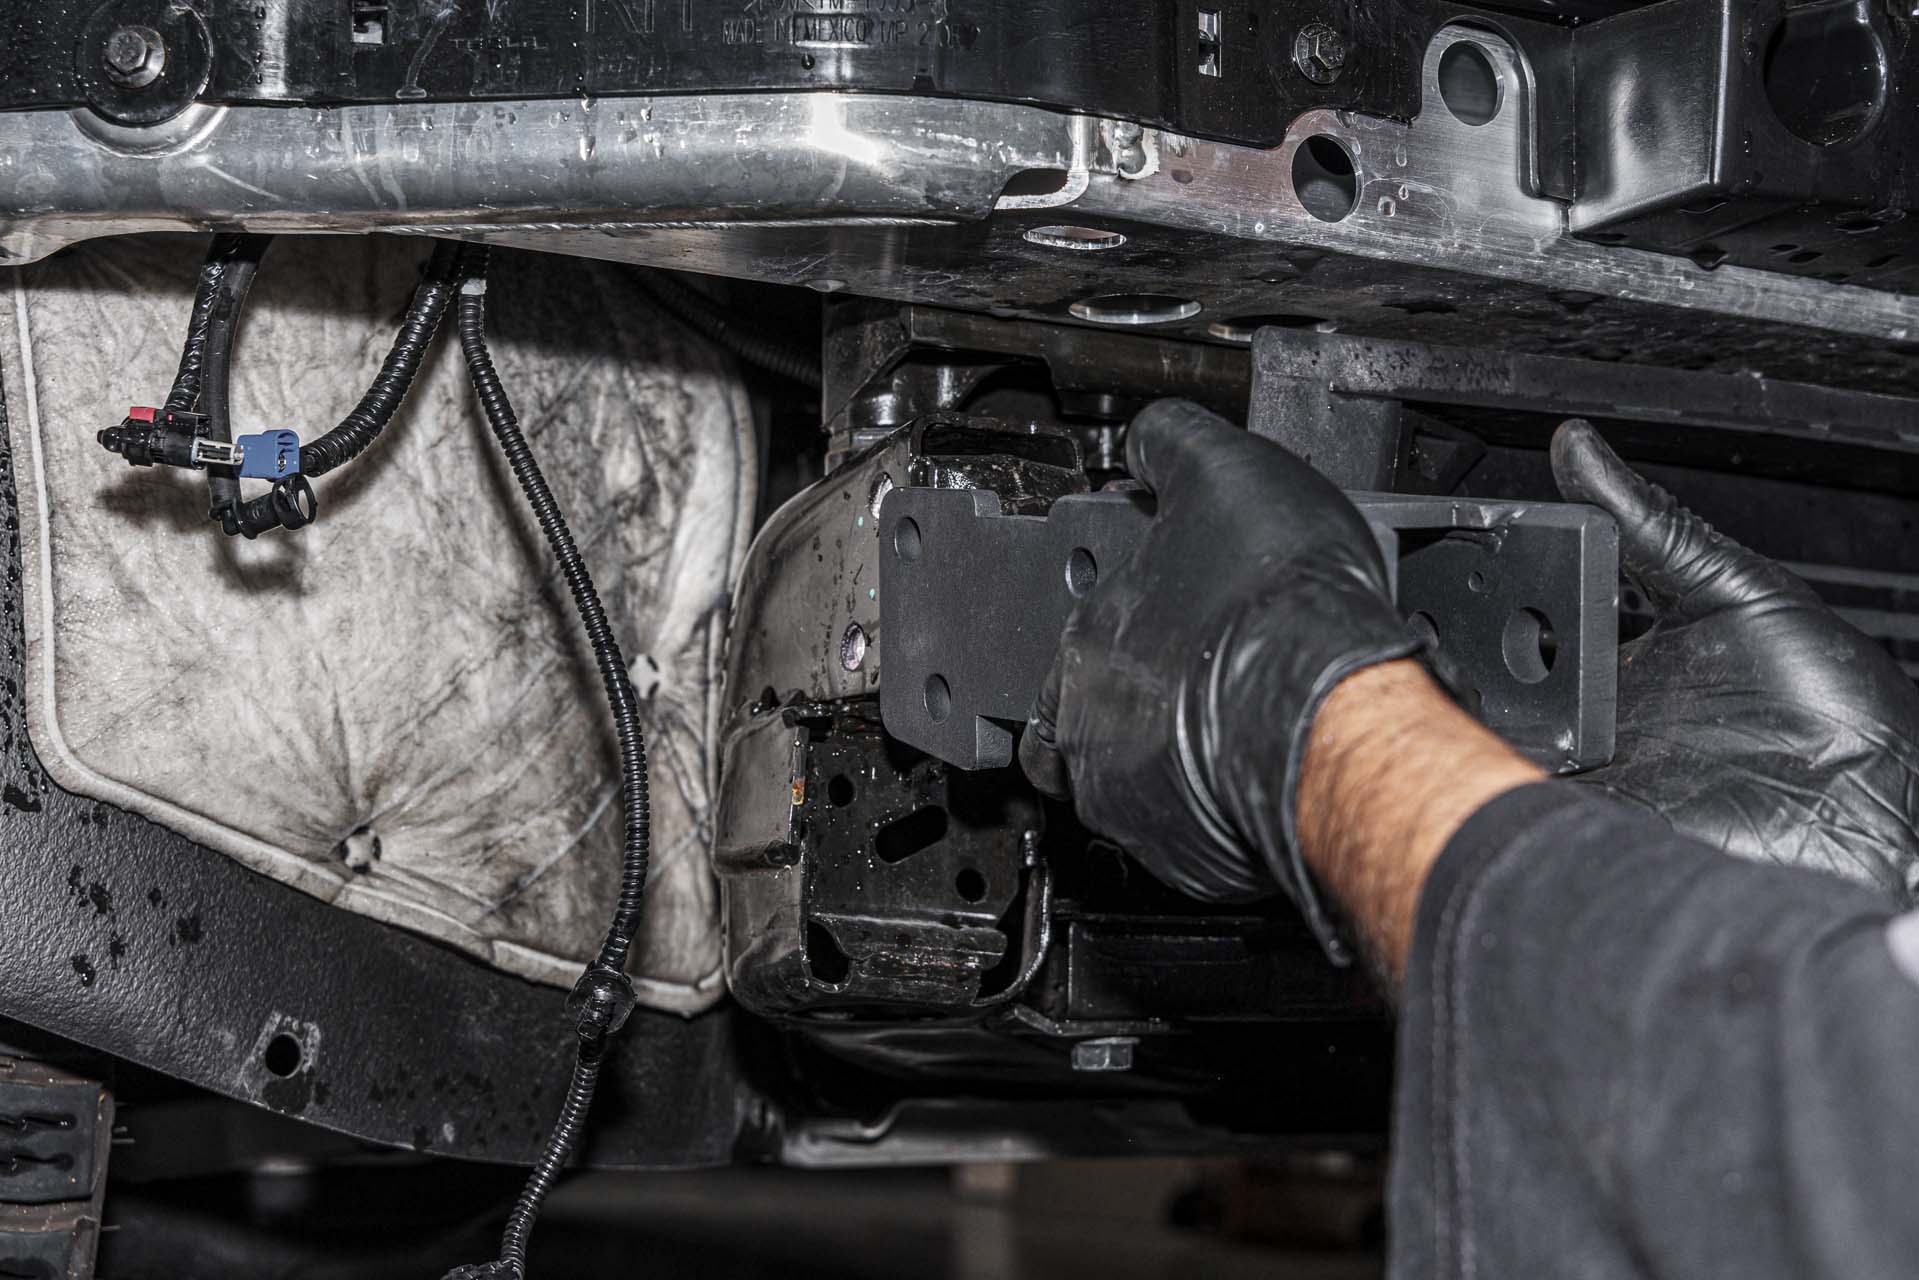
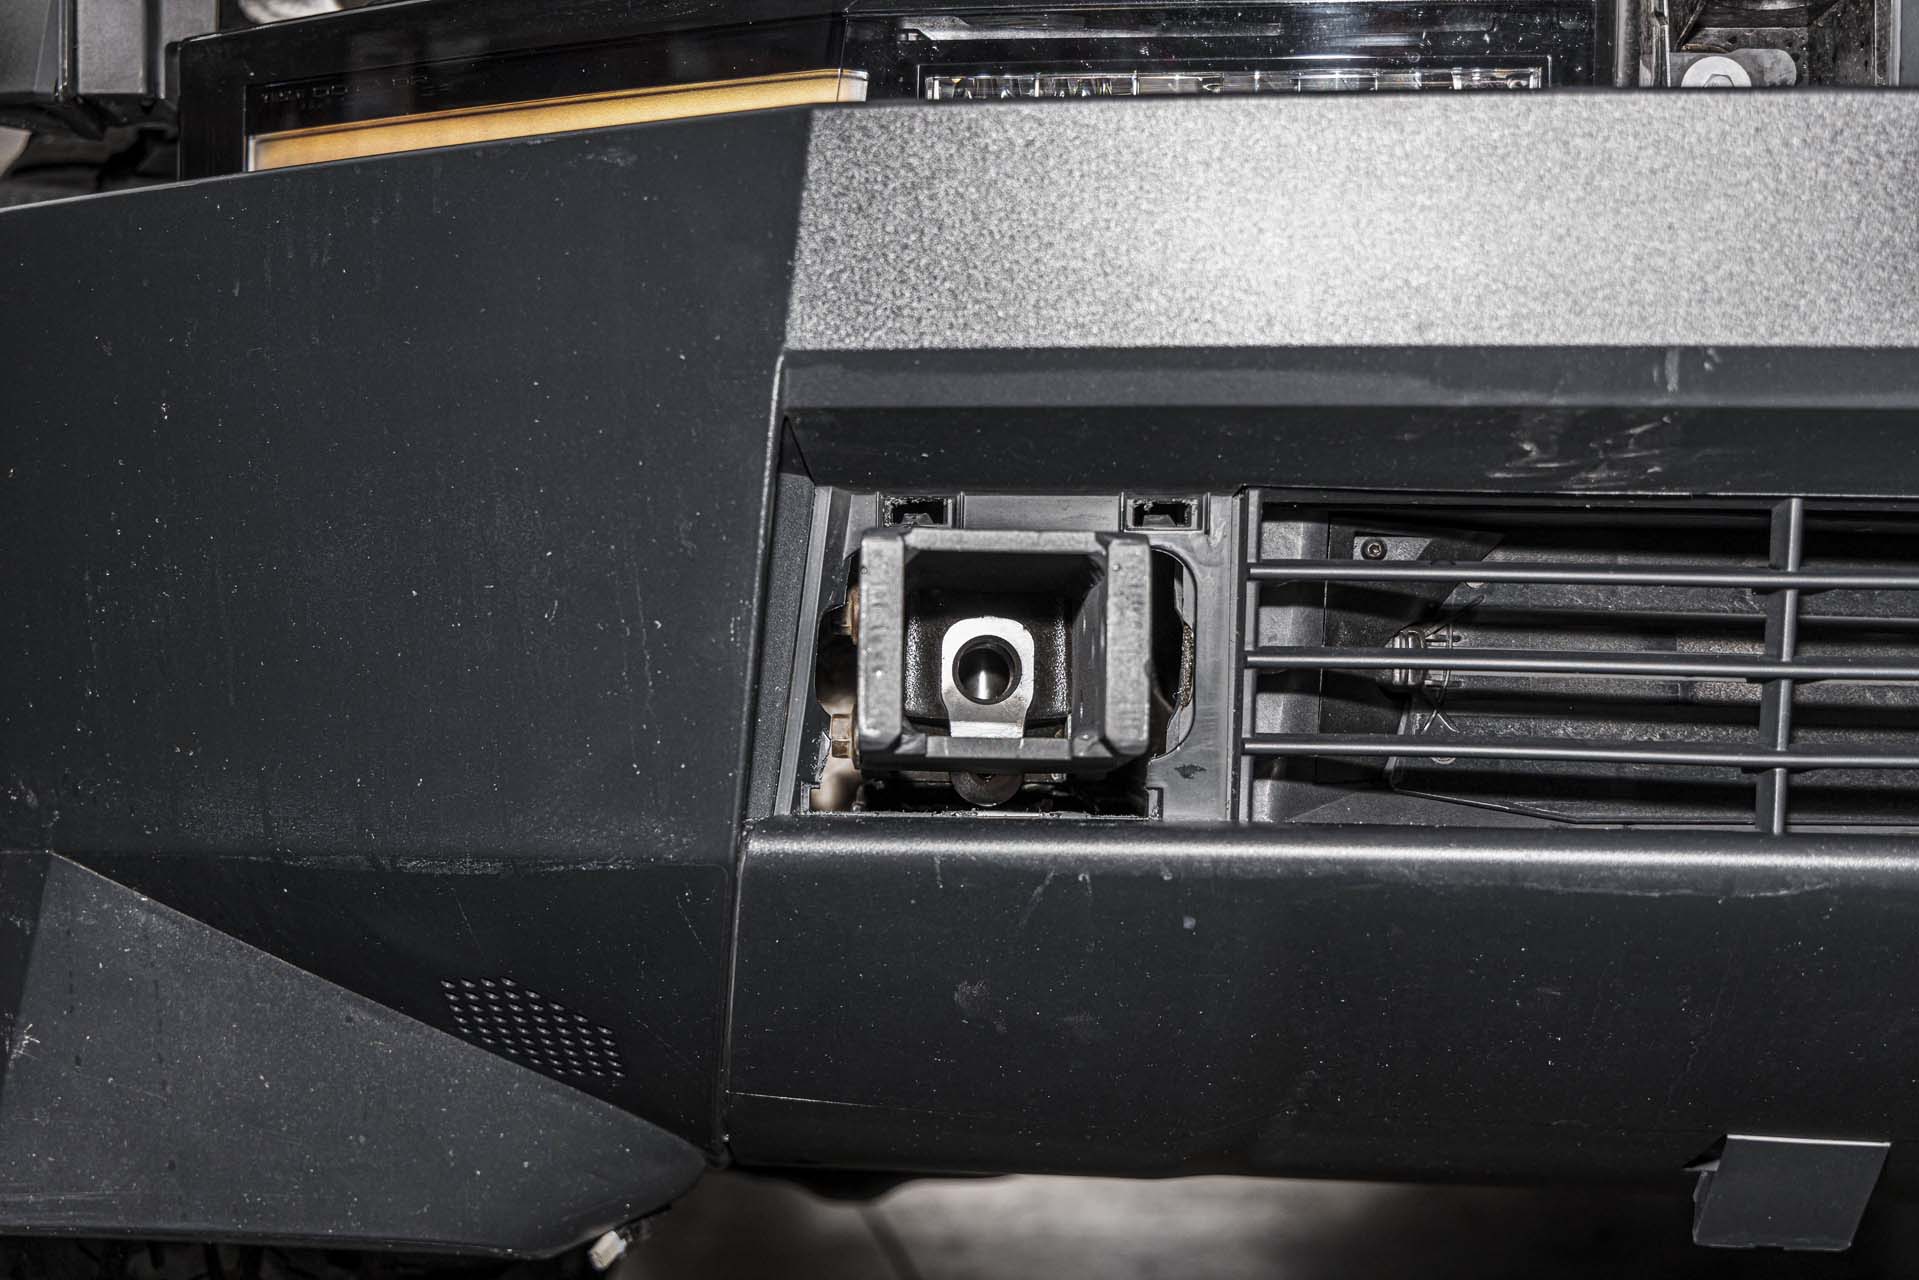
Next, using a 15mm socket, remove all 4 bolts securing each tow hook to the front of the vehicle. Once all 4 bolts have been removed, pull the hook away from the vehicle.
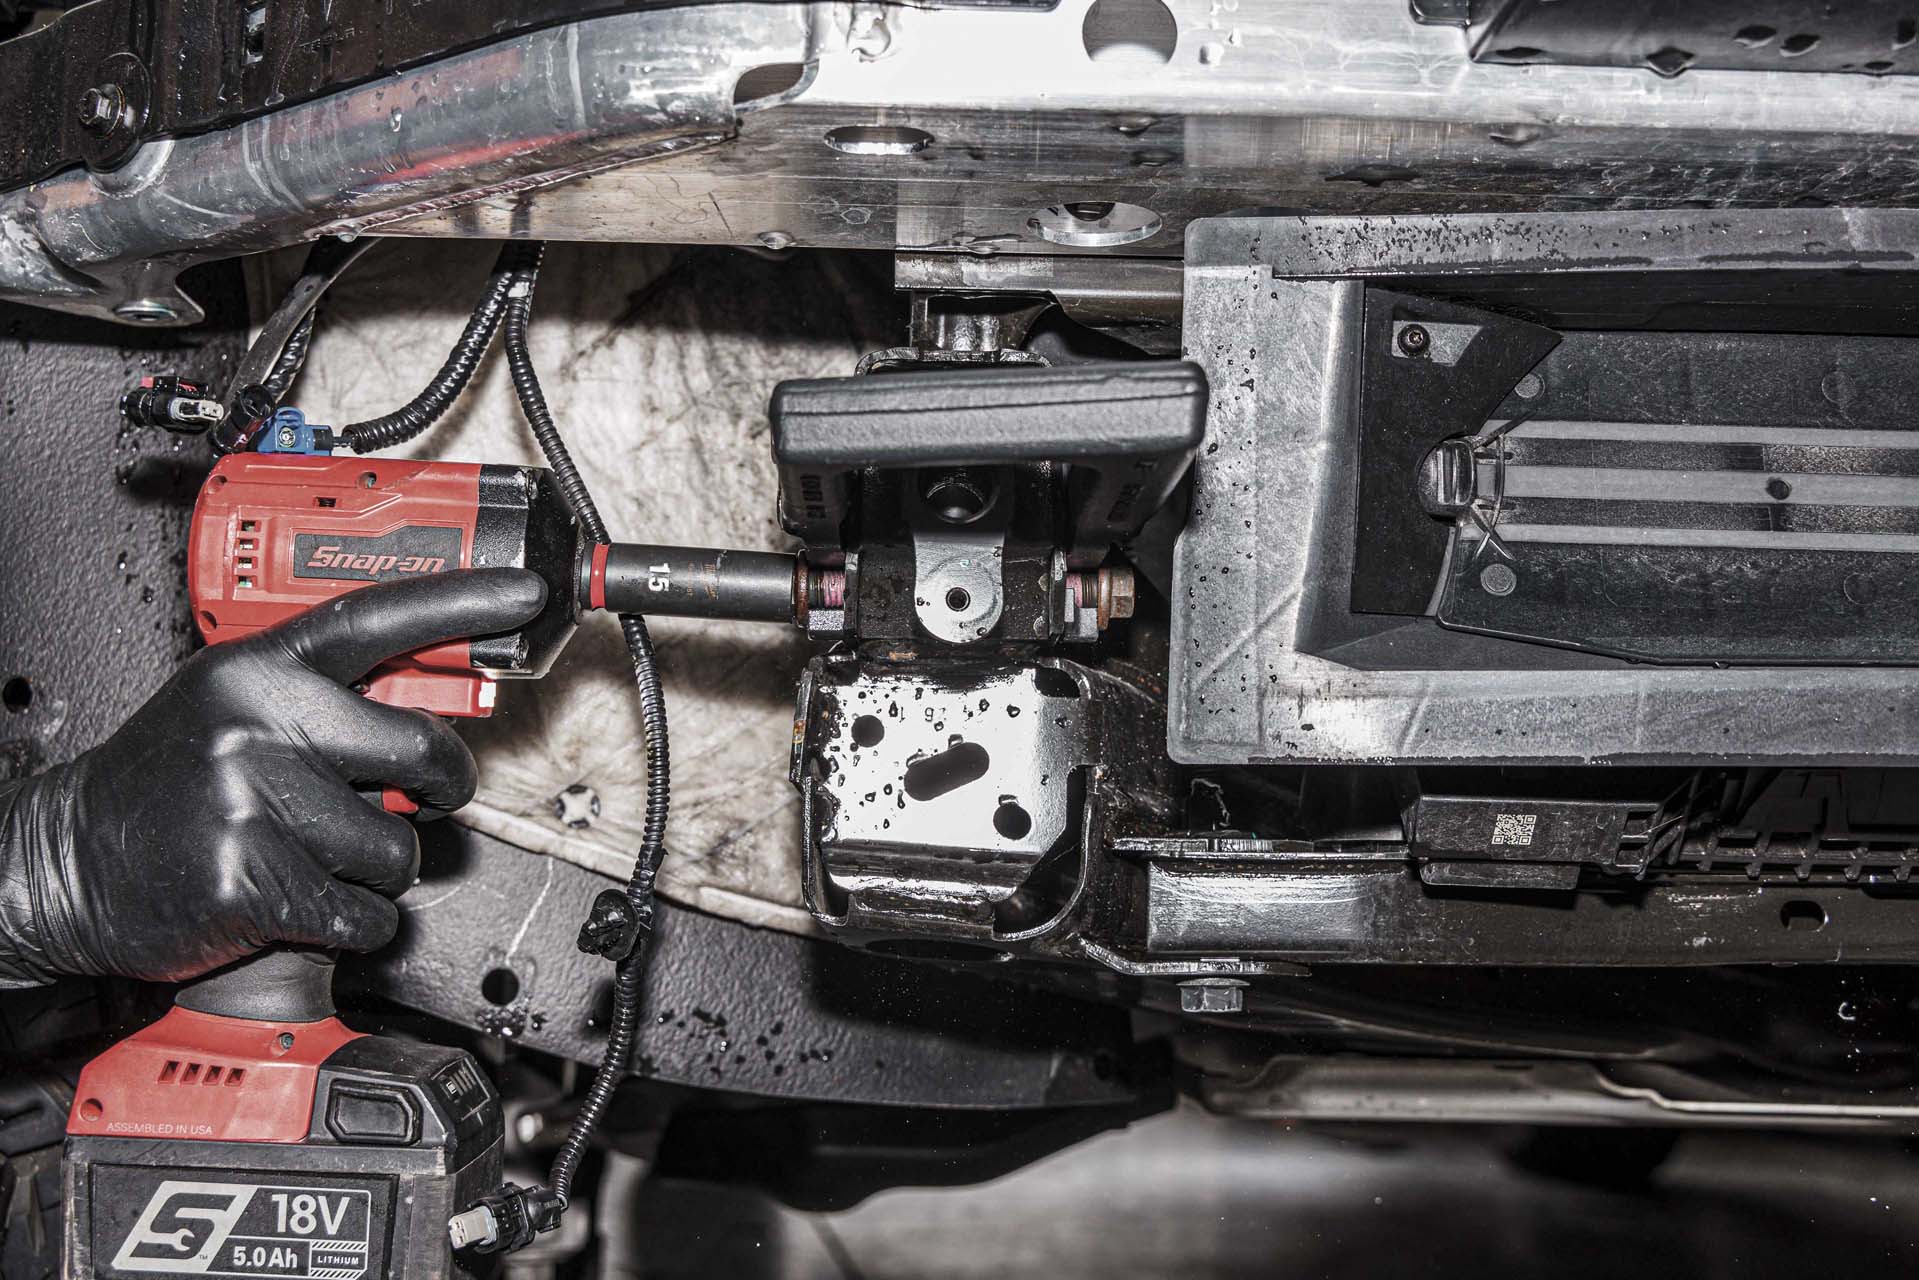
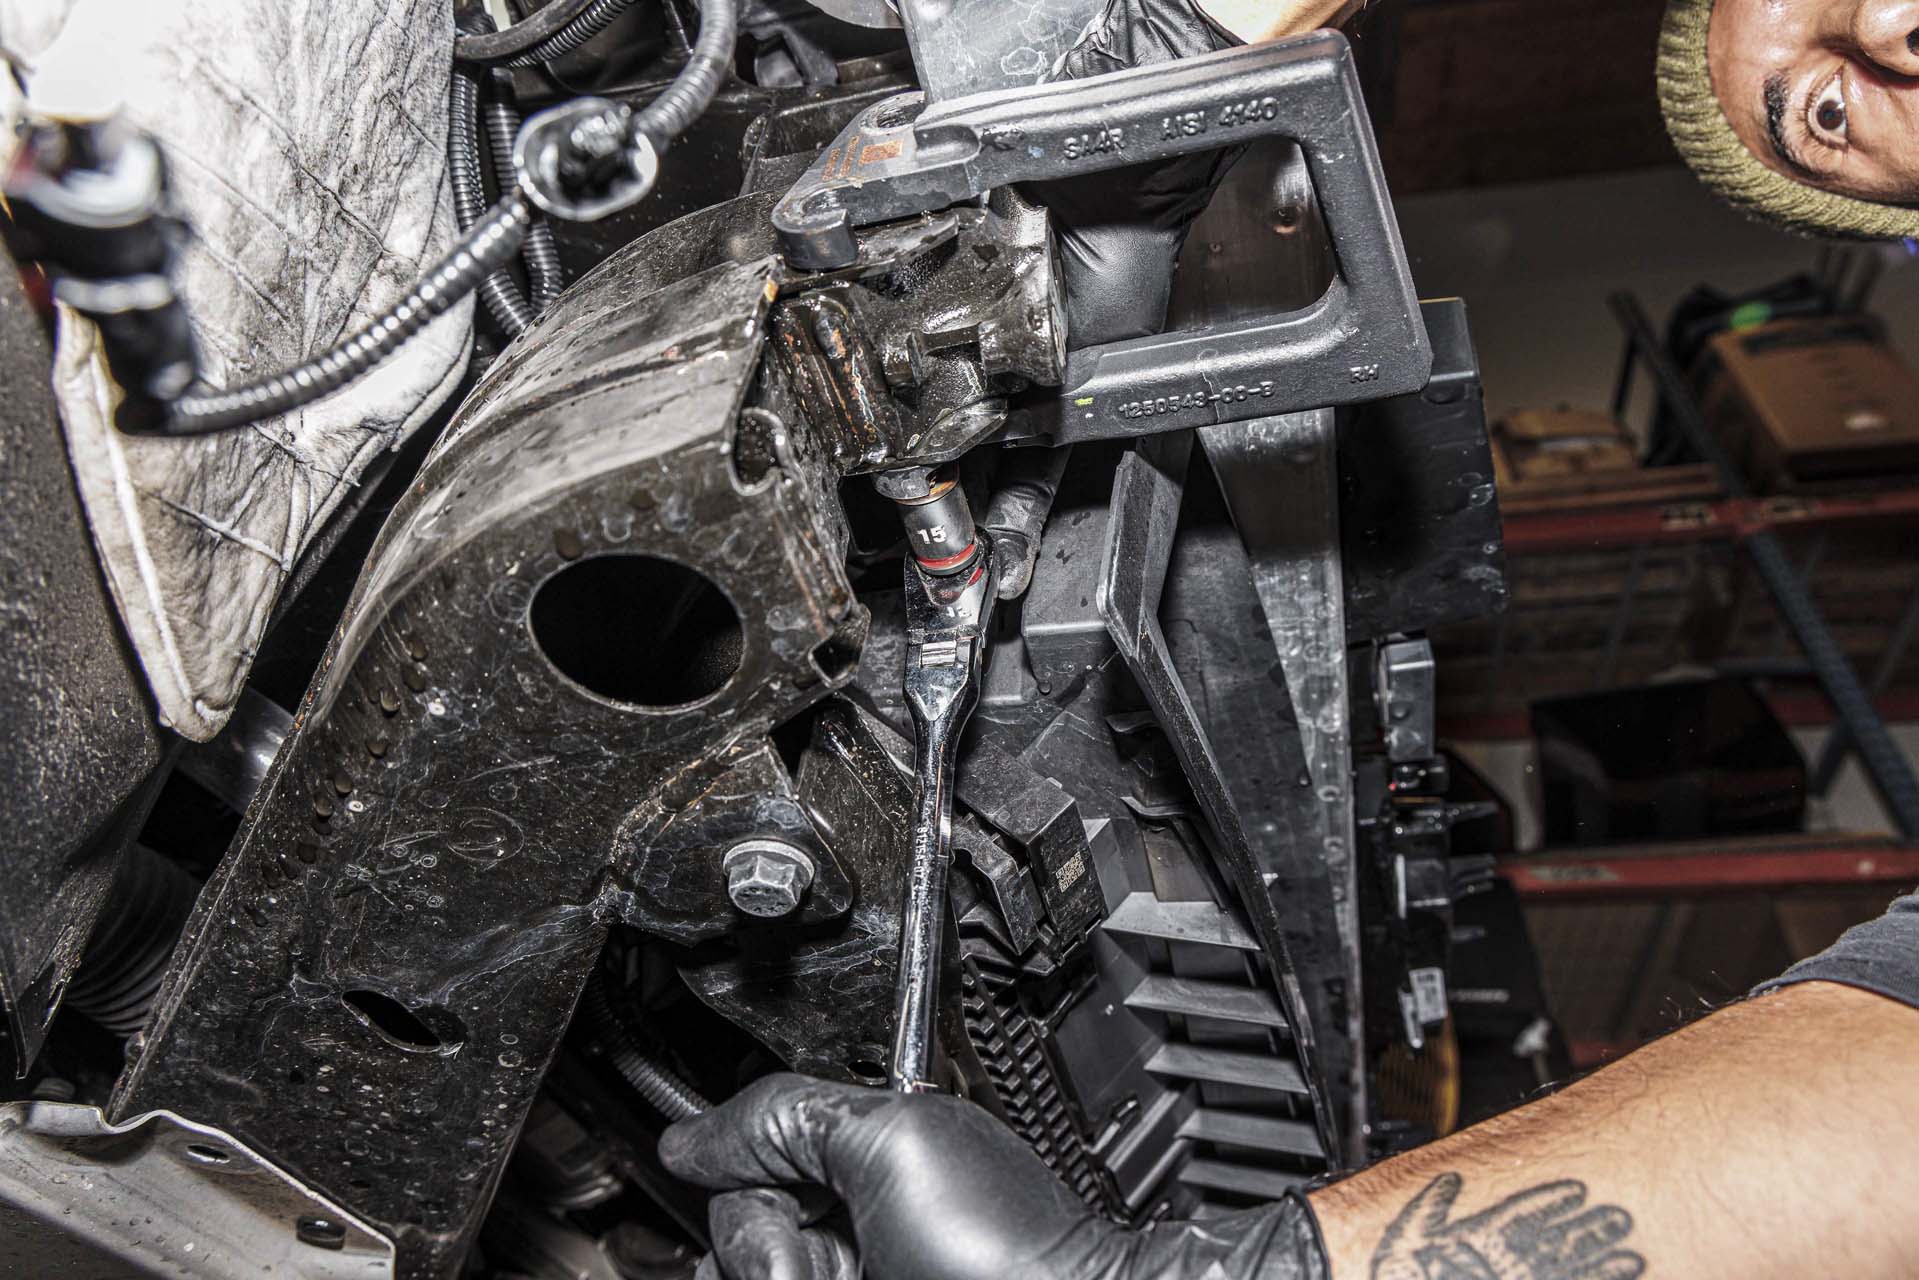
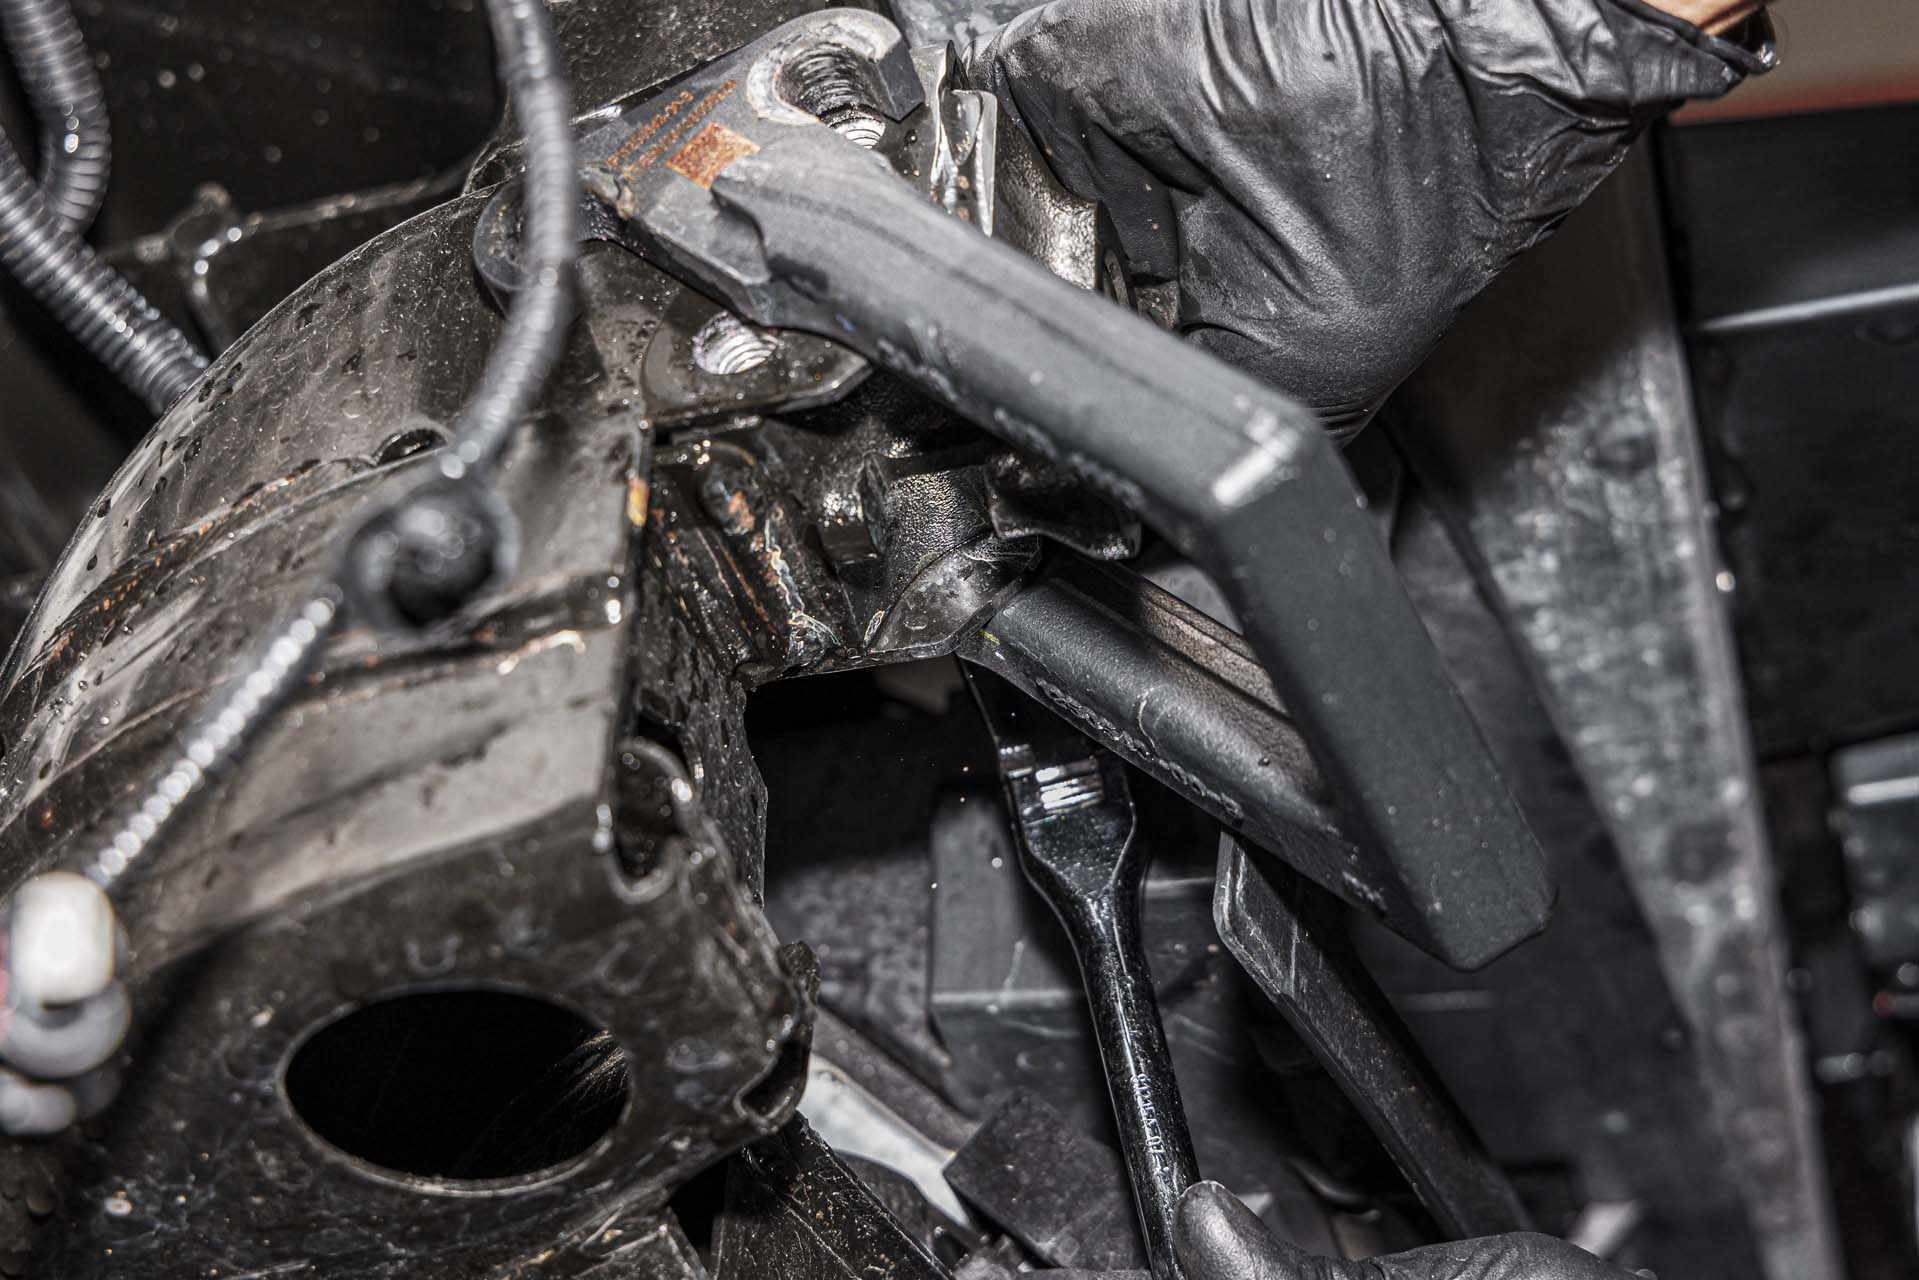
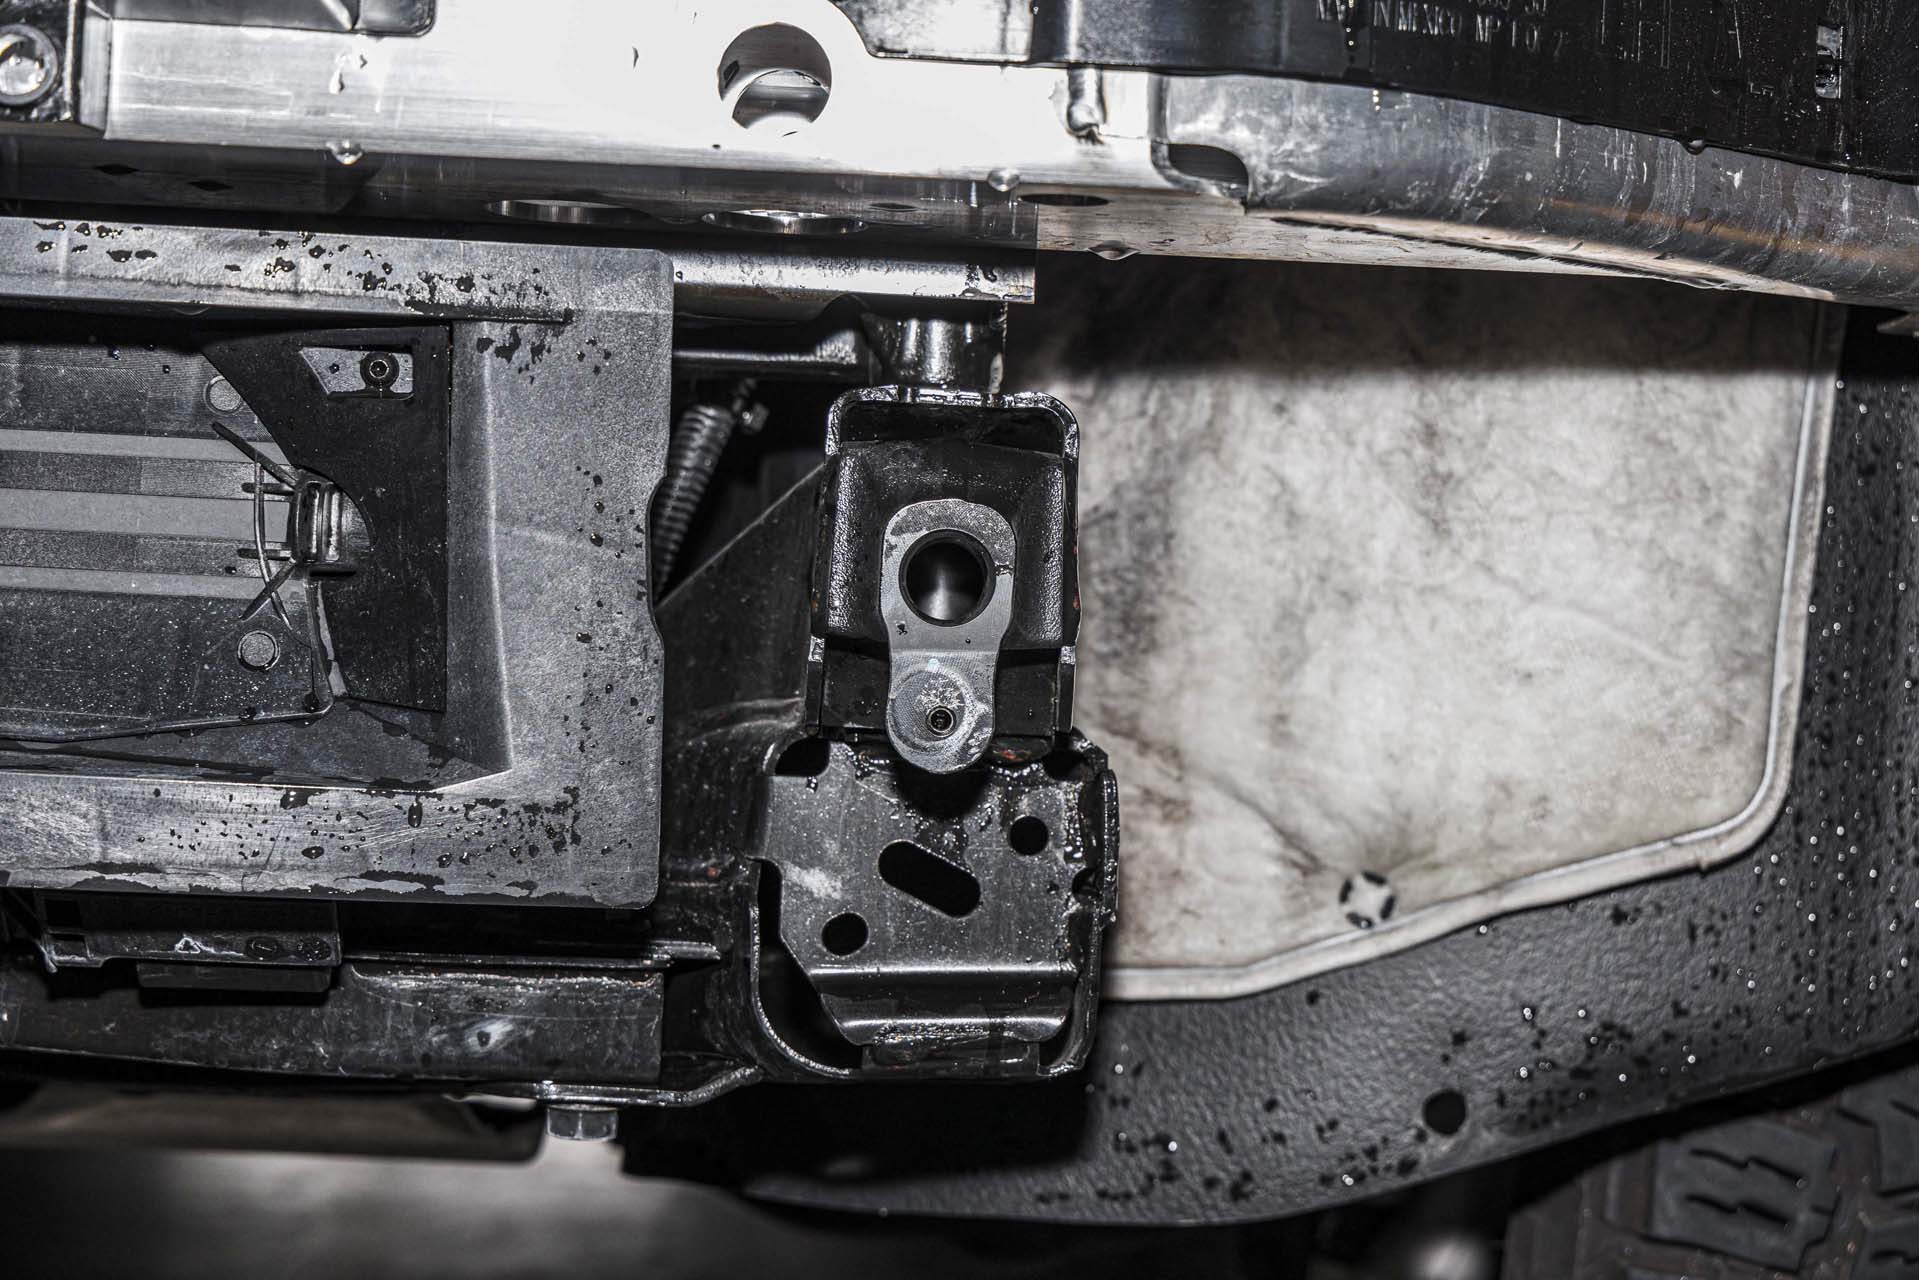
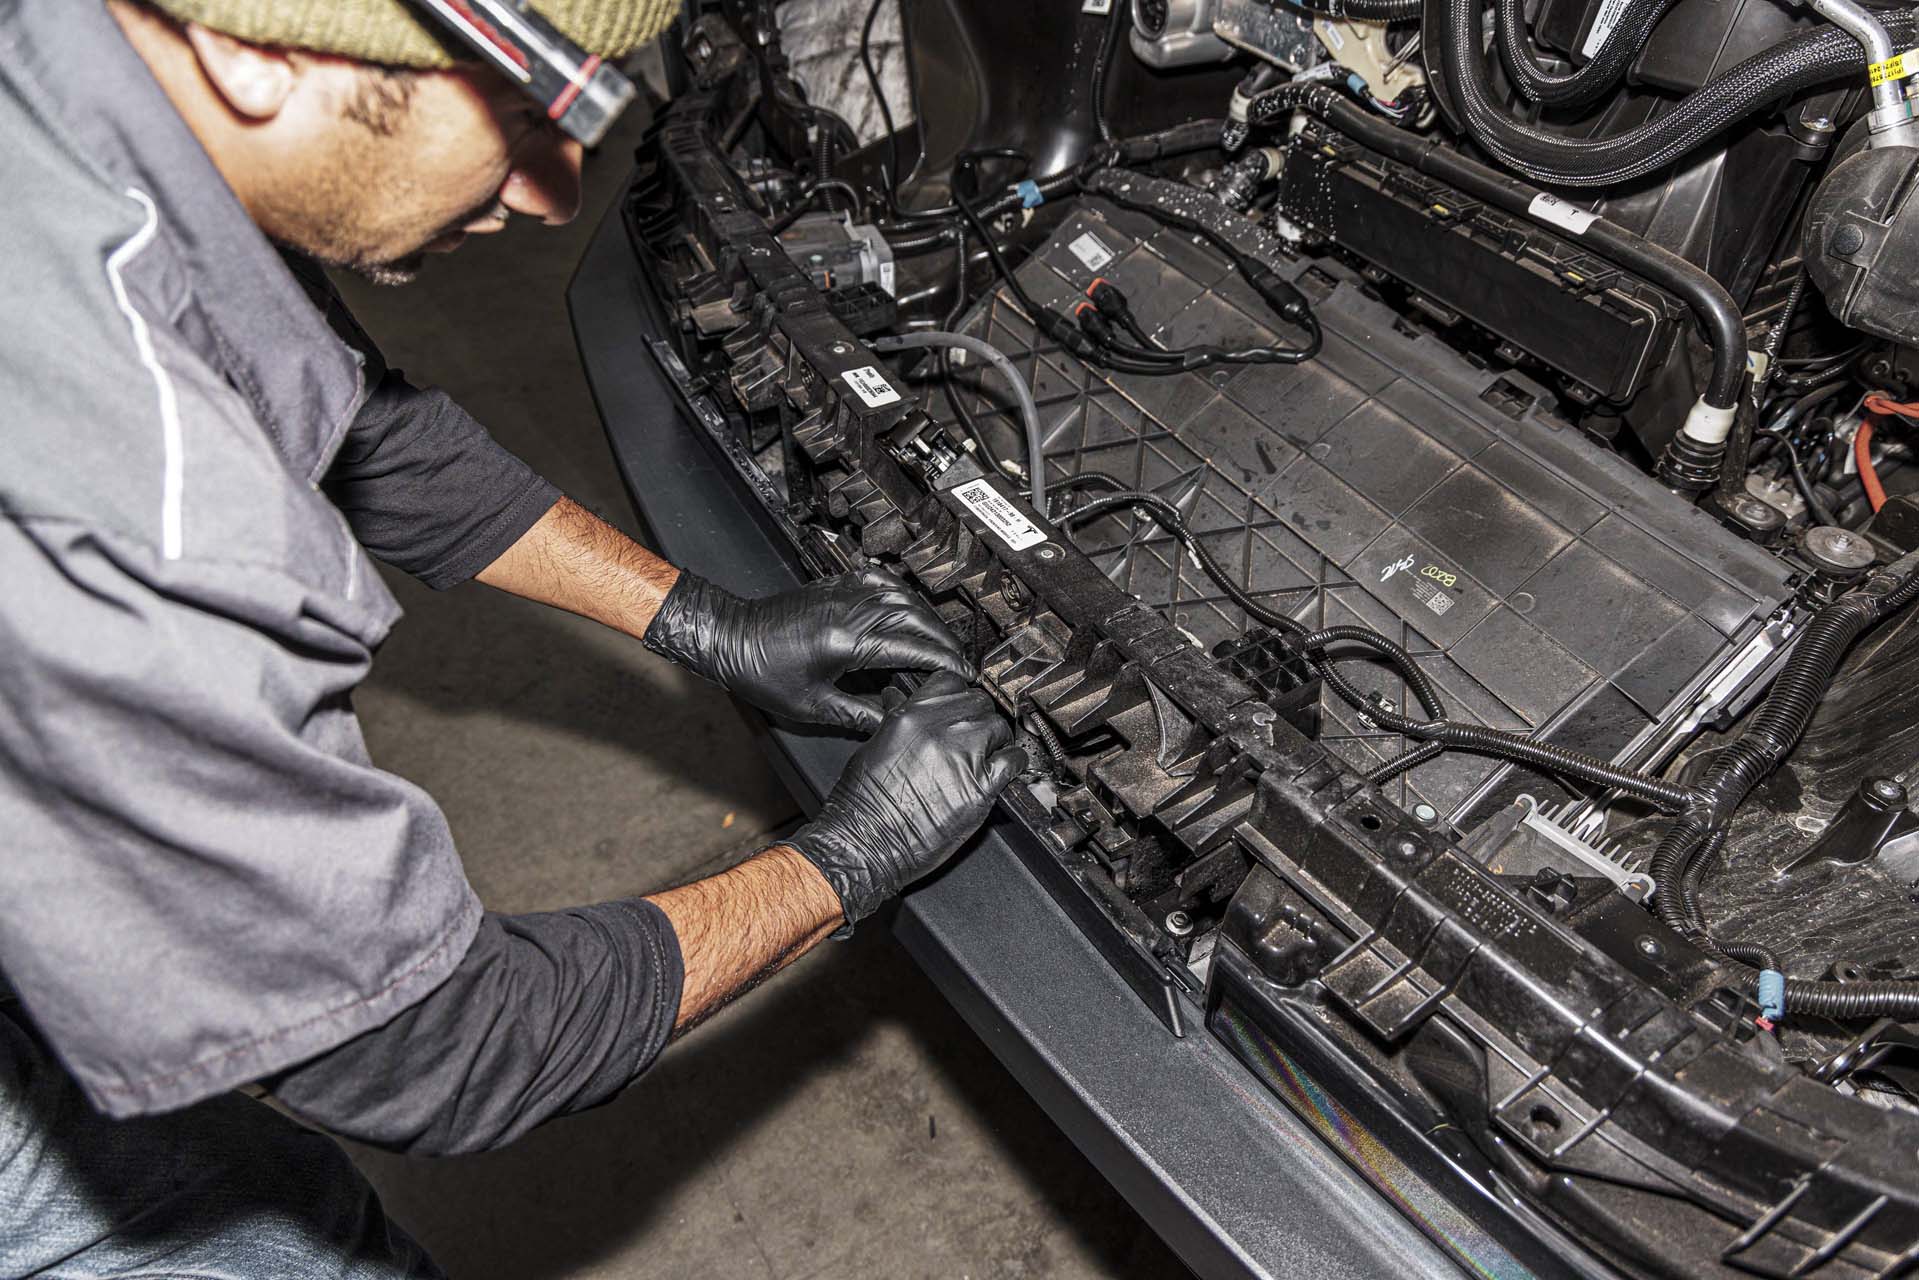
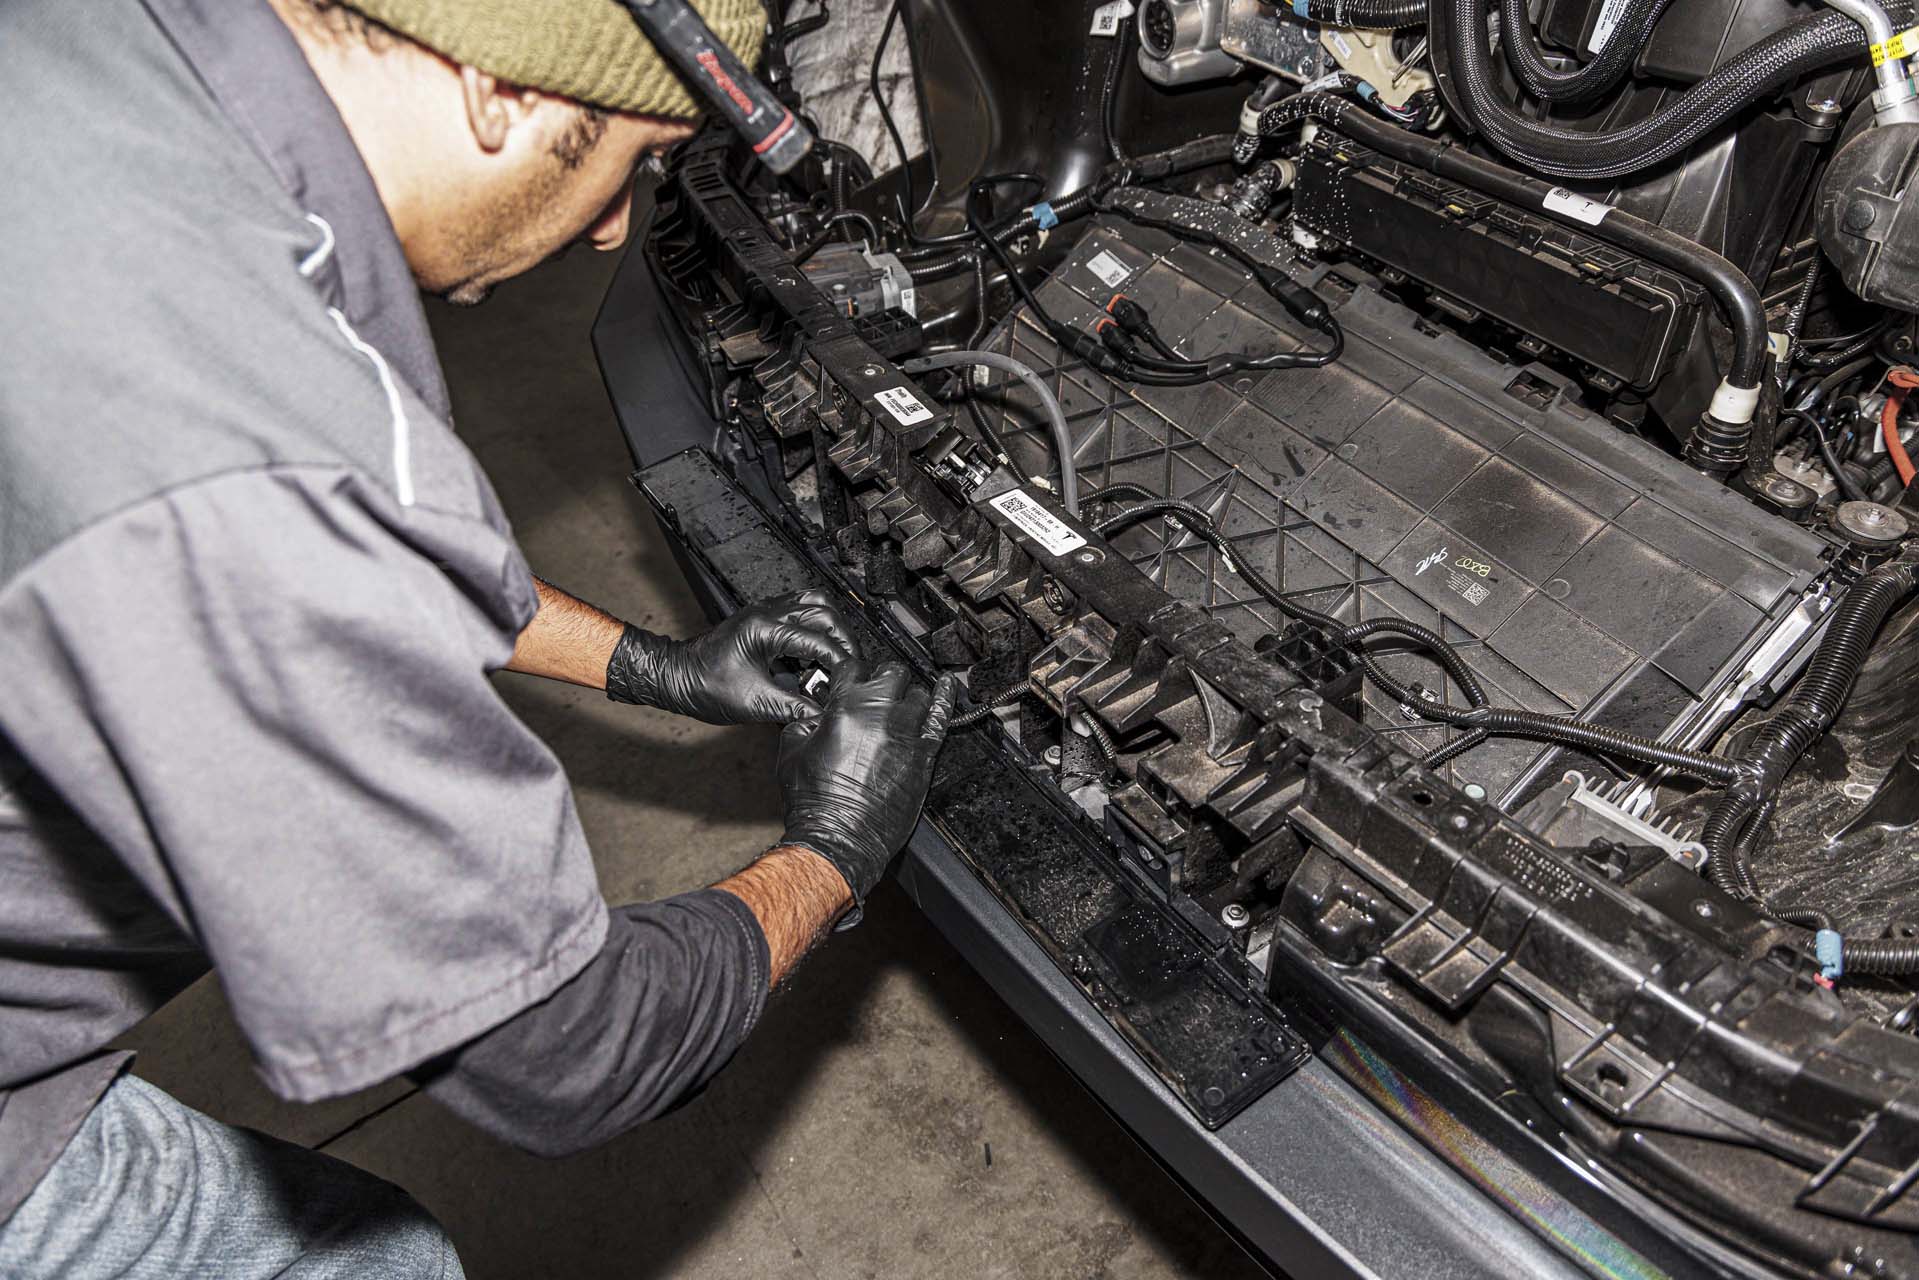
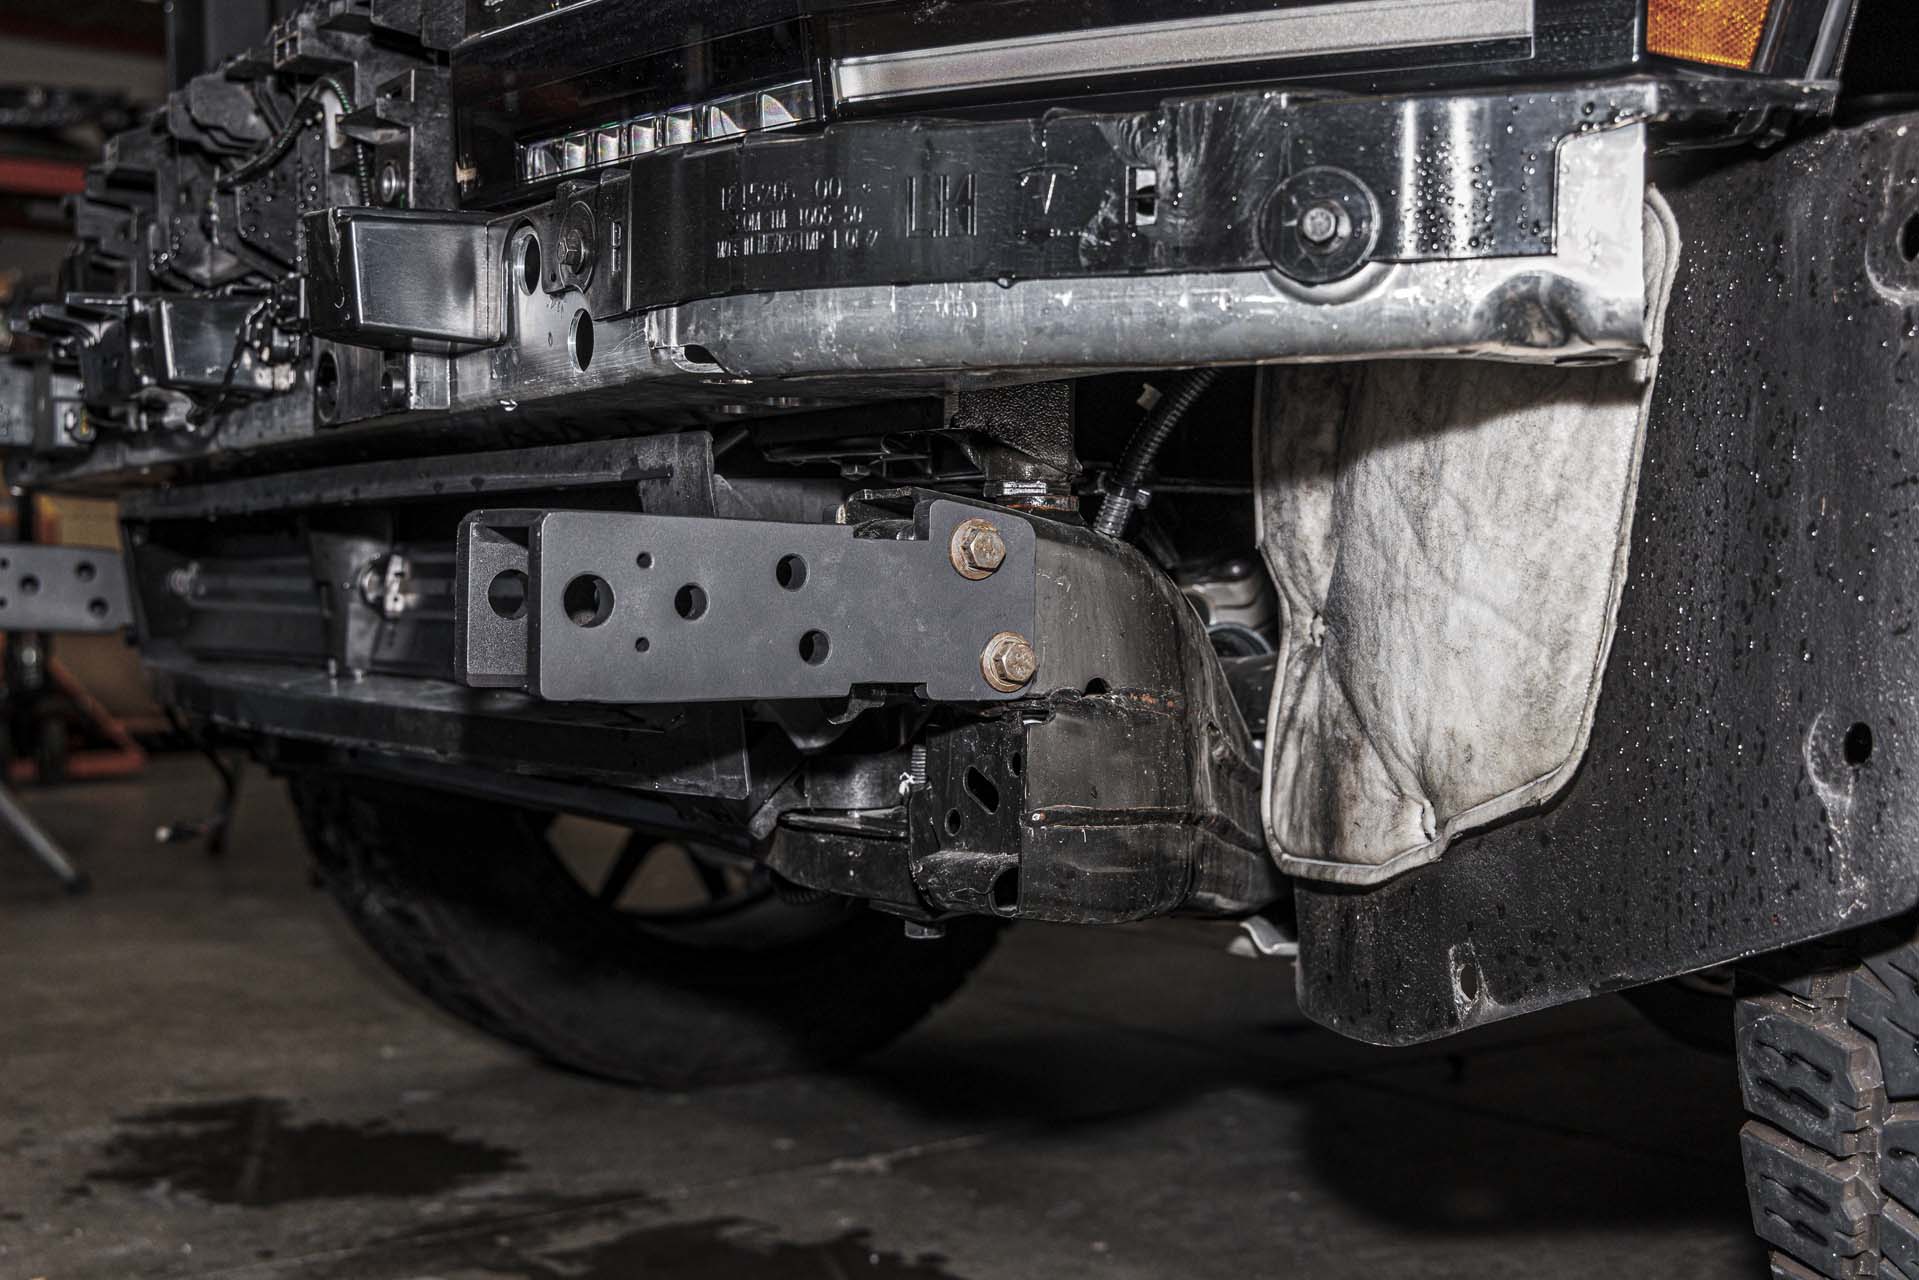
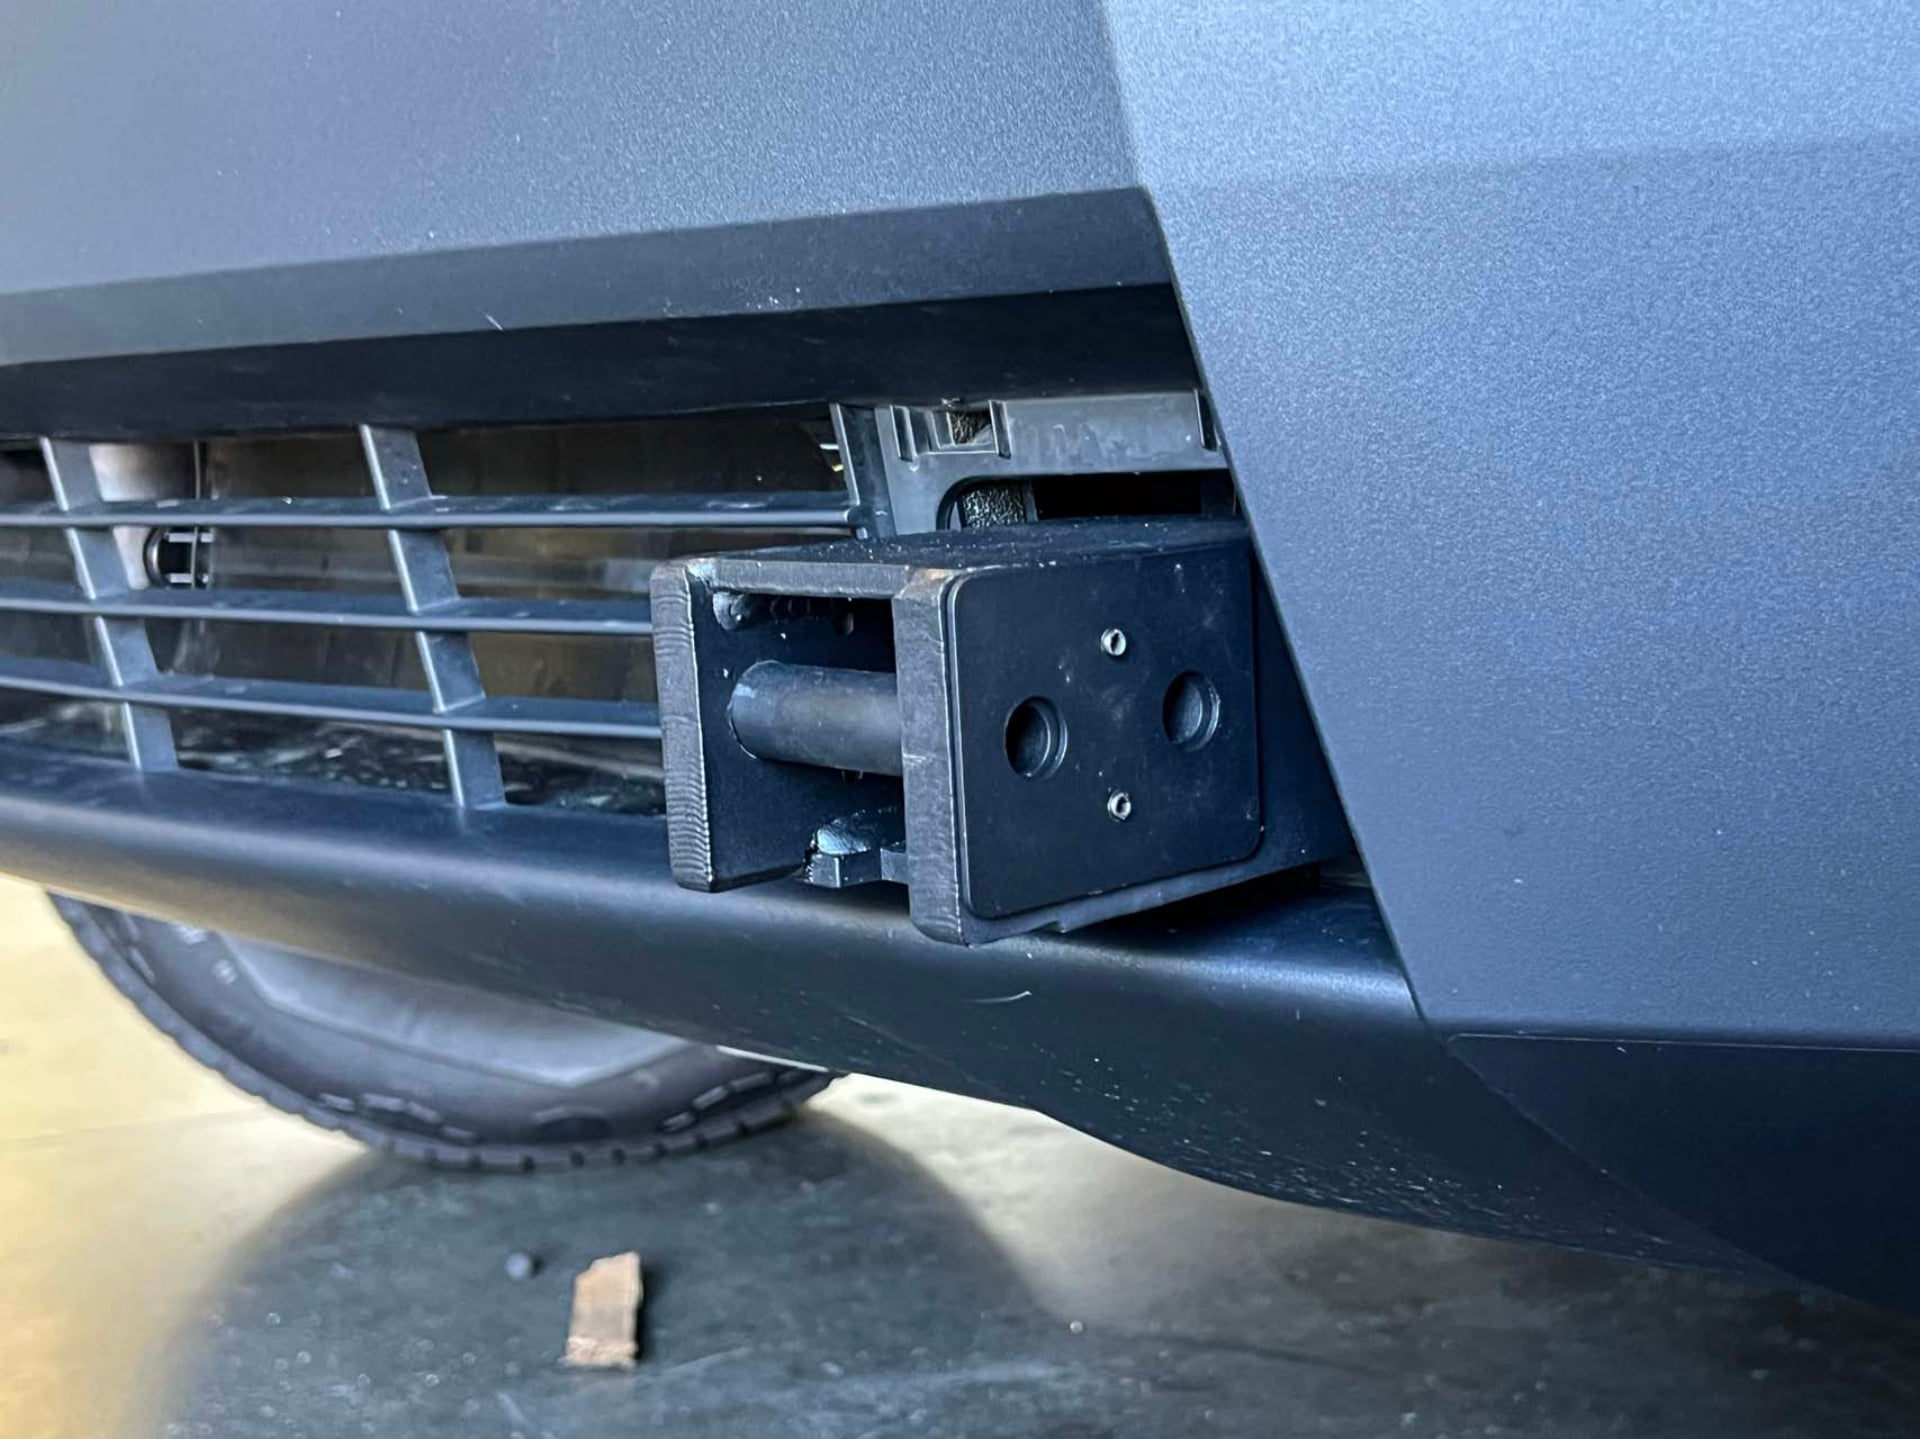
Using a 15mm socket and the factory tow hook bolts, fasten the bull bar mounts in the following orientation.
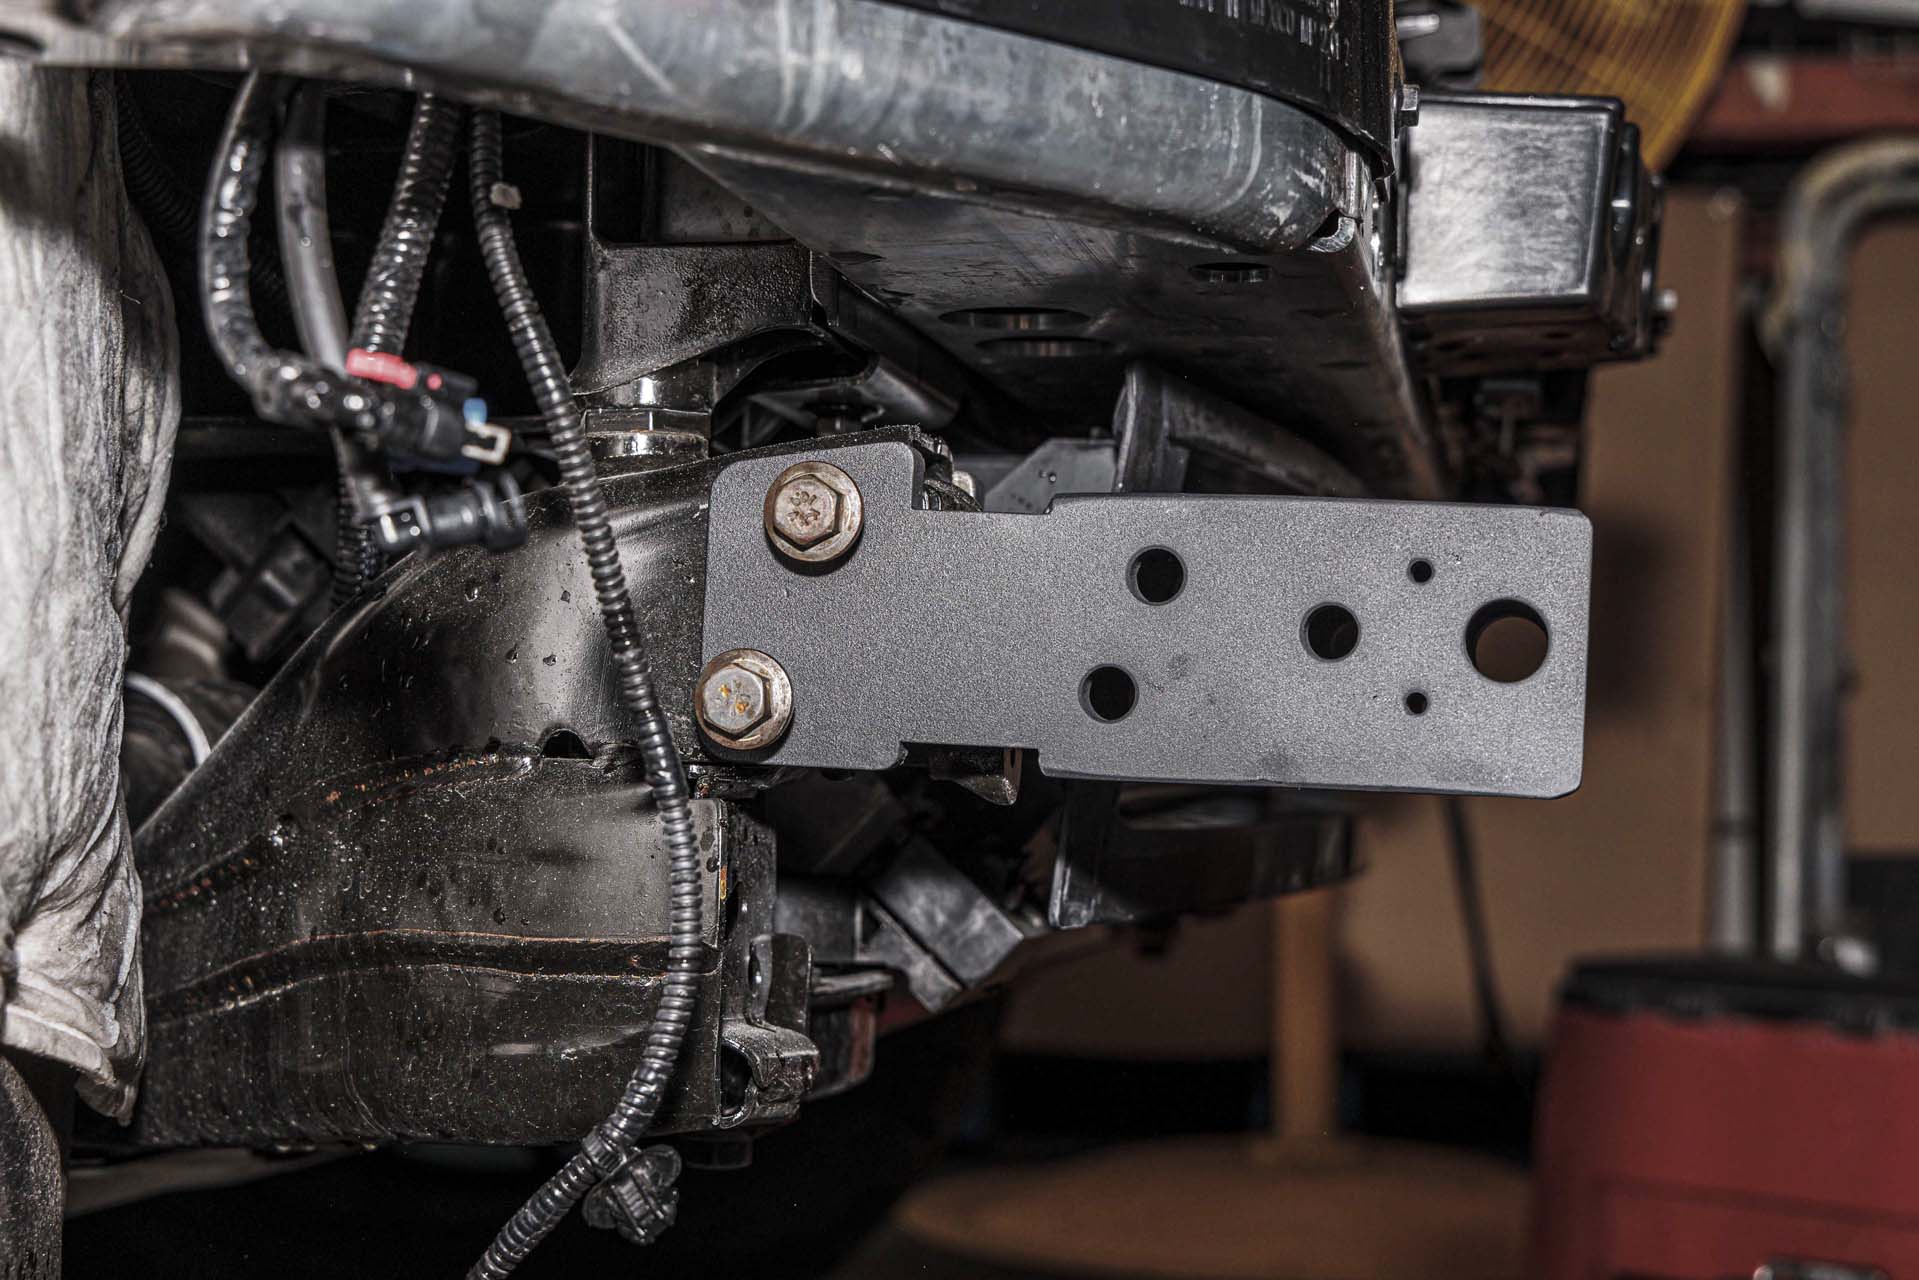
Note: If there are any issues fitting the bull bar mount to the vehicle, it may be that there is some additional material left over from the subframe assembly before your vehicle was assembled. If this is the case, we highly recommend reaching out to our support team, or consulting a local body shop to help with the bull bar mount clearance as needed.
Once you’ve verified the mounts fit properly, using a 15mm socket, medium strength thread locker, and a torque wrench, torque the factory bolts to 58 lbs-ft.
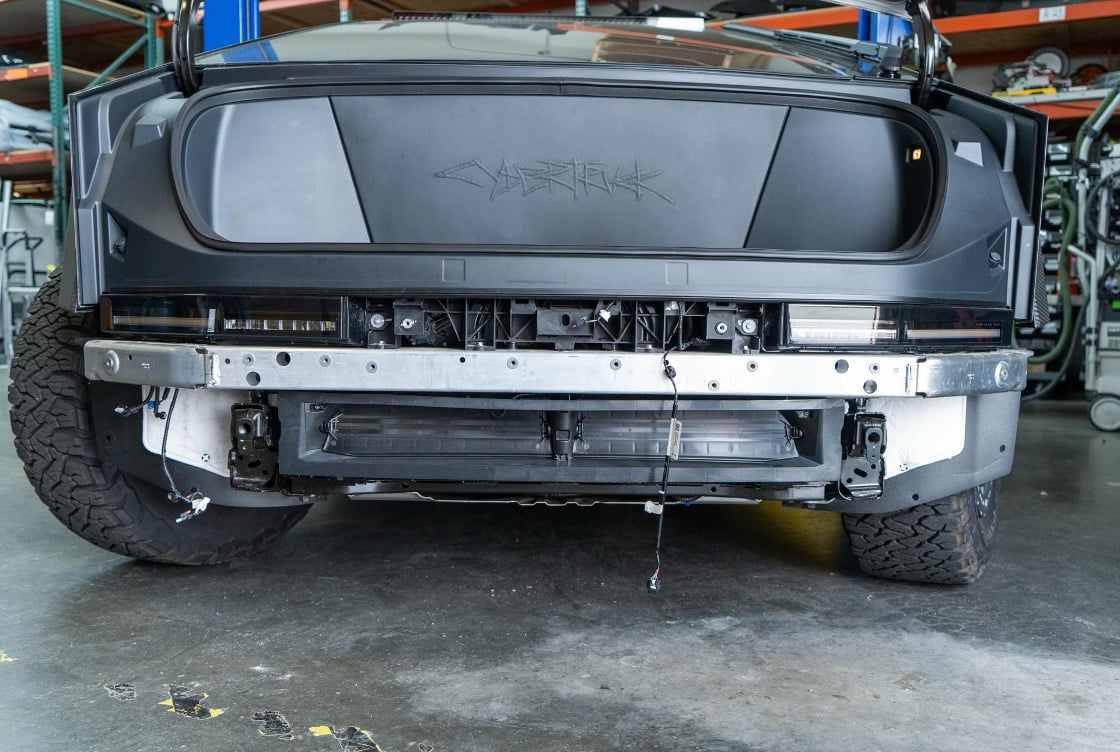
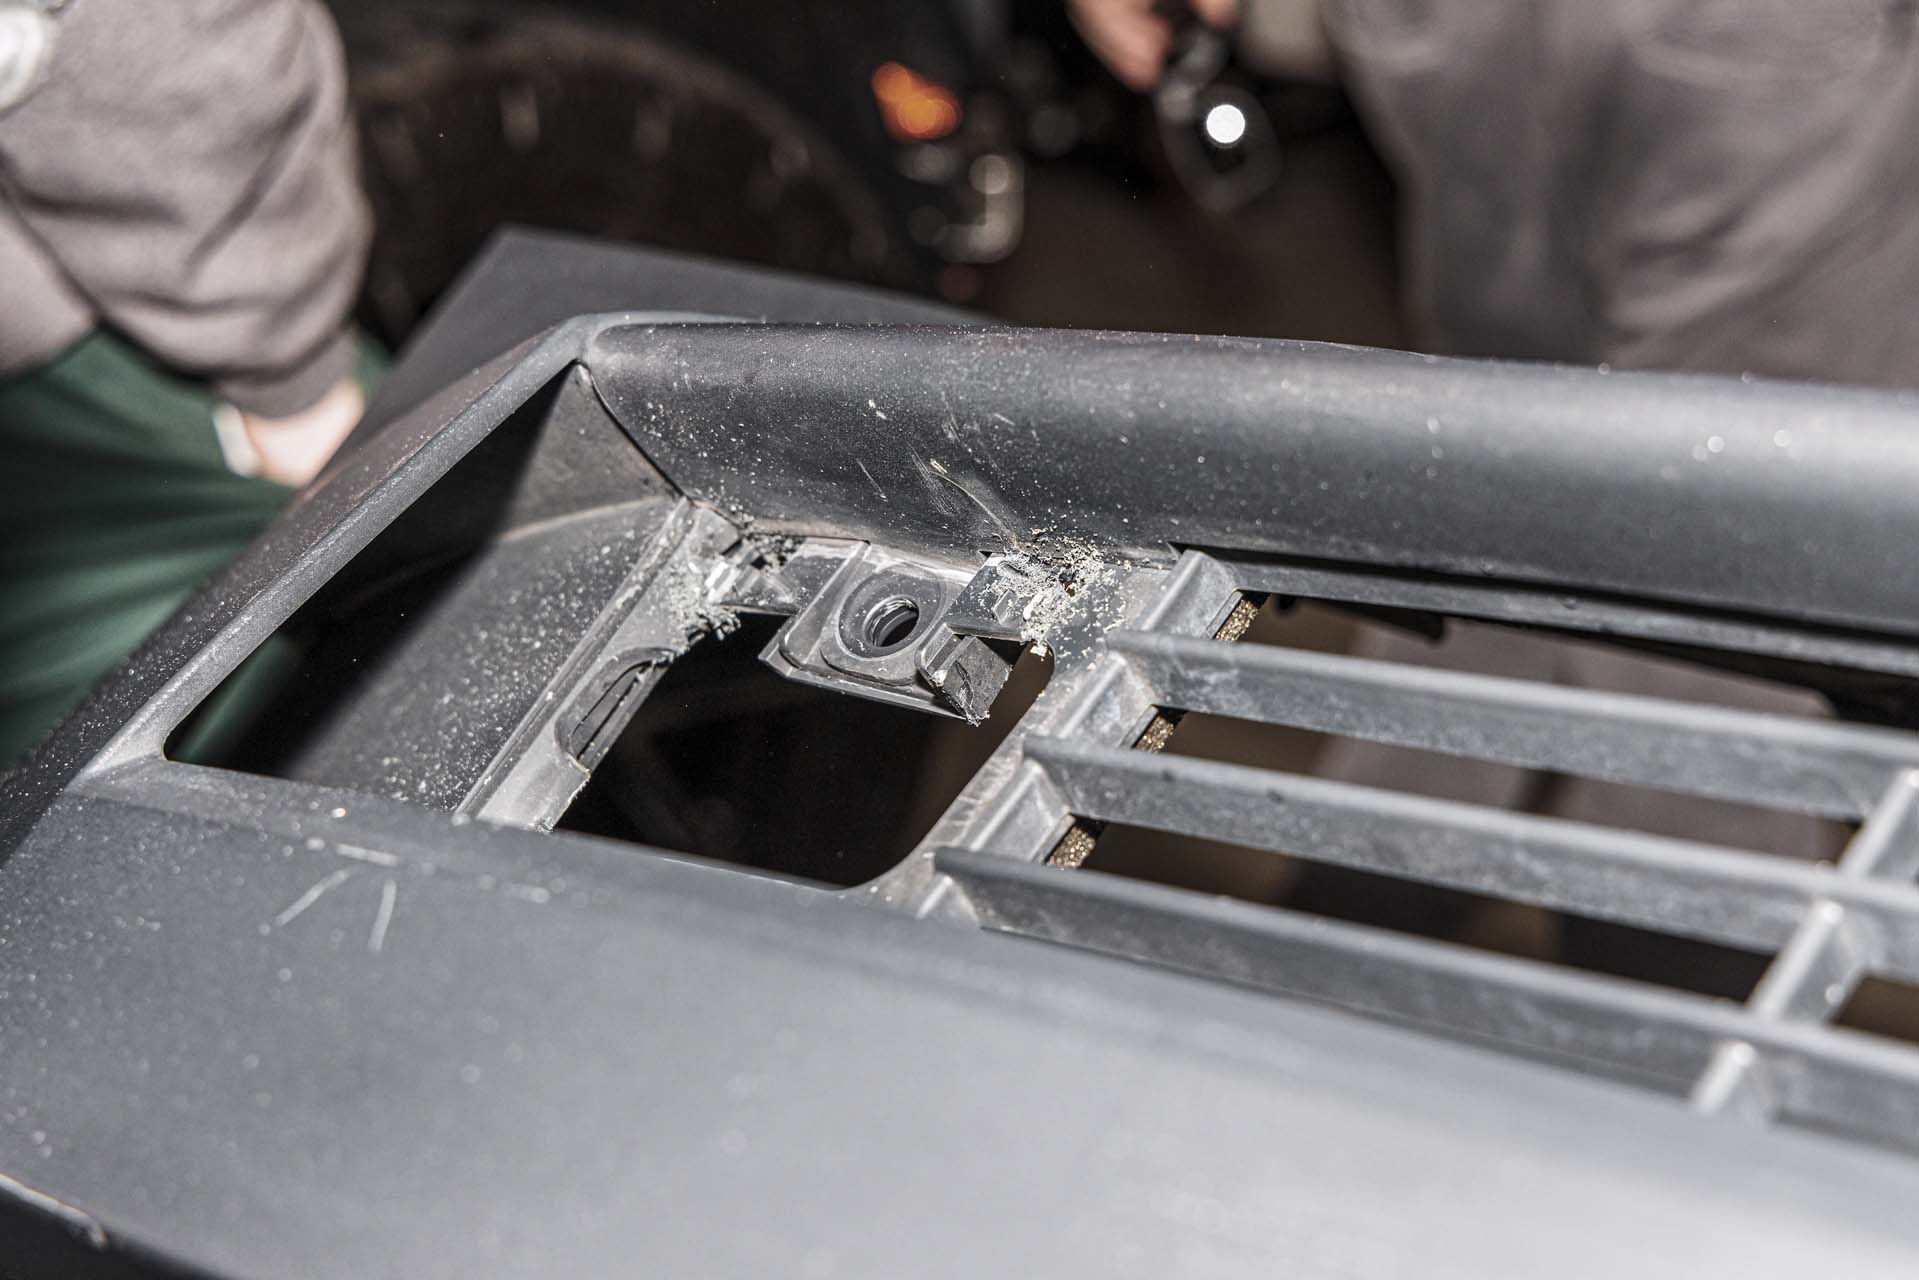
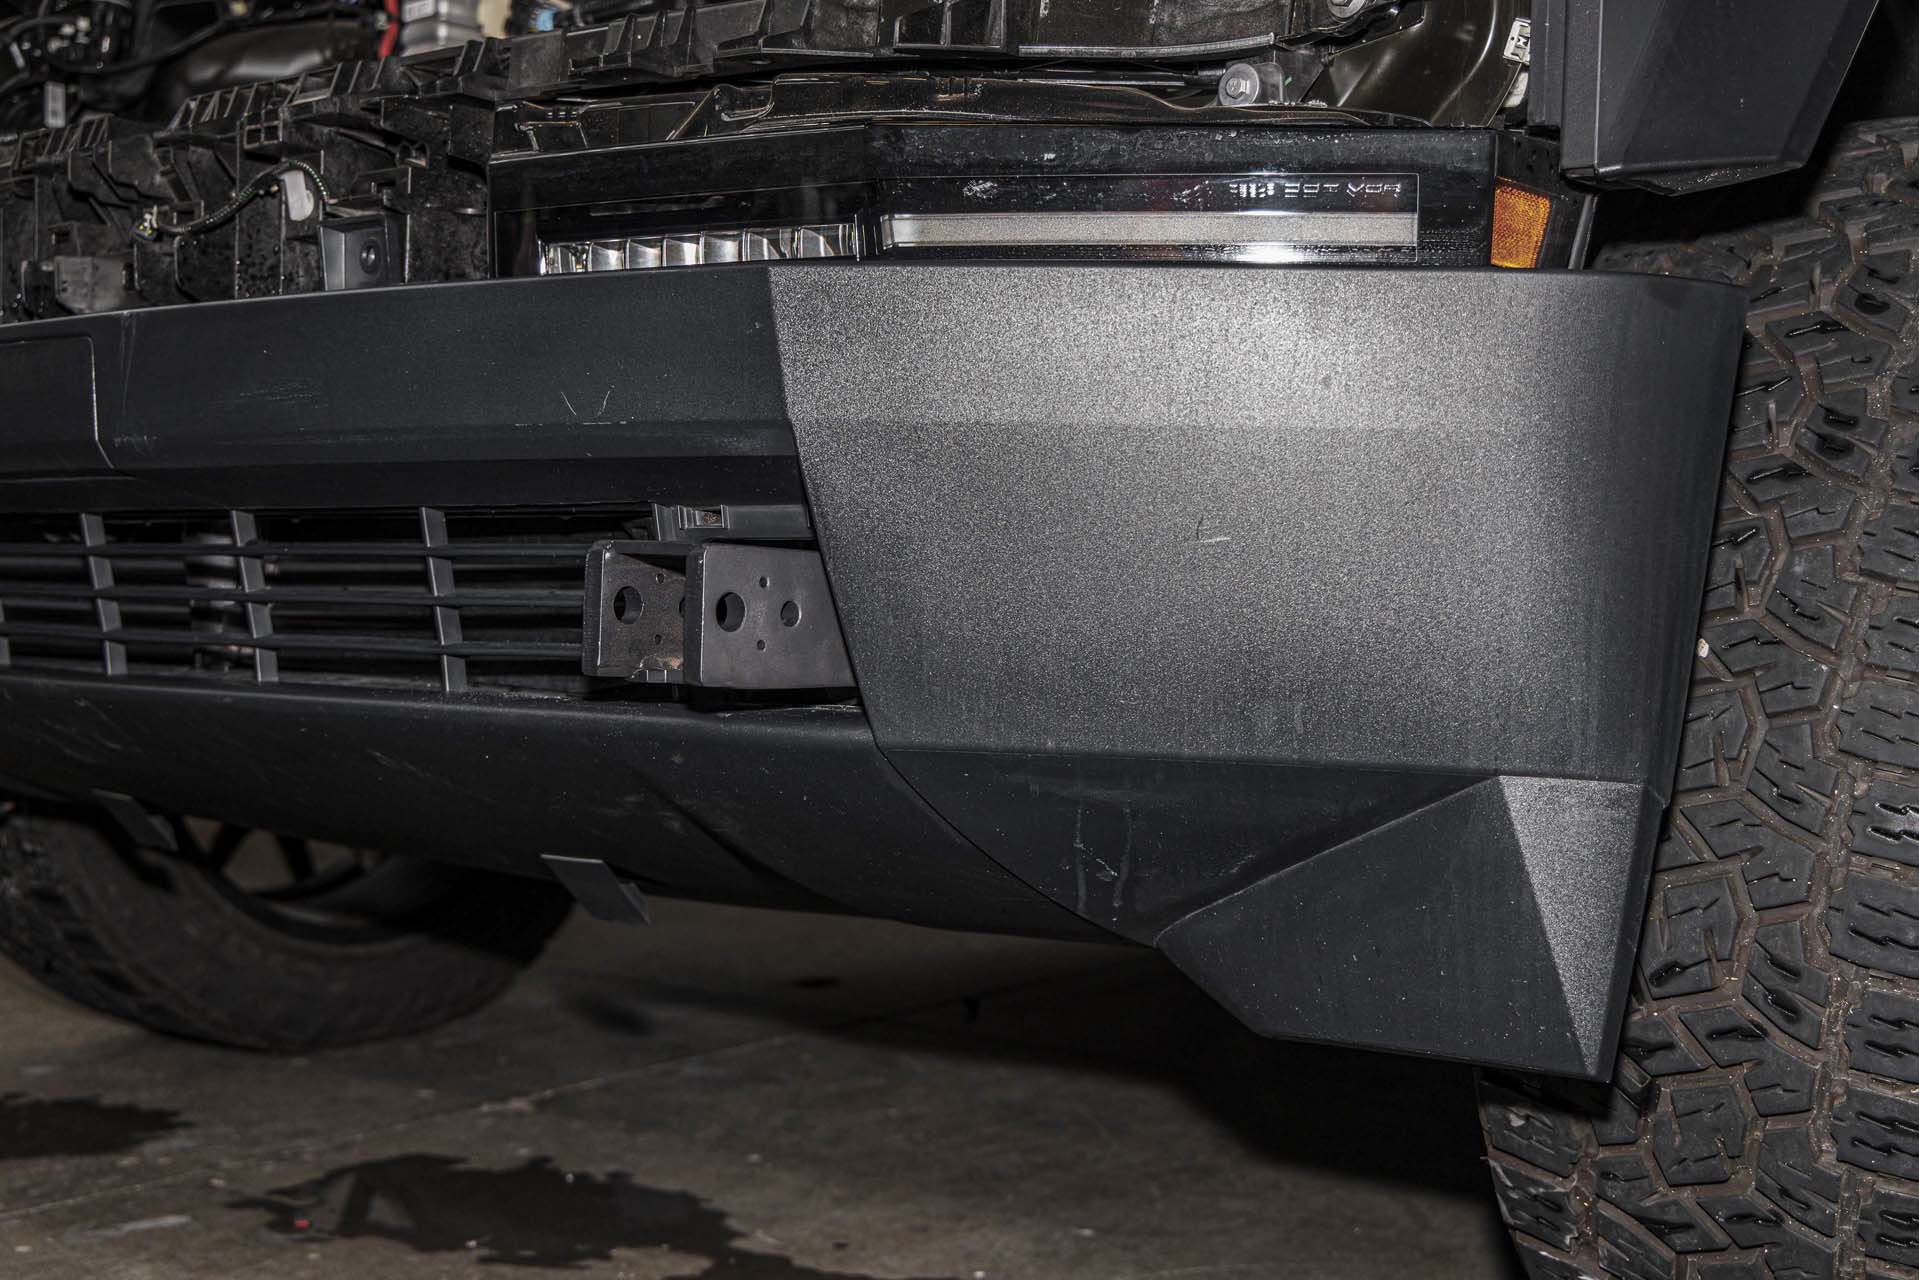
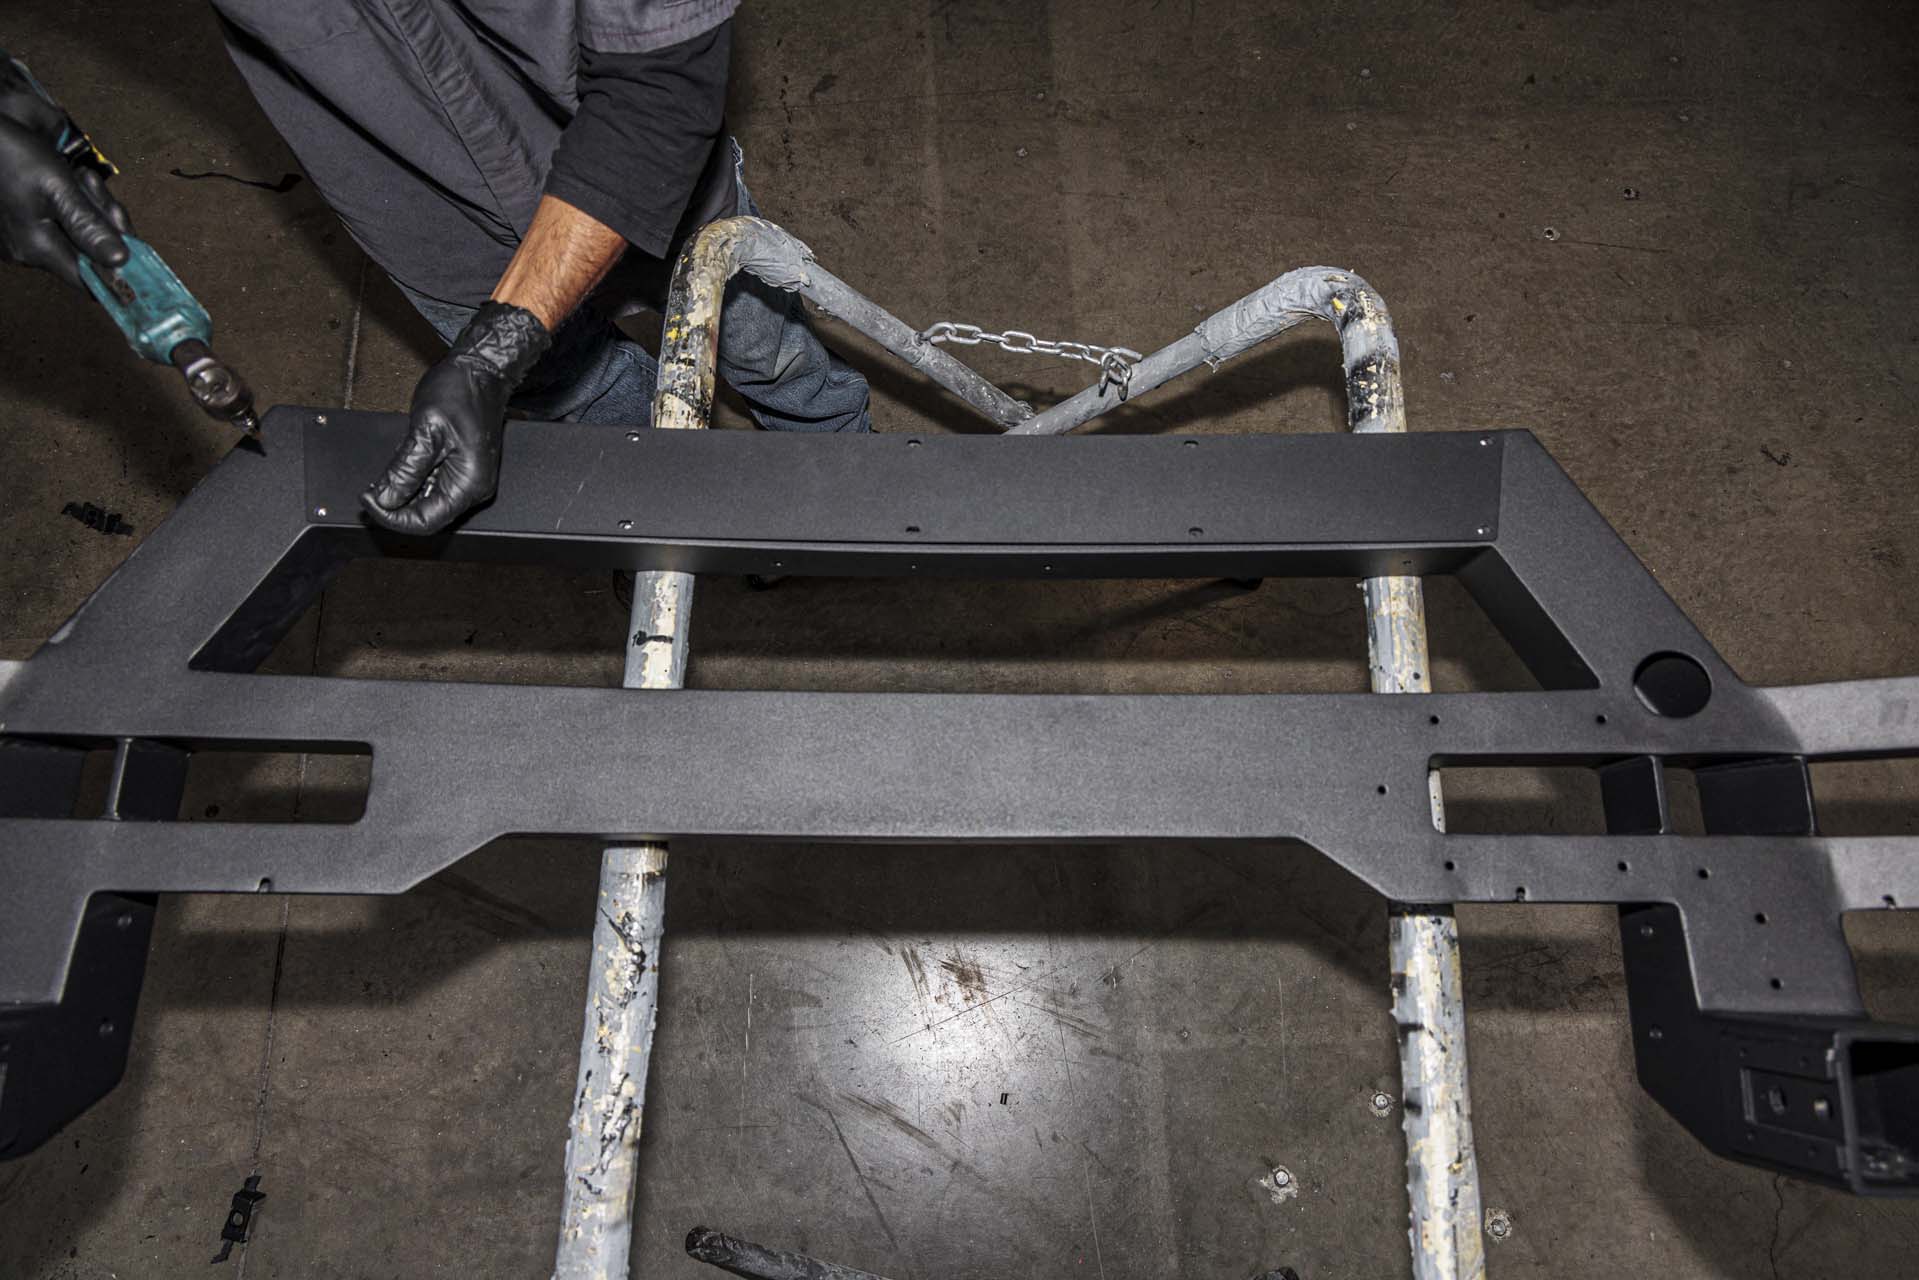
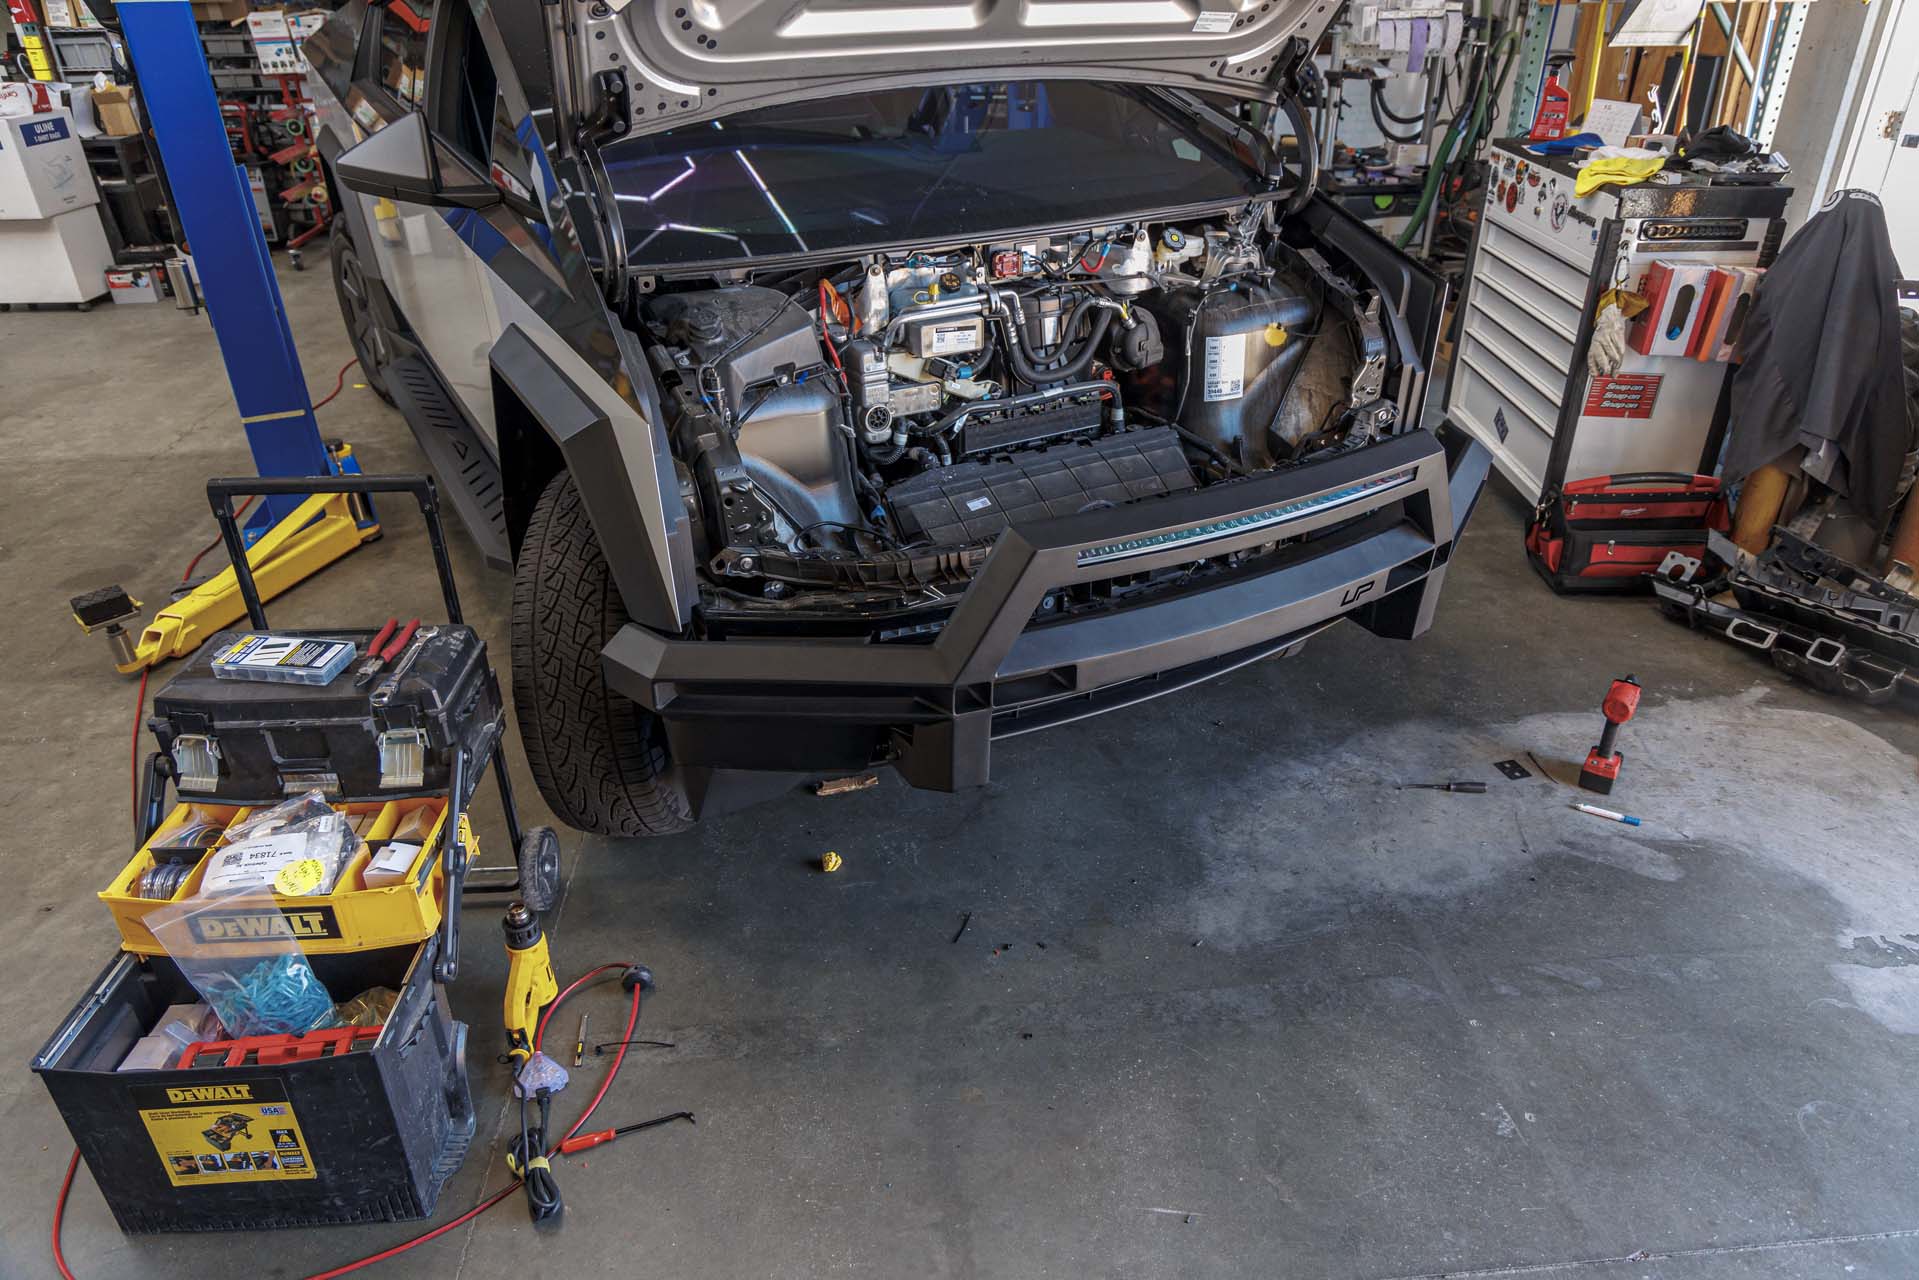
With the factory bumper removed from the vehicle, test fit the bumper against the bull bar mounts to reveal the specific section of the bumper that must be trimmed as shown below. The goal is to only trim away the section where the factory bumper blocks the bull bar mounts from entering the factory tow hook area of the factory bumper. Using a paint marker, mark the area that needs to be trimmed away. Note: We highly advise that multiple people or jack stands are used to mock up and stabilize the bumper so that only the necessary materials are trimmed away.
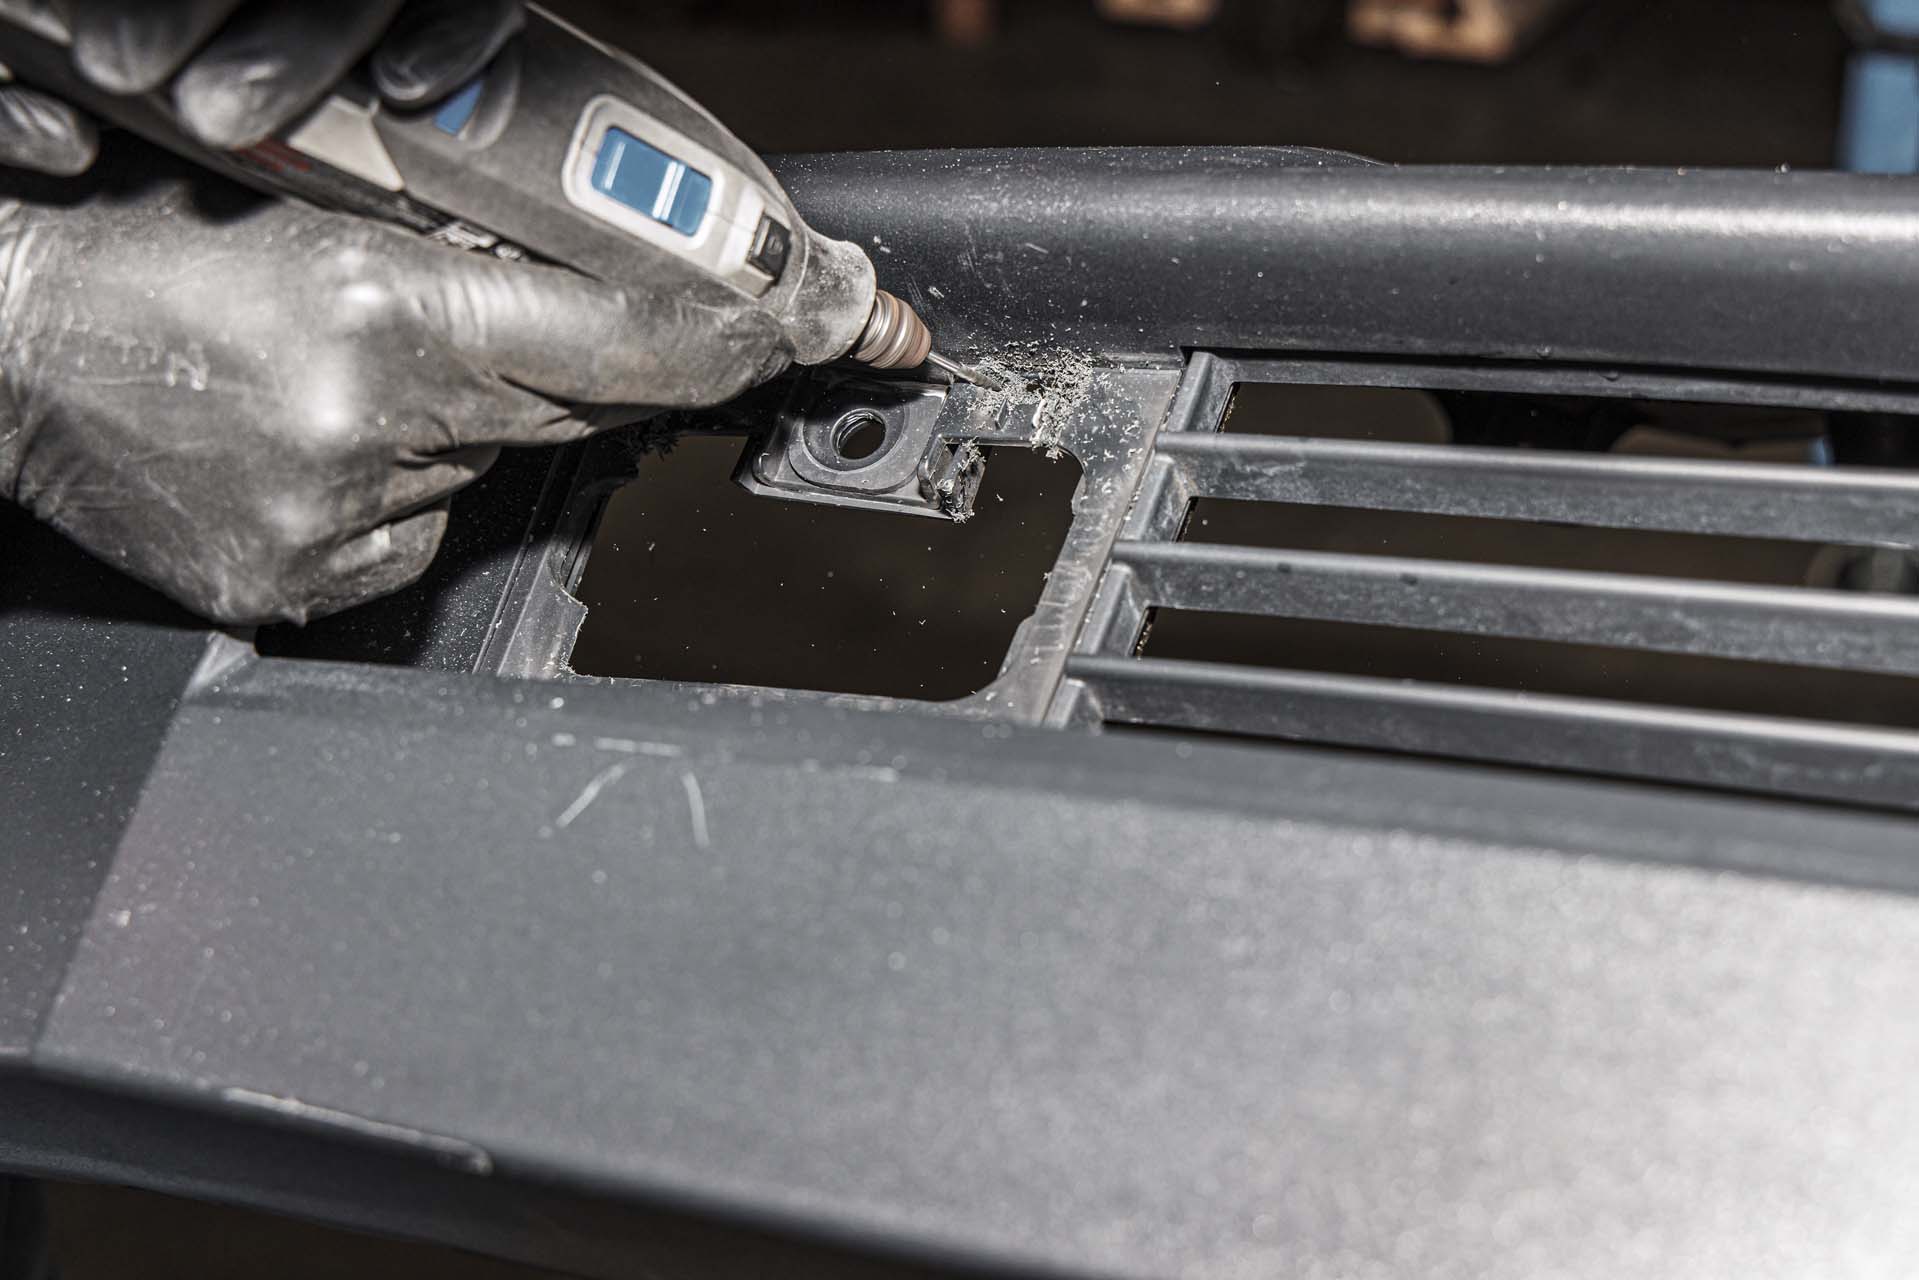
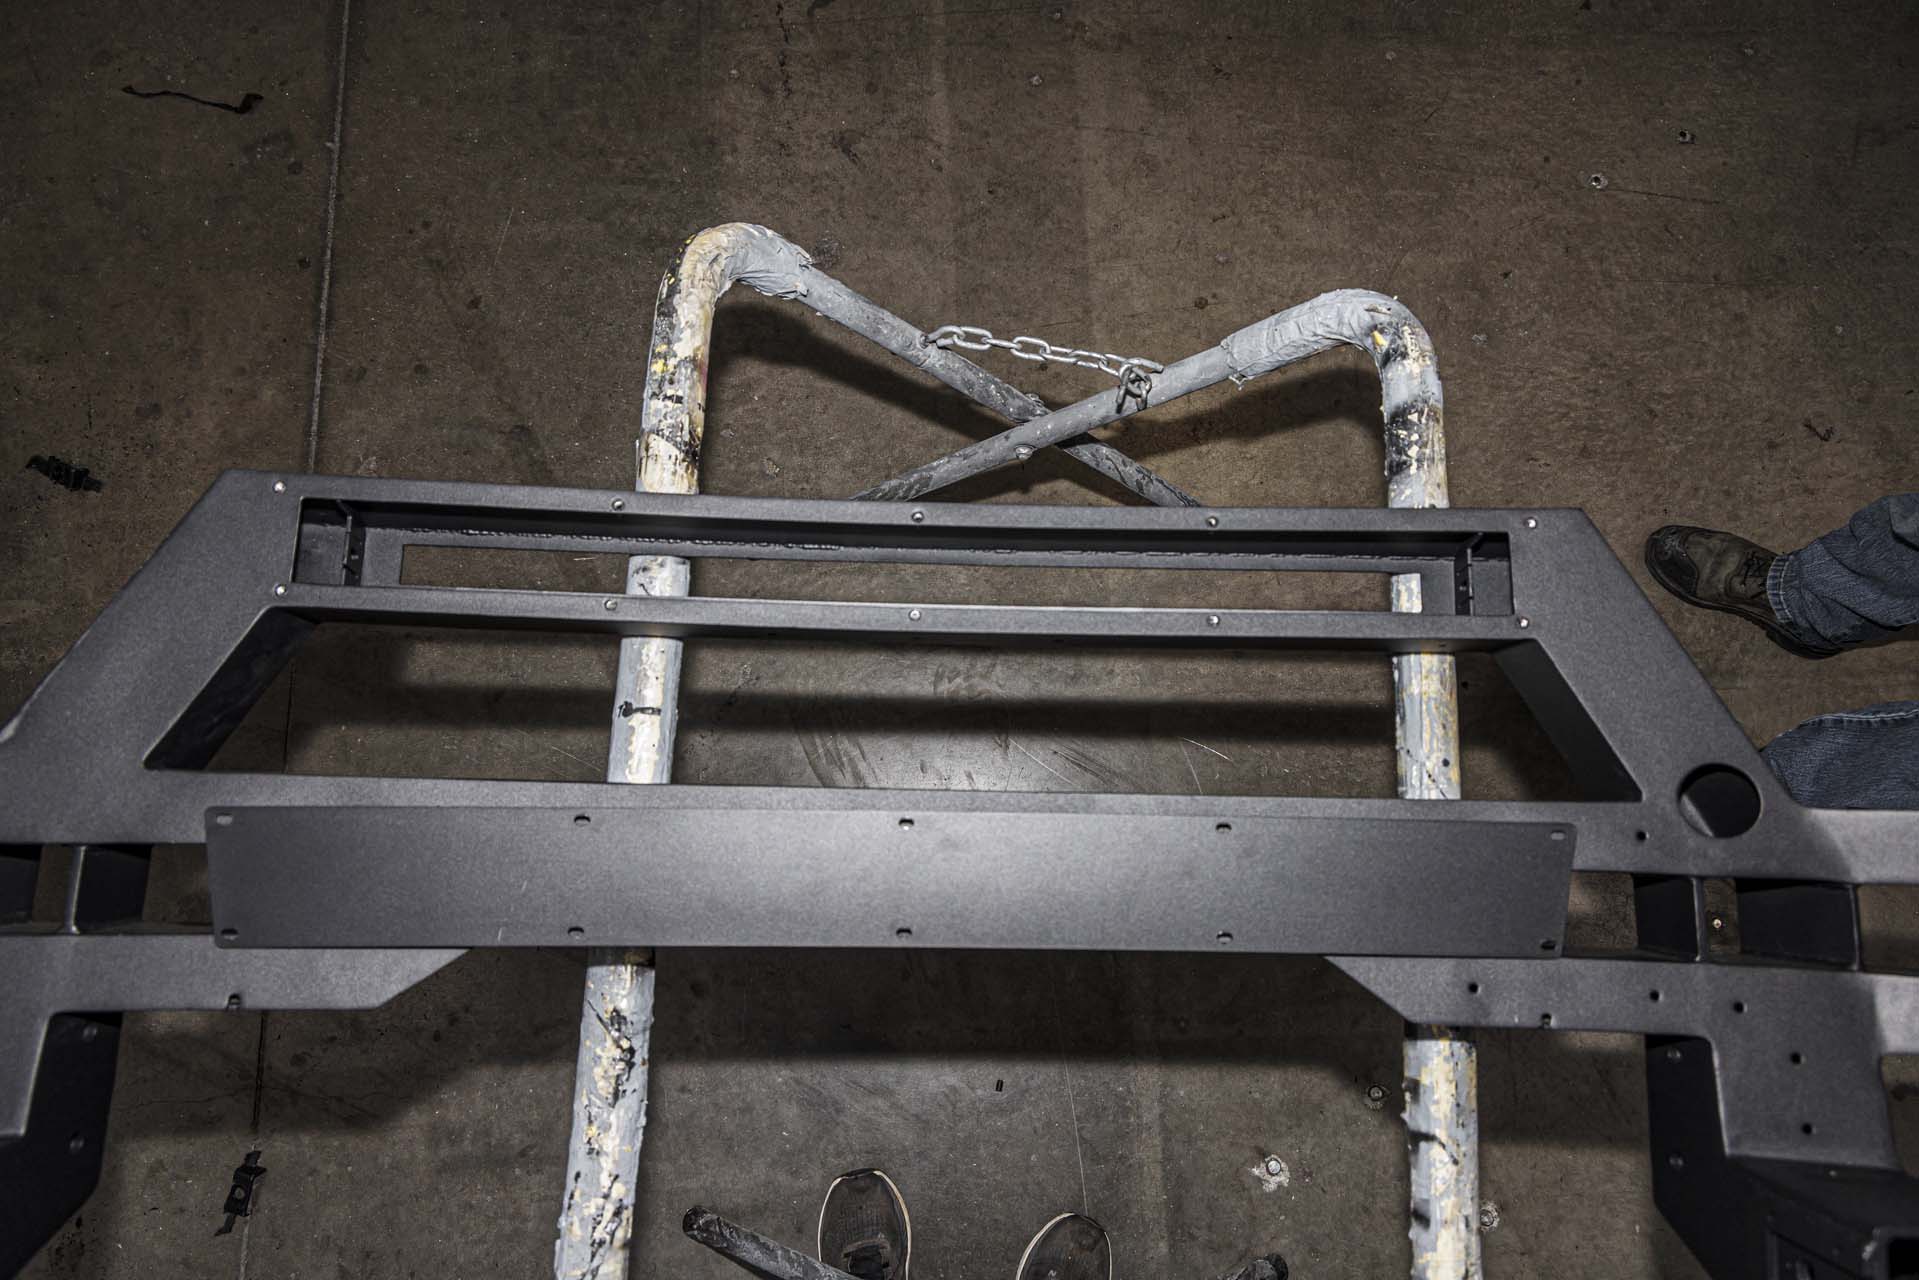
Once the bumper is marked up for trimming, use a plastic trim cutting tool to cut away the area that blocks the factory bumper from fitting over the bull bar mount as shown below.

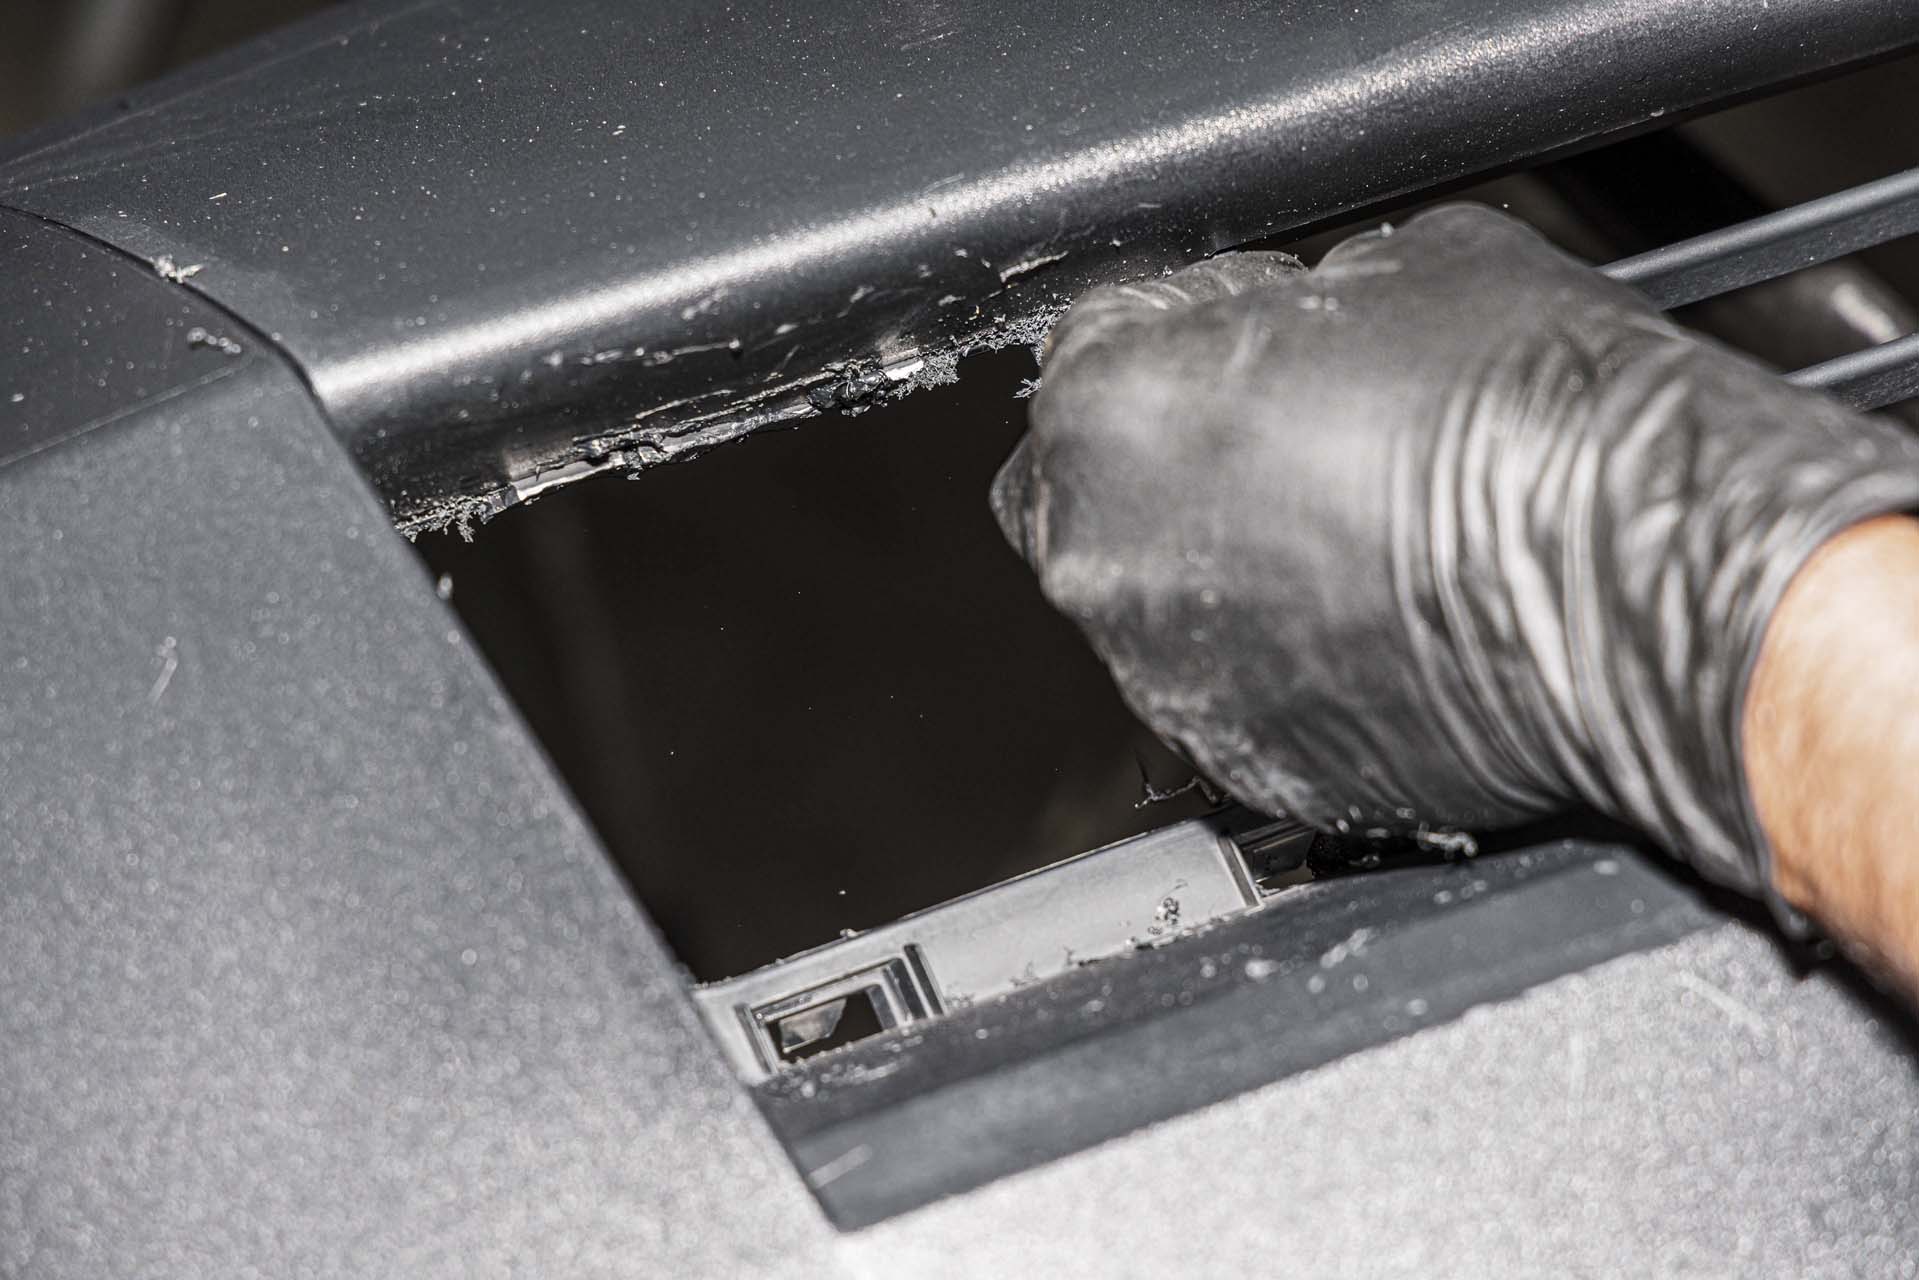
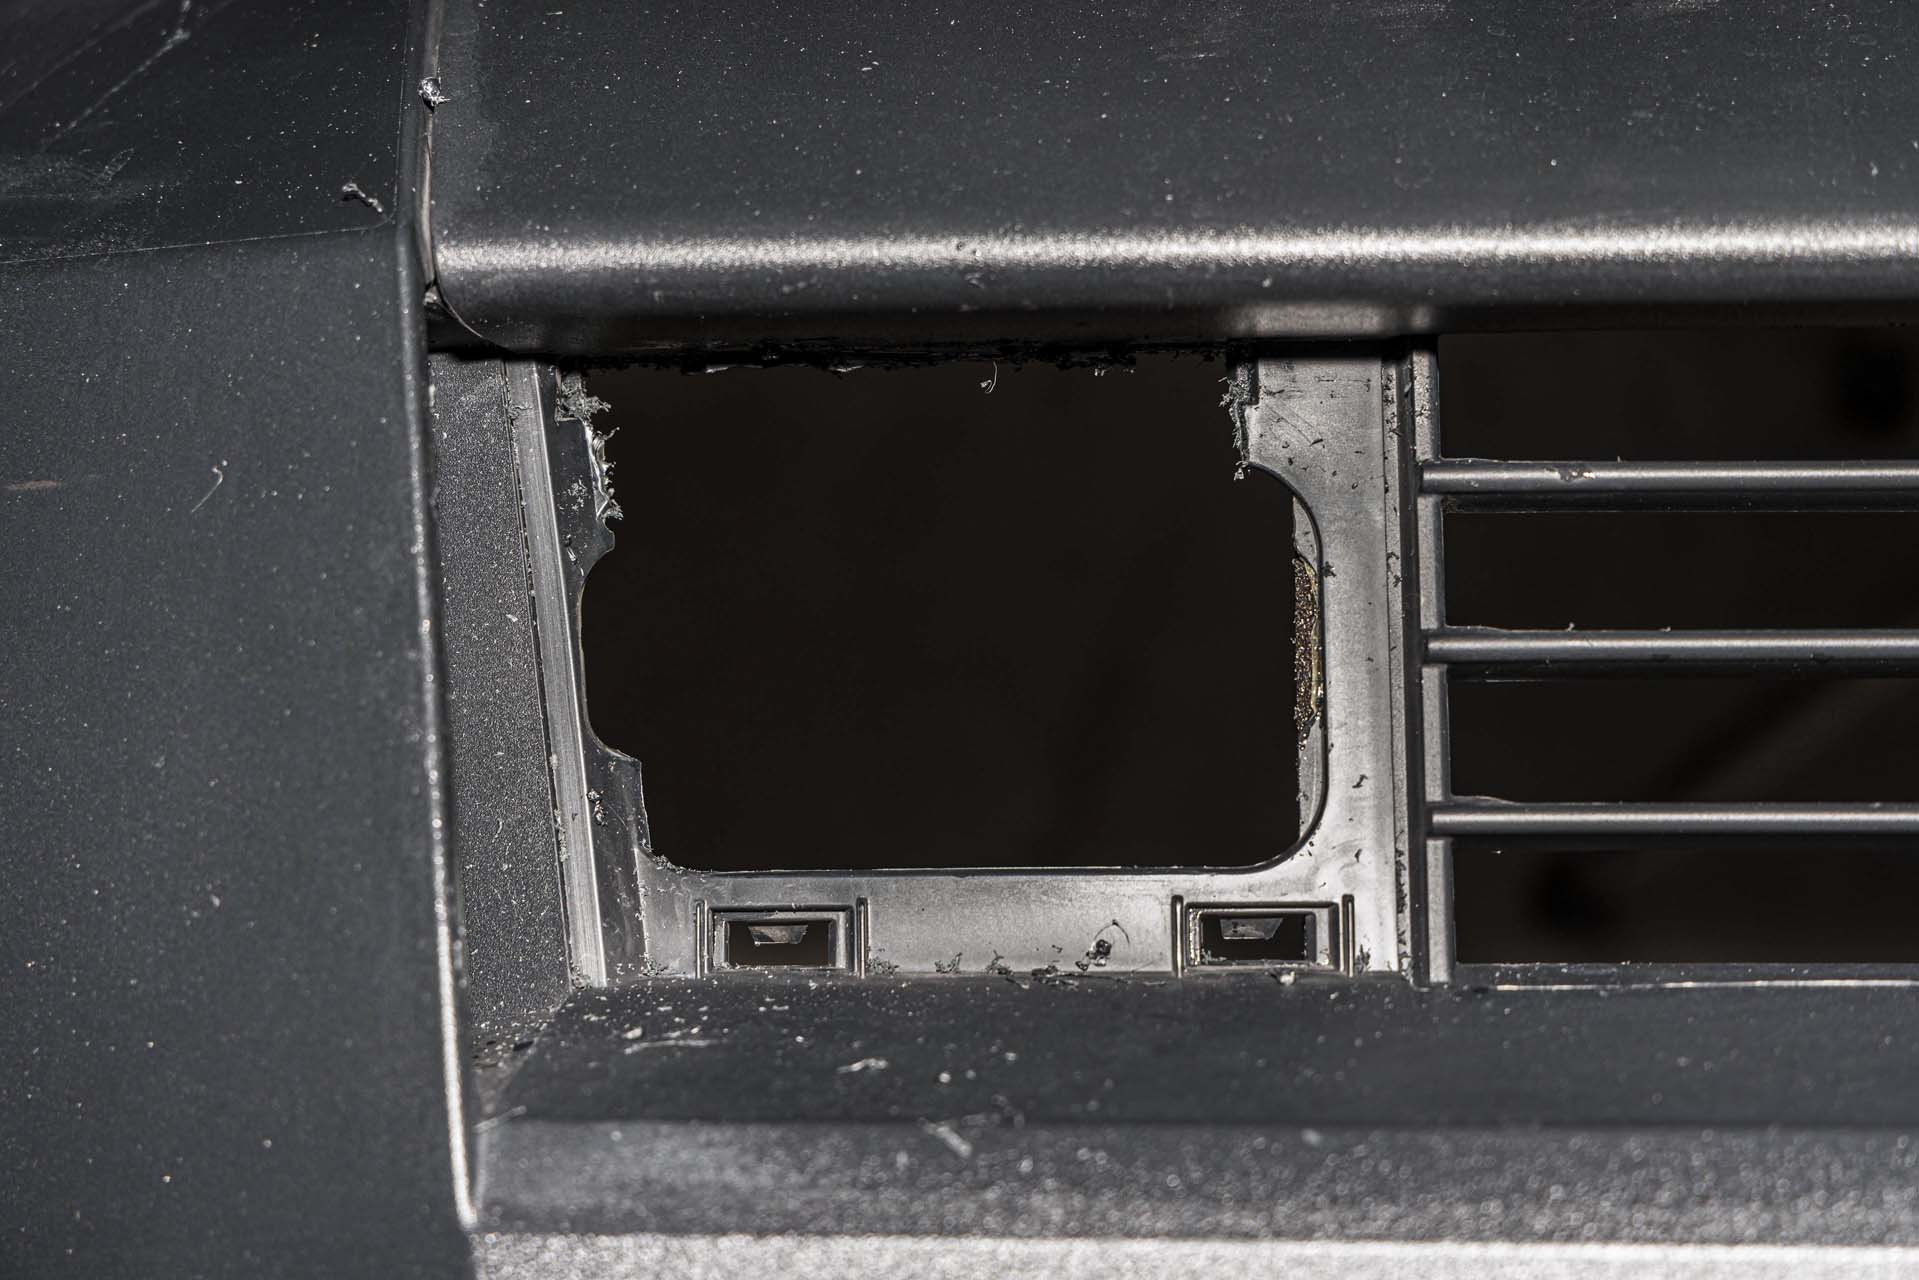
After the trimming has been completed, proceed to test fit the bumper over the bull bar mounts to ensure that the bumper seats against the vehicle properly.
Note: If you did not order a bull bar with a light bar, skip to Step 12.
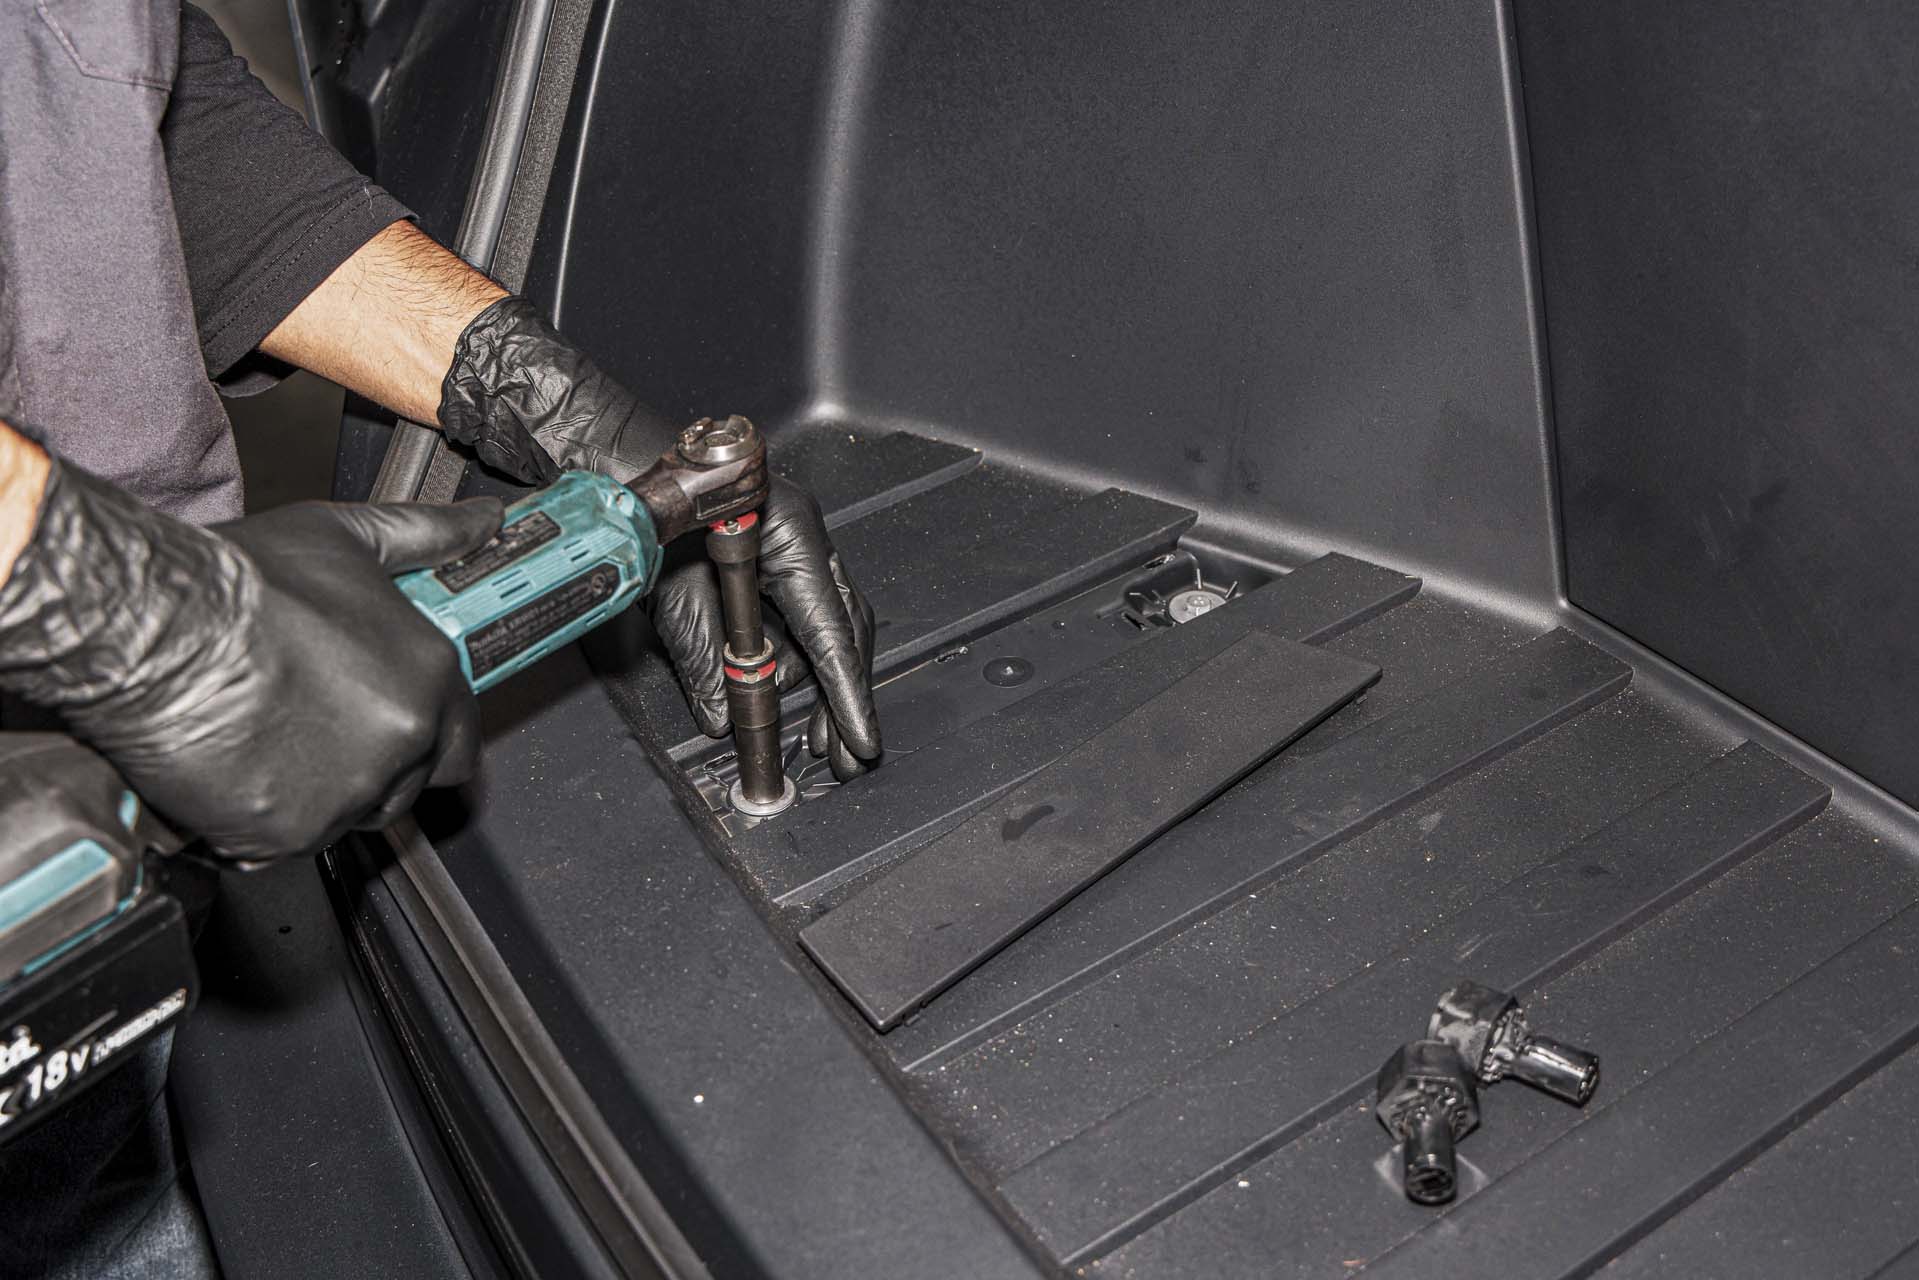
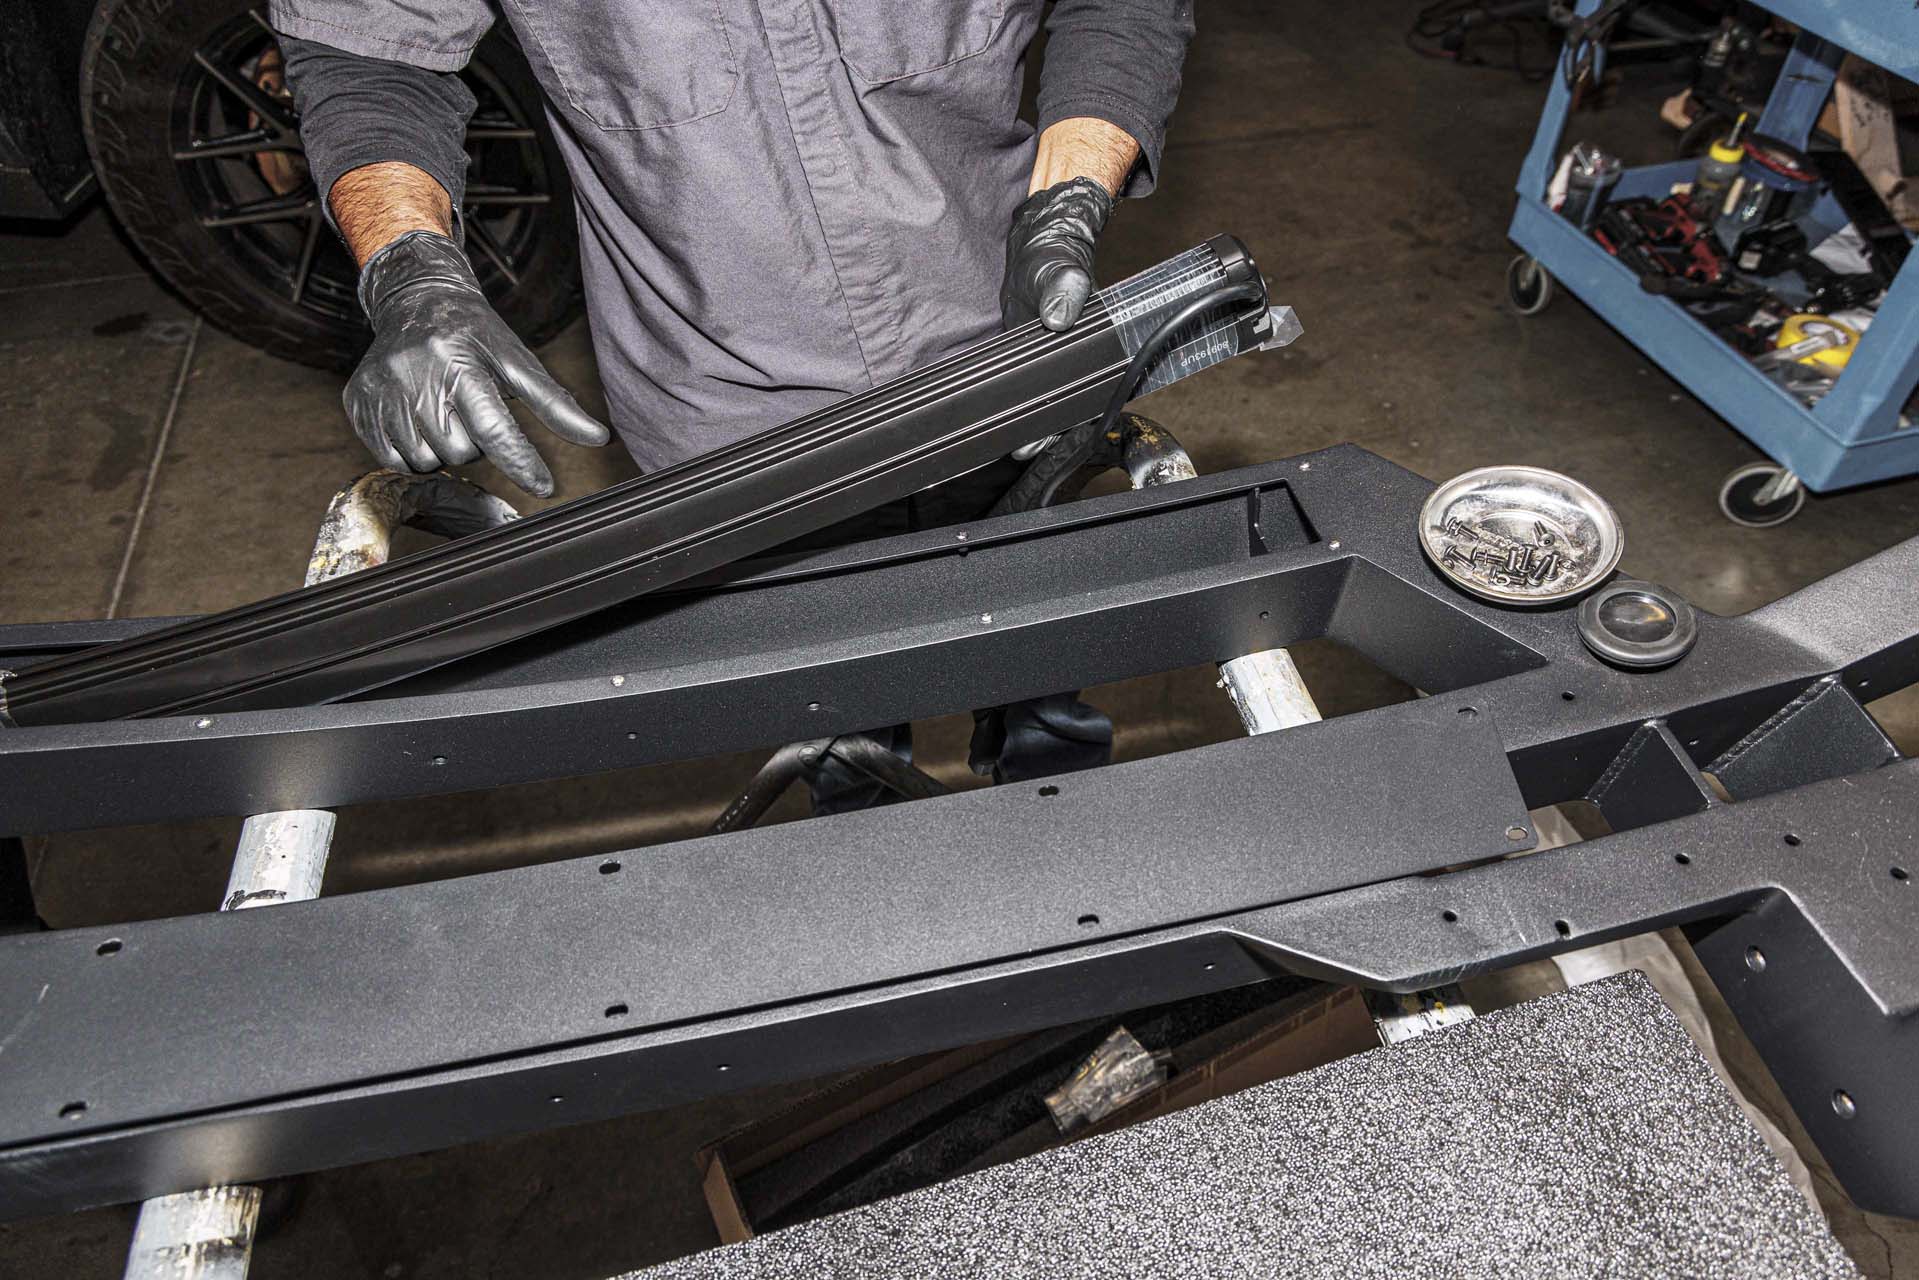
Next, assemble the front bull bar. Using a 3mm hex socket, remove the 10 bolts and washers securing the light bar backing plate to the bull bar.
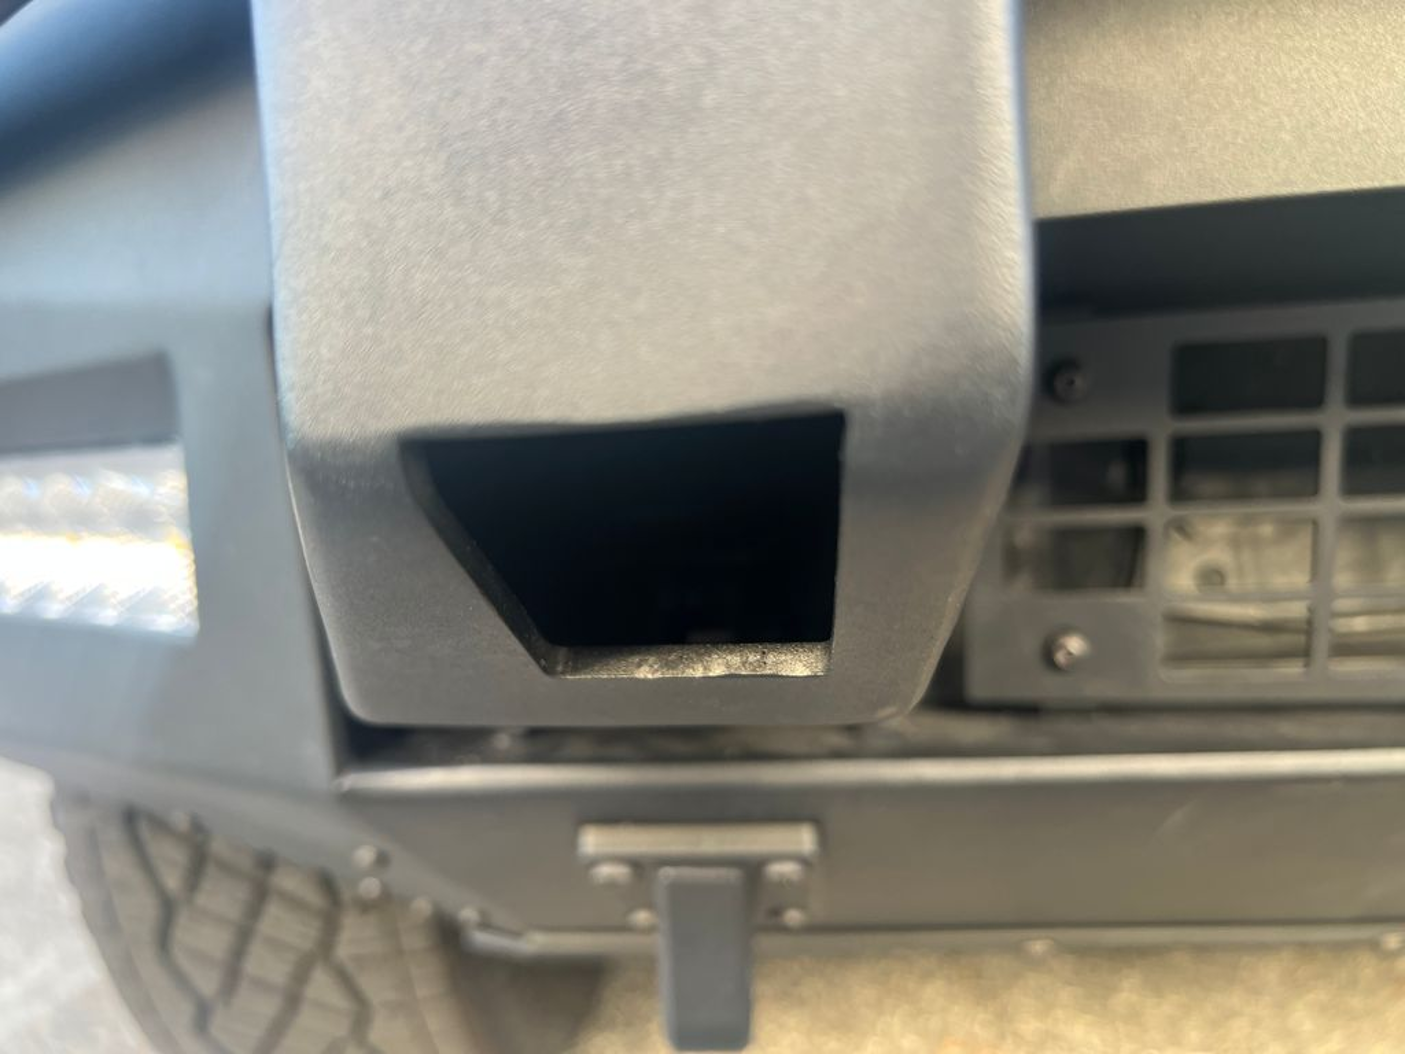
Place the light bar into the bull bar with the power cable facing the passenger side of the bull bar as shown below. Be sure to feed the power cable through the bull bar assembly and out the accessory port as shown below.
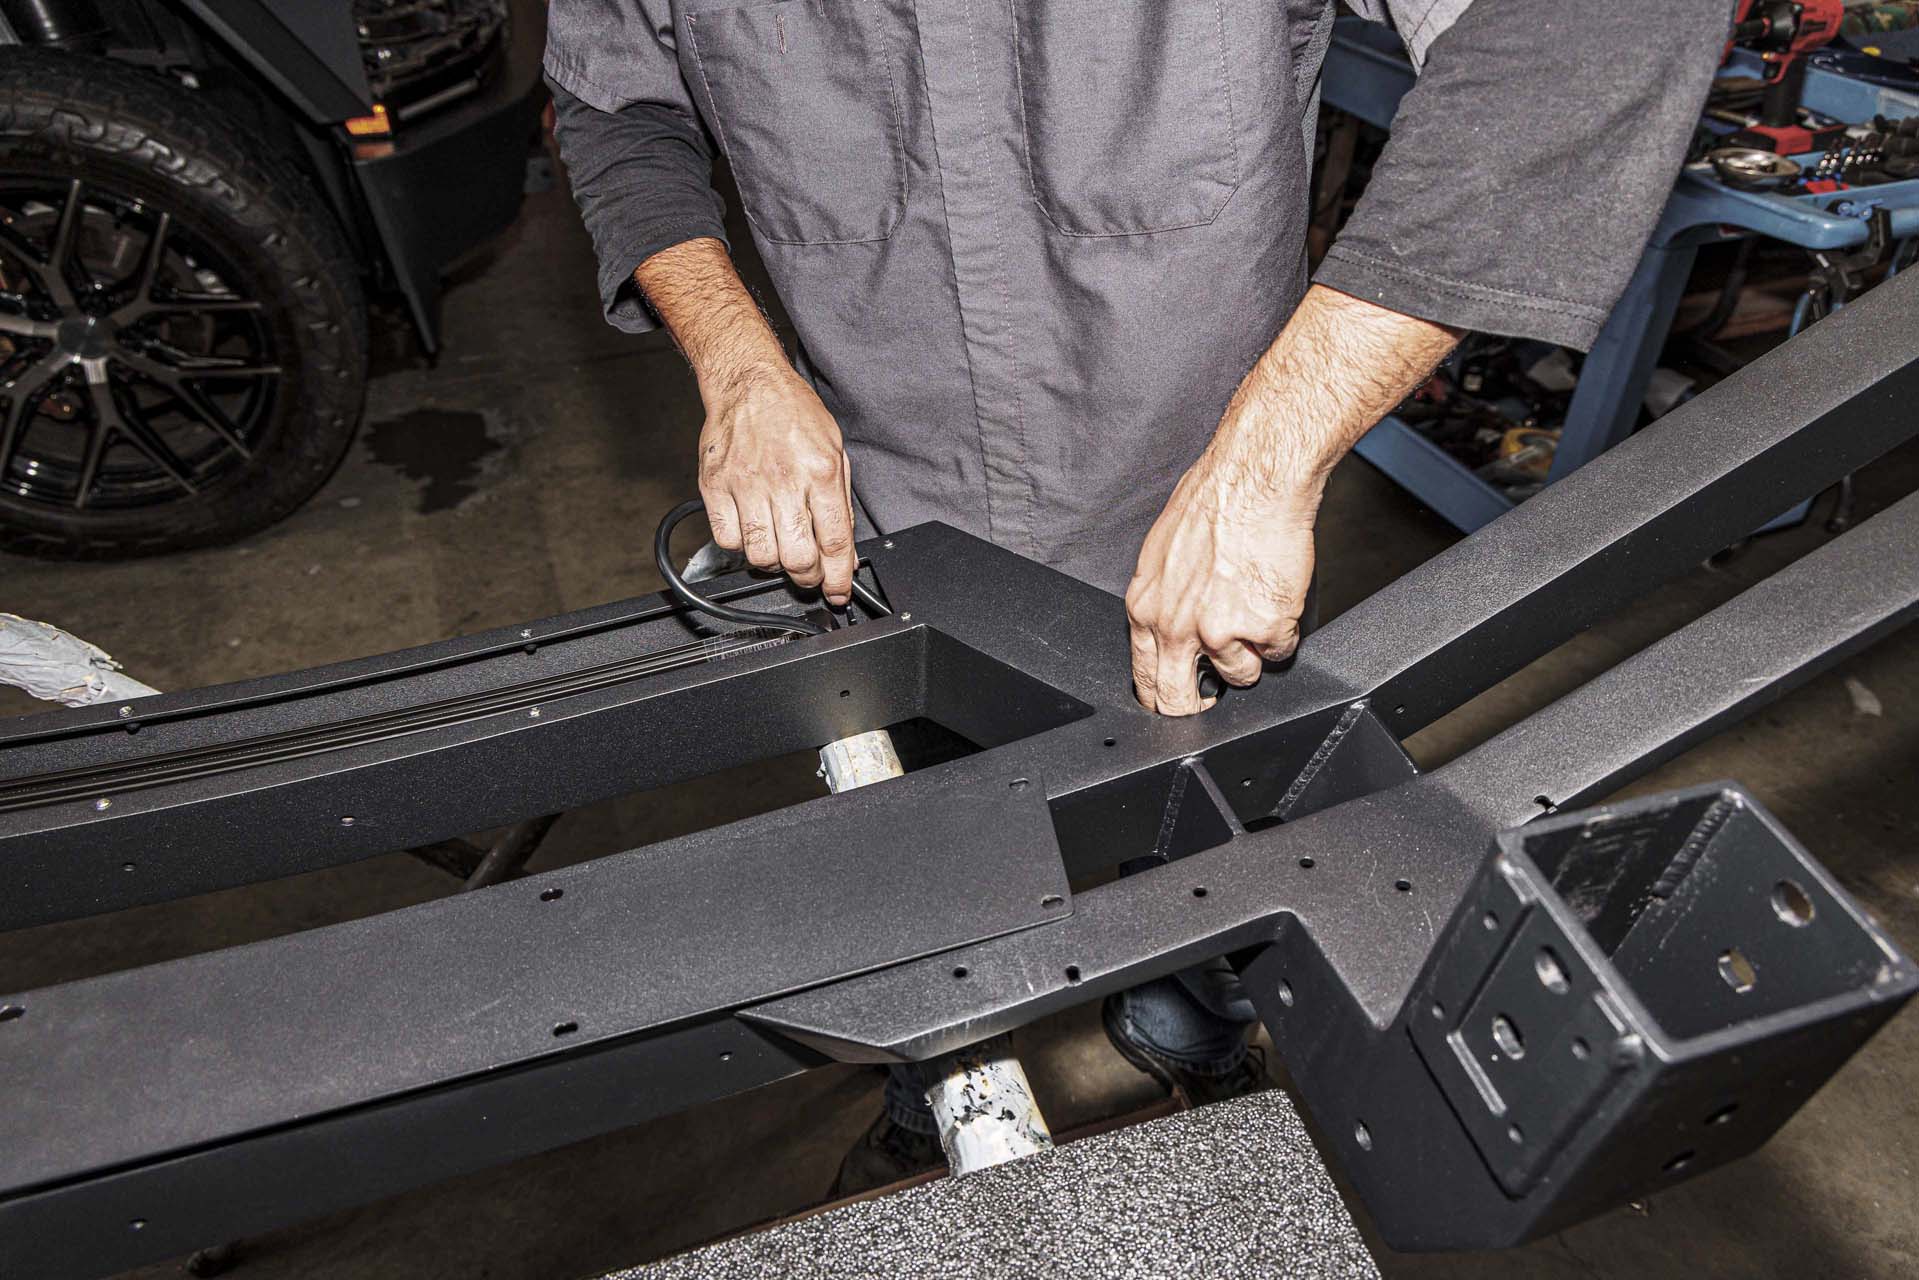
Using a 13mm ratcheting wrench, fasten 2 provided bolts, split washers, and shims to secure the light bar to the bull bar. Note that the tabs that the light bar bolt to are slotted, so prior to applying final torque, be sure to check that the depth is even on both ends of the light bar.
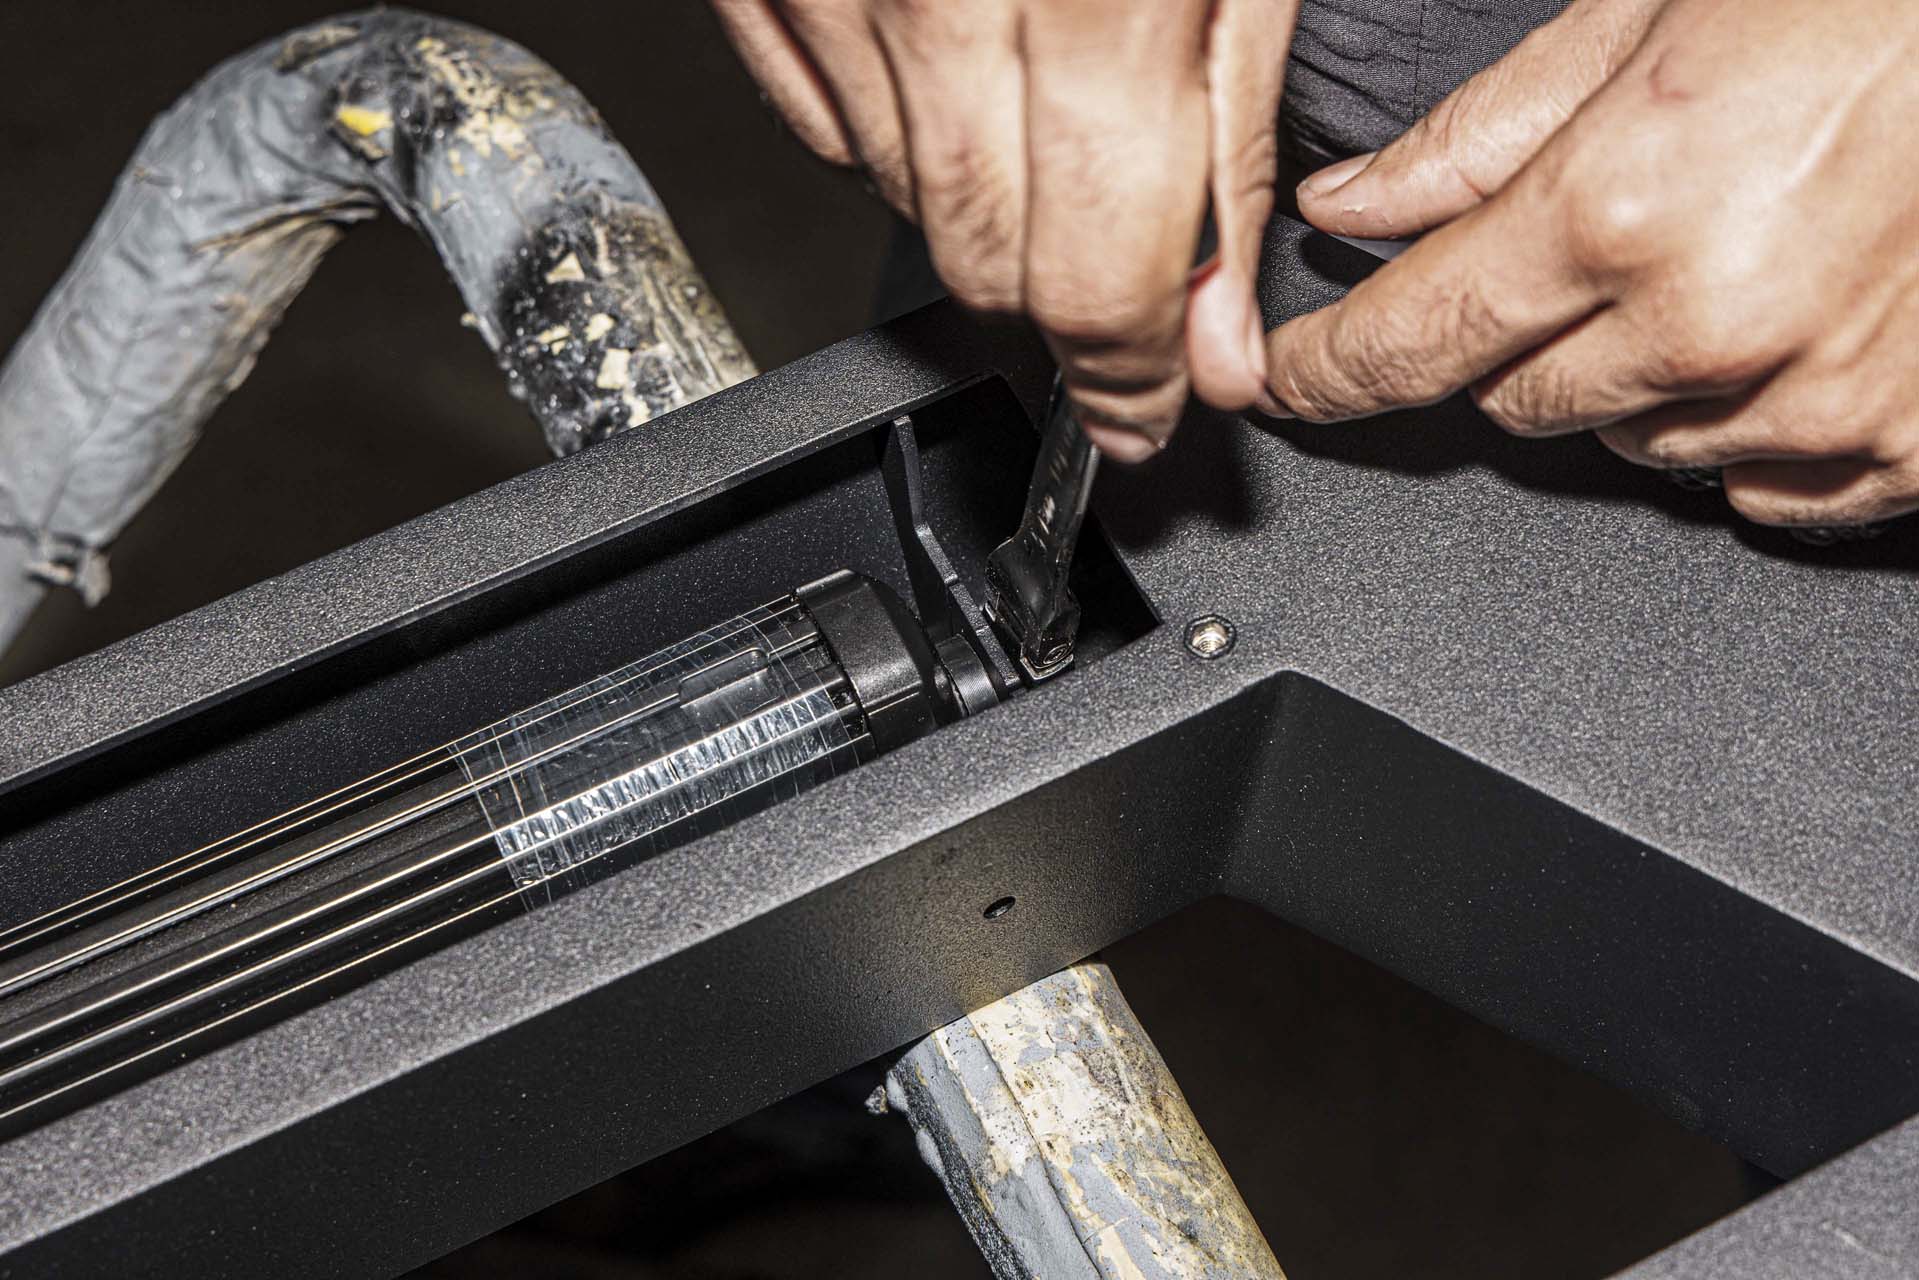
Torque to 15 ft/lbs.
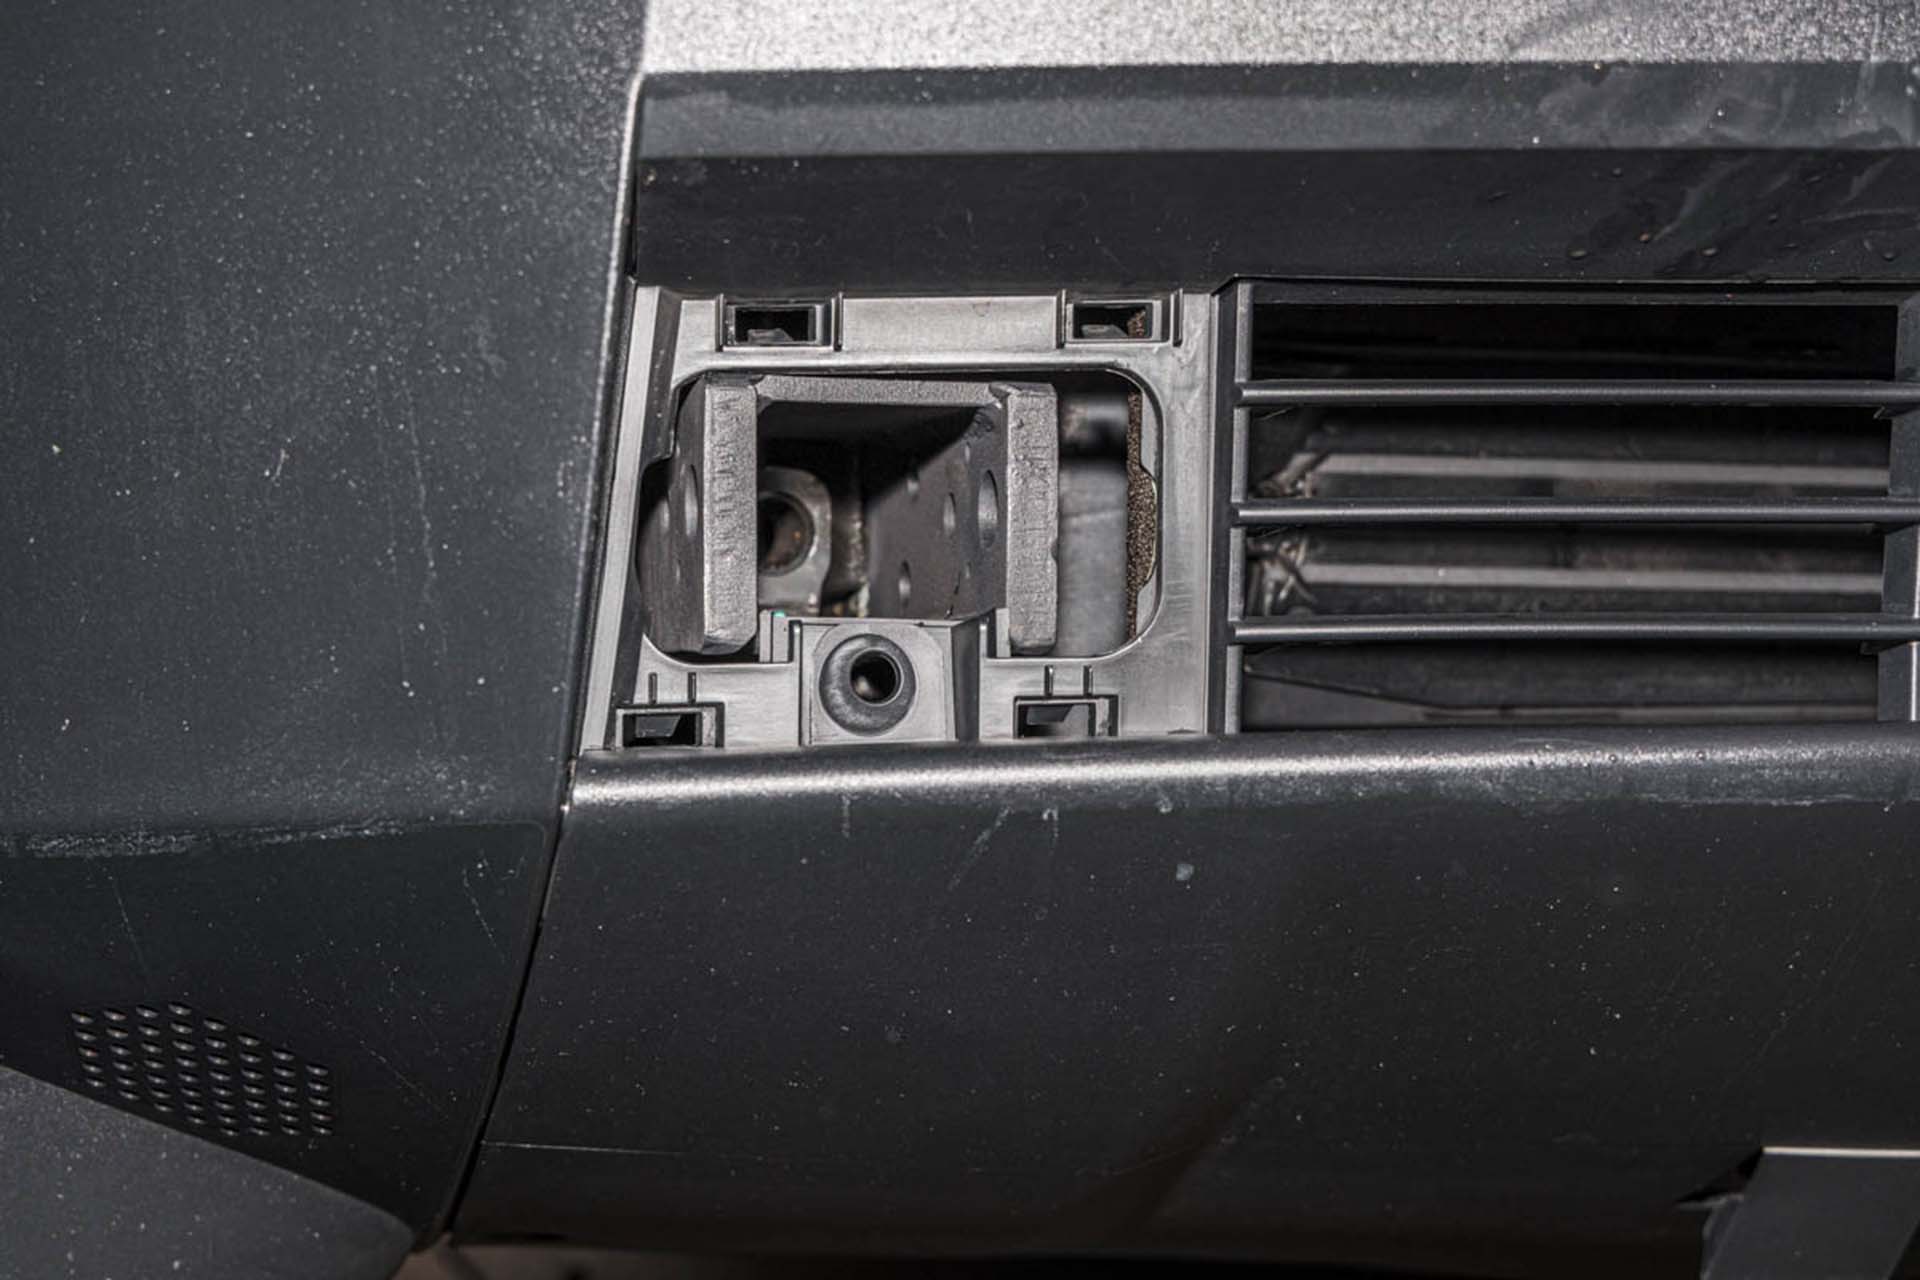
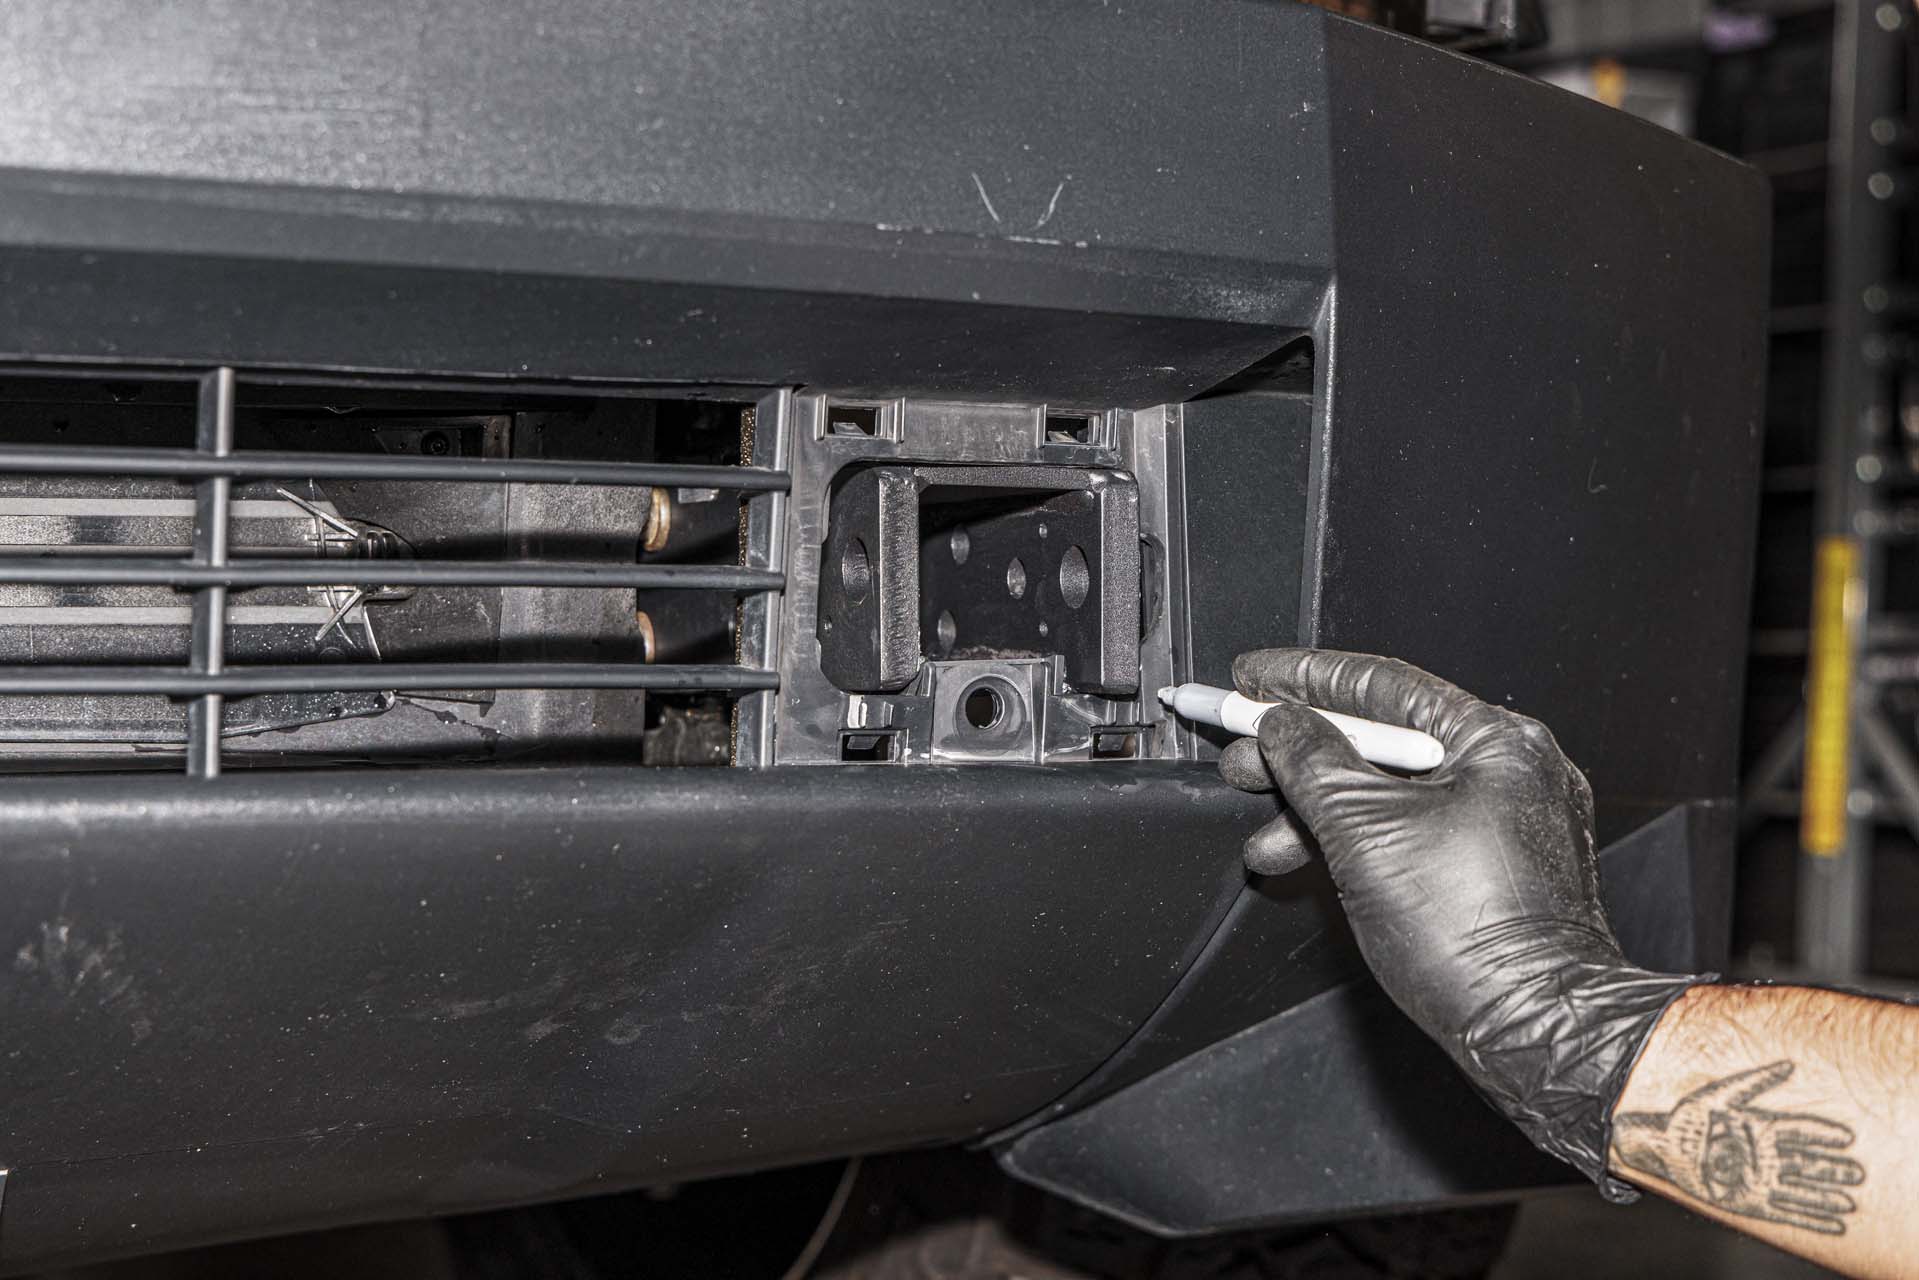
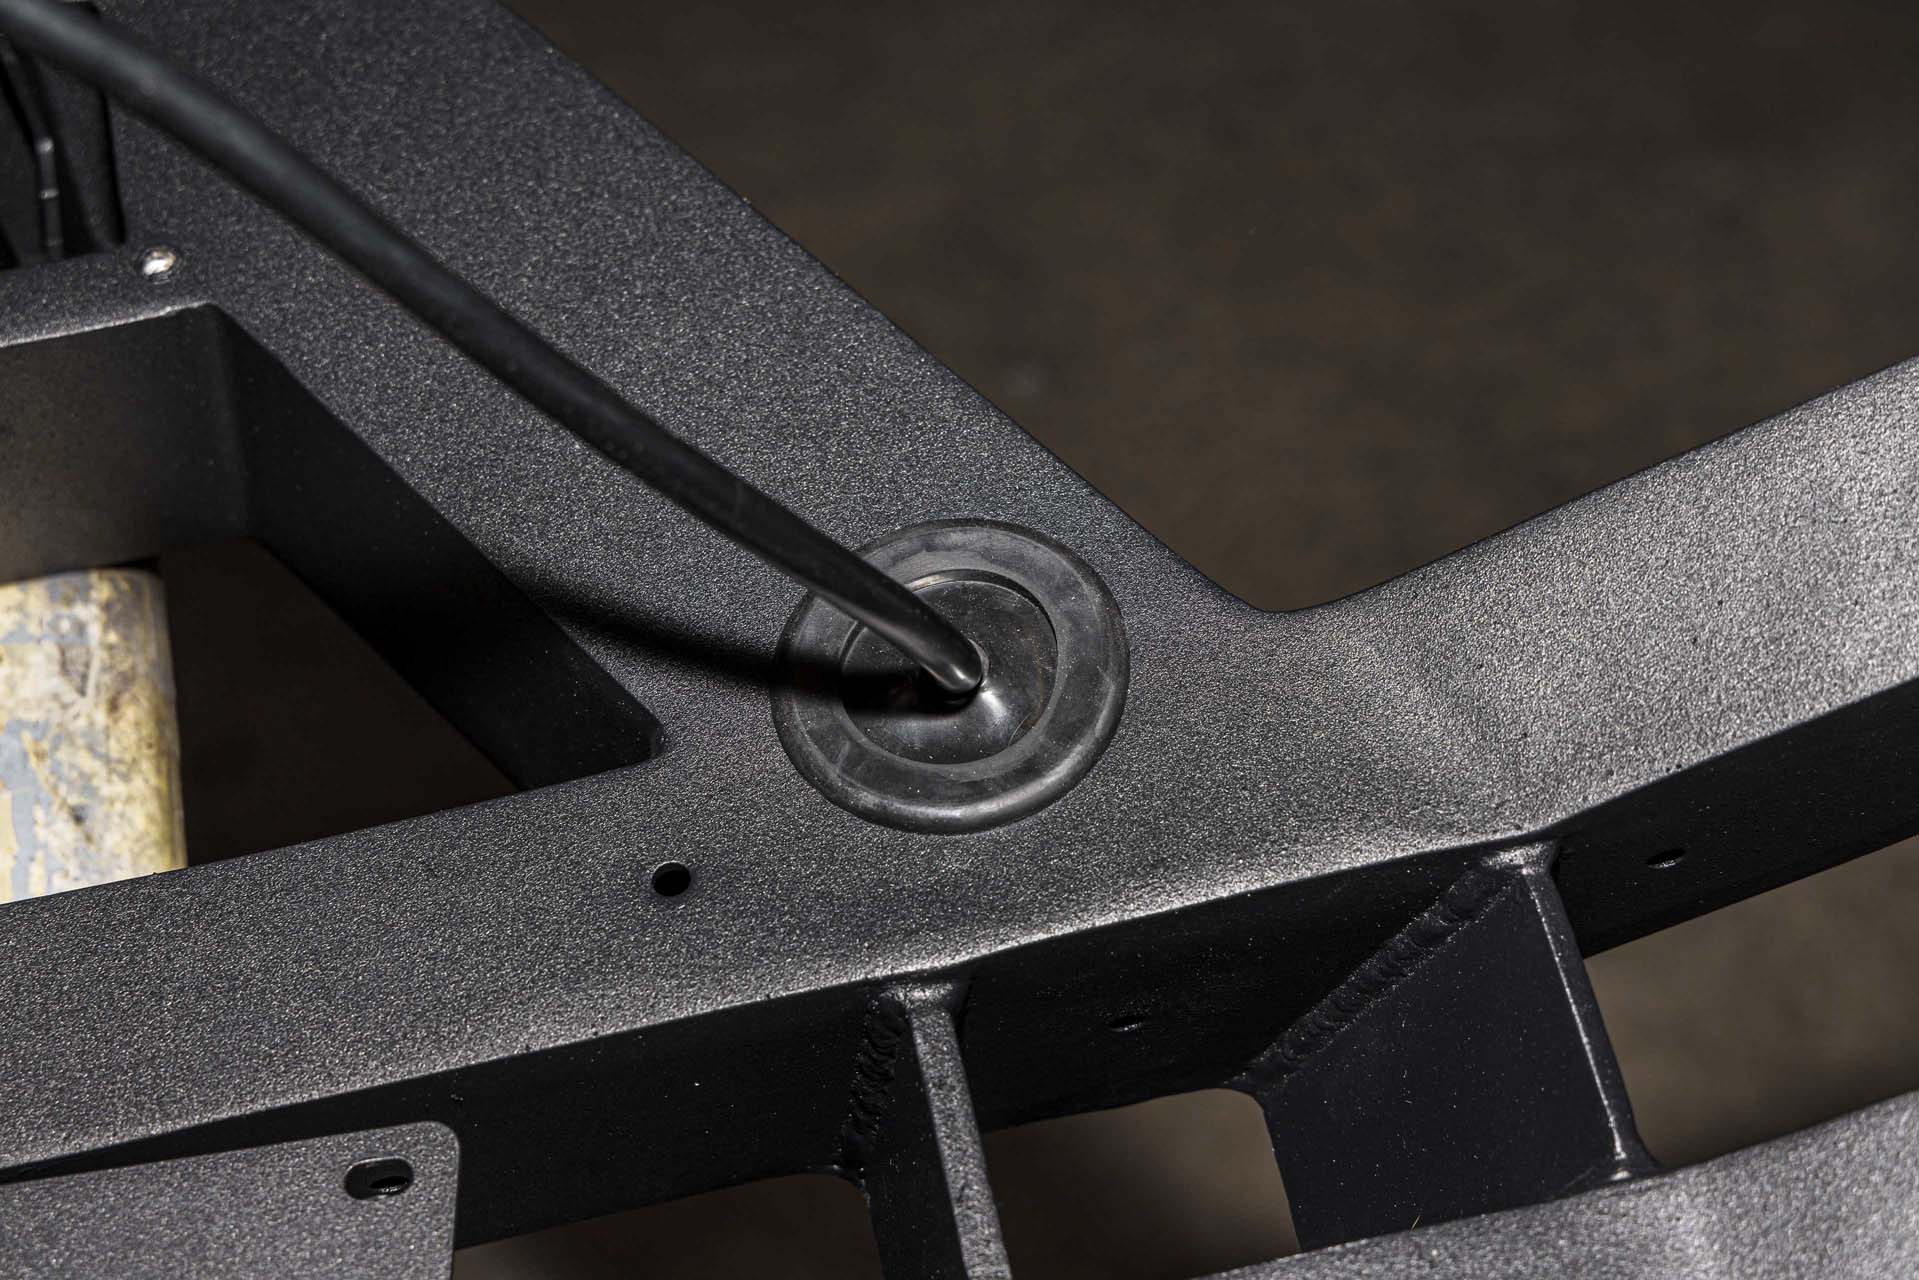
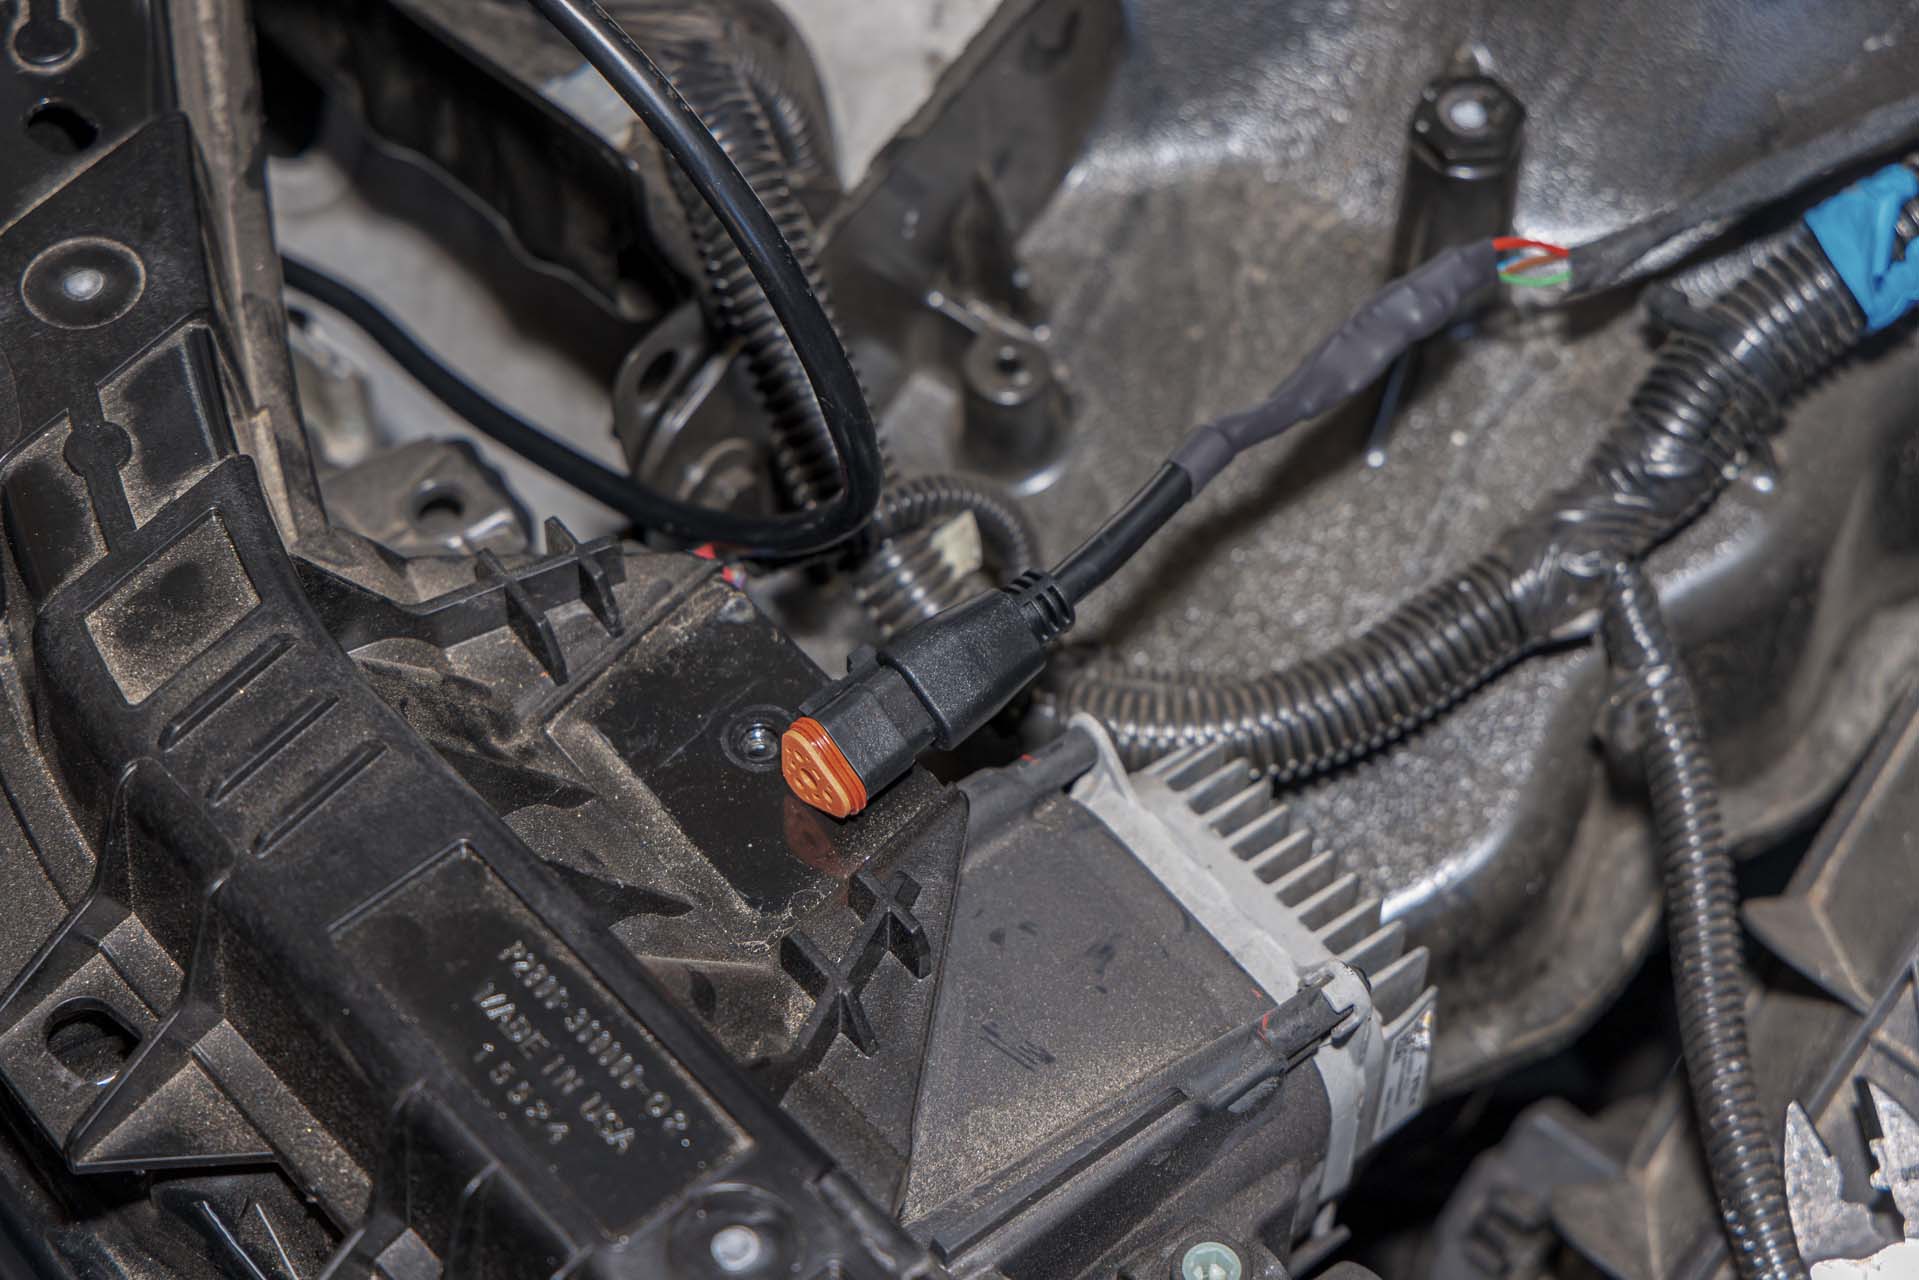
Next, install the provided rubber gasket into the bull bar accessory port, and over the light bar power cable as shown below, and feed the light bar power cable through the hole.
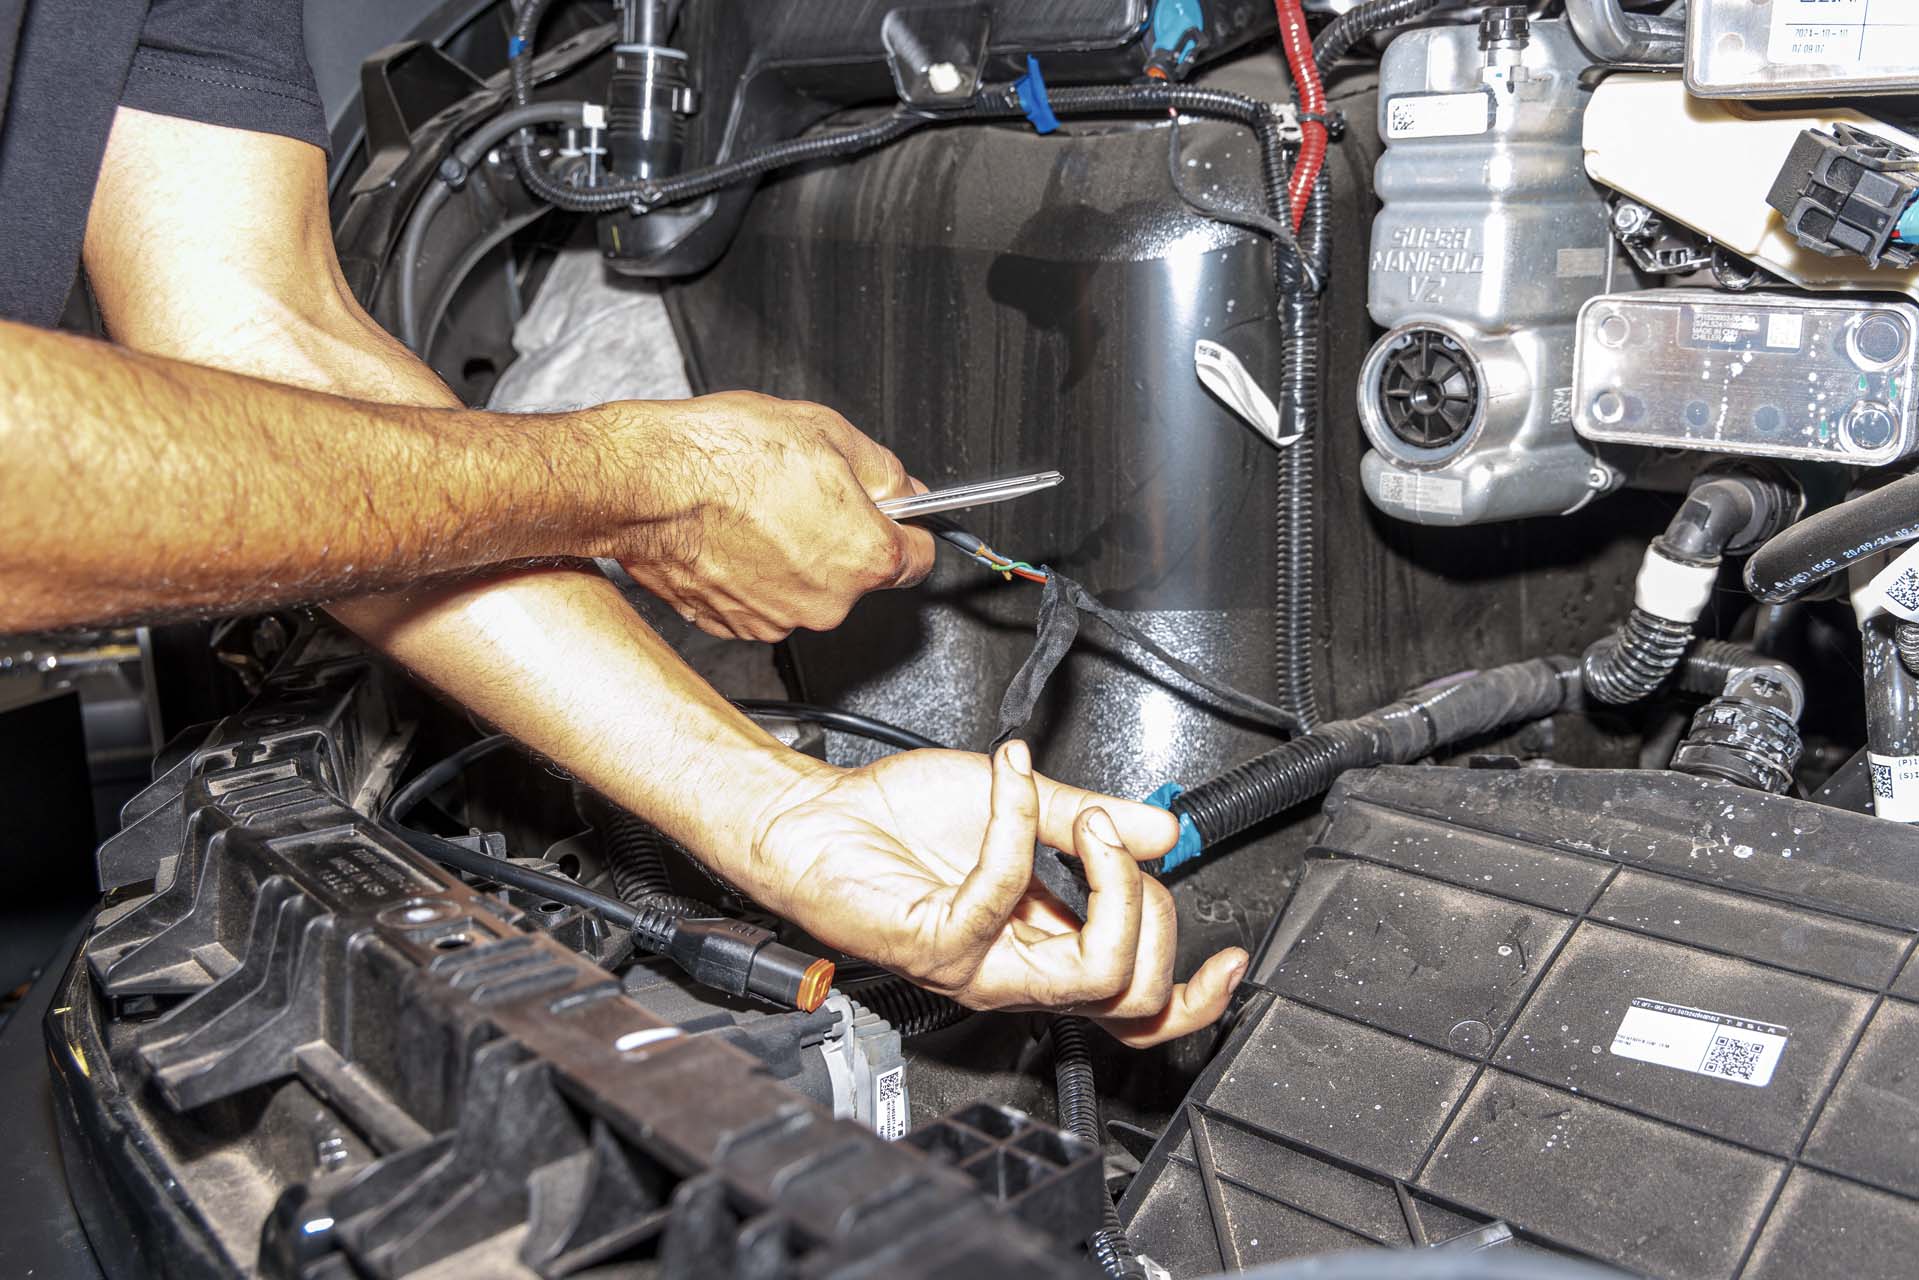
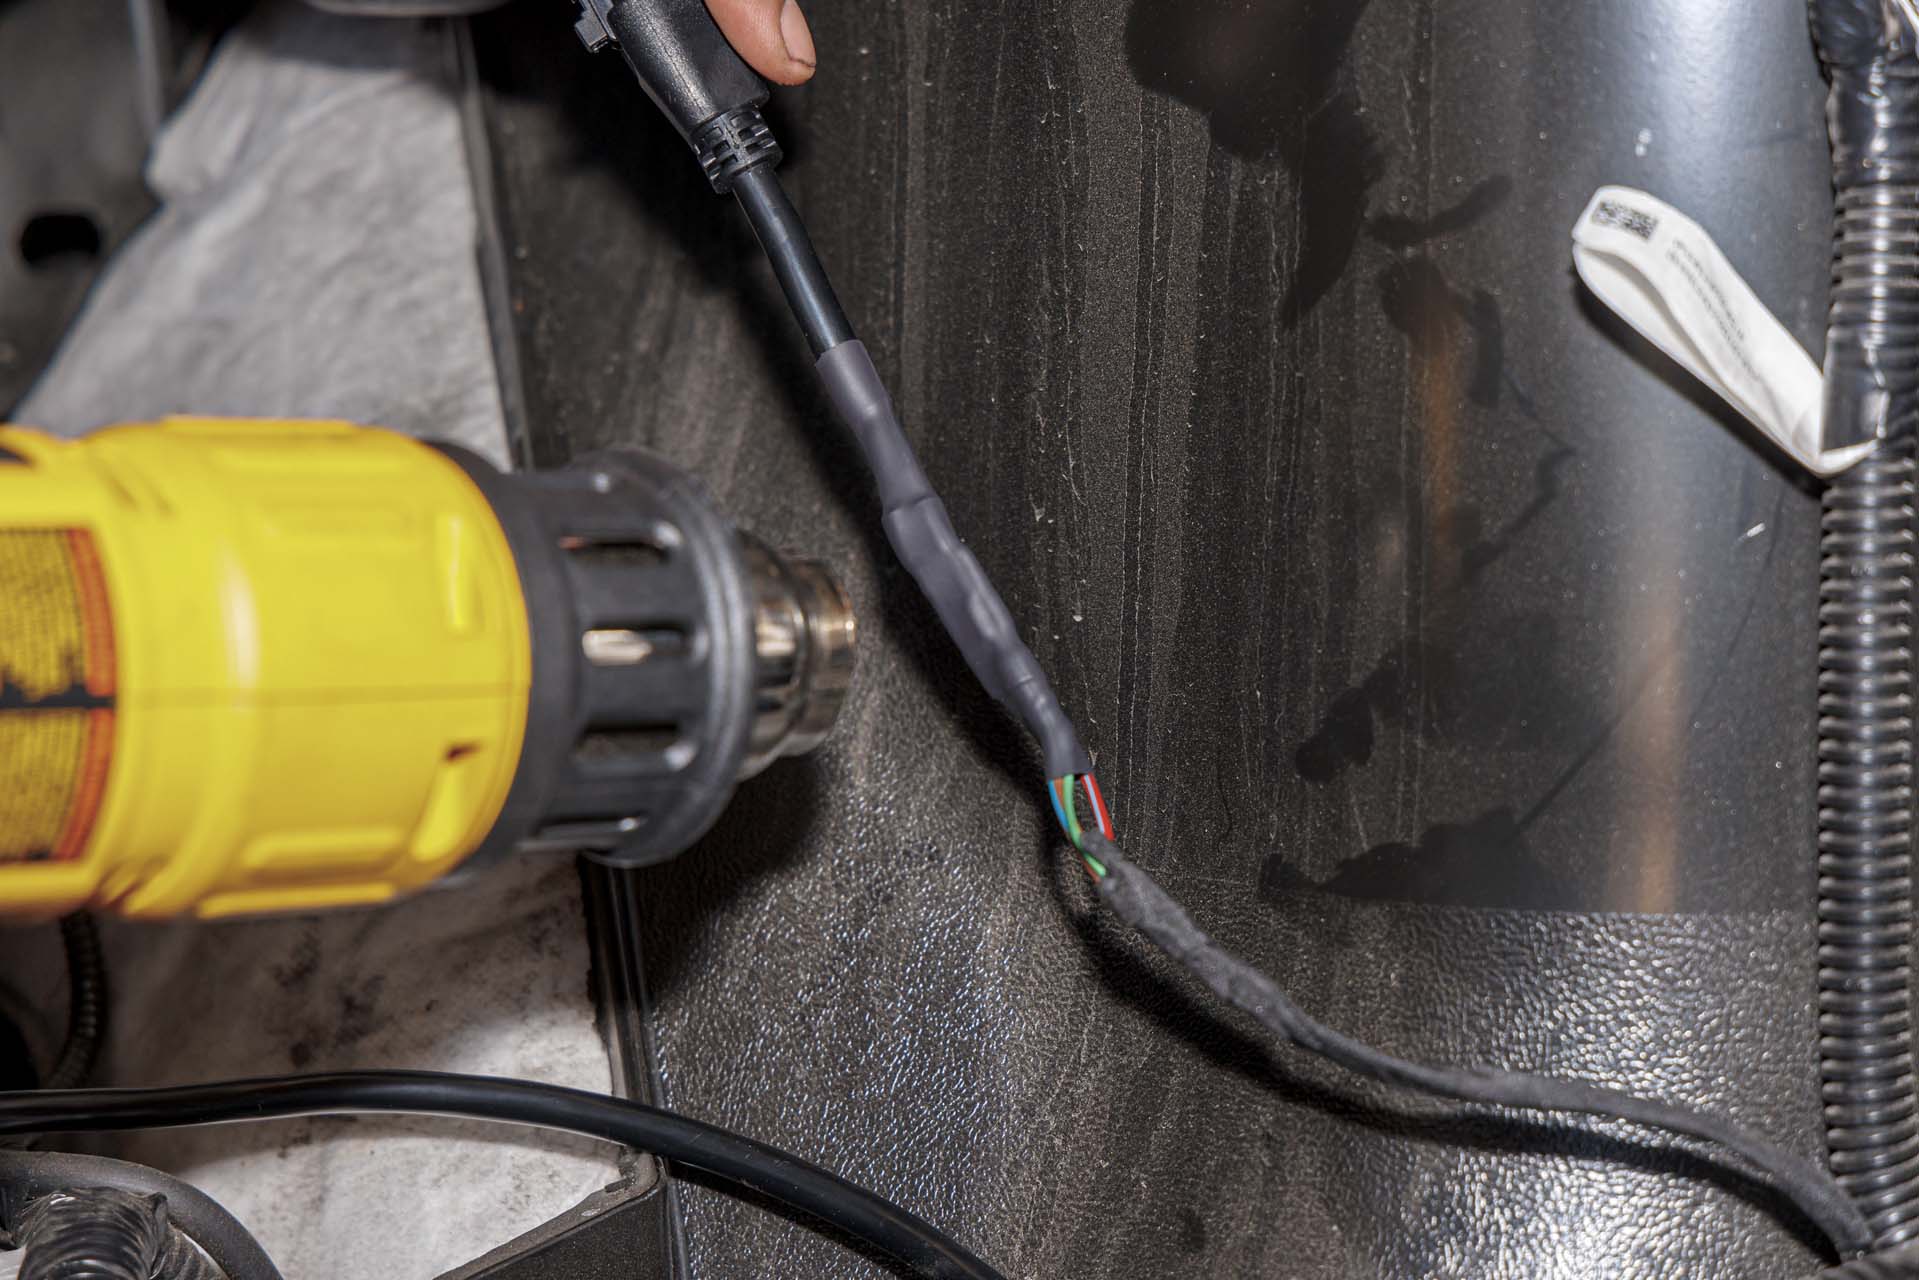
Using a wire cutting tool, cut off the socket end of the light bar cable. This will be connected to the factory front power feed.
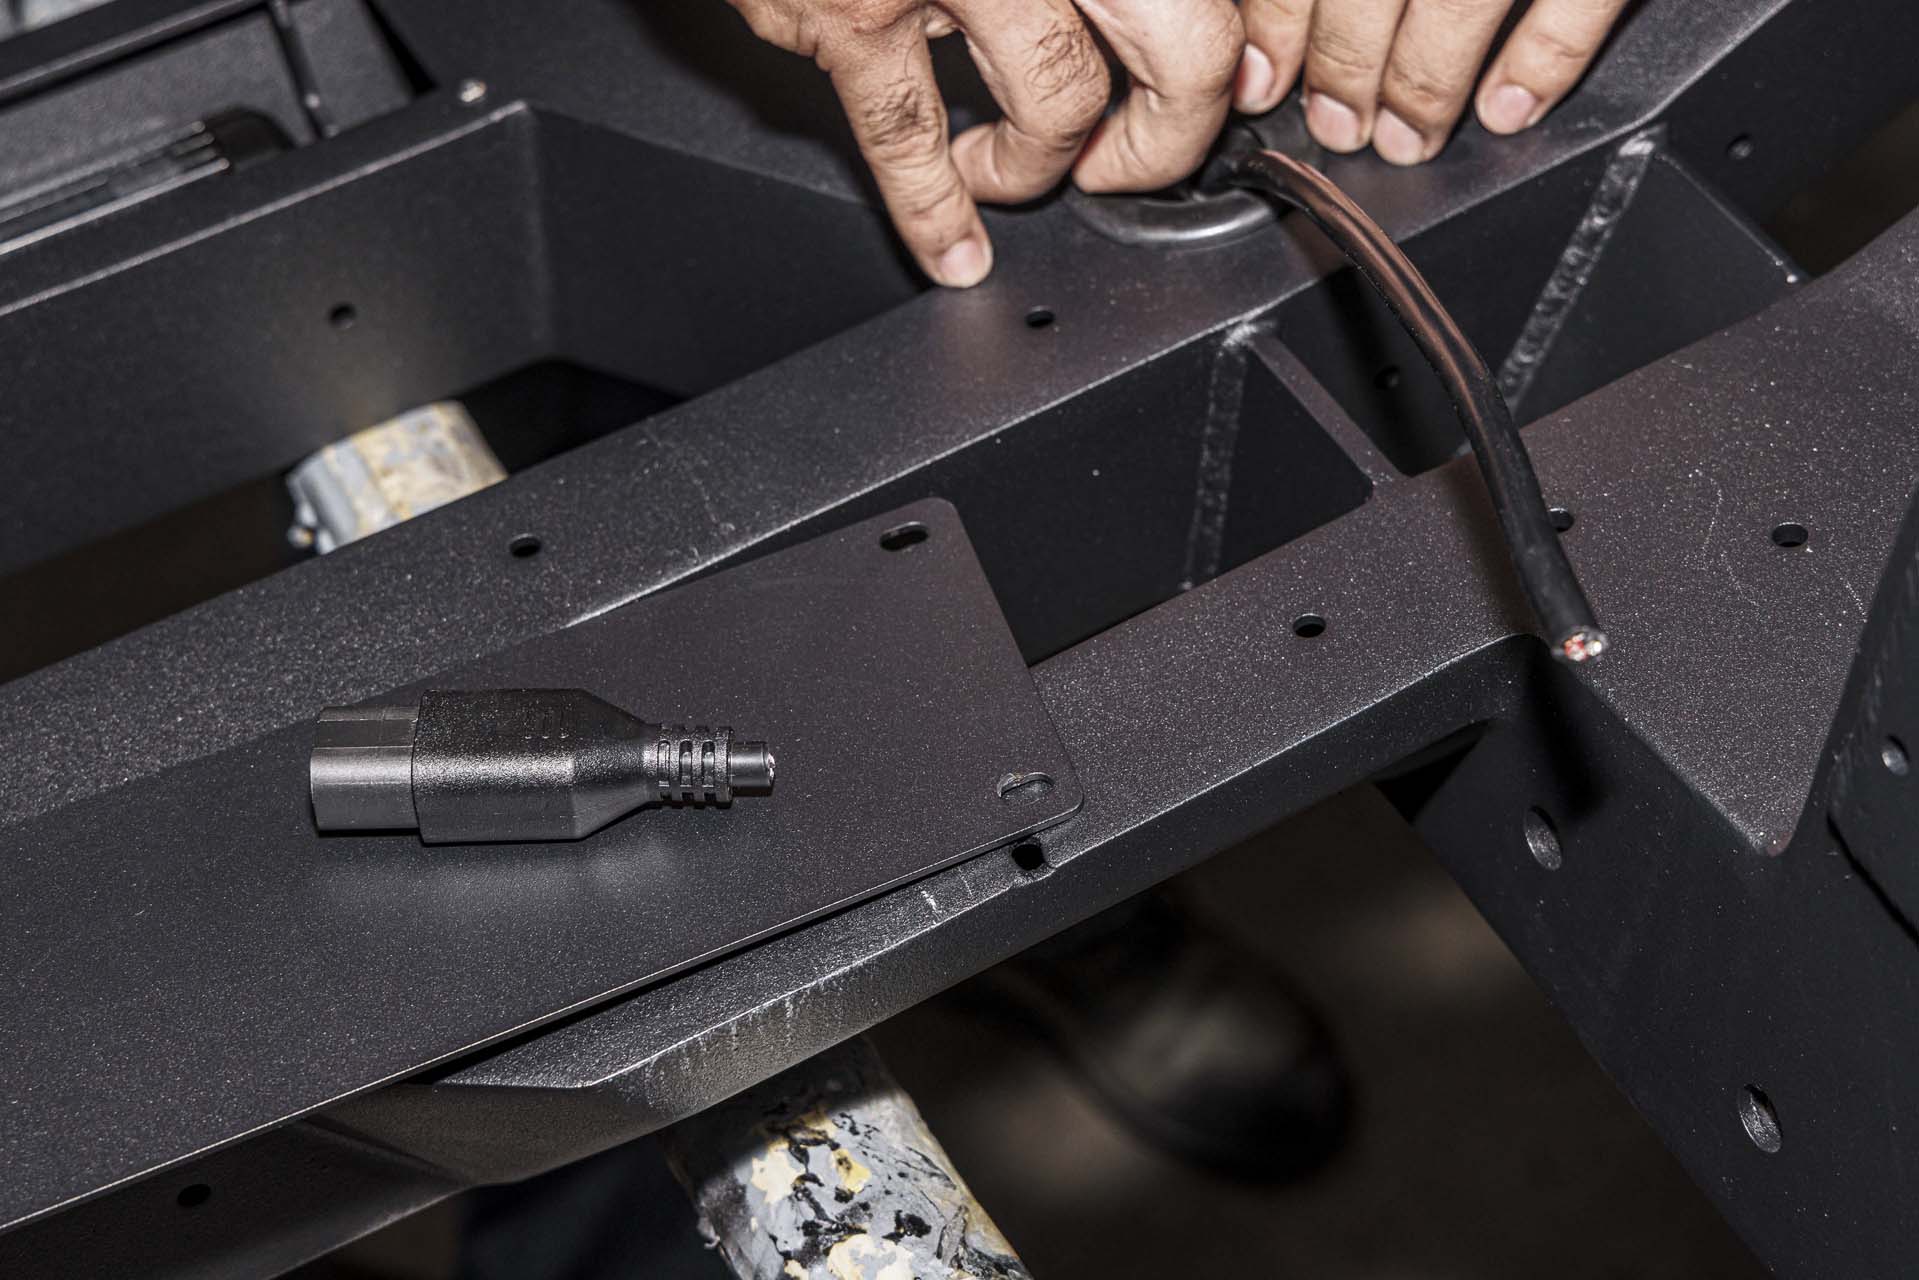
Using a wire stripping tool, remove some of the housing to expose the cables inside as shown below.
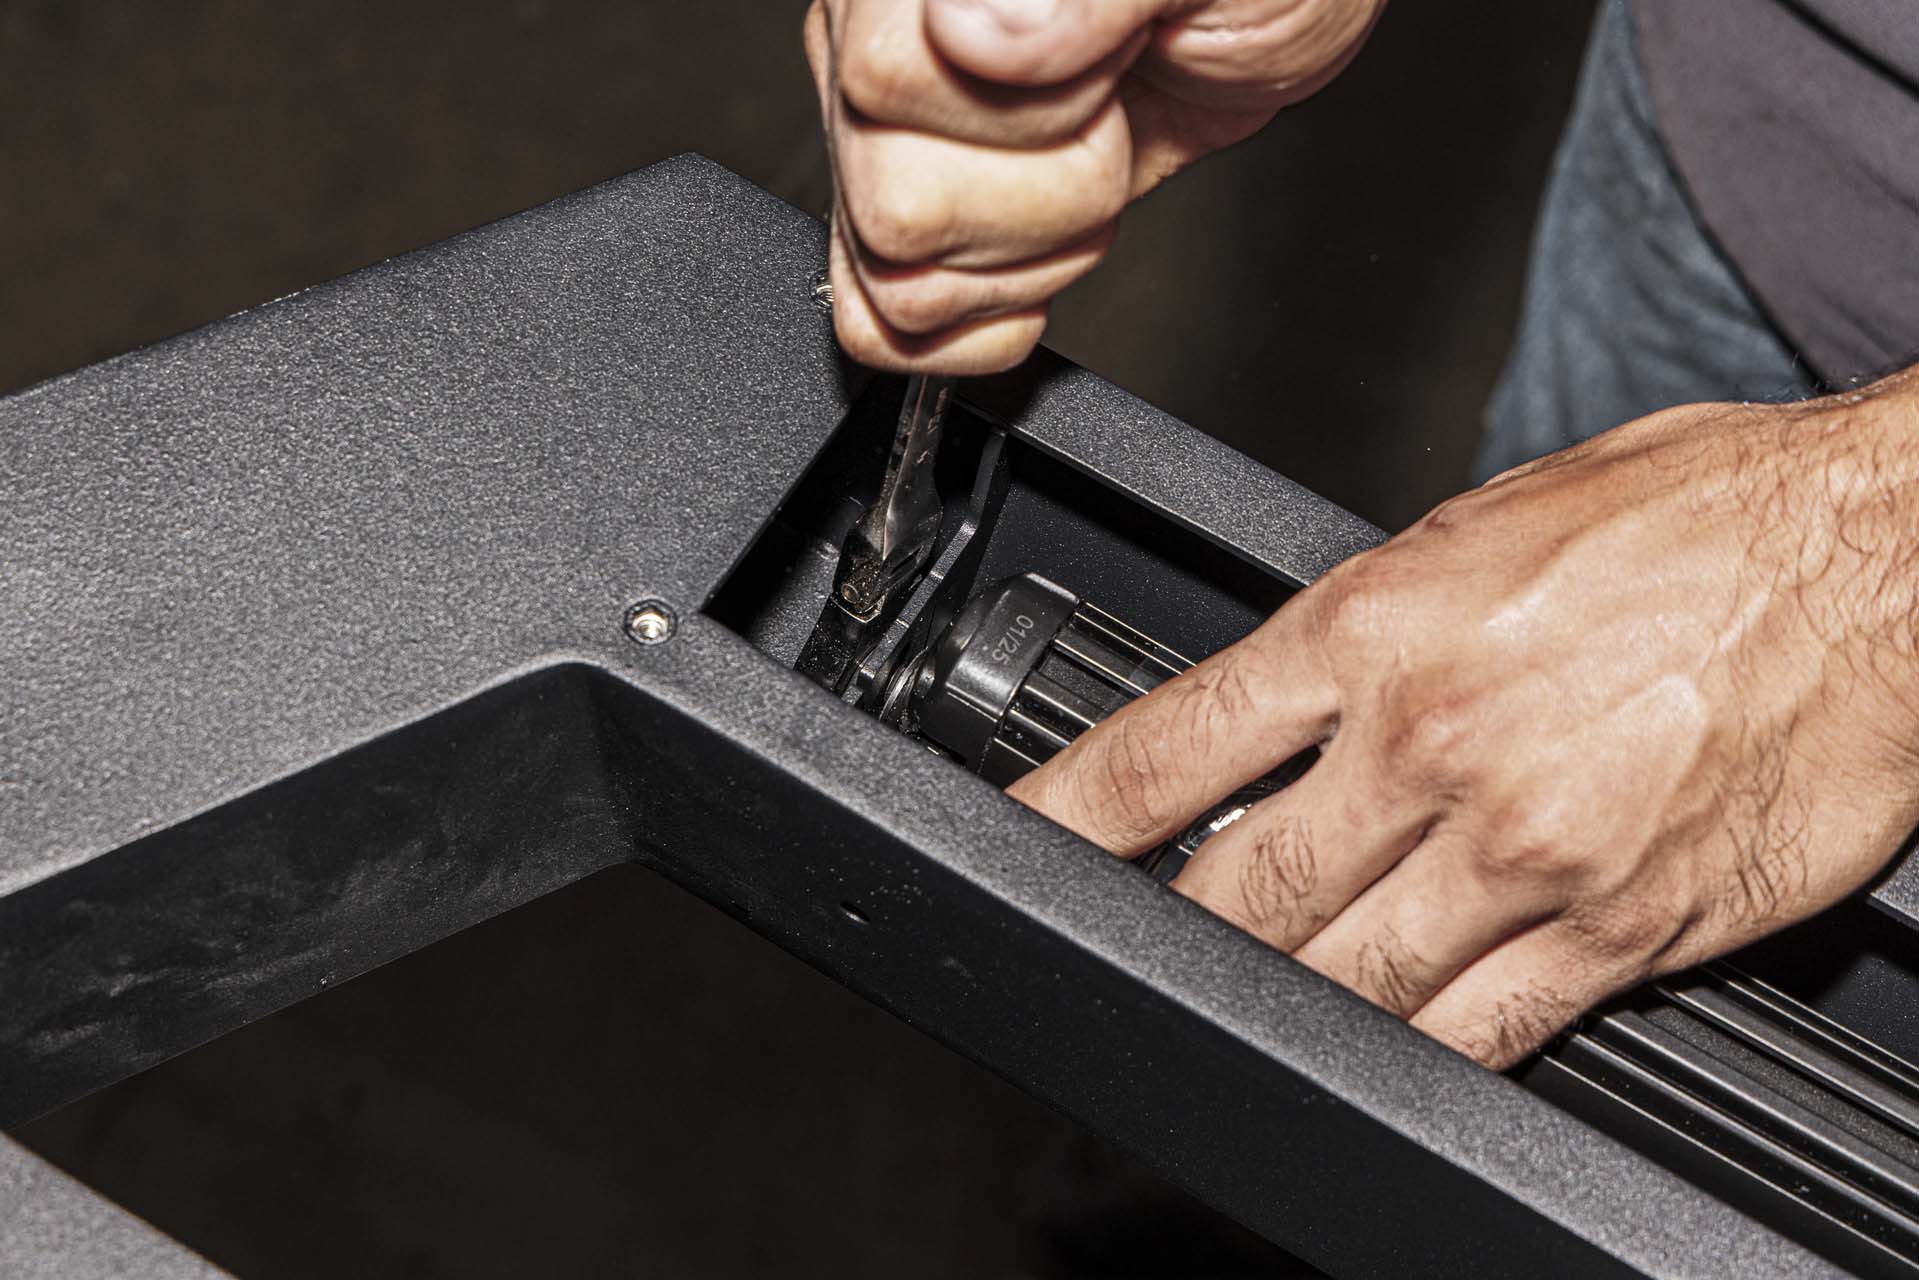
Using a 3mm hex socket, reinstall the light bar backing plate onto the bull bar.
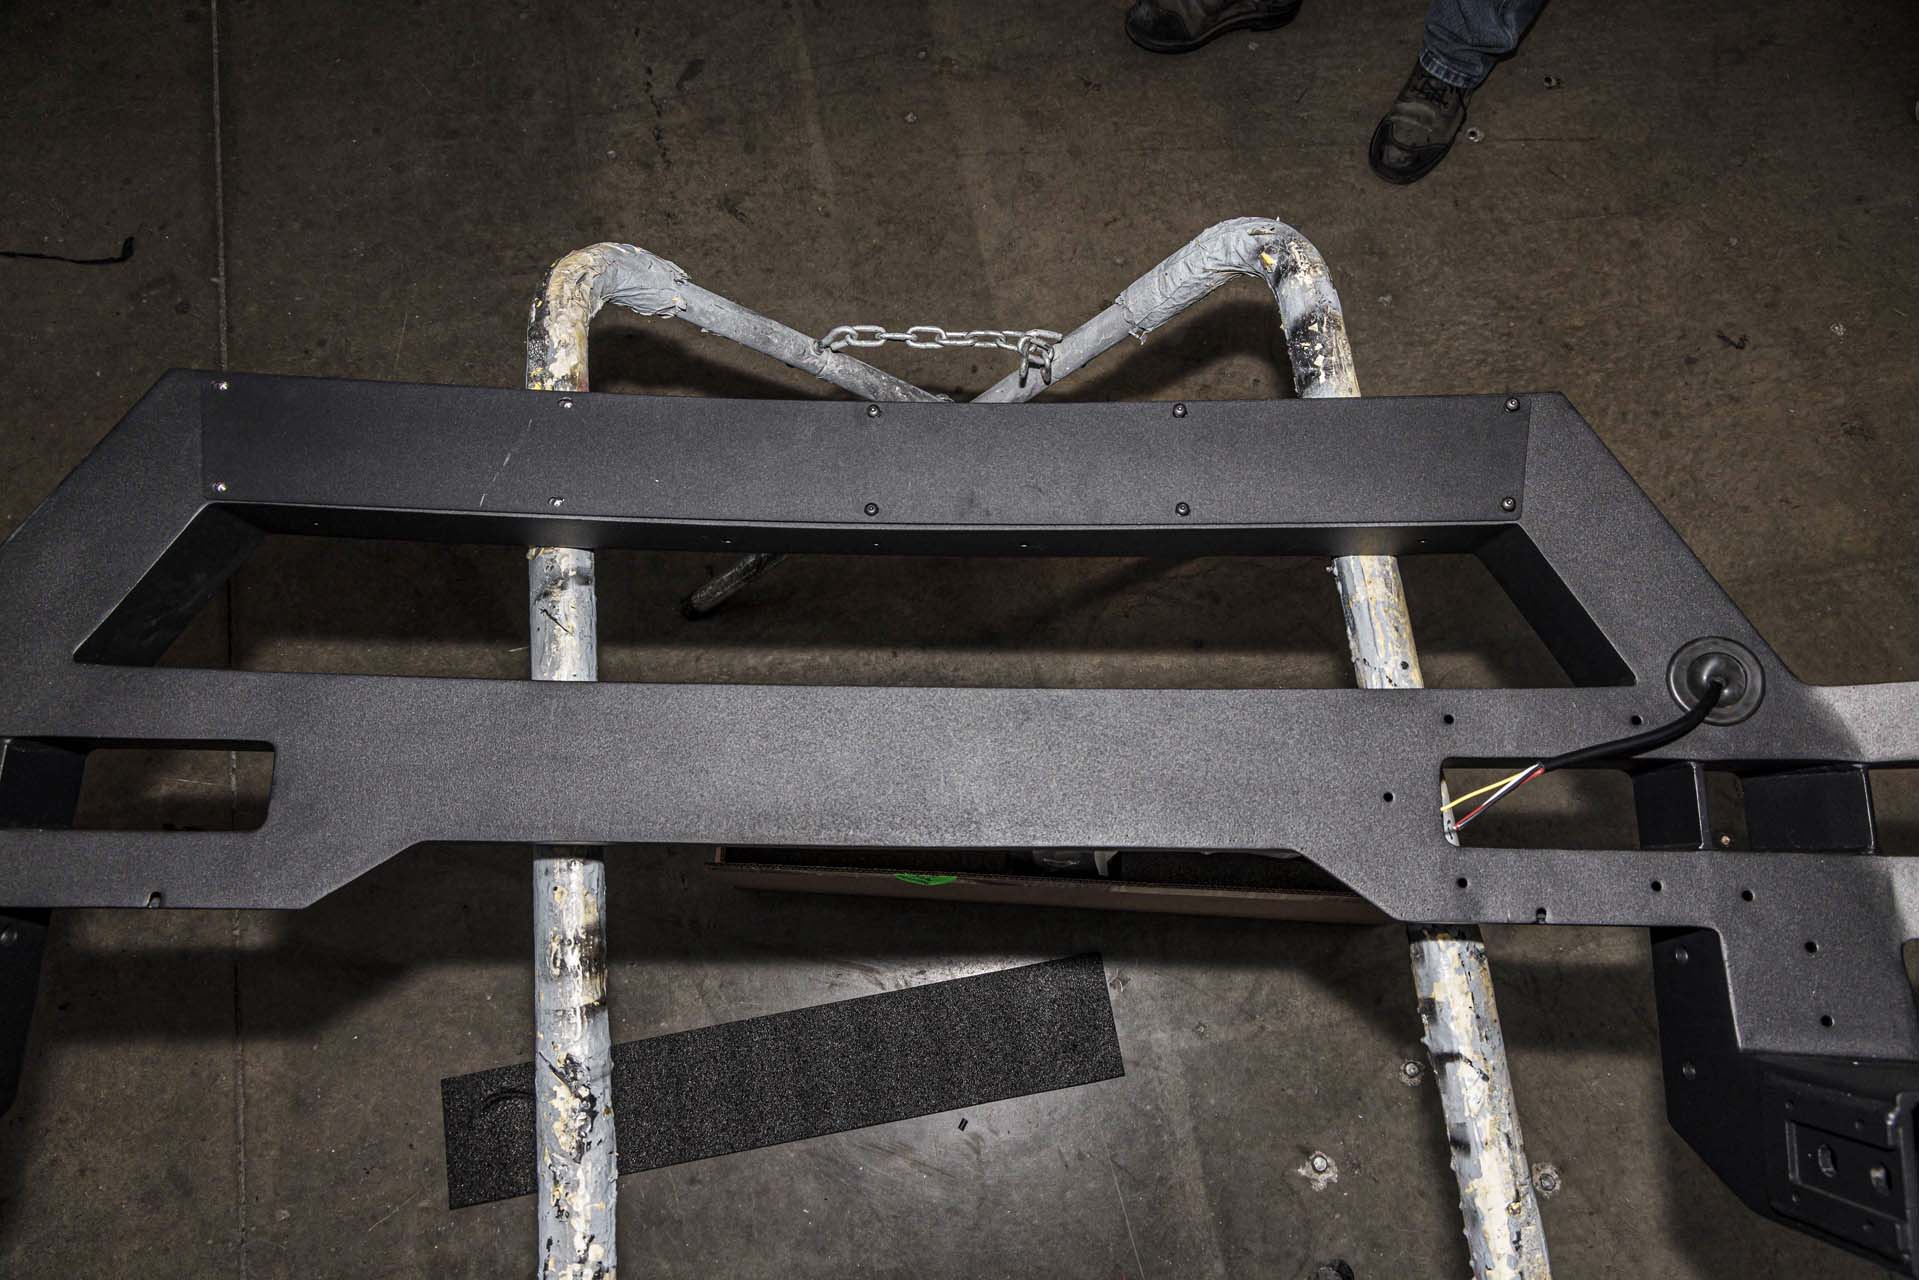
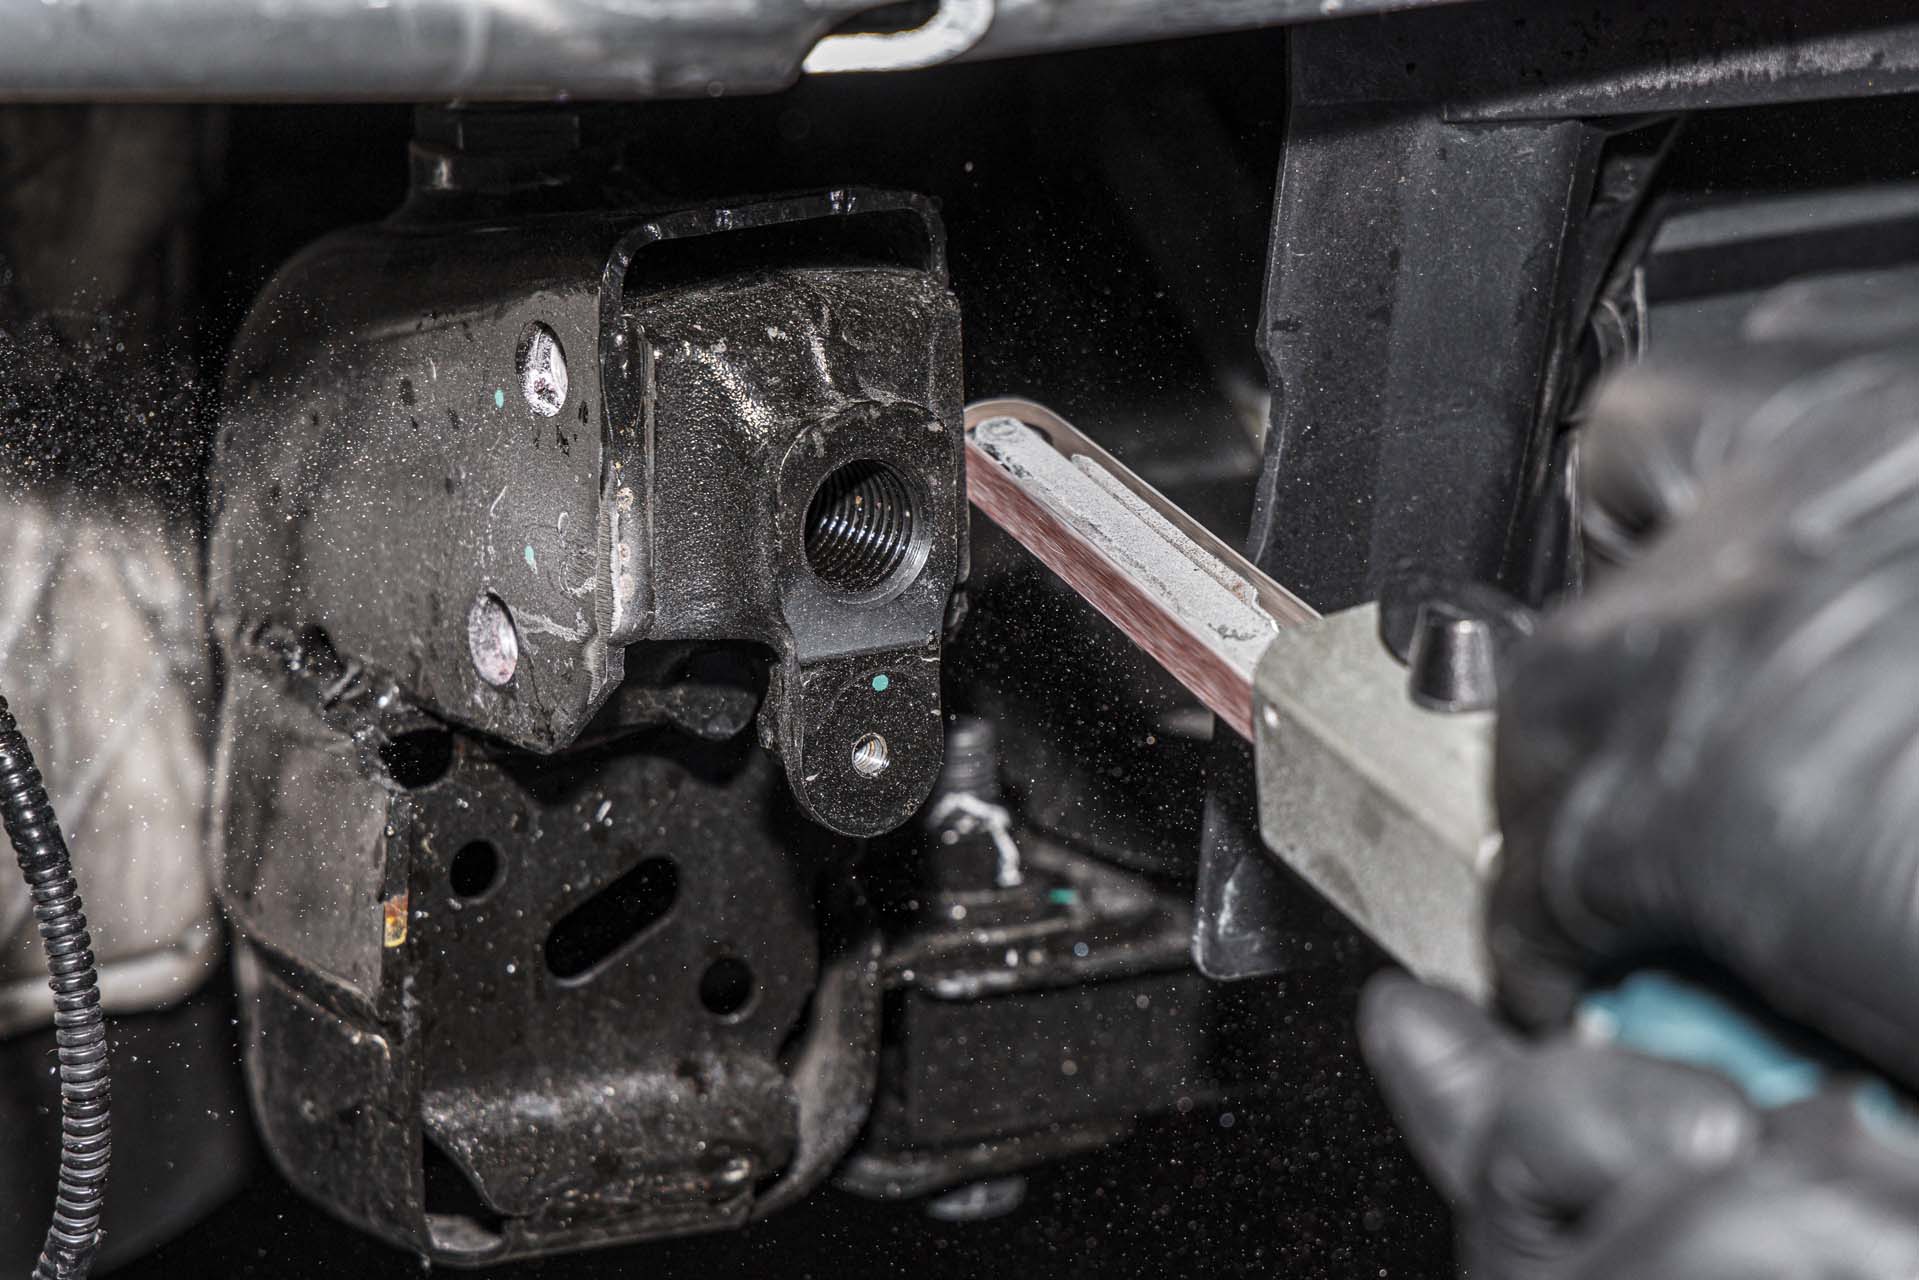
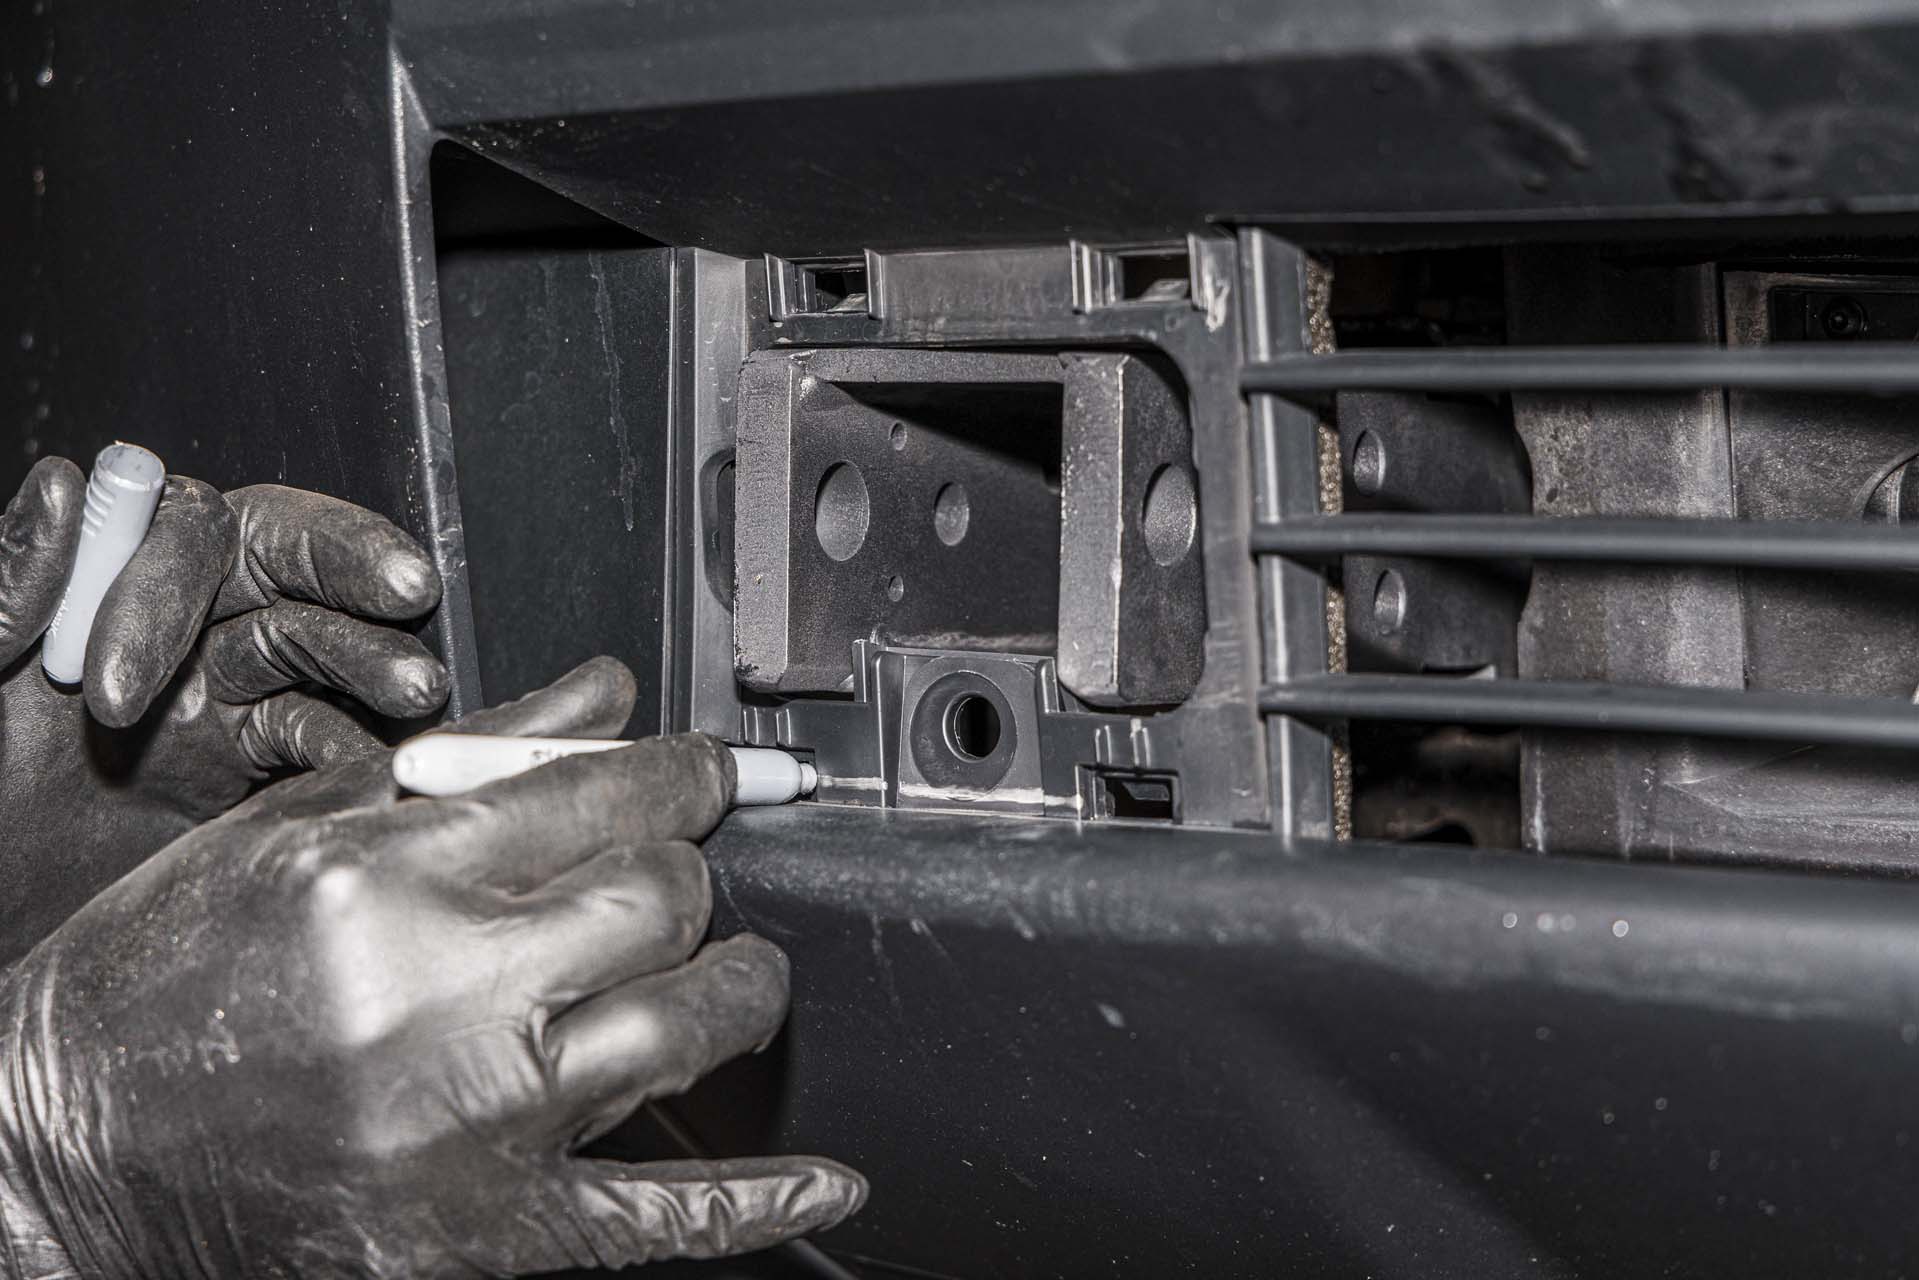
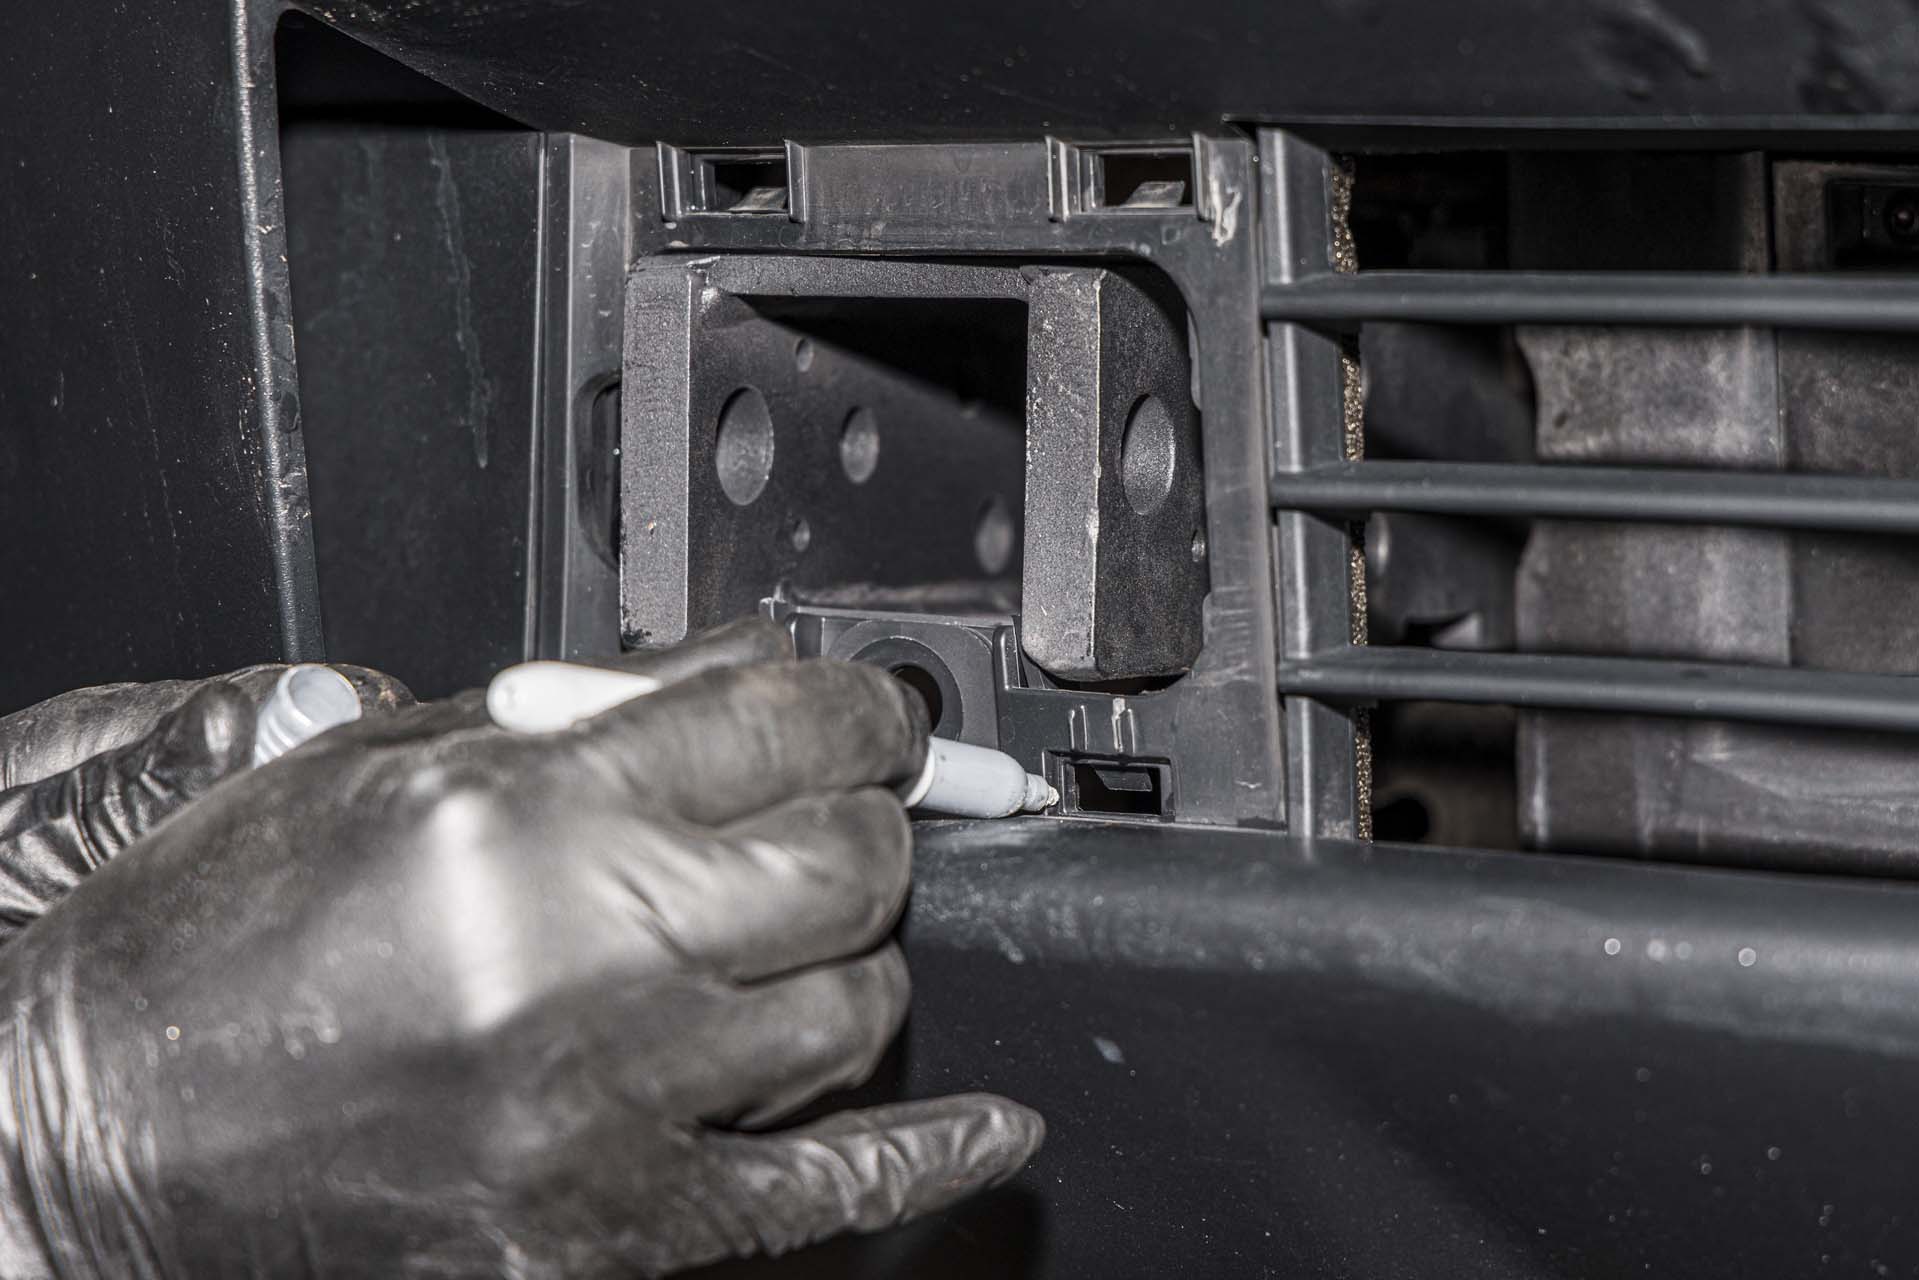
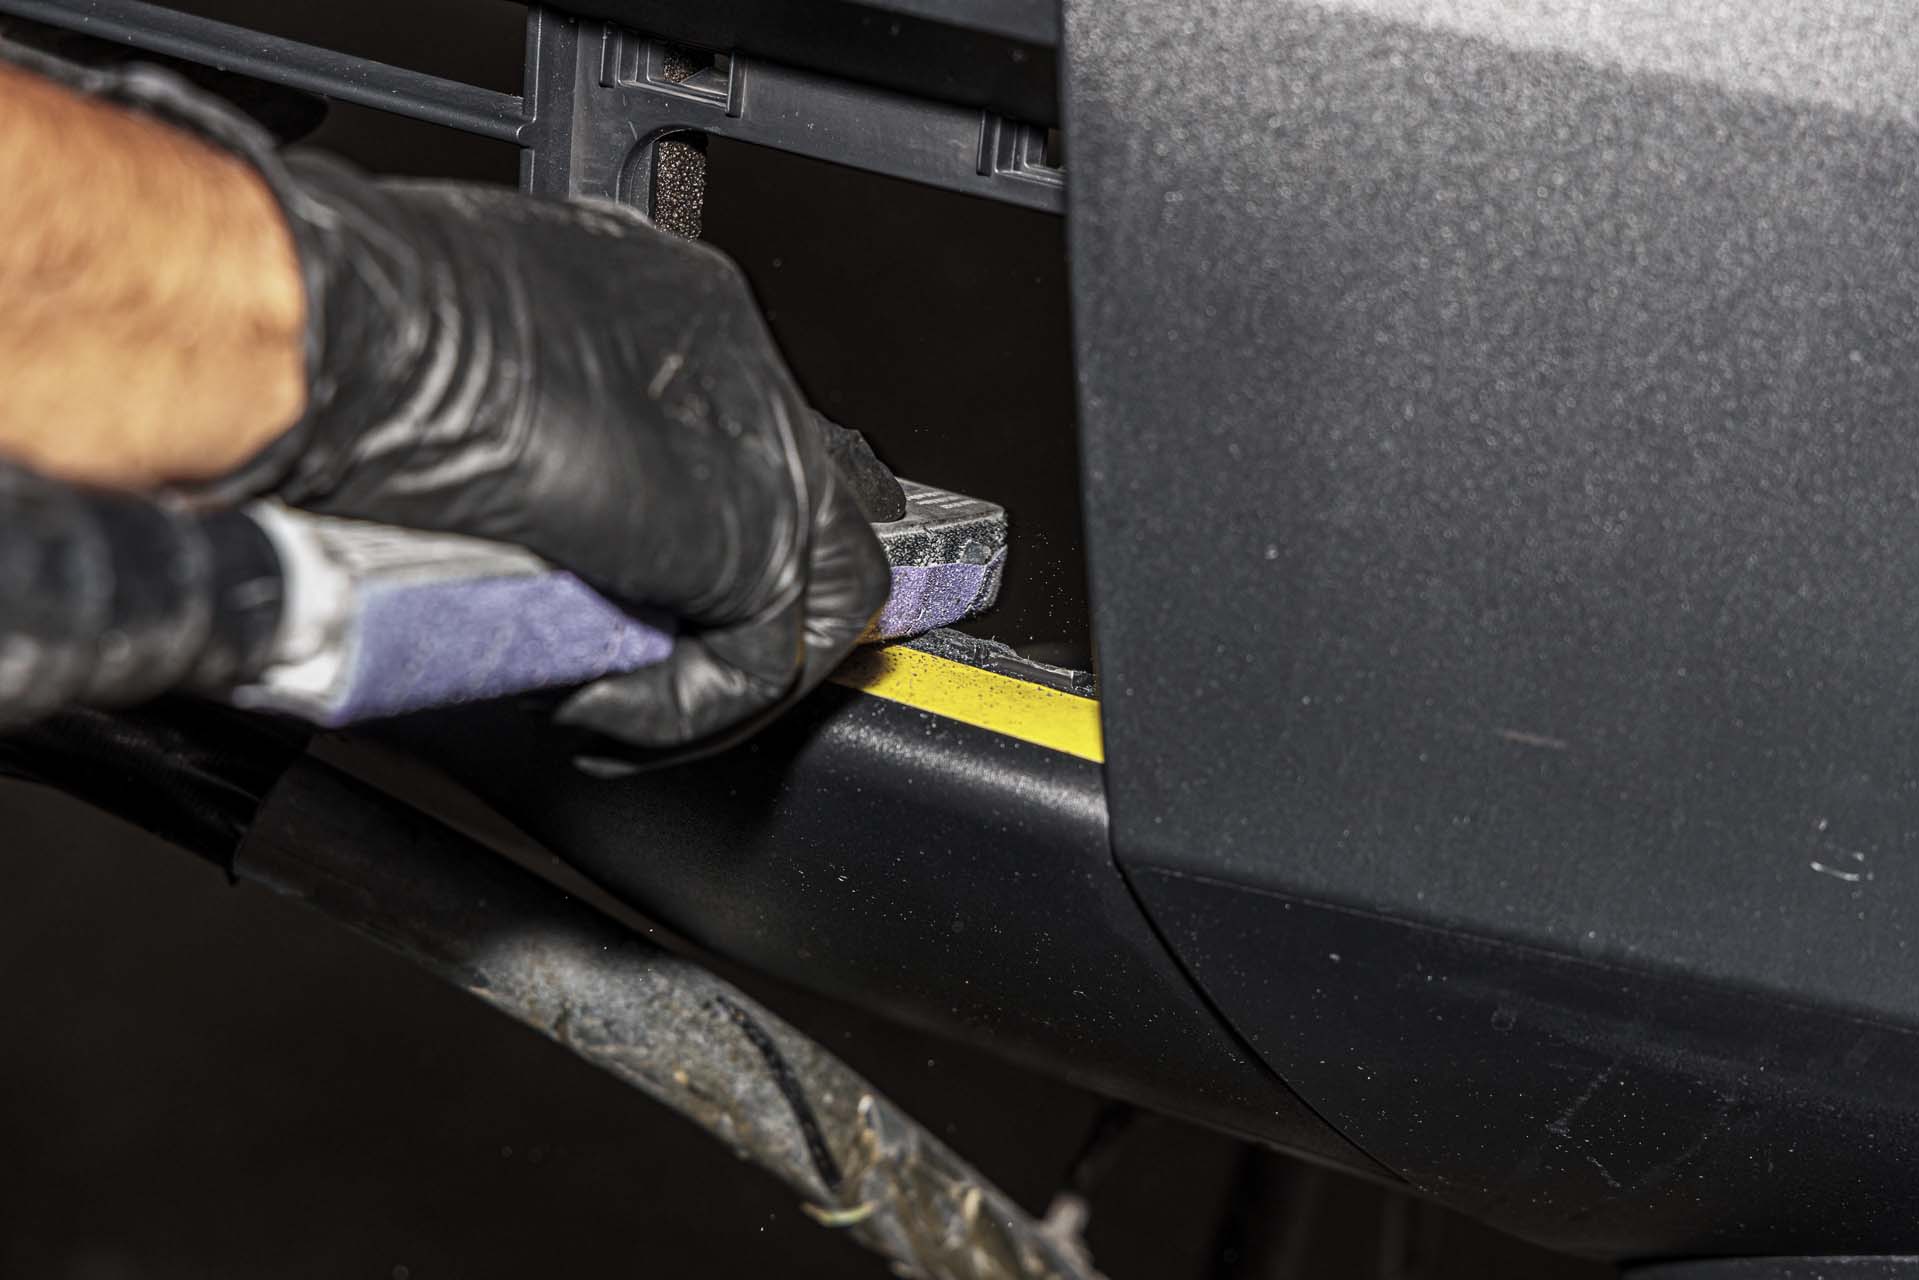
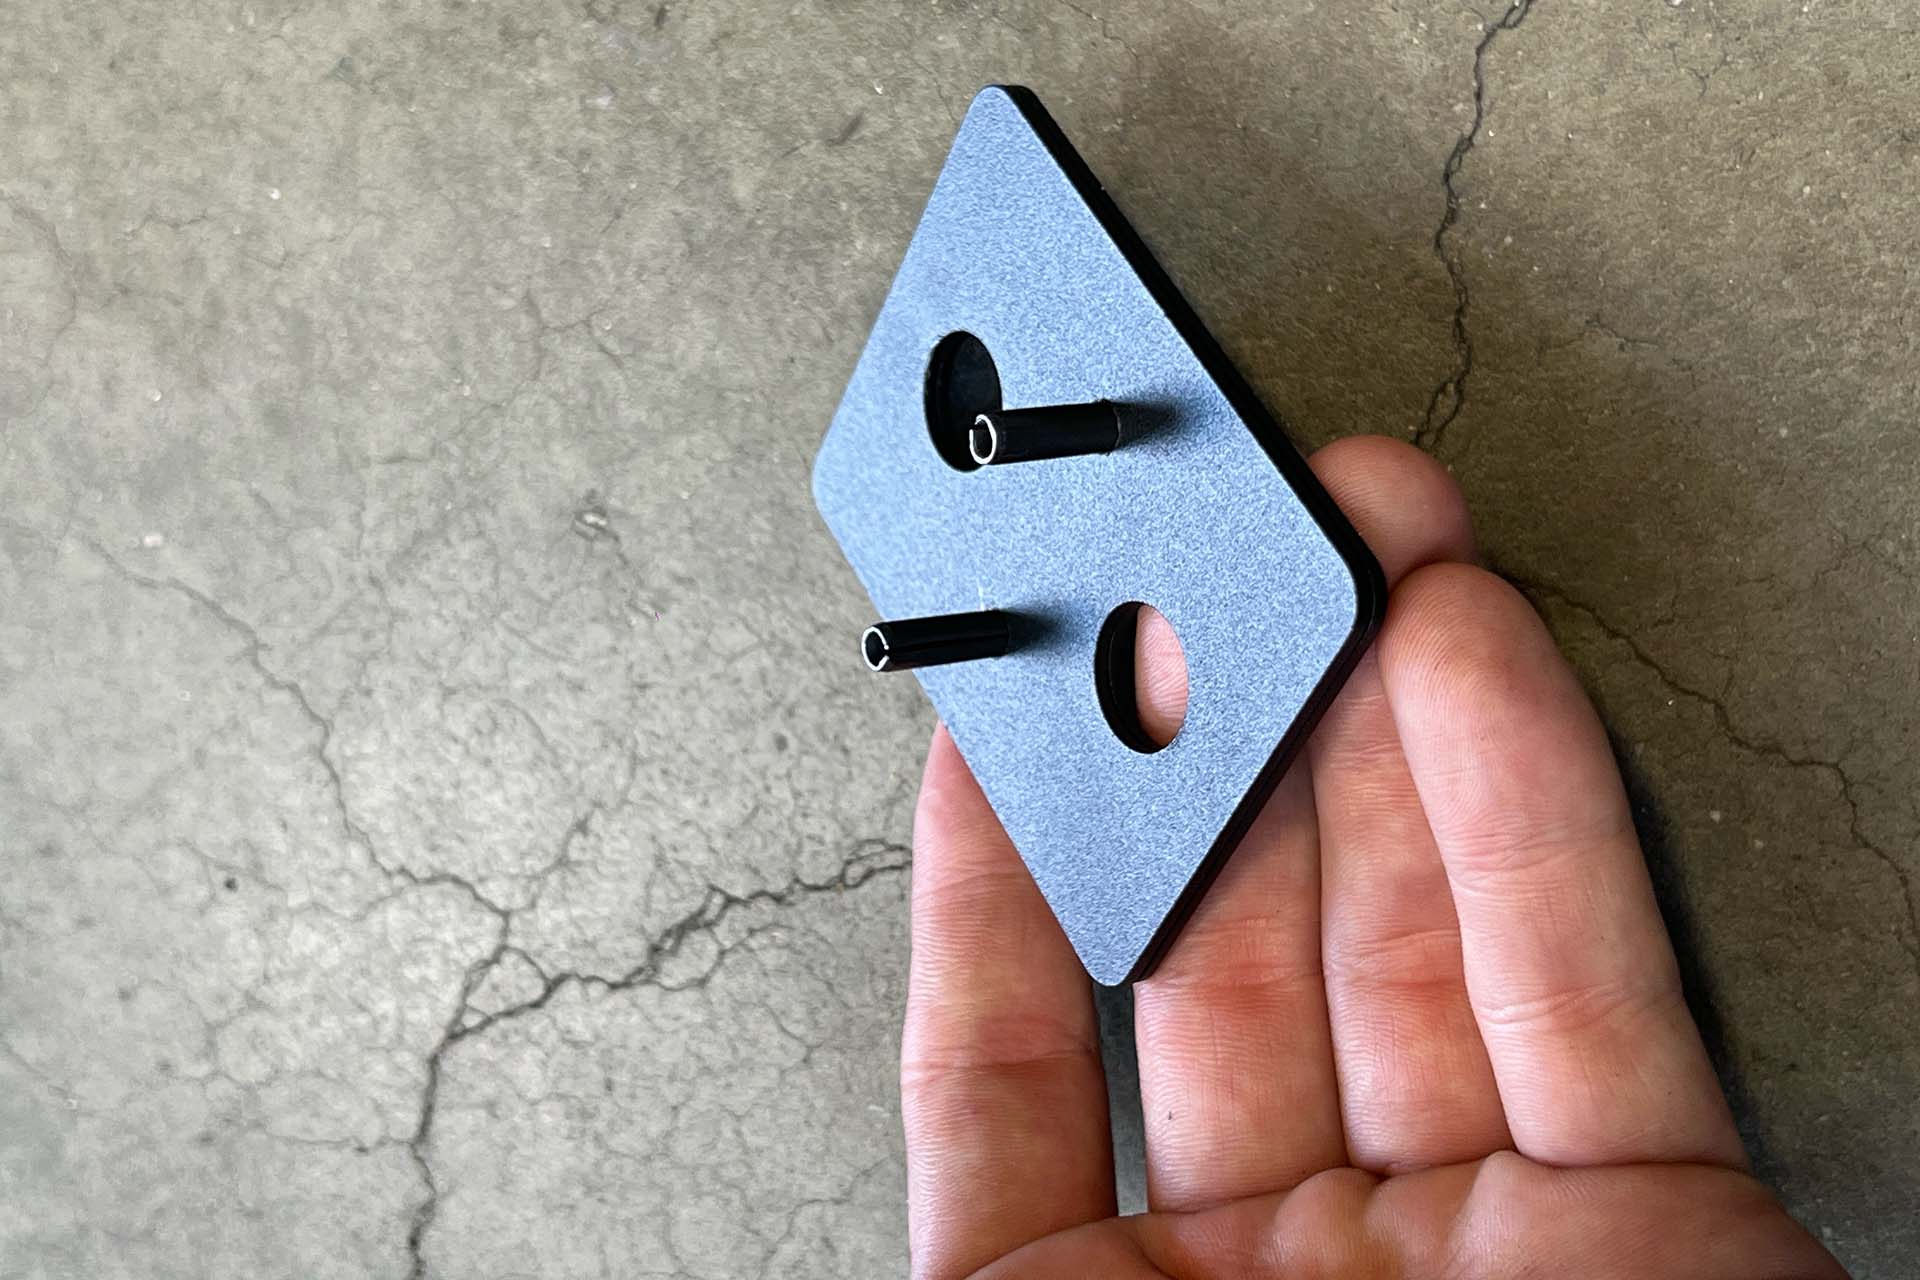
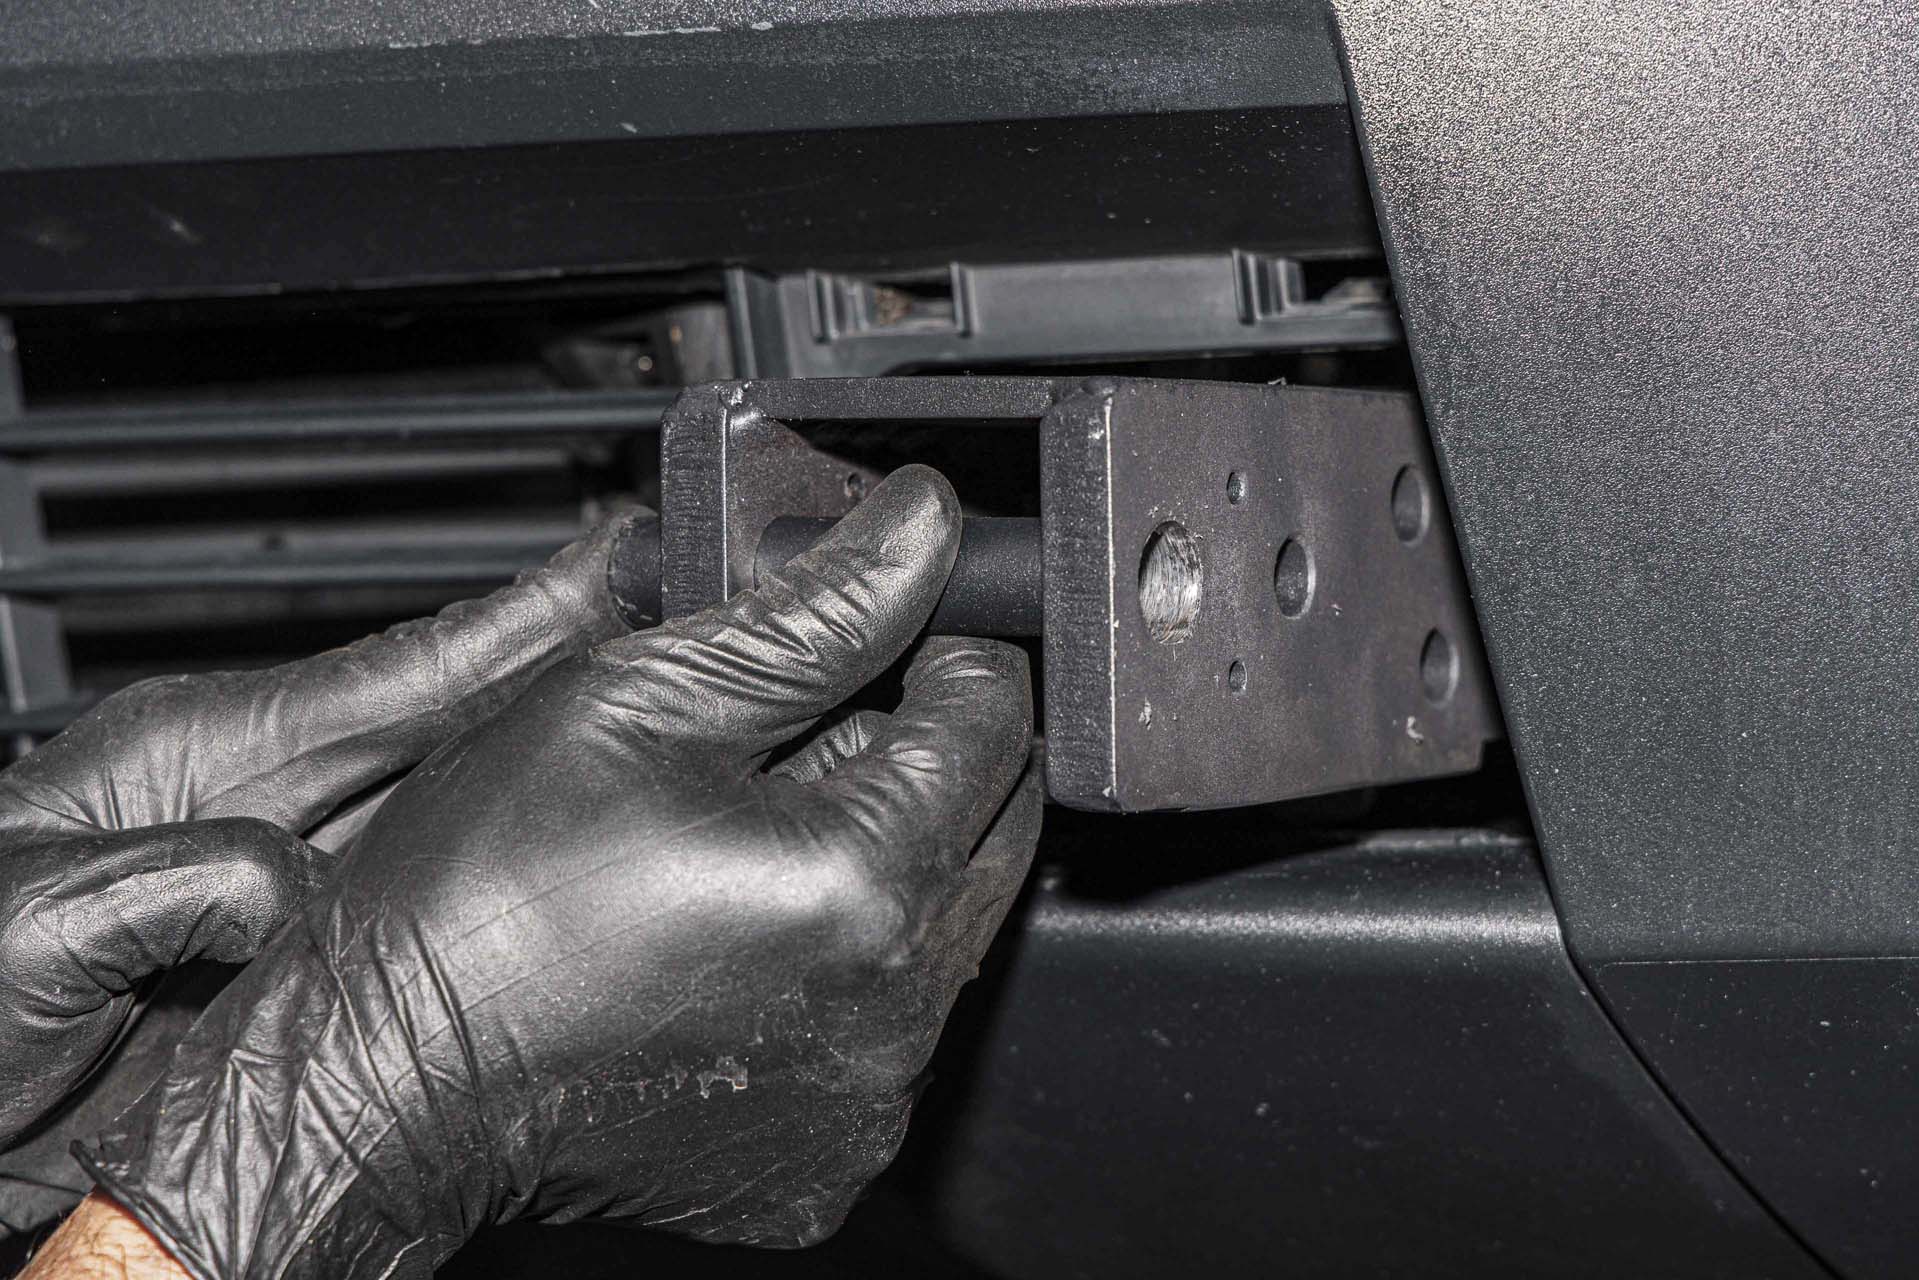
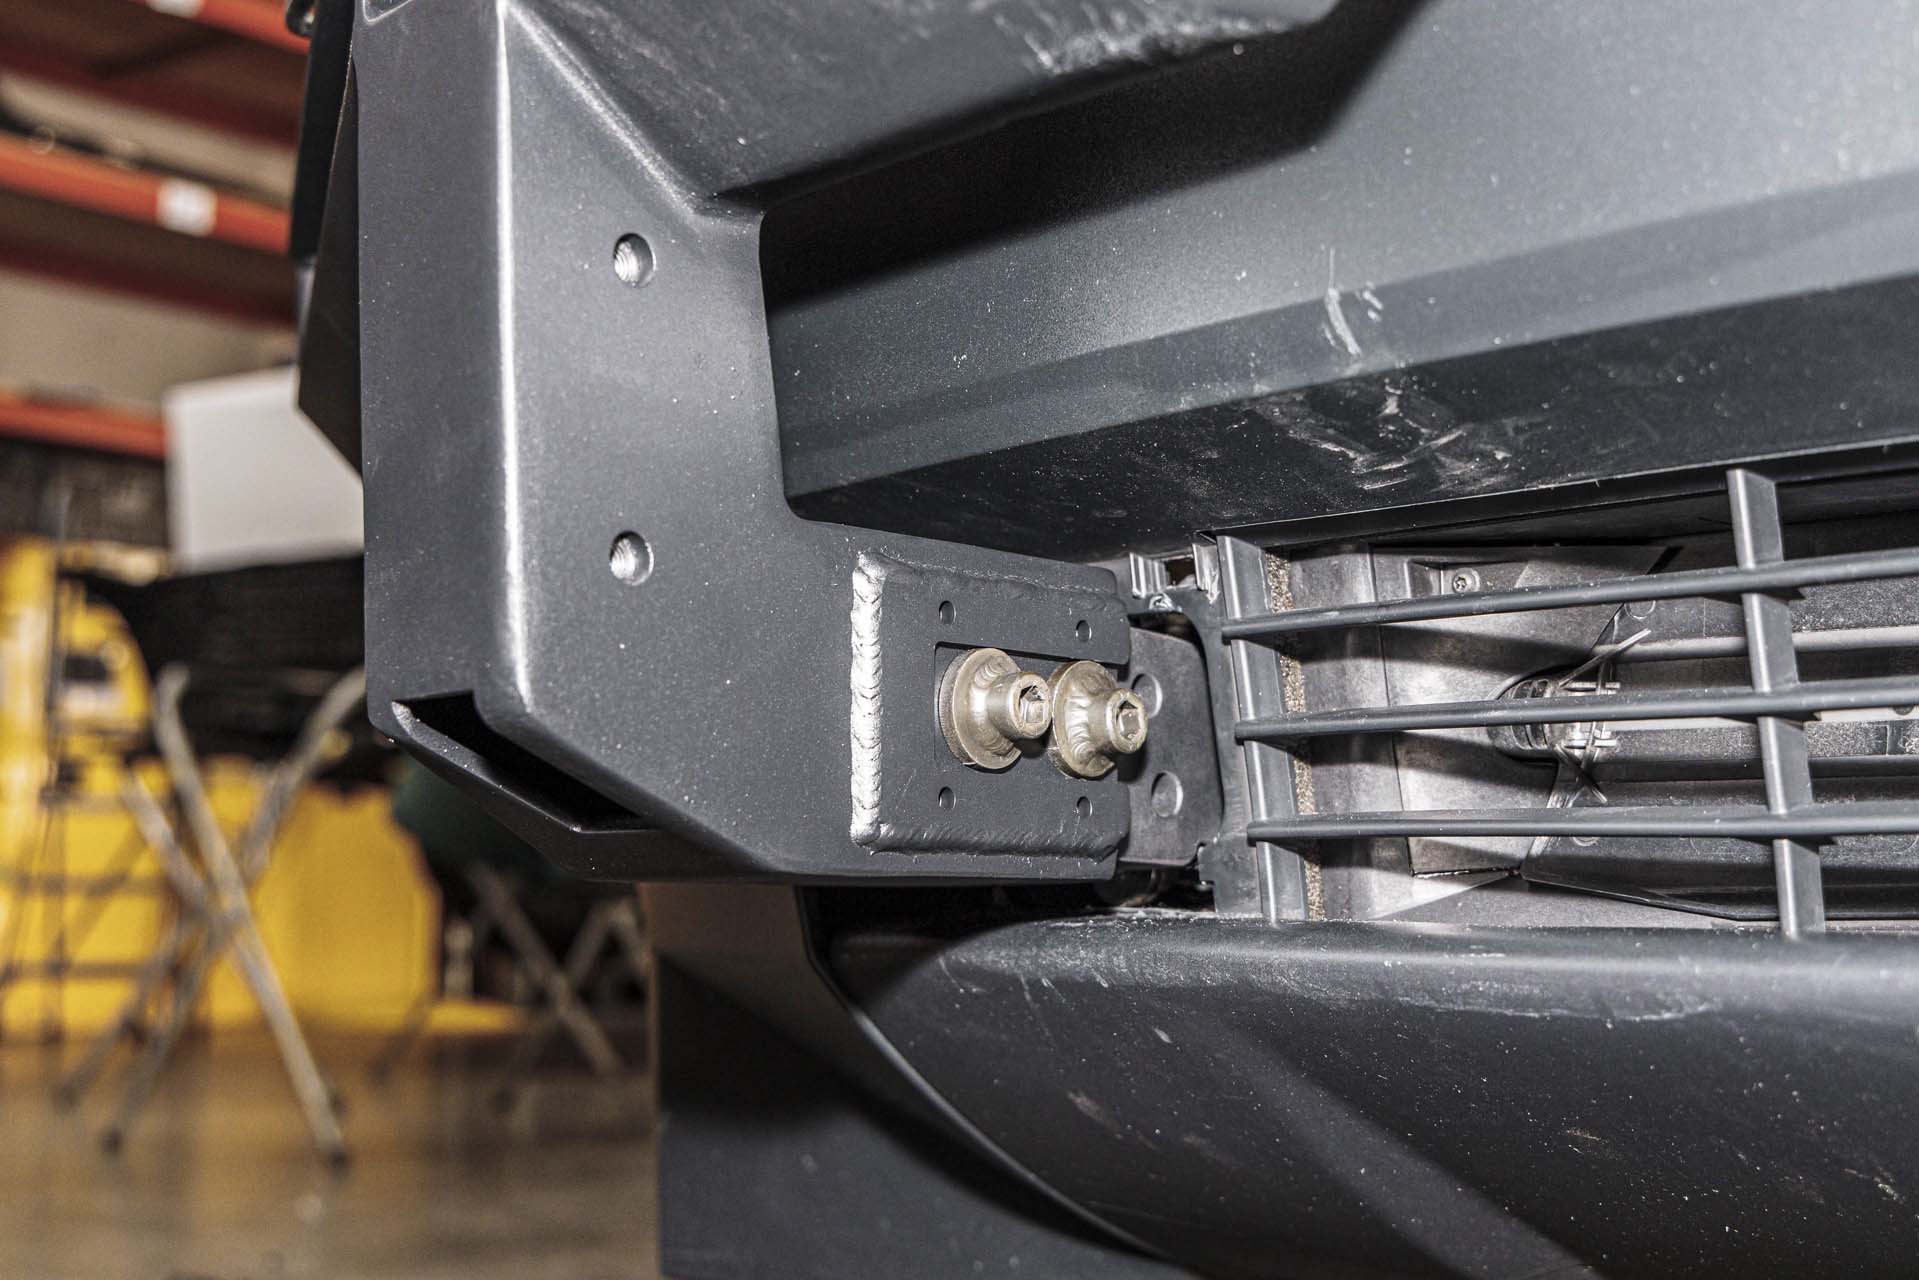
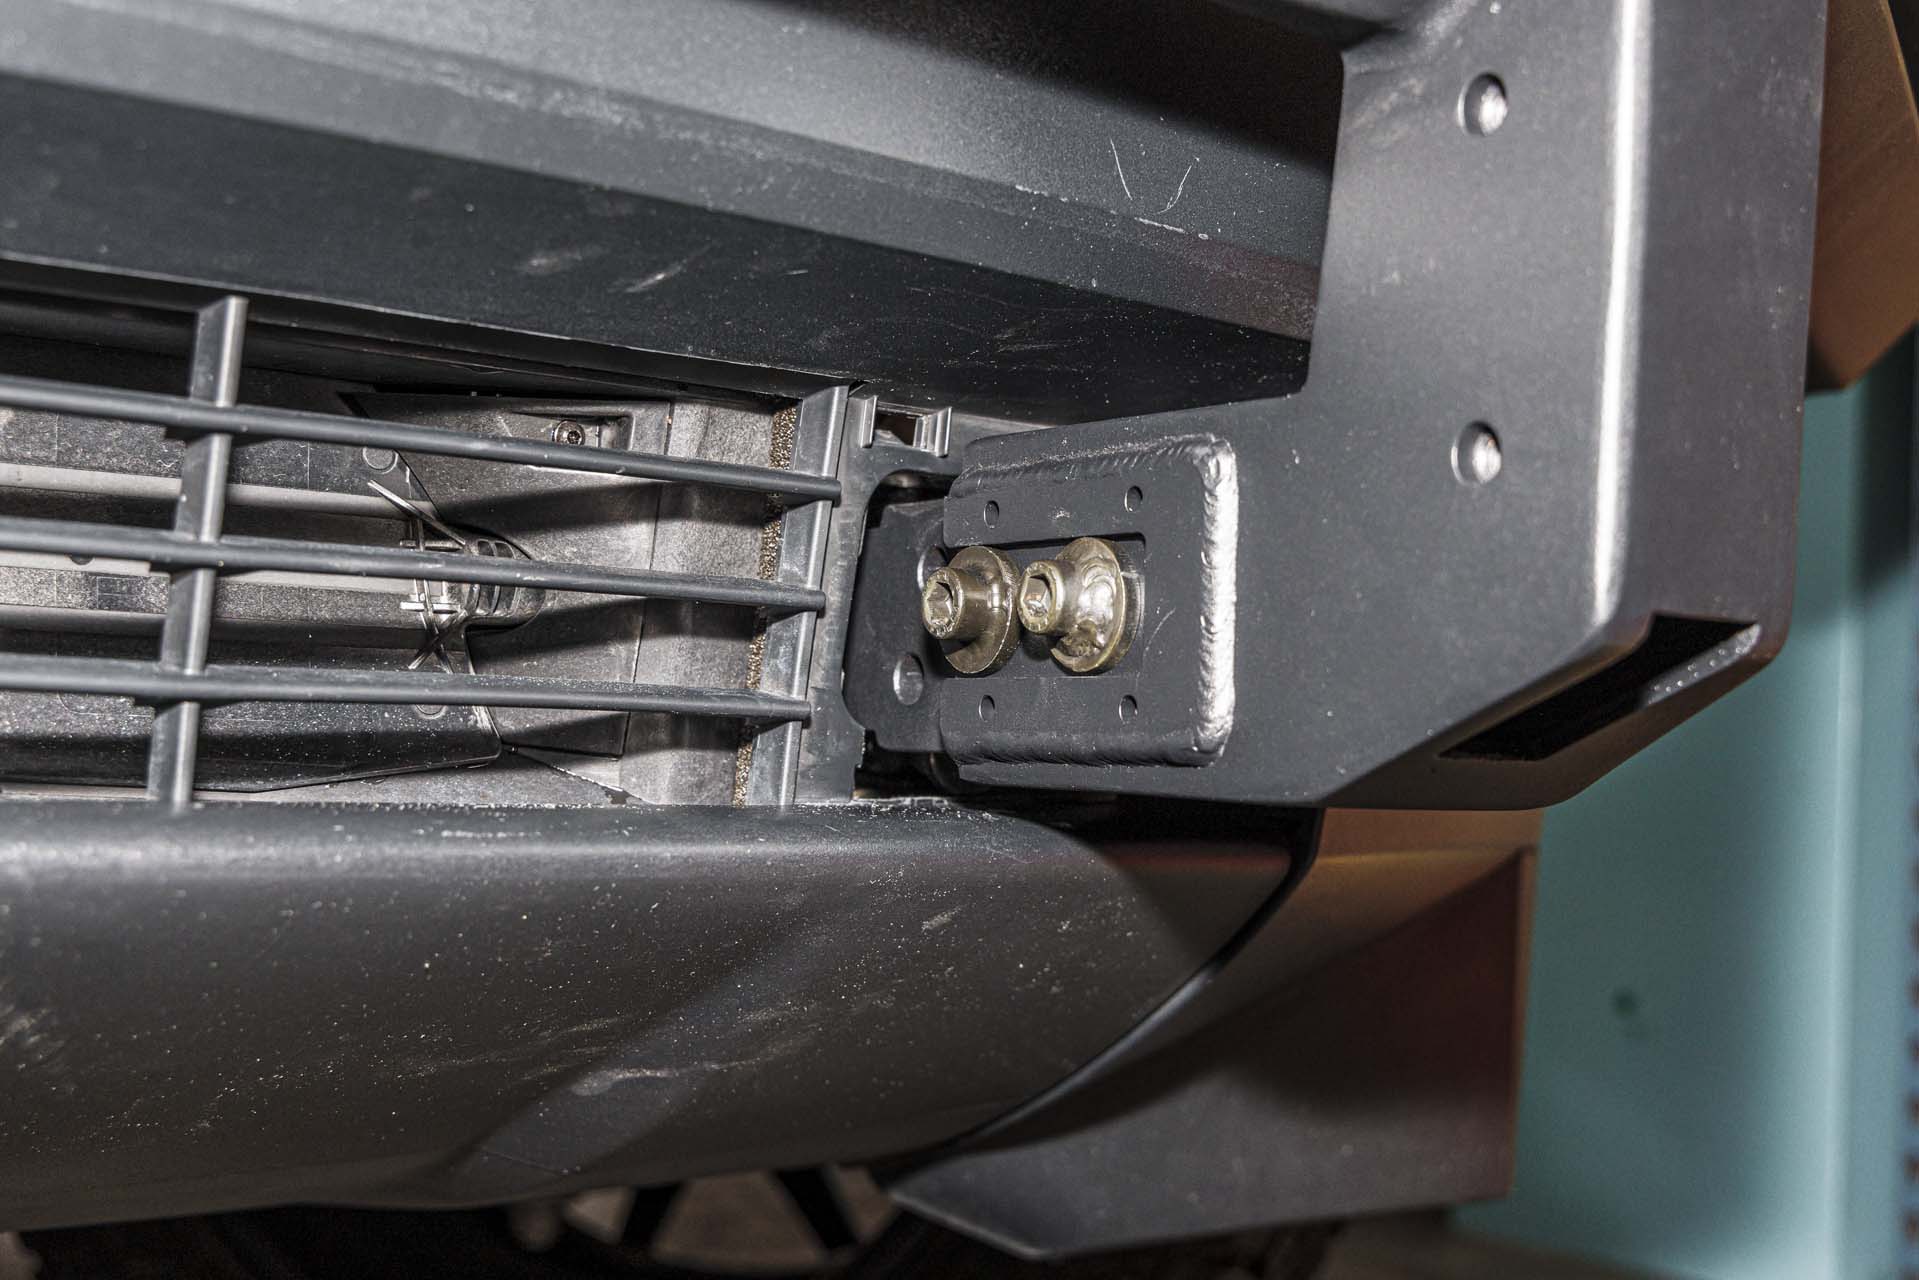
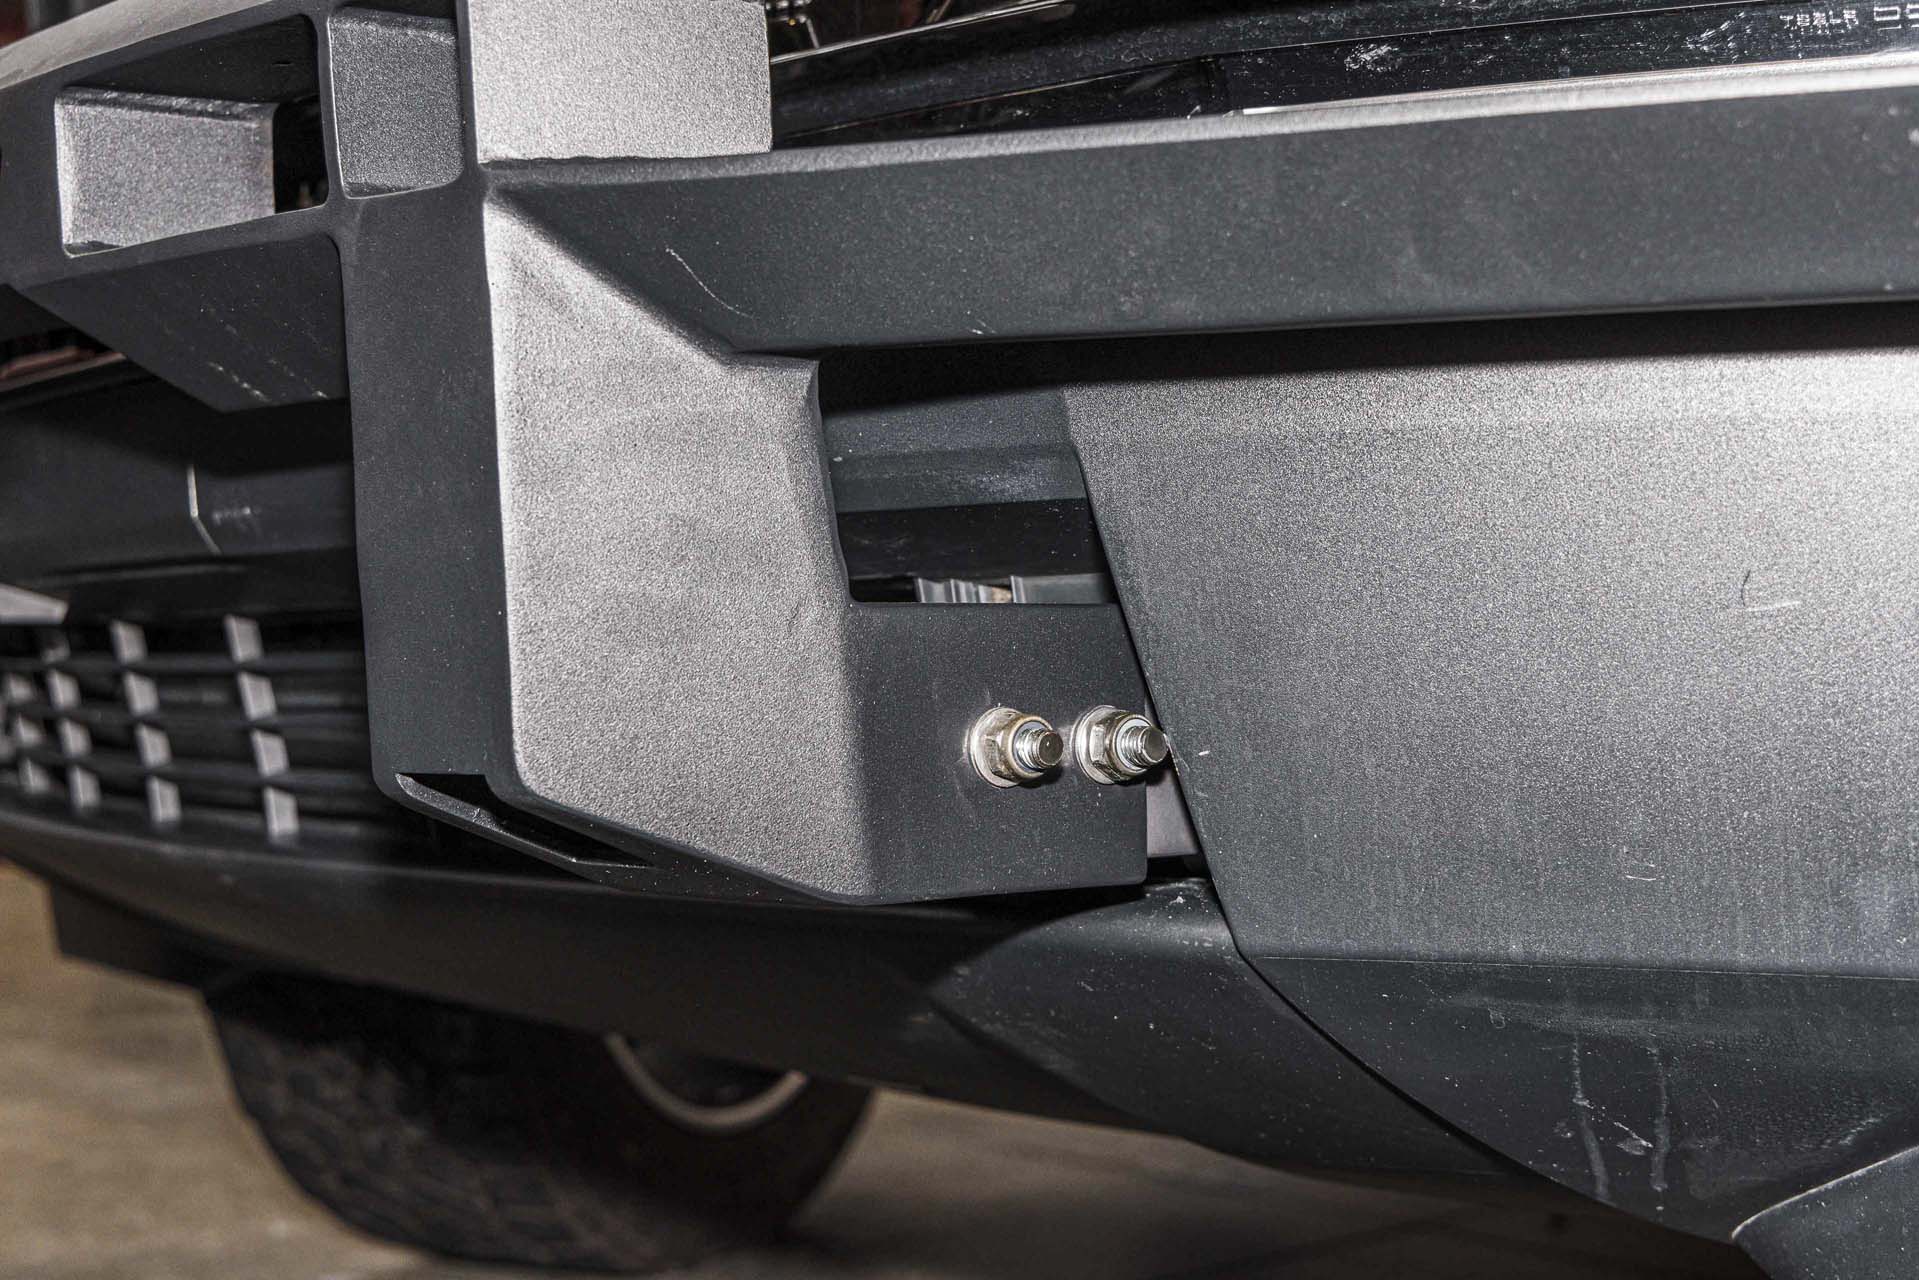
Next, test fit the bull bar onto the vehicle to check for tolerances. From the factory, there are slight tolerances in the spacing of the factory recovery points in which the UP bull bar mounts are secured to the vehicle. Slide the bull bar over the mounts to check for space between the bull bar and the bull bar mount. To do this, you’ll look through the lower peep hole of the bull bar to determine how many shims need to be used as shown below. Note that improper use of shims can cause the bull bar to rock or tilt.
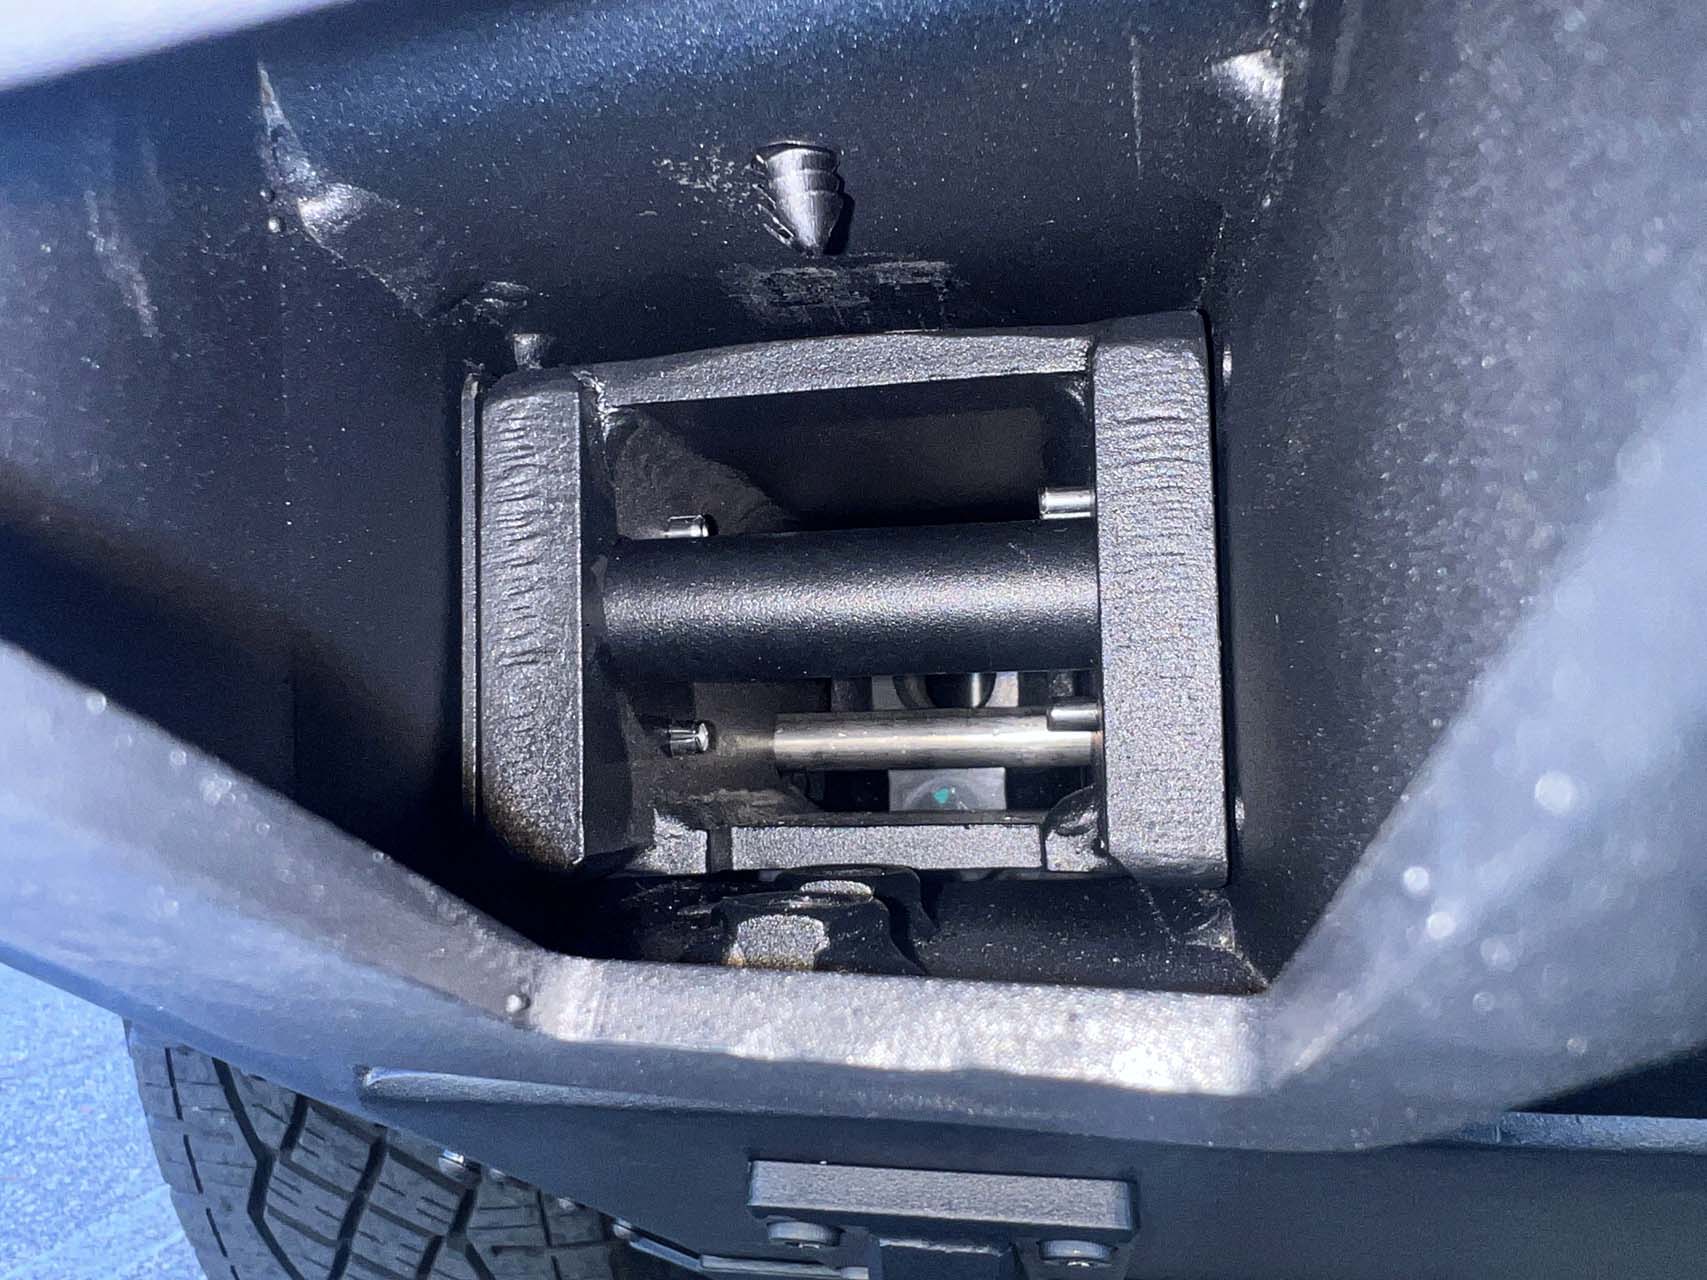
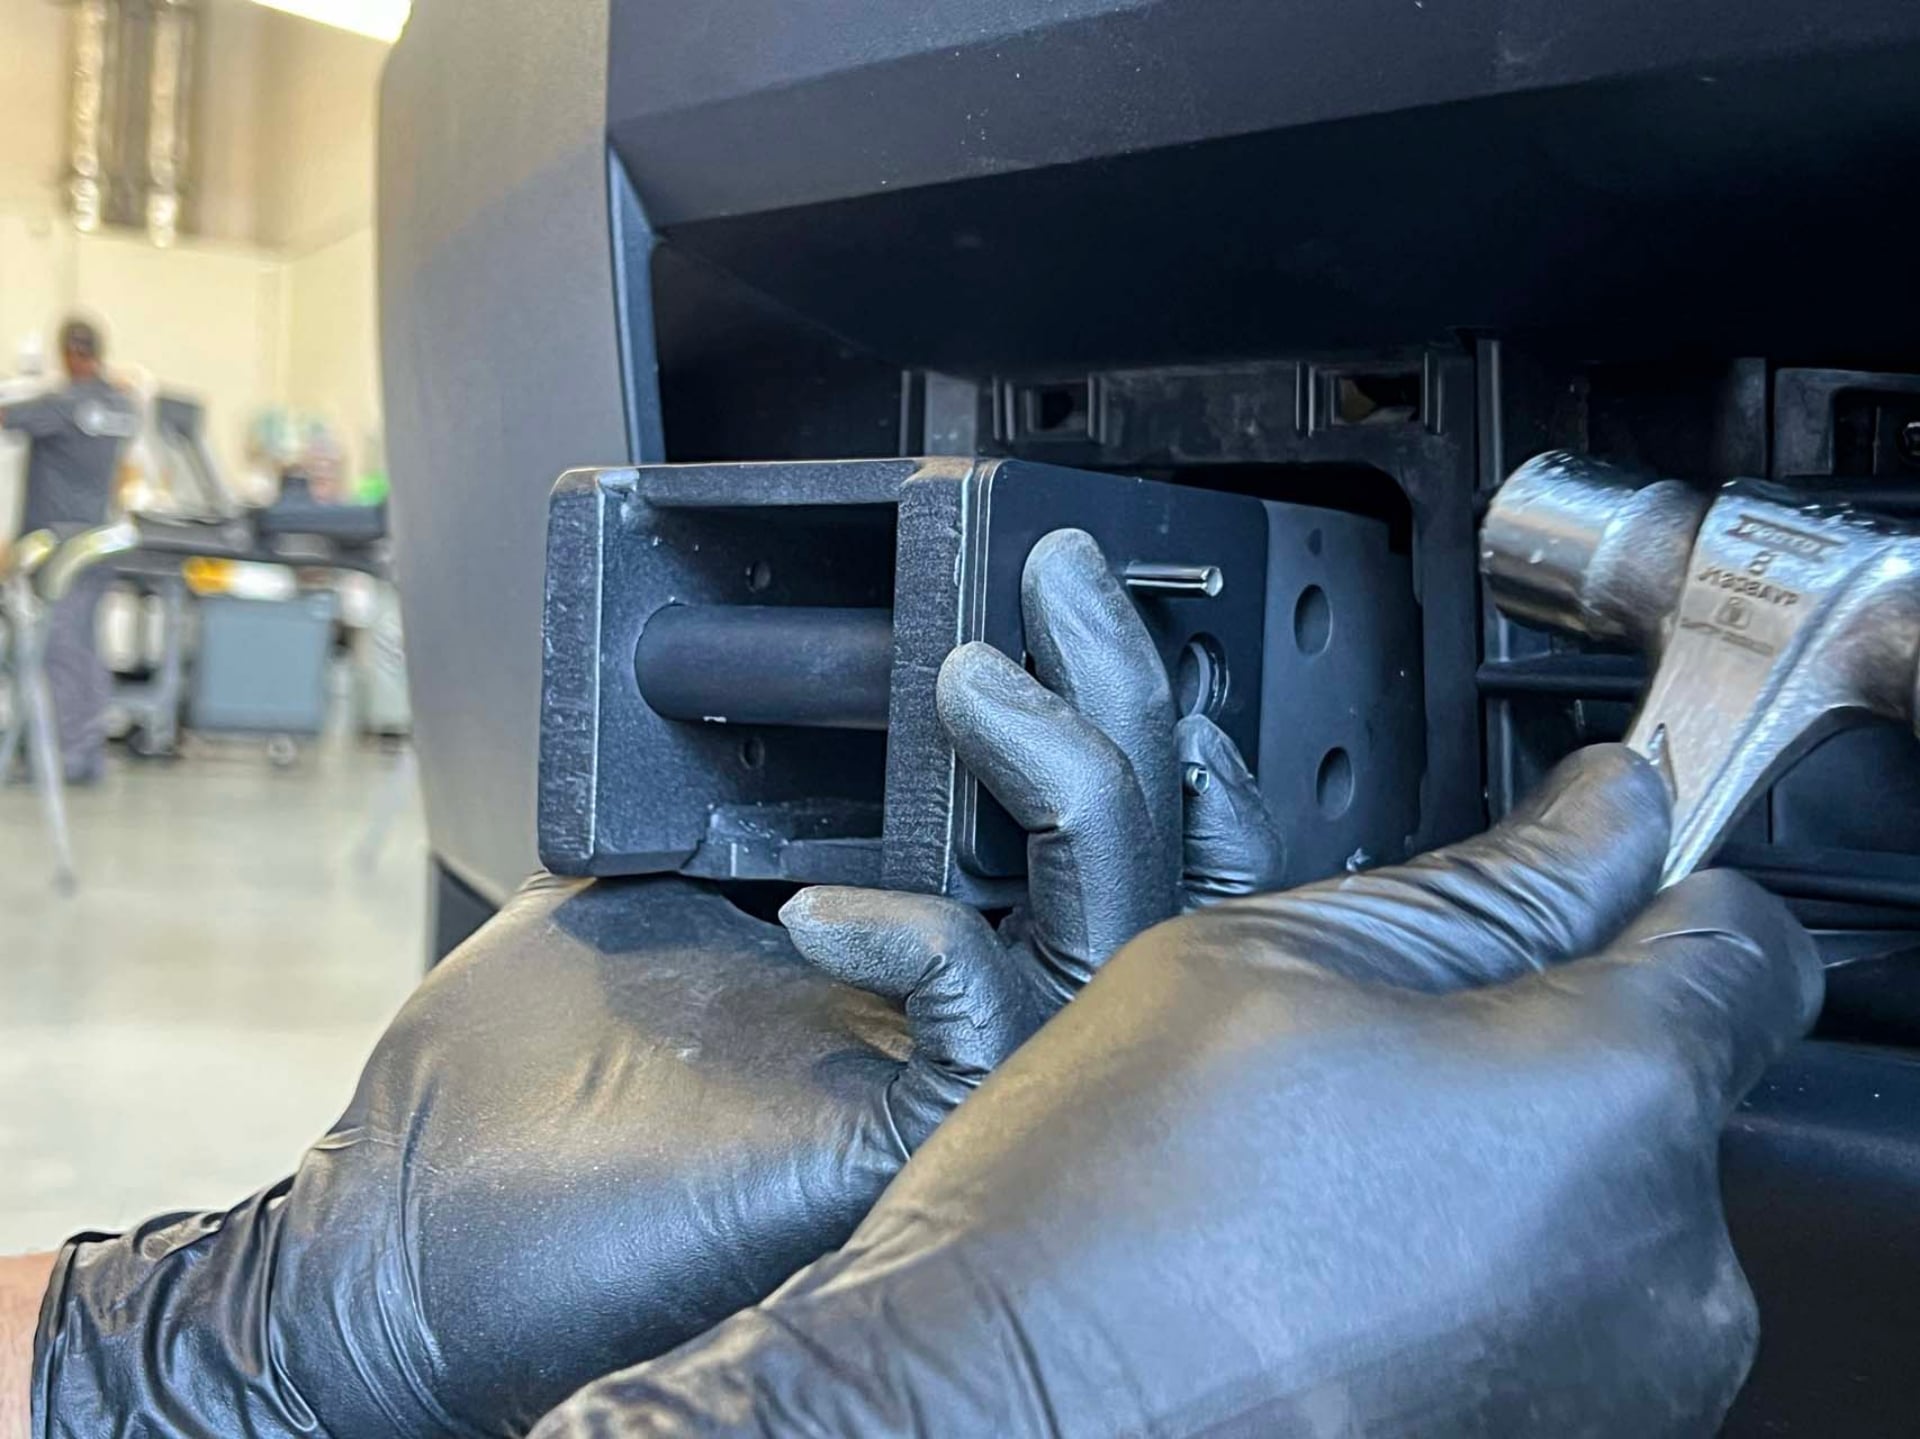
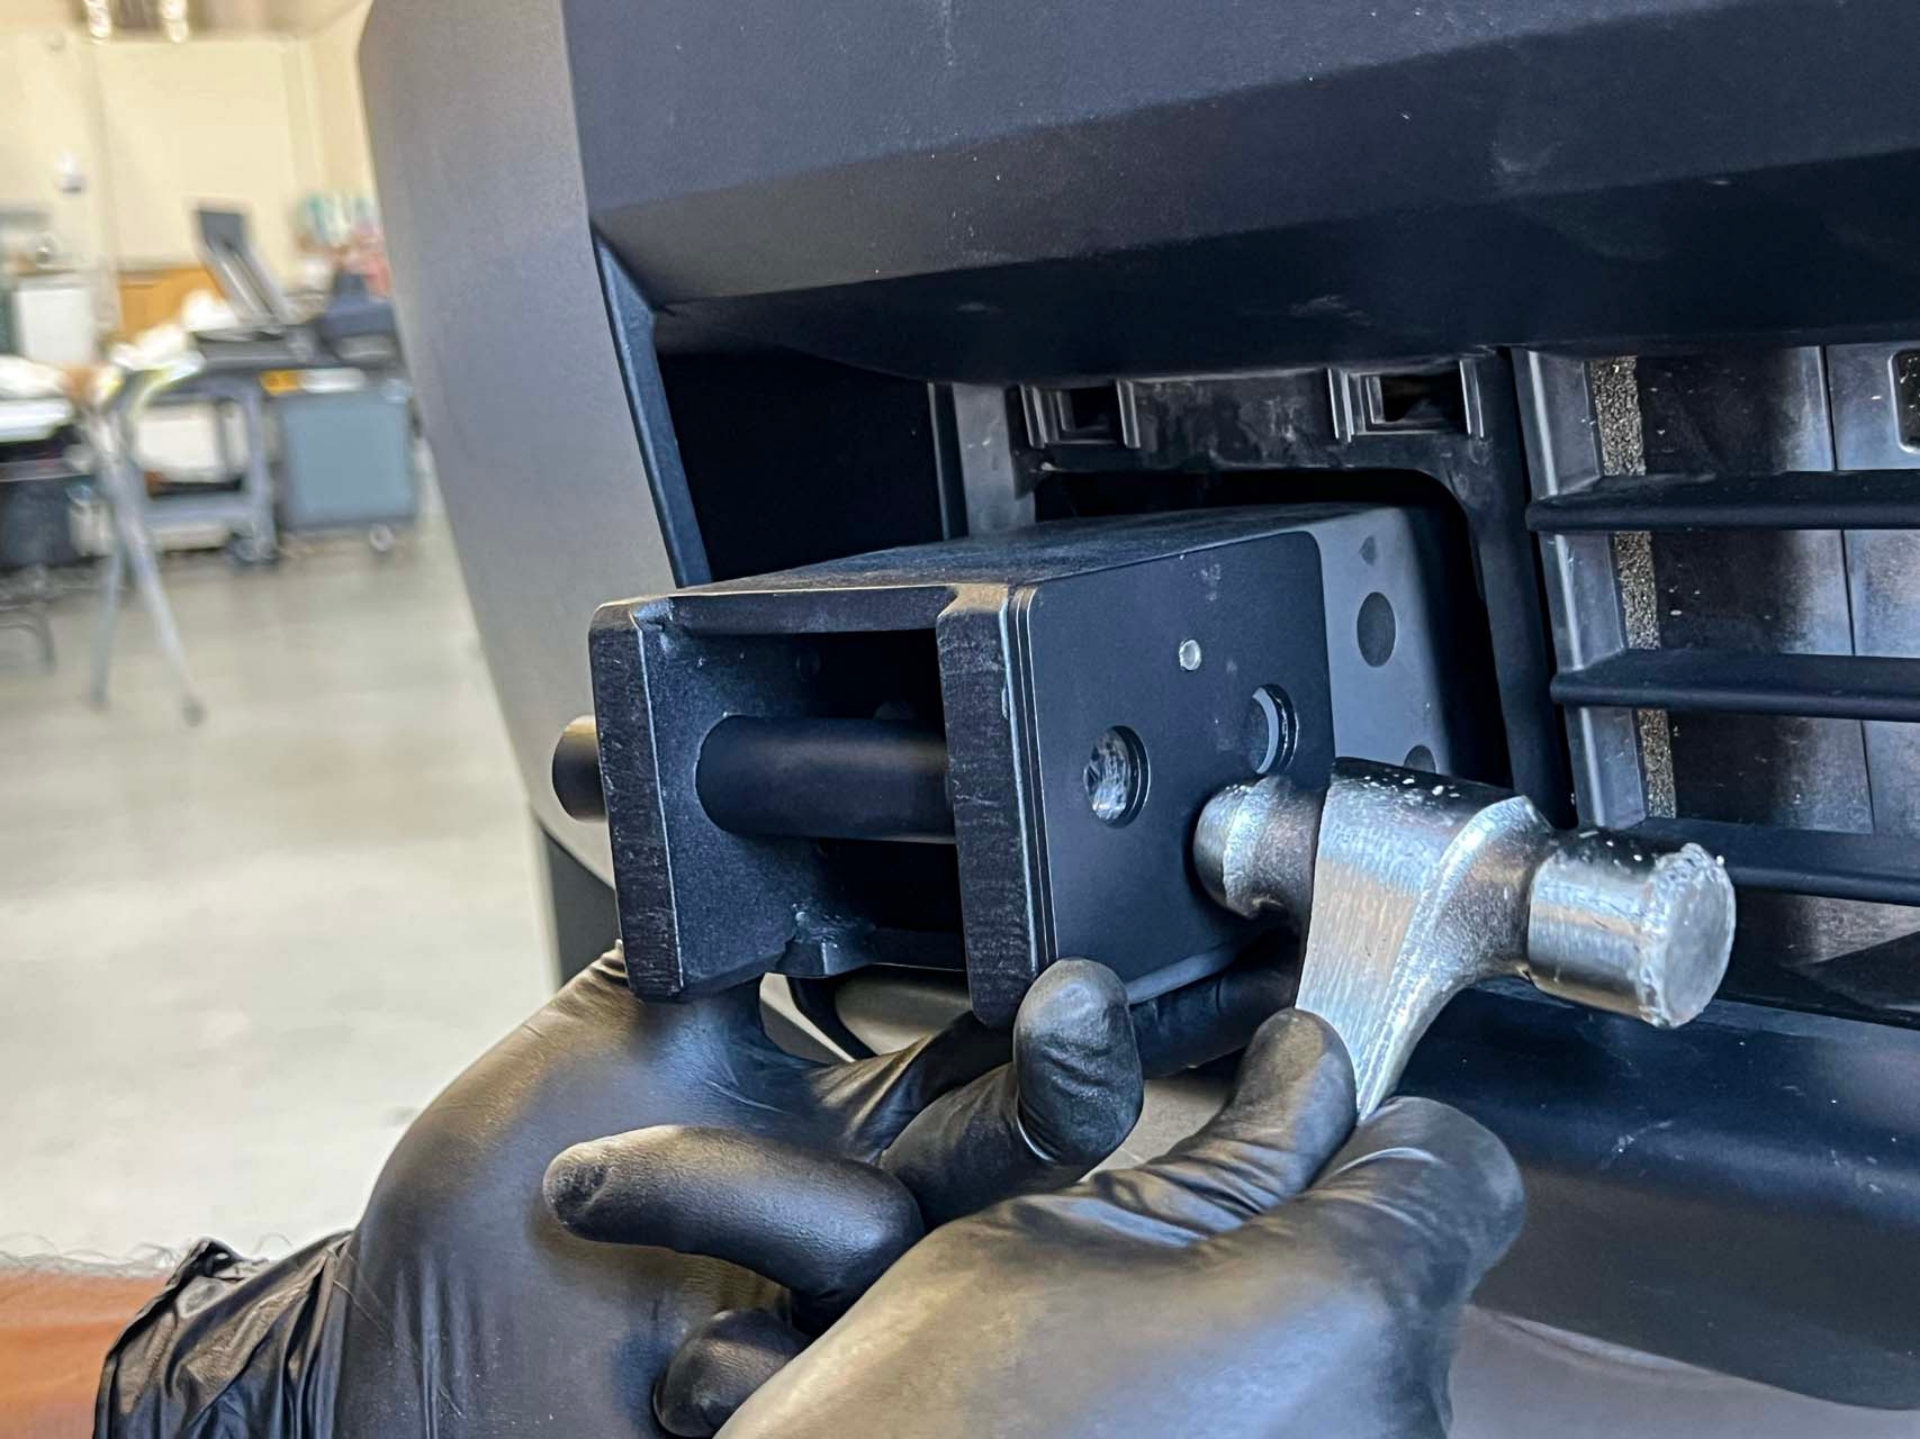
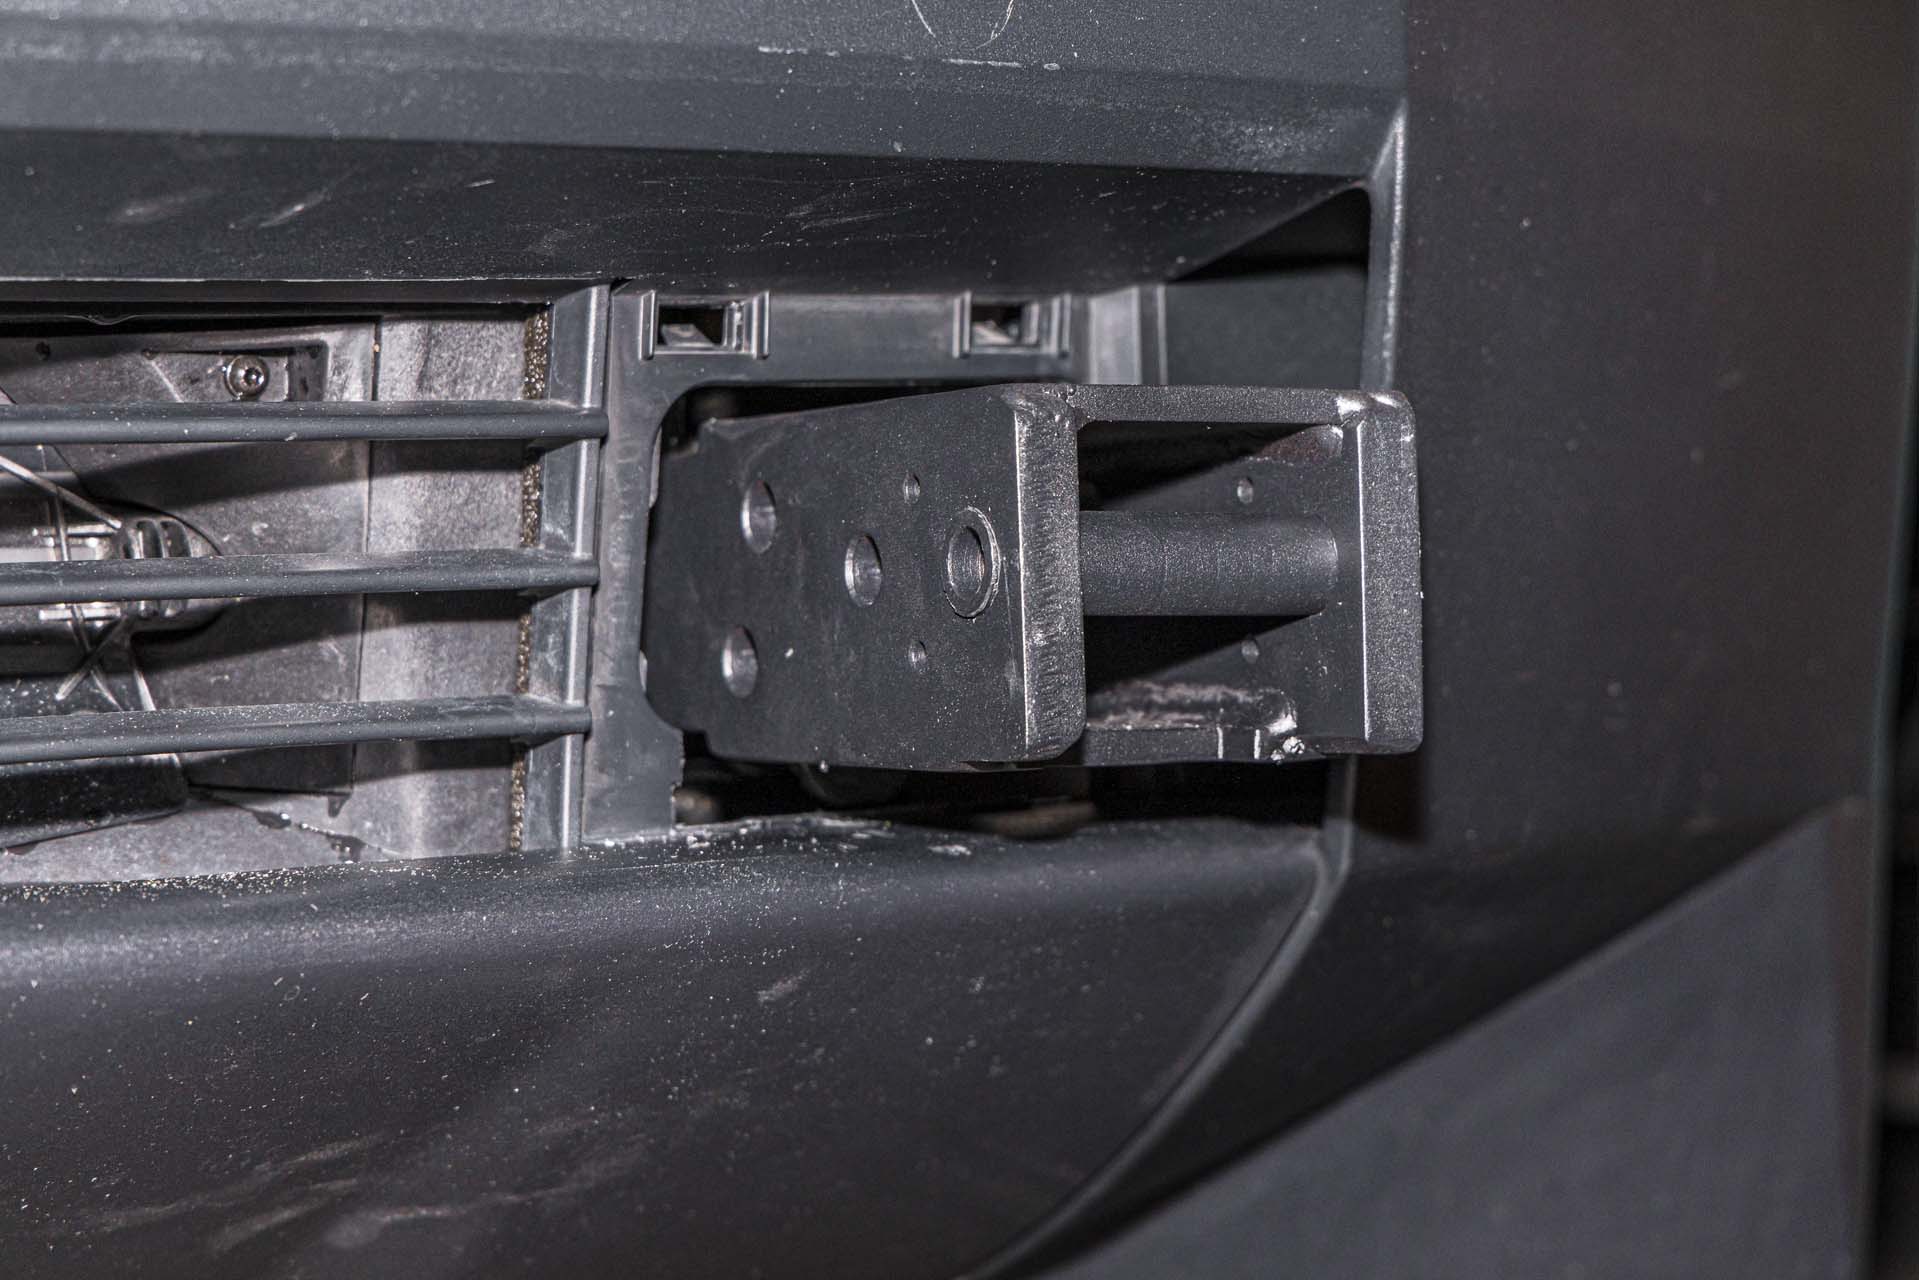
Once the quantity of shims are determined, remove the bull bar to install the shims onto the bull bar mounts accordingly. Using a small hammer and the provided pins, tap the shims and pins into the bull bar mounts until the pins are flush with the shims. Note that the shims will slightly close when pressed into the shim plate. If you need to pull the pins to reseat them in a different position, you can open them back up using a flathead to ensure they pressfit during the second use.

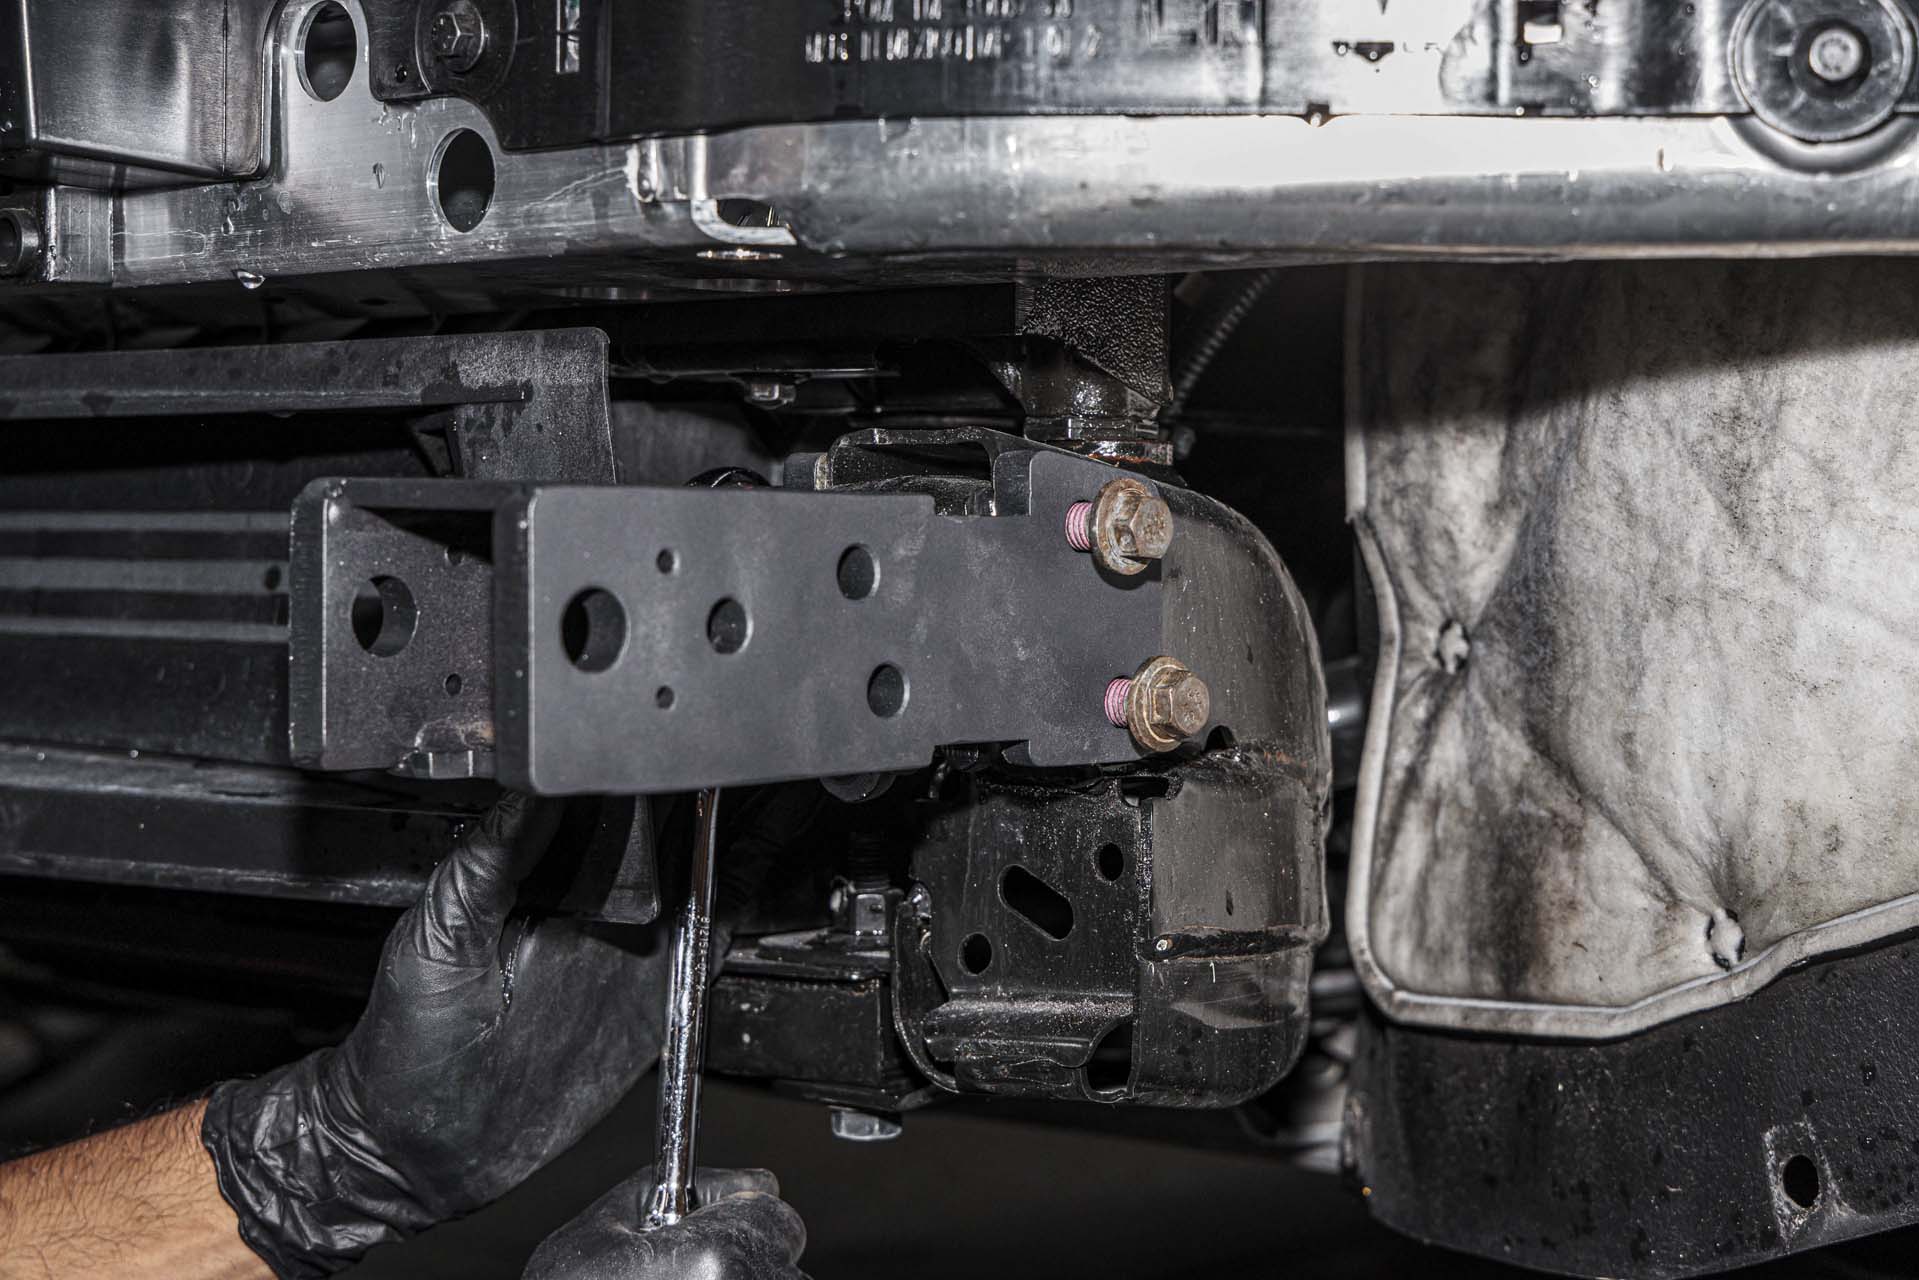
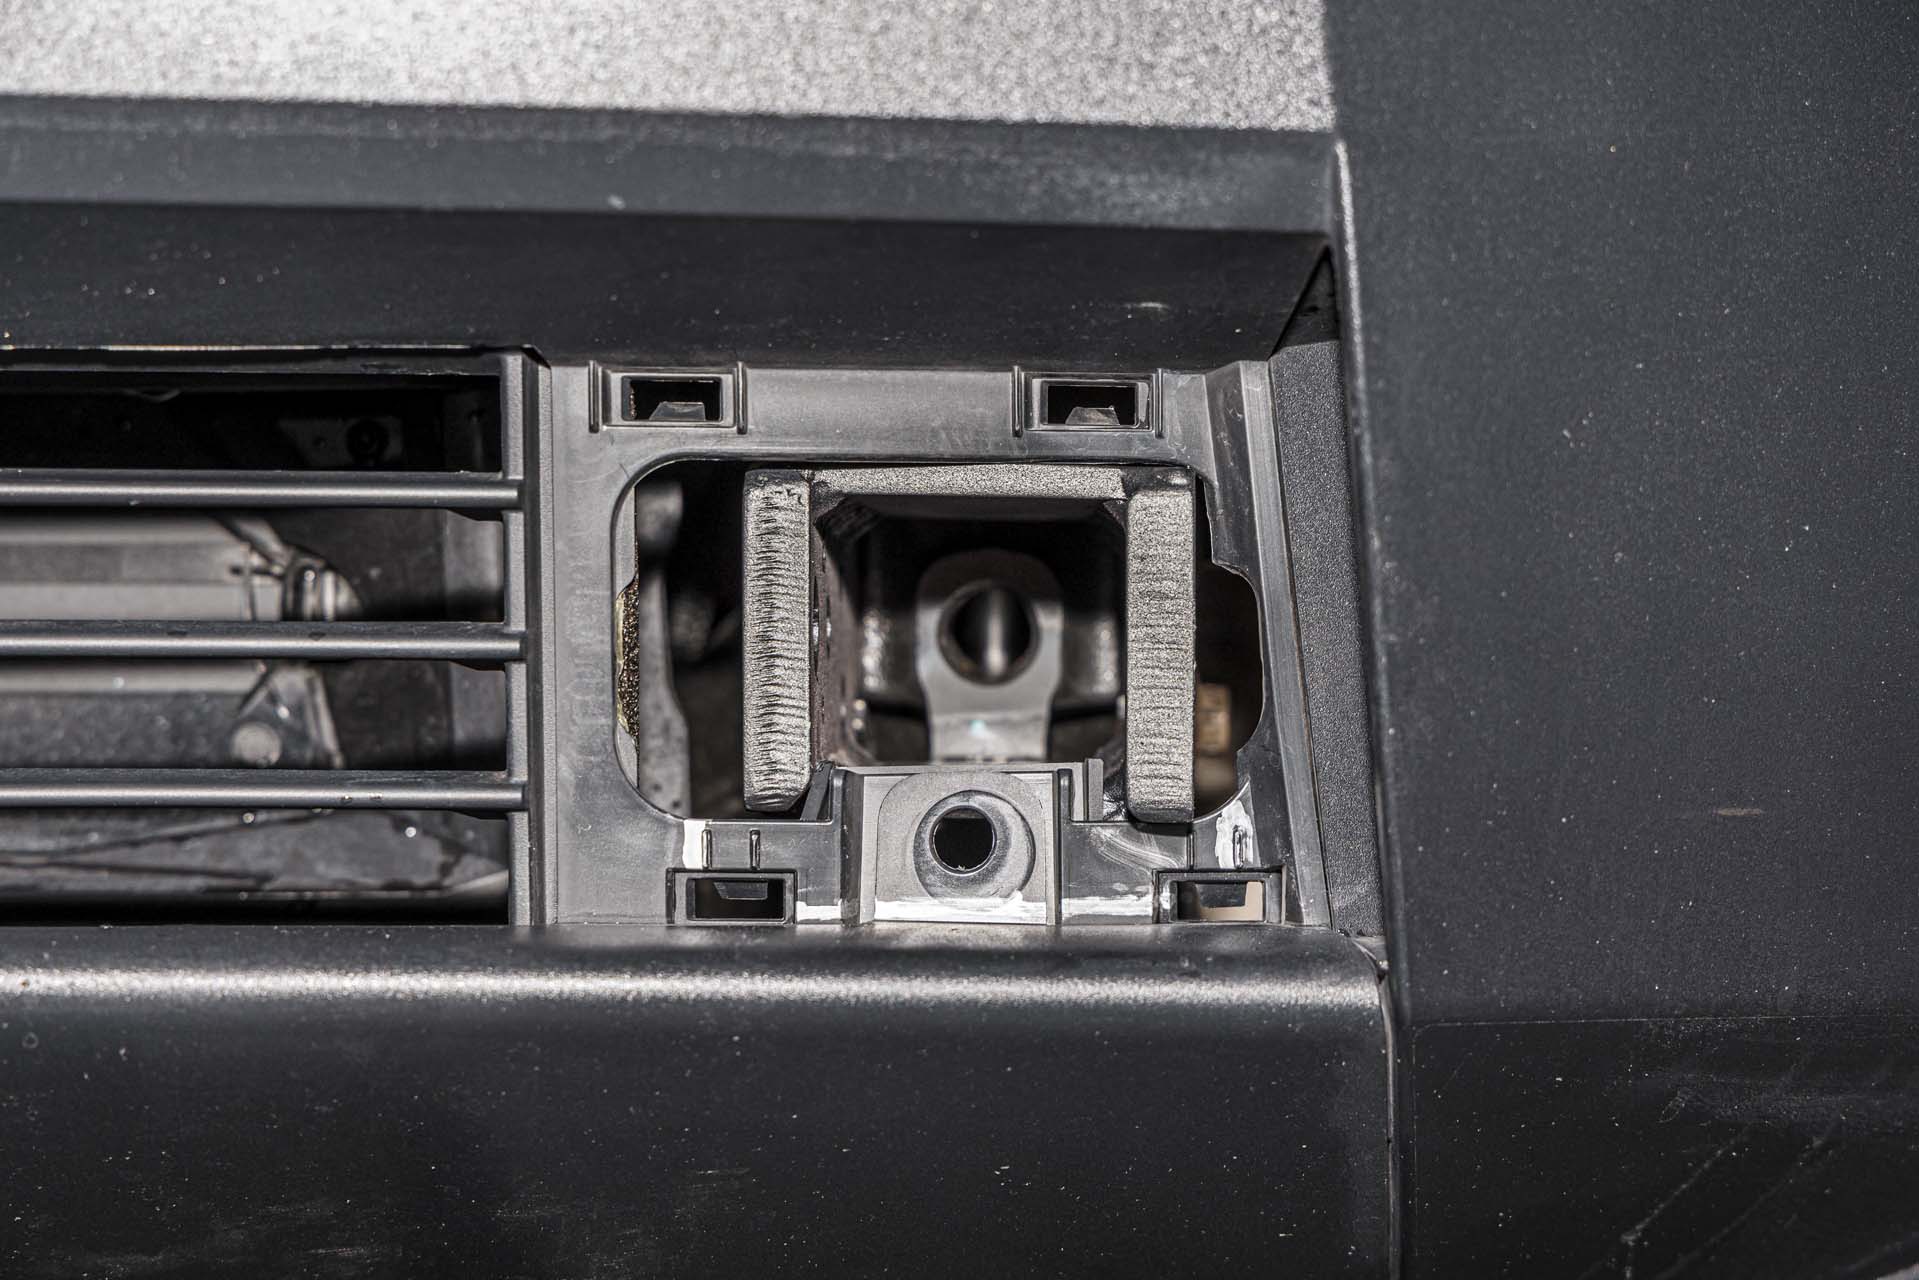
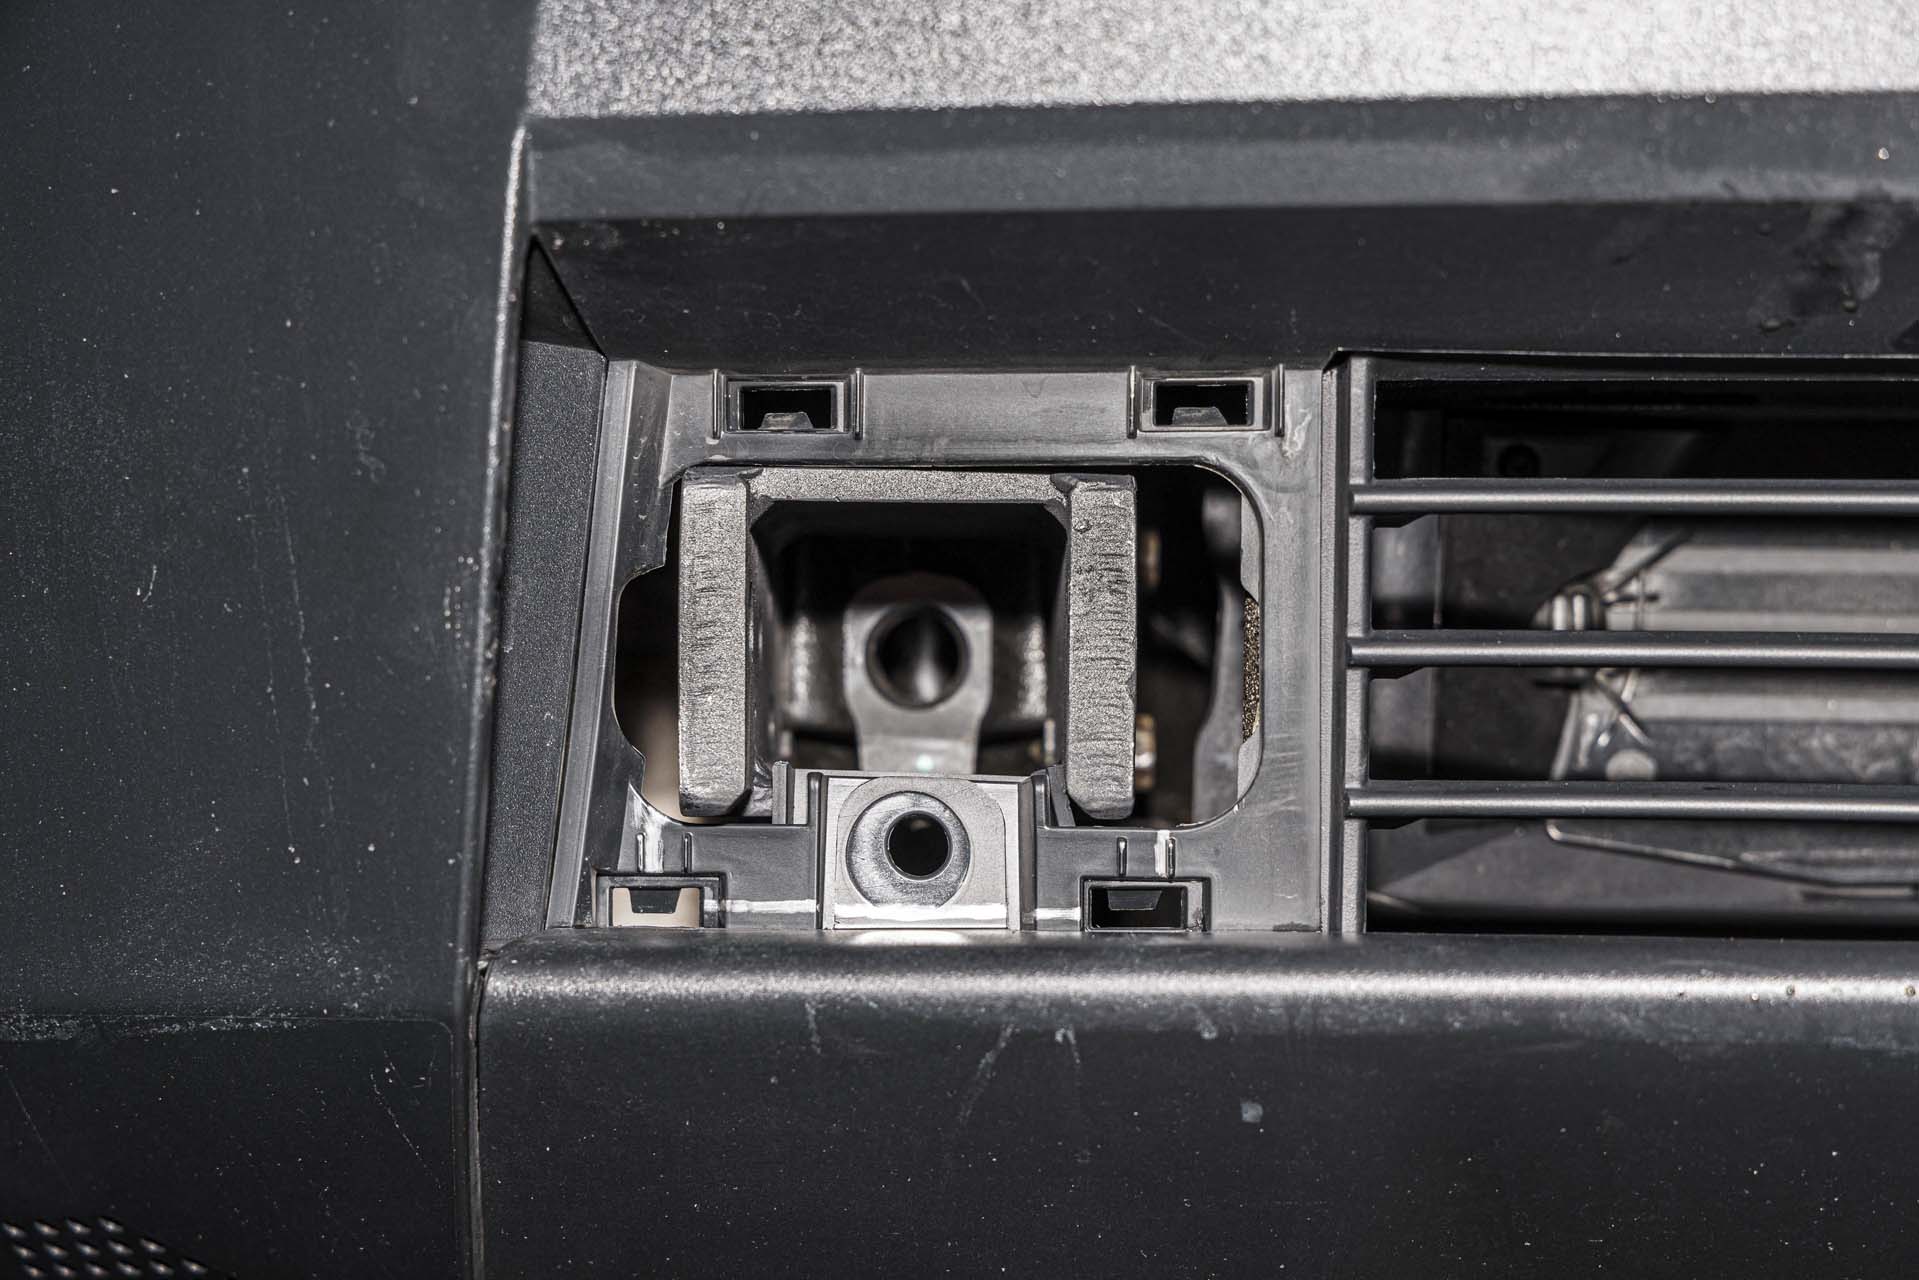
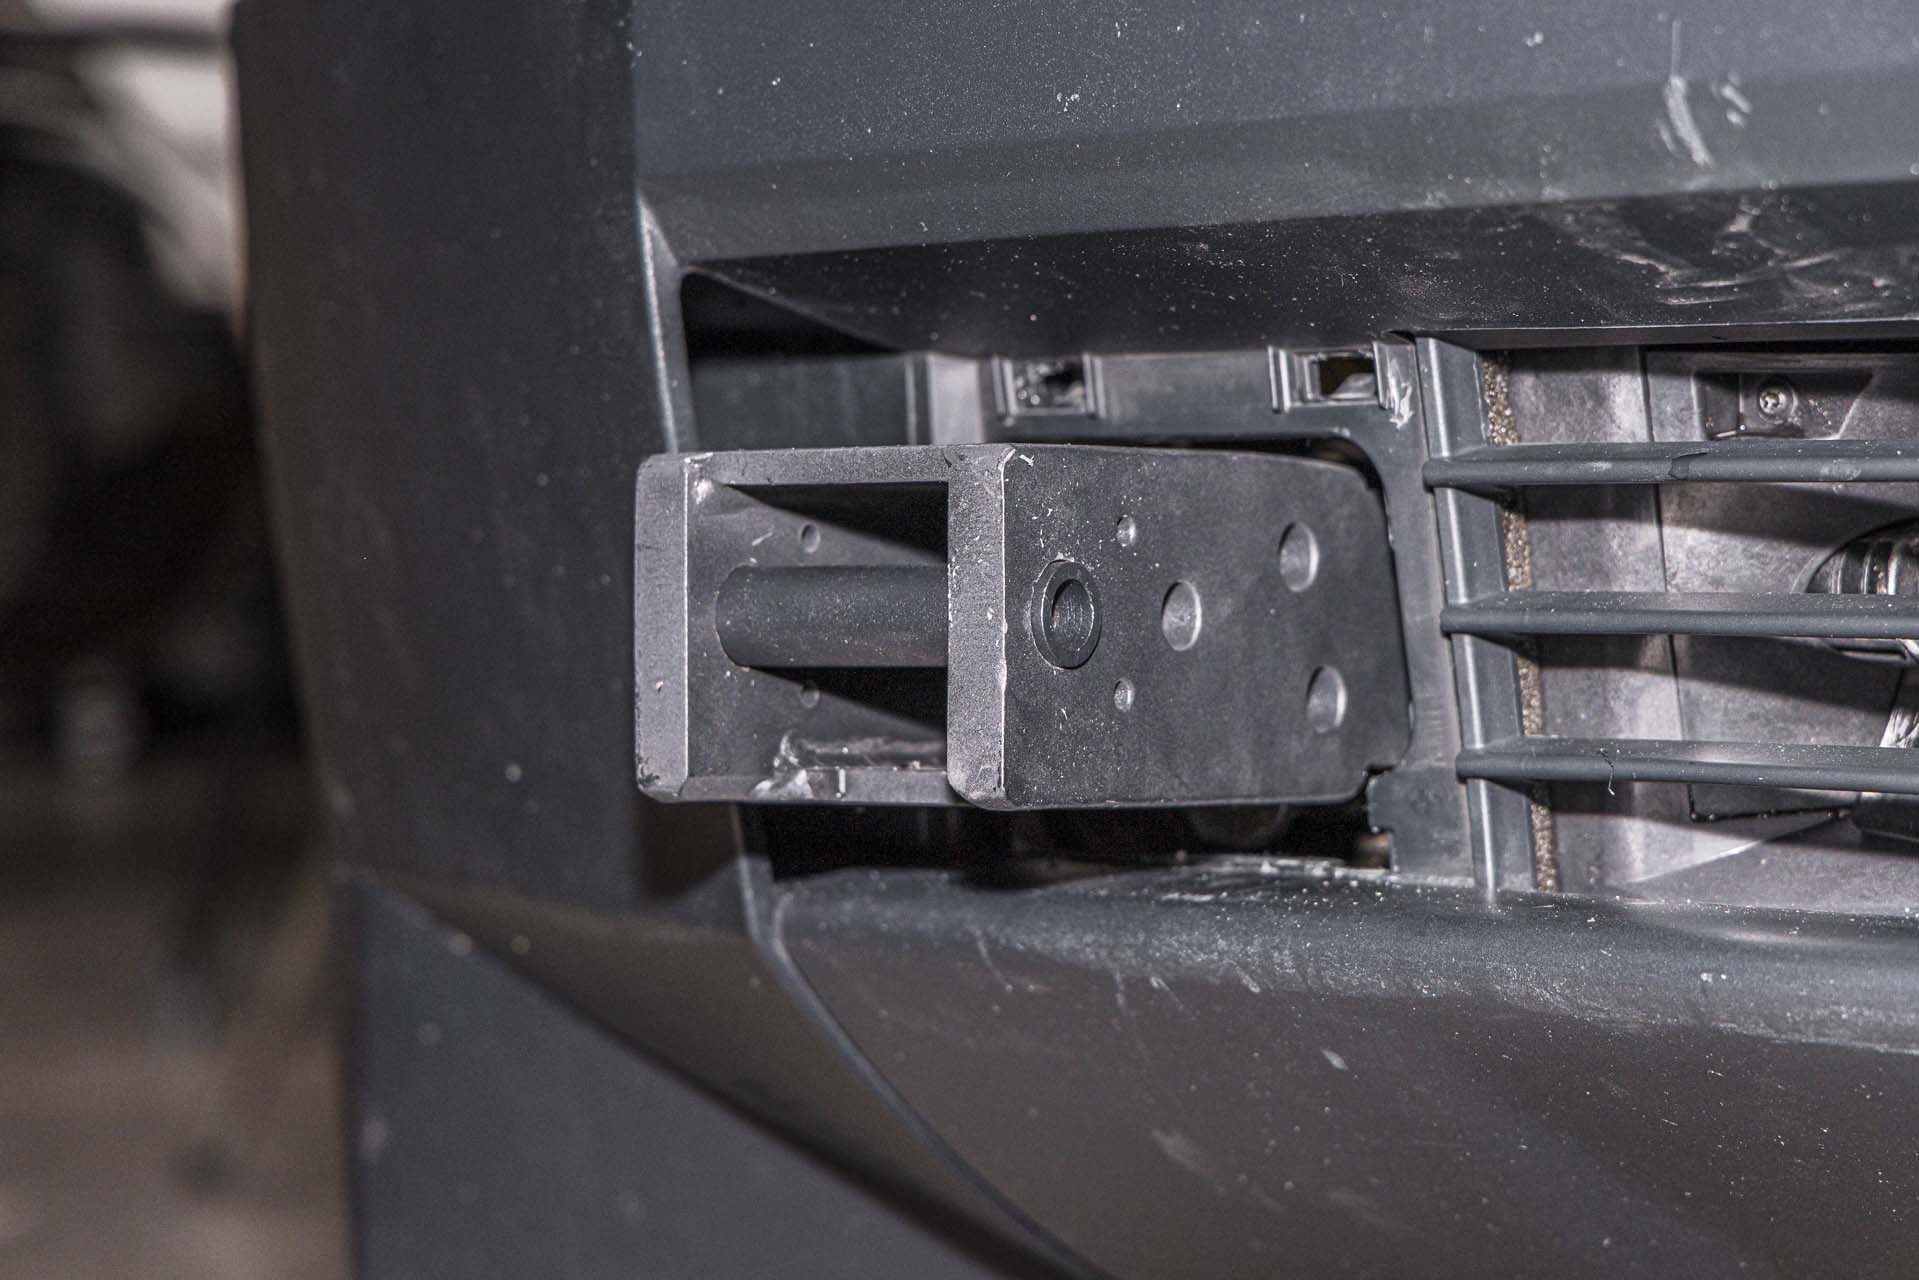
Next, install the provided bolt sleeve into the front bull bar mount slots.

With the shims installed on the bull bar mounts, you are ready to complete the final installation steps. Slide the bull bar over the bull bar mounts until both bolt holes line up. Insert the provided cam-bolts to each inner side of the bull bar to secure the bull bar to the bull bar mounts. Note: the lobe of the cam bolts should be facing away from each other to properly space the bull bar from the hood.
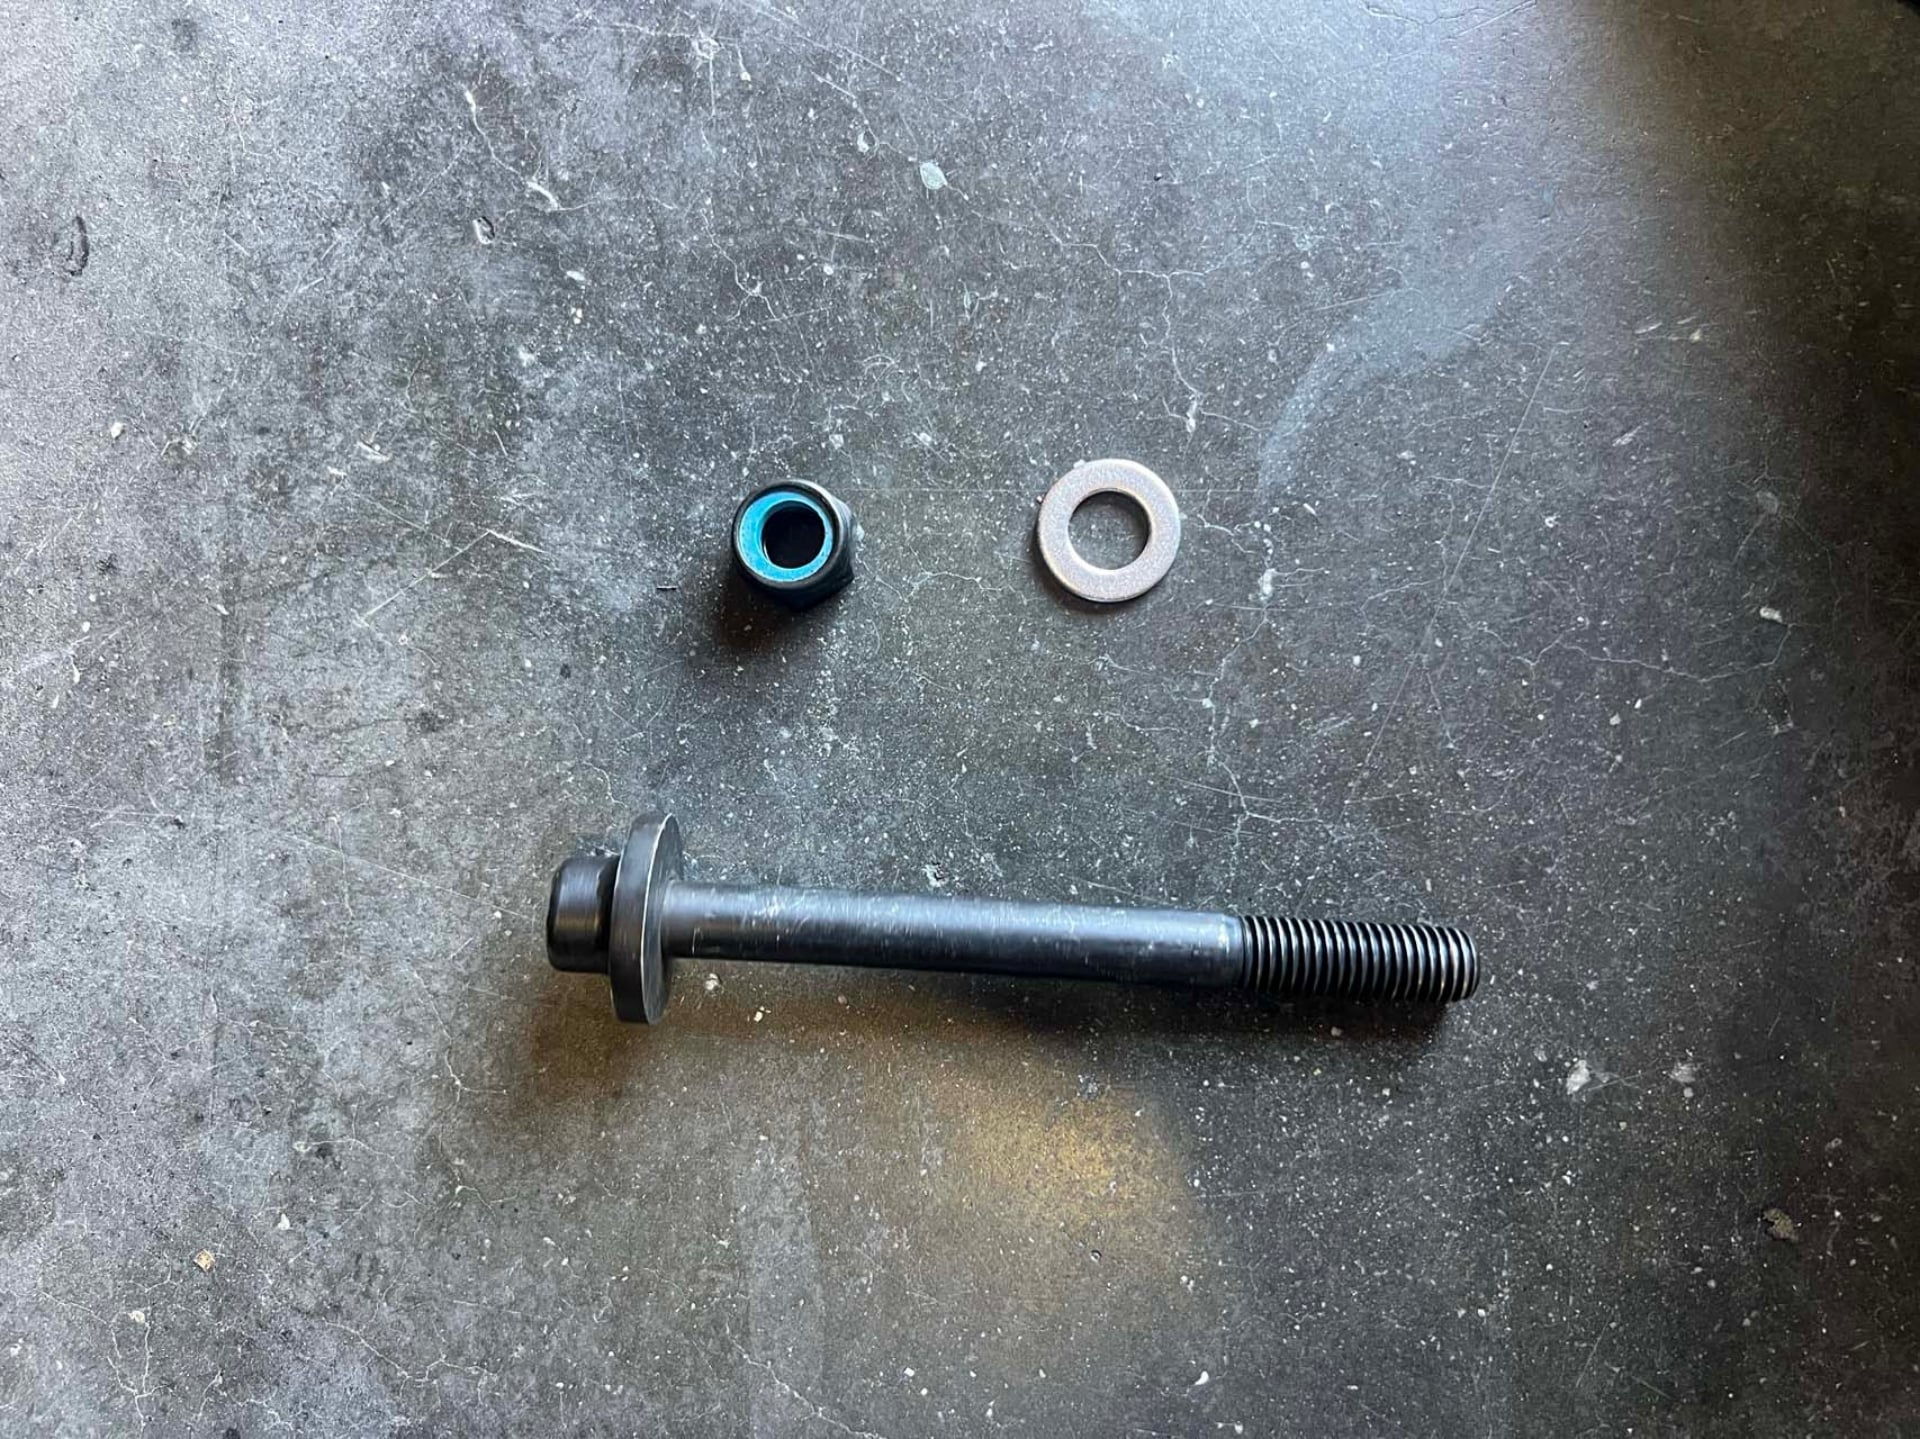
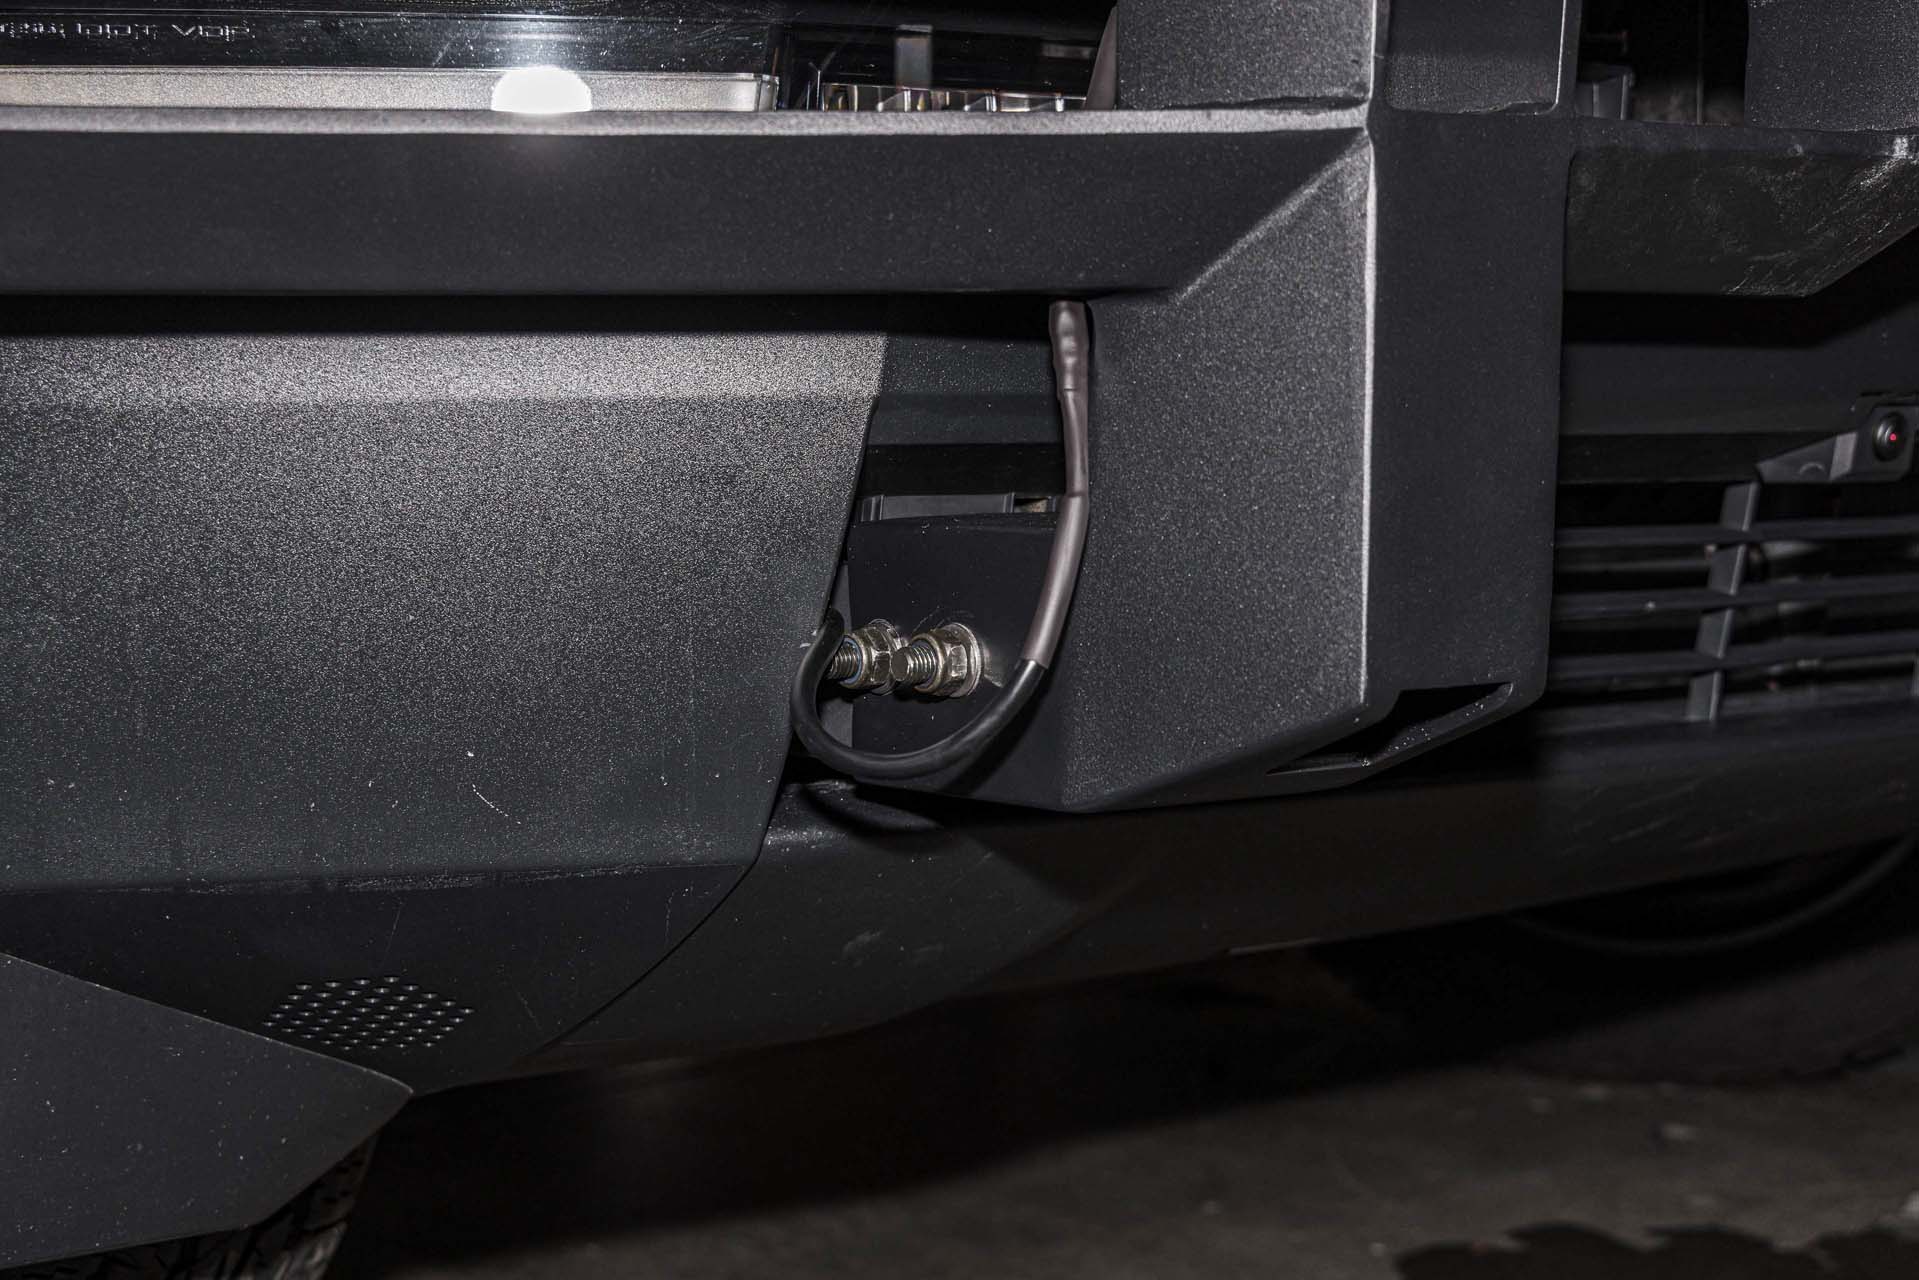
Using an 19mm socket and torque wrench, torque the bull bar lock nuts to 38 ft/lbs.
With the bull bar installed, it is time to complete the wiring and confirm light bar function. Note: If you did not purchase a light bar with your bull bar, you may proceed to reassemble your frunk assembly.
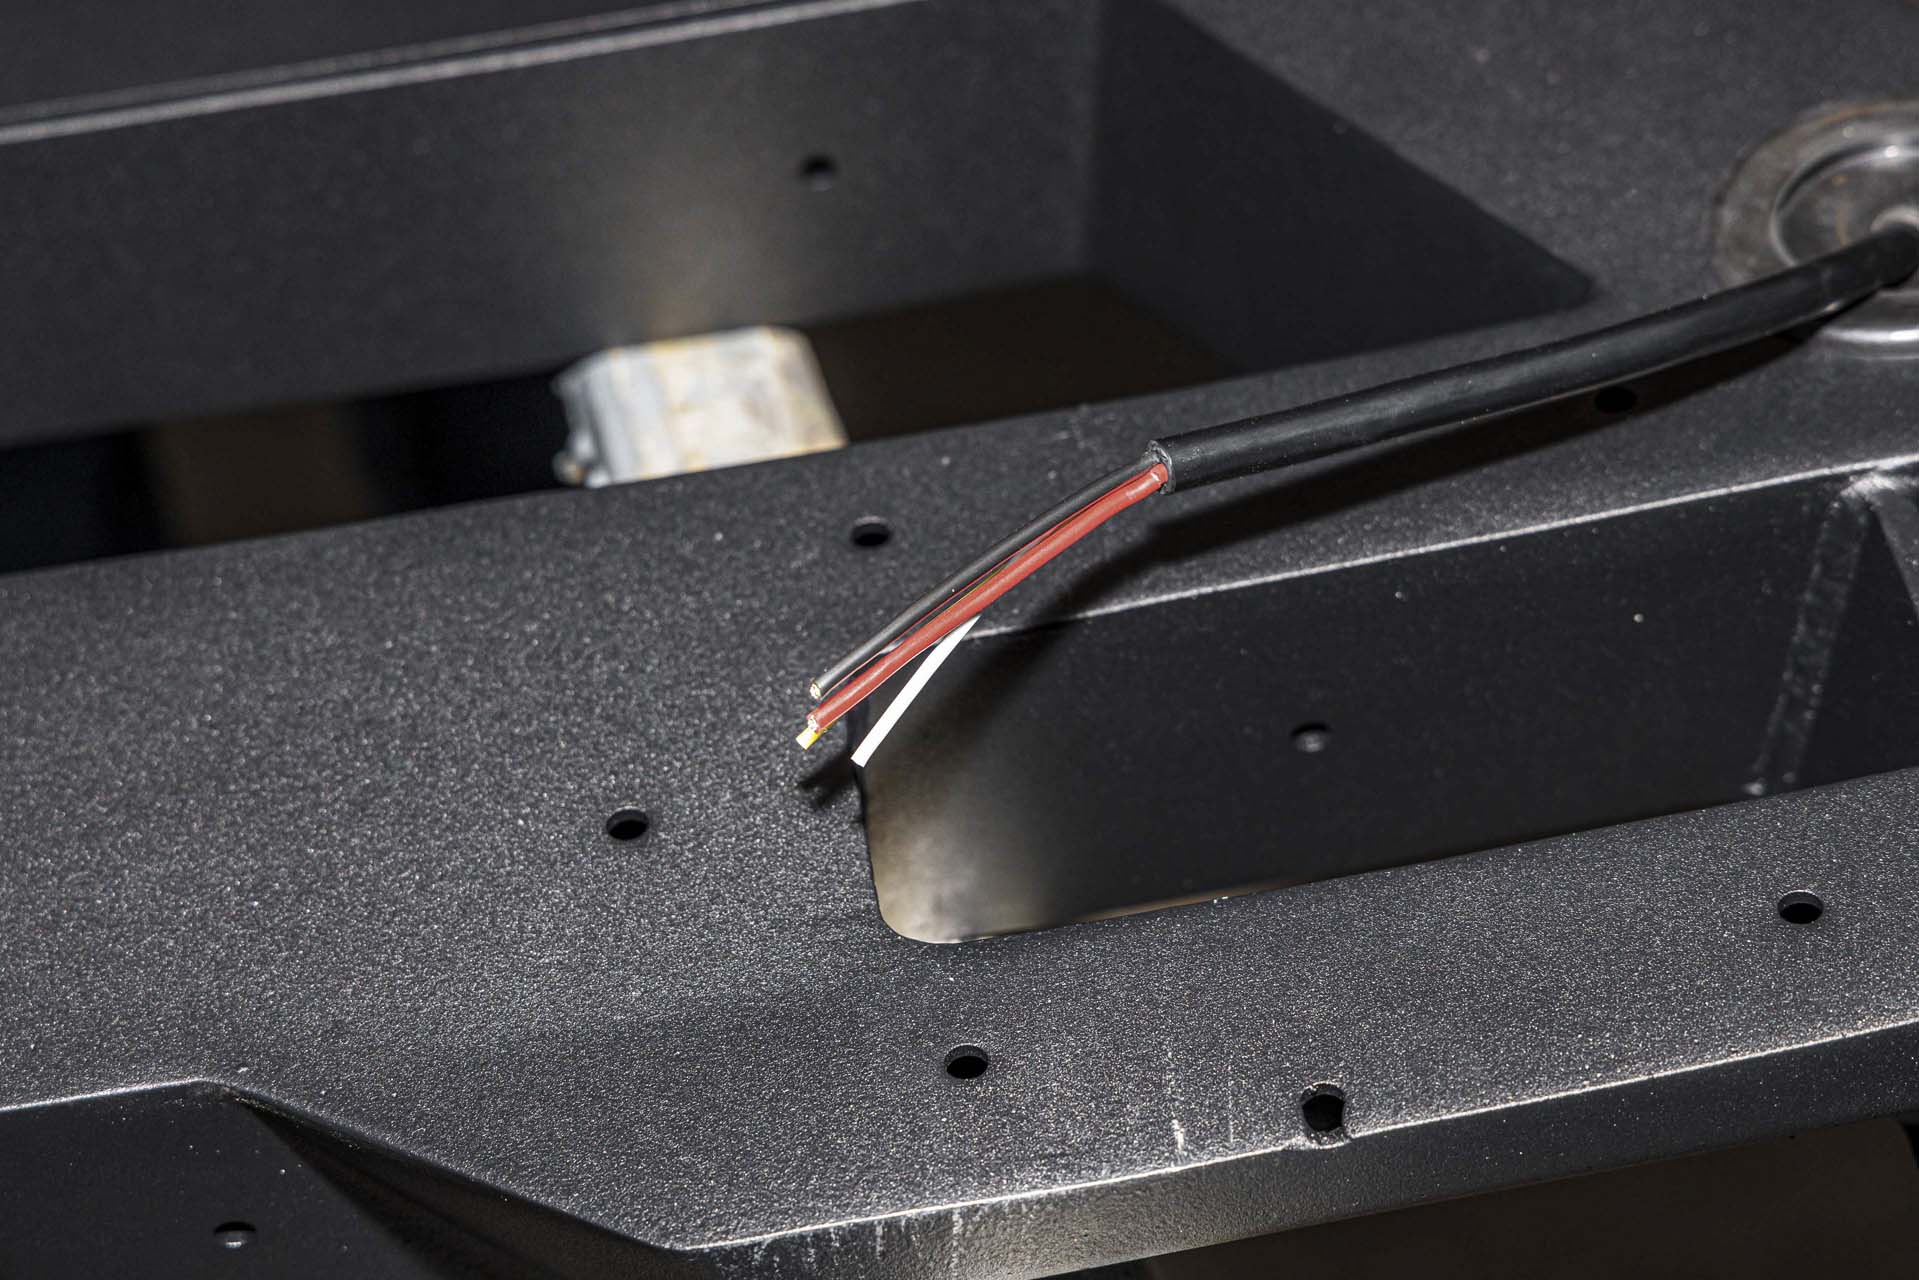
First, remove the tape from the factory front power feed to expose the factory auxiliary power cables for splicing.
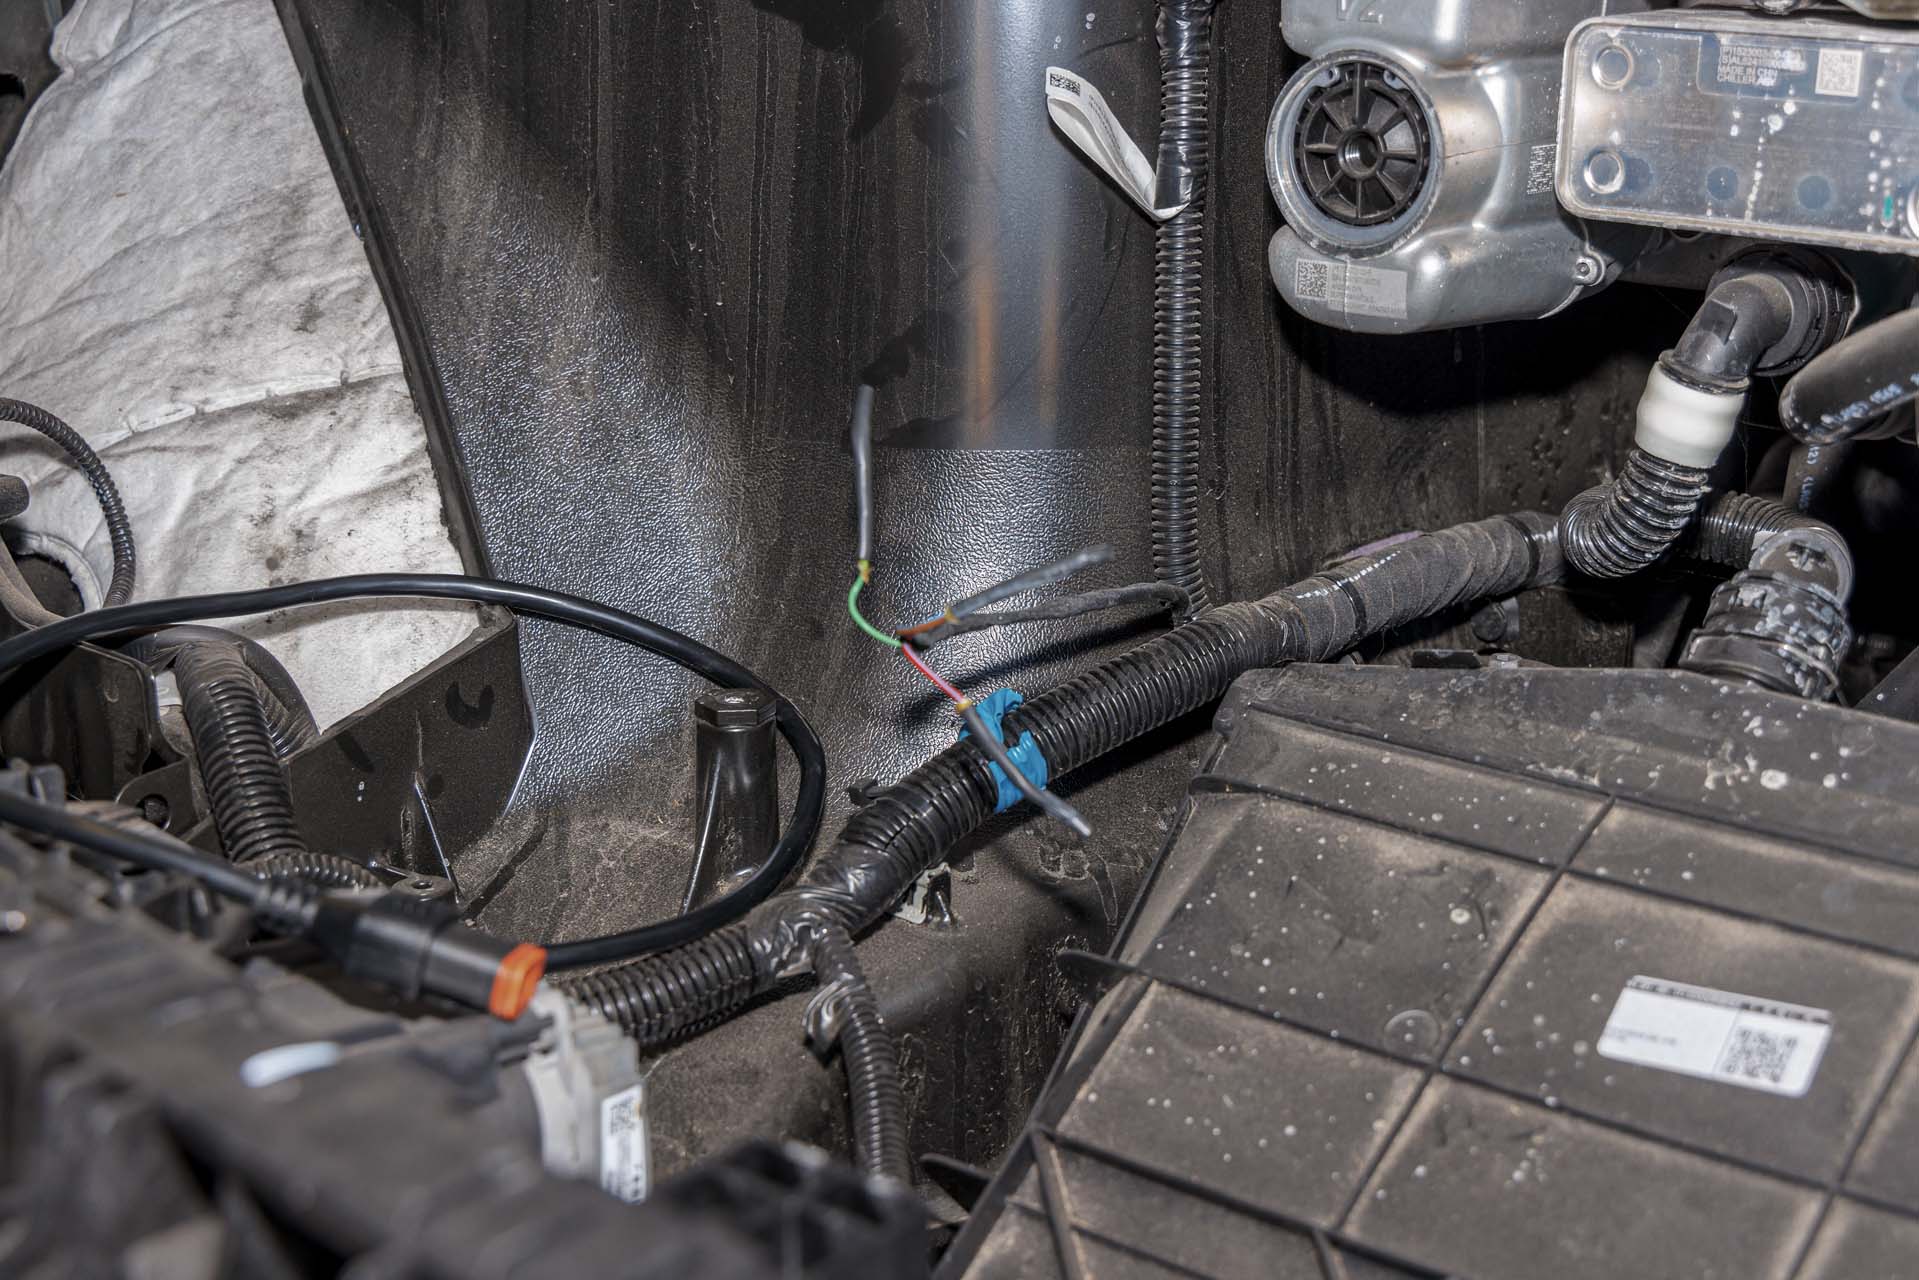
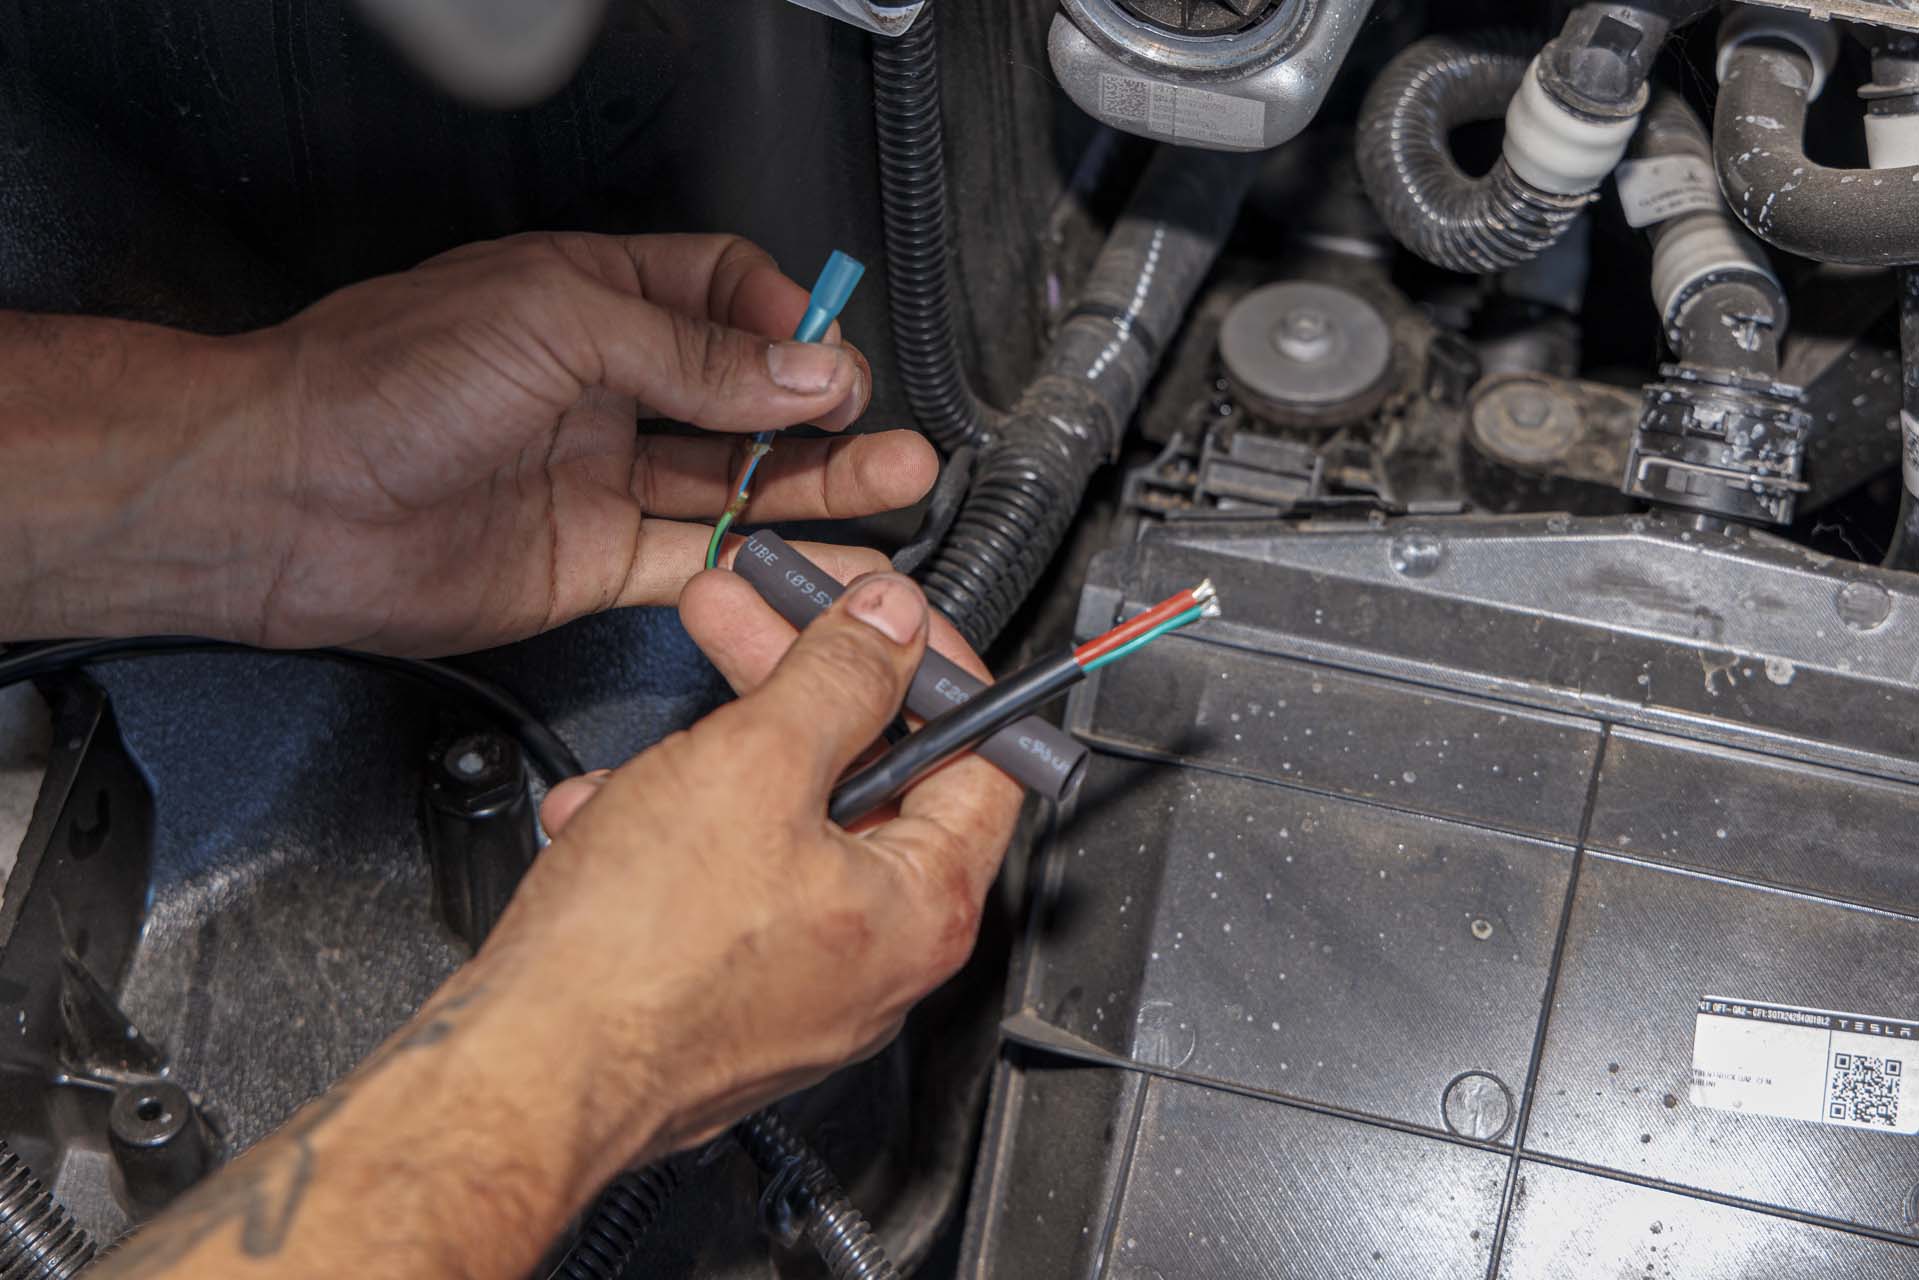
Next, using a wire stripper, remove the covers to expose the lead ends of both the red and brown factory power feed cables. Note: the photo below shows the use of crimp connectors. You are welcome to use them, but they are not required, nor included.
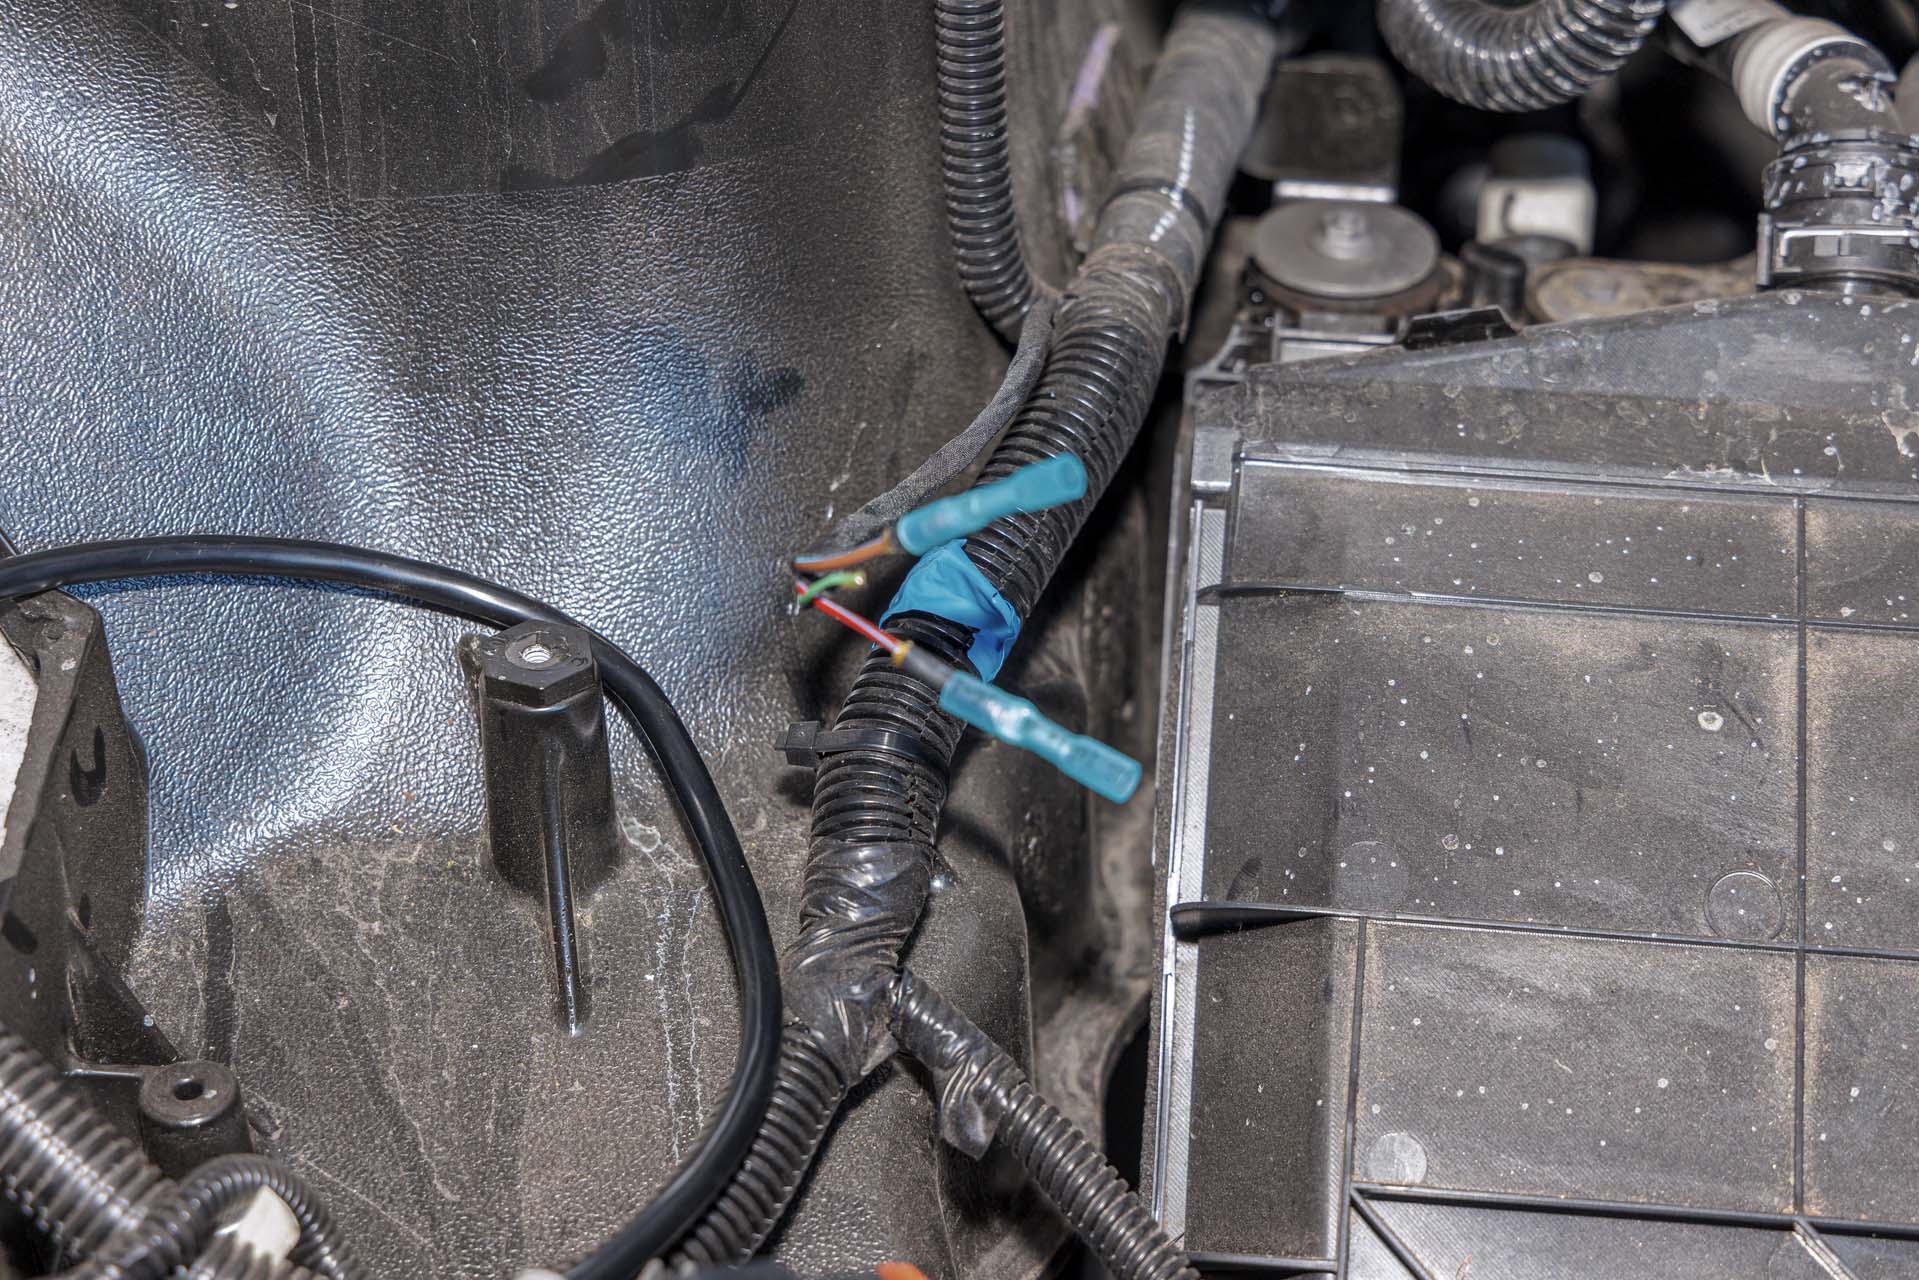
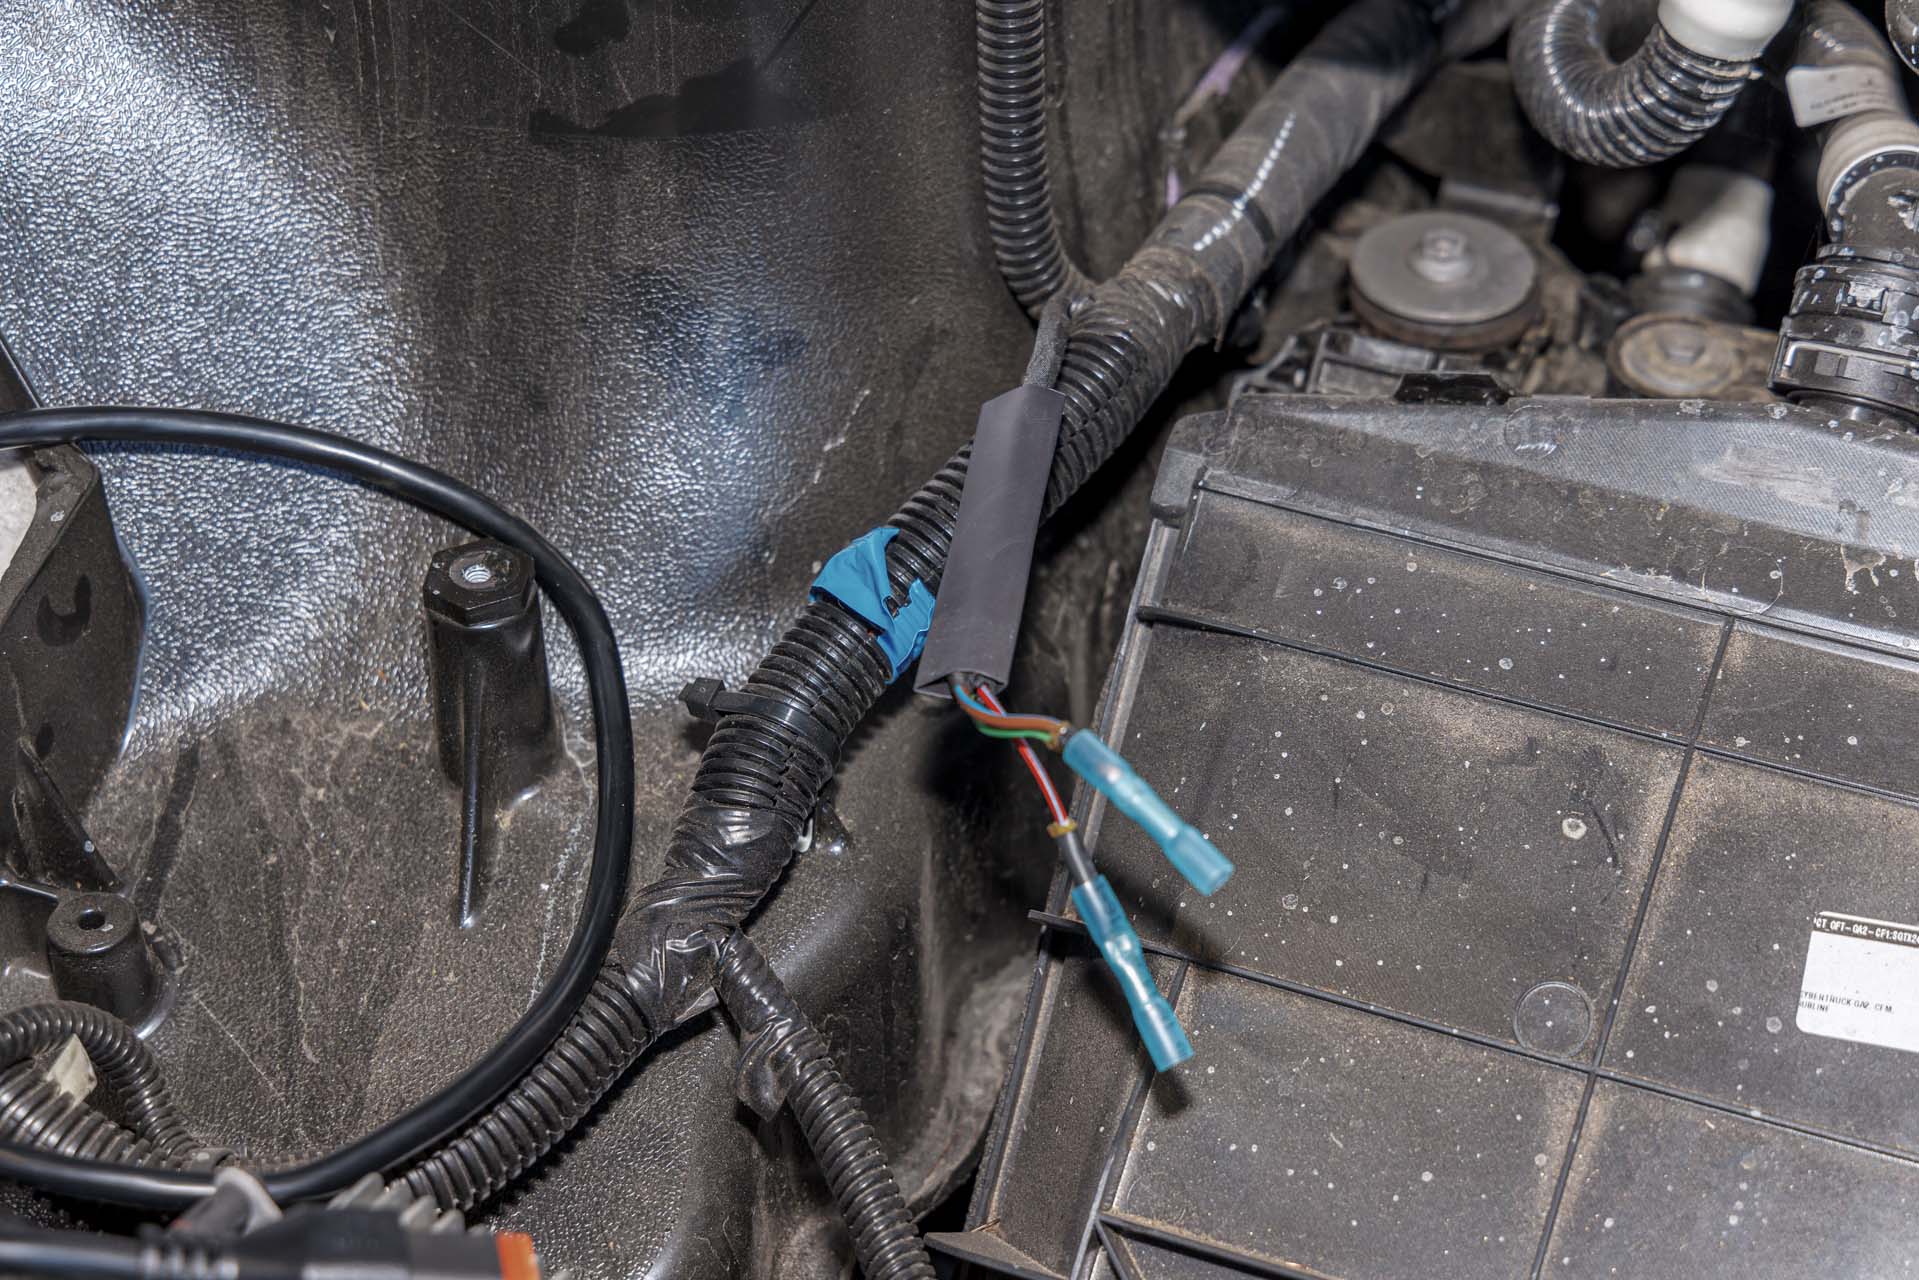
Next, connect the red factory power feed cable to the provided red pigtail cable. You’ll also connect the factory brown power feed cable to the black pigtail cable. Note: for best weather protection, we recommend using a heat shrink tube or wrap to protect the connection from the elements.
Turn on the front power feed: Select the vehicle icon > “Outlets & Mods” > “Power Feed – Frunk”.
You should see confirmation from the lights. If you do not see a response from the lights, reach out to the support team at support@unpluggedperformance.com for further information.
Once the wiring and testing are complete, follow these steps to reassemble the vehicle:
Reconnect Latch Housing: Plug the power cable back into the frunk release button housing and snap the housing back into its original location in the frunk area.
Reconnect Emergency Release: Connect the emergency latch release power cable to the driver-side of the frunk tub.
Reinstall Frunk Tub: Carefully lower the frunk tub into the vehicle, ensuring it is properly aligned with the mounting points. Using a 10mm socket, reinstall the 4 bolts at the bottom of the tub, and the 2 bolts at the top of the tub.
Reinstall Cowling: Position the upper cowling and press down firmly in a swift motion to snap the retainer clips back into place.
Reinstall Bump Stops: Screw the hood bump stops back into their threaded holes by turning them clockwise.
Final Trim Panels: Snap the 2 small cover panels back over the top frunk bolts.
Check Clearances: Close the hood slowly to ensure there is no interference between the hood and the new Bull Bar. If necessary, adjust the cam-bolt lobes installed in Step 12 to increase clearance.
Installation Complete! For further assistance or troubleshooting, you can contact the Unplugged Performance support team at support@unpluggedperformance.com.