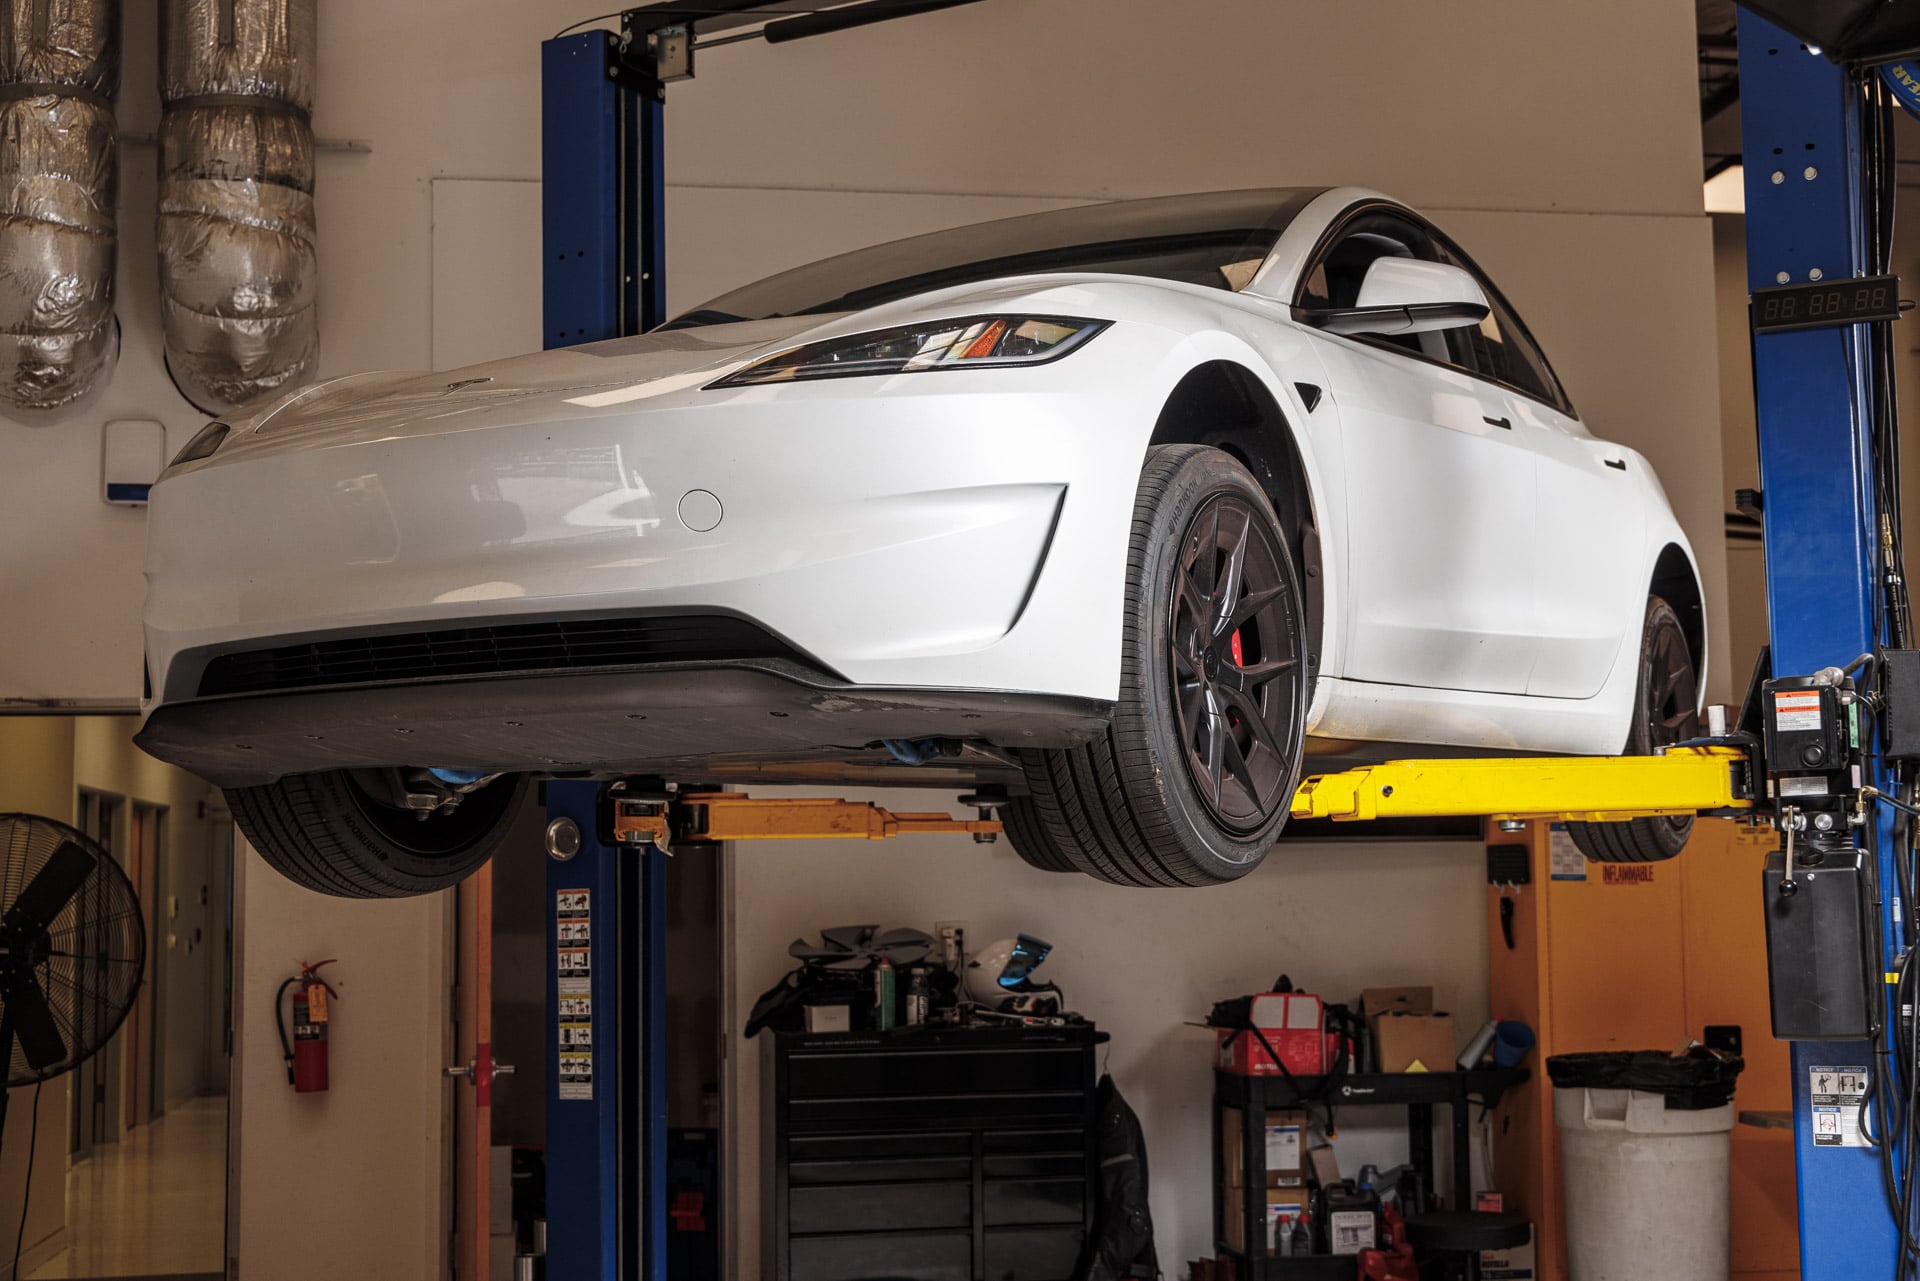
Model 3 Highland Performance
Side Skirt
INSTALLATION GUIDE
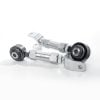
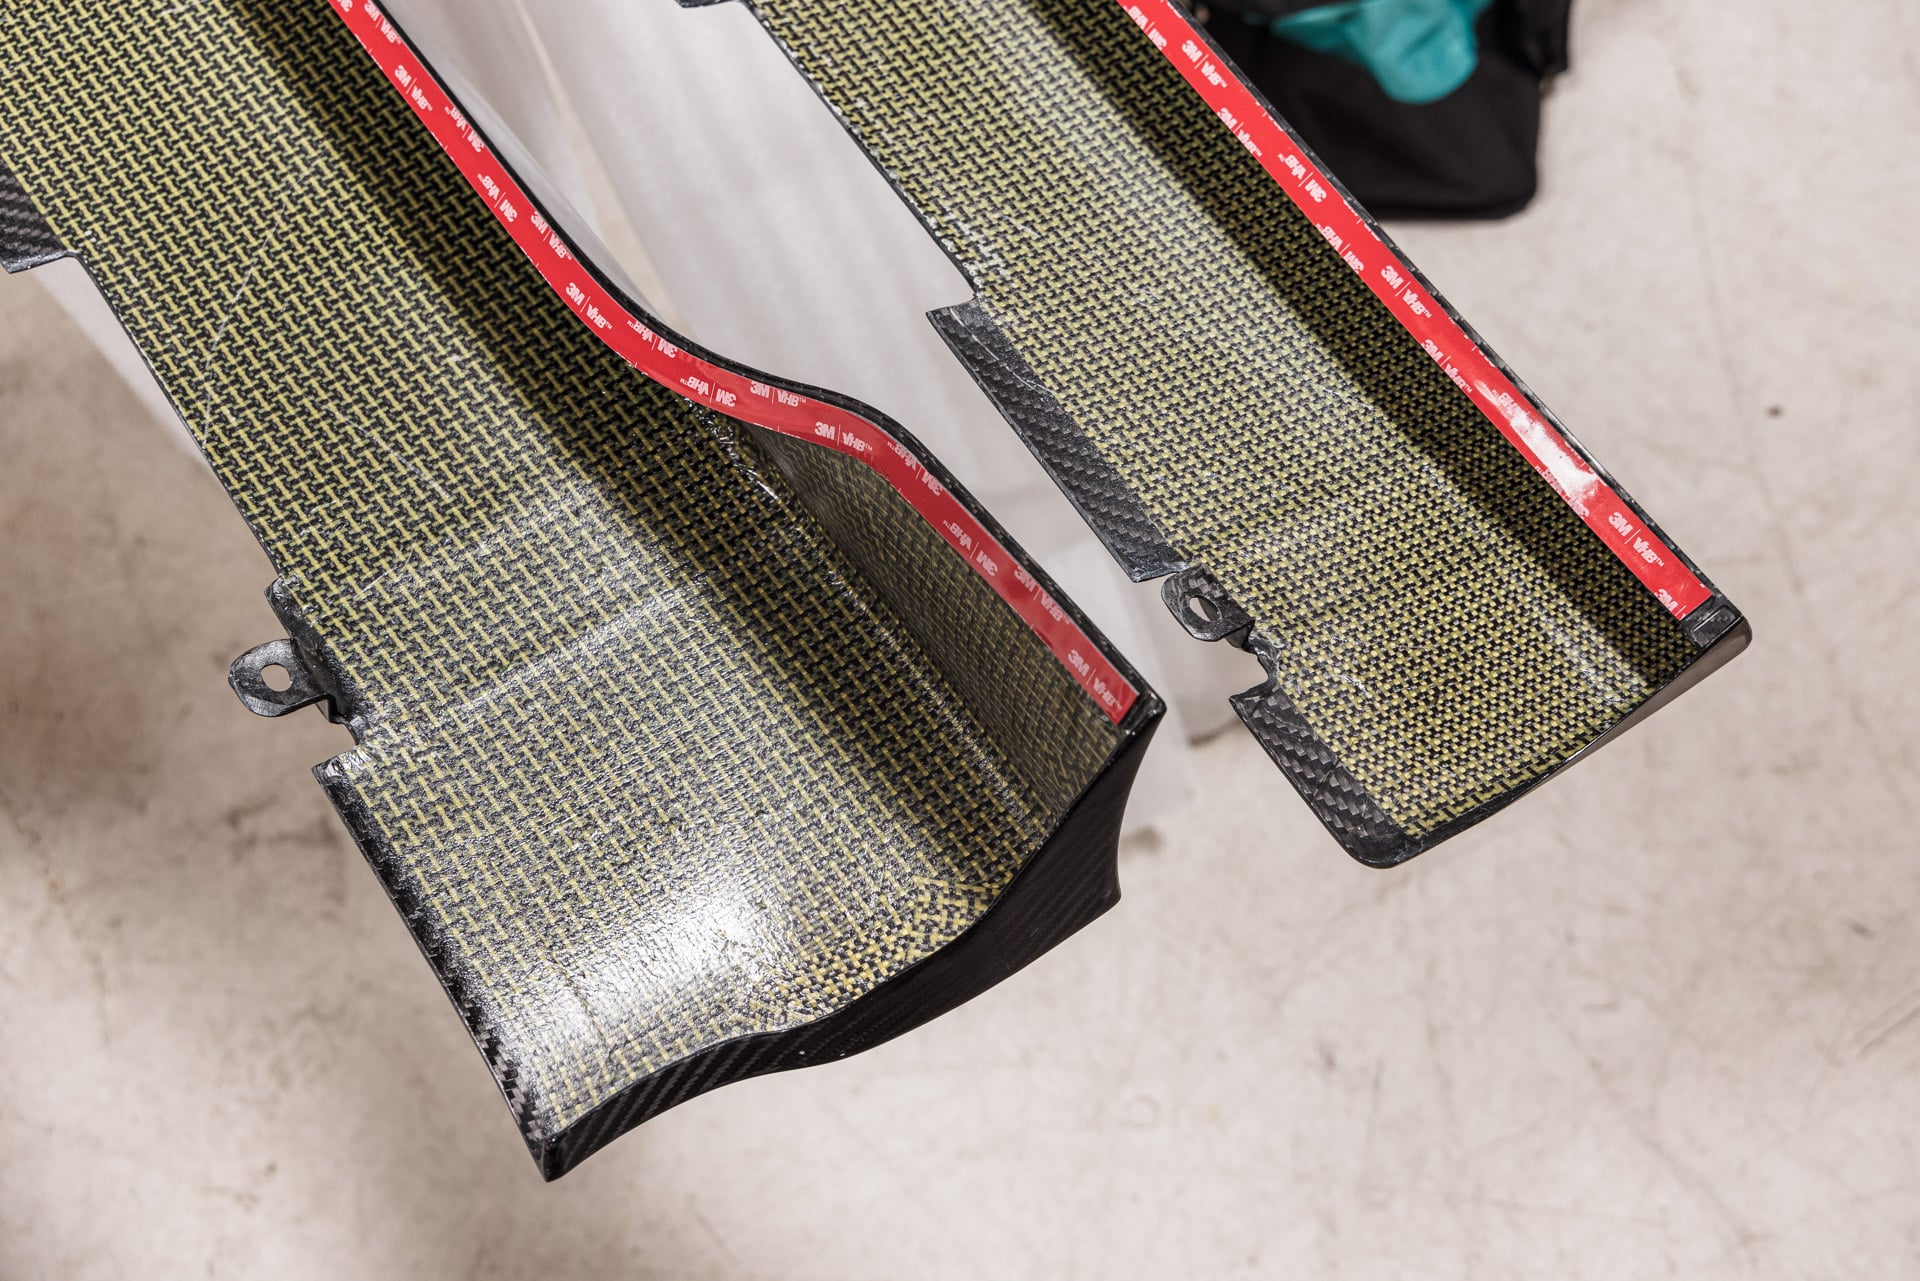
- UP Side Skirt Pair
- Adhesive Promoter
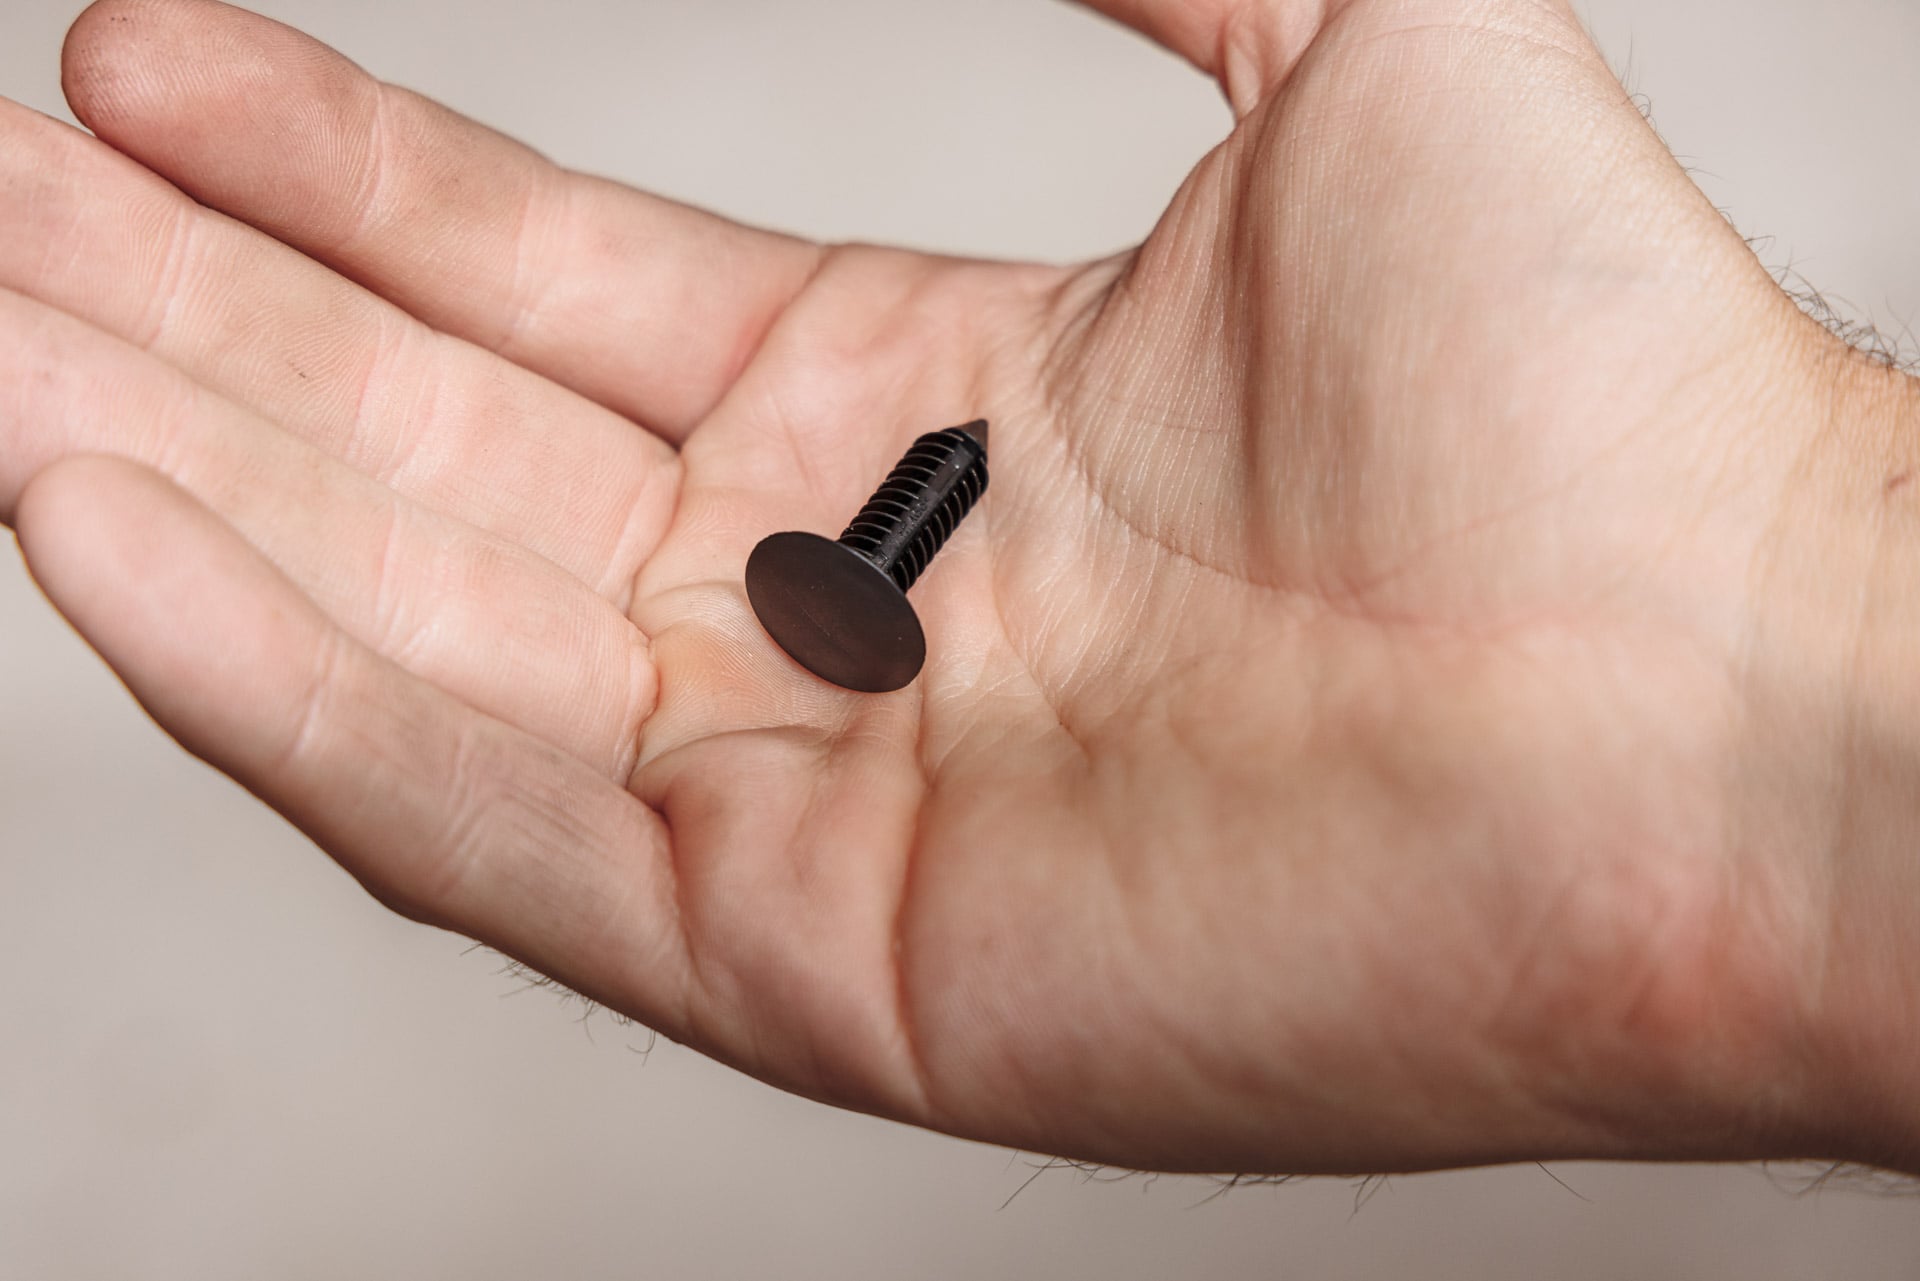
- Push Clips
- 10mm deep socket
- Ratchet or driver
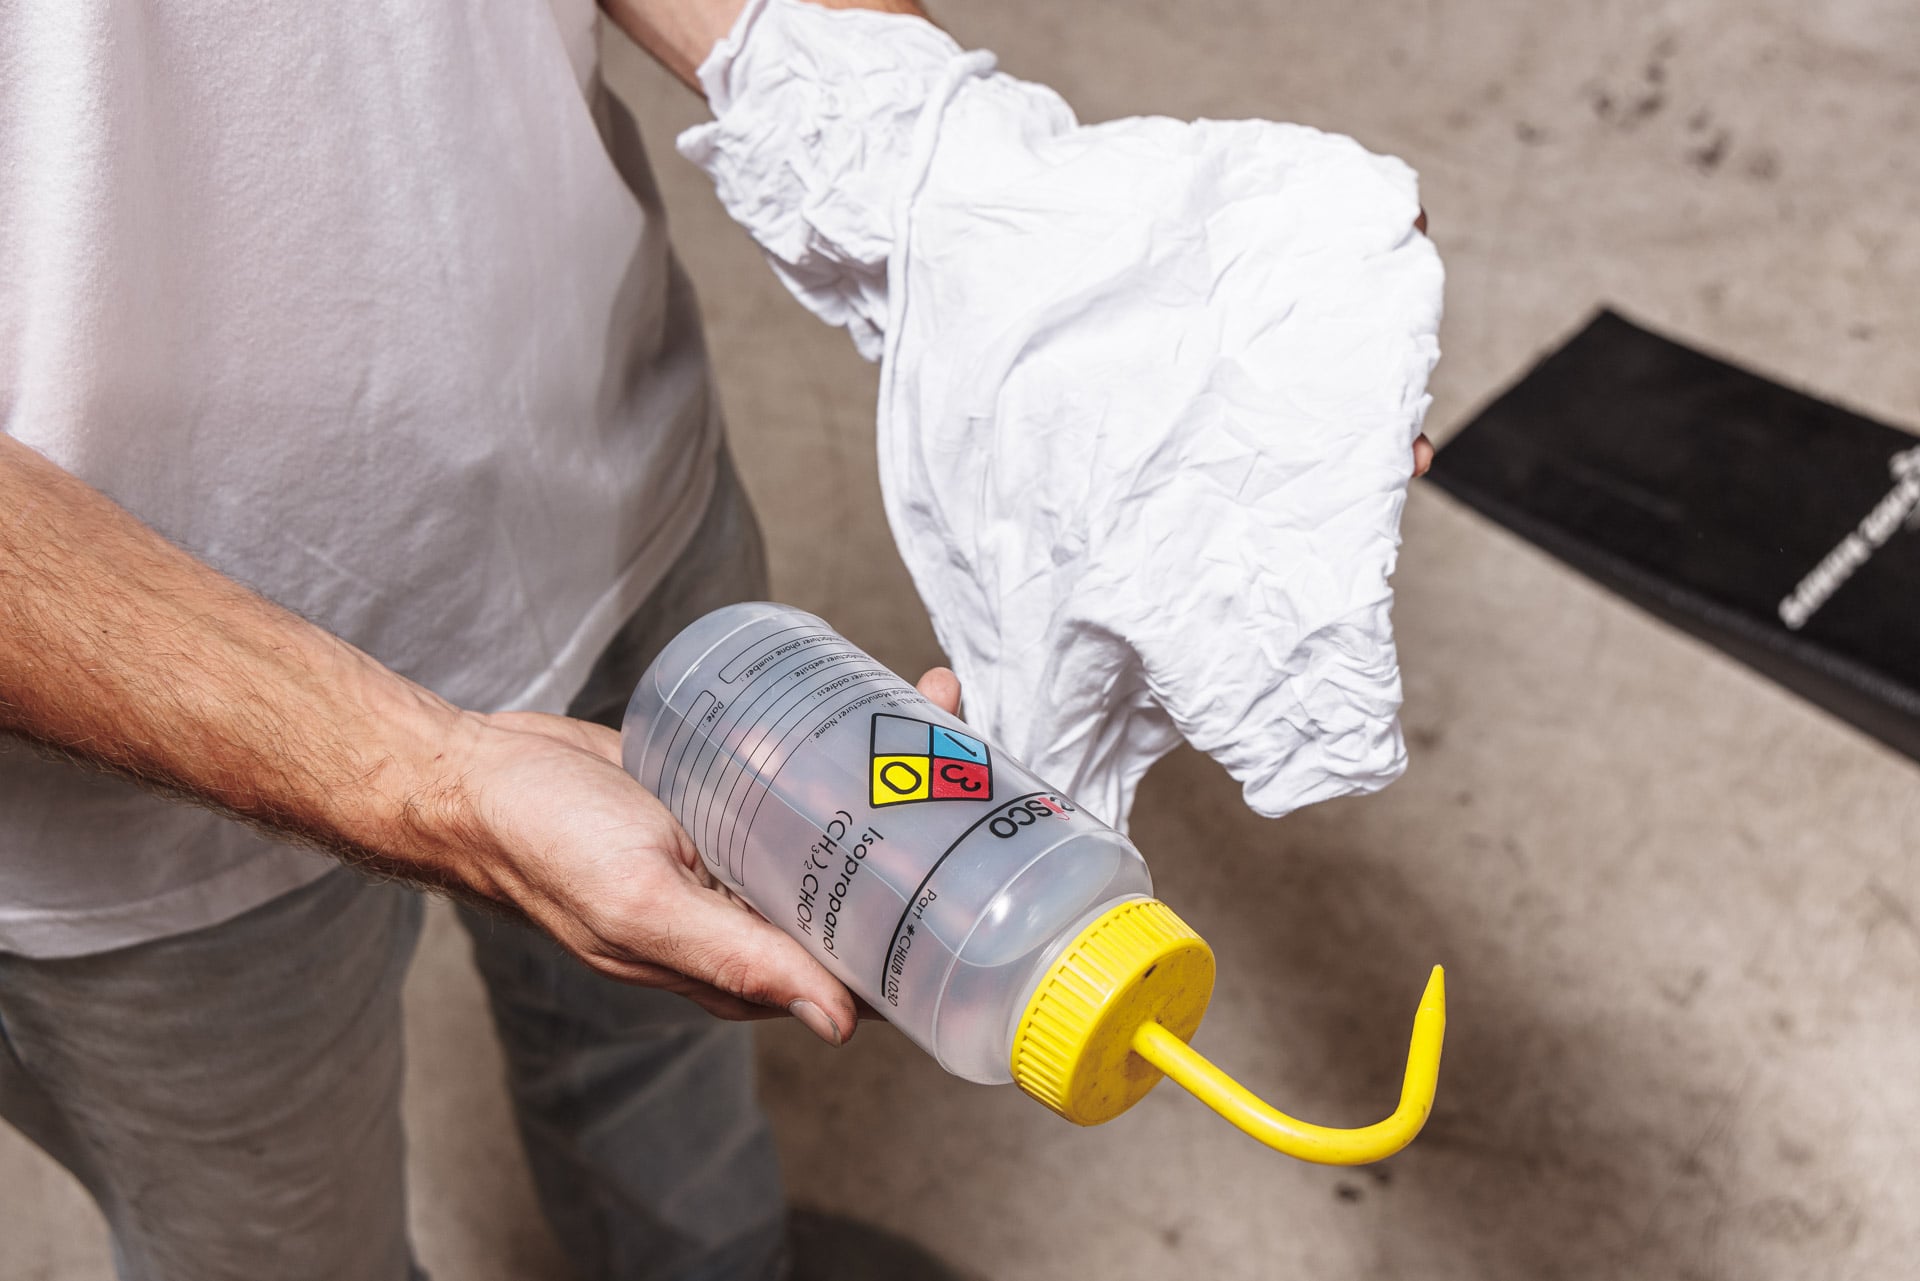
- Icepropyl alcohol
- Microfiber cleaning cloth
- Trim clip removal tool (recommended)
By installing or using this product, you understand and agree with the following: If you do not agree, do not proceed with the installation and return this product within 30 days for a full refund of the purchase price from the company from which you have purchased it.
- I understand and agree that this product is intended to be installed for use on private roads and in jurisdictions where the use of this product is deemed legal by the local authorities. Furthermore, I understand and agree Unplugged Performance does not have any knowledge or control of regulations in my local jurisdiction, and it is up to me to determine if the product is acceptable for use with my vehicle.
- I understand that Unplugged Performance has done testing of this product on road and on closed racetracks but does not have the ability to test the vehicle for localized standards and regulations.
- I understand and agree that if the vehicle manufacturer determines that any Unplugged Performance products have contributed to a problem with the vehicle it may affect the vehicle’s warranty. Furthermore, I understand and agree that Unplugged Performance has no duty nor ability to be involved in internal manufacturer decisions.
- I understand and agree that if this product is given to an installer for installation on my vehicle, I have read and agreed with all the previous, even if I am not personally installing these parts on my vehicle. Furthermore, I understand and agree that this product should be installed by a trained professional that is familiar with both the vehicle as well as this product. Furthermore, I understand and agree that I and/or my chosen installer will follow the installation instructions carefully and dutifully test the vehicle post-installation in a safe and controlled environment to ensure proper operation.
- I understand and agree that by installing this product Unplugged Performance and all associated persons and entities as well as the vehicle manufacturer and all associated entities must be held harmless in the event of any suit, damages, or other legal action. Furthermore, I hereby release Unplugged Performance and any associated entities from any and all liability for any potential claim or claims.
If you do not agree with any of the above statements, you should return the product immediately. For more information please see our Terms and Conditions.
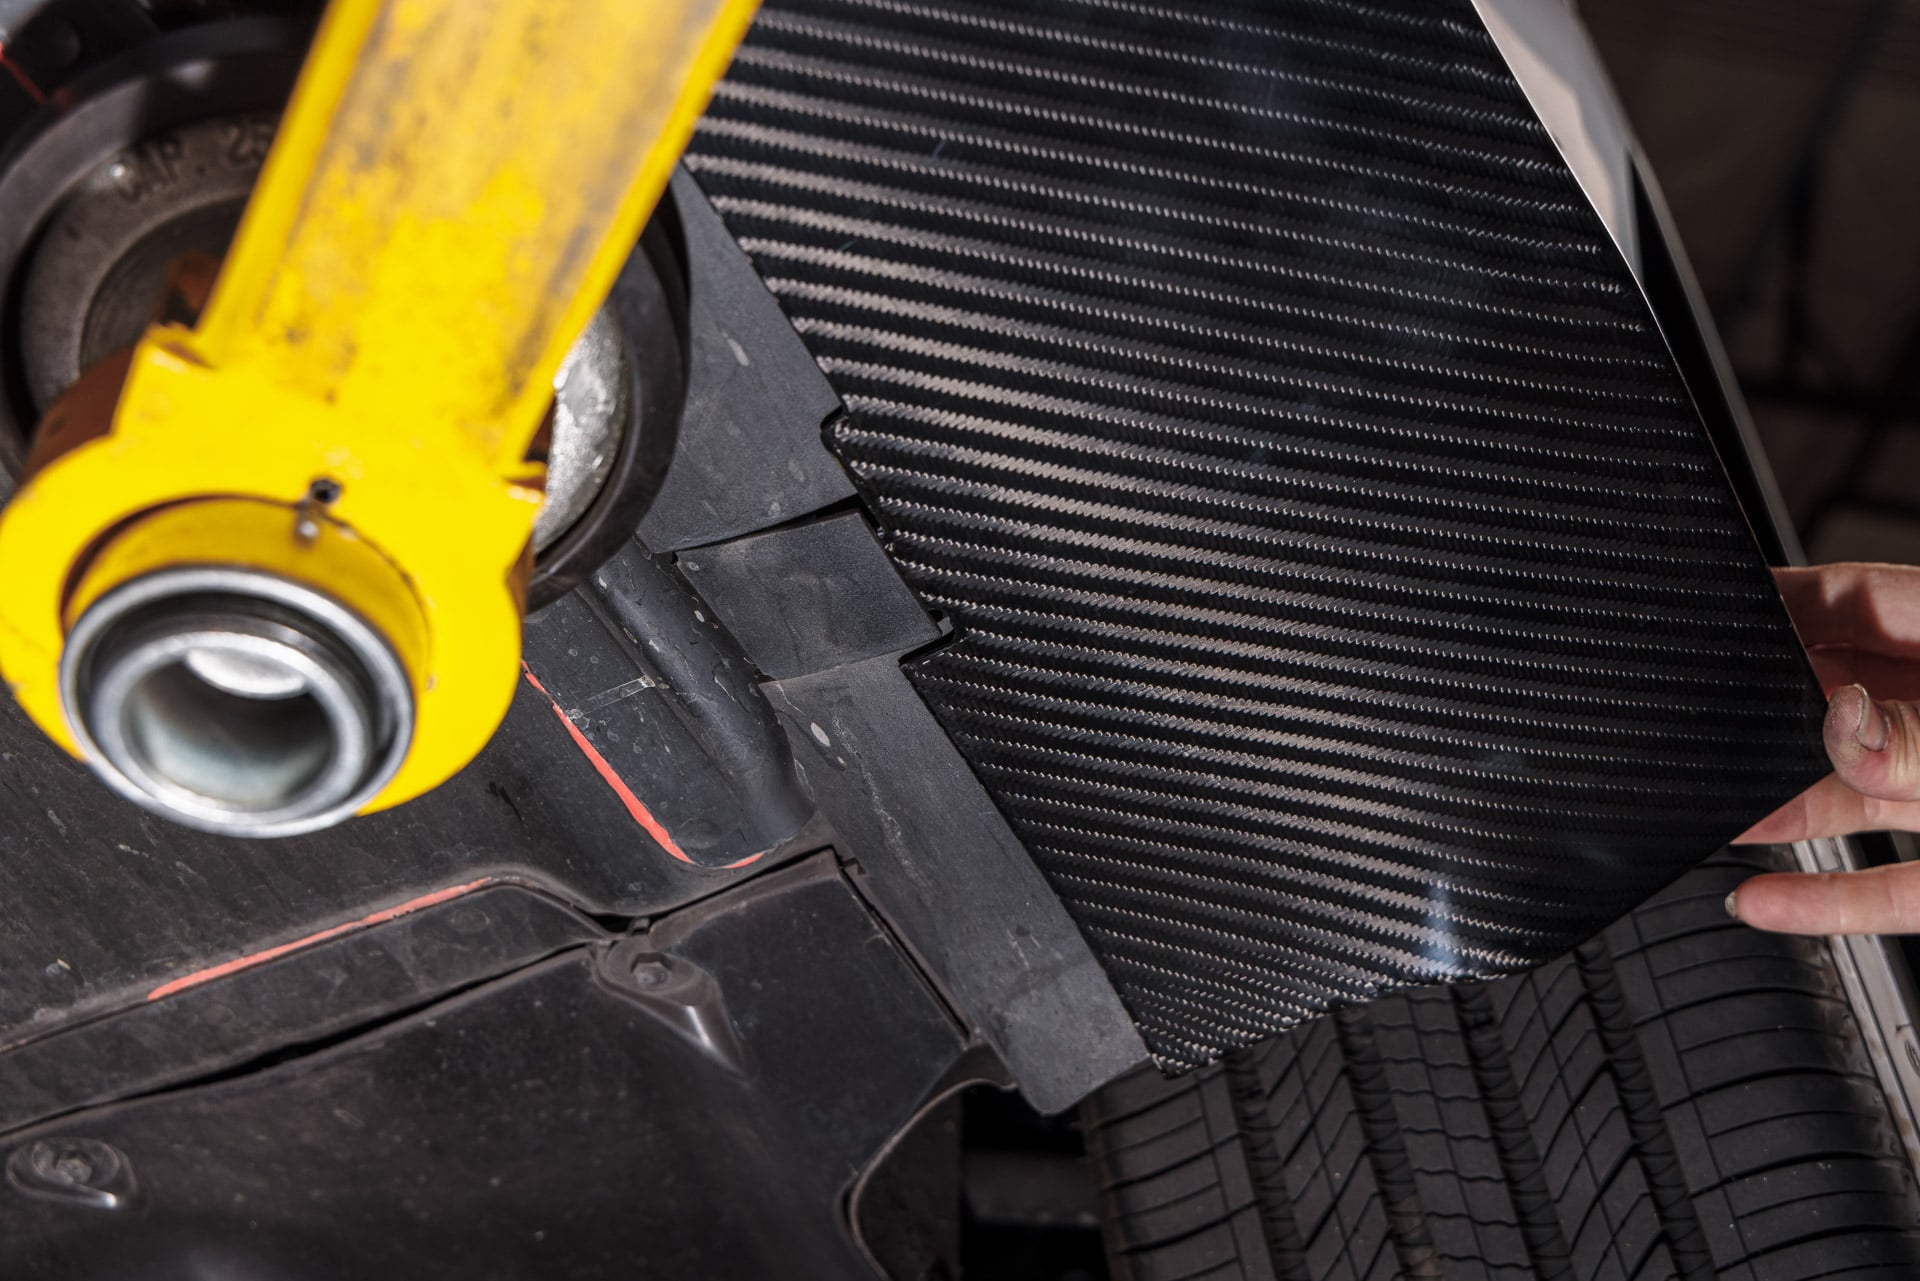
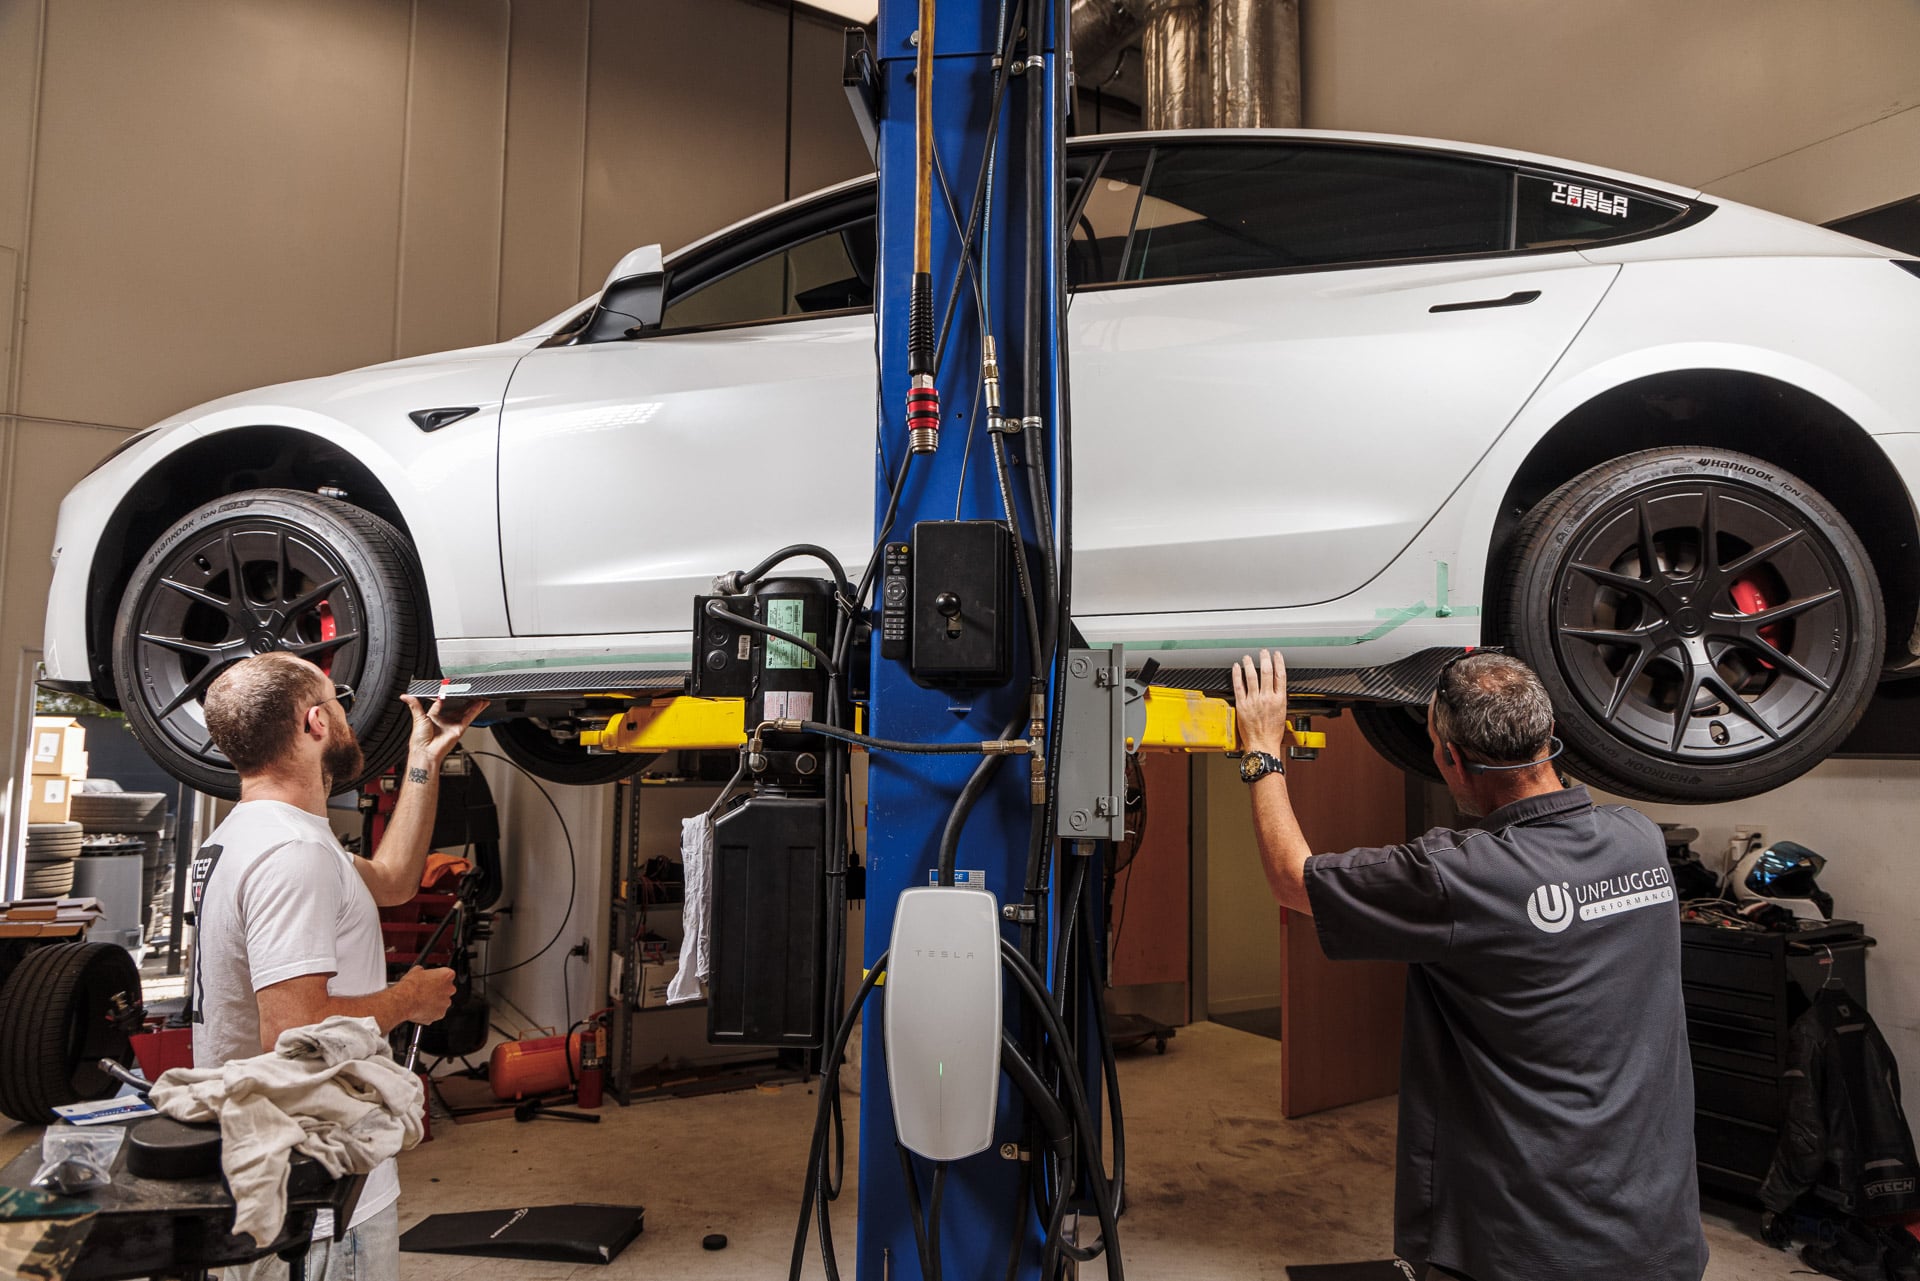
1. Carefully lift the vehicle off of the ground using a vehicle hoist. Be sure that the lift points do not interfere with the placement of the UP side skirt installation.
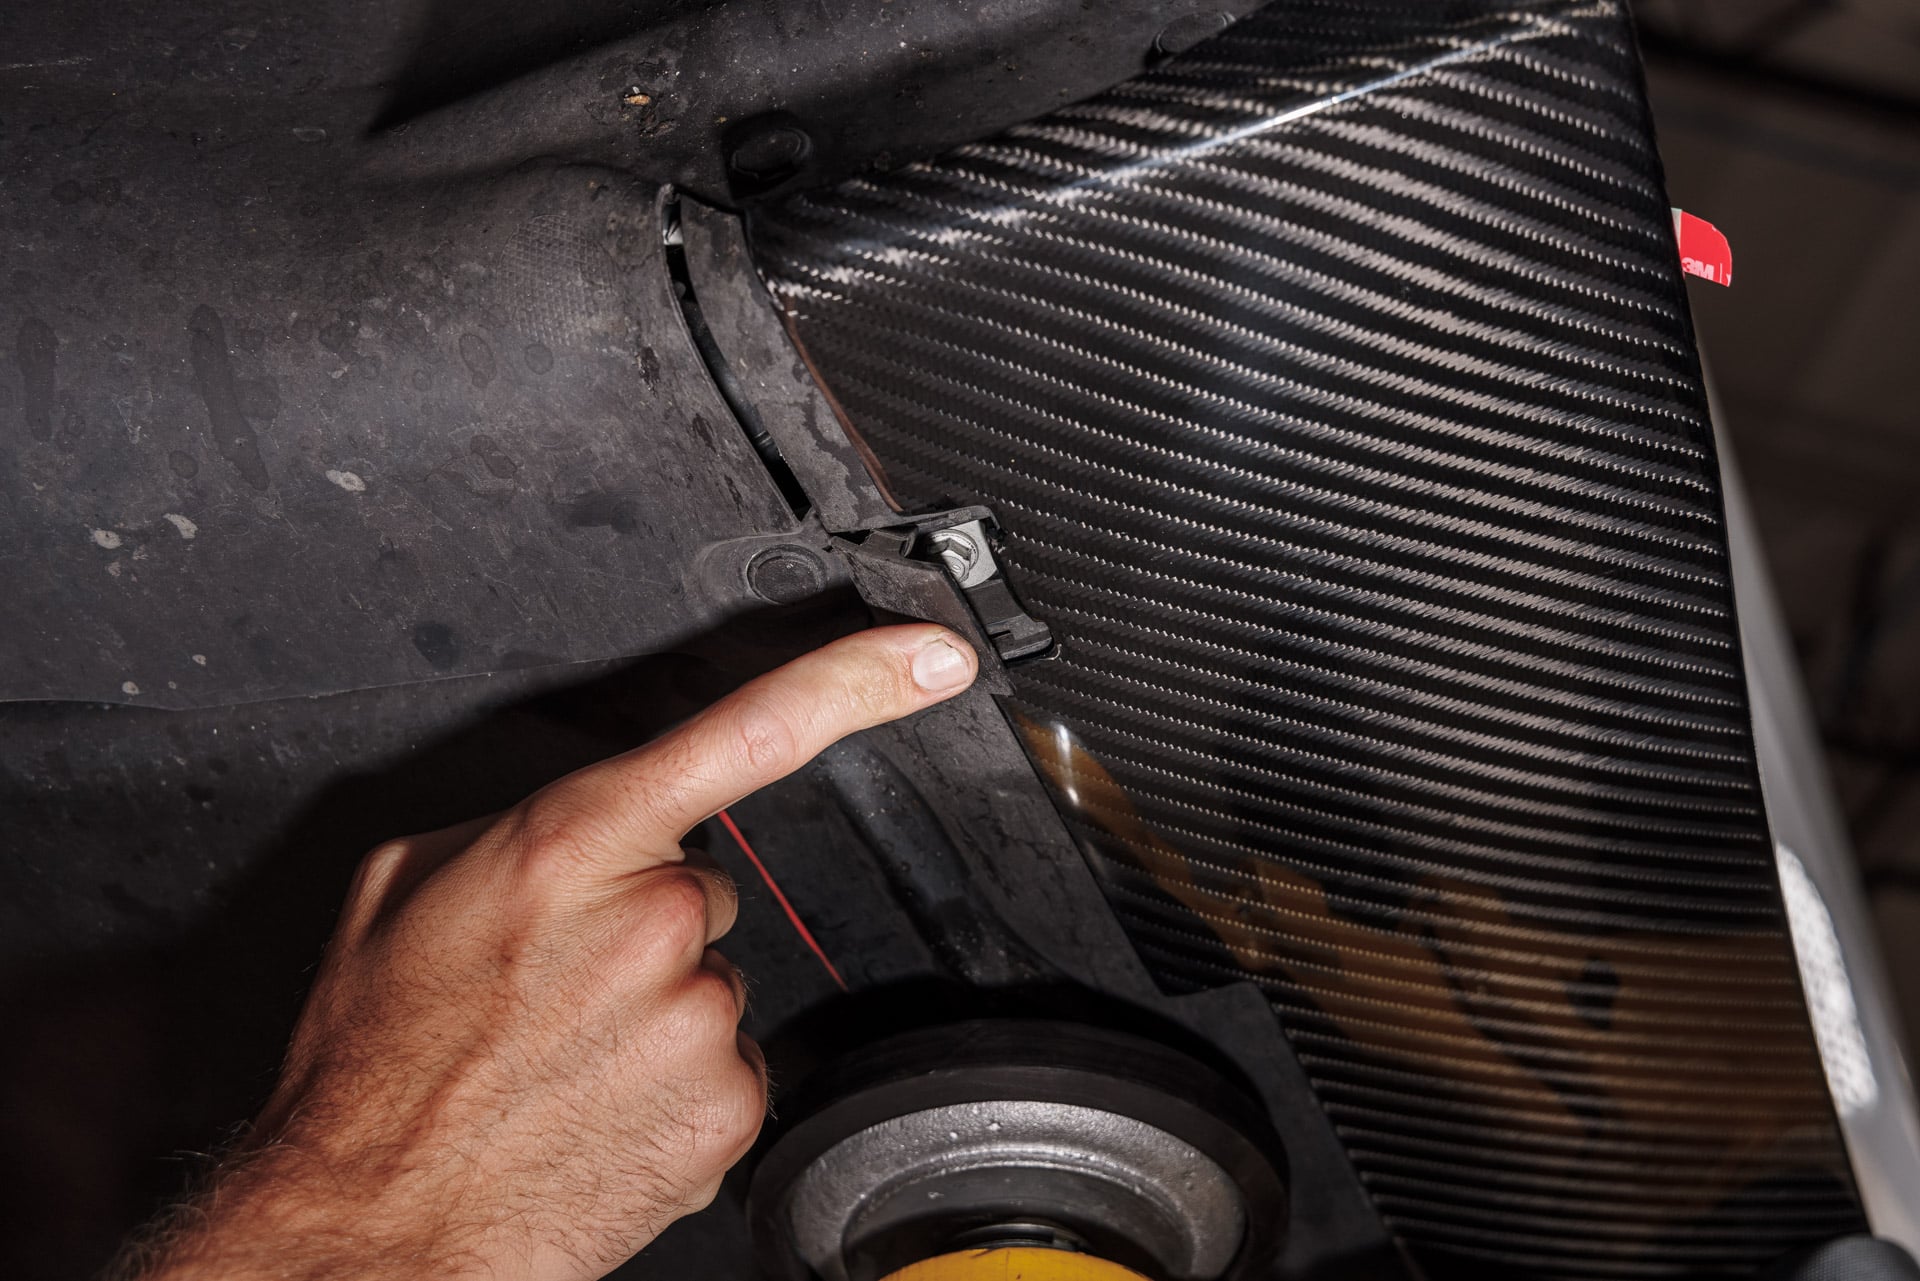
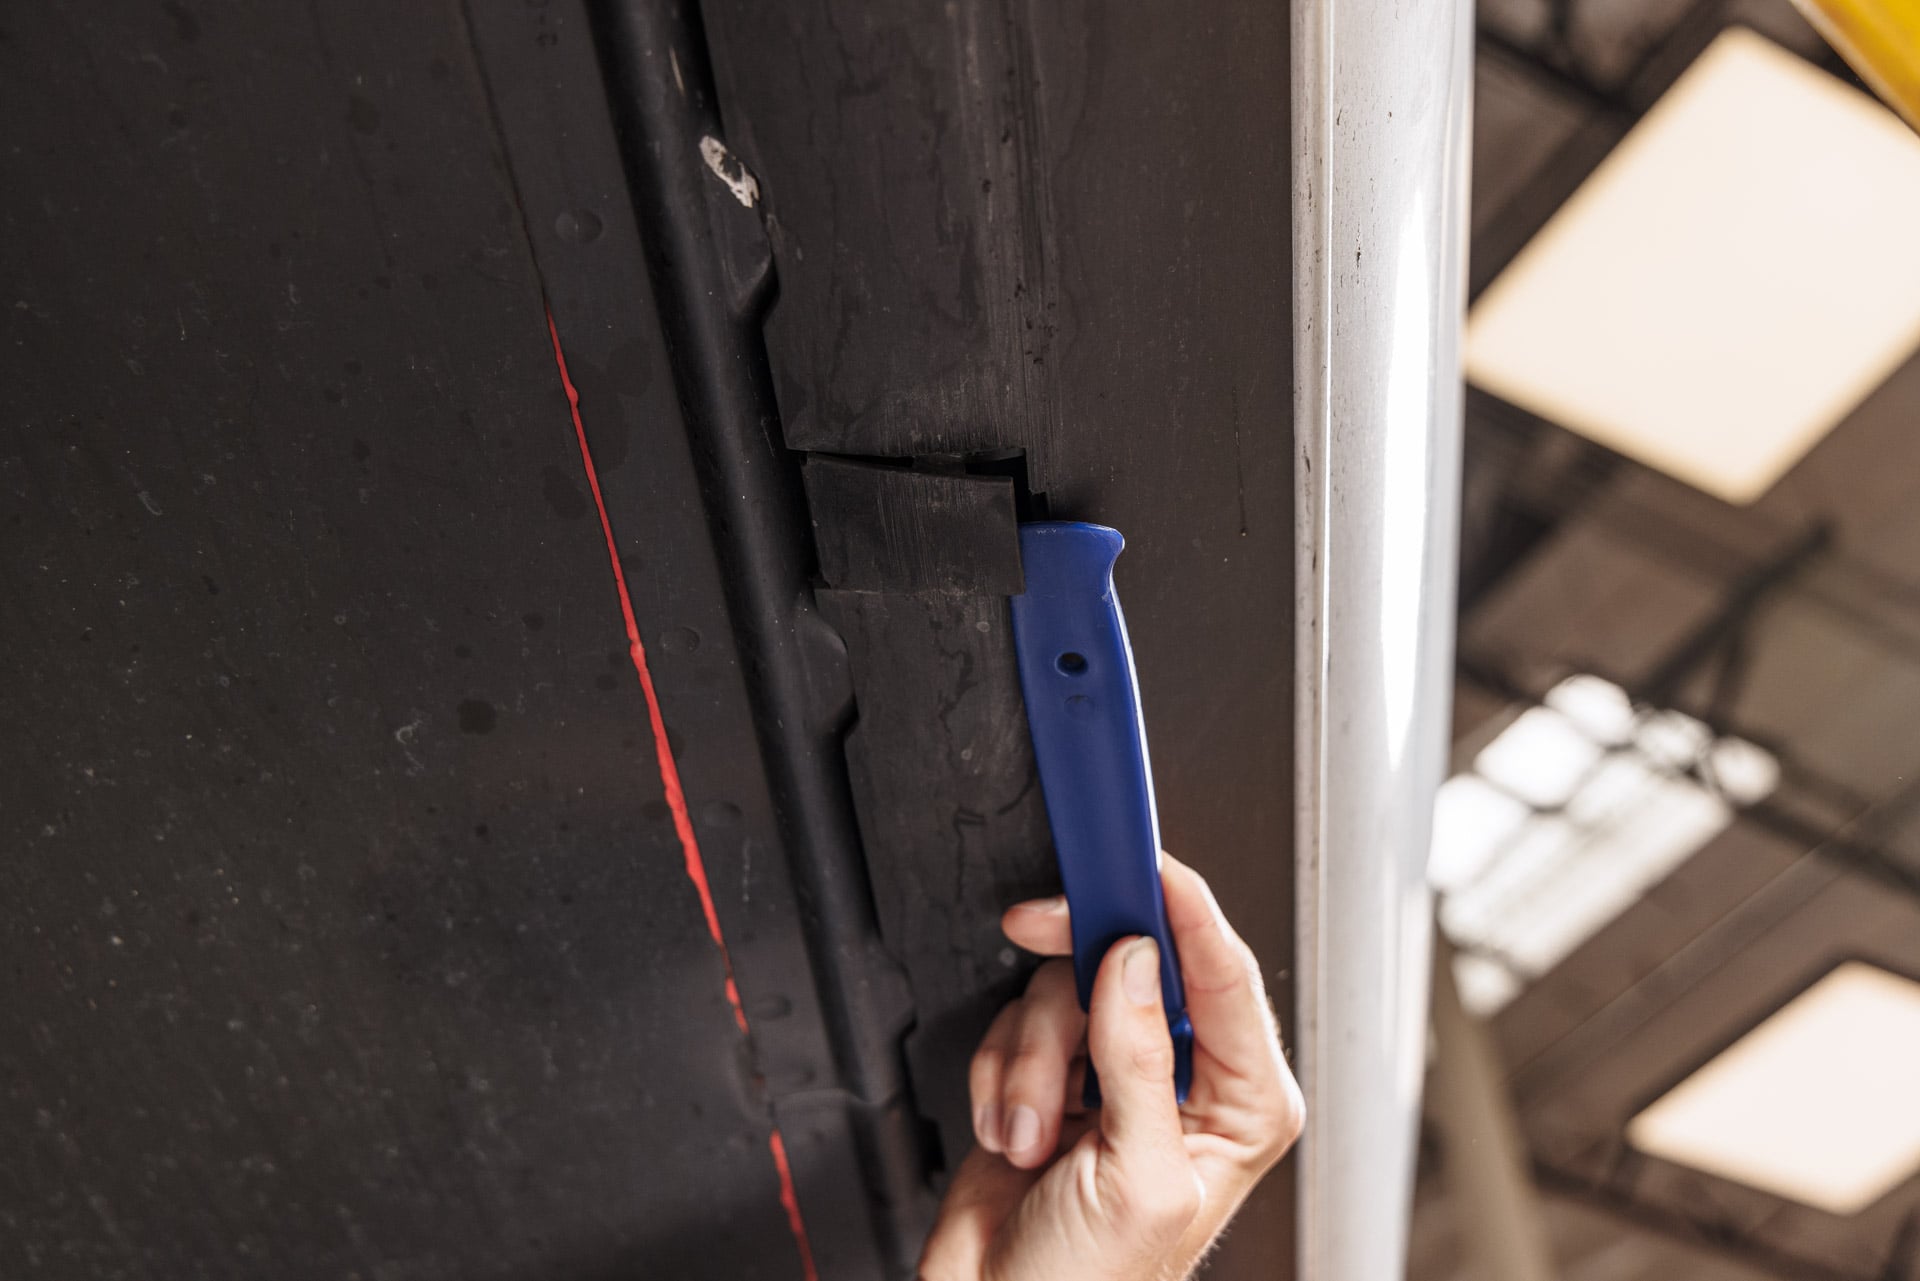
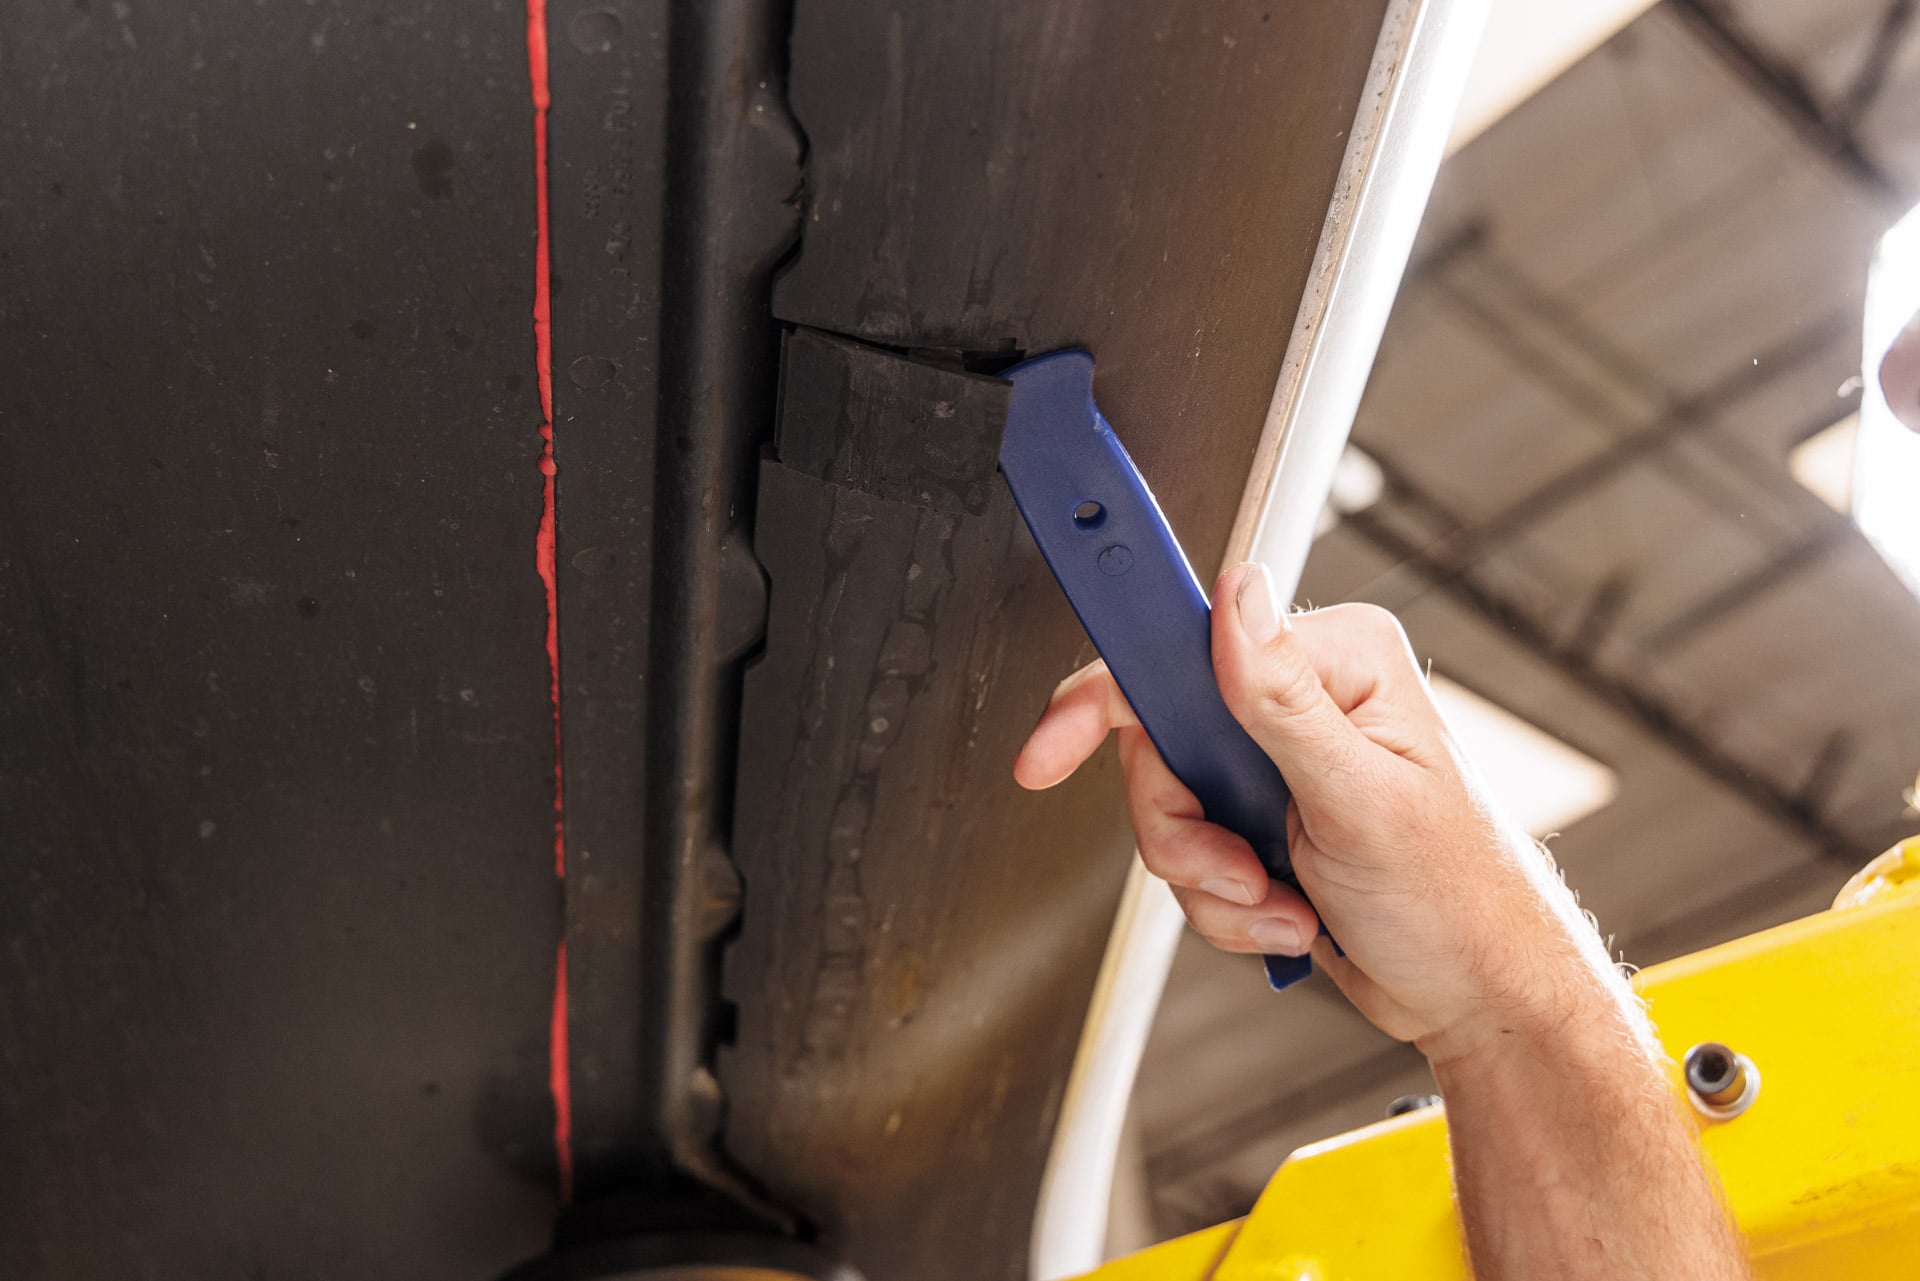
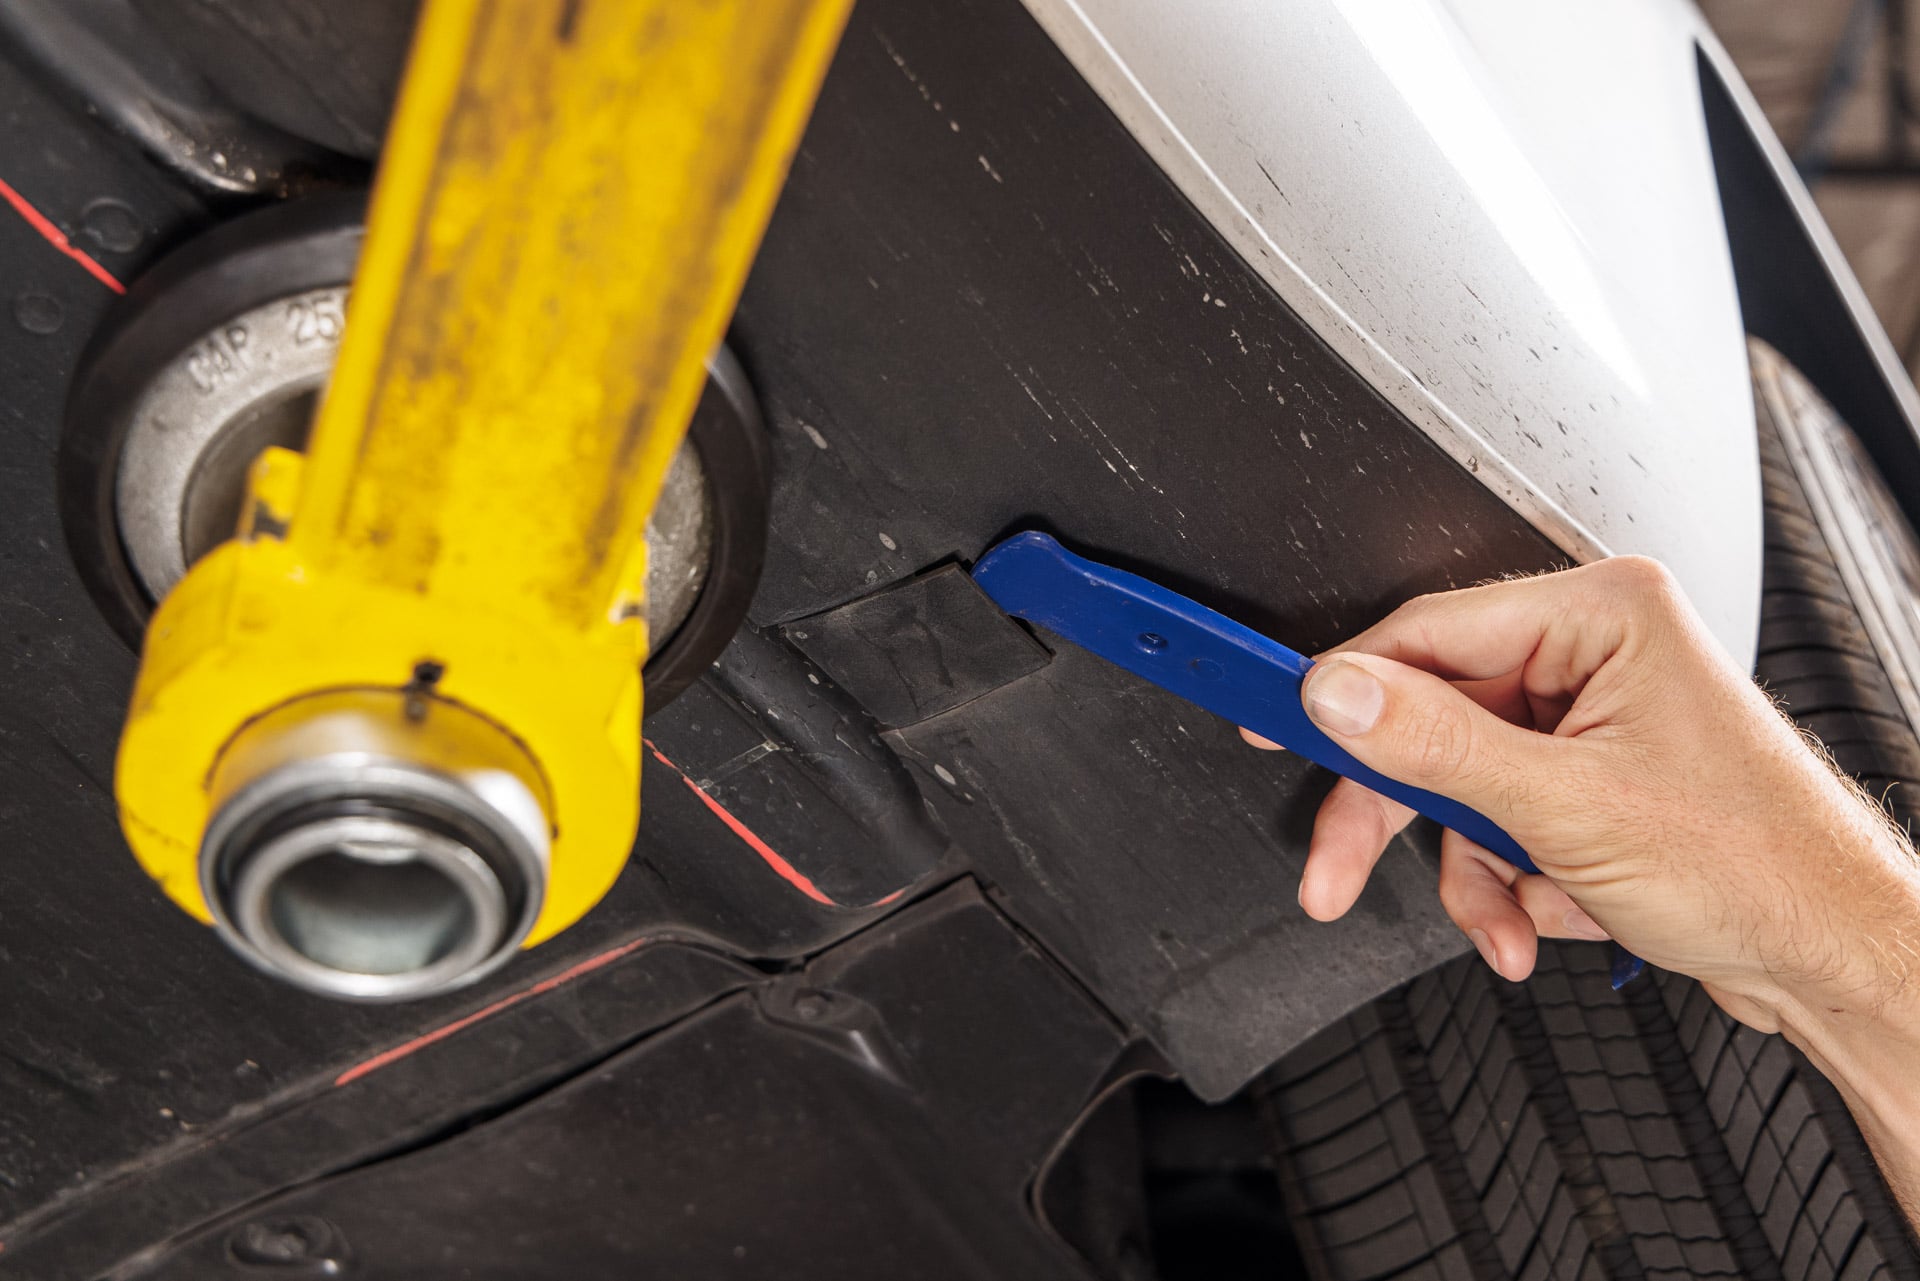
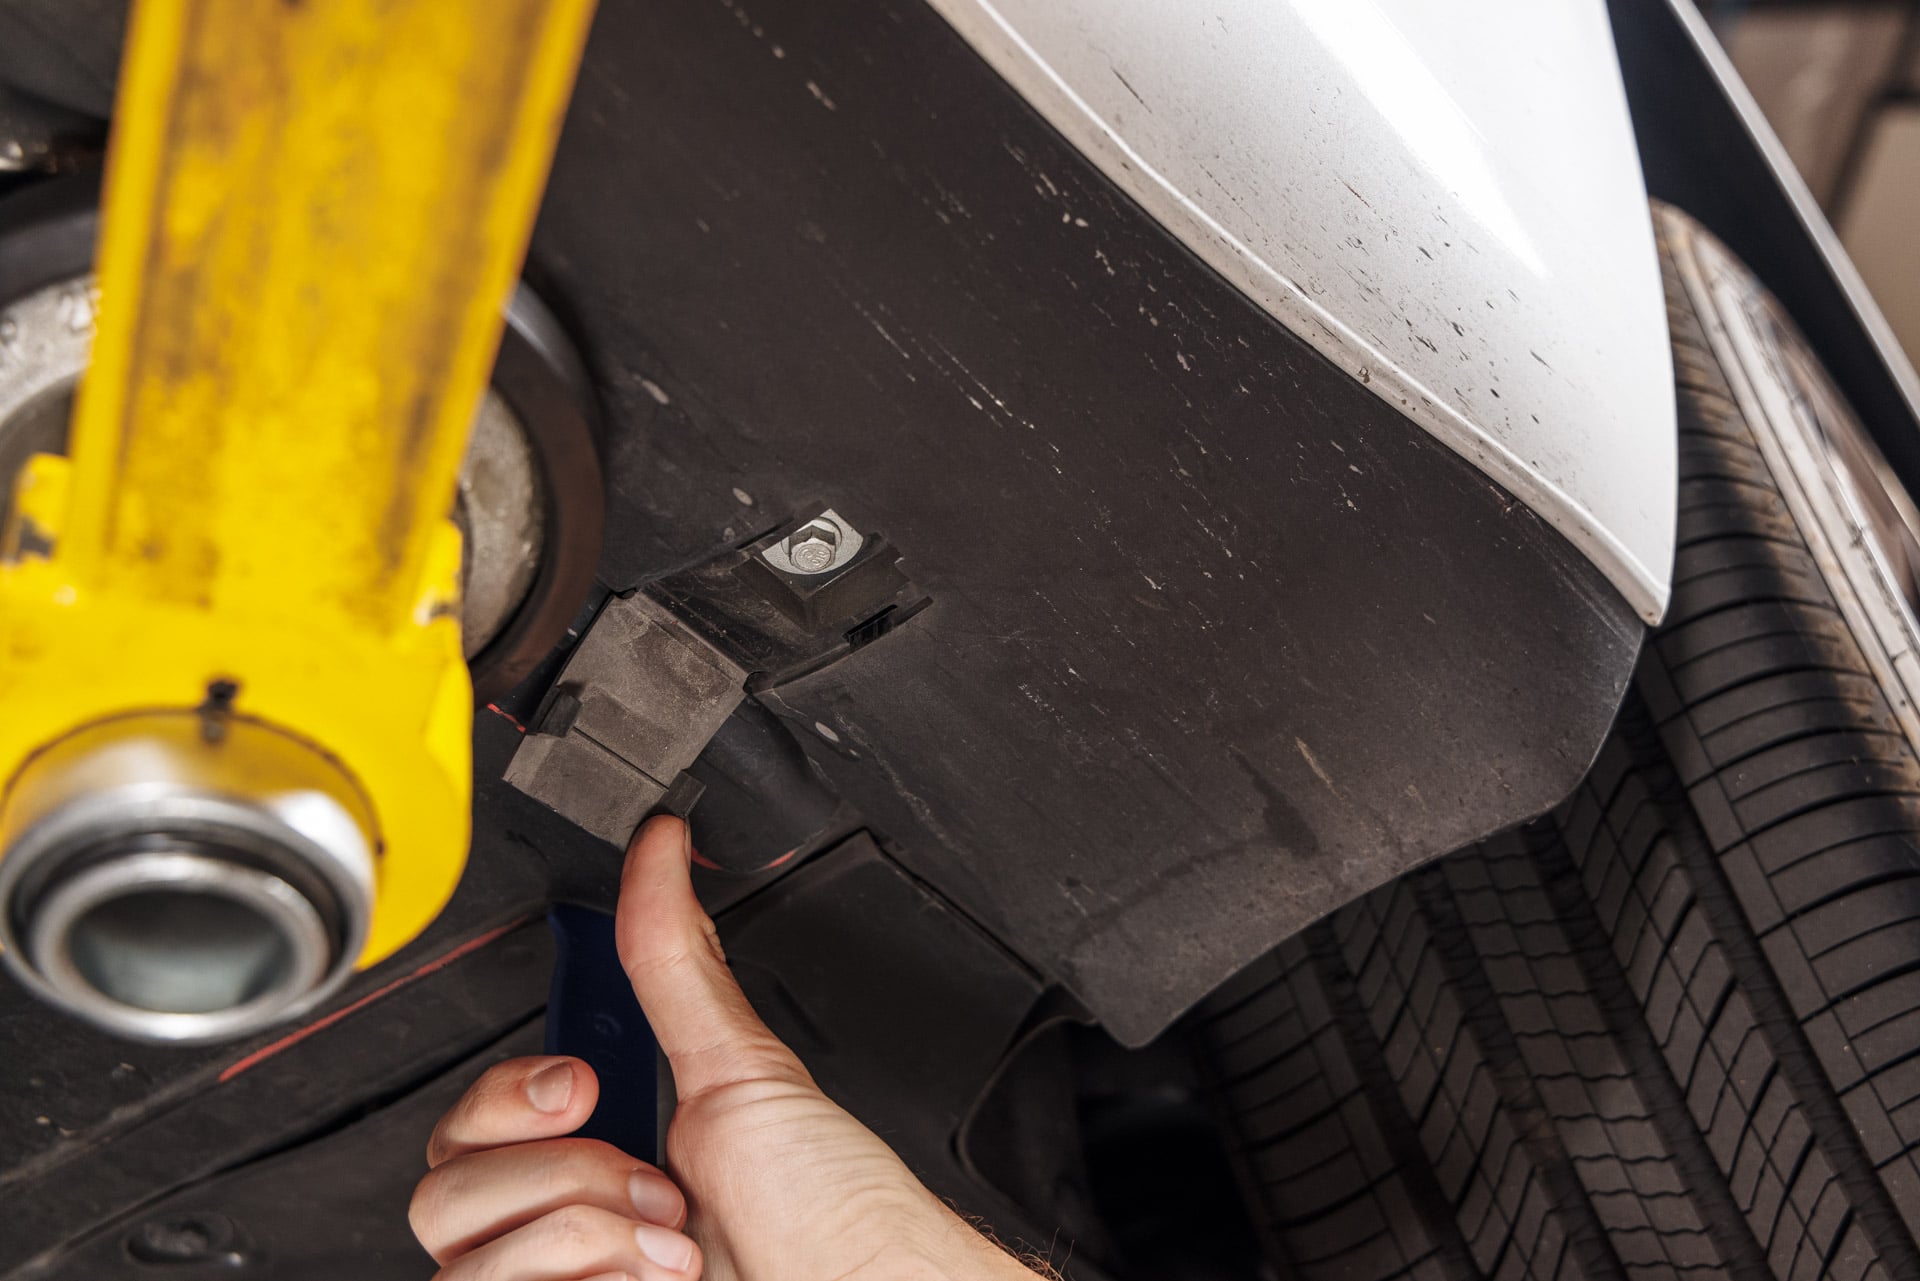
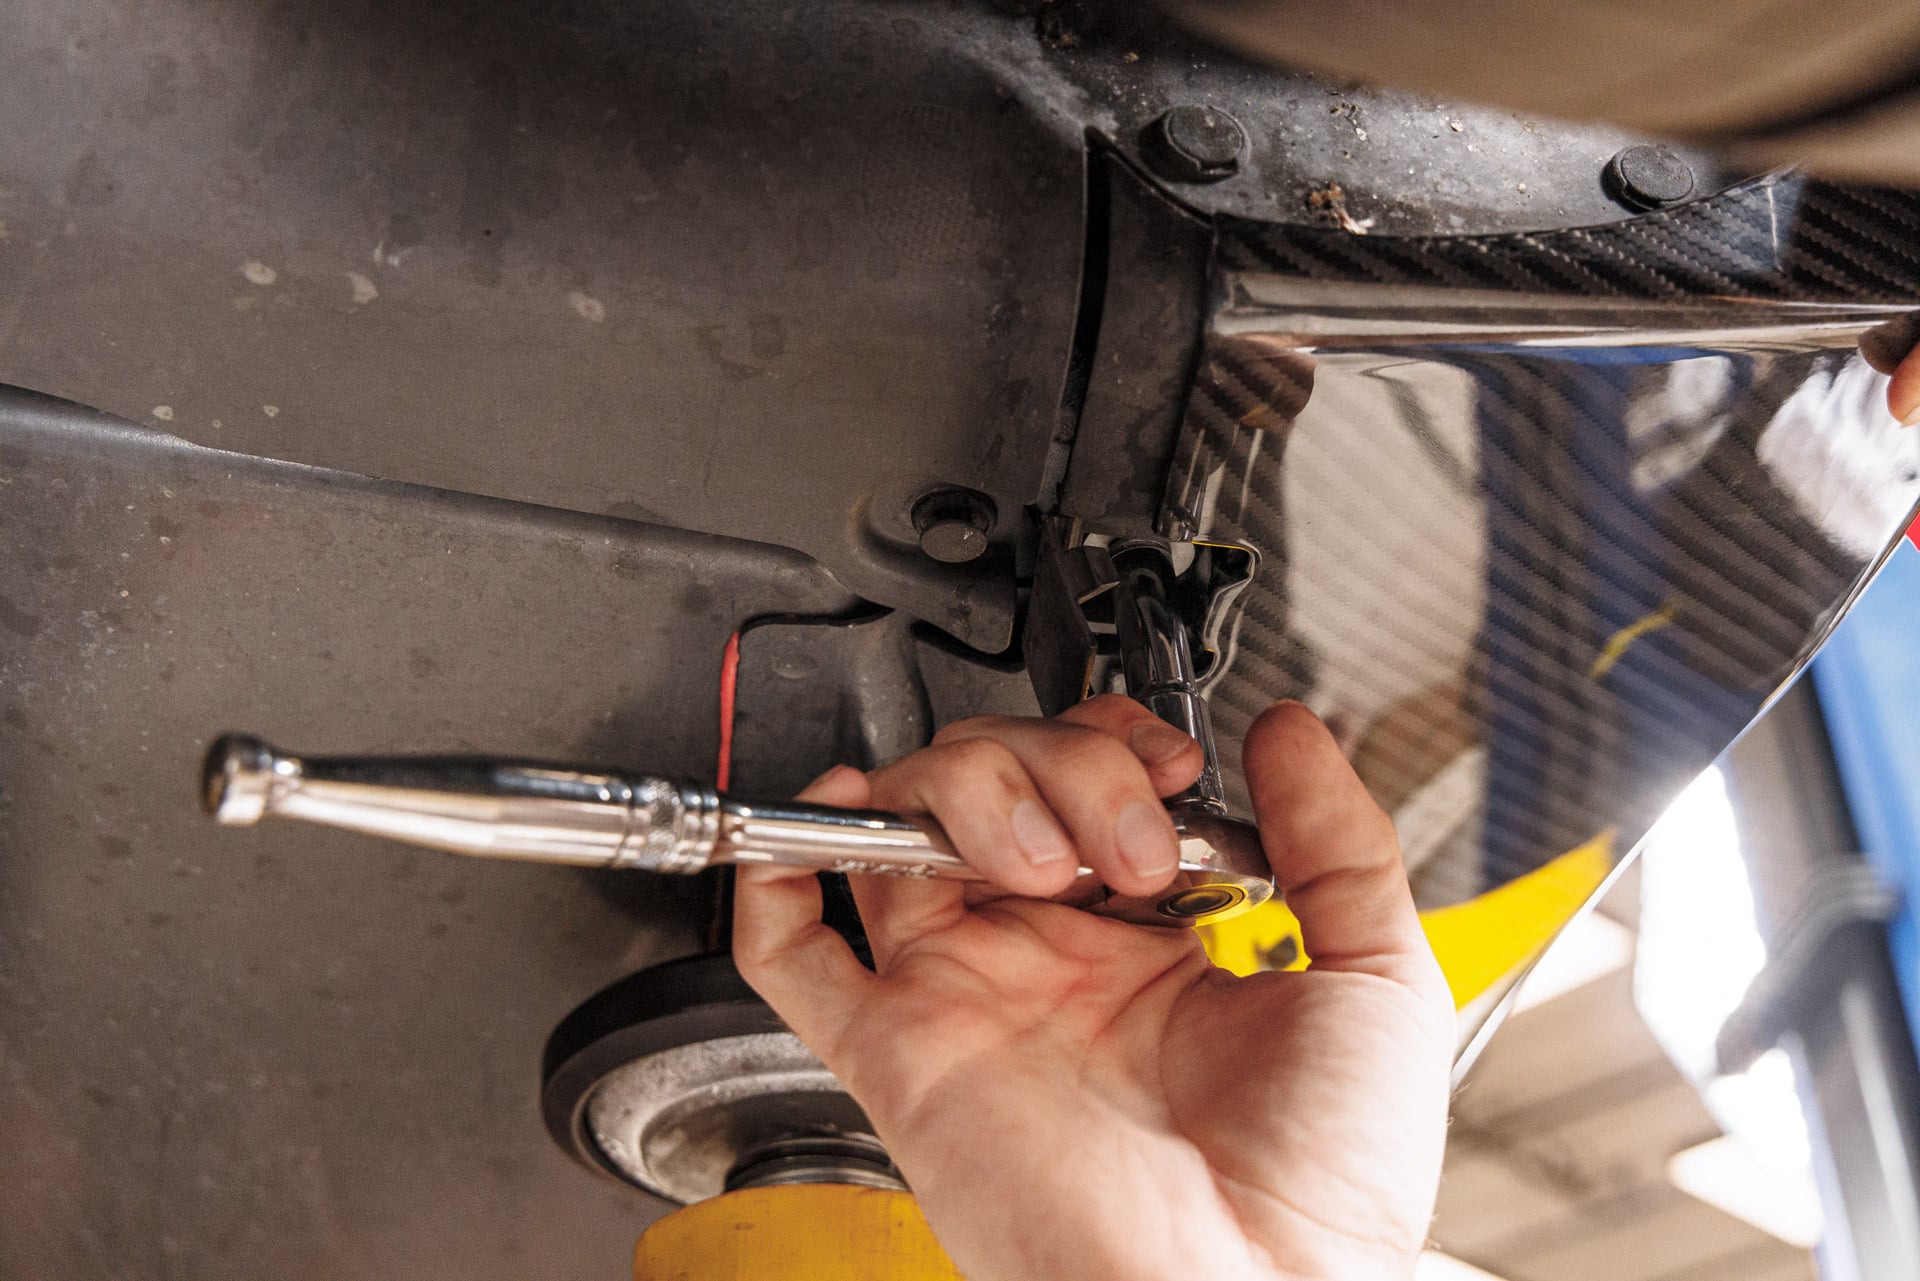
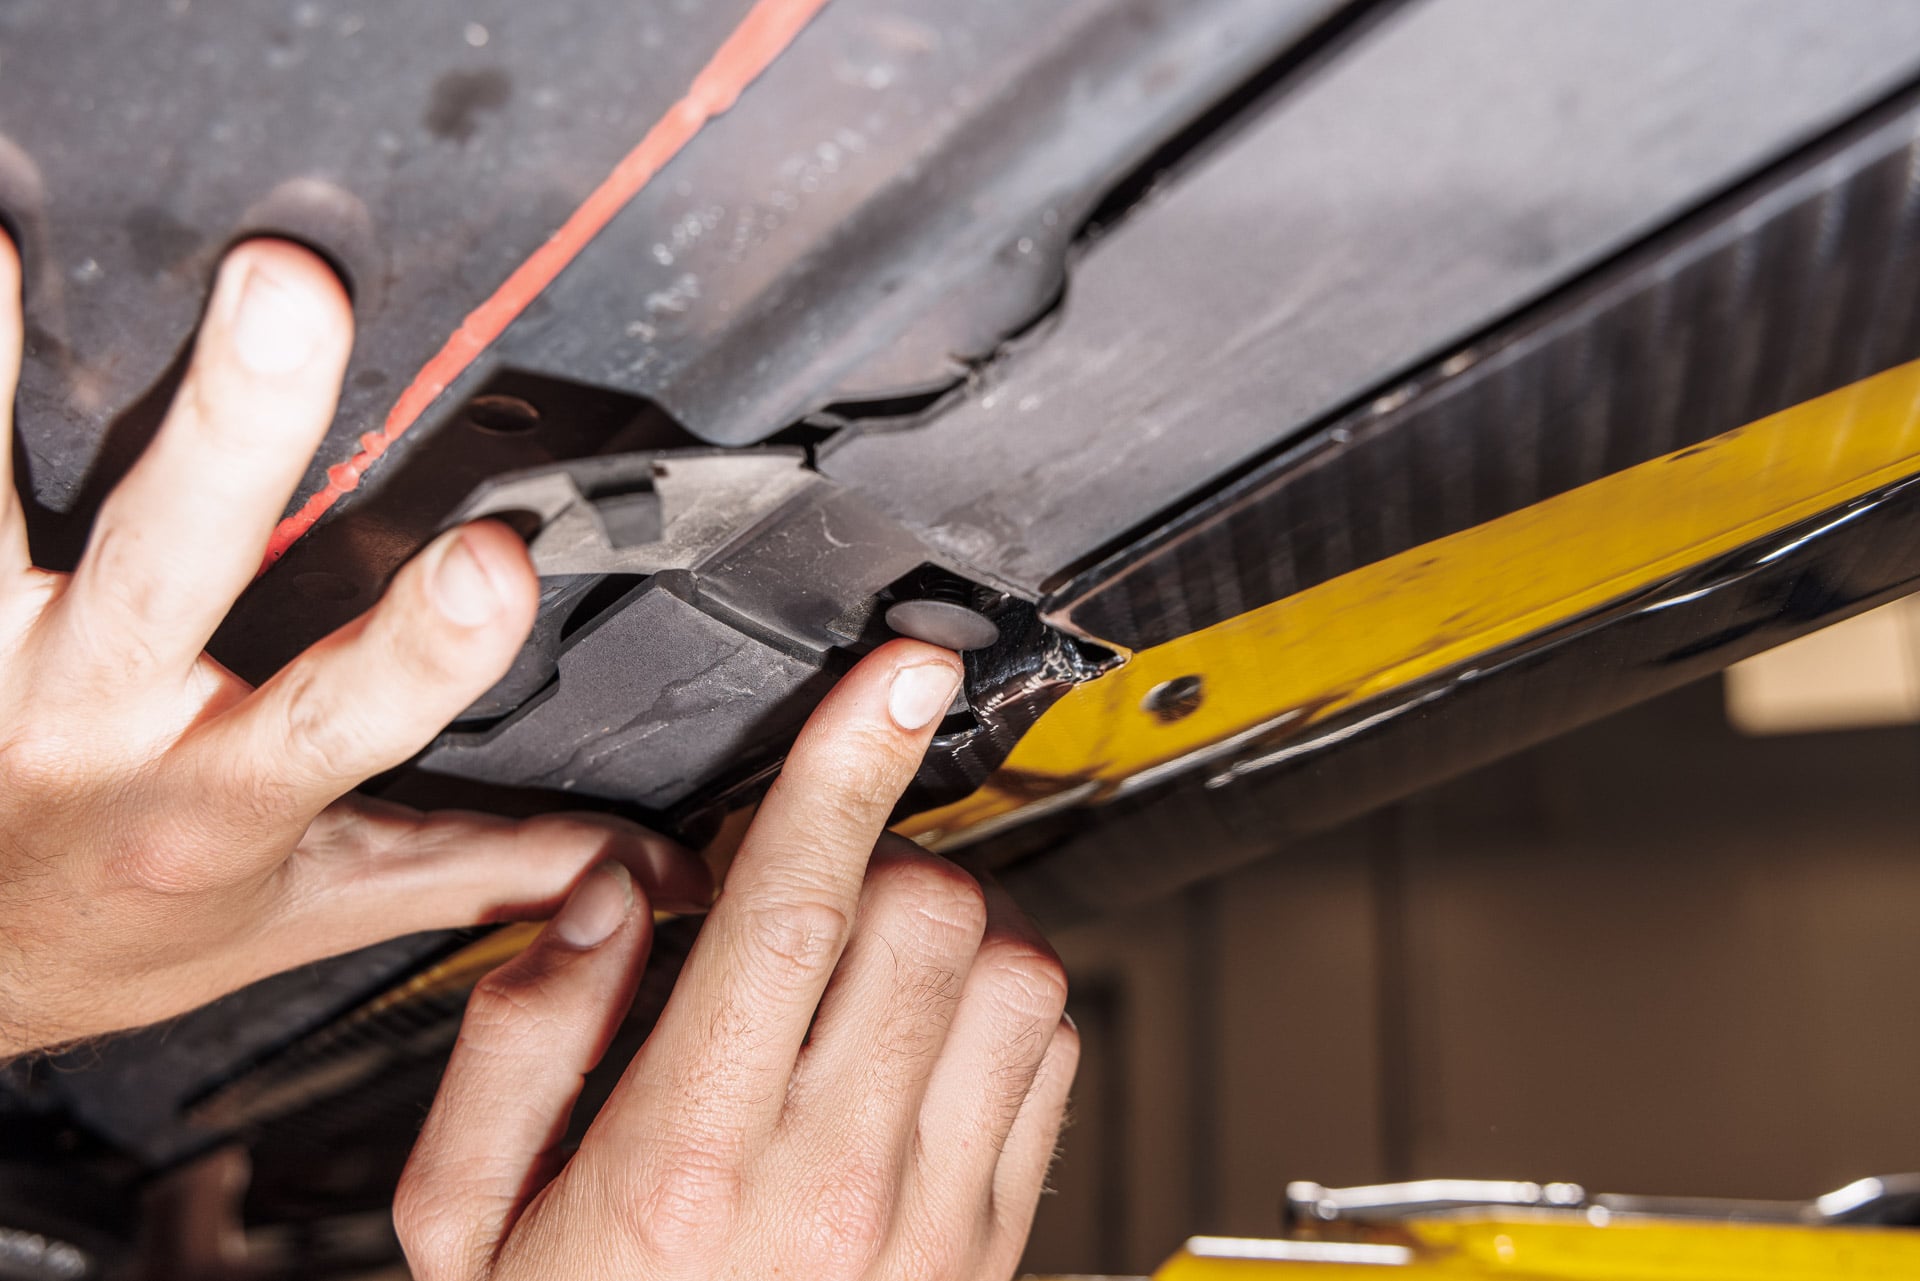
2. Carefully pry off the 4 plastic bolt covers along the lower rocker panel.
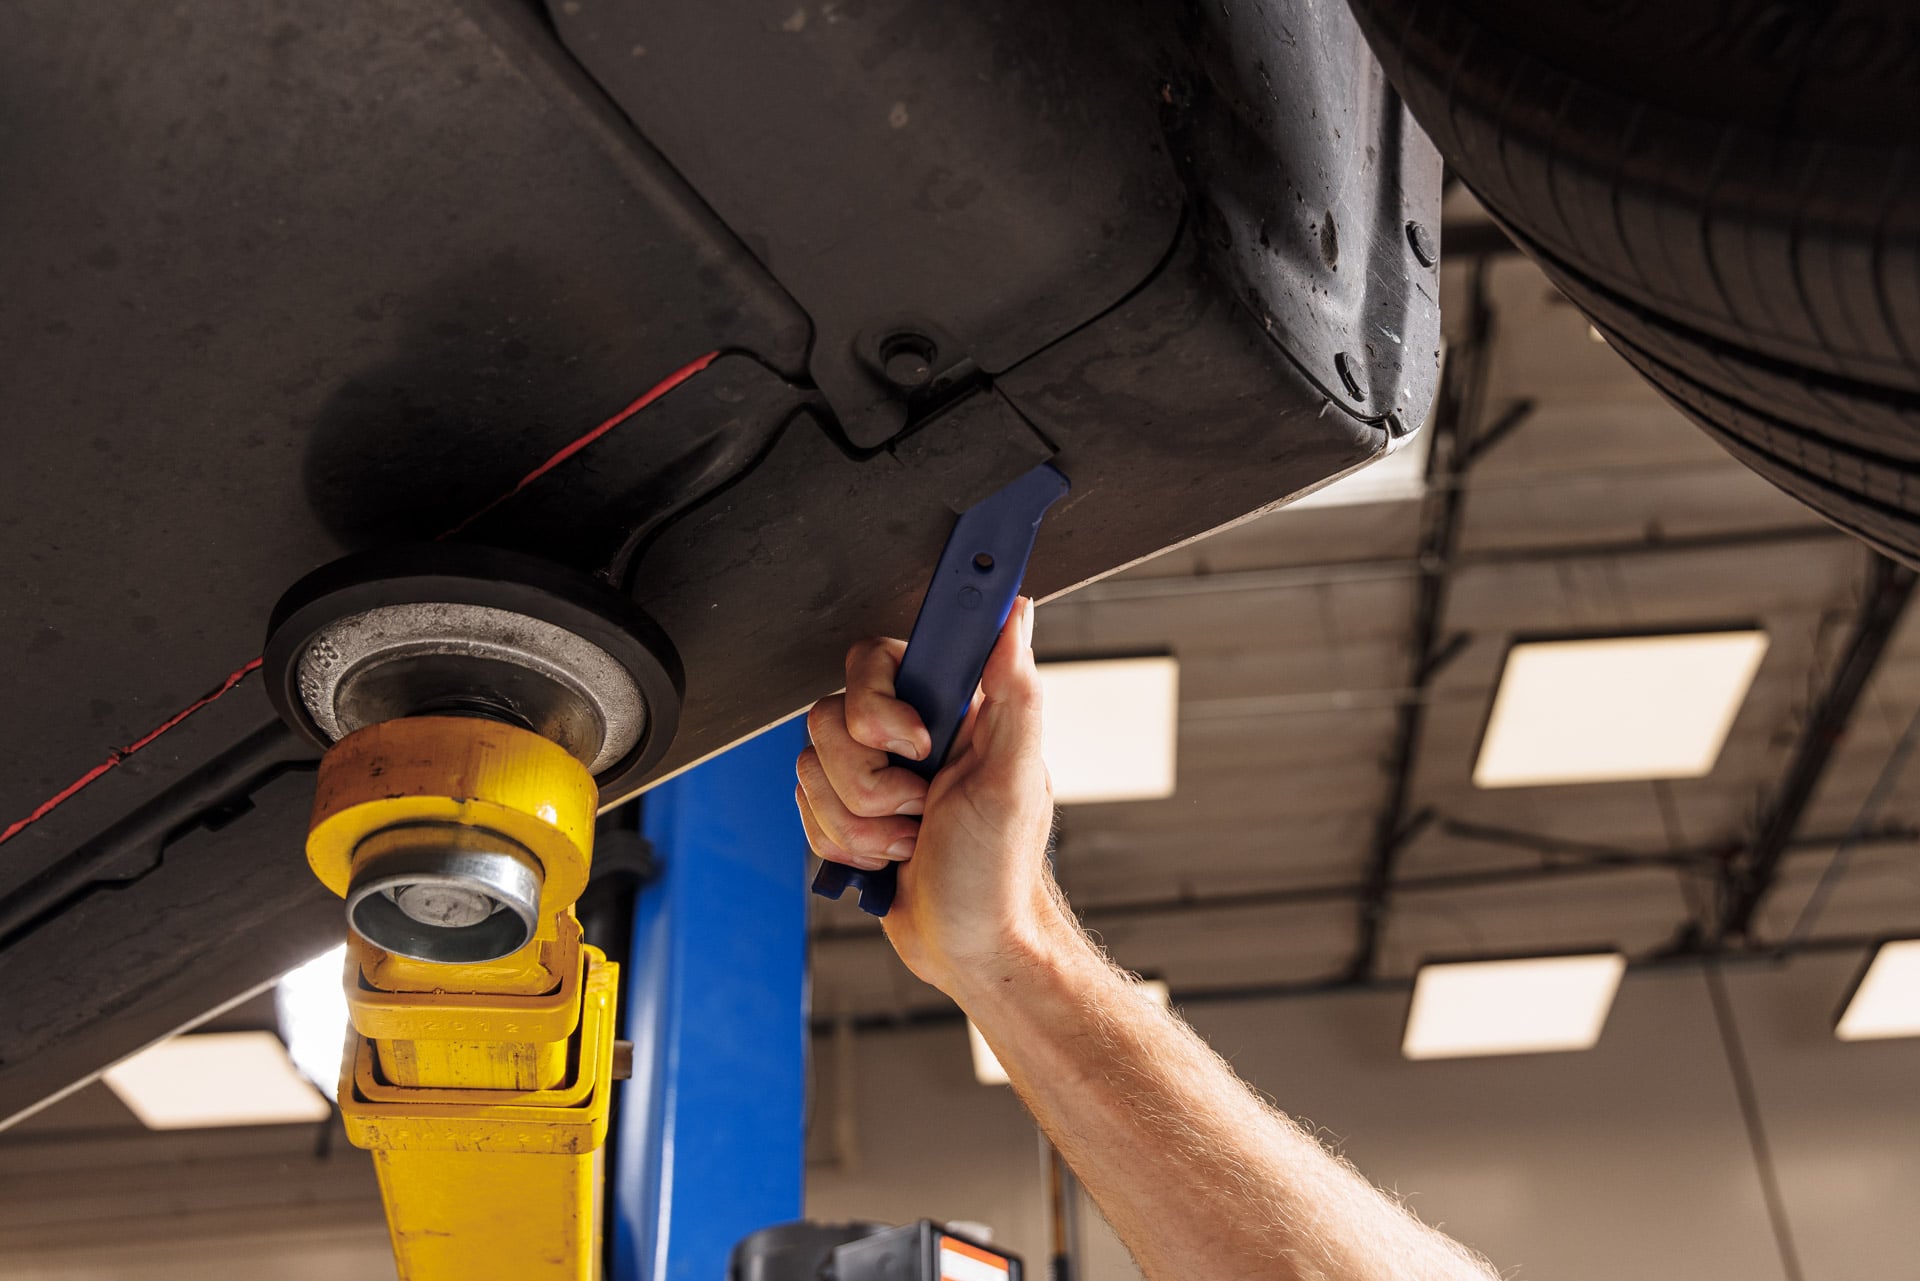
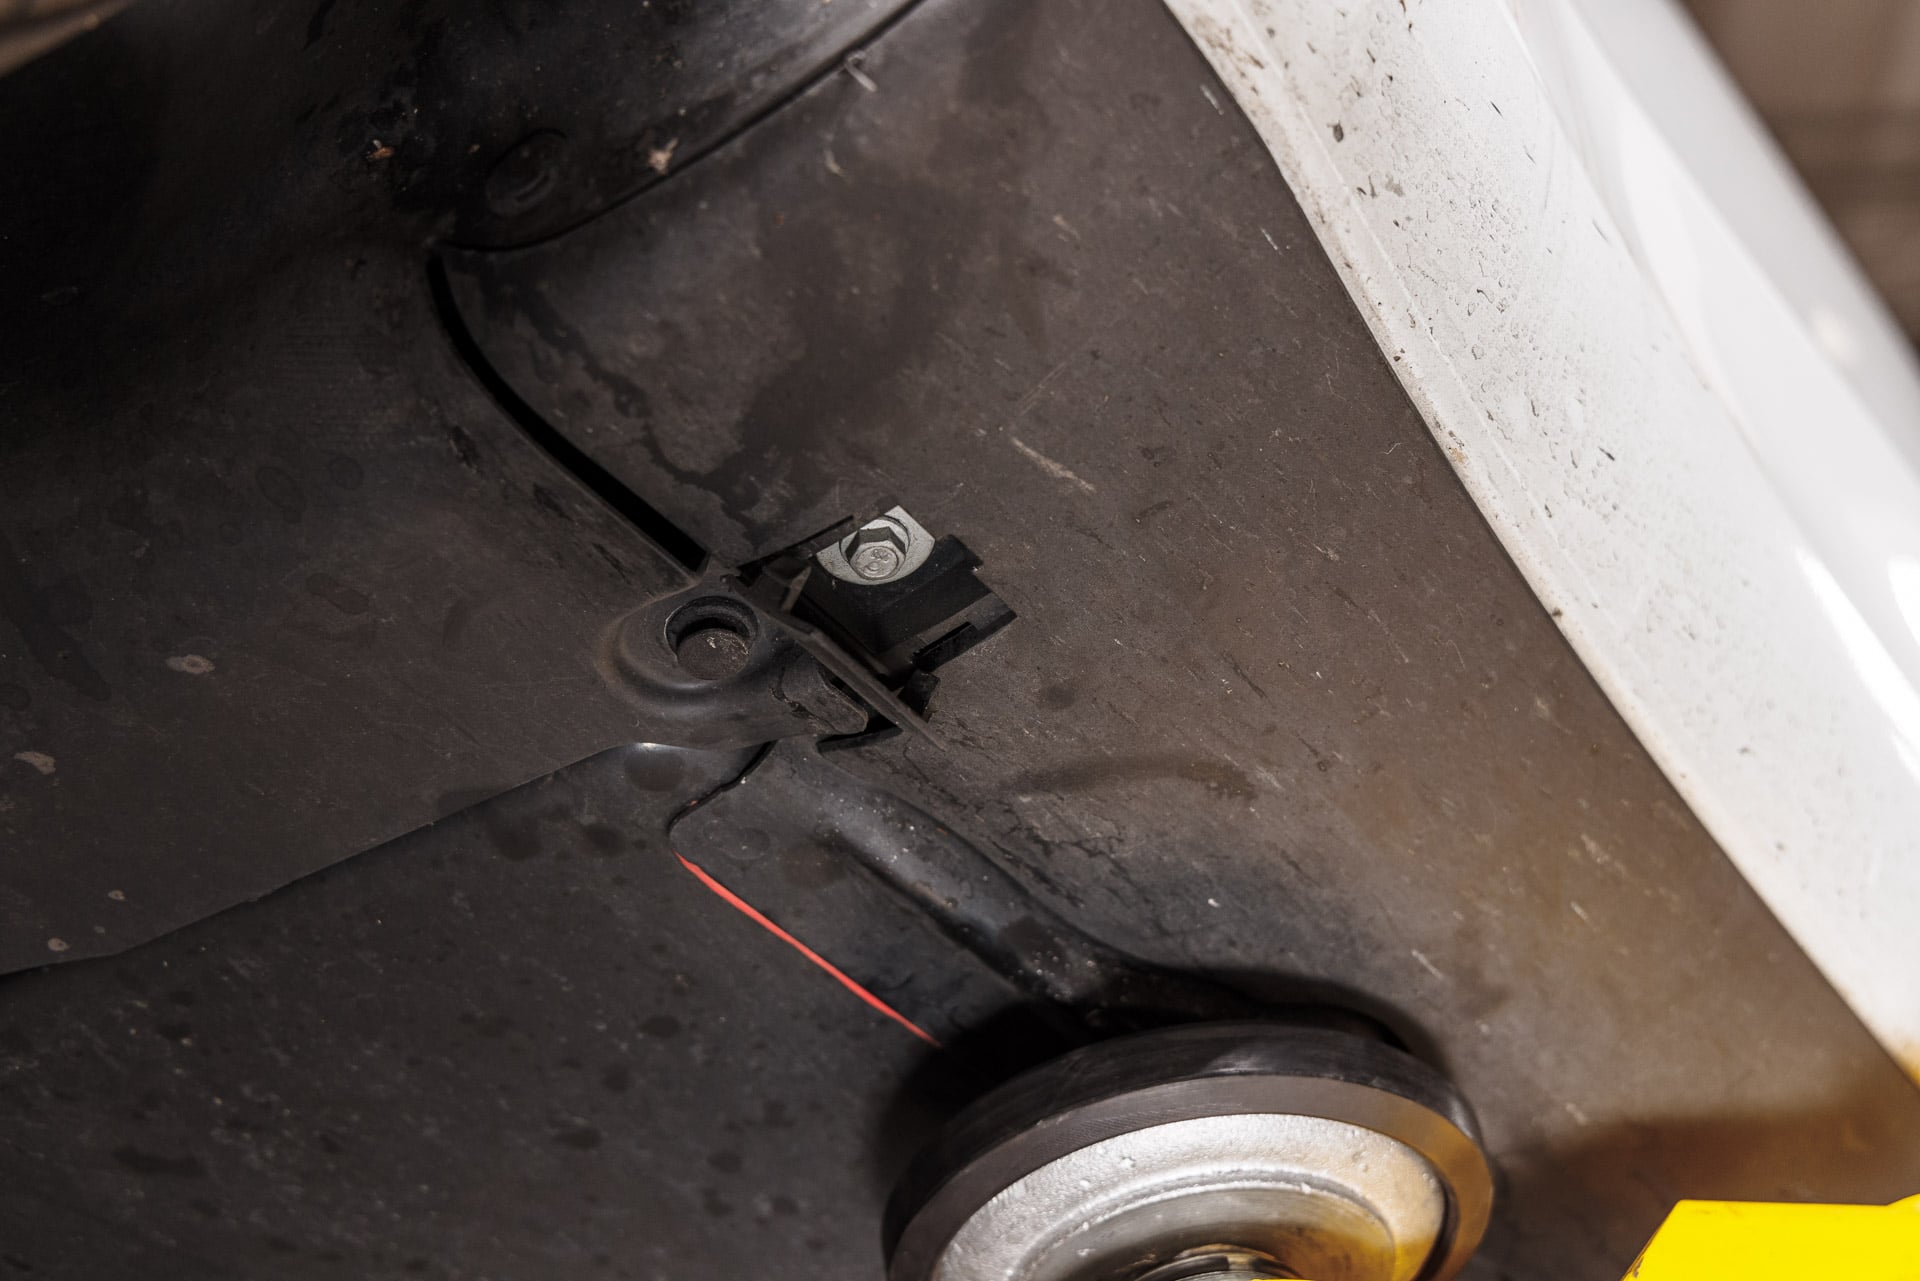
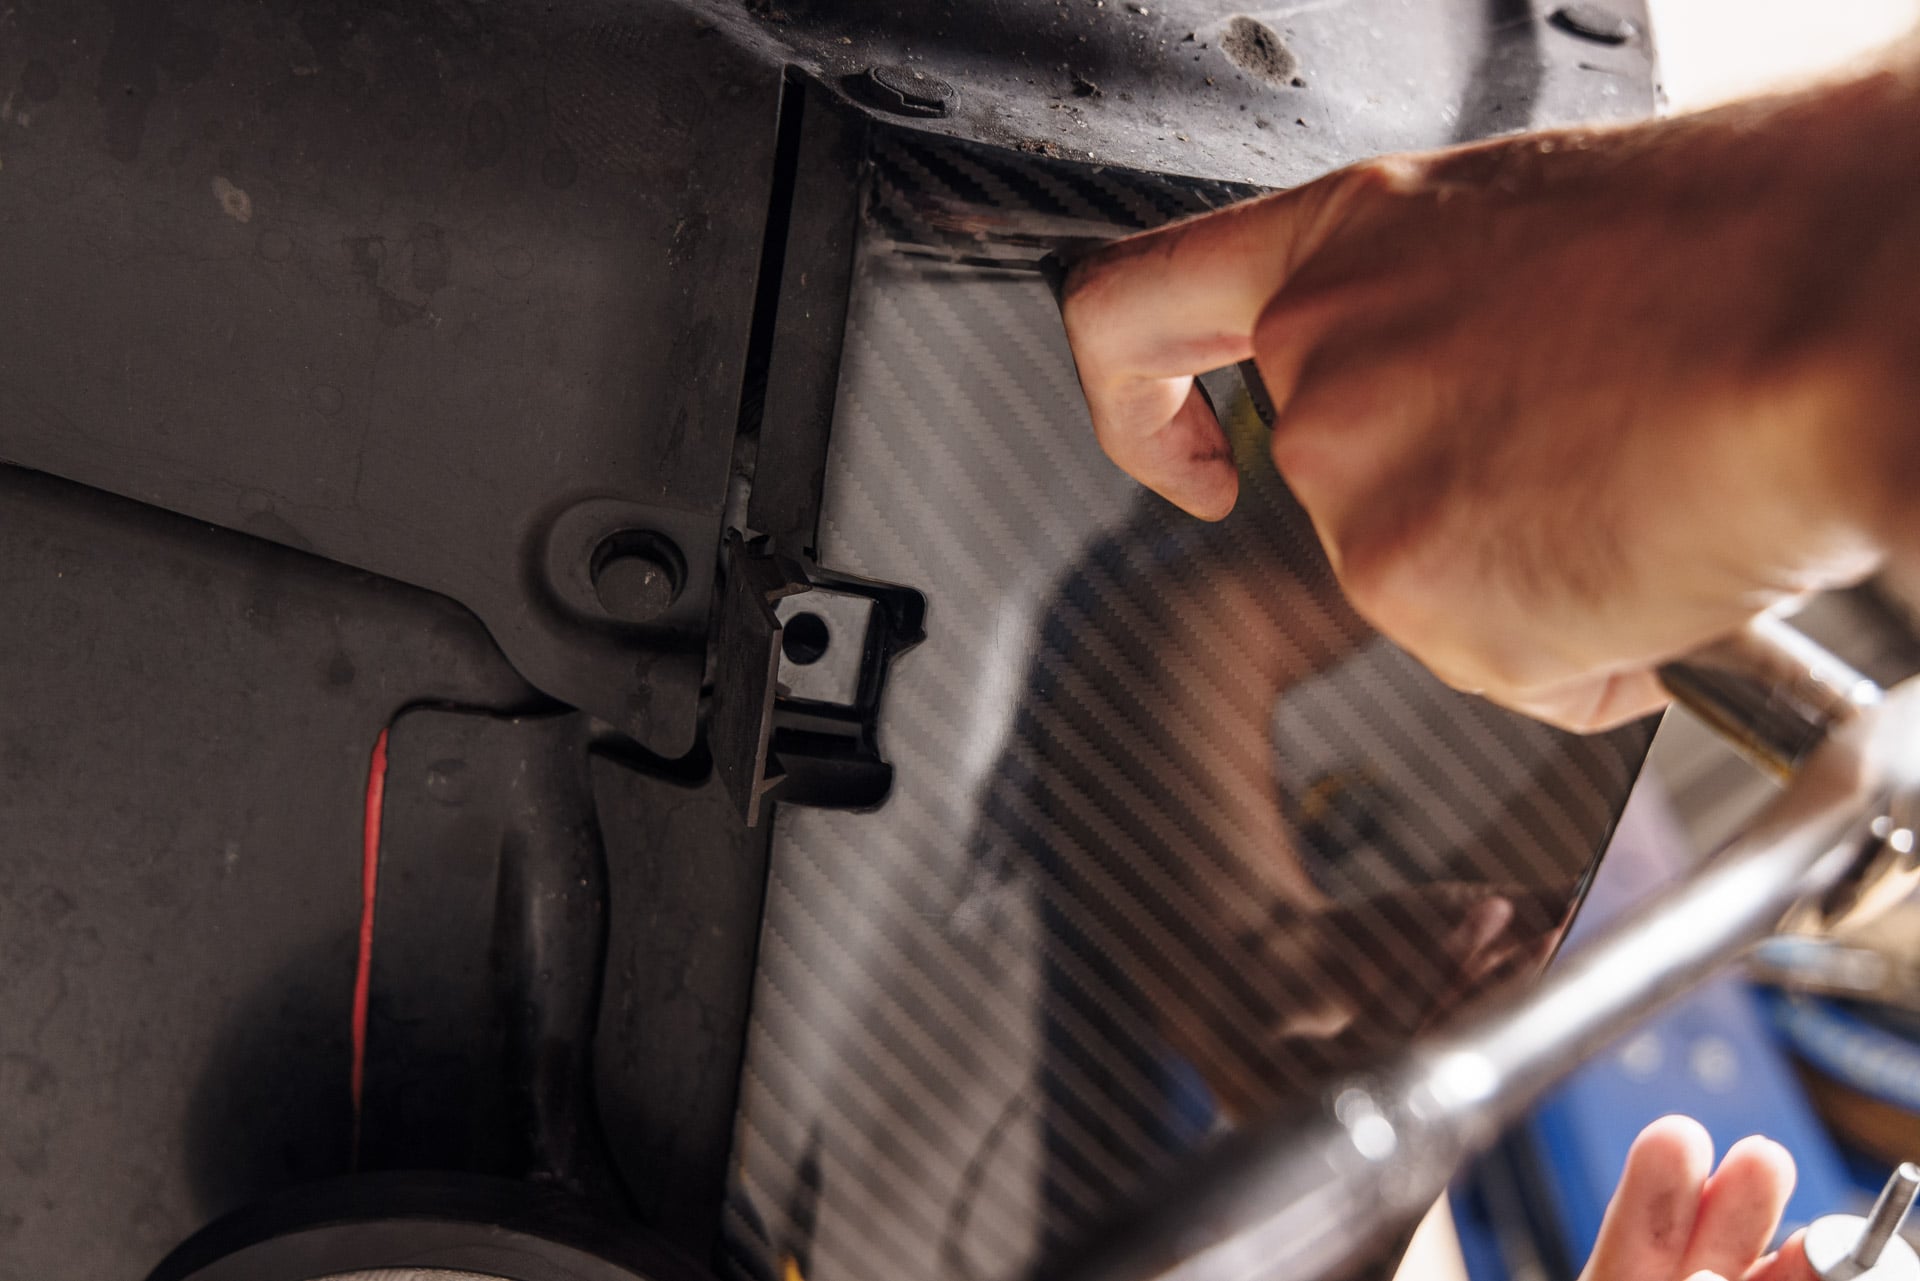
3. Using a 10 mm deep socket, remove the 2 factory bolts securing the rocker panel cover to the vehicle body. Note that some vehicles may have varying hardware quantities.
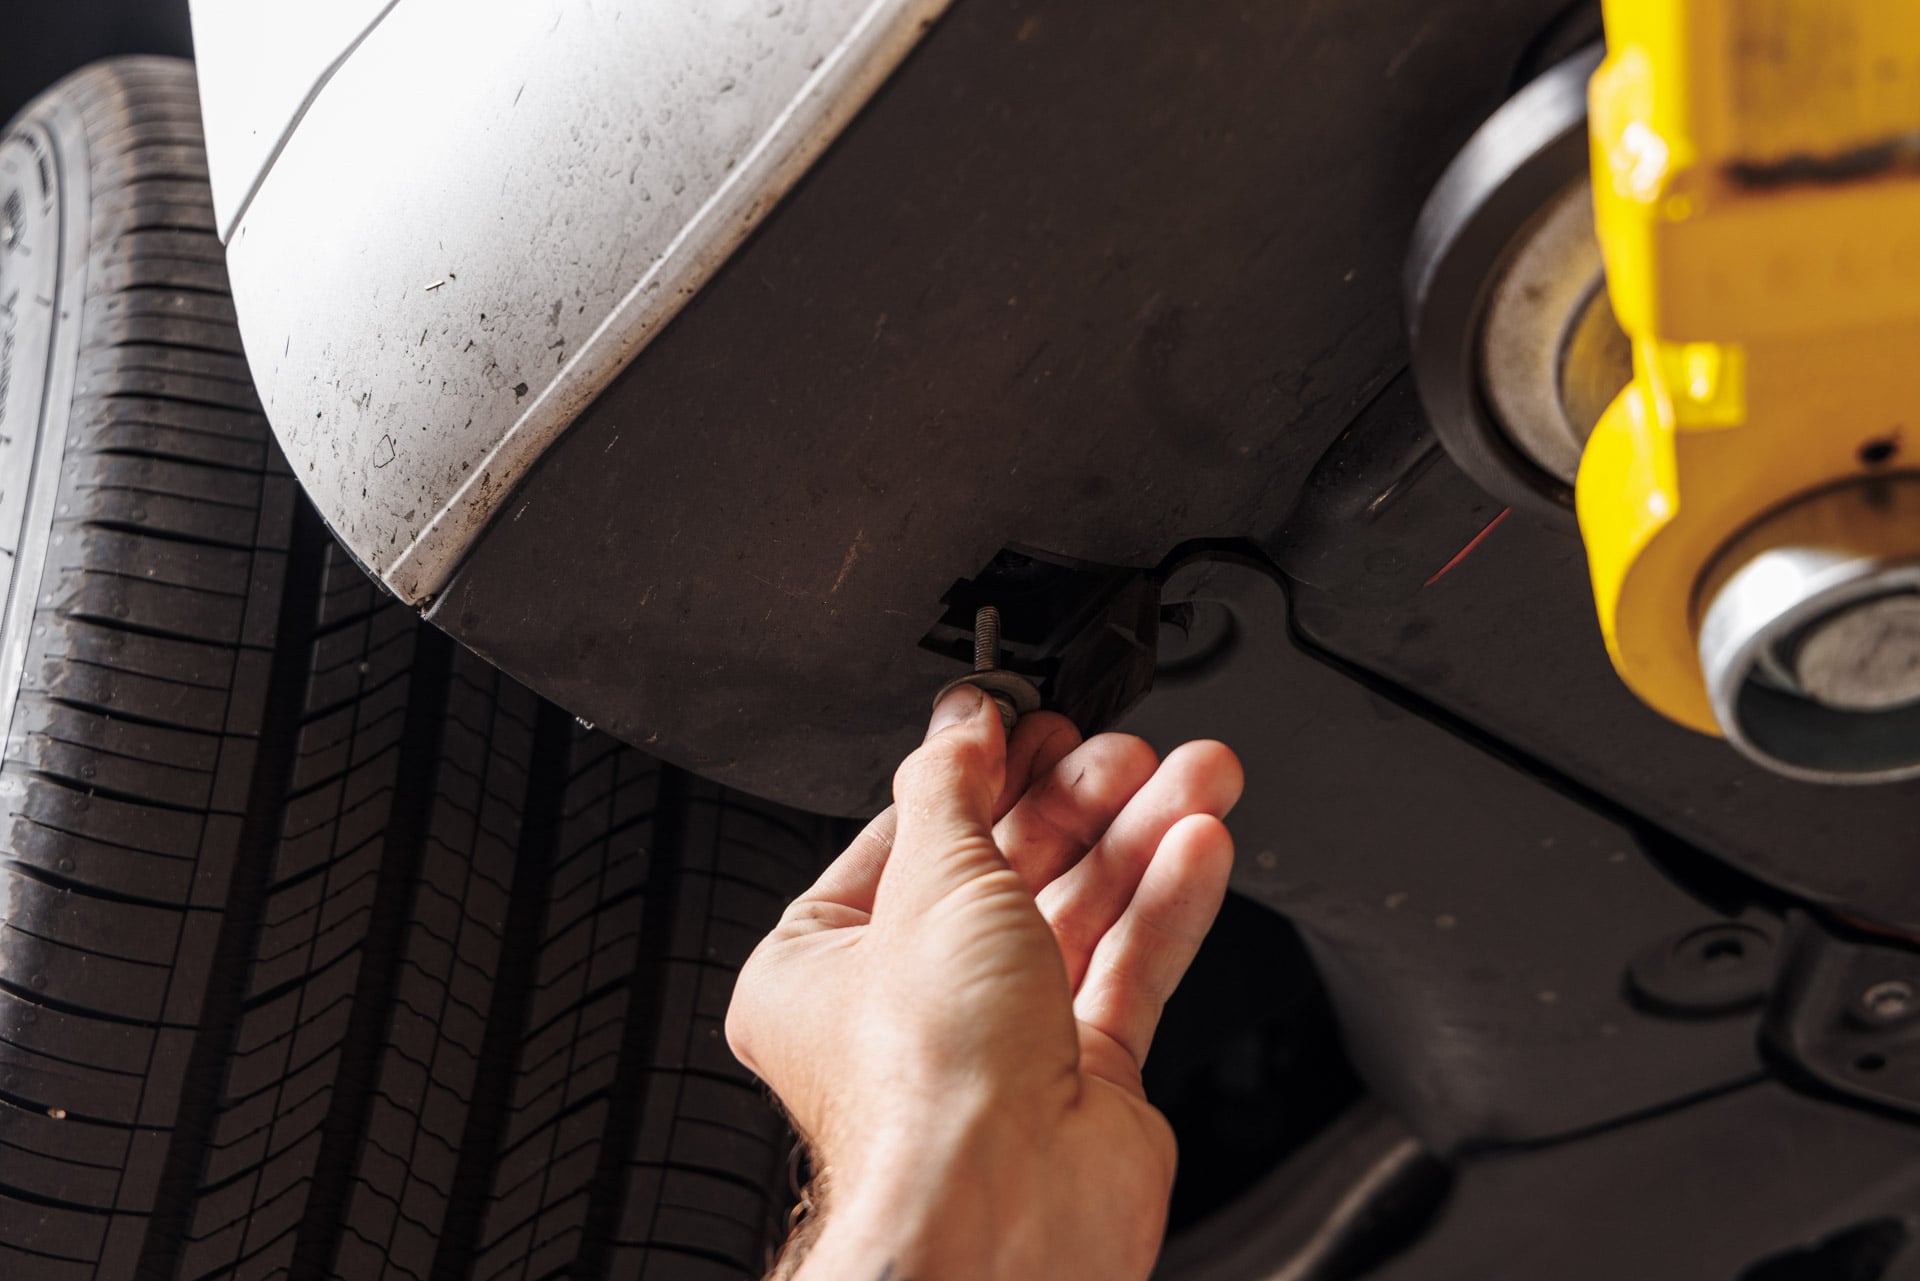


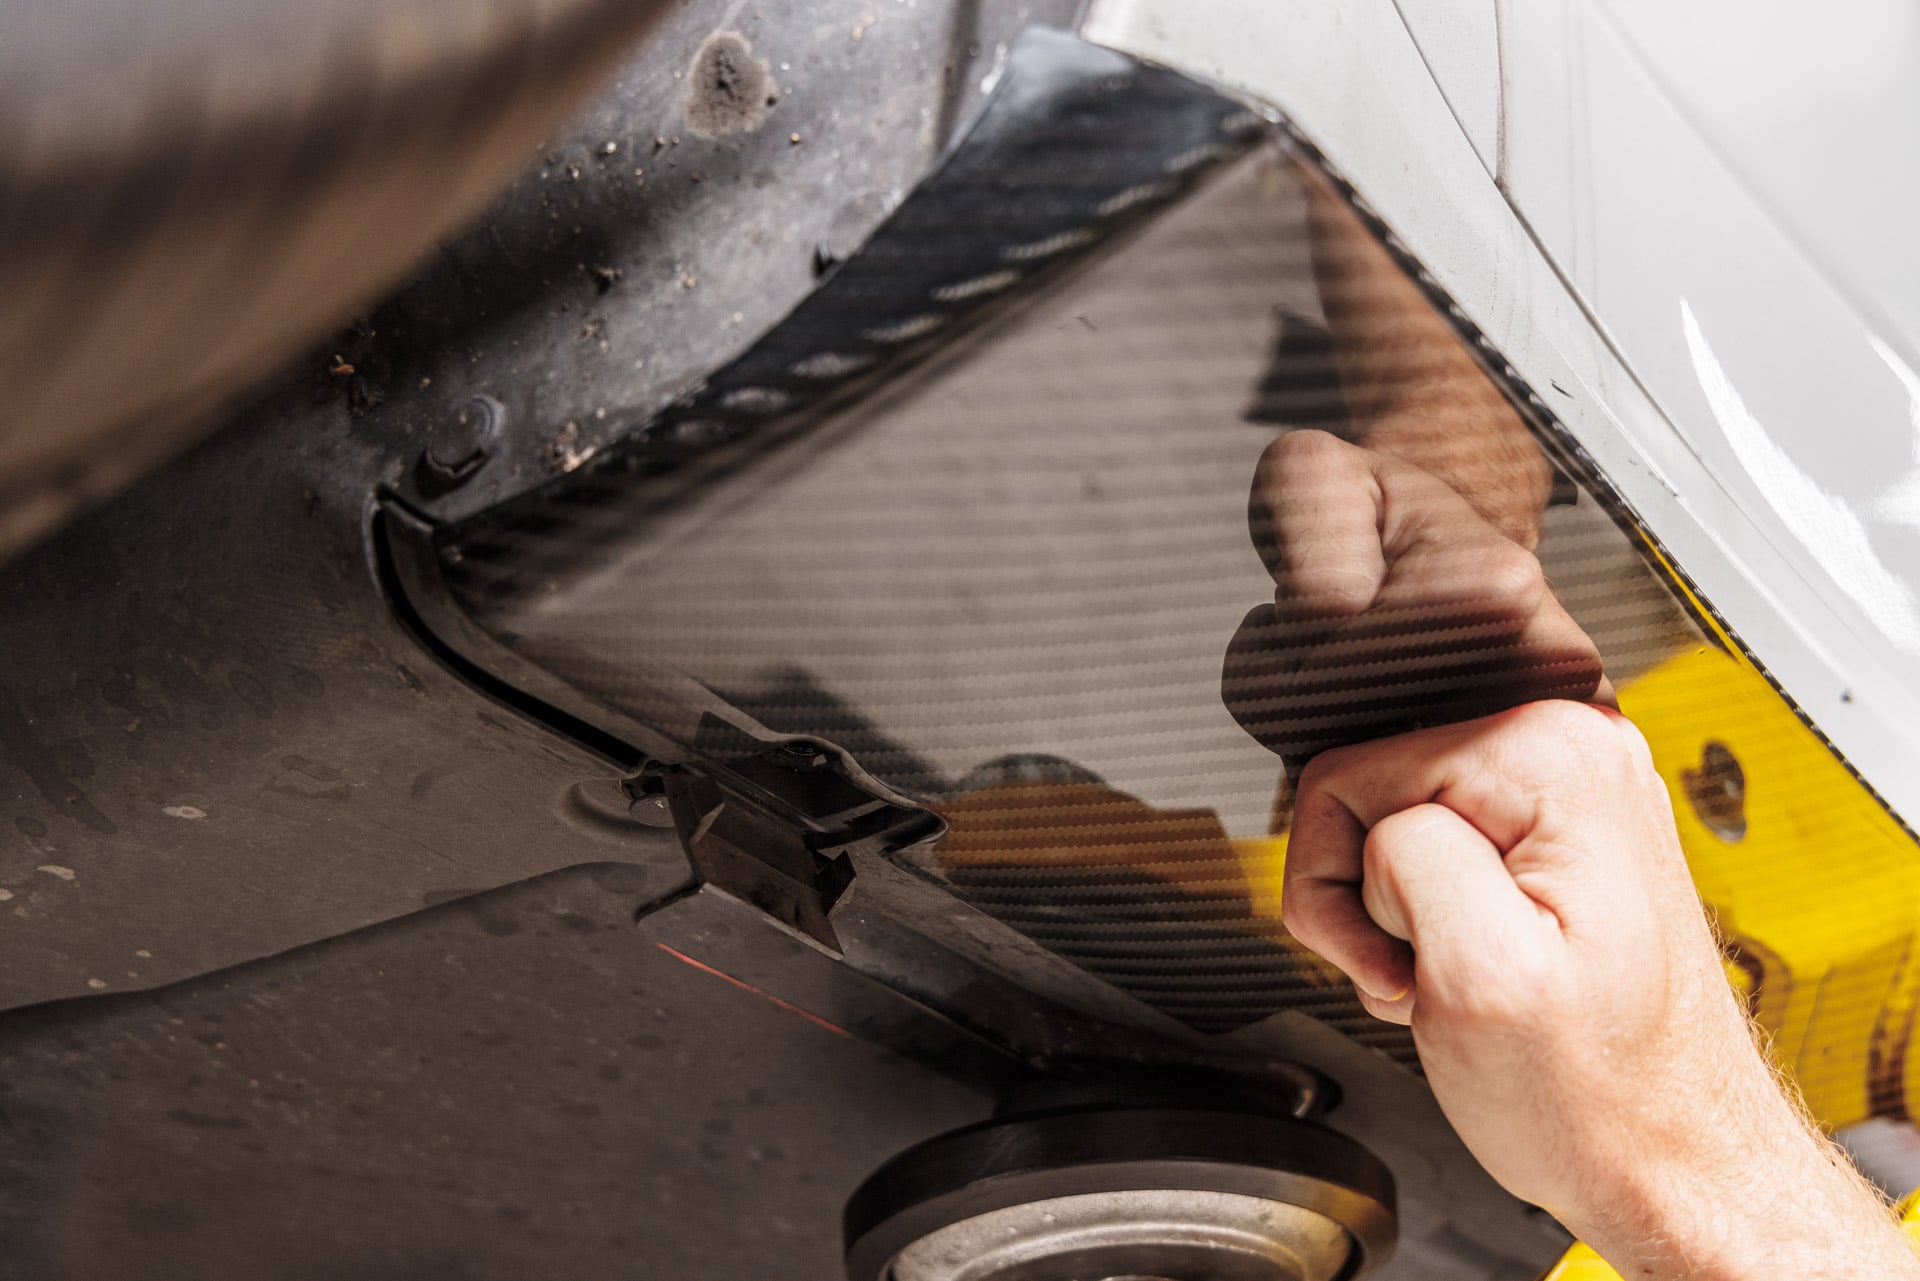
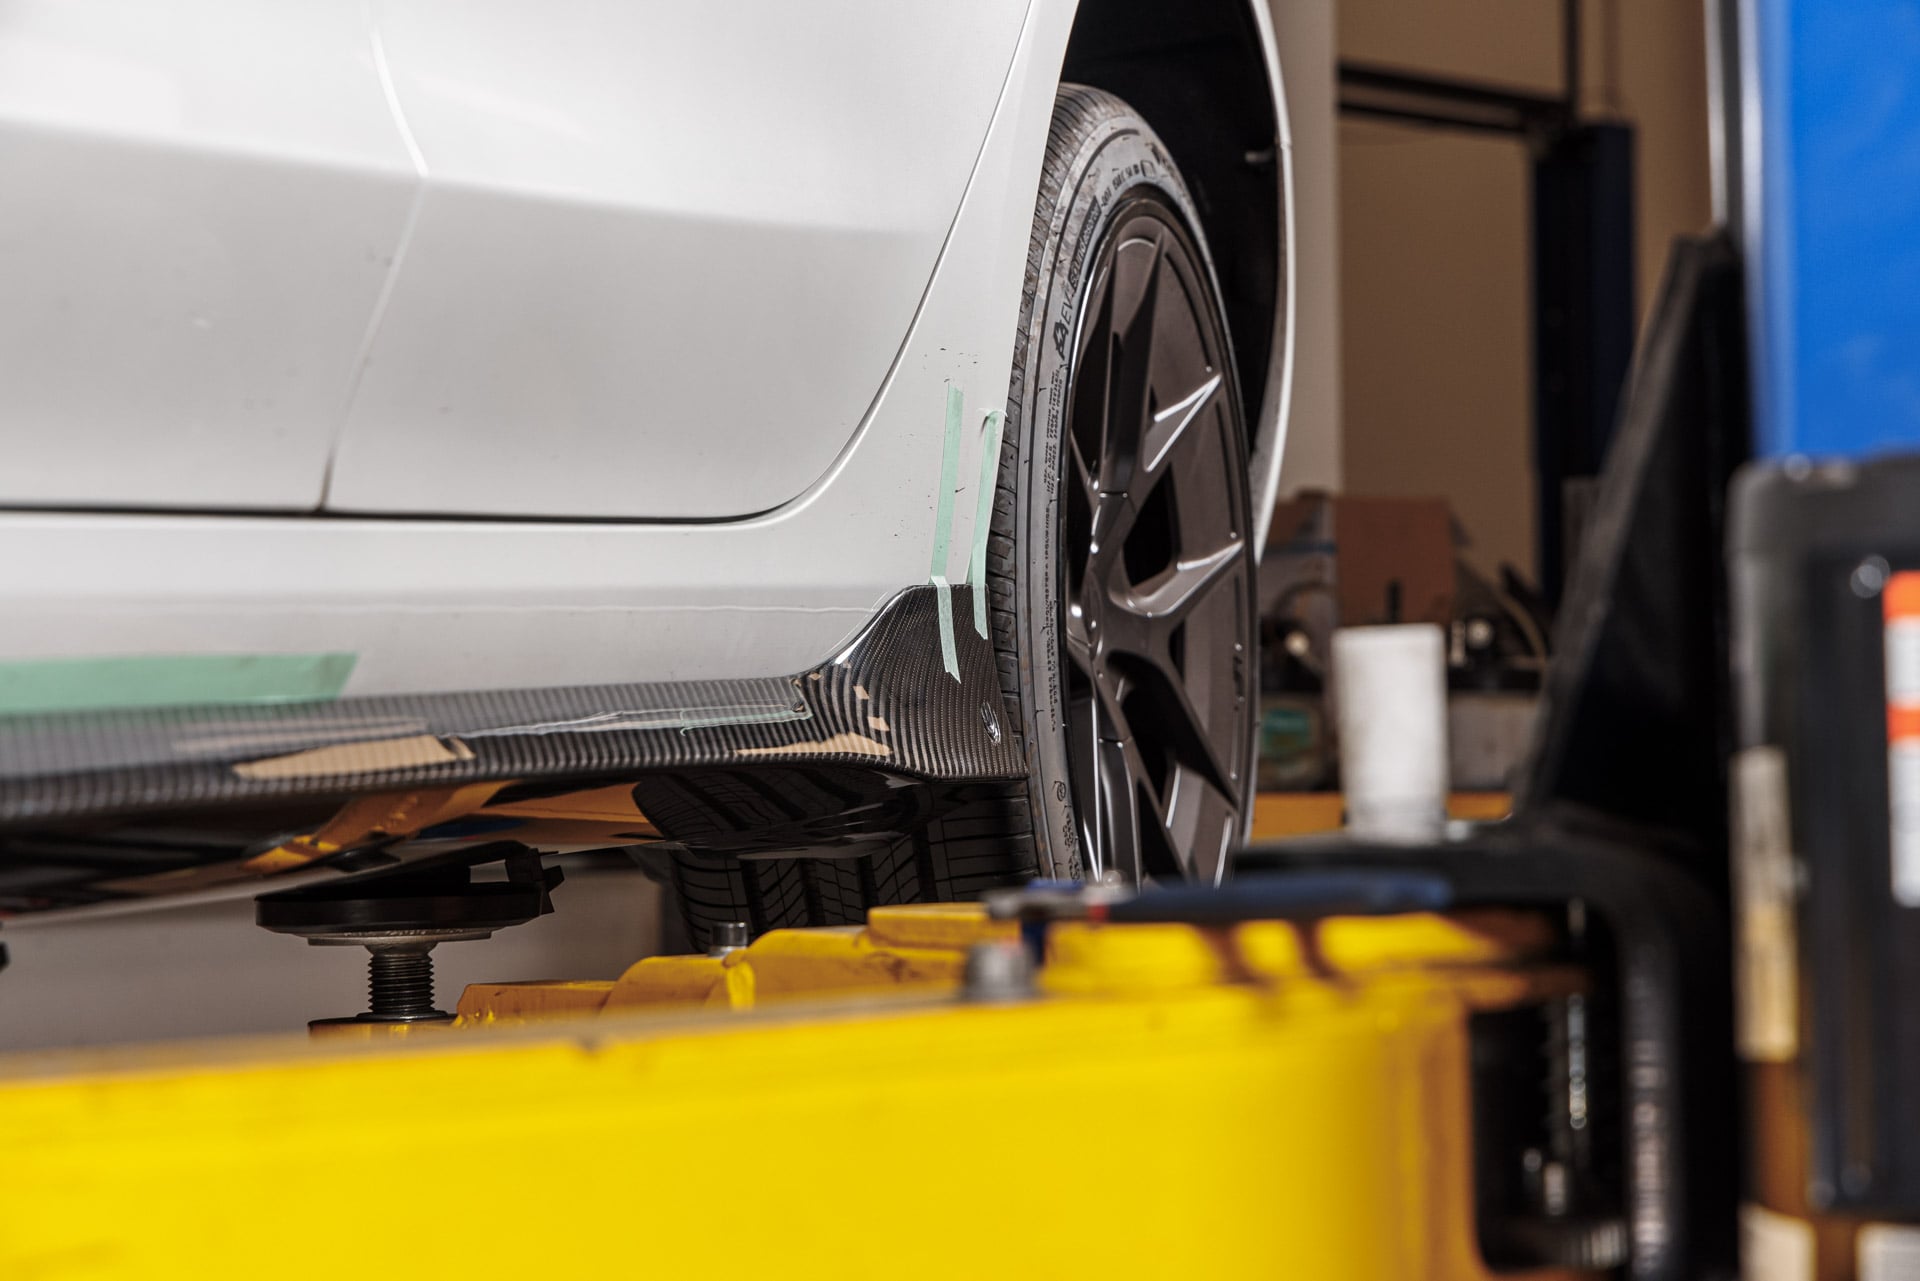
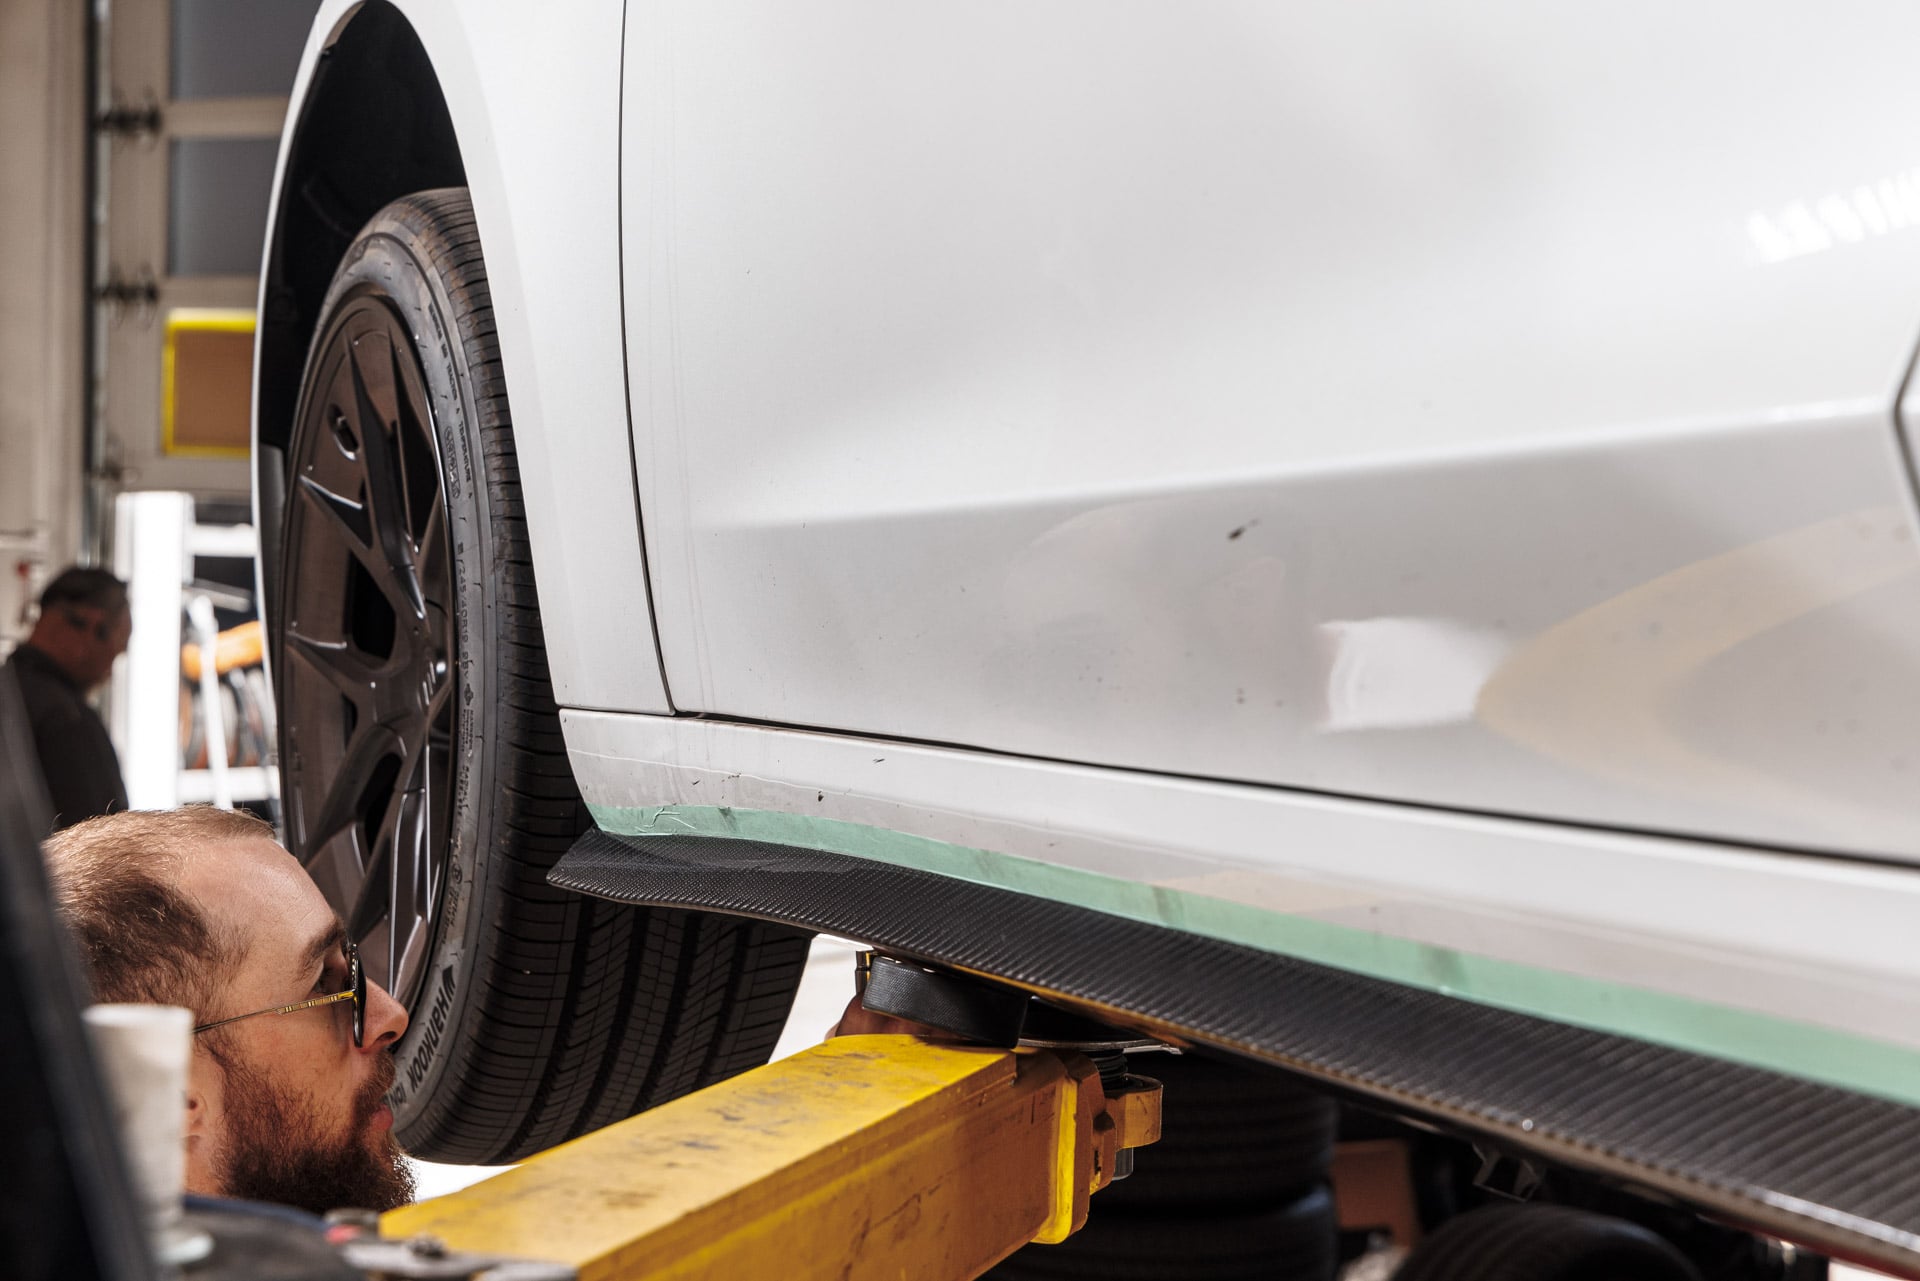
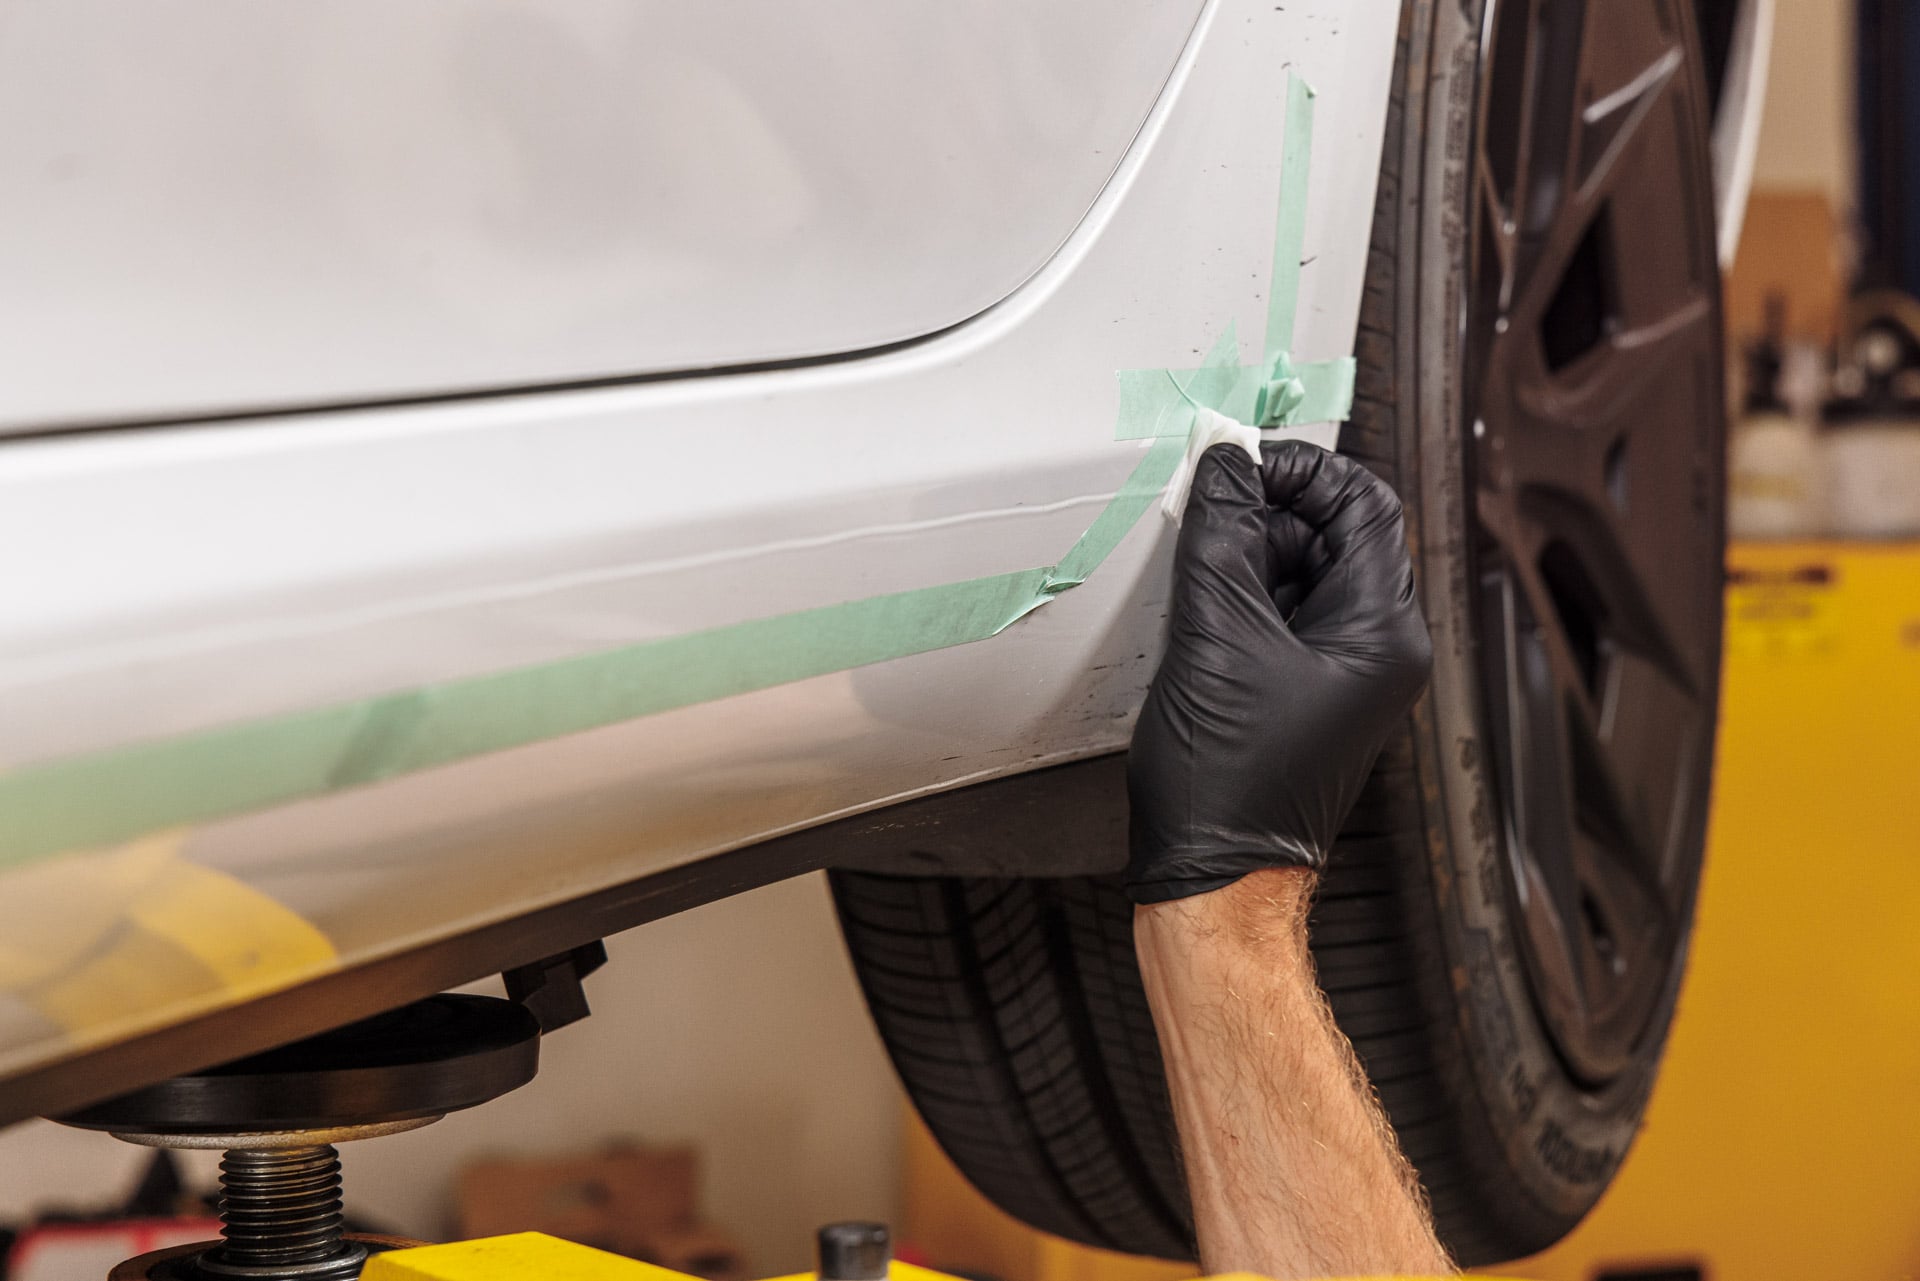
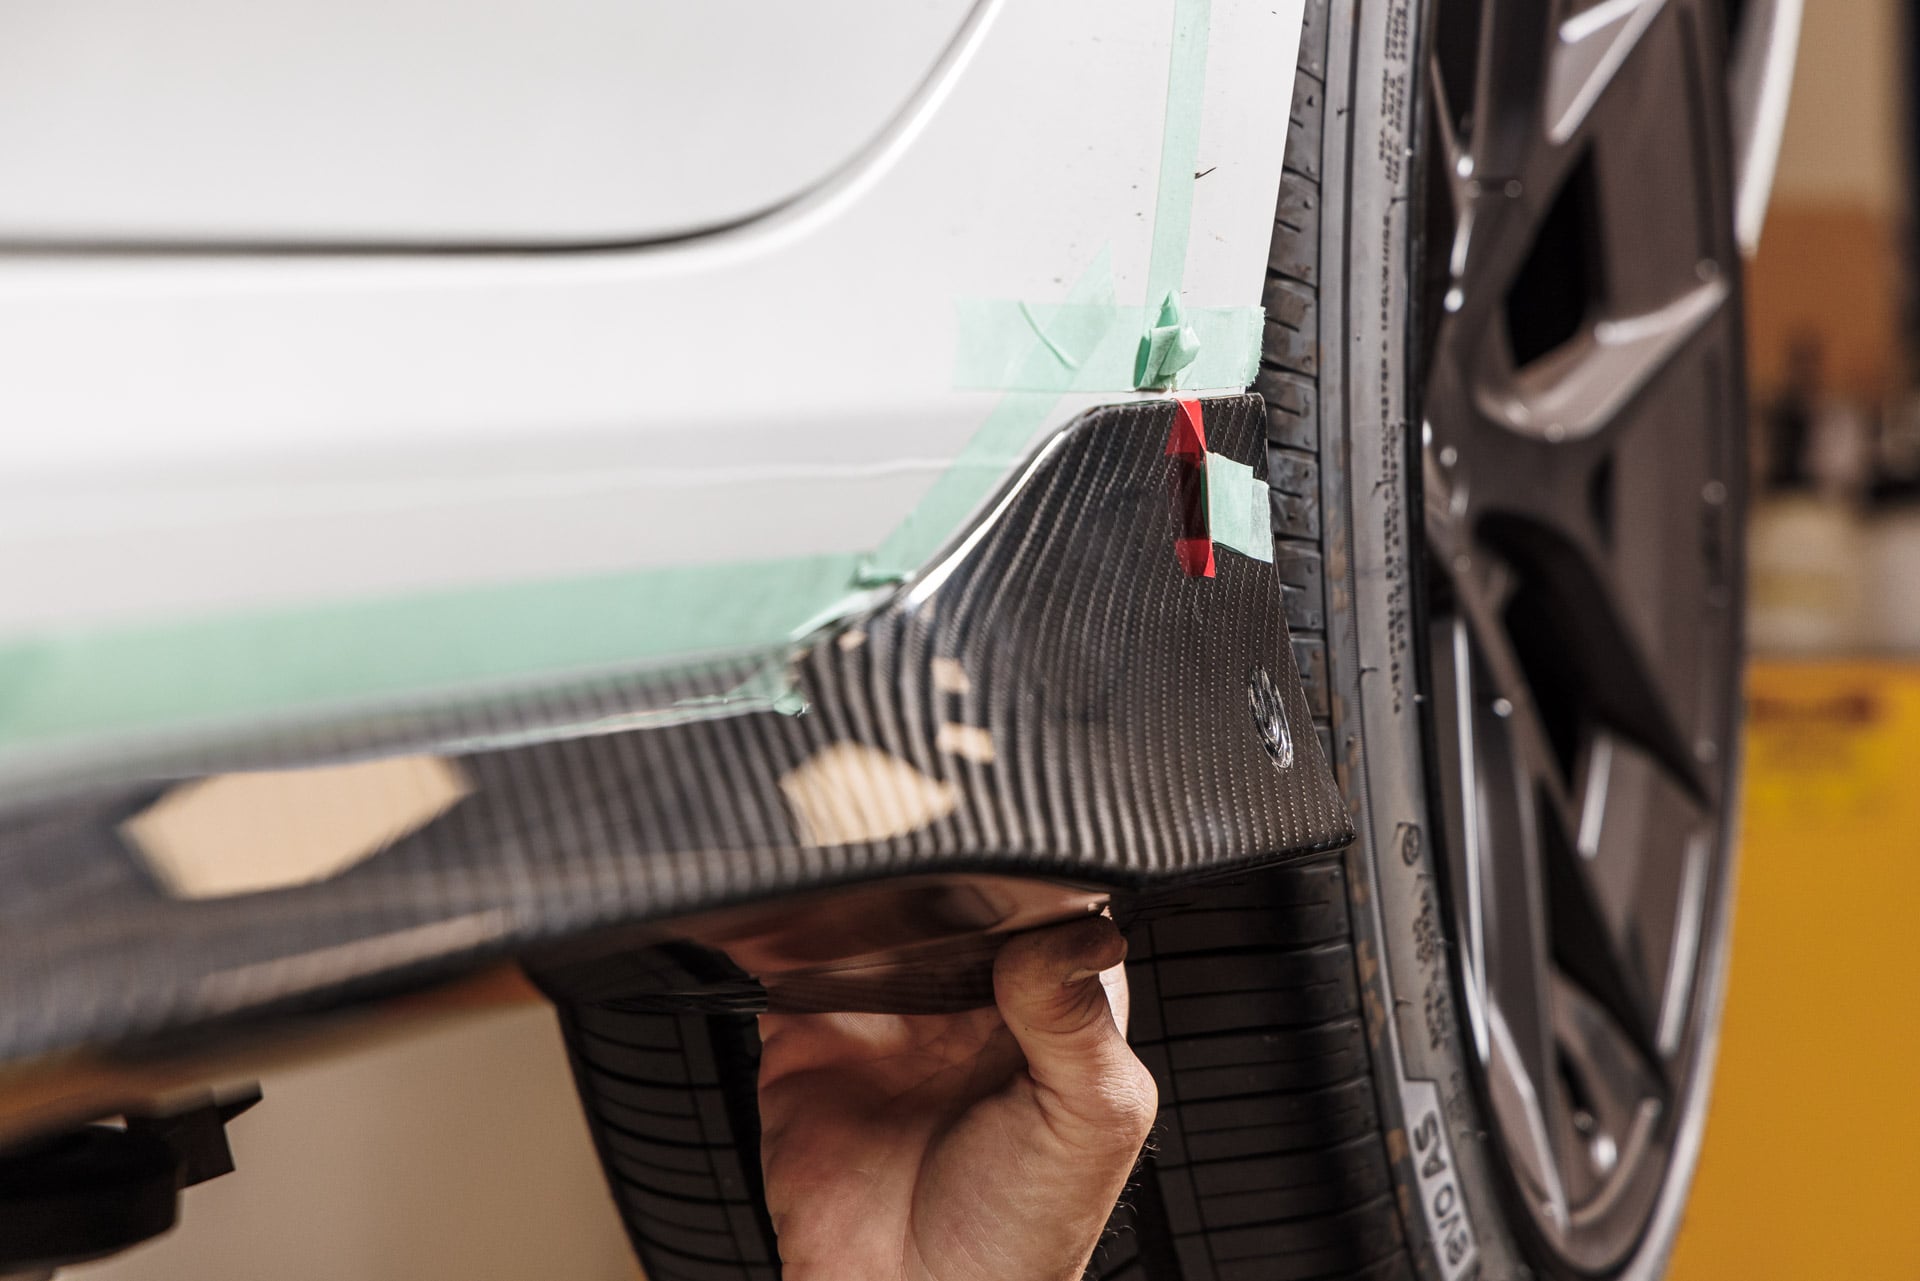
4. Hold the side skirt up to the vehicle. Using masking tape, secure the side skirt to the vehicle. If the bottom side swings away from the vehicle, hand thread a factory 10mm bolt to secure the bottom of the side skirt to the vehicle.
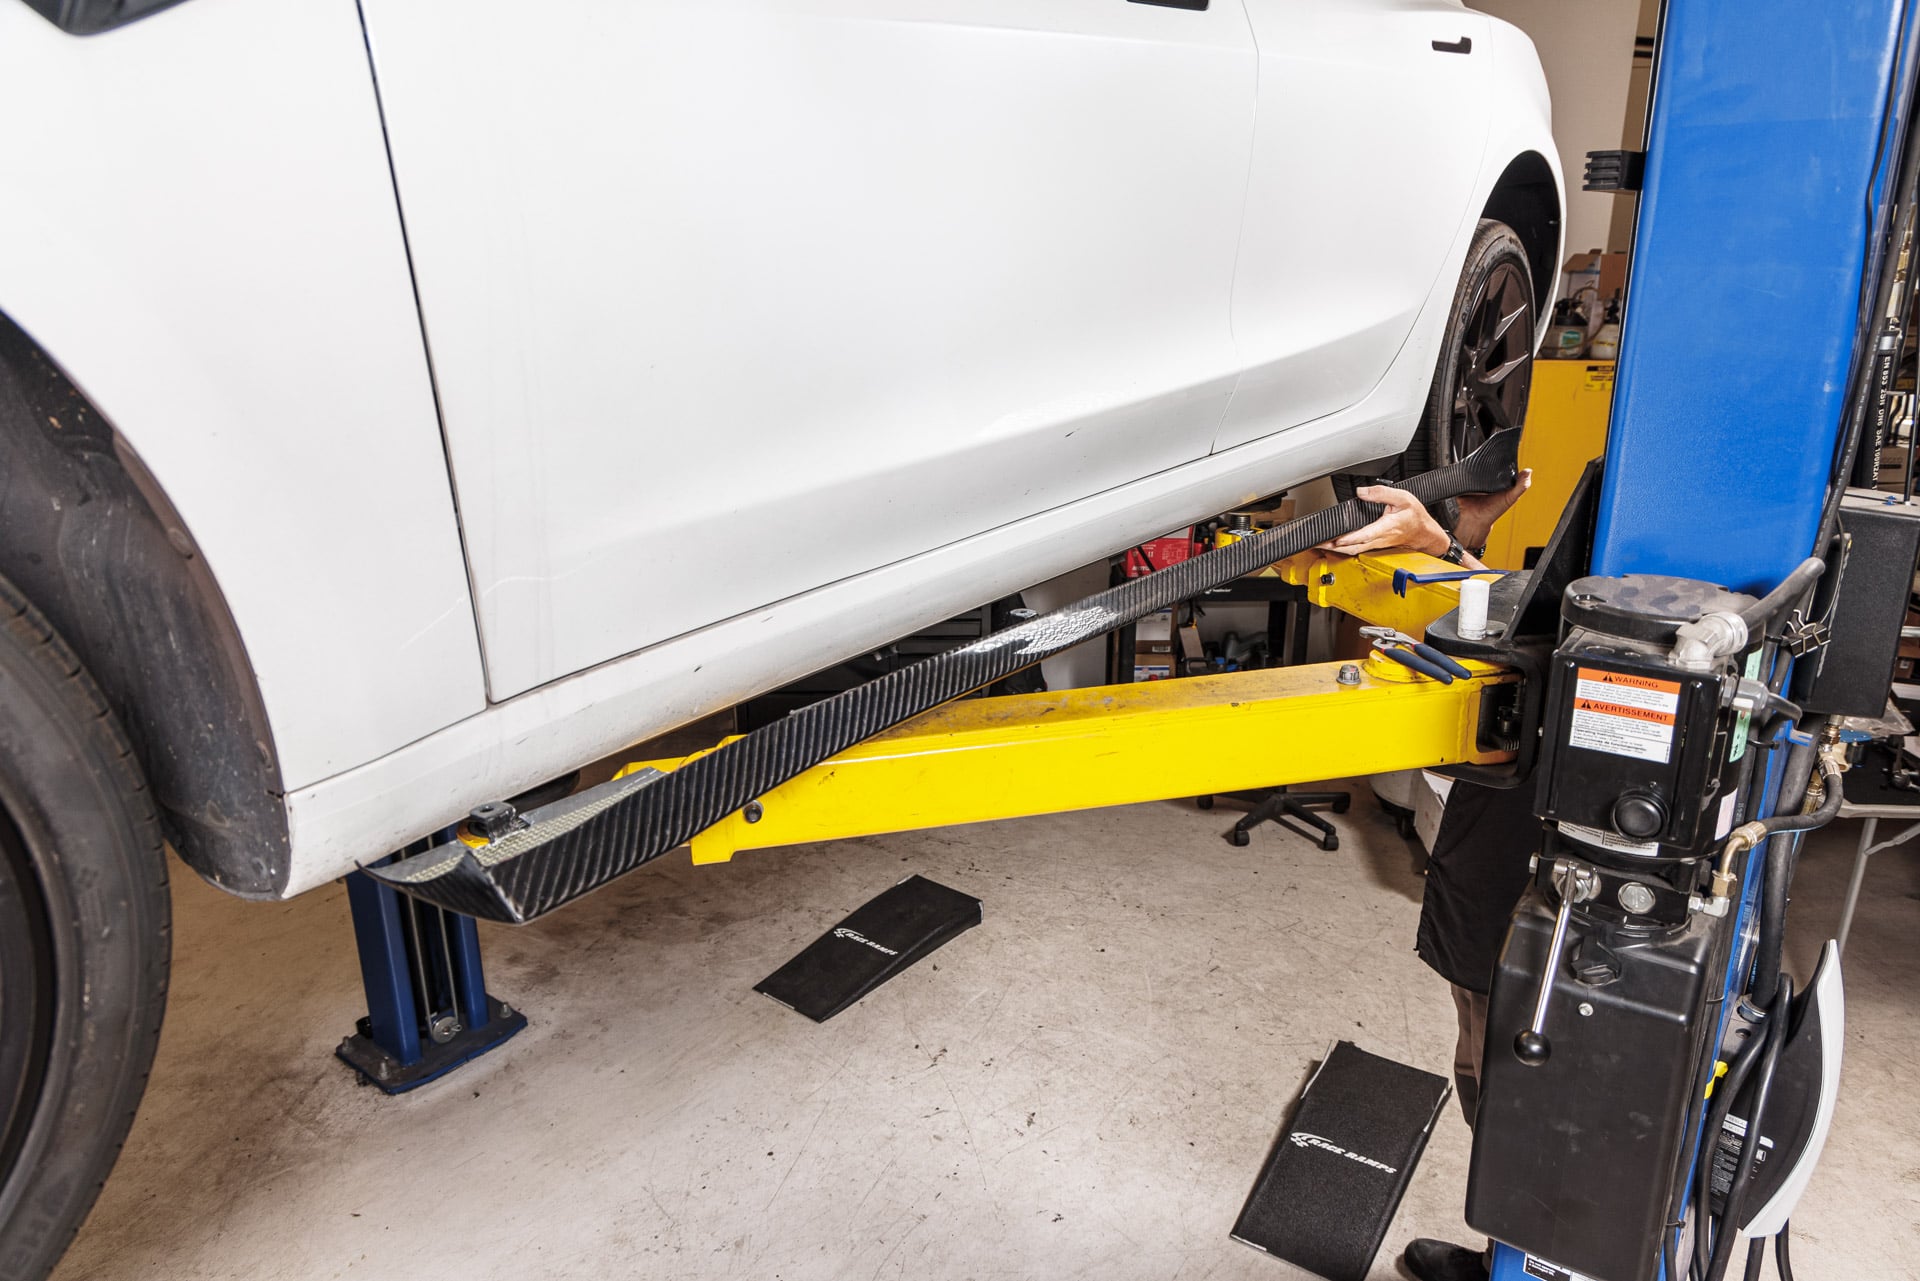
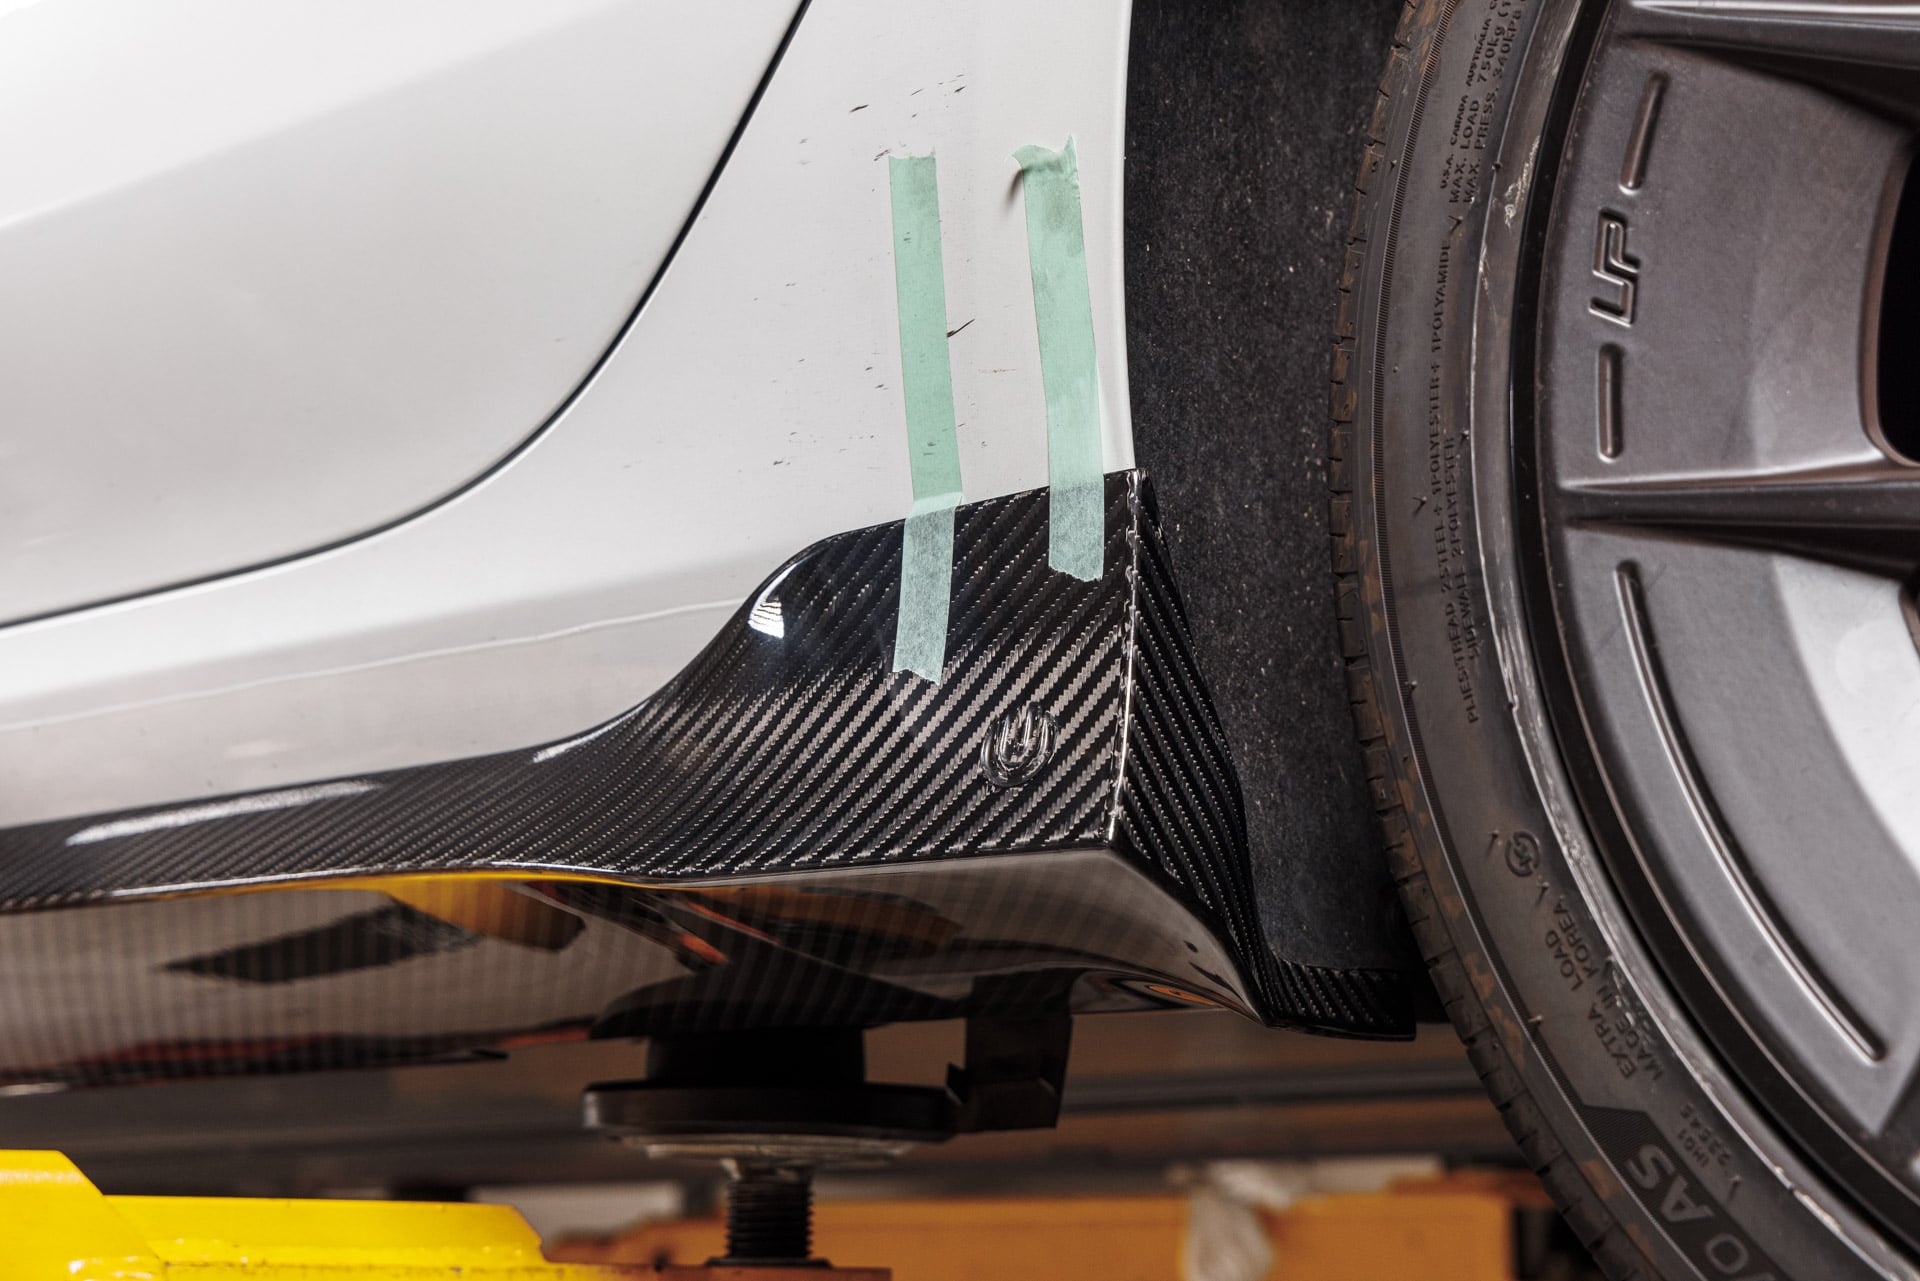
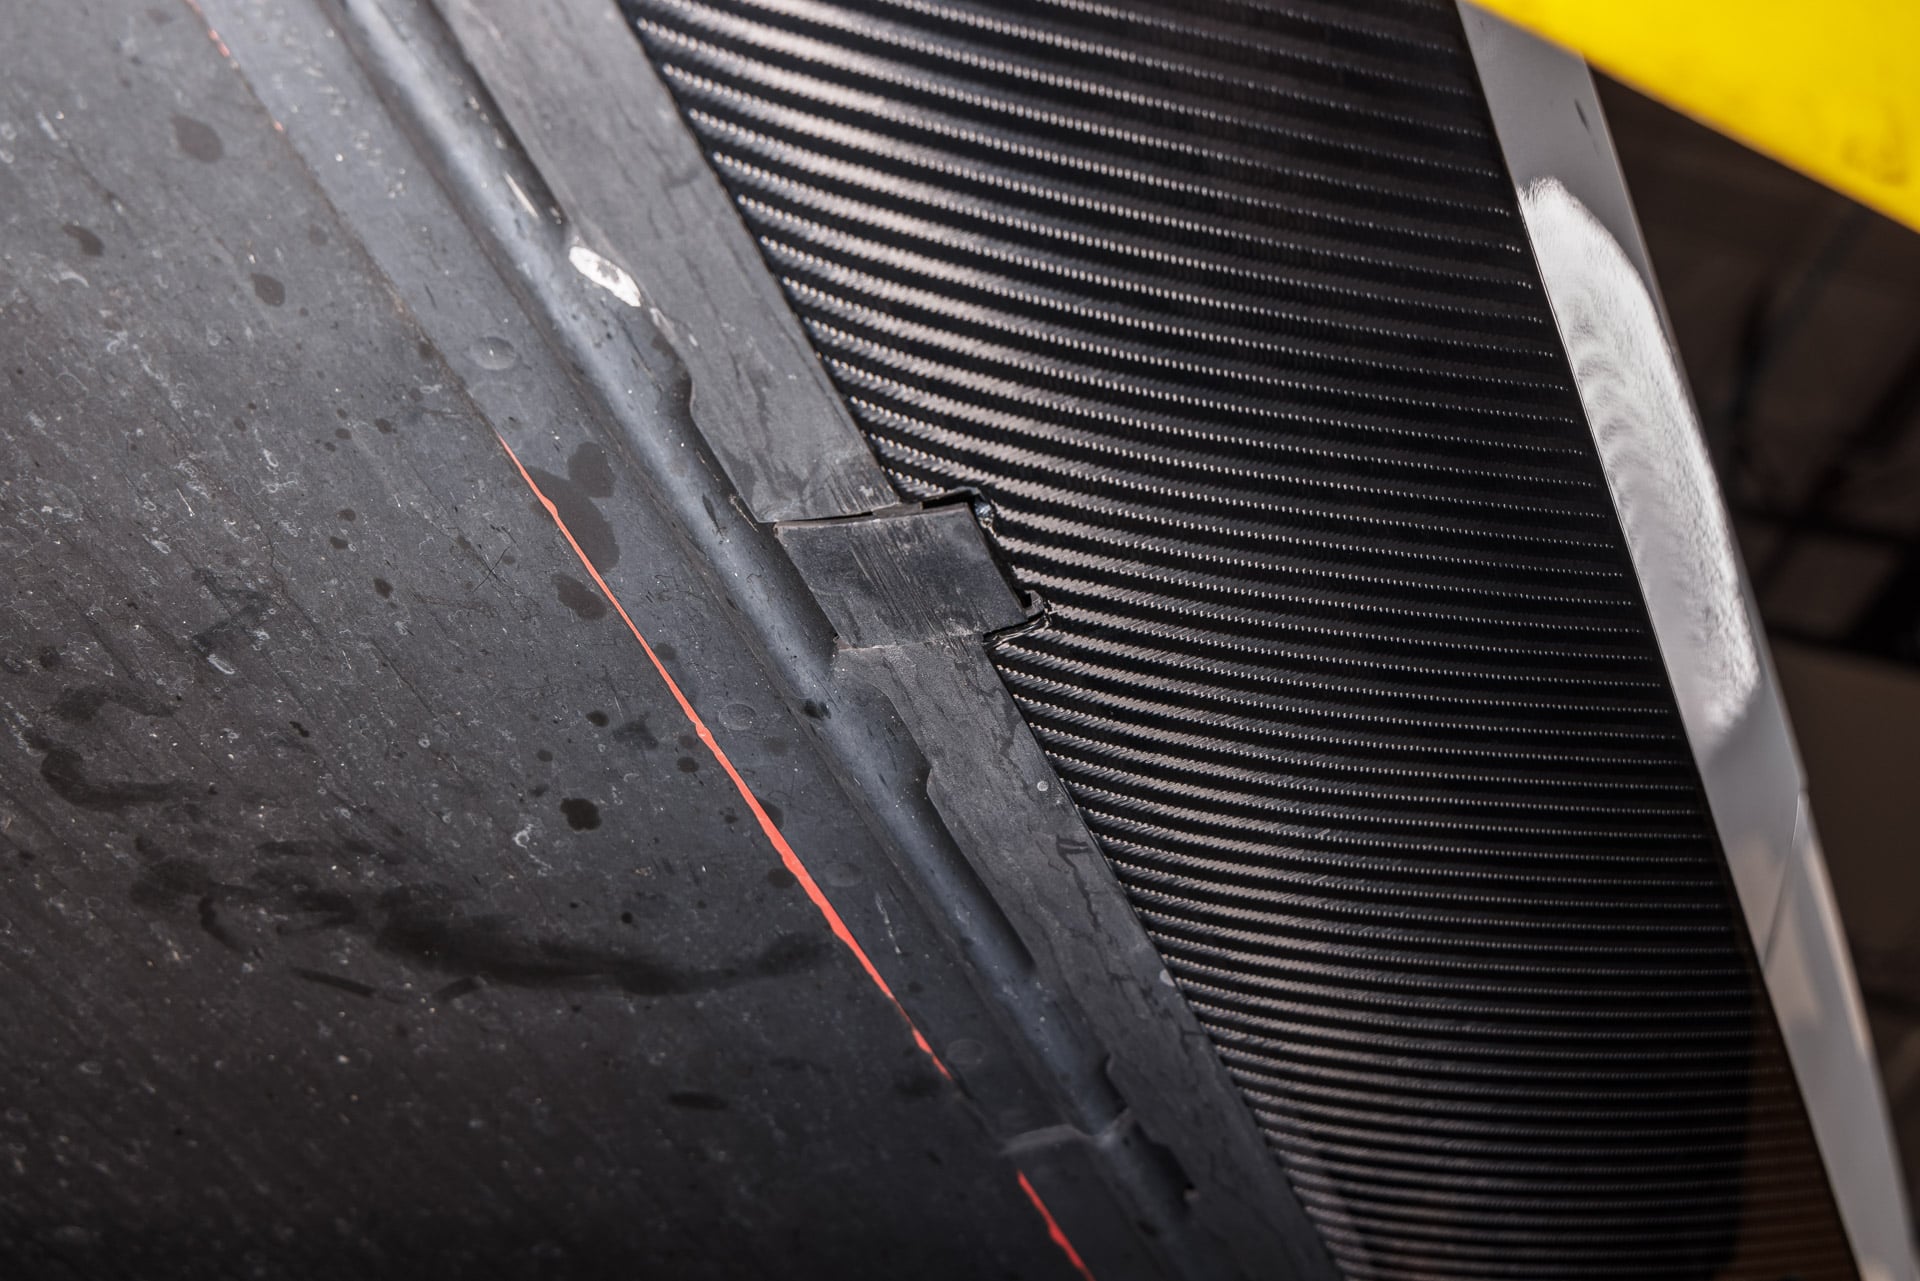
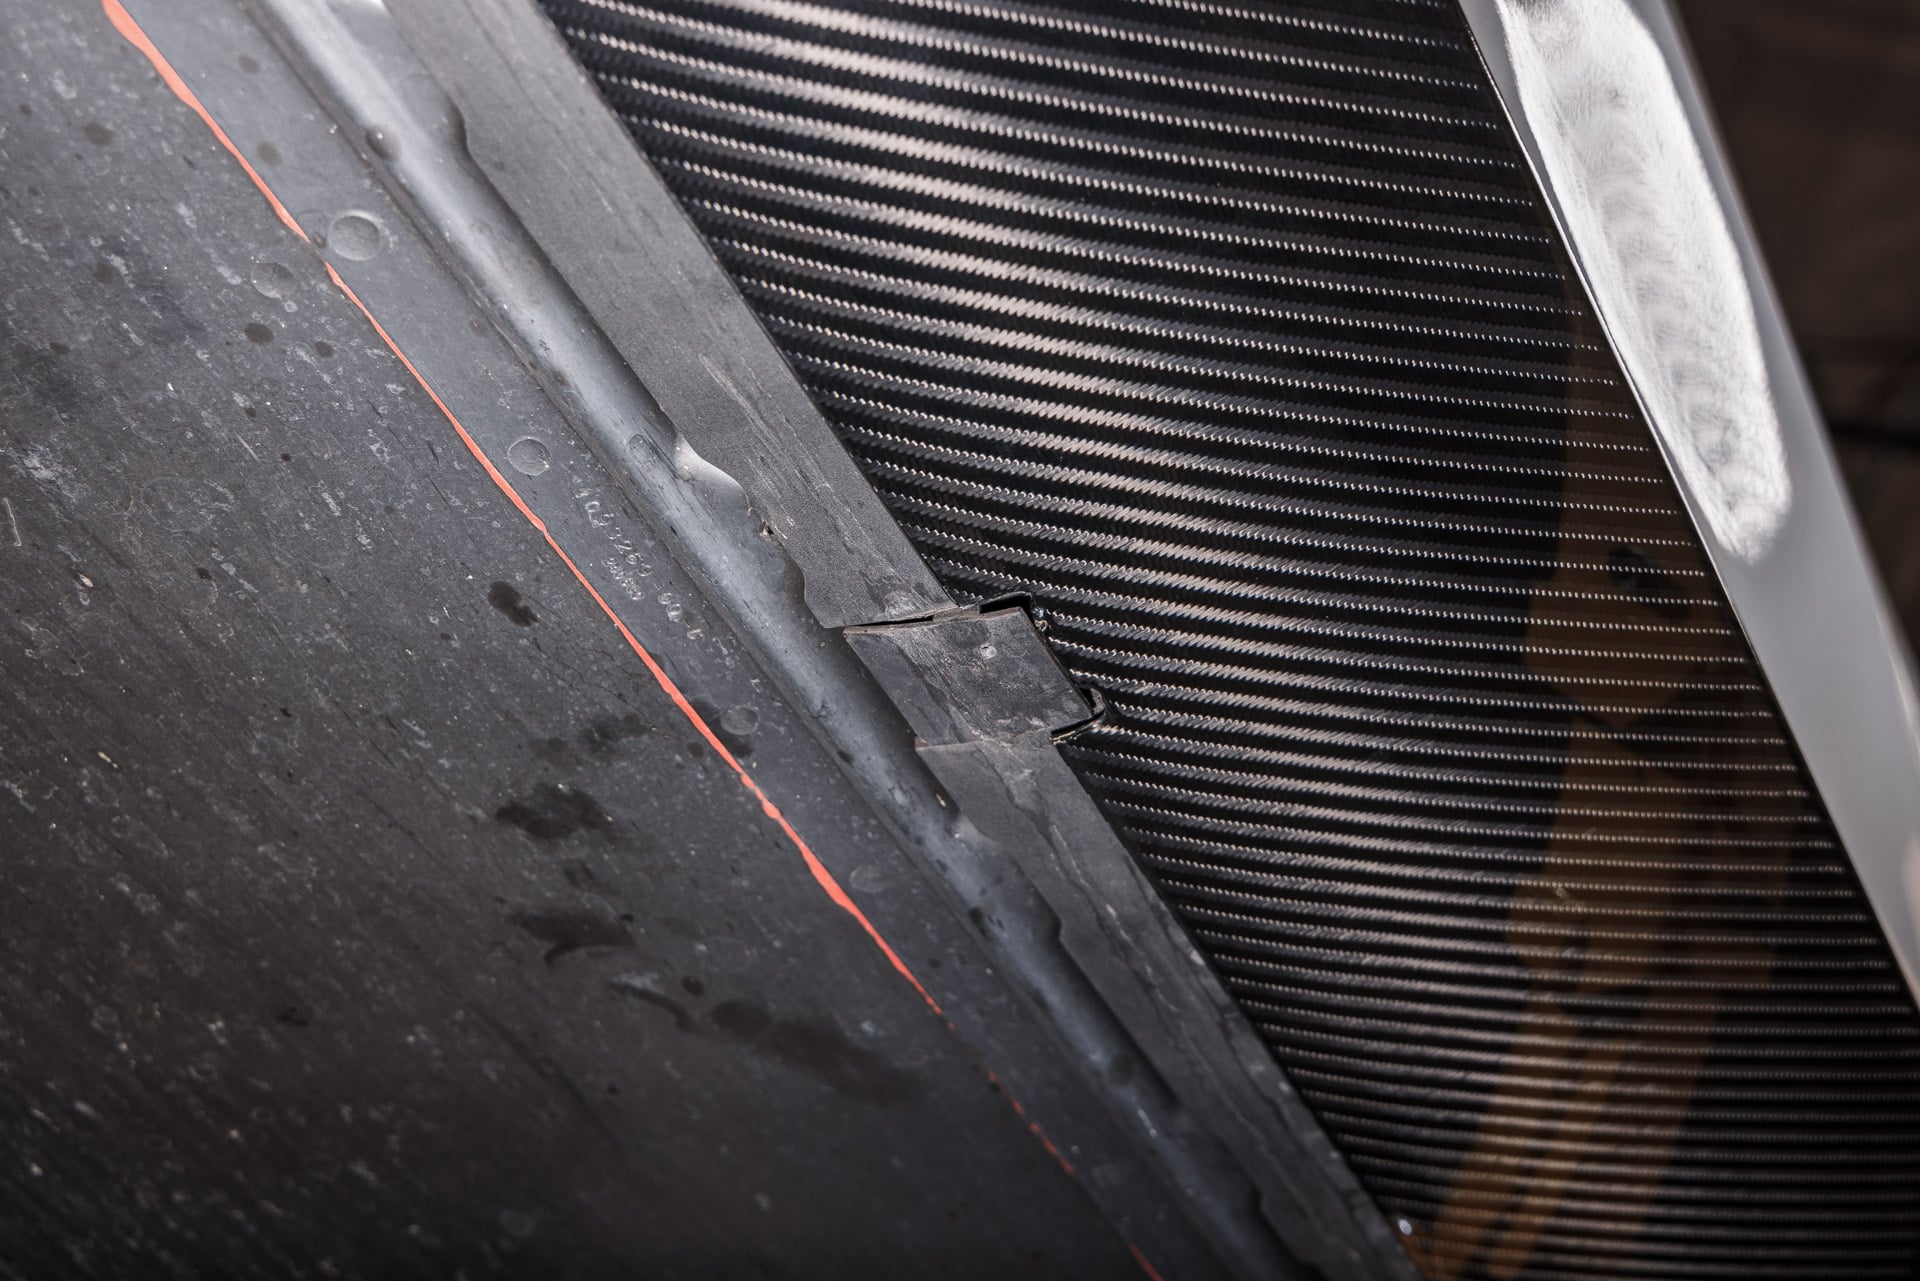
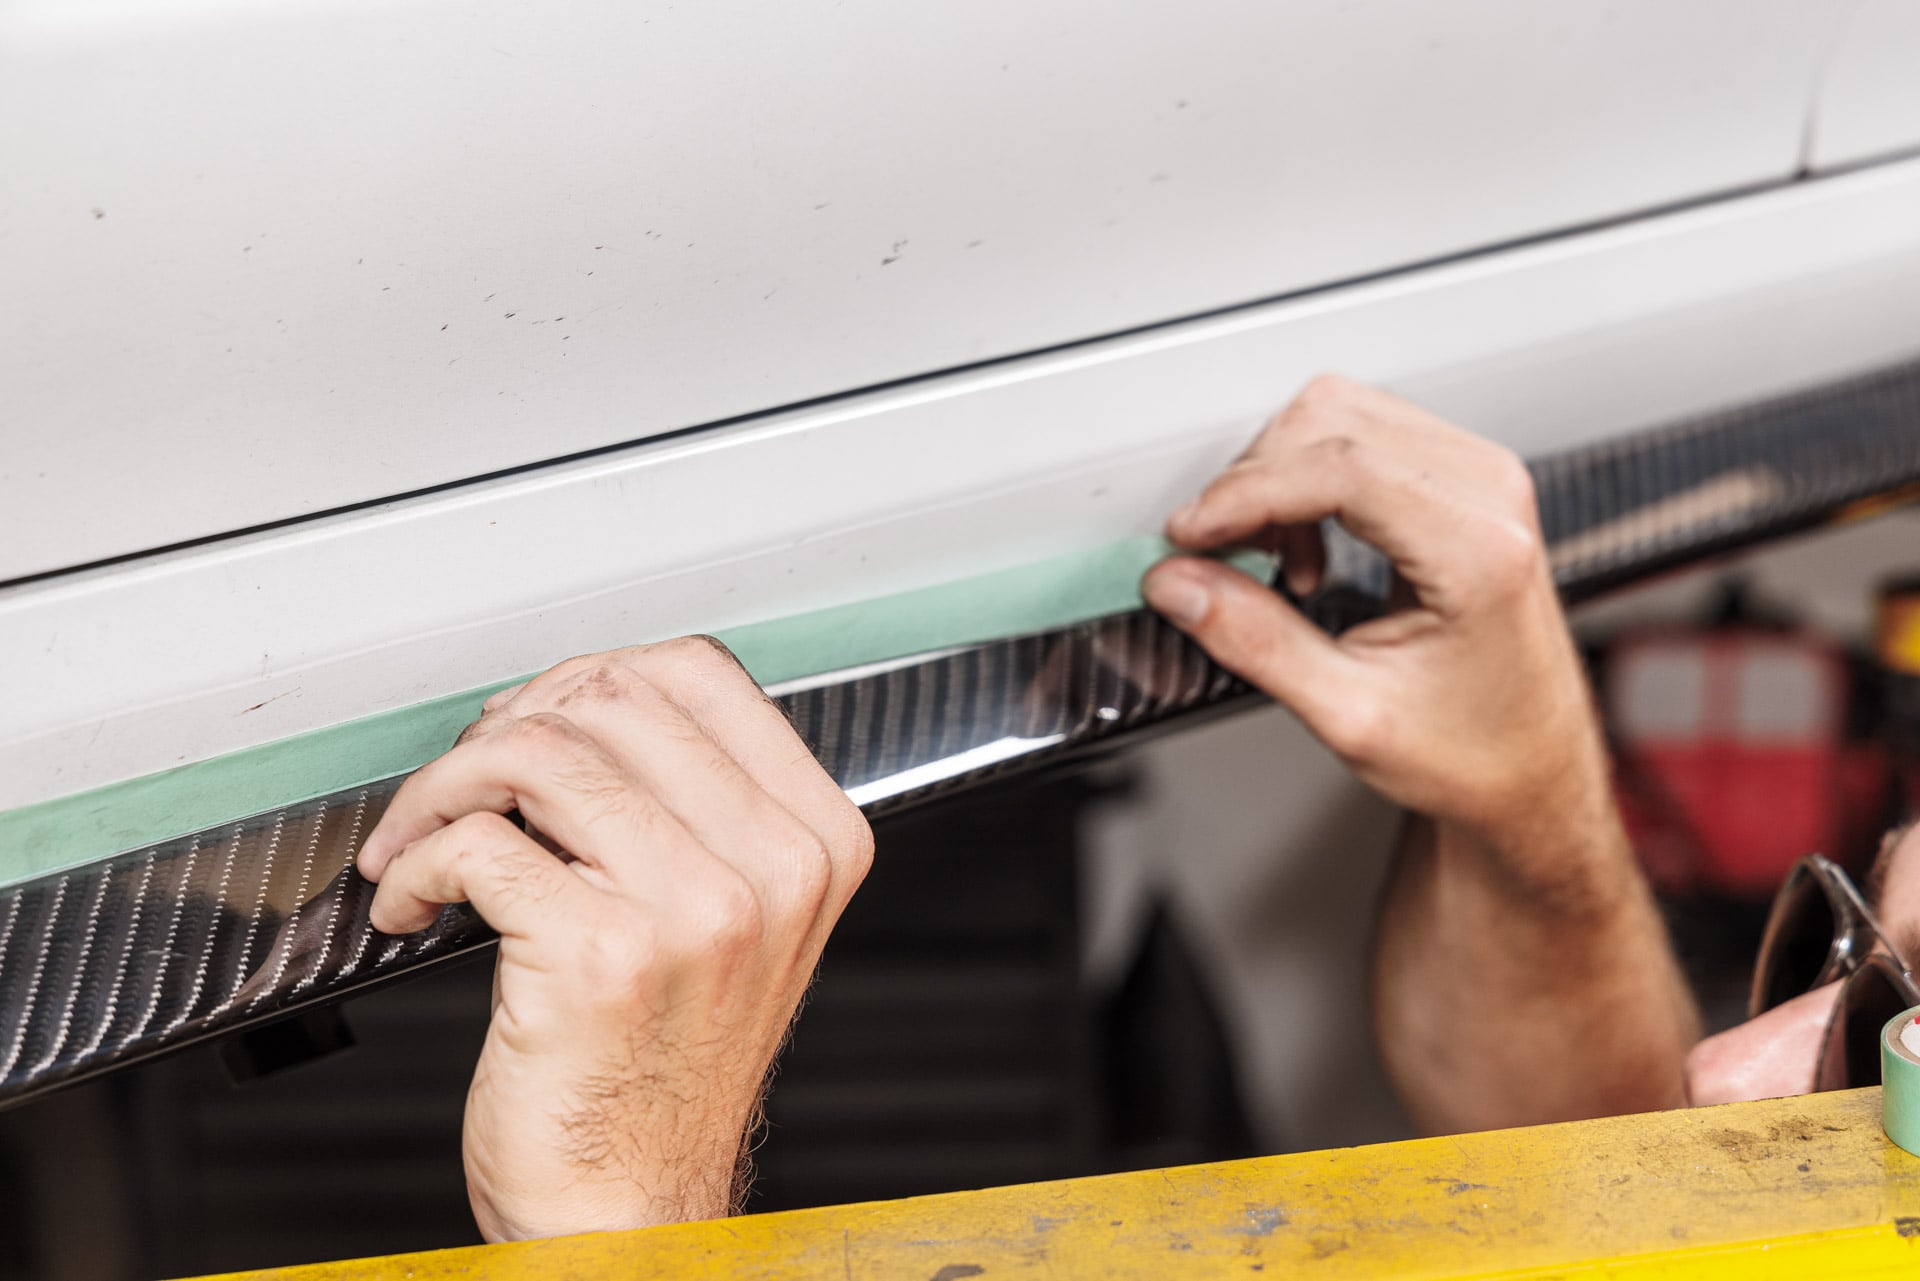
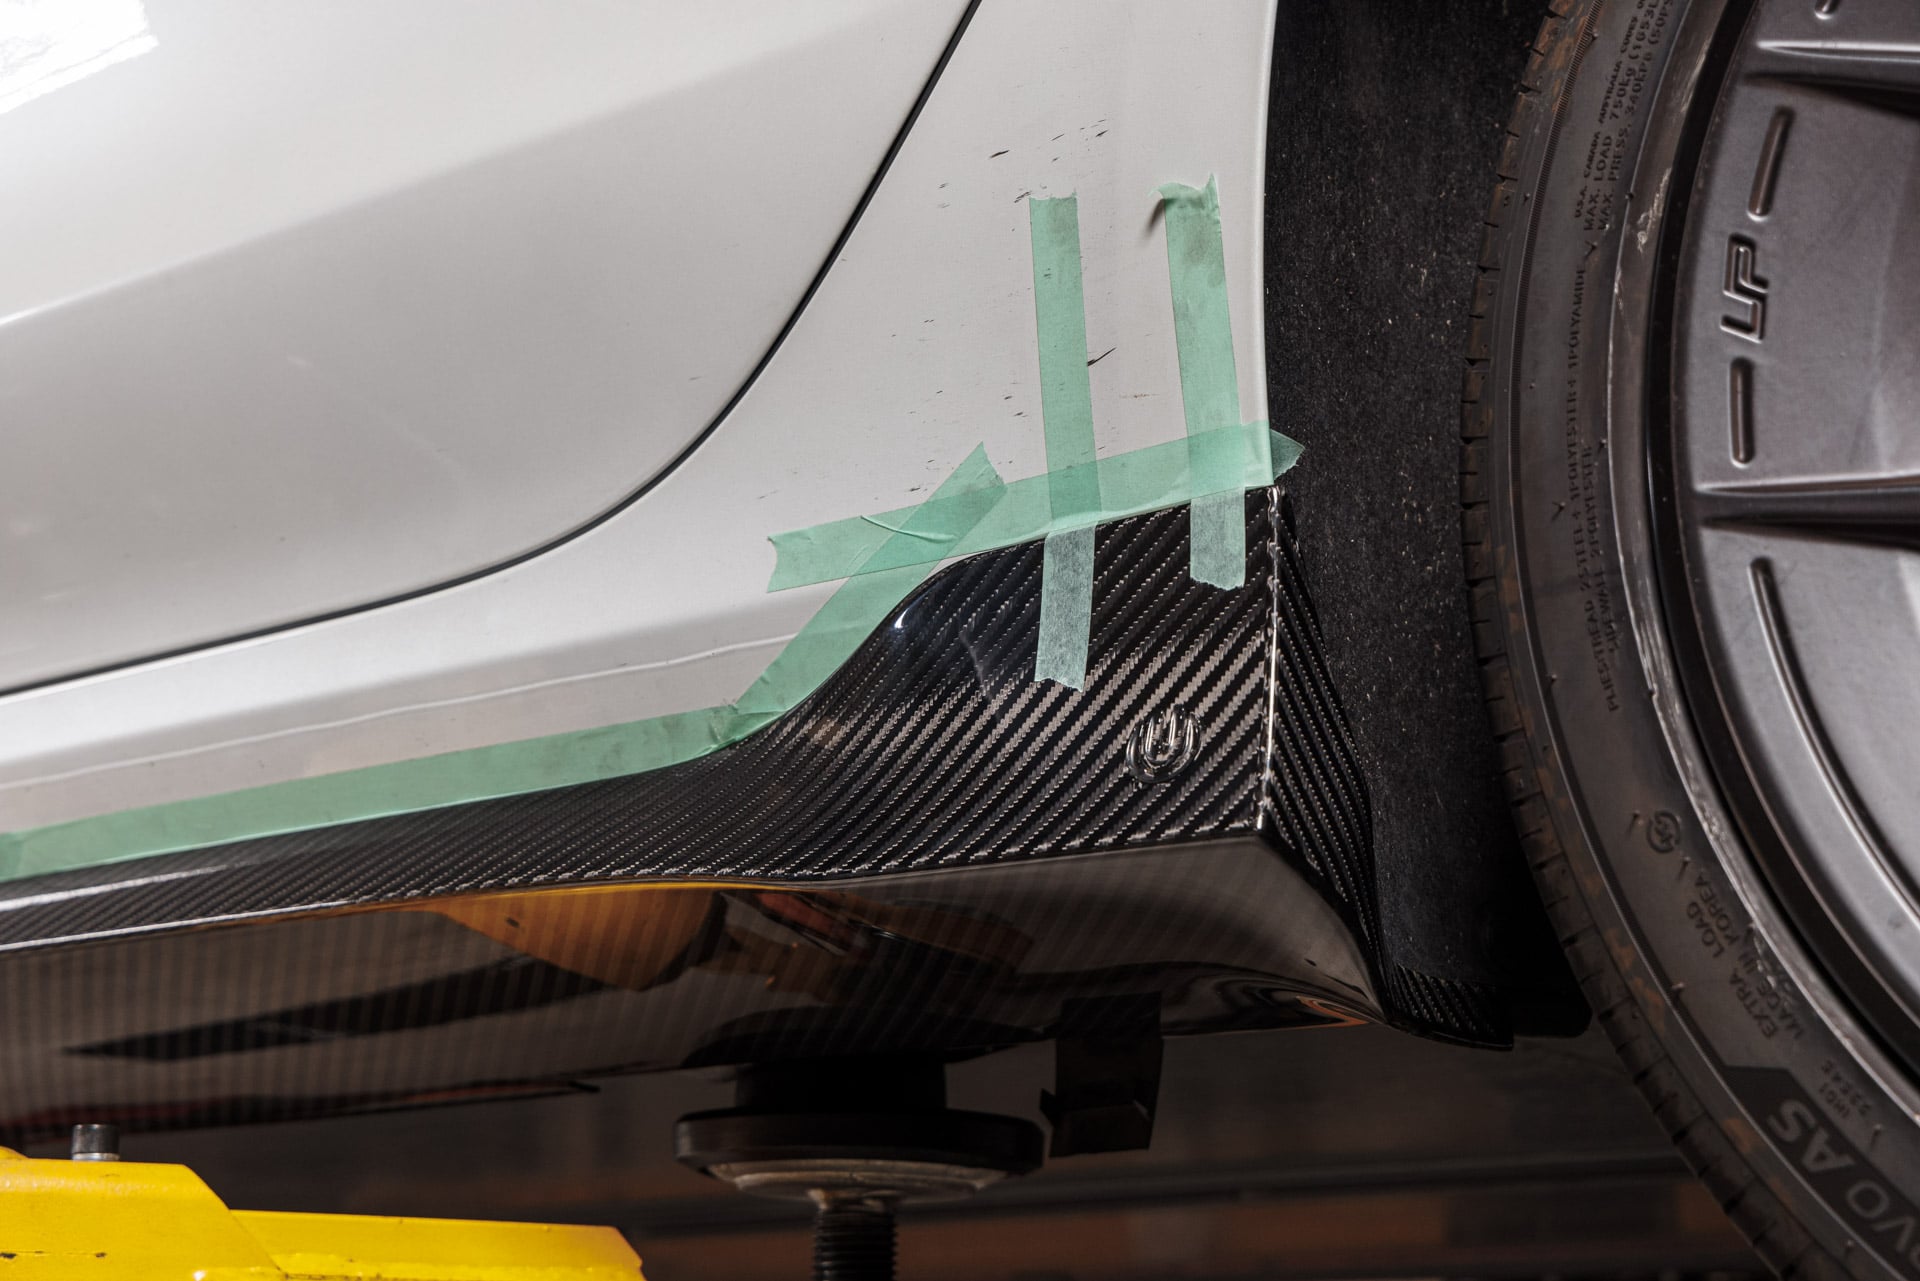
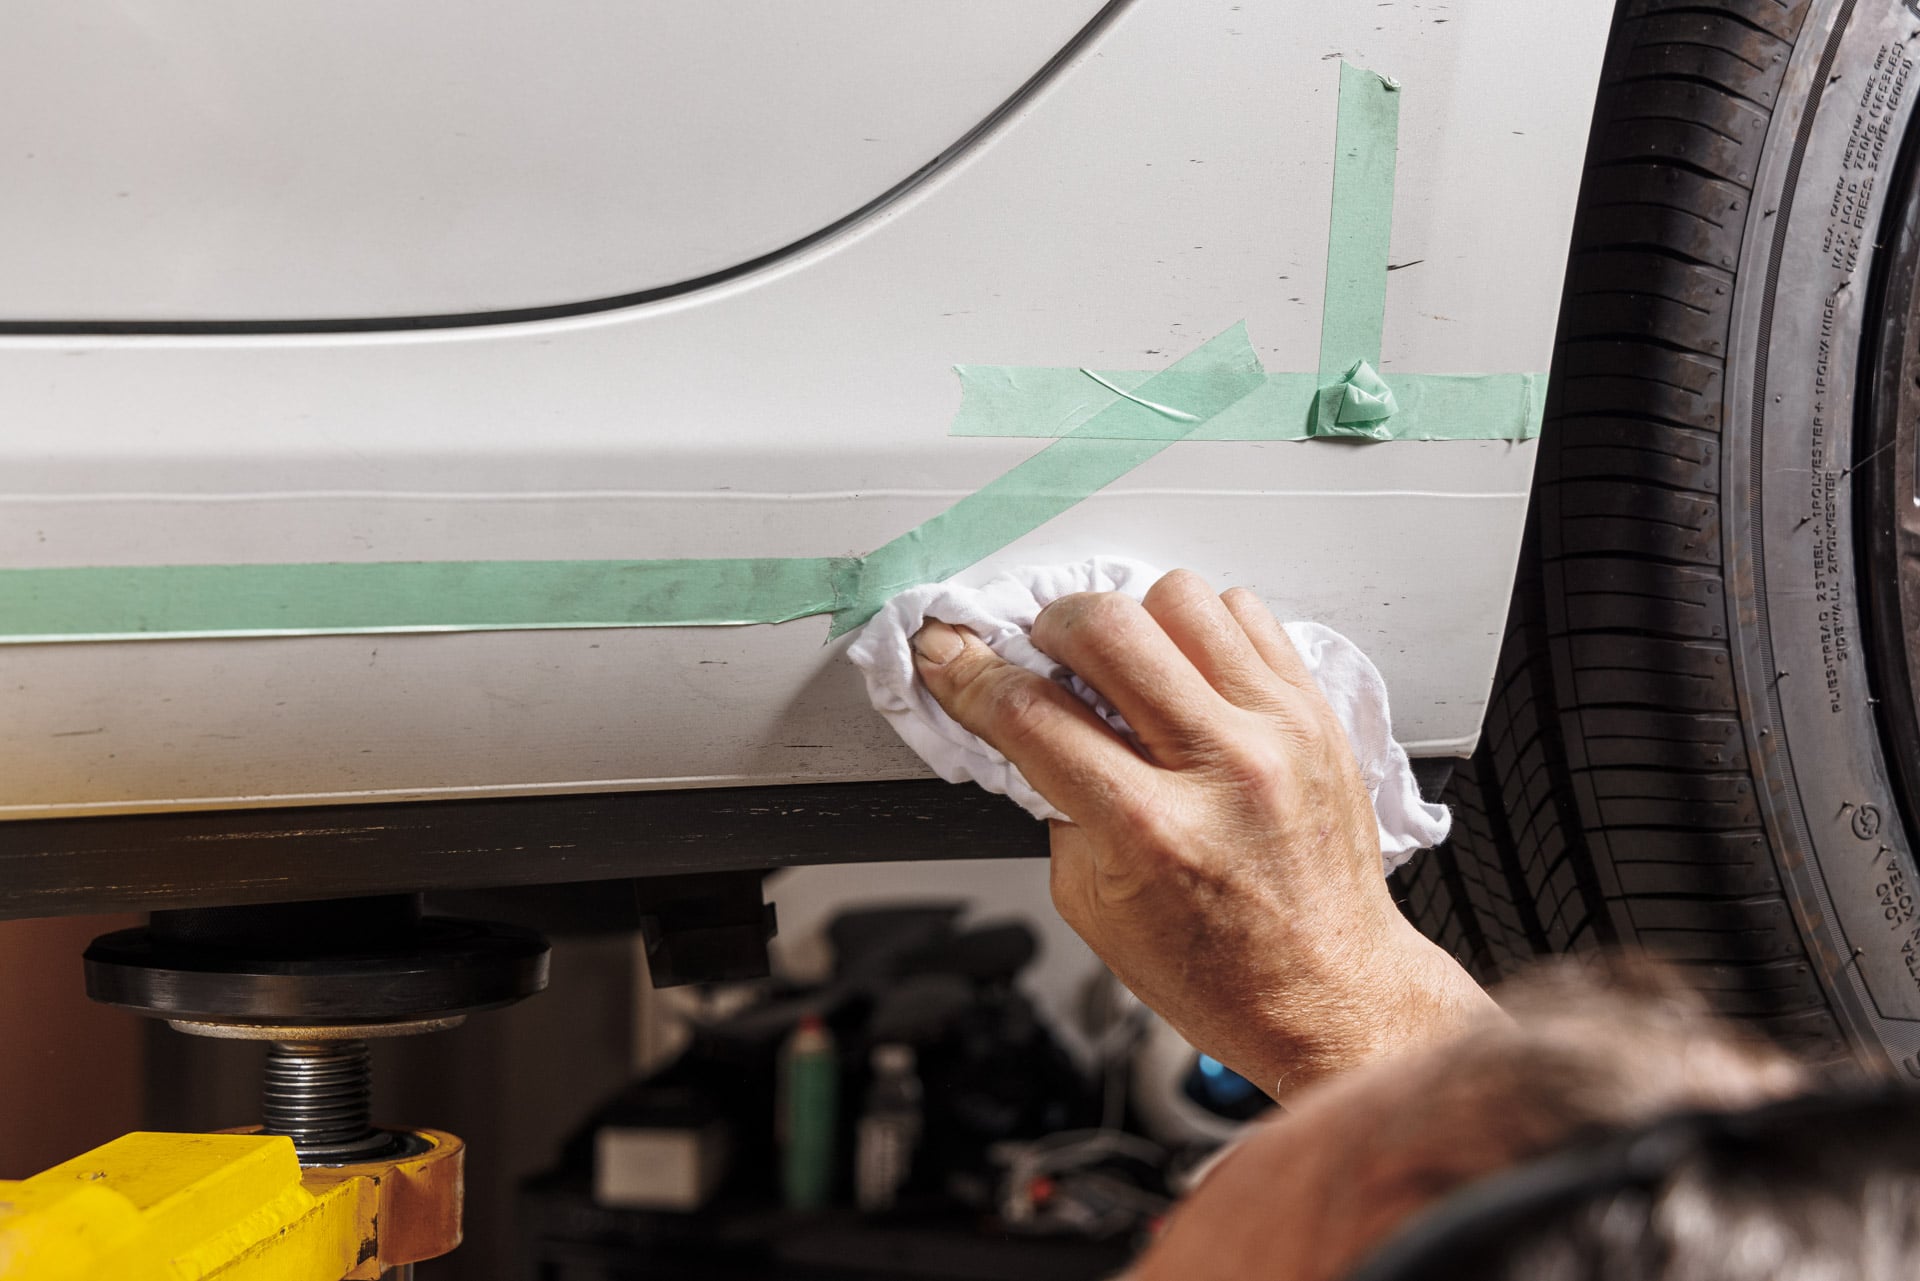
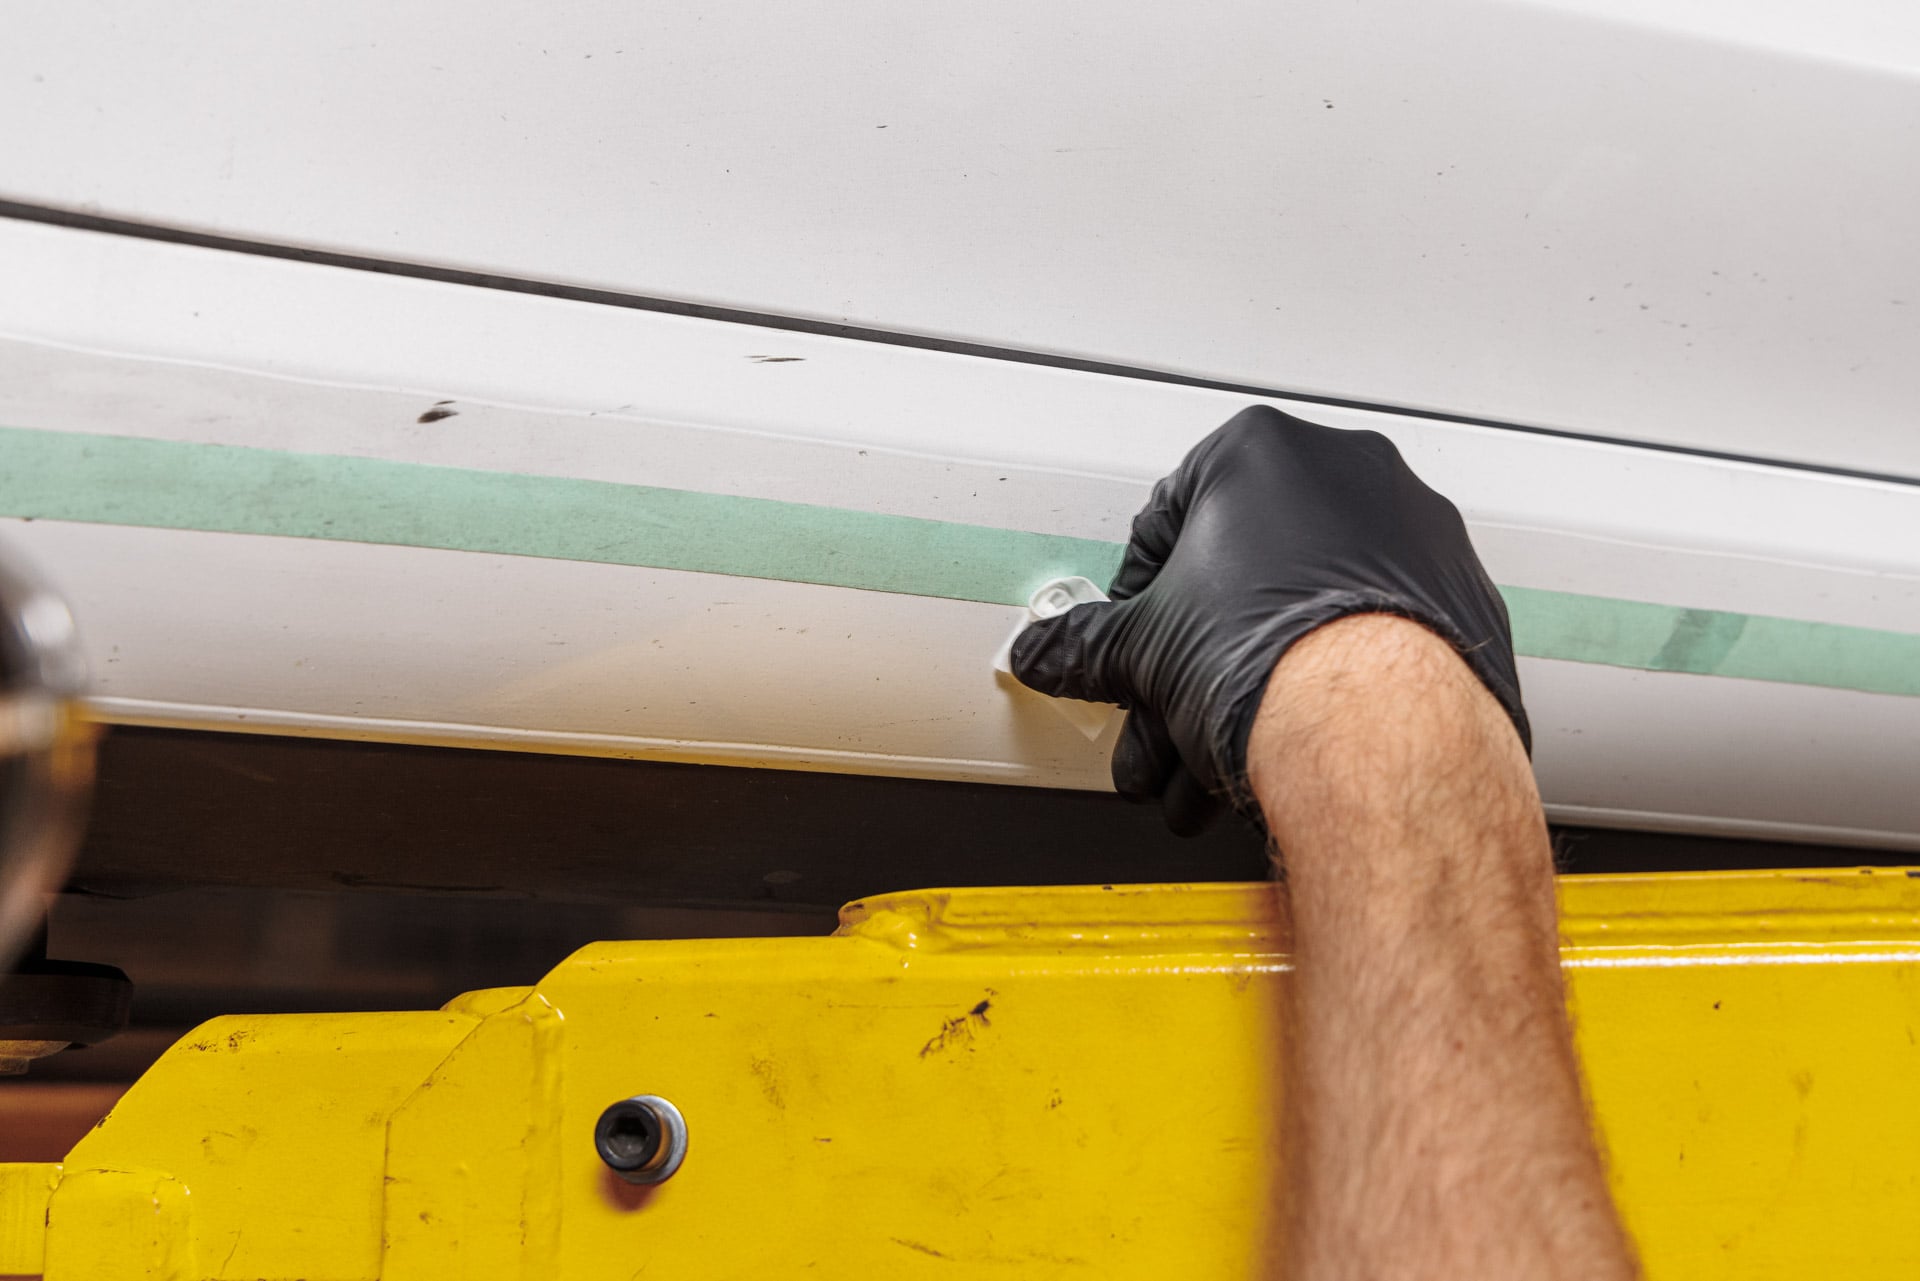
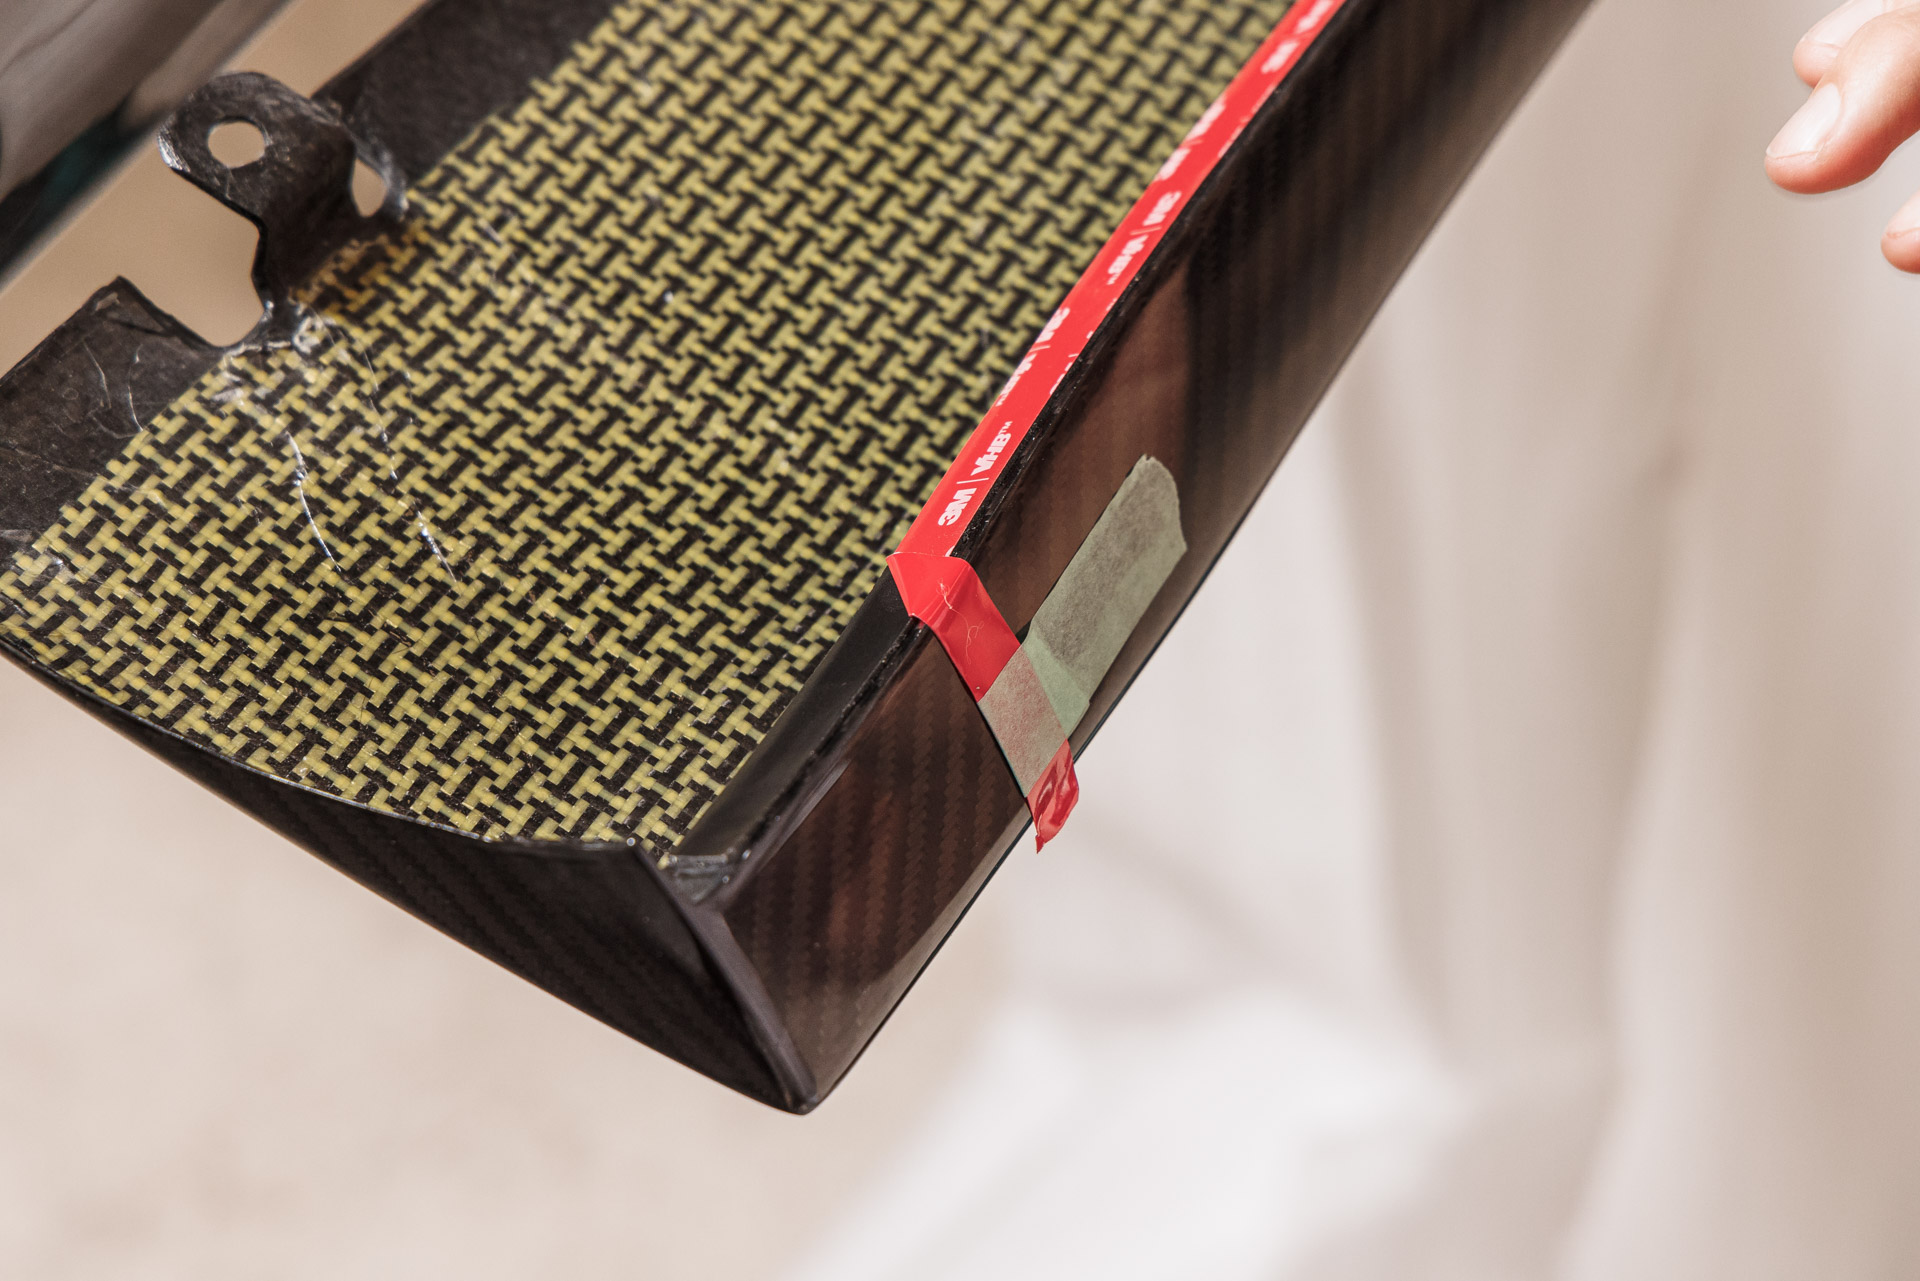
5. Using masking tape, trace the top side of the side skirt directly onto the vehicle paint as shown. This will be used as a reference to apply an adhesive promoter to the bonded area at a later step.

6. Once the scotch tape has been applied, proceed to remove the side skirt from the vehicle.
7. With the side skirt removed, using 99%+ isopropyl alcohol, clean the surface below the scotch tape line on the vehicle surface until fully clean. Note that any PPF or ceramic coatings can negatively impact the bond to the vehicle, so removal is highly recommended prior to install.
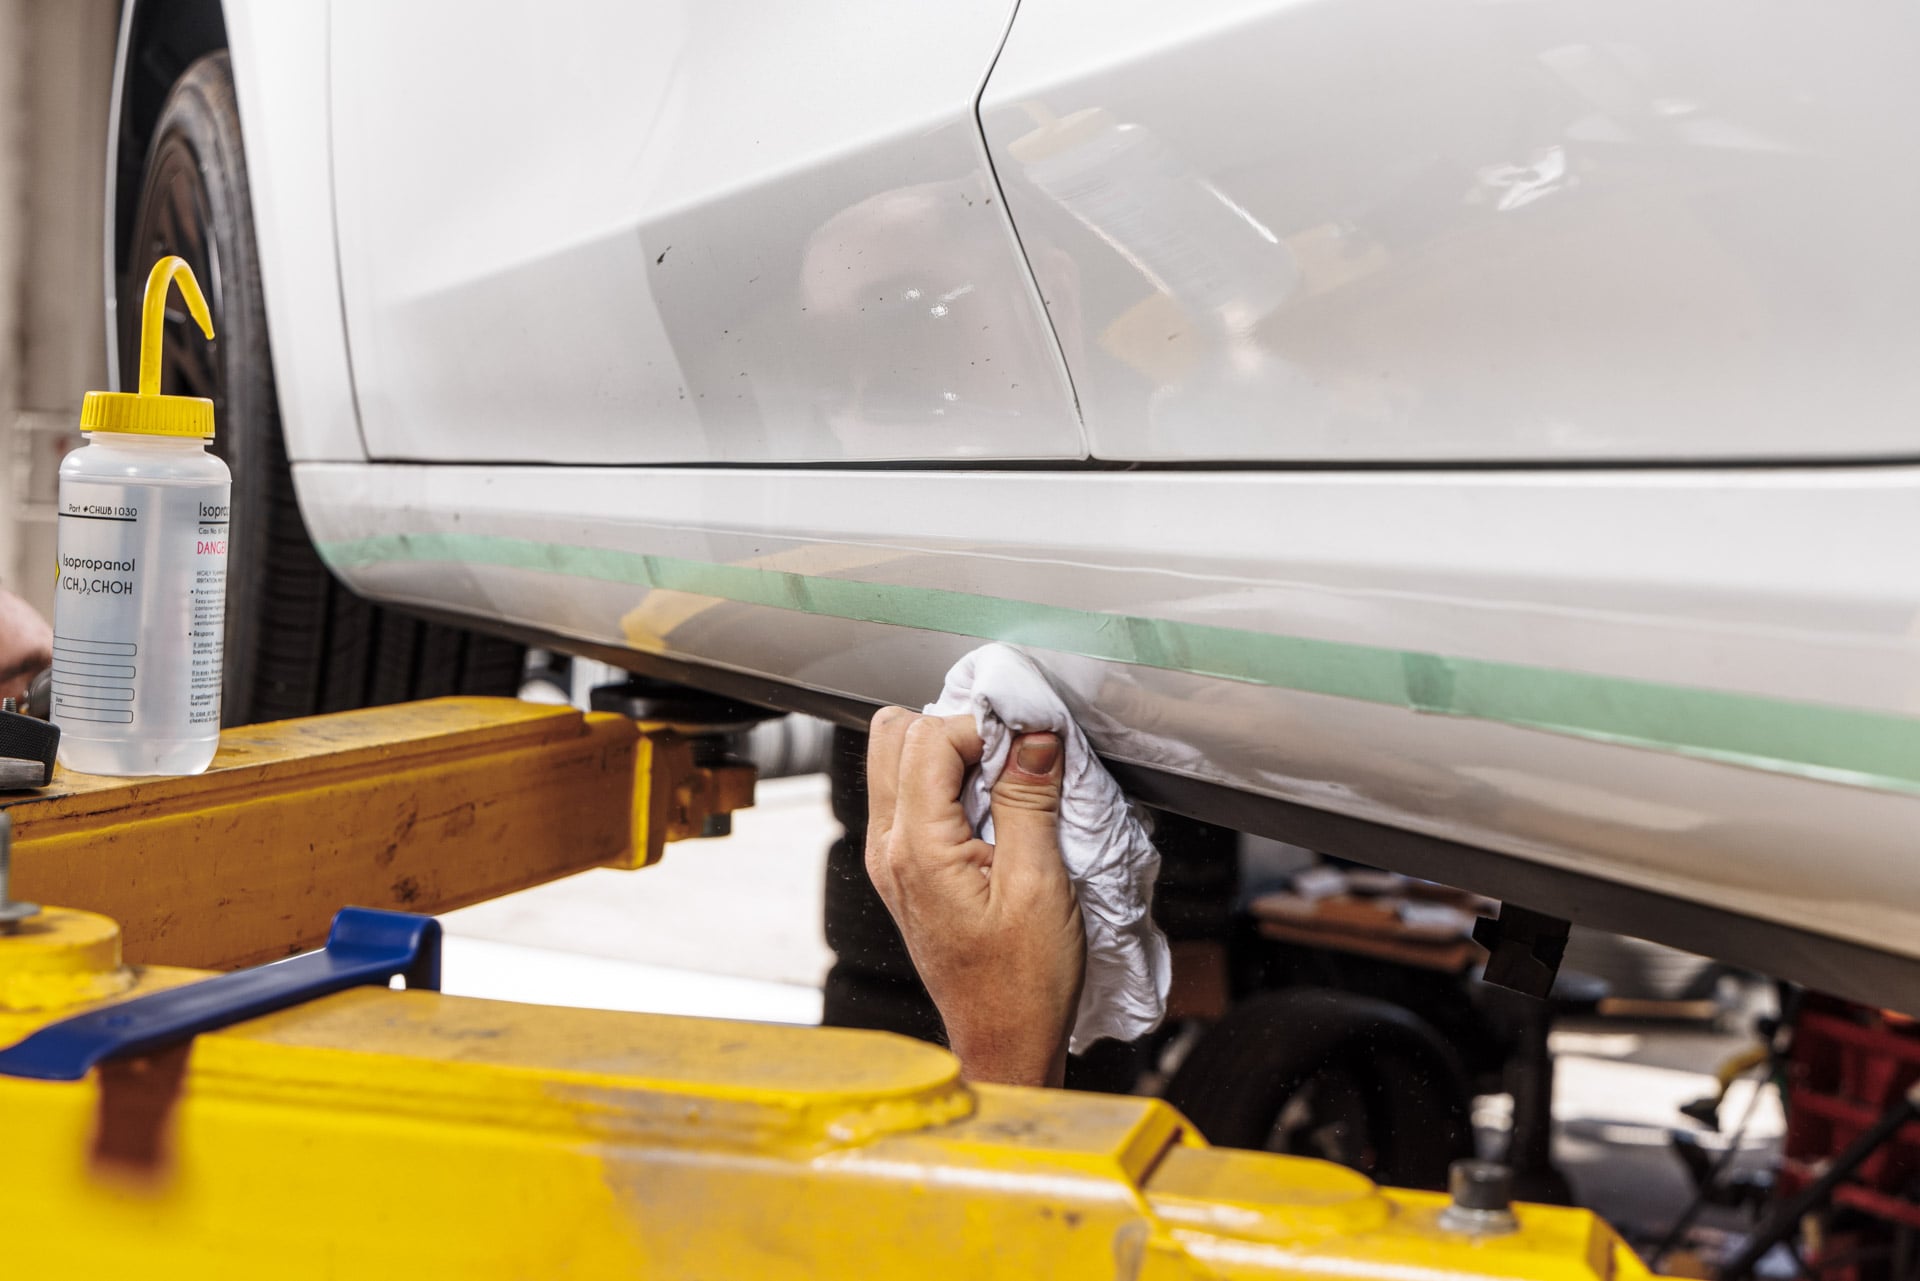
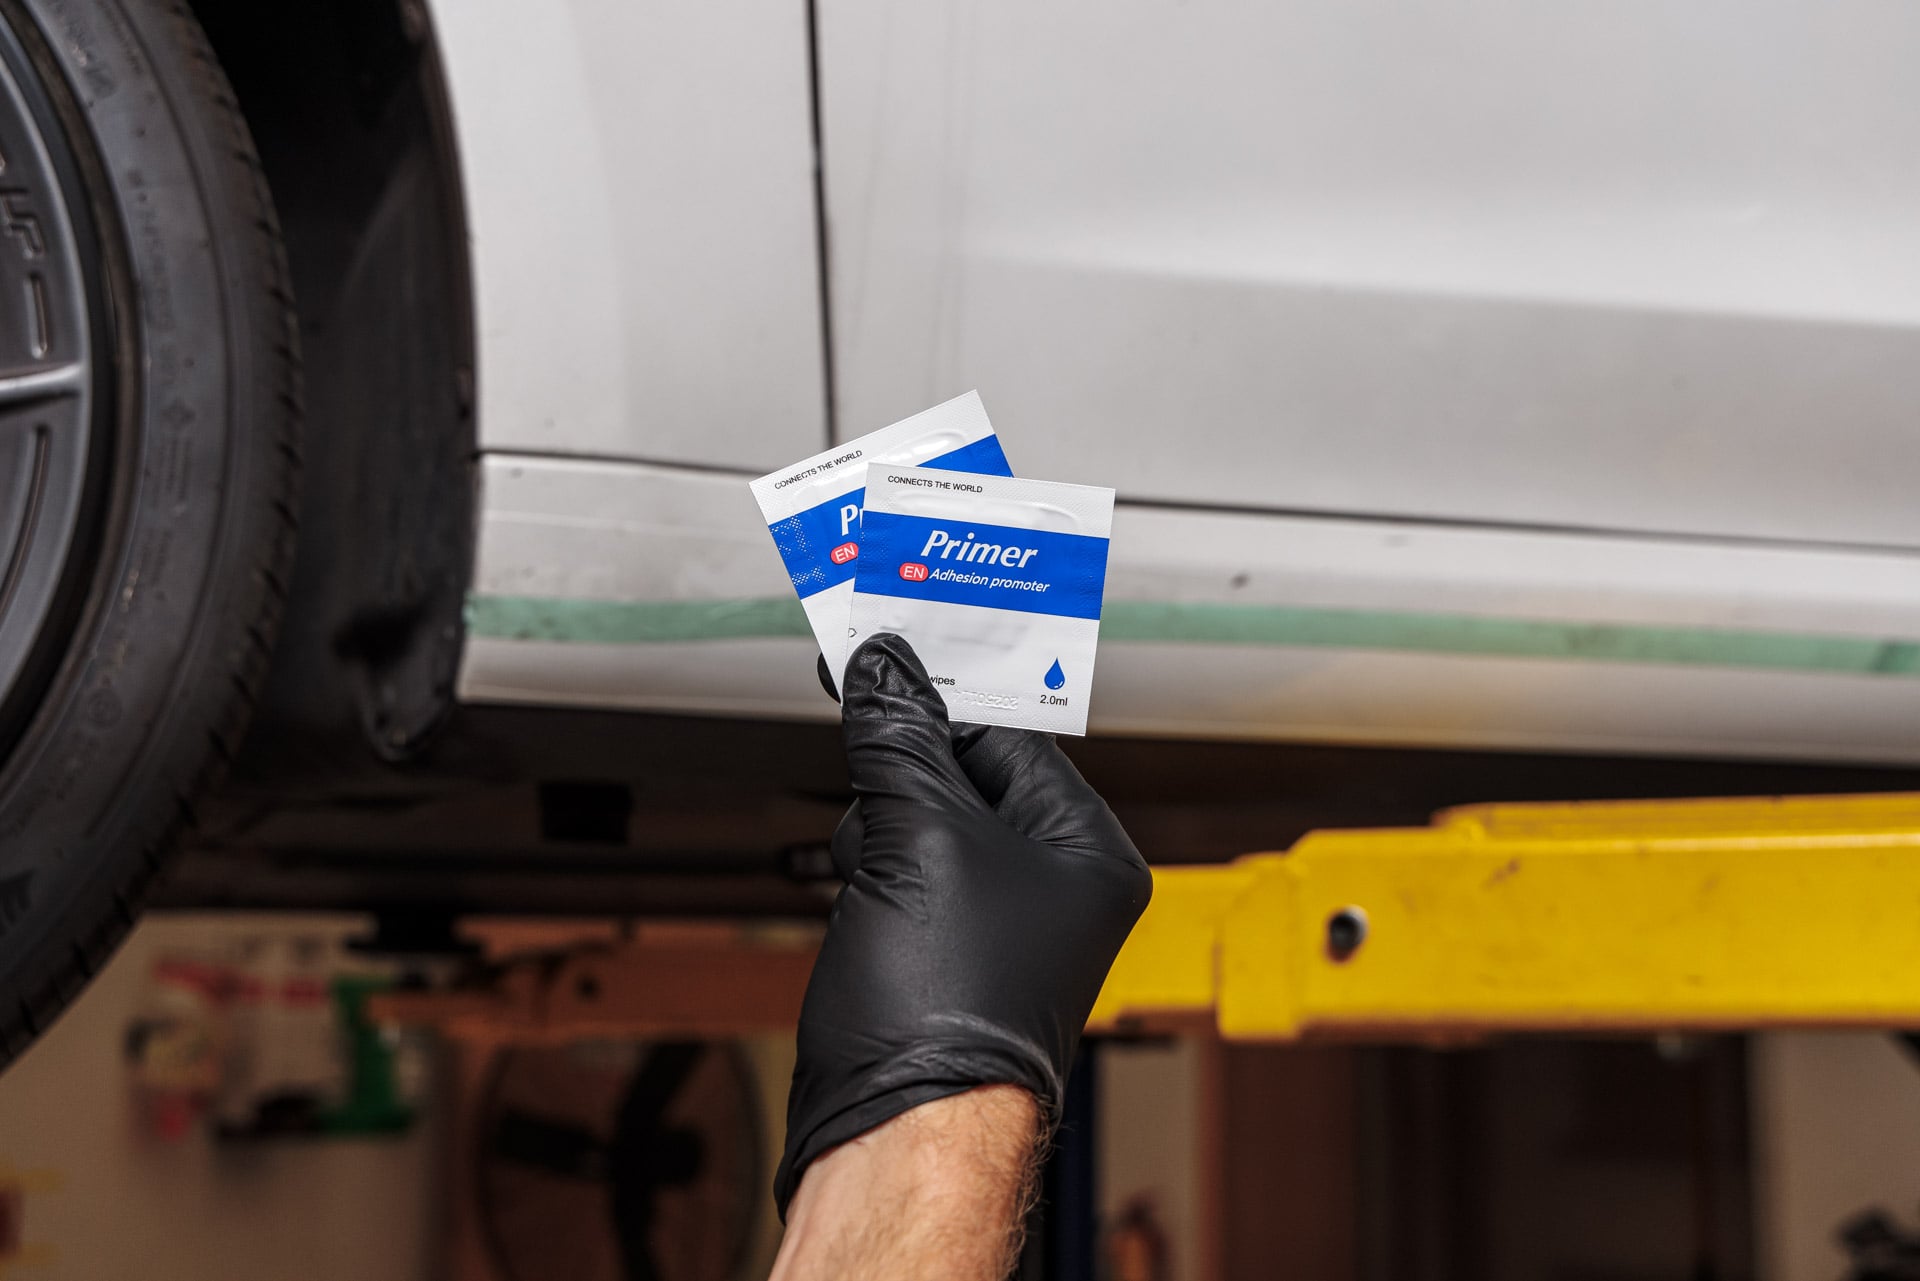
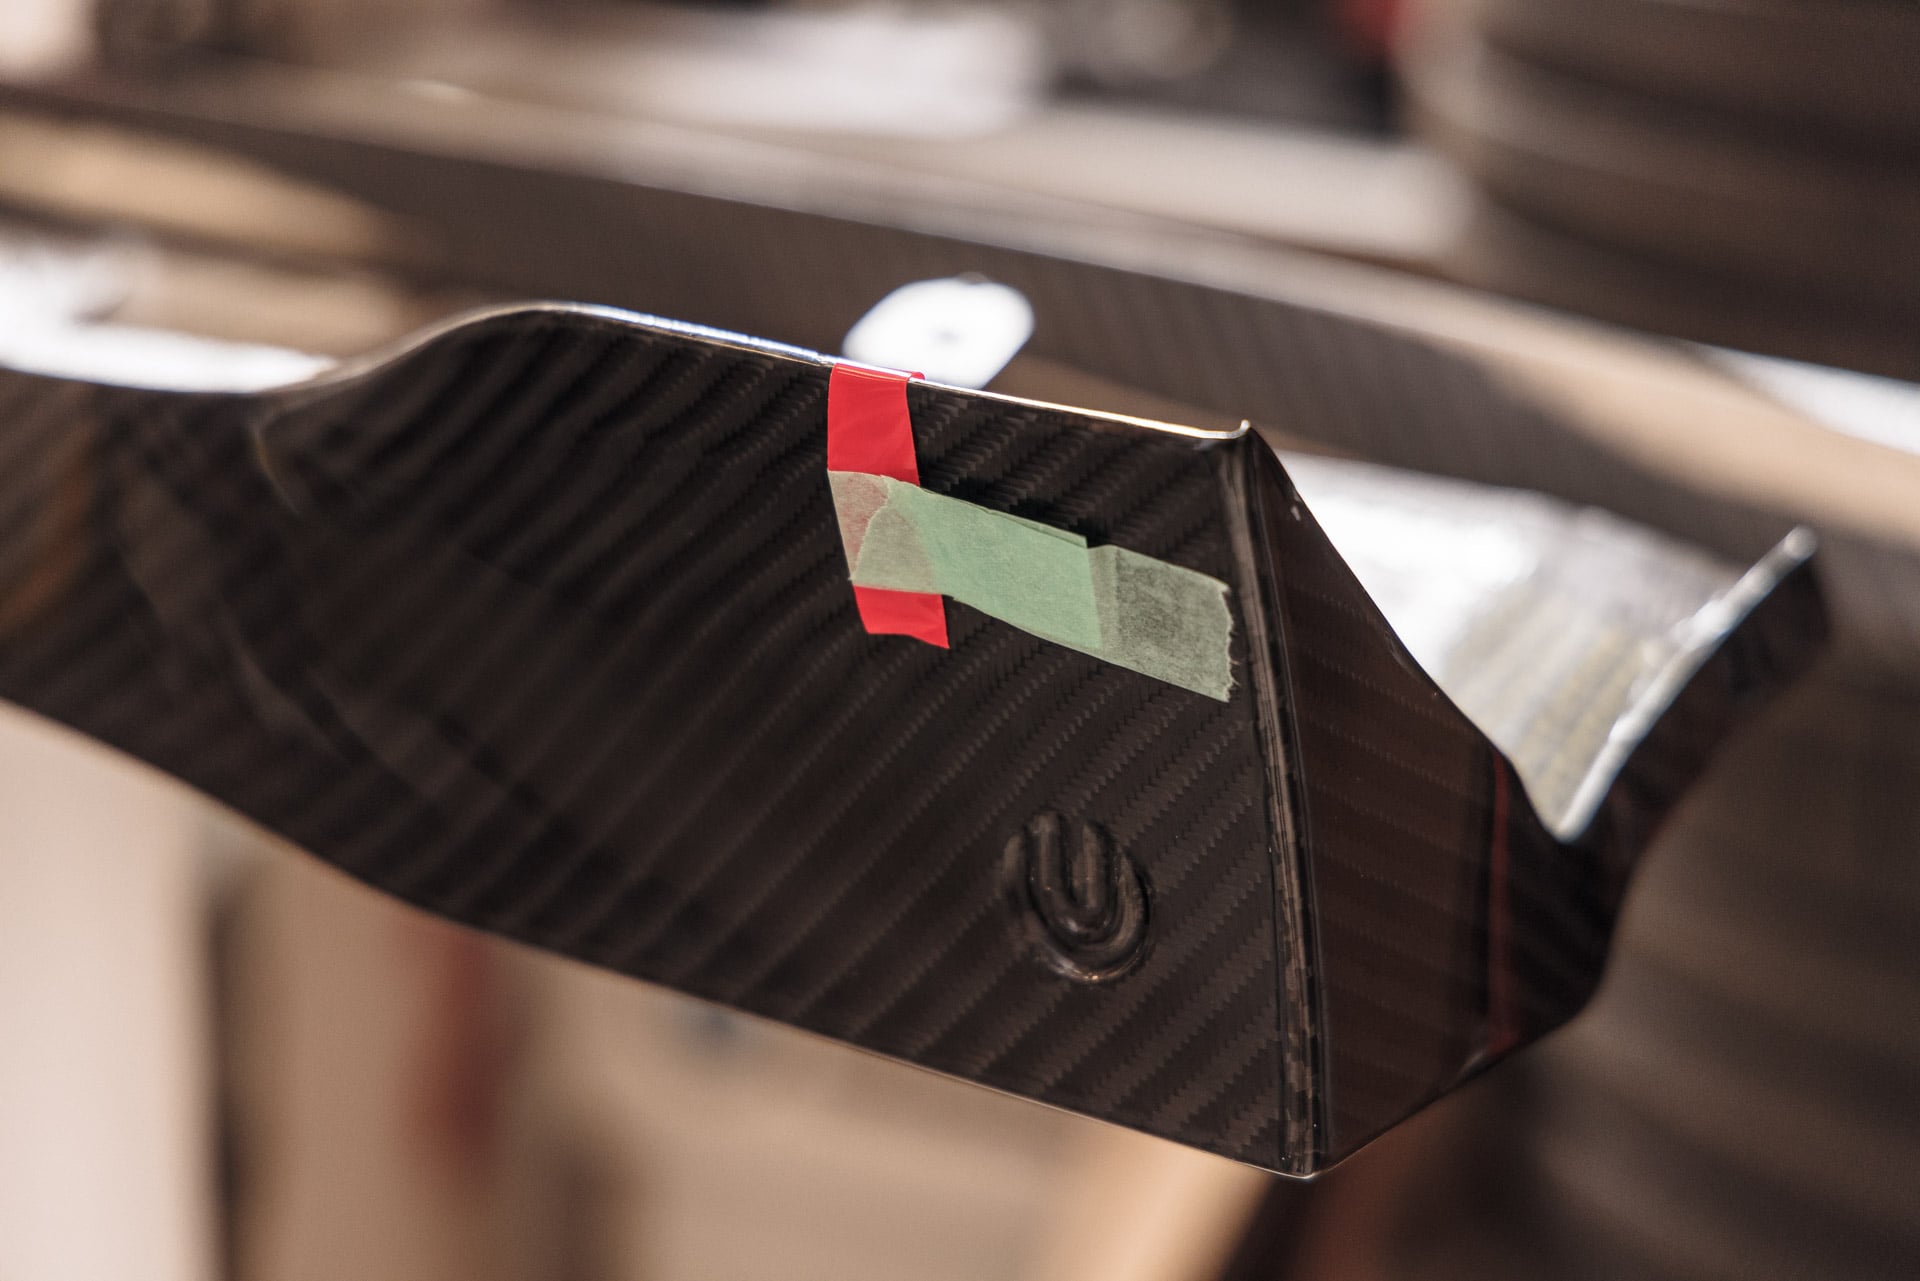
8. Now, using the provided adhesive promoter, apply adhesive promoter below the tape line in the area where the 3M tape will engage with the vehicle surface.
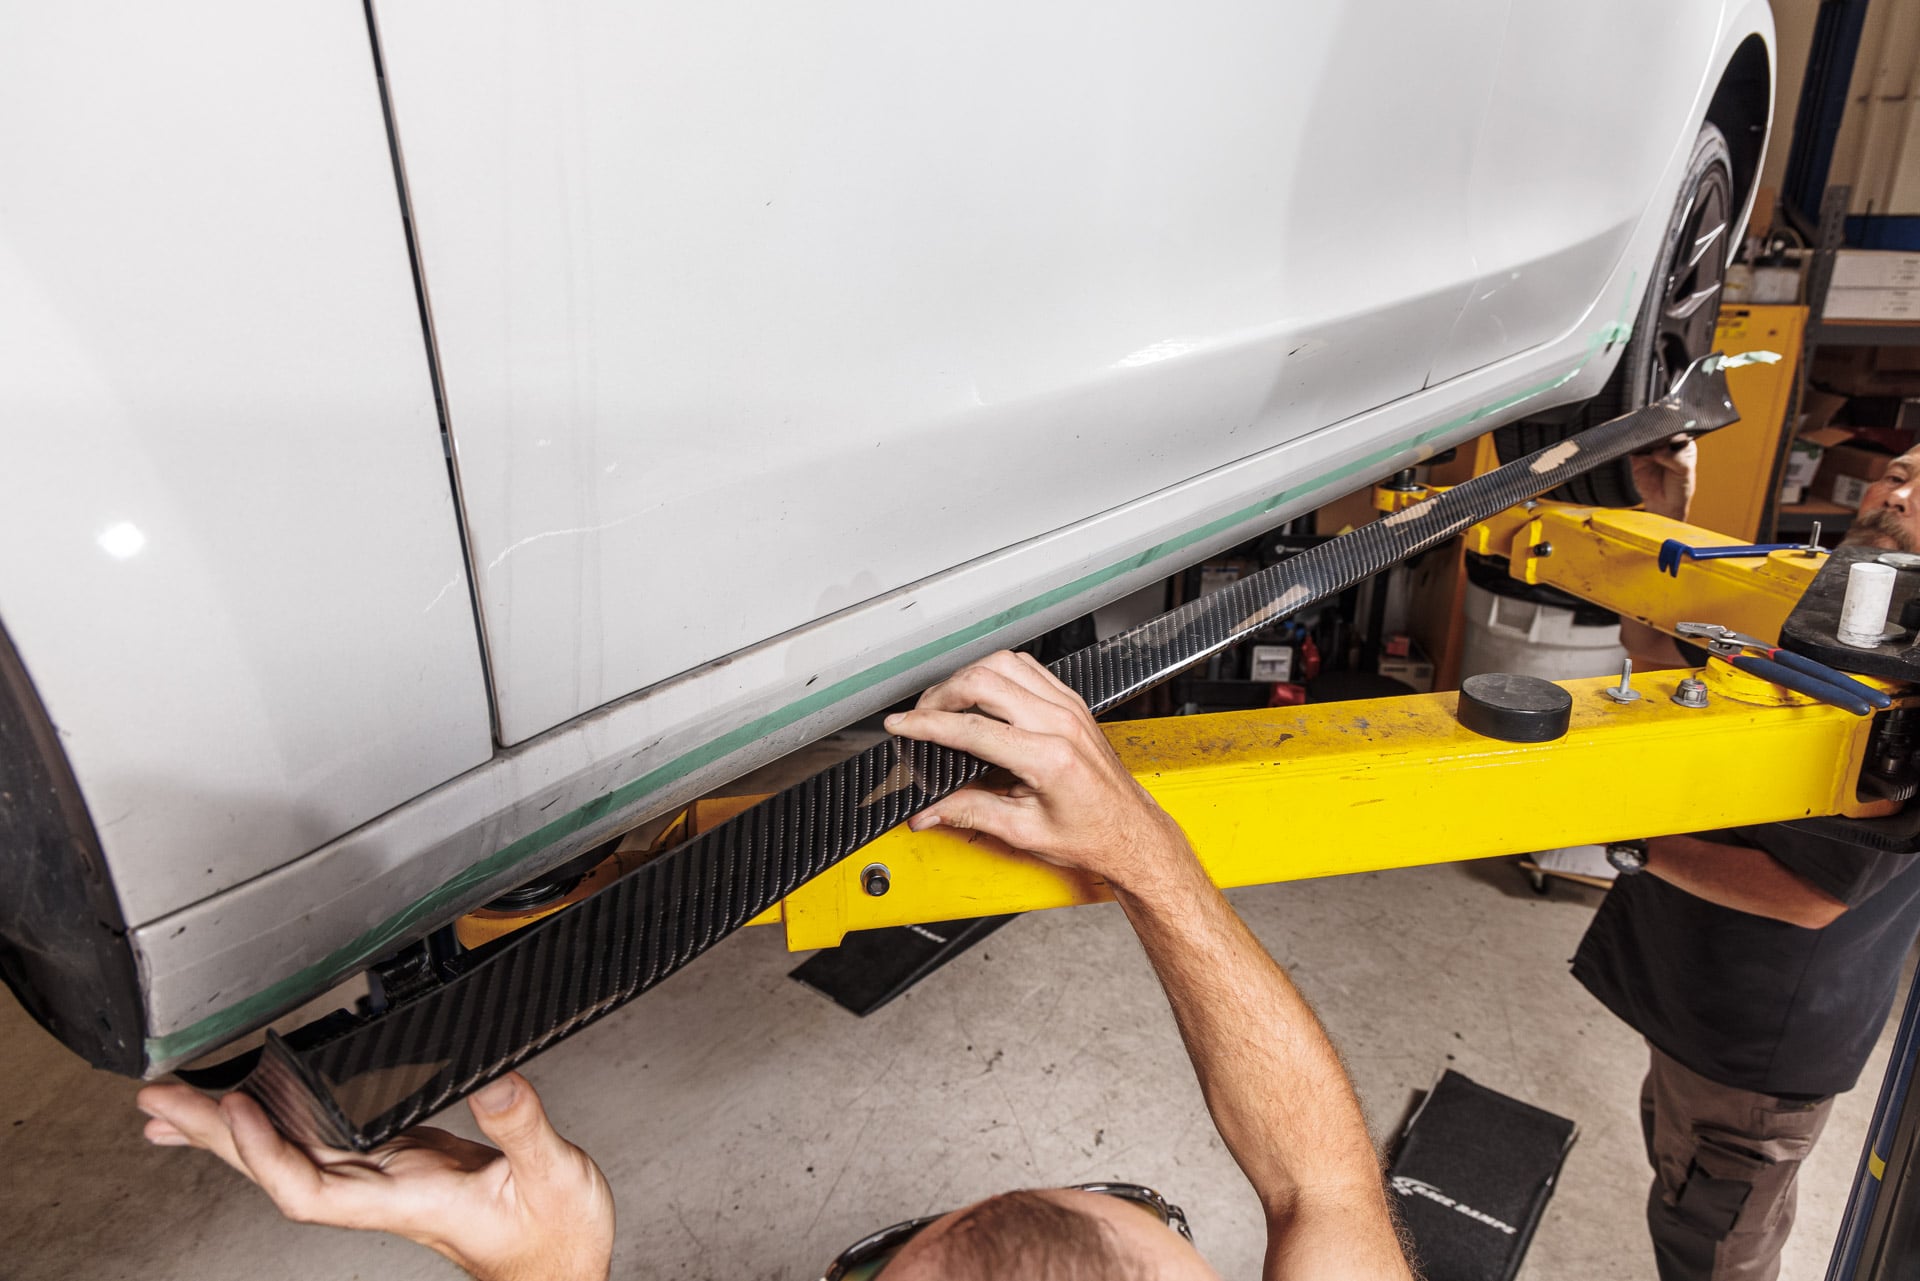
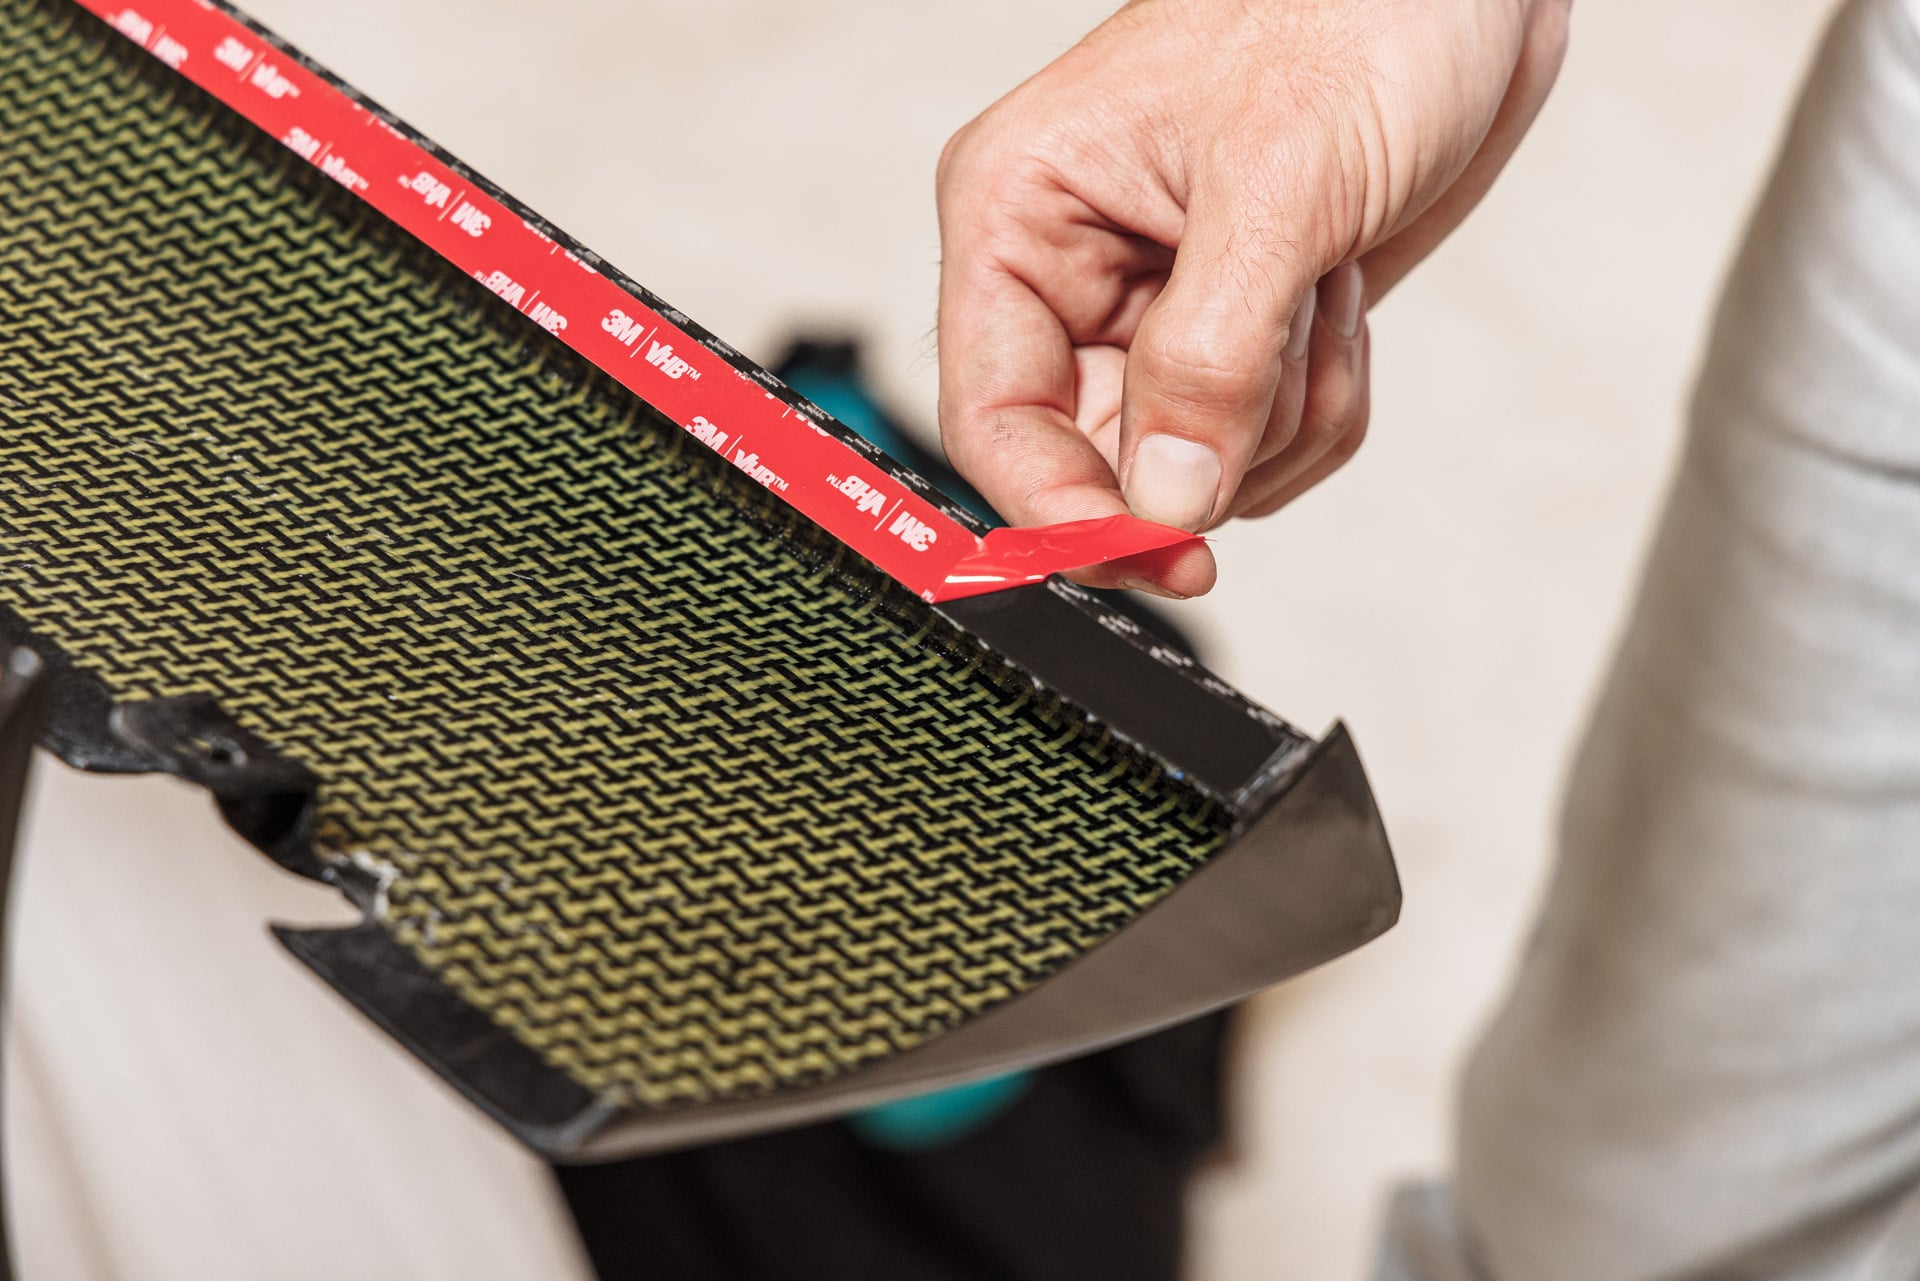
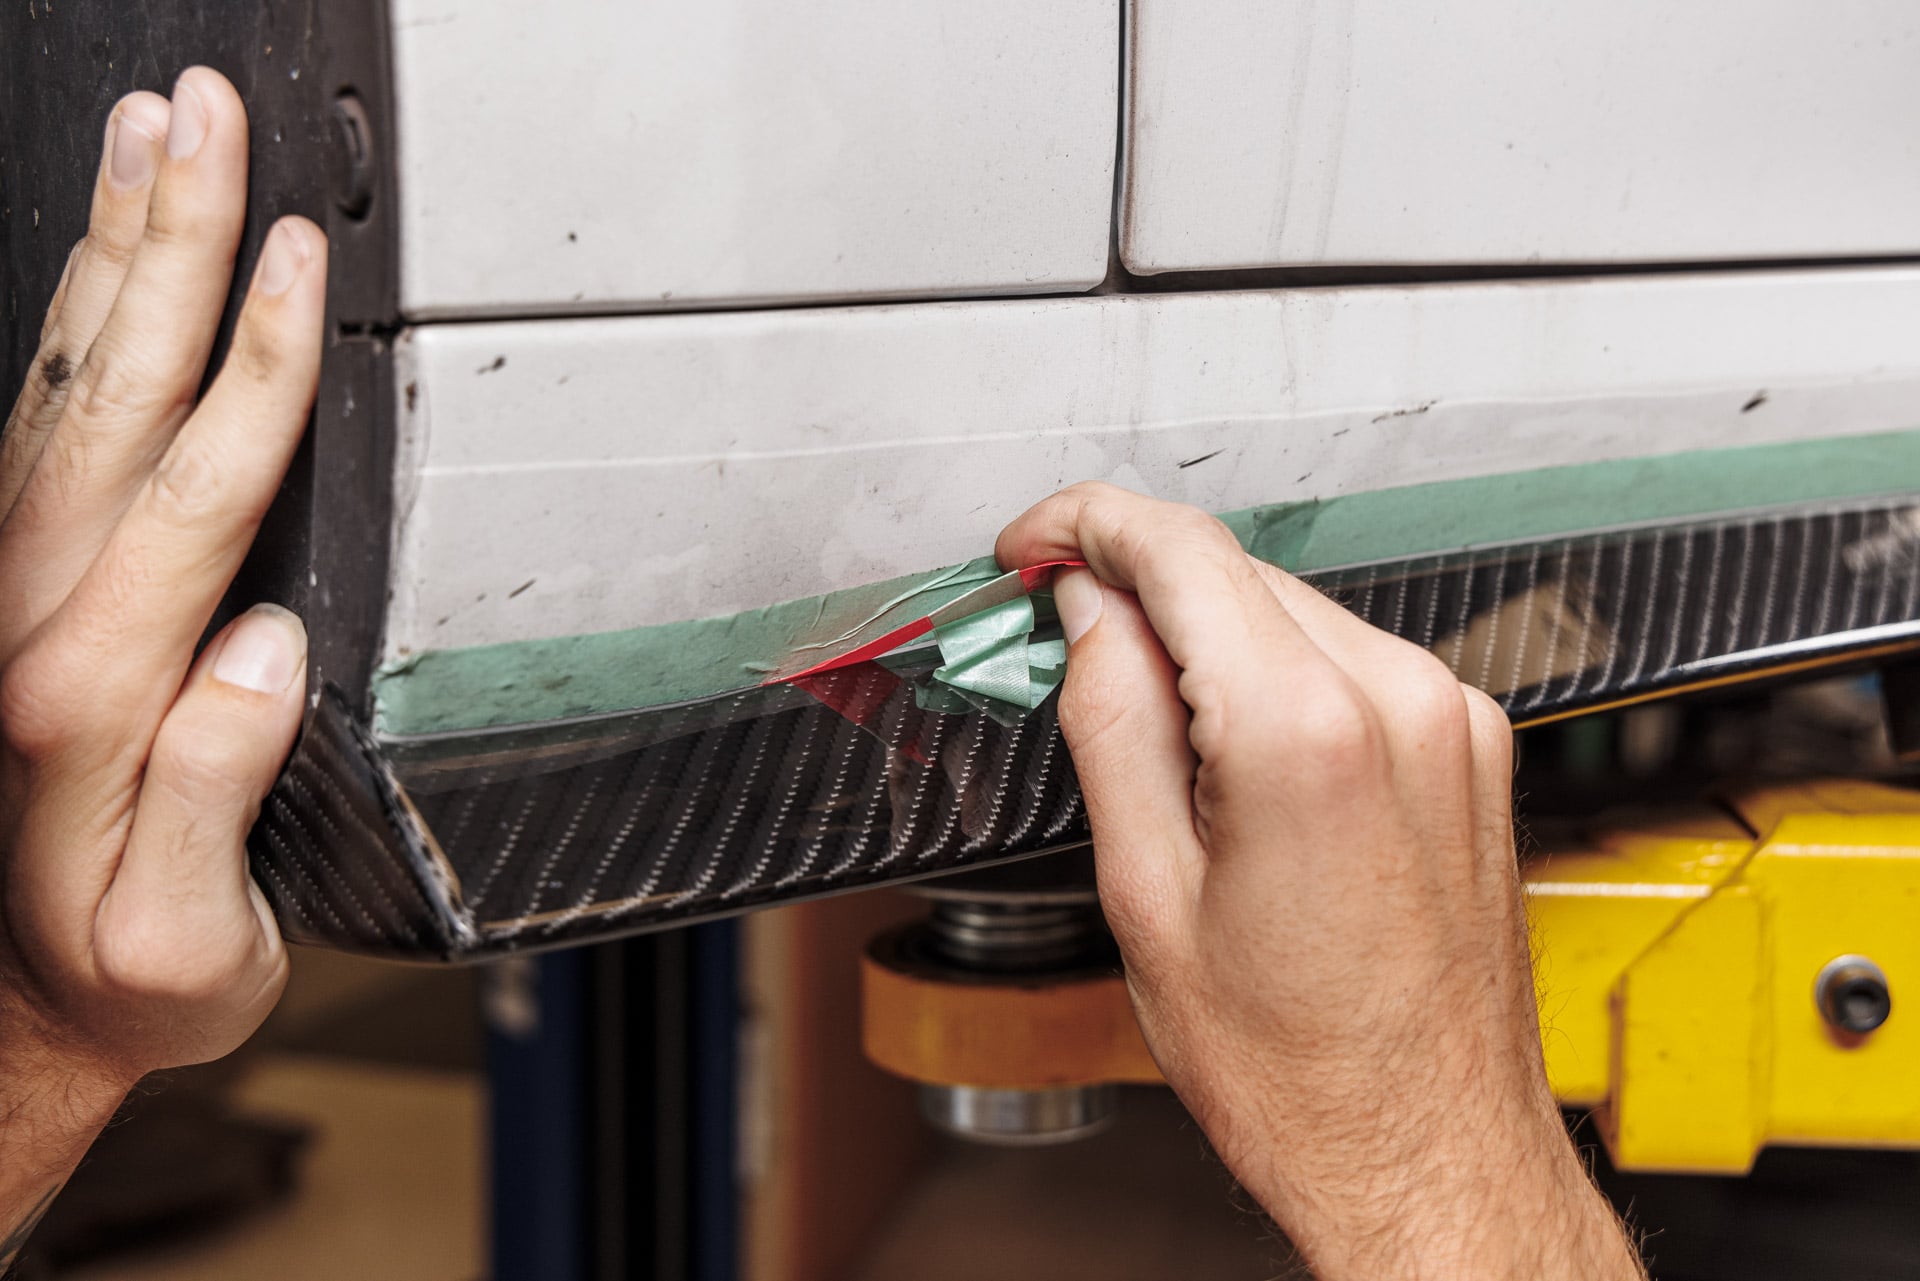
9. Before the side skirt is installed, be sure to pull the 3M lead ends for later access. This will allow access to removing the backing tape during installation.

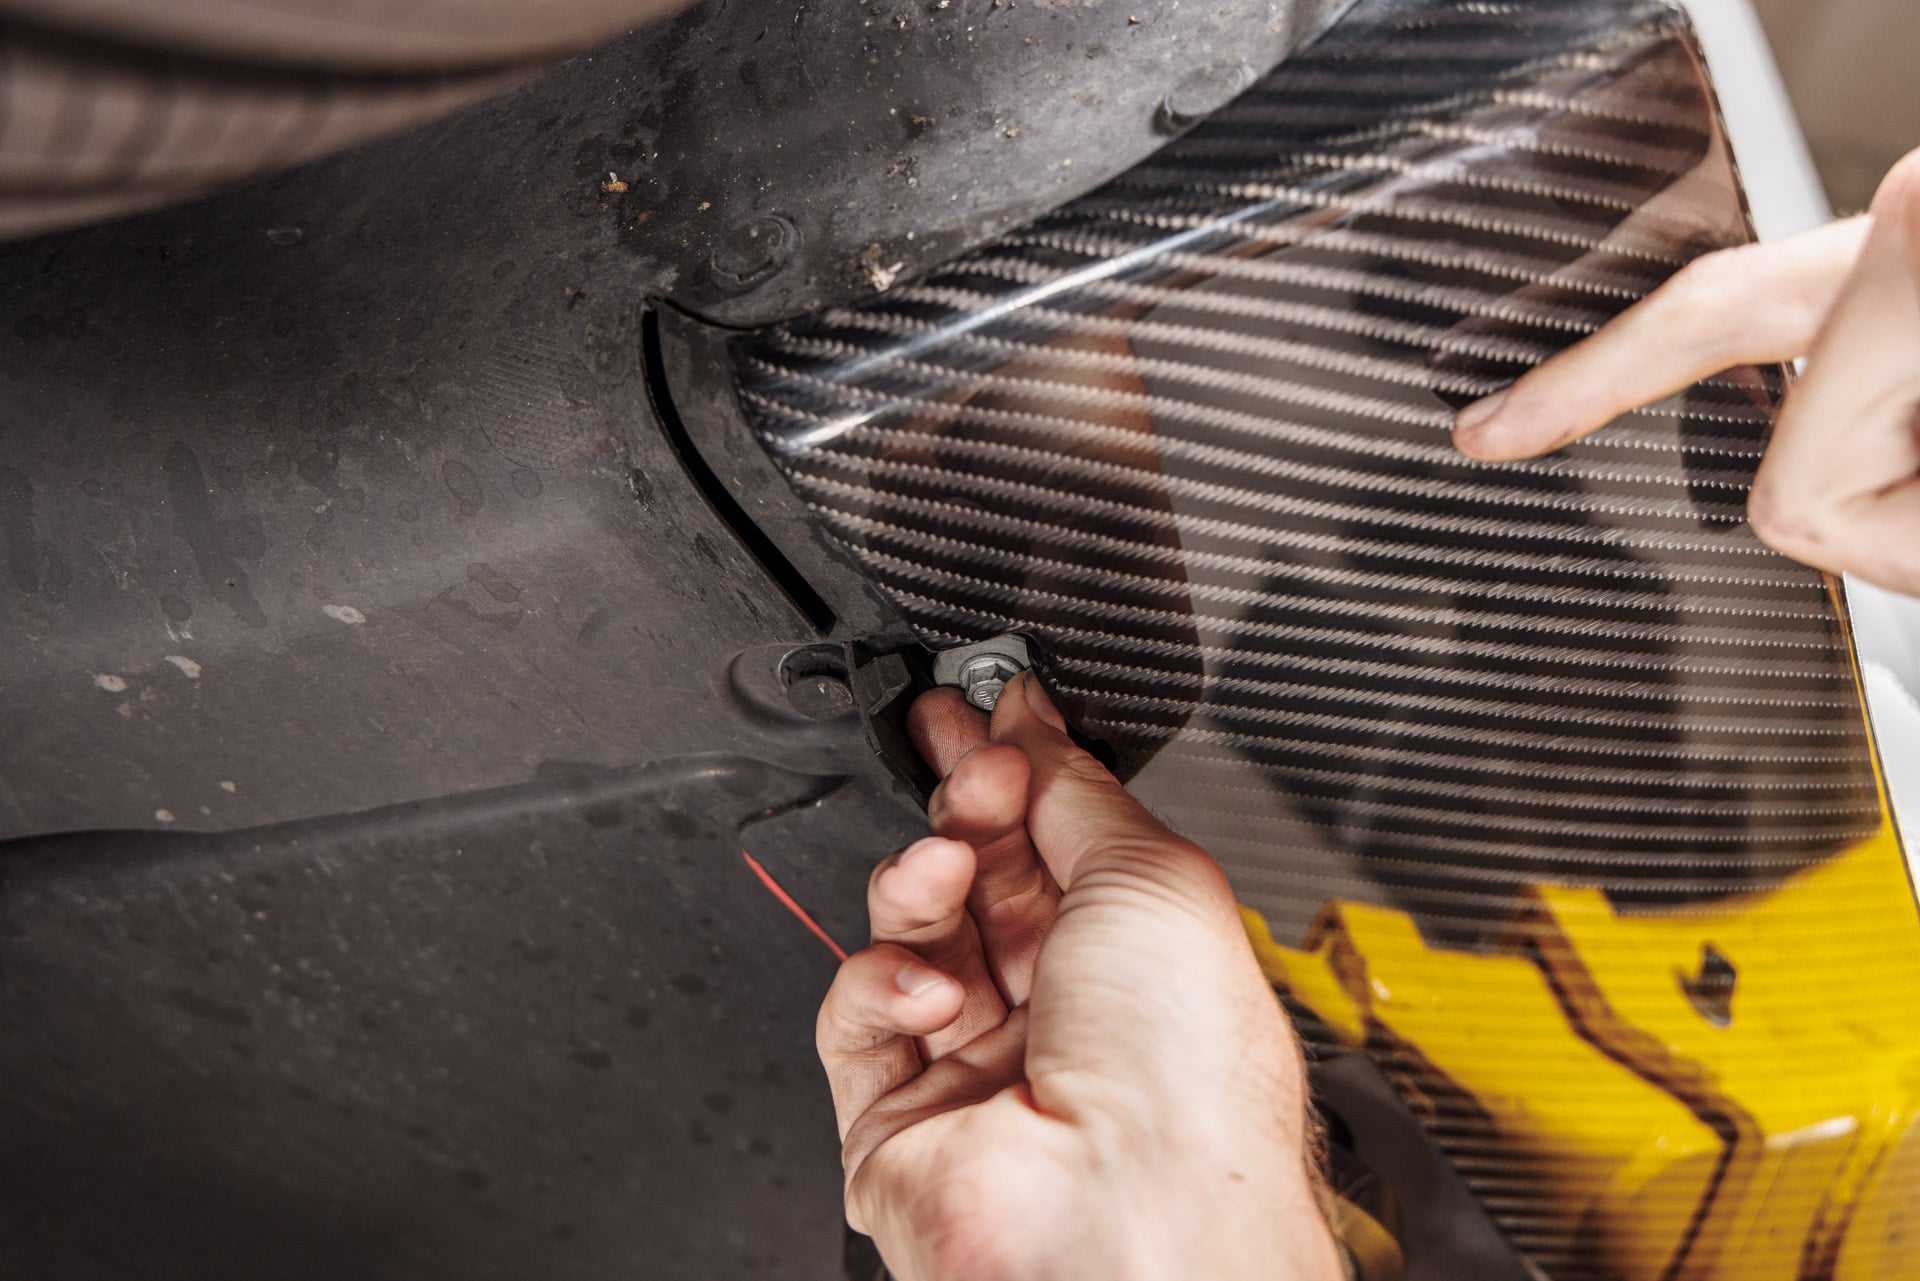
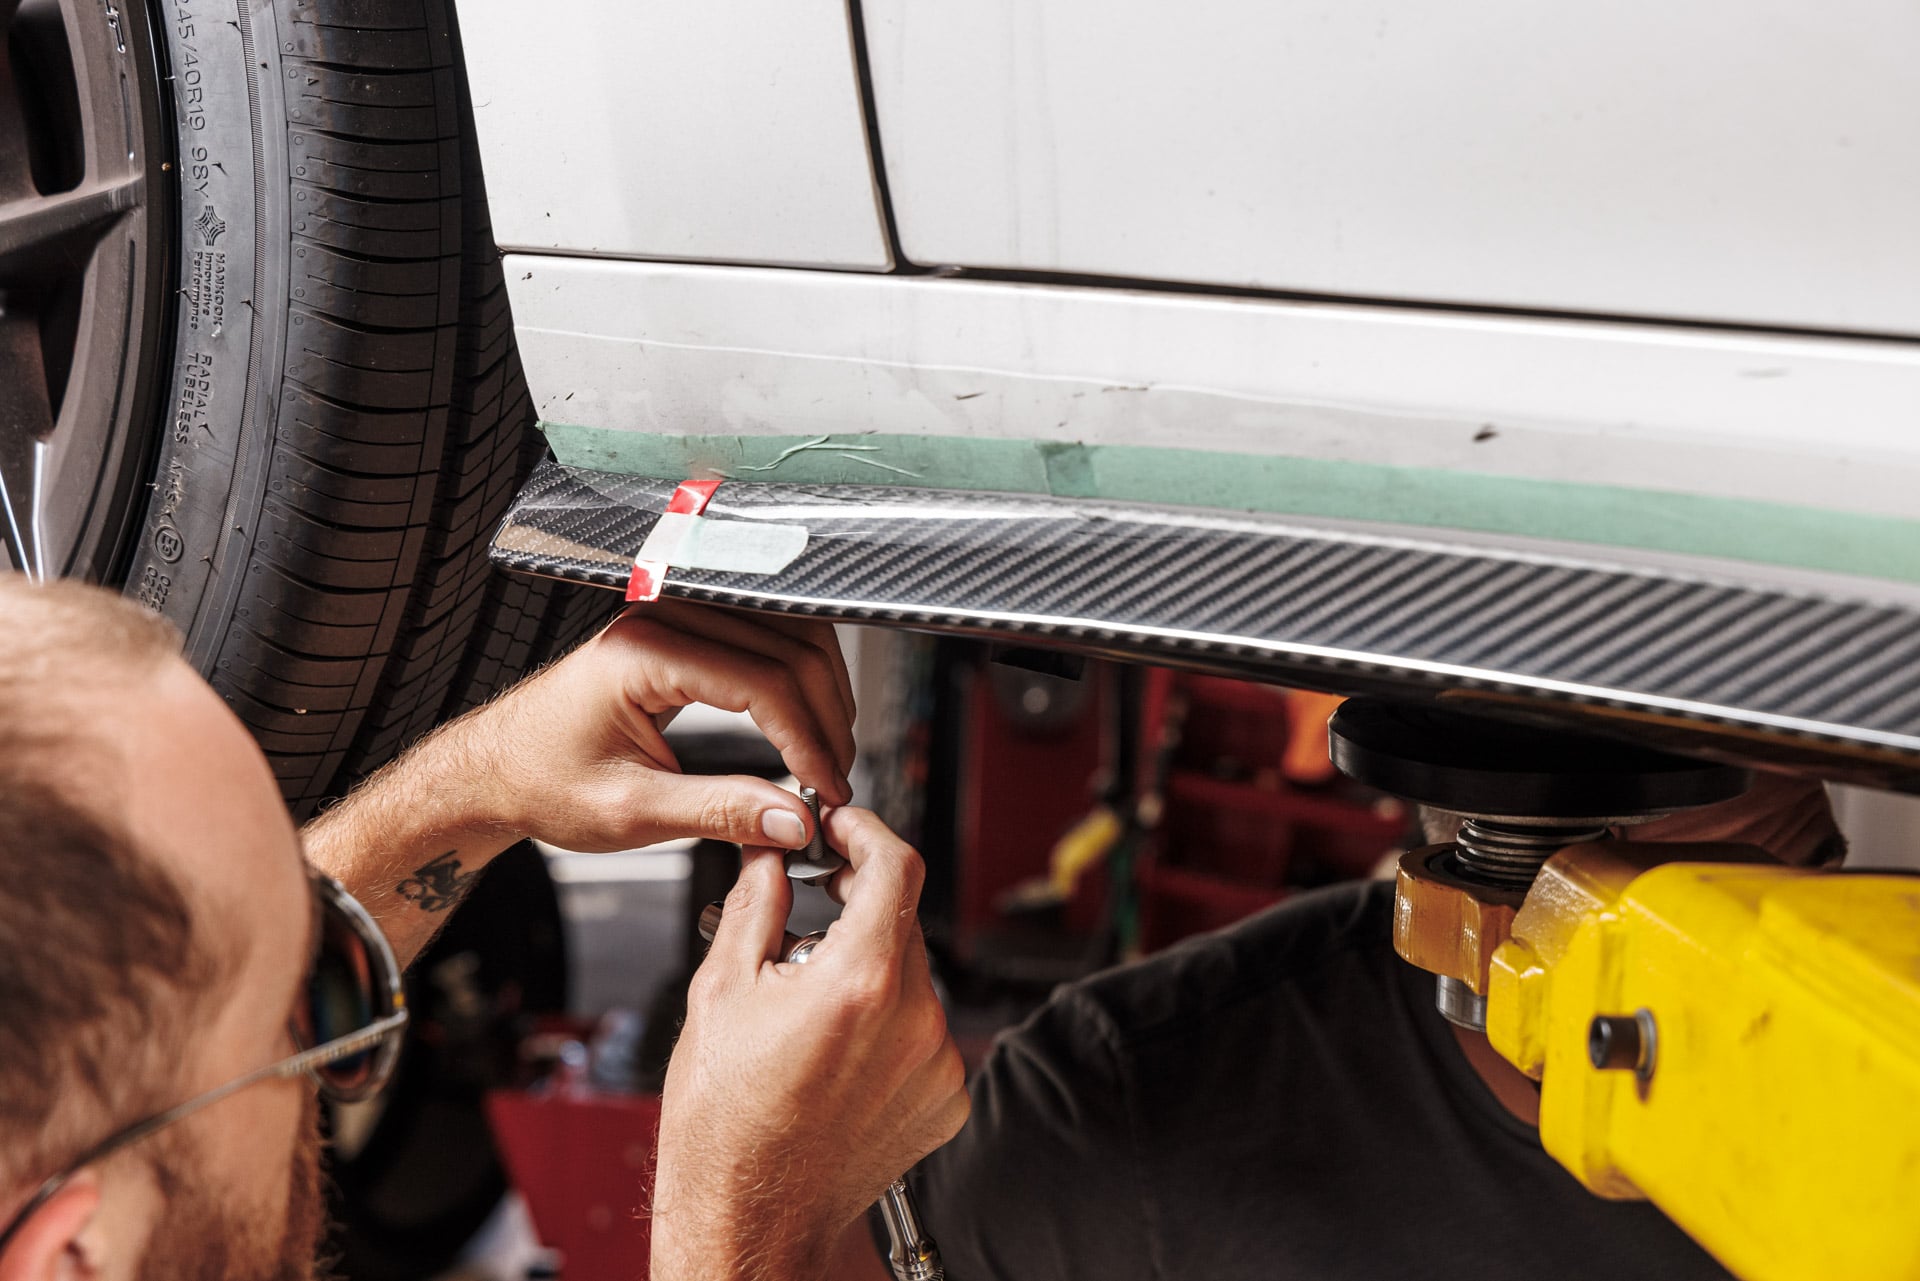
10. Place the side skirt onto the vehicle, and hand thread the factory 10mm bolts to ensure proper placement.
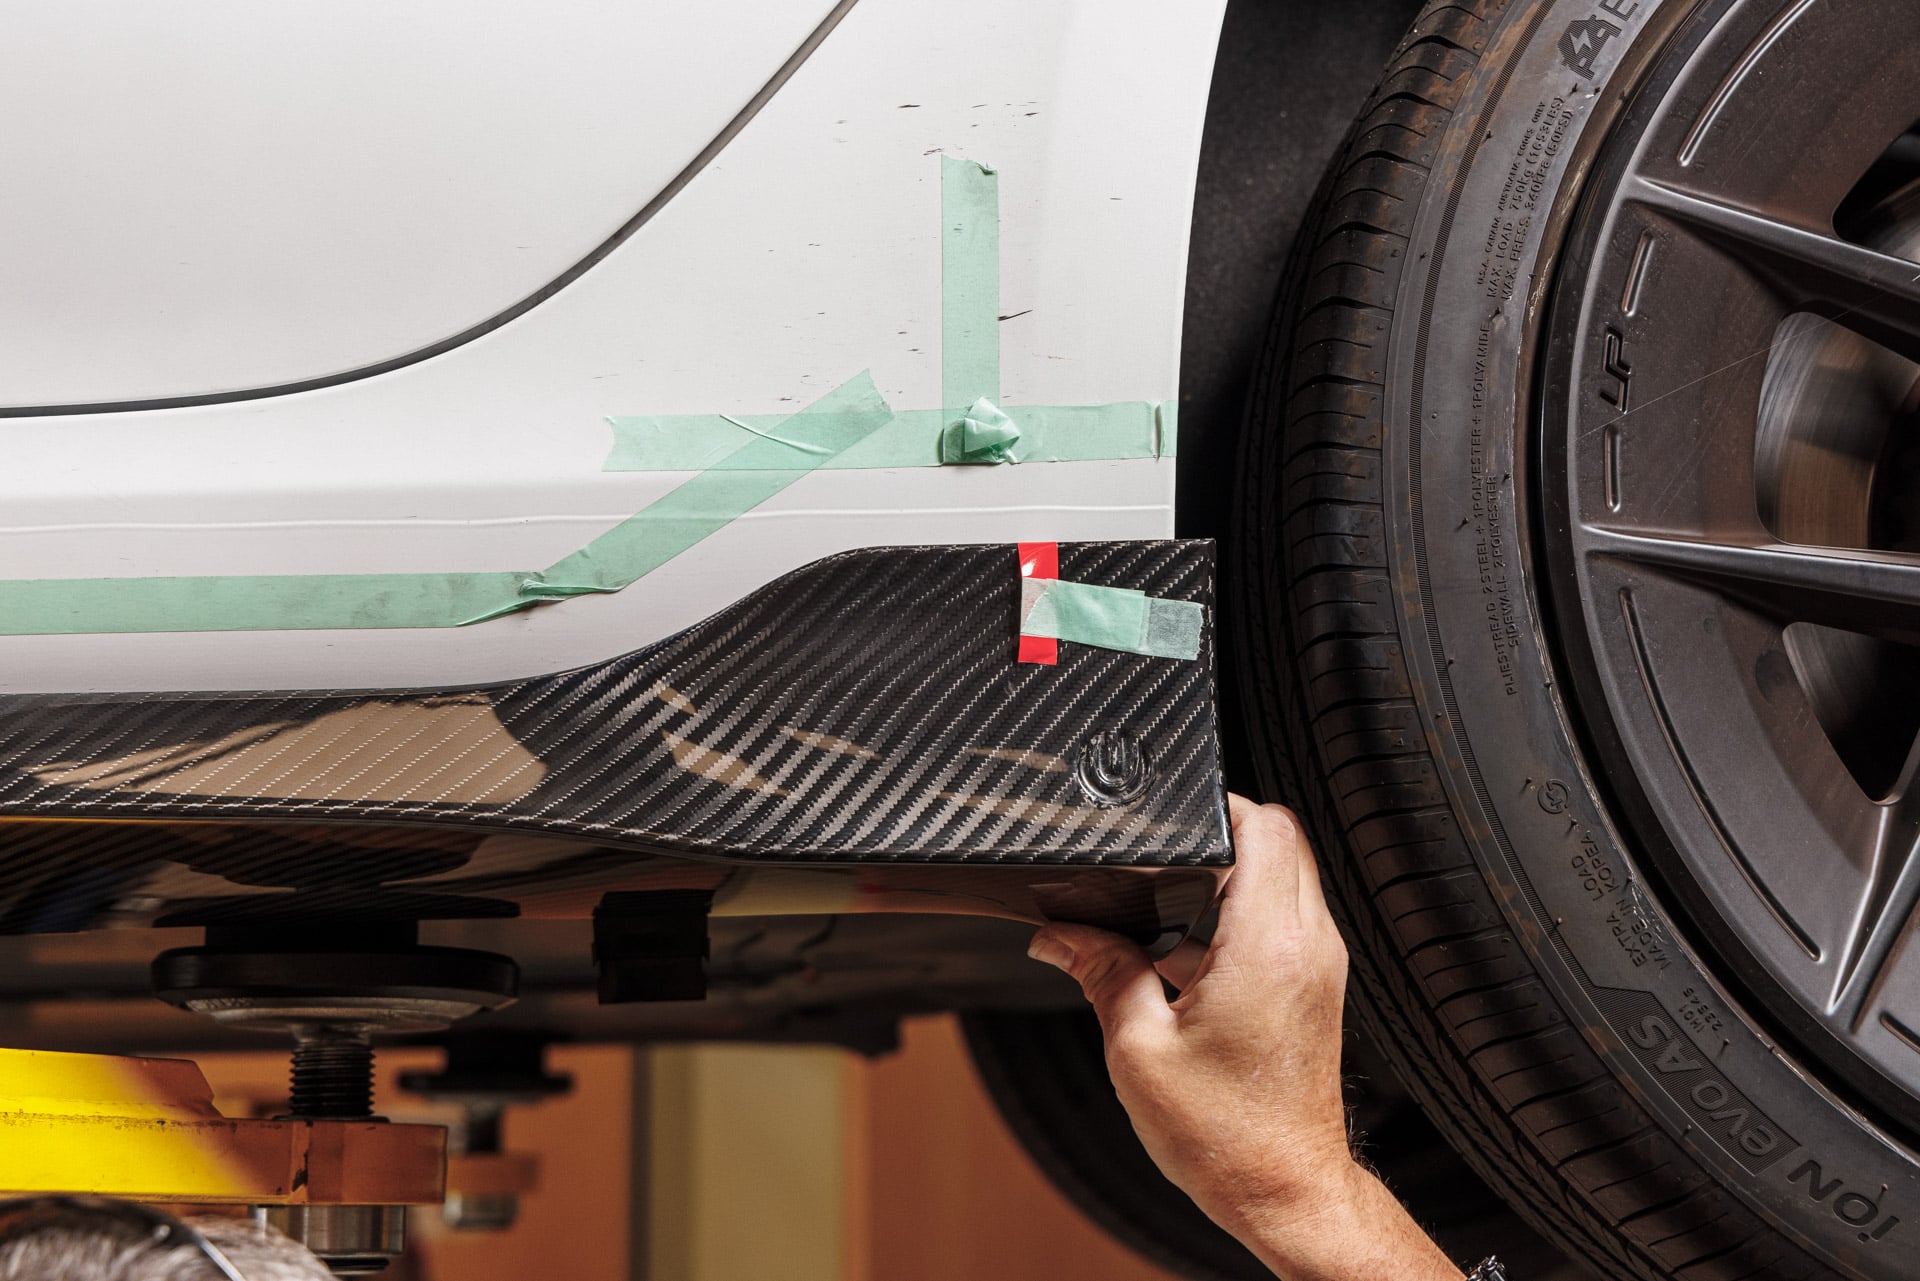
11. Once the side skirt is in position, start with one lead end, and pull away from the side skirt while following up with pressure on the exposed tape to bind it to the vehicle surface.
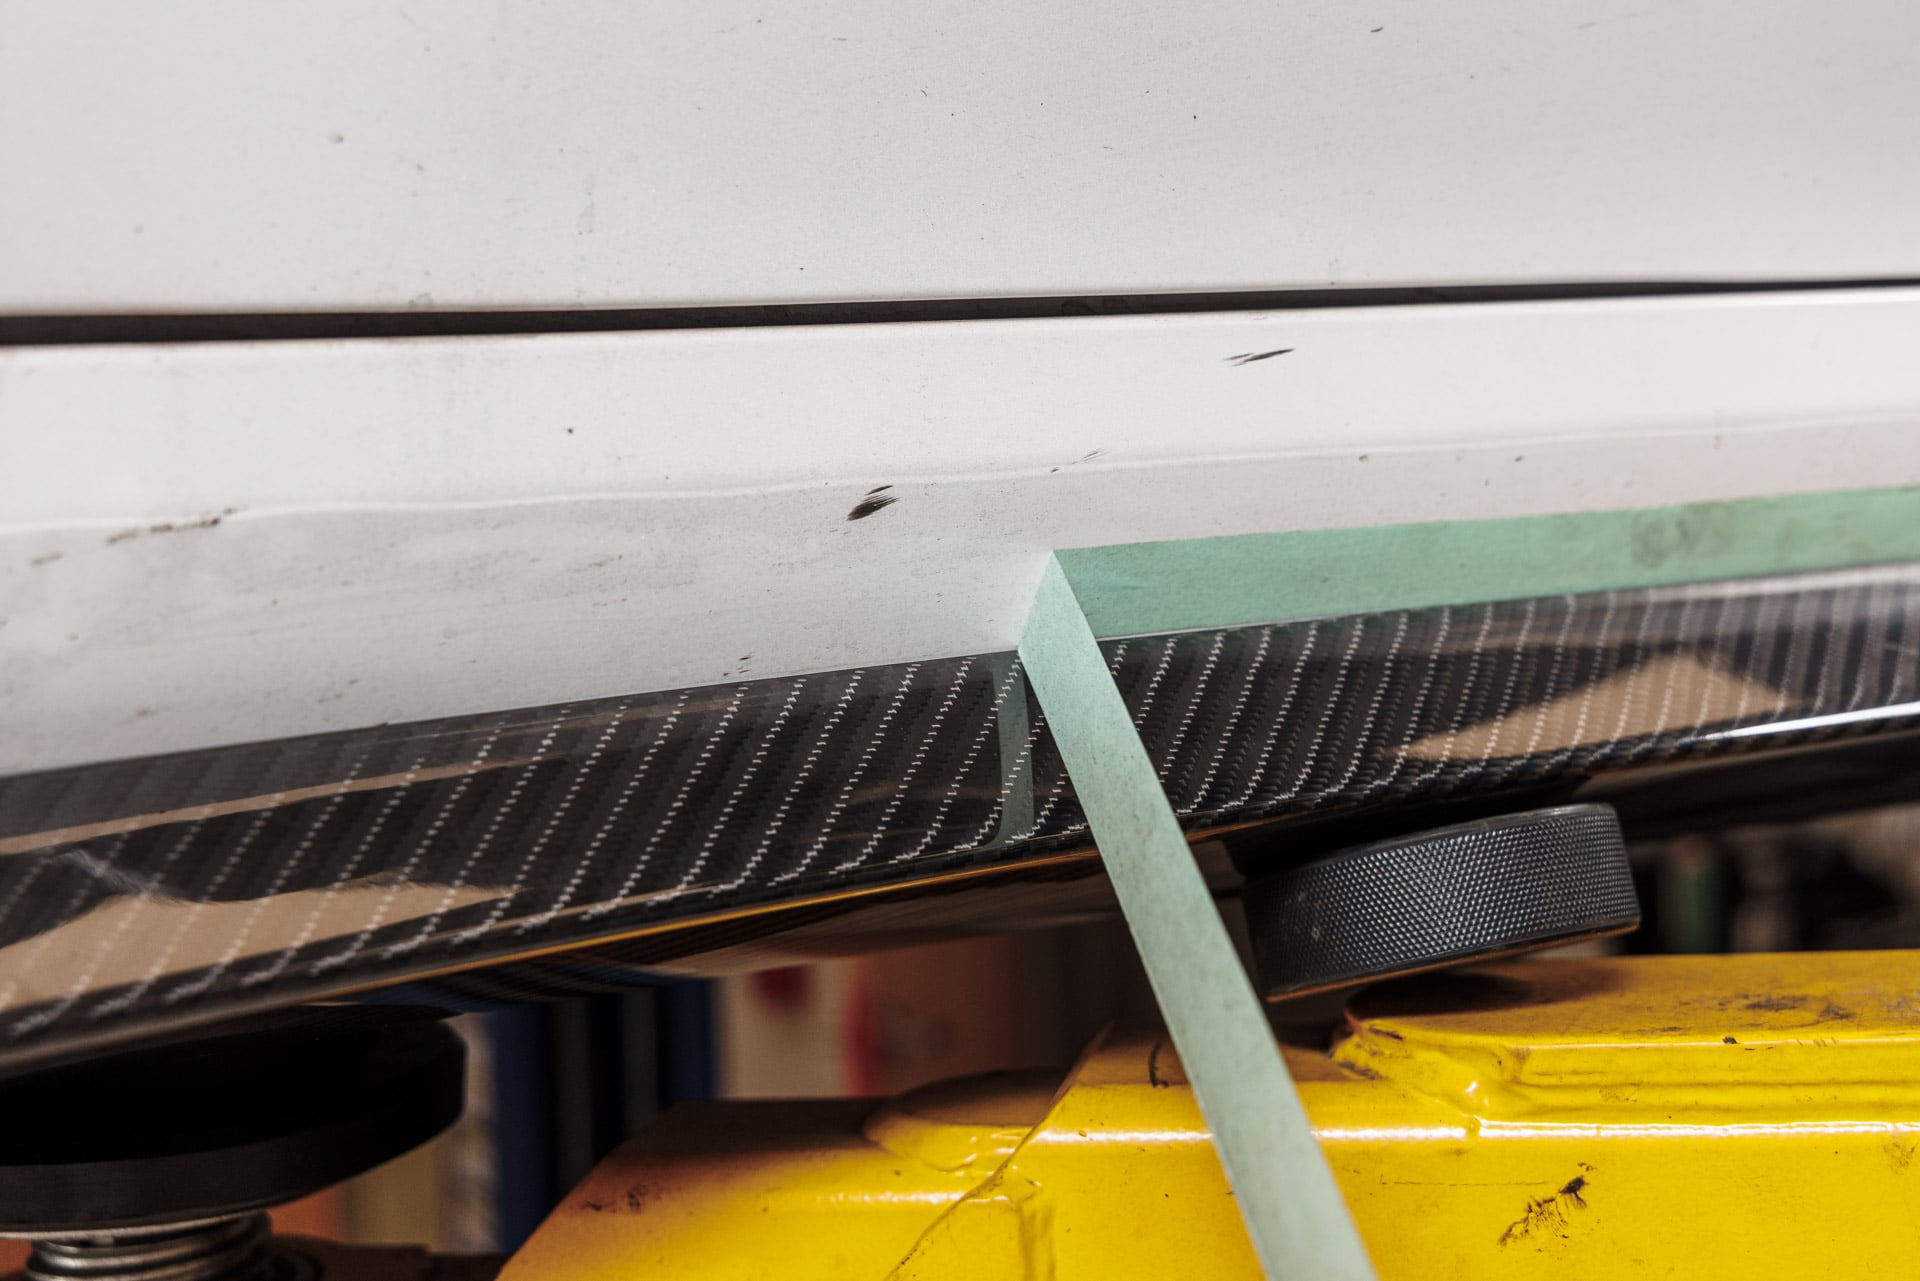
12. Once all of the 3M backing tape has been removed and slight pressure has been applied to the side skirt to ensure thorough contact throughout the adhesive area, proceed to remove all excess masking tape.
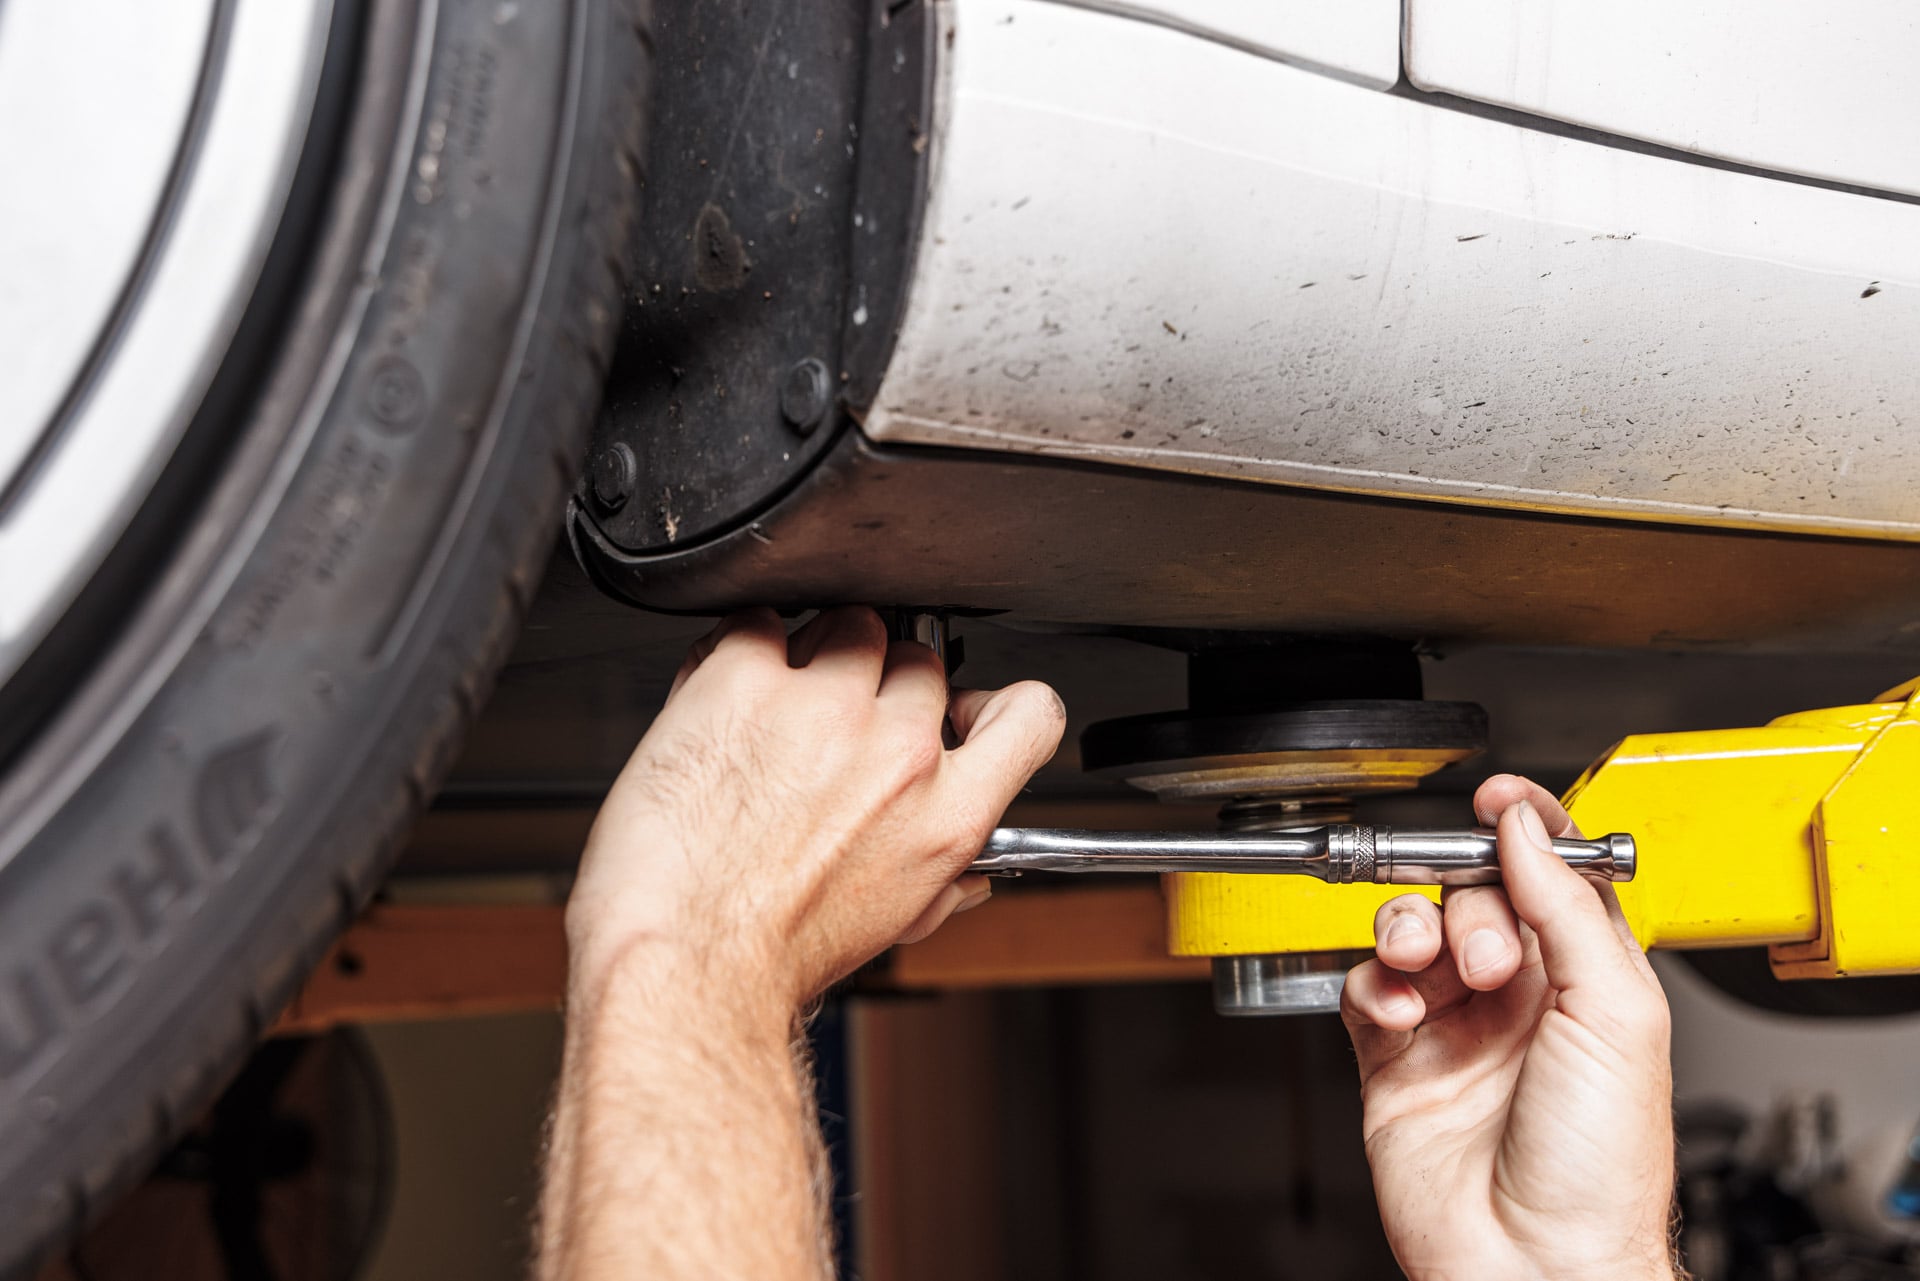
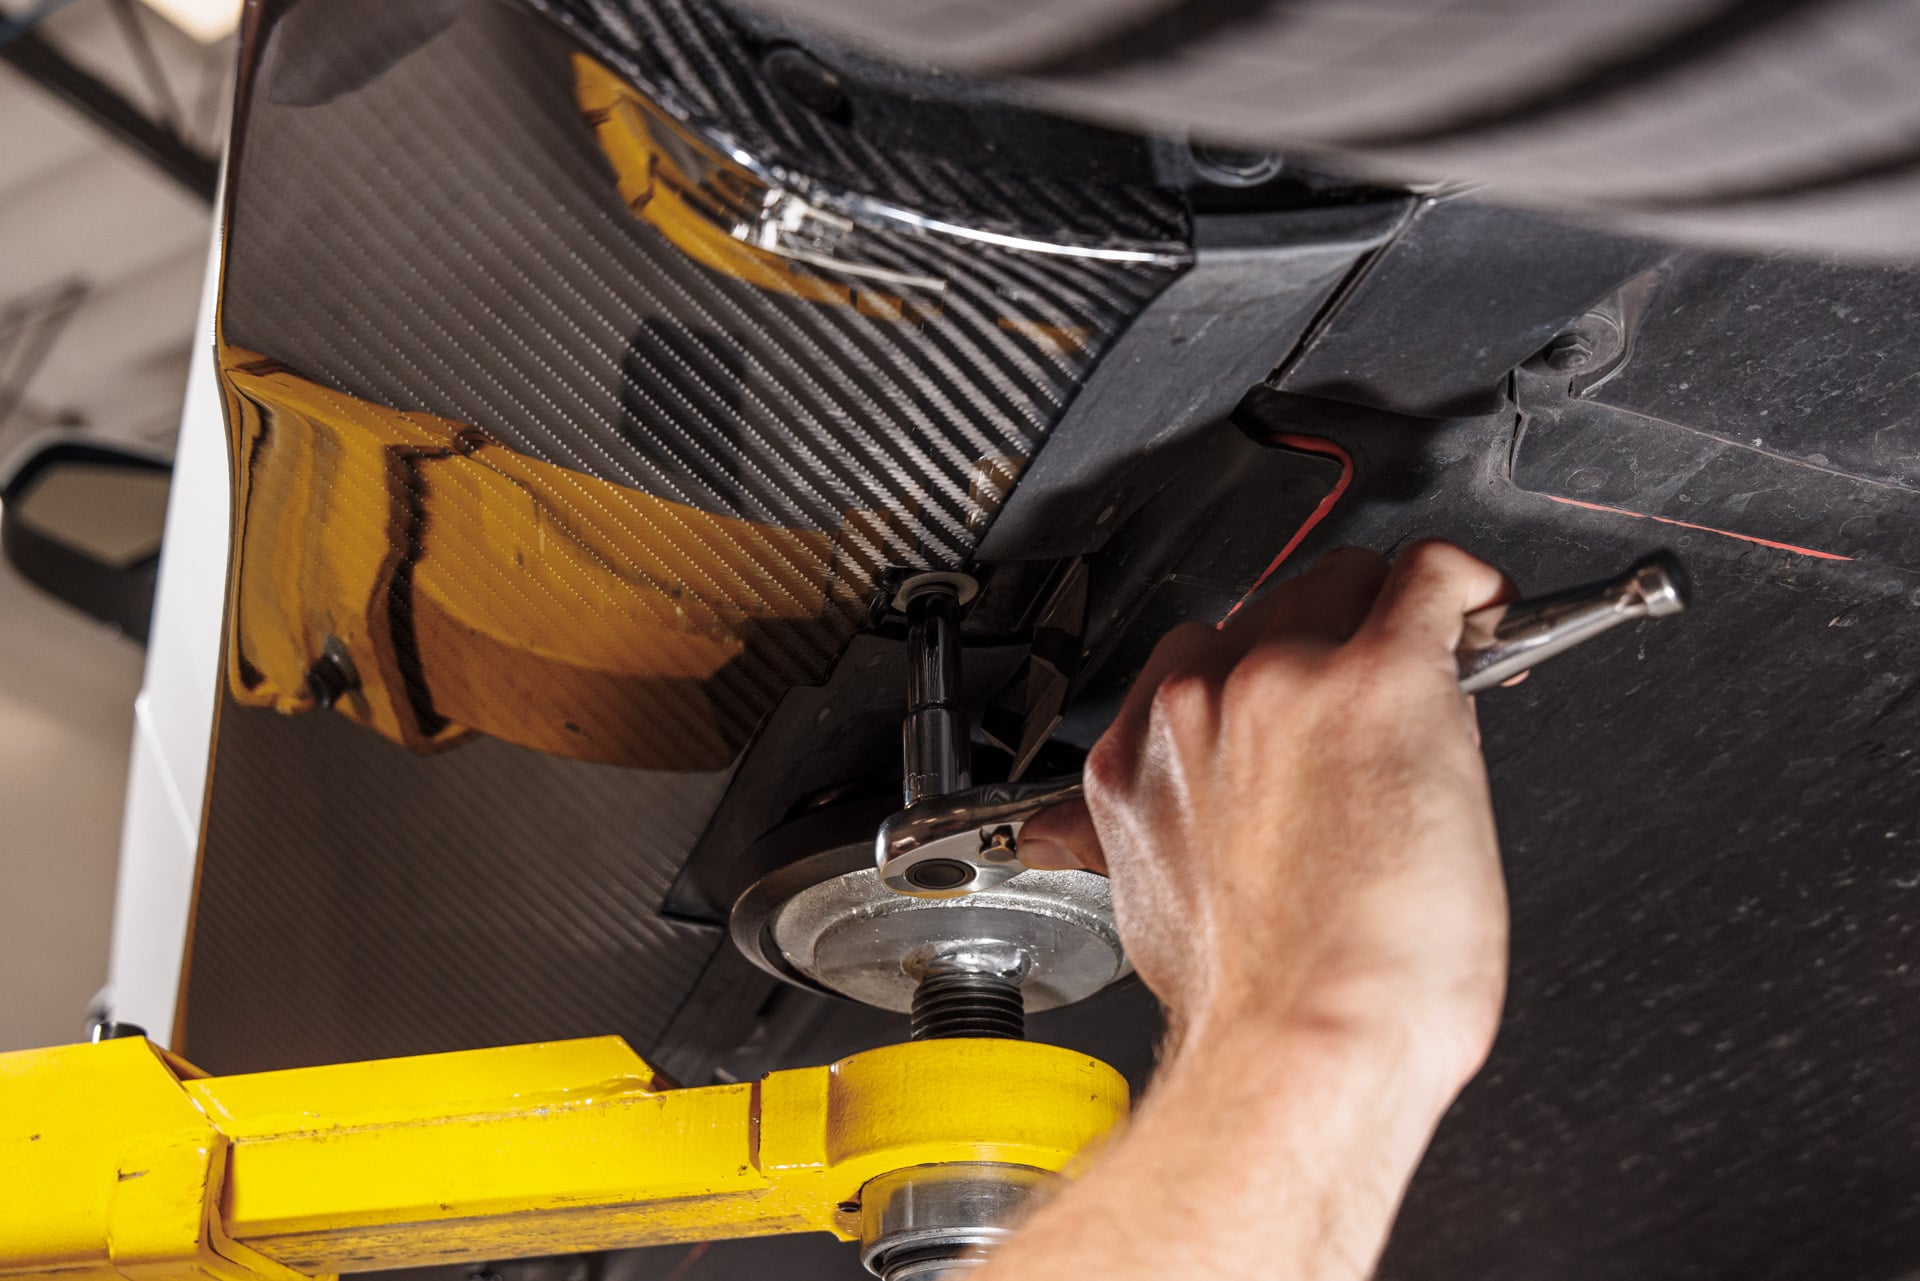
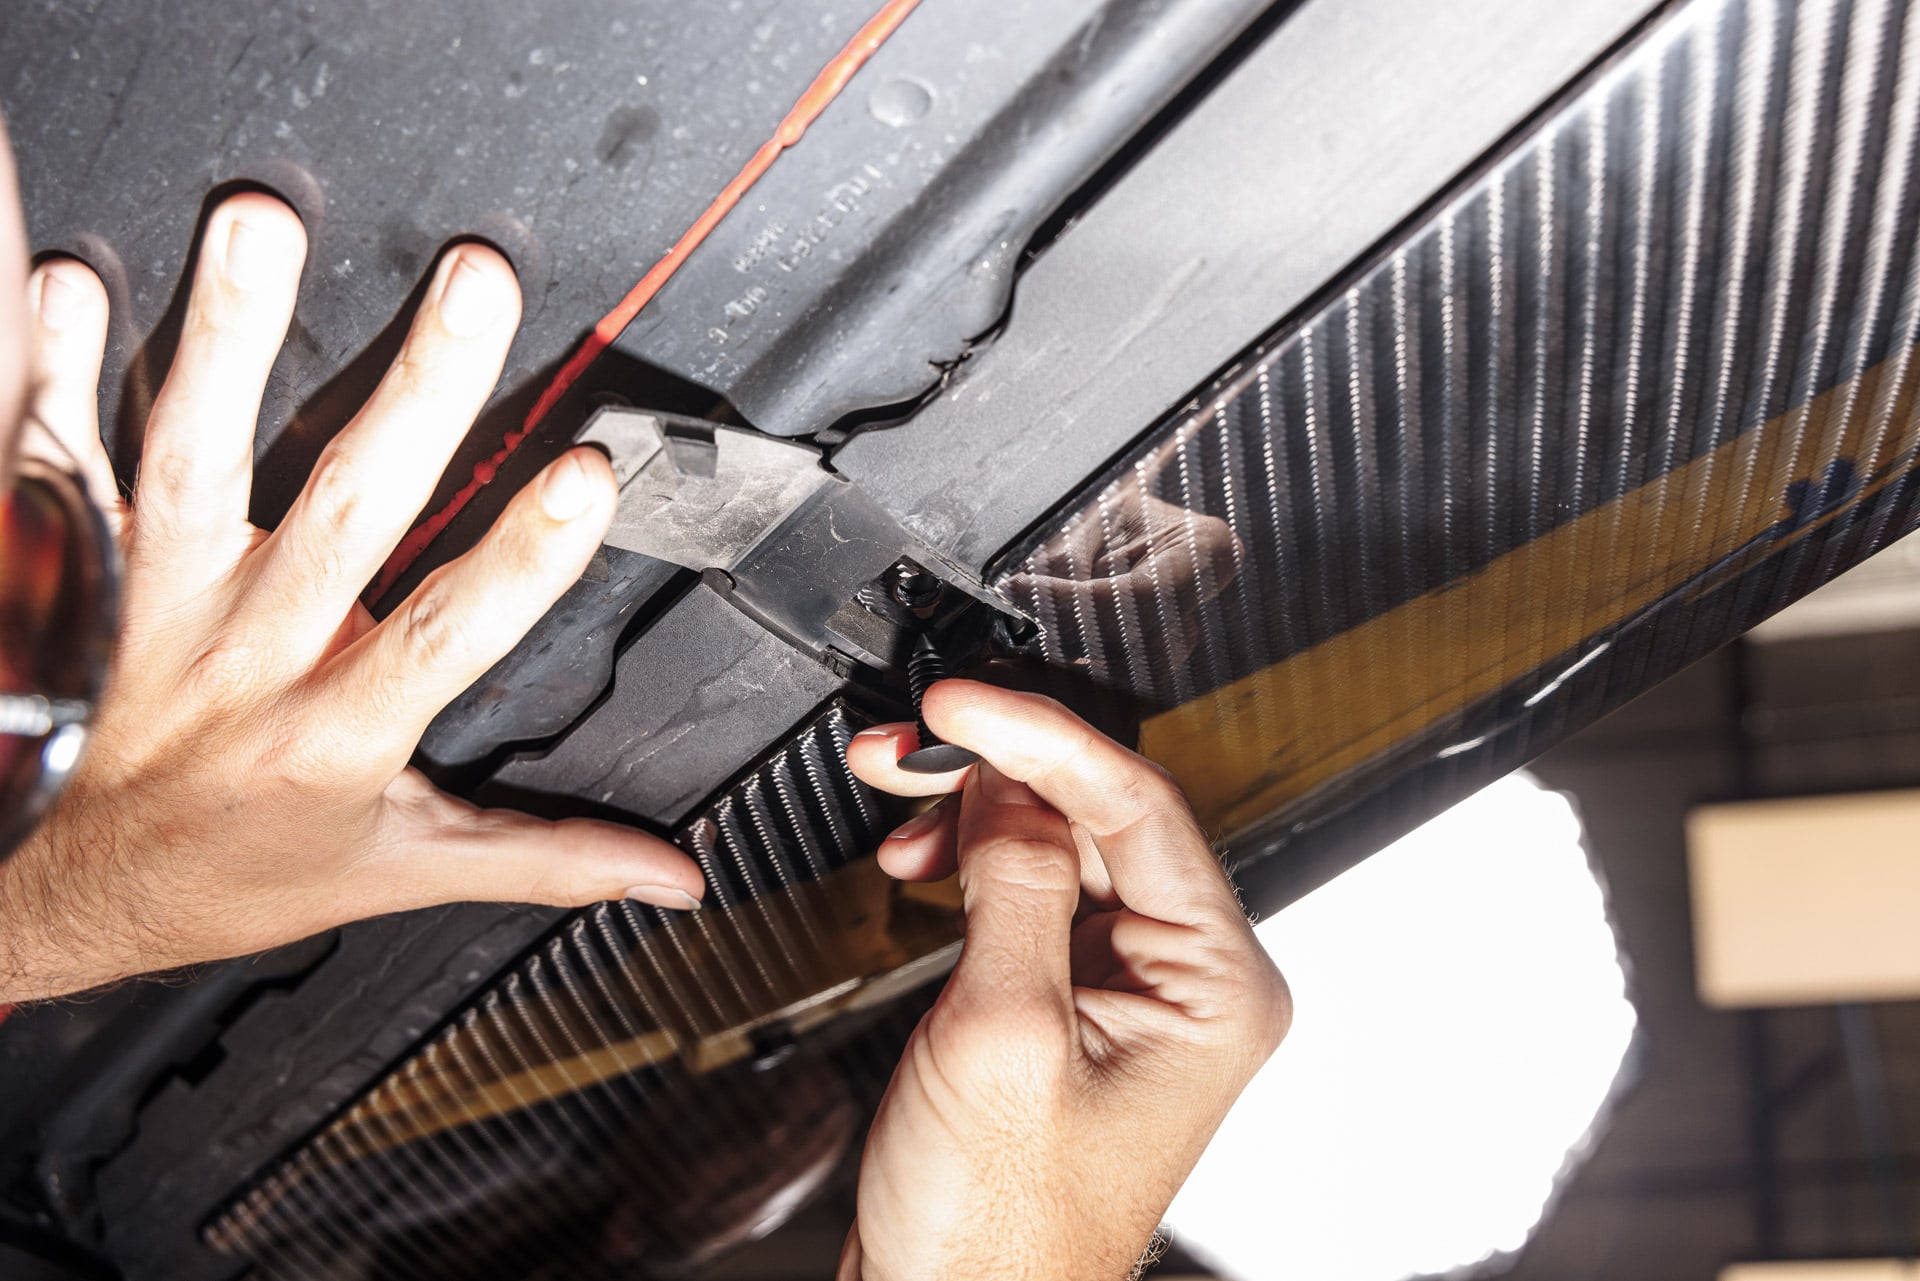
13. Using a 10mm socket with factory bolts, torque the factory 10mm bolts to 4ft/lbs. Note if your vehicle has 2 bolts as opposed to 4, you may need to use the provided plastic retainer clips in place of a 10mm bolt for the center 2 mounting points. If your vehicle uses bolts in all 4 mounting points, proceed with reinstalling 4 factory bolts.
14. Next, close all of the flaps to complete installation.