Model 3 Highland Performance
Rear Diffuser Extension
INSTALLATION GUIDE
- UP Rear Diffuser Extension
- Adhesive Promoter
Note: IF you plan to install both the UP rear diffuser trim as well as the rear diffuser extension, be sure to install the diffuser extension first prior to installing the rear diffuser cover. The placement of the rear diffuser trim may be affected by the placement of the rear diffuser extension.
- Gloves
- Rubbing alcohol, or equivalent no-residue cleaning solution
- Microfiber cloth or equivalent cloth
By installing or using this product, you understand and agree with the following: If you do not agree, do not proceed with the installation and return this product within 30 days for a full refund of the purchase price from the company from which you have purchased it.
- I understand and agree that this product is intended to be installed for use on private roads and in jurisdictions where the use of this product is deemed legal by the local authorities. Furthermore, I understand and agree Unplugged Performance does not have any knowledge or control of regulations in my local jurisdiction, and it is up to me to determine if the product is acceptable for use with my vehicle.
- I understand that Unplugged Performance has done testing of this product on road and on closed racetracks but does not have the ability to test the vehicle for localized standards and regulations.
- I understand and agree that if the vehicle manufacturer determines that any Unplugged Performance products have contributed to a problem with the vehicle it may affect the vehicle’s warranty. Furthermore, I understand and agree that Unplugged Performance has no duty nor ability to be involved in internal manufacturer decisions.
- I understand and agree that if this product is given to an installer for installation on my vehicle, I have read and agreed with all the previous, even if I am not personally installing these parts on my vehicle. Furthermore, I understand and agree that this product should be installed by a trained professional that is familiar with both the vehicle as well as this product. Furthermore, I understand and agree that I and/or my chosen installer will follow the installation instructions carefully and dutifully test the vehicle post-installation in a safe and controlled environment to ensure proper operation.
- I understand and agree that by installing this product Unplugged Performance and all associated persons and entities as well as the vehicle manufacturer and all associated entities must be held harmless in the event of any suit, damages, or other legal action. Furthermore, I hereby release Unplugged Performance and any associated entities from any and all liability for any potential claim or claims.
If you do not agree with any of the above statements, you should return the product immediately. For more information please see our Terms and Conditions.
Be sure to prepare the surface that the rear diffuser extension will make contact with prior to install. Be sure to use a cleaning solution that does not leave any residue. If the contact areas are unclear, you can test fit the rear diffuser extension to confirm which areas need to be cleaned.

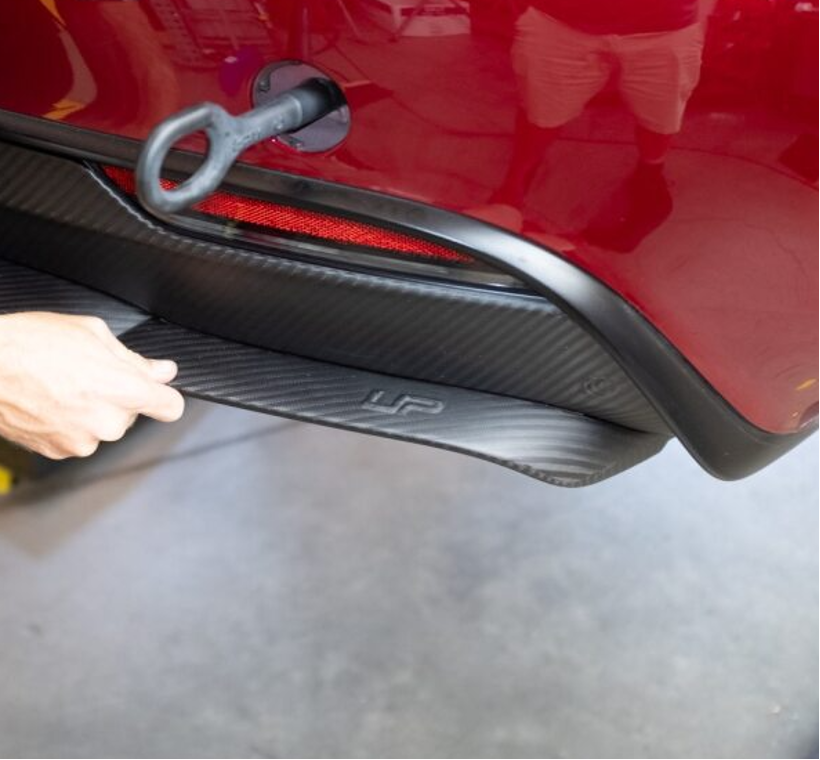
Place the rear diffuser extension over the factory rear fascia to check for proper fitment. The primary goal here is to cover the factory plastic extension without impacting visibility of rear light and reflector indicators.

Before you install the rear diffuser extension, be sure to pull the backing tape at each edge so that it can be pulled away once the lip spoiler is in the correct location.


Once you have determined where to place the rear diffuser extension, apply the supplied adhesive promoter to the areas where the rear diffuser extension adhesive will contact the fascia.

Install the rear diffuser extension onto the rear fascia. Adjust the rear diffuser extension accordingly until desired placement is achieved.

Once desired placement is achieved, apply pressure towards the rear diffuser extension while removing the lead ends to ensure the desired placement is locked in place.


Congratulations! You have completed your rear diffuser extension!
The cure time for the adhesive is a few hours, so be sure not to expose the car to moisture for at least 24 hours after installation. Otherwise, you are all set to go!