My Account My Account
Menu
HD UNDERBODY ARMOR

TESLA CYBERTRUCK UP INVINCIBLE®
HD UNDERBODY ARMOR
INSTALLATION GUIDE

  • Parts List
  • Tool List
  • Torque Specs
  • Release of liability and product warranty
  • 01 Step 1: Lift the Vehicle
  • 02 Step 2: Disassemble Under Armor Panels
  • 03 Step 3: Install Under Armor Structure
  • 04 Step 4: Torque Armor Structure
  • 05 Step 5: Install Under Armor Shield
  • 06 Step 6: Torque Under Armor Shield
Parts List
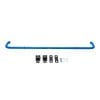
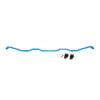
  • FRONT ARMOR STRUCTURE – QTY 1
  • FRONT MID ARMOR STRUCTURE – QTY 1
  • REAR MID ARMOR STRUCTURE – QTY 1
  • REAR ARMOR STRUCTURE – QTY 1
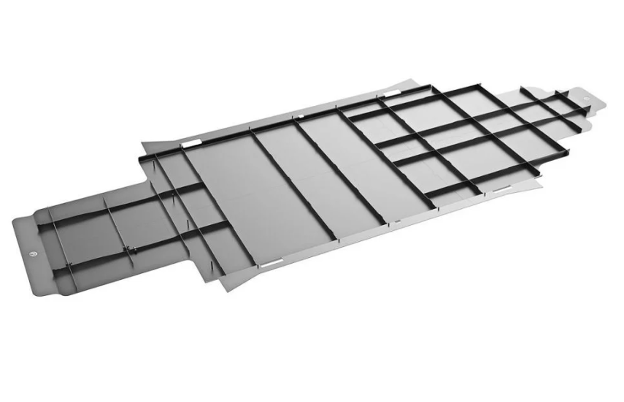
  • FRONT ARMOR SHIELD – QTY 1
  • FRONT MID ARMOR SHIELD – QTY 1
  • REAR MID ARMOR SHIELD – QTY 1
  • REAR ARMOR SHIELD – QTY 1

INVINCIBLE TESLA CYBERTRUCK UNDERBODY ARMOR INSTALLATION0001

NOTE: Most factory hardware will not be re-used unless specified. However, be sure to keep all factory hardware until the final install is complete.

Tool List
  • 4mm Allen Socket
  • 10mm Socket
  • 13mm Socket
  • 15mm Socket
  • 13mm End Wrench
  • Impact Gun or Ratcheting Wrench
  • Lift Table (Will be needed to lift the armor panels onto the truck safety)
  • Torque Wrench
  • Safety Gloves
Torque Specs

Please see individual steps for torque specs.

Release of liability and product warranty

By installing or using this product, you understand and agree with the following: If you do not agree, do not proceed with the installation and return this product within 30 days for a full refund of the purchase price from the company from which you have purchased it.

  • I understand and agree that this product is intended to be installed for use on private roads and in jurisdictions where the use of this product is deemed legal by the local authorities. Furthermore, I understand and agree Unplugged Performance does not have any knowledge or control of regulations in my local jurisdiction, and it is up to me to determine if the product is acceptable for use with my vehicle.
  • I understand that Unplugged Performance has done testing of this product on road and on closed racetracks but does not have the ability to test the vehicle for localized standards and regulations.
  • I understand and agree that if the vehicle manufacturer determines that any Unplugged Performance products have contributed to a problem with the vehicle it may affect the vehicle’s warranty. Furthermore, I understand and agree that Unplugged Performance has no duty nor ability to be involved in internal manufacturer decisions.
  • I understand and agree that if this product is given to an installer for installation on my vehicle, I have read and agreed with all the previous, even if I am not personally installing these parts on my vehicle. Furthermore, I understand and agree that this product should be installed by a trained professional that is familiar with both the vehicle as well as this product. Furthermore, I understand and agree that I and/or my chosen installer will follow the installation instructions carefully and dutifully test the vehicle post-installation in a safe and controlled environment to ensure proper operation.
  • I understand and agree that by installing this product Unplugged Performance and all associated persons and entities as well as the vehicle manufacturer and all associated entities must be held harmless in the event of any suit, damages, or other legal action. Furthermore, I hereby release Unplugged Performance and any associated entities from any and all liability for any potential claim or claims.

If you do not agree with any of the above statements, you should return the product immediately. For more information please see our Terms and Conditions

01 Step 1: Lift the Vehicle

Before you begin your installation, be sure that your Cybertruck is in the tallest setting. If possible, we highly recommend using a 4 post lift with blocks to place underneath the vehicle in order to raise it. We also recommend turning off bluetooth to ensure that the truck’s entry height mode is not triggered by a nearby phone key as this may pose a safety concern.

02 Step 2: Disassemble Under Armor Panels

Using a 4mm Allen key, remove each M6x1x20mm tapered bolt securing each underbody armor panel to the structure. (61 bolts and 61 washers total)

03 Step 3: Install Under Armor Structure

Now that the armor has been fully disassembled, using a 10mm socket, remove 3 factory bolts securing the rear underbody panel to the vehicle.

INVINCIBLE TESLA CYBERTRUCK UNDERBODY ARMOR INSTALLATION0006
Using a 15mm socket, remove the 3 factory bolts securing the front of the rear underbody panel to the vehicle.

INVINCIBLE TESLA CYBERTRUCK UNDERBODY ARMOR INSTALLATION0007
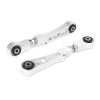
Support and lift the rear armor structure to the vehicle. Using a 10mm socket, loosely fasten 3 M6x1x45mm bolts, M6 washers, and BUSH#1 spacers to secure the rear armor structure to the vehicle.


Using a 13mm Socket, fasten 3 M10x1.5x70mm bolts, washers, and BUSH#3 spacers to secure the rear armor structure to the vehicle.


Support and lift the rear mid armor structure to the vehicle. Using a 13mm Socket, fasten 3 M10x1.25x45mm bolts, 3 M10 washers, and BUSH#3 spacers to loosely secure each side of the rear mid armor structure to the vehicle.

INVINCIBLE TESLA CYBERTRUCK UNDERBODY ARMOR INSTALLATION0025
Using a 13mm socket and 13mm wrench to counterhold, loosely fasten 10 M8x1.25x50mm bolts, 20 M8 lock washers, 10 M8x1.25 lock nuts, and 5 SHIM#1 spacers to secure the rear armor structure to the rear mid armor structure.

Support and lift the front mid armor structure to the vehicle. Using a 13mm socket, loosely fasten 4 M10x1.25x45mm bolts, washers, and BUSH#2 spacers to loosely fasten each side of the front mid armor structure to the vehicle.


Using a 13mm socket and 13mm wrench to counterhold, loosely fasten 10 M8x1.25x50mm bolts, 20 M8 lock washers, 10 M8x1.25 lock nuts, and 5 SHIM#1 spacers to secure the rear mid armor structure to the front mid armor structure.


Support and lift the front armor structure to the vehicle. Using a 10mm socket, loosely fasten 4 M6x1x45mm bolts, M6 washers, and BUSH#1 spacers to secure the front armor structure to the vehicle.

INVINCIBLE TESLA CYBERTRUCK UNDERBODY ARMOR INSTALLATION0039

Using a 13mm socket, loosely fasten 2 M10x1.25x45mm bolts, 2 washers, and 2 BUSH#2 spacers to secure each side of the front mid armor structure to the vehicle.

INVINCIBLE TESLA CYBERTRUCK UNDERBODY ARMOR INSTALLATION0040

Using a 13mm socket and 13mm wrench to counterhold, loosely fasten 10 M8x1.25x50mm bolts, 20 M8 lock washers, 10 M8x1.25 lock nuts, and 5 SHIM#1 spacers to secure the front mid armor structure to the front armor structure.

INVINCIBLE TESLA CYBERTRUCK UNDERBODY ARMOR INSTALLATION0041

04 Step 4: Torque Armor Structure

Now that the structure has been assembled on the car, final torque should be applied in the following order. 1. subframes, 2. side rails, 3. armor connection points.

Torque subframe hardware to 17 ft/lbs

Torque side rail hardware to 17 ft/lbs

Torque armor connection points to 17 ft/lbs

05 Step 5: Install Under Armor Shield

Now you can begin to install the armor shield, starting with the rear-most panel, and then working your way to the front-most panel. Be sure to install all provided hardware loosely prior to applying final torque to ensure that the panel alignment is correct.


Using a 4mm Allen key, loosely fasten each provided M6x1x20mm tapered bolt and washer to secure each underbody armor panel to the structure. Start with the rear Under Armor Shield, and work your way forward to ensure that each hole lines up between panels. Support each panel using either a table jack, or a second set of hands as any panel flex may affect ease of installation. Repeat this step for each panel from the rear of the vehicle toward the front of the vehicle. (61 bolts and 61 washers total)

 Install Under Armor Shield
Using a 4mm allen key, fasten 10 provided M6x1x16 bolts and M6 lock washers to secure each armor panel together. (30 bolts and 30 lock washers total)

06 Step 6: Torque Under Armor Shield

Once all hardware is installed, apply final torque to all 61 bolts. Using a 4mm allen socket and a torque wrench, torque to 10 ft/lbs. Be sure to check torque on each bolt a few times through to ensure that nothing was missed.
Next, apply final torque to all 30 bolts. Using a 4mm allen socket and a torque wrench, torque to 10 ft/lbs. Be sure to check torque on each bolt a few times through to ensure that nothing was missed.

Congratulations! Your Cybertruck INVINCIBLE underbody armor Installation is complete!

Unplugged Performance Reviews Section Footer Background Image

WHAT OUR CUSTOMERS SAY

RATED 4.96 Rating Star Rating Star Rating Star Rating Star Rating Star (316 REVIEWS)
LEAVE A REVIEW

With real reviews from real customers, shop UP products for your Tesla Model S, 3, X, Y and Cybertruck with confidence. Leave reviews and earn up to 2000 UP Rewards points each, redeemable towards exclusive UP Products.

Tesla Model 3 and Model Y Front Lower Control Arm Spherical Bushing Set
RATED 5.0
Rating Star Rating Star Rating Star Rating Star Rating Star
Tesla Model 3 and Model Y Front Lower Control Arm Spherical Bushing Set
Been waiting for this part from UP since purchasing my coilovers almost 2 years ago. This part is completely much more superior than the OEM part and steering feel is much more accurate and responsive.
jdl21292 April 10, 2023
Tesla Model Y Billet Adjustable Rear Camber Arm Set
RATED 5.0
Rating Star Rating Star Rating Star Rating Star Rating Star
Tesla Model Y Billet Adjustable Rear Camber Arm Set
As part of my purchase of the Luxury Coilover Suspension for my Model Y, I included both the Front Upper Control Arms and Rear Camber Arms, to mitigate any issues with uneven tire wear. When I purchased the UP / BBS Flugplatz wheels with tires, I was relieved that the additional 2 pieces were...
p.flores September 16, 2022
Tesla Model 3 Stainless Steel Sport Brake Line Set
RATED 5.0
Rating Star Rating Star Rating Star Rating Star Rating Star
Tesla Model 3 Stainless Steel Sport Brake Line Set
Amazing! Bought these along with the Unplugged Performance Competition Track Brake Pads and the results were incredible. Took my 2022 Model 3 Performance to Tesla Corsa with these installed and the difference was instantly noticeable. No more mushy feel when the temps got high. Brakes felt solid....
Tesla S. October 19, 2022
Tesla Model 3 and Model Y Adjustable Front & Rear Sway Bar End Link Set
RATED 5.0
Rating Star Rating Star Rating Star Rating Star Rating Star
Tesla Model 3 and Model Y Adjustable Front & Rear Sway Bar End Link Set
Been waiting for this part from UP since purchasing my coilovers almost 2 years ago and just perfect timing that old links are completely shot and this totally changed the overall feel of the car and reduced tension. Customer service is excellent and will be doing next upgrades with UP
jdl21292 April 10, 2023
Tesla Model X / Model X Plaid (2021+) Billet Adjustable Rear Toe Arm Set
RATED 5.0
Rating Star Rating Star Rating Star Rating Star Rating Star
Tesla Model X / Model X Plaid (2021+) Billet Adjustable Rear Toe Arm Set
I purchased the camber and toe arm set my Tesla Model X Plaid. The primary purpose of buying these arms was to reduce the inner tire wear. These arms are well engineered, beautifully crafted and built solid. I highly recommend these products made by Unplugged Performance. The craftsmanship of the...
f1dinesh August 07, 2023
Tesla Model 3 Sport Pro Coilover Suspension Kit
RATED 5.0
Rating Star Rating Star Rating Star Rating Star Rating Star
Tesla Model 3 Sport Pro Coilover Suspension Kit
Awesome product!
Edgar August 28, 2023
Tesla Model 3 Billet Adjustable Rear Camber Arm Set
RATED 5.0
Rating Star Rating Star Rating Star Rating Star Rating Star
Tesla Model 3 Billet Adjustable Rear Camber Arm Set
Got these with my order of Moderate Springs and Street/Track Sway-bars and they do what they are intended to do. Got my alignment darn near within spec which will help with tire wear. I haven't had them for long so I can't comment on durability but they sure are built sturdy as hell. If you are...
850arrrsaylikepirate December 19, 2022
High-efficiency carbon trunk spoiler for Tesla Model Y
RATED 5.0
Rating Star Rating Star Rating Star Rating Star Rating Star
High-efficiency carbon trunk spoiler for Tesla Model Y
Love the look of the spoiler, improves efficiency, mailing up for some of the battery degradation.
filmmichaelcox September 16, 2025
Tesla Model 3 Ascension Front Fascia System (Front Bumper)
RATED 5.0
Rating Star Rating Star Rating Star Rating Star Rating Star
Tesla Model 3 Ascension Front Fascia System (Front Bumper)
The ascension front fascia makes my model 3 look so much sportier and aggressive. I’ve had it on my car for over a year now and I love it. The car looks way better than stock. This is how the car should look coming out of the factory.
Christian November 15, 2022
Tesla Model Y Juniper Carbon Fiber Aero Mirror Cap Covers
RATED 5.0
Rating Star Rating Star Rating Star Rating Star Rating Star
Tesla Model Y Juniper Carbon Fiber Aero Mirror Cap Covers
Anthony N. February 26, 2026
Unplugged Performance Newsletter
Subscribe to our Newsletter
Sign up to get the latest updates on UP Products, news, galleries and offers!
Please select all Tesla models you are interested in:
FEATURED IN
TeslaRati Logo 1
Automobile Magazine Logo 1
MotorTrend Logo 1
AutoBlog Logo 1
TopGear Logo 1
Car and Driver Logo 1
Road and Track Logo 1
The Drive Logo 1
AutoWeek Logo 1
The Joe Rogan Experience Logo 1
Unplugged Performance is the world leader in premium performance upgrades for Tesla vehicles. With our USA-made line of stylish and high-performance parts, our sole focus is on holistic development and improvement of all Tesla cars.
Unplugged Performance was founded and incubated by the team behind the world-renowned automotive customizer Bulletproof Automotive. Unplugged Performance is the world's leading company focused on the customization and sports performance of Tesla Motors vehicles.
All of our parts are researched and engineered on our own development vehicles with the intention of improving every aspect of the driving and ownership experience. Unplugged produces an exclusive range of premium upgrades to give a new sporty performance identity to Tesla Model S, Model X, Model 3, Model Y, and the Cybertruck.
Improving on perfection is no easy task, and to do so Unplugged products are professionally designed, prototyped, and manufactured in-house in Hawthorne, CA, and in collaboration with the best motorsports suppliers. The supercar performance of Tesla vehicles meets supercar-grade enhancements with Unplugged Performance.
Tesla Model Y - Premium Aftermarket Upgrades & Wheels
GUARANTEED SAFE CHECKOUT WITH THESE PREMIUM PAYMENT OPTIONS
Payment Options - American Express, Discover, Visa, MasterCard, JCB, Maestro Credit Cards Payment Options - Apple Pay, PayPal, Splitit, Diners Club International, Union Pay Credit Cards
TESLA, TESLA MOTORS, and all related brands, marks and intellectual property including but not limited to TESLA ROADSTER, TESLA CYBERTRUCK, MODEL S, MODEL 3, MODEL X, MODEL Y, and the "TESLA," "T" logos designs are trademarks or registered trademarks of Tesla Motors, Inc. in the United States and other countries. Unplugged Performance has no official relationship with Tesla Motors.
THESE PRODUCTS CAN EXPOSE YOU TO CHEMICALS WHICH ARE KNOWN BY THE STATE OF CALIFORNIA TO CAUSE CANCER, OR BIRTH DEFECTS, OR OTHER REPRODUCTIVE HARM. FOR MORE INFORMATION PLEASE VISIT WWW.P65WARNINGS.CA.GOV
COPYRIGHT © 2026 UNPLUGGED PERFORMANCE®. ALL RIGHTS RESERVED.
THE UNPLUGGED PERFORMANCE® MARK AND LOGO ARE TRADEMARKS OF UNPLUGGED PERFORMANCE INC. ALL RIGHTS RESERVED. PLEASE REVIEW THE TERMS & CONDITIONS AND PRIVACY POLICY BEFORE USING OUR WEBSITE.
close