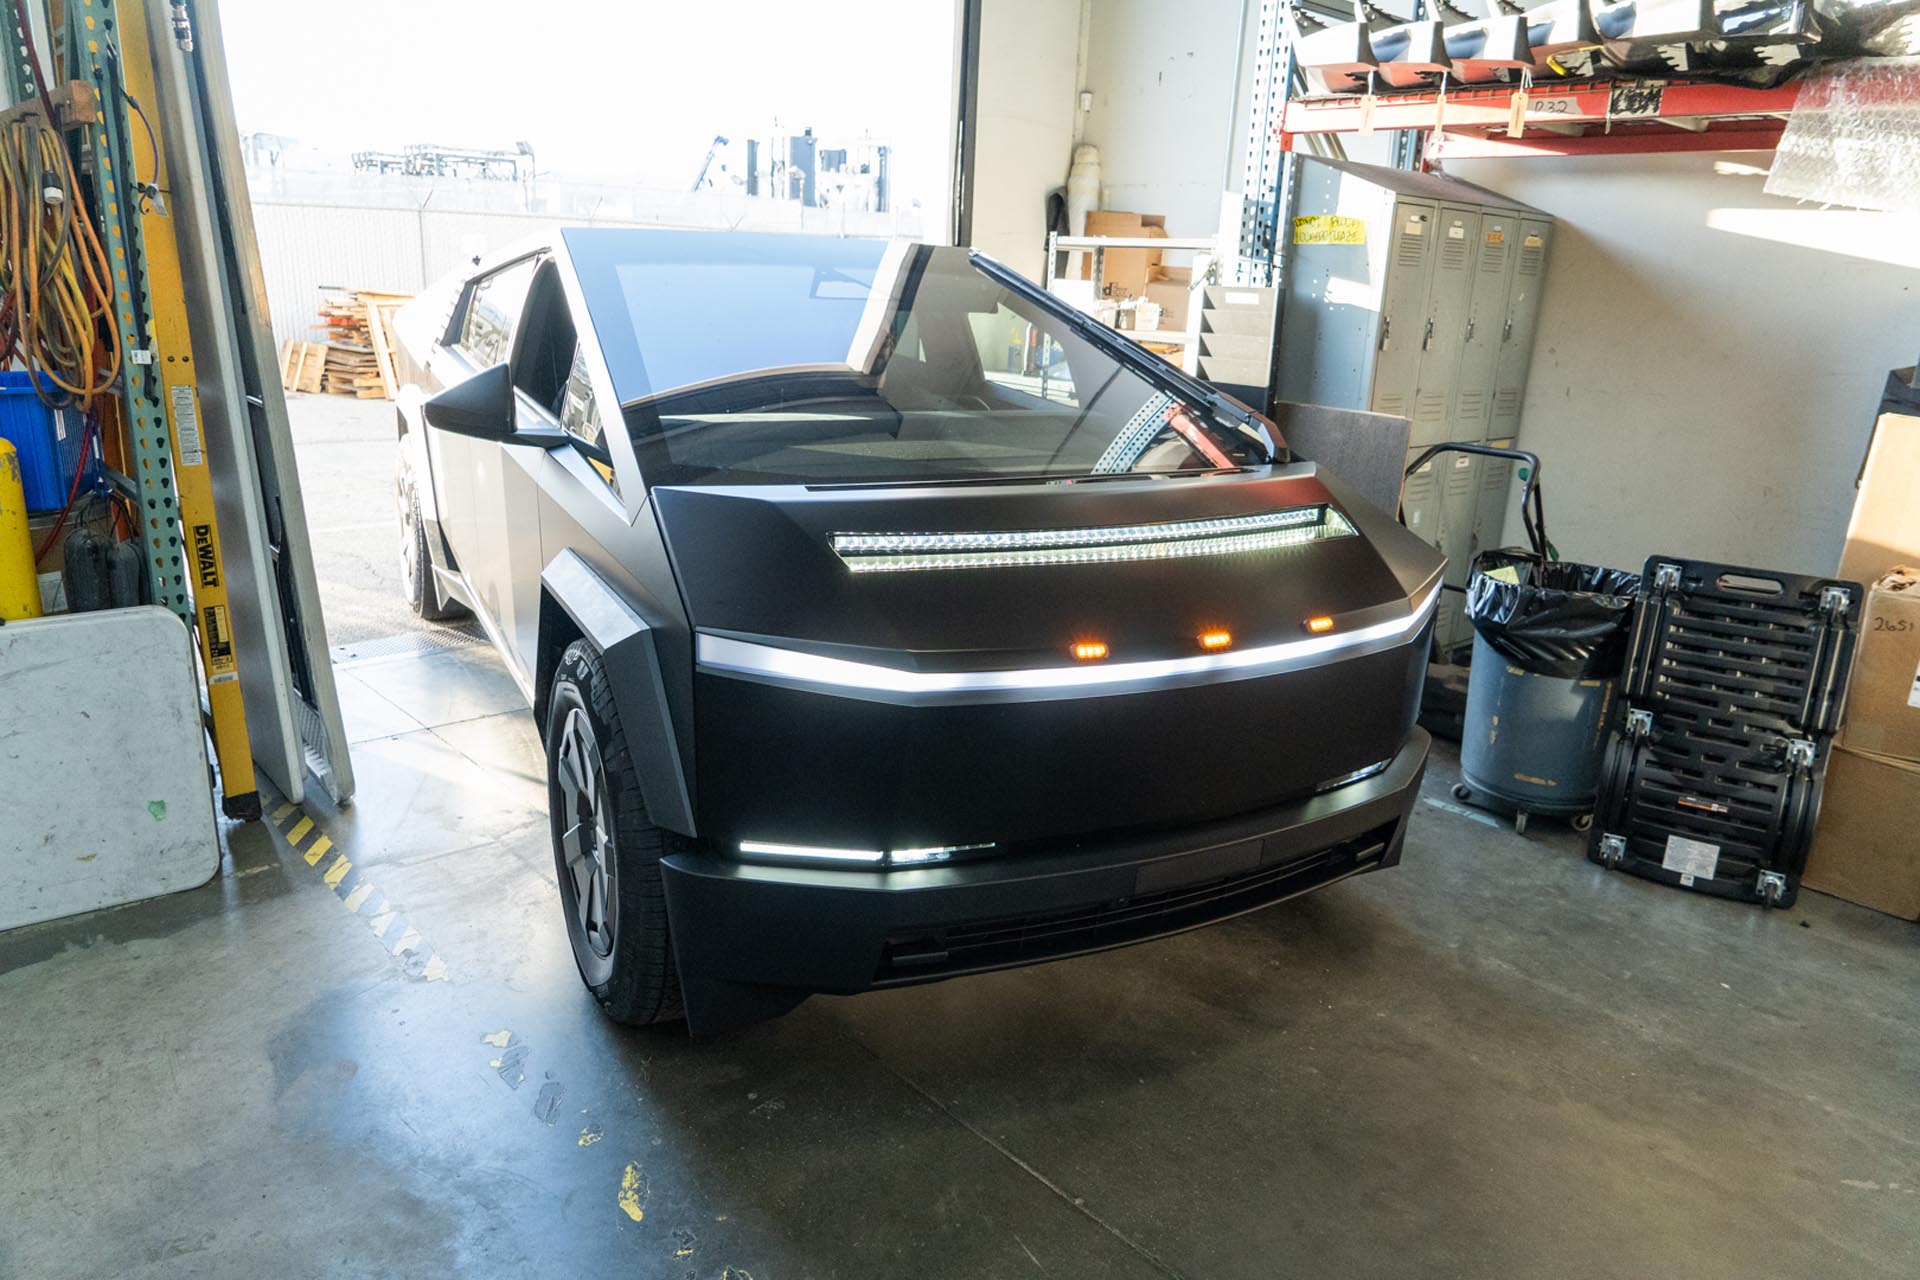
TESLA CYBERTRUCK UP INVINCIBLE®
Carbon Fiber Hood System with 50” LED Light Bar
INSTALLATION GUIDE
- UP INVINCIBLE Hood
- UP 50” Curved Light Bar (preinstalled)
- Pigtail adapter
- Adhesive Promoter
- Wire Strippers
- Masking Tape
- Isopropyl Alcohol (or equivelant non residue surface cleaner)
- Wire Crimper
- Philips Head Screwdriver (small)
- 8mm End Wrench
- 5mm Allen Key
- 5mm allen bolts securing the light bar to the hood – 5ft/lbs
- Philips screw securing amber lights to hood – 10 inch/lbs
This product carries a lifetime warranty against mechanical failure or corrosion. It can be exchanged for an identical item, or a similar item as determined by Unplugged Performance. It may not be returned for cash or credit. There is no warranty regarding surface imperfections or aesthetic damage incurred during regular use, and/or damage to the brackets from an impact or other unusual driving circumstance.
By installing or using this product, you understand and agree with the following: If you do not agree, do not proceed with the installation and return this product within 30 days for a full refund of the purchase price from the company from which you have purchased it.
- I understand and agree that this product is intended to be installed for use on private roads and in jurisdictions where the use of this product is deemed legal by the local authorities. Furthermore, I understand and agree Unplugged Performance does not have any knowledge or control of regulations in my local jurisdiction, and it is up to me to determine if the product is acceptable for use with my vehicle.
- I understand that Unplugged Performance has done testing of this product on road and on closed racetracks but does not have the ability to test the vehicle for localized standards and regulations.
- I understand and agree that if the vehicle manufacturer determines that any Unplugged Performance products have contributed to a problem with the vehicle it may affect the vehicle’s warranty. Furthermore, I understand and agree that Unplugged Performance has no duty nor ability to be involved in internal manufacturer decisions.
- I understand and agree that if this product is given to an installer for installation on my vehicle, I have read and agreed with all the previous, even if I am not personally installing these parts on my vehicle. Furthermore, I understand and agree that this product should be installed by a trained professional that is familiar with both the vehicle as well as this product. Furthermore, I understand and agree that I and/or my chosen installer will follow the installation instructions carefully and dutifully test the vehicle post-installation in a safe and controlled environment to ensure proper operation.
- I understand and agree that by installing this product Unplugged Performance and all associated persons and entities as well as the vehicle manufacturer and all associated entities must be held harmless in the event of any suit, damages, or other legal action. Furthermore, I hereby release Unplugged Performance and any associated entities from any and all liability for any potential claim or claims.
If you do not agree with any of the above statements, you should return the product immediately. For more information please see our Terms and Conditions
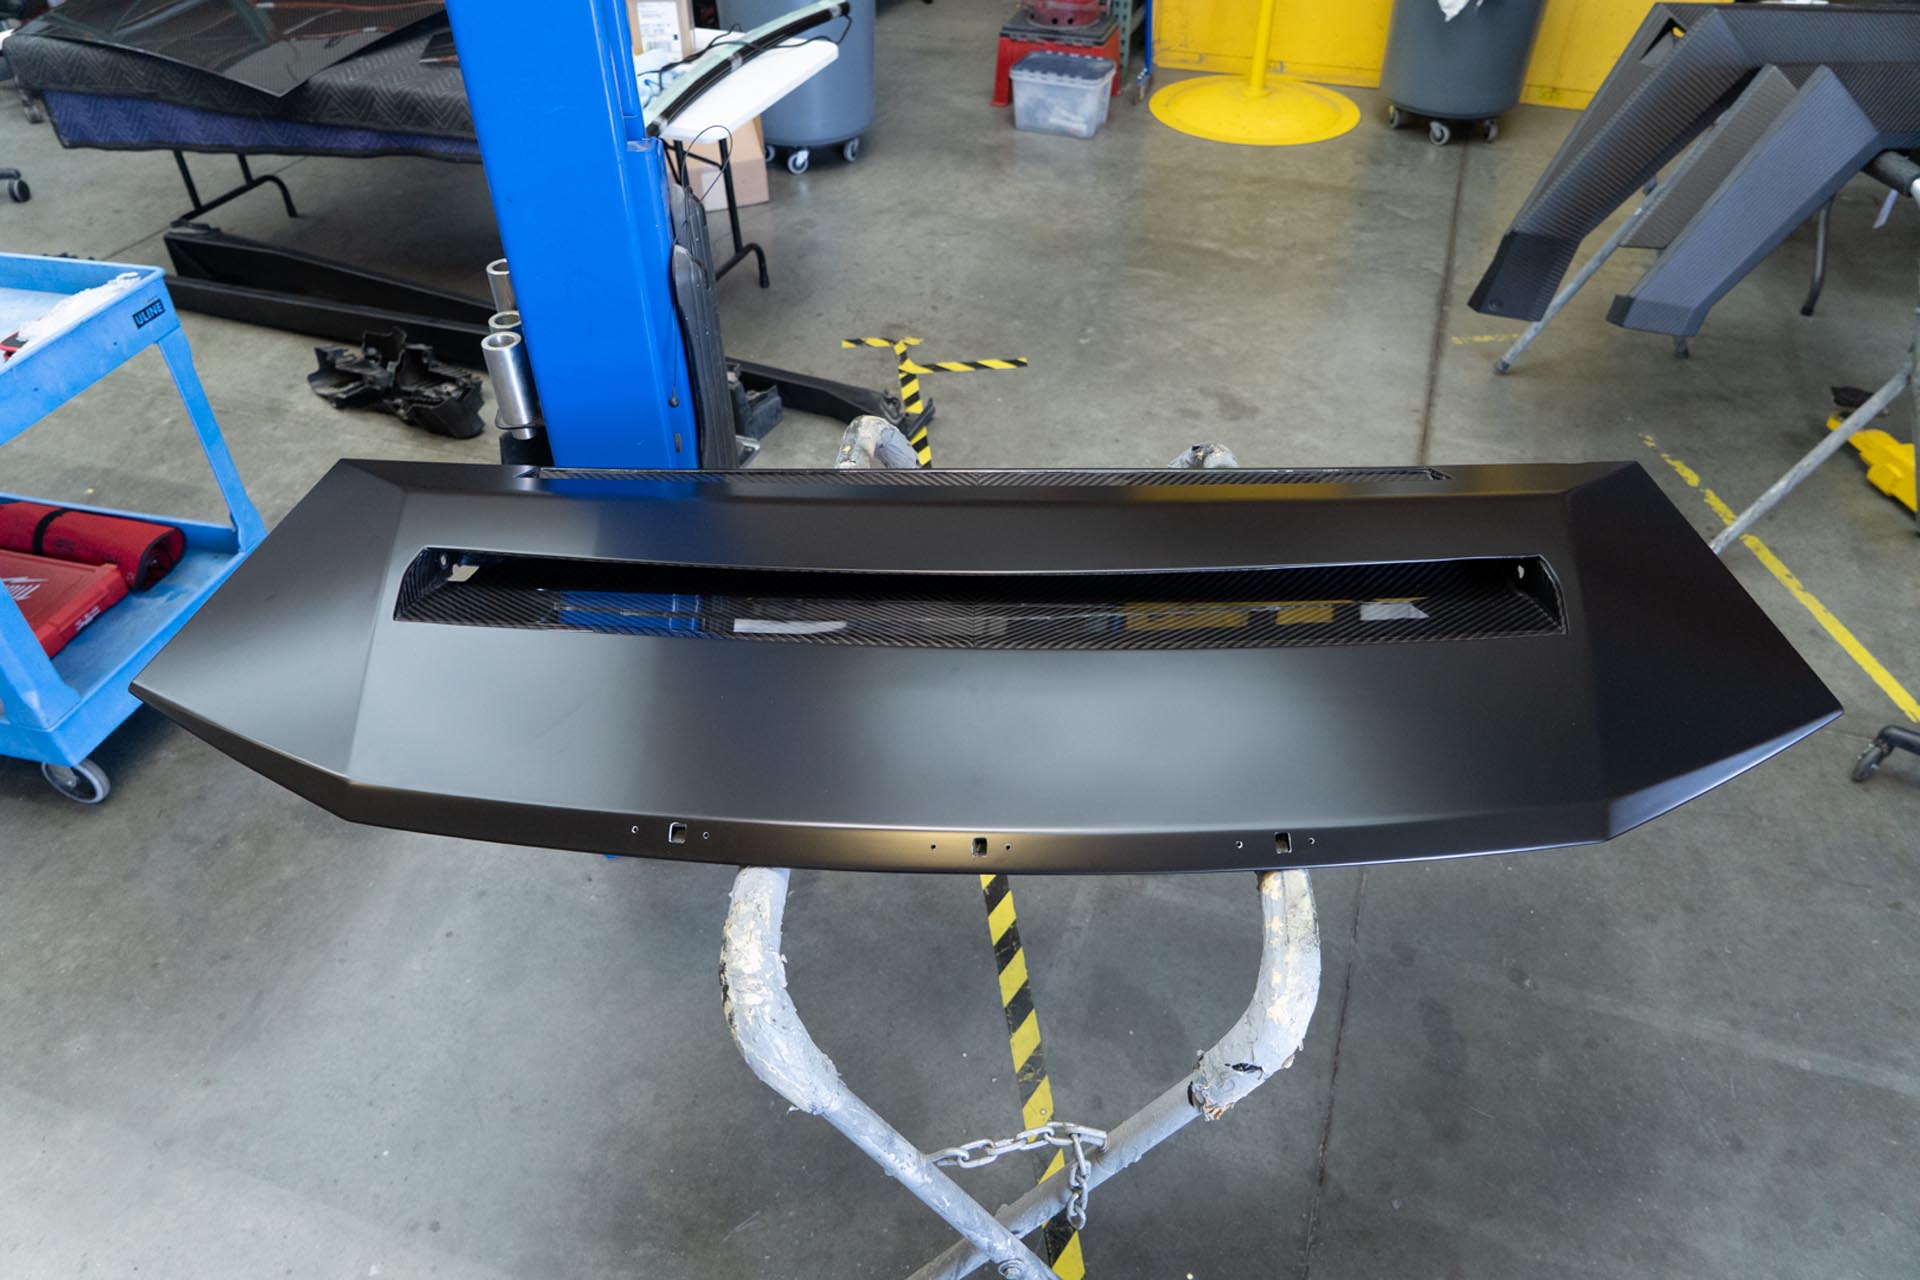
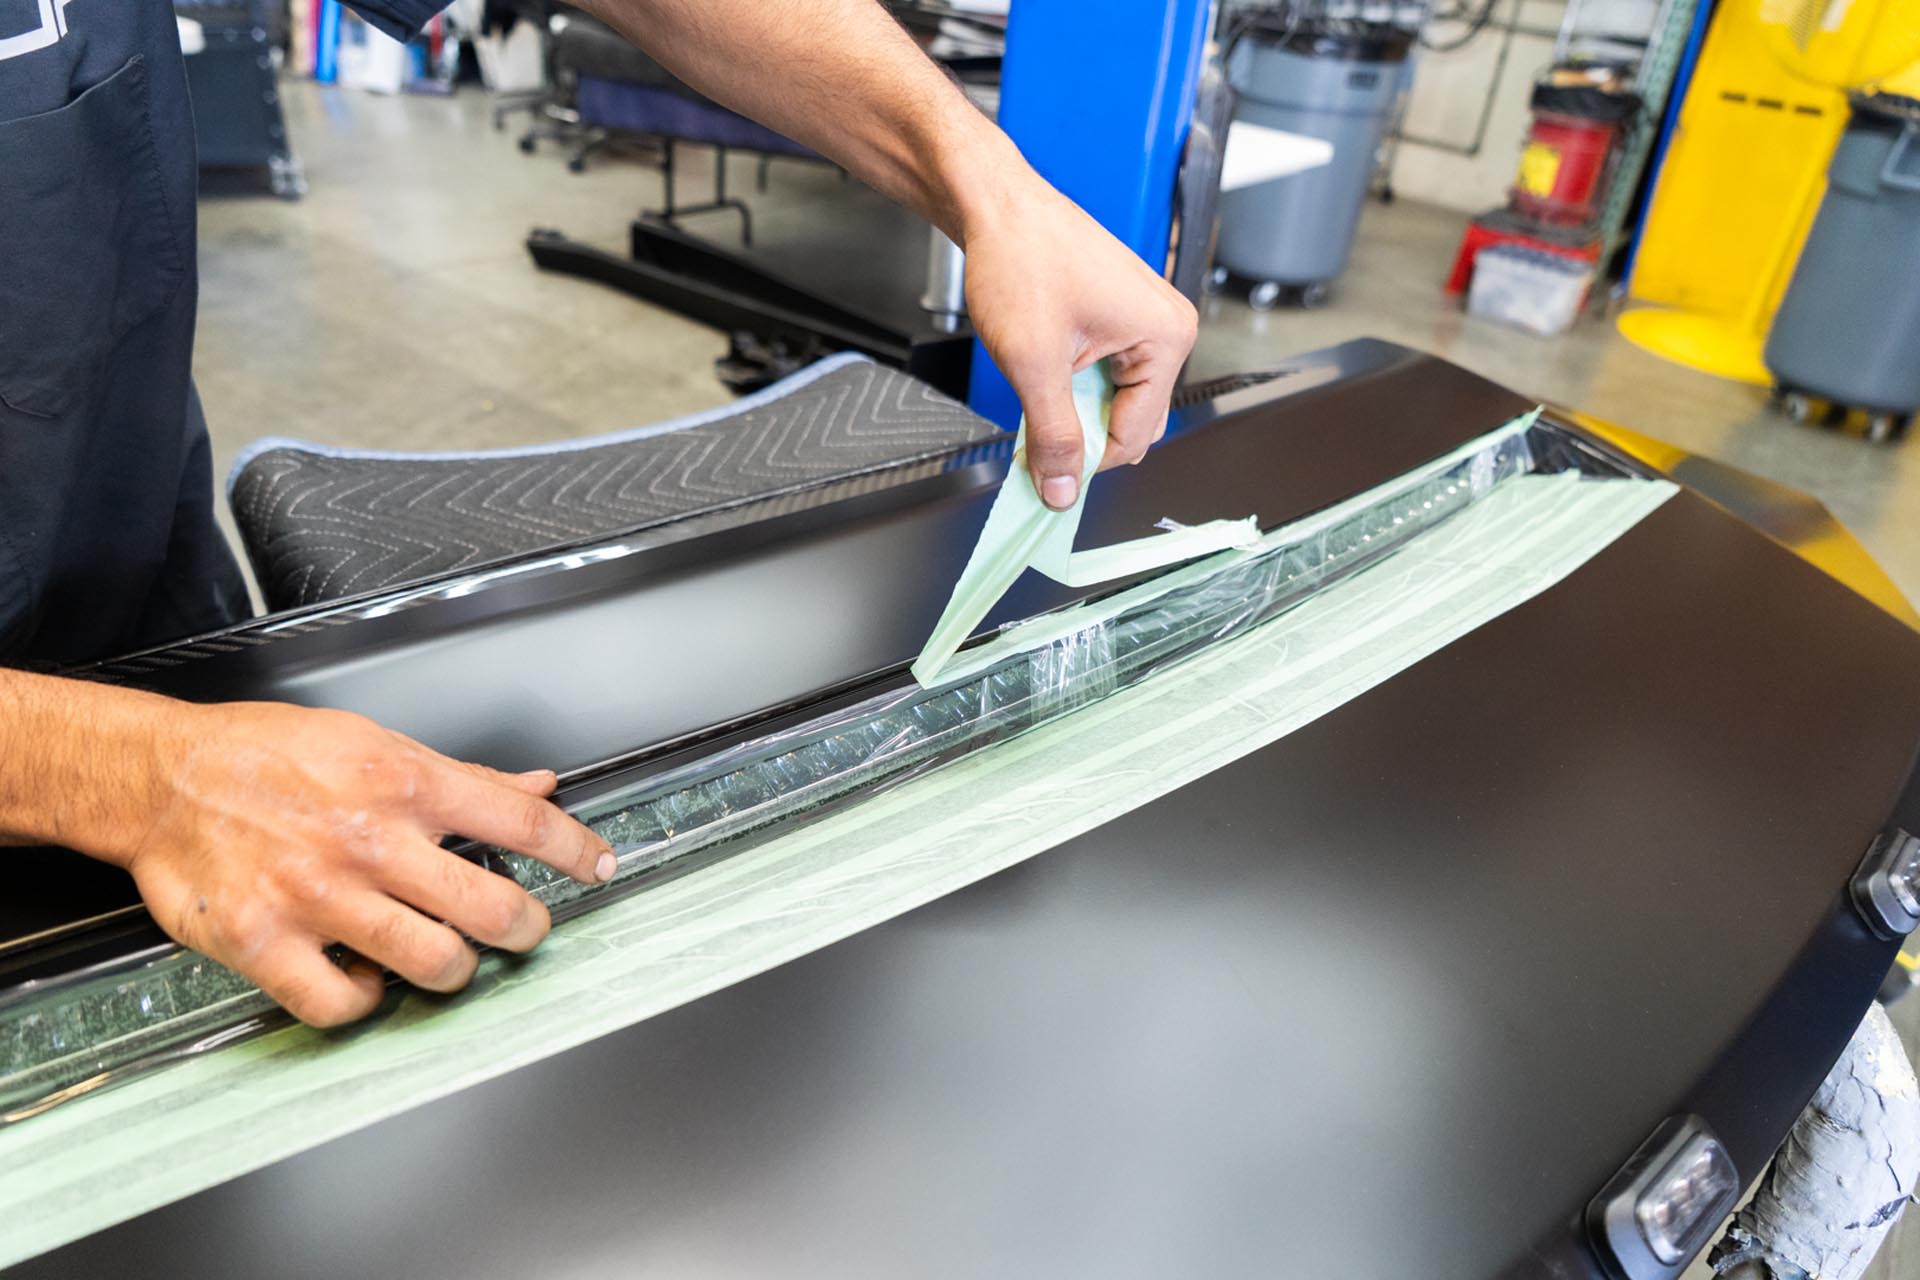
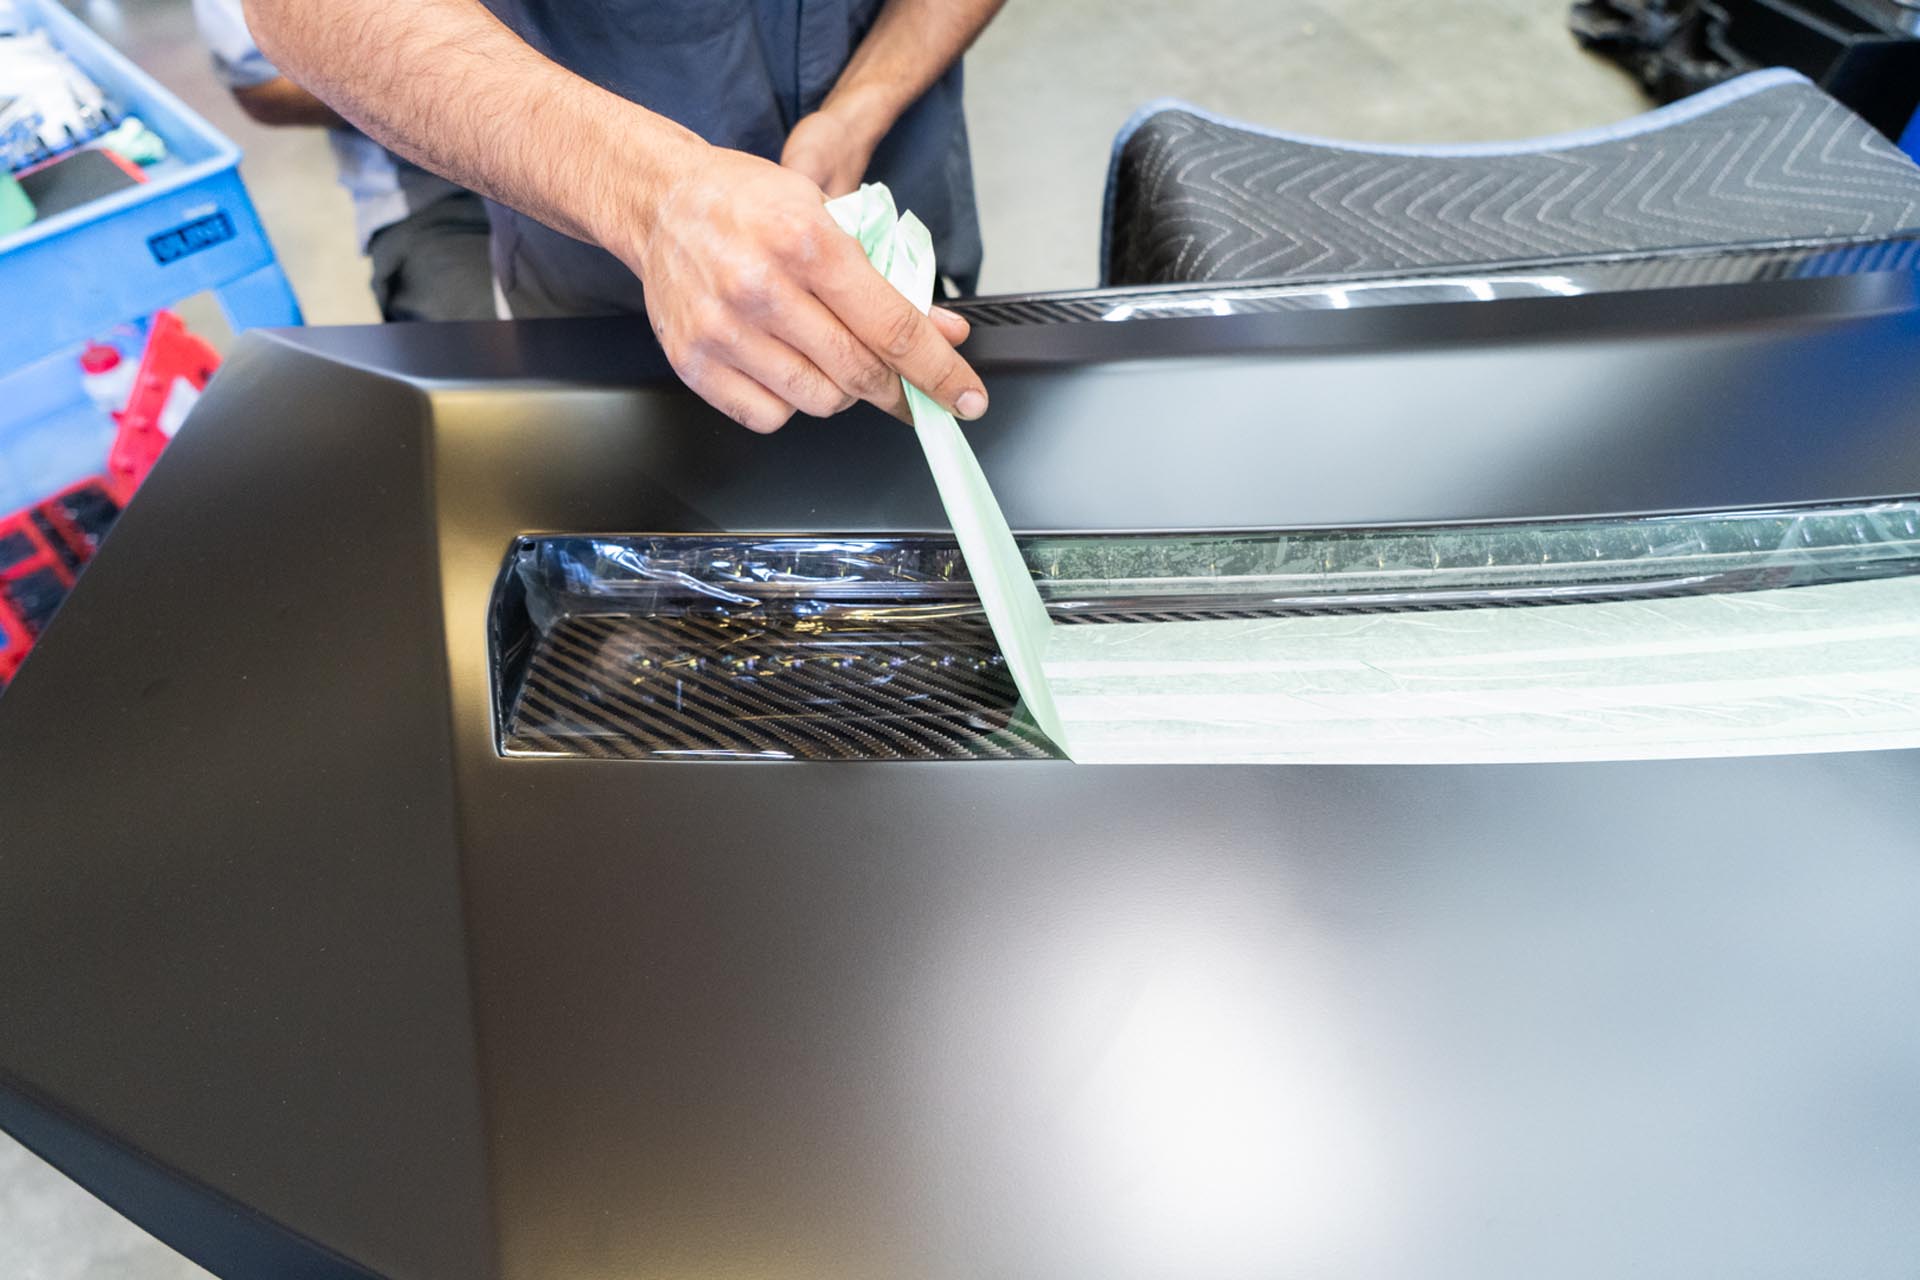
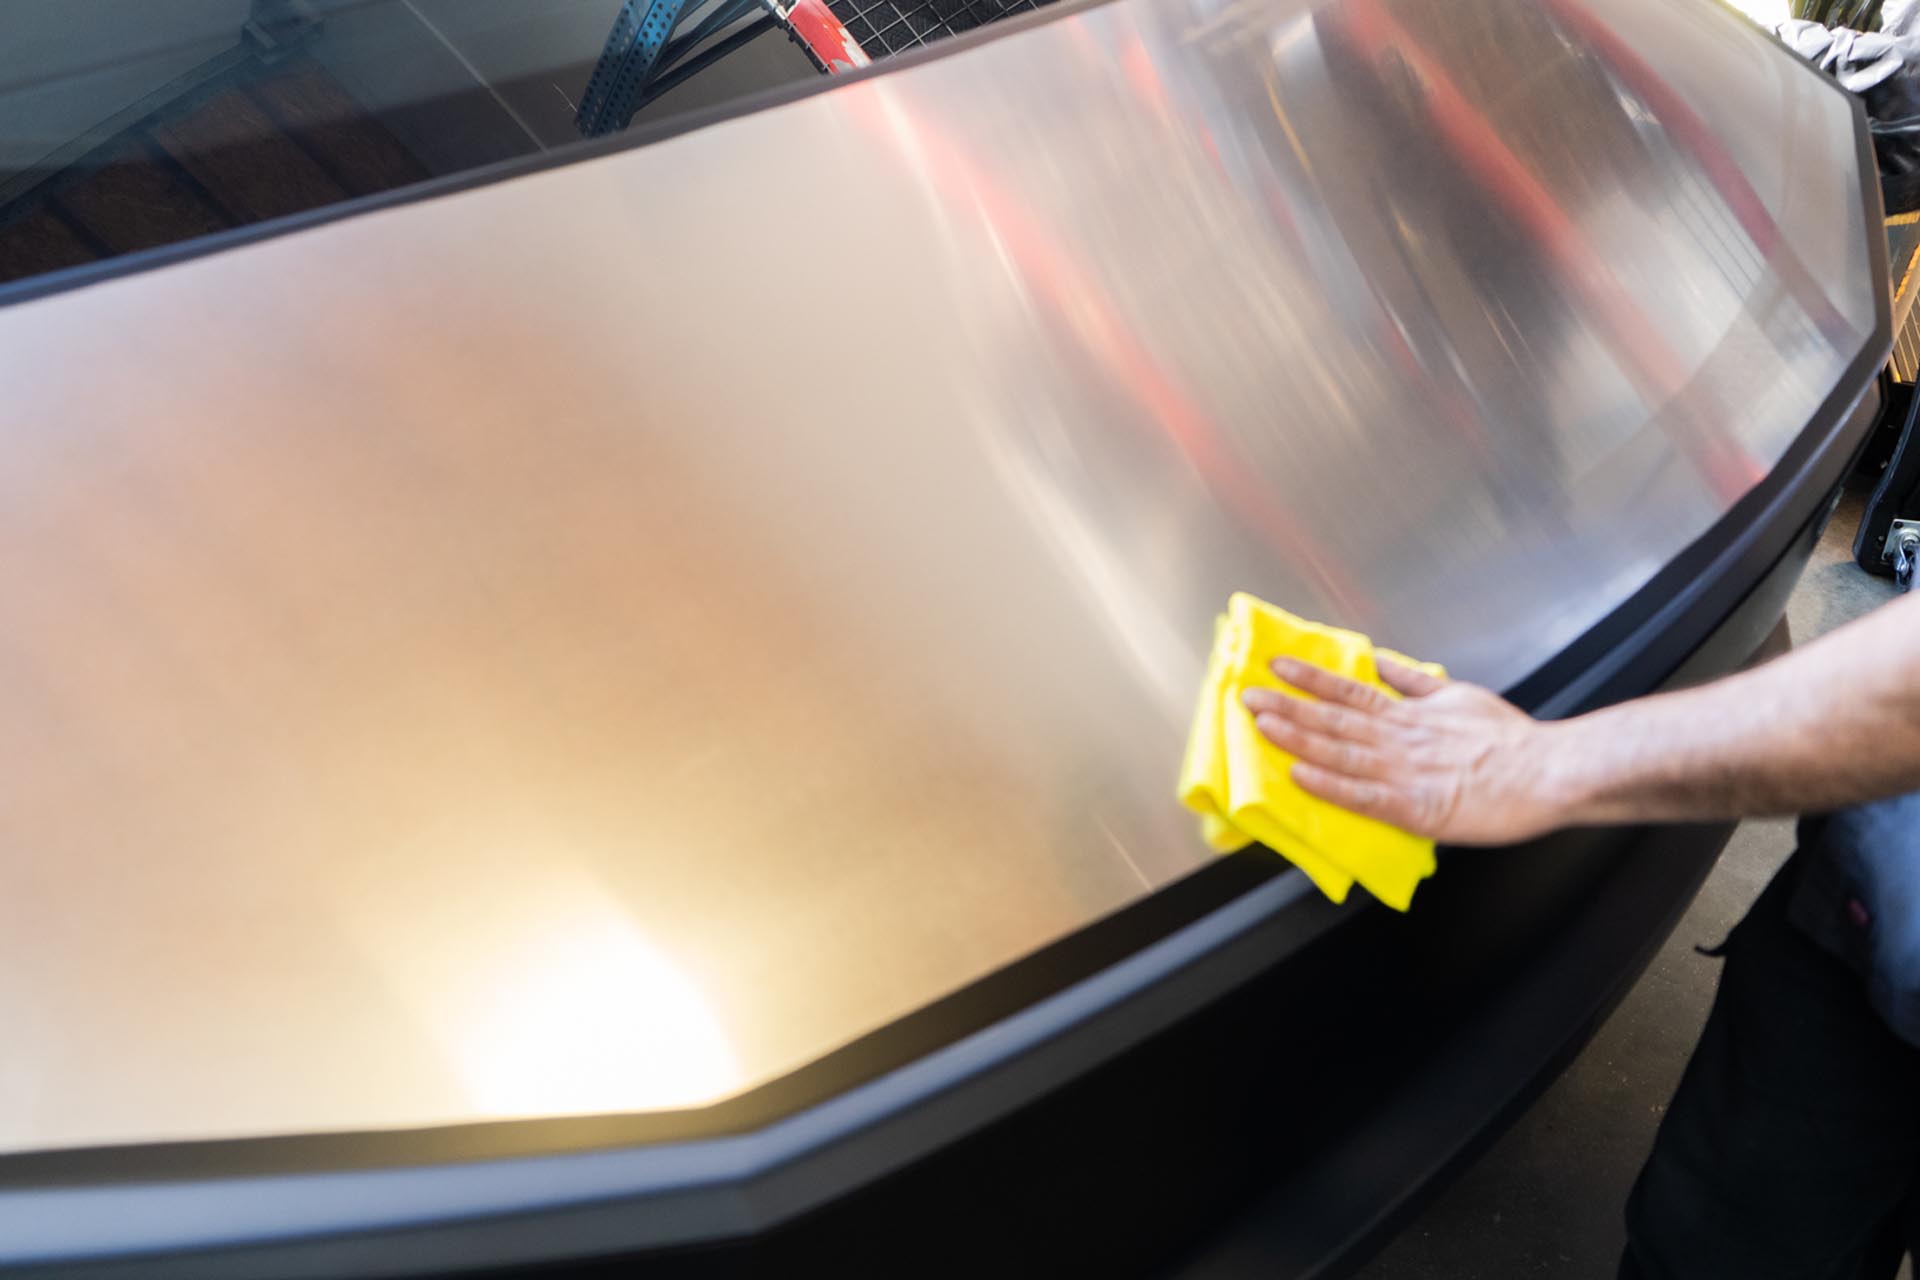
This product is designed to be delivered with a base coat. Be sure to consider protecting the product from environmental degradation before installation. The example below shows a protective film applied over the carbon hood.
In most cases, the hood is shipped in a preassembled state, so many of the wiring steps below will likely not apply to your initial installation. The wiring steps are shown simply to showcase the wiring configuration examples, and provide guidance for general serviceability needs.
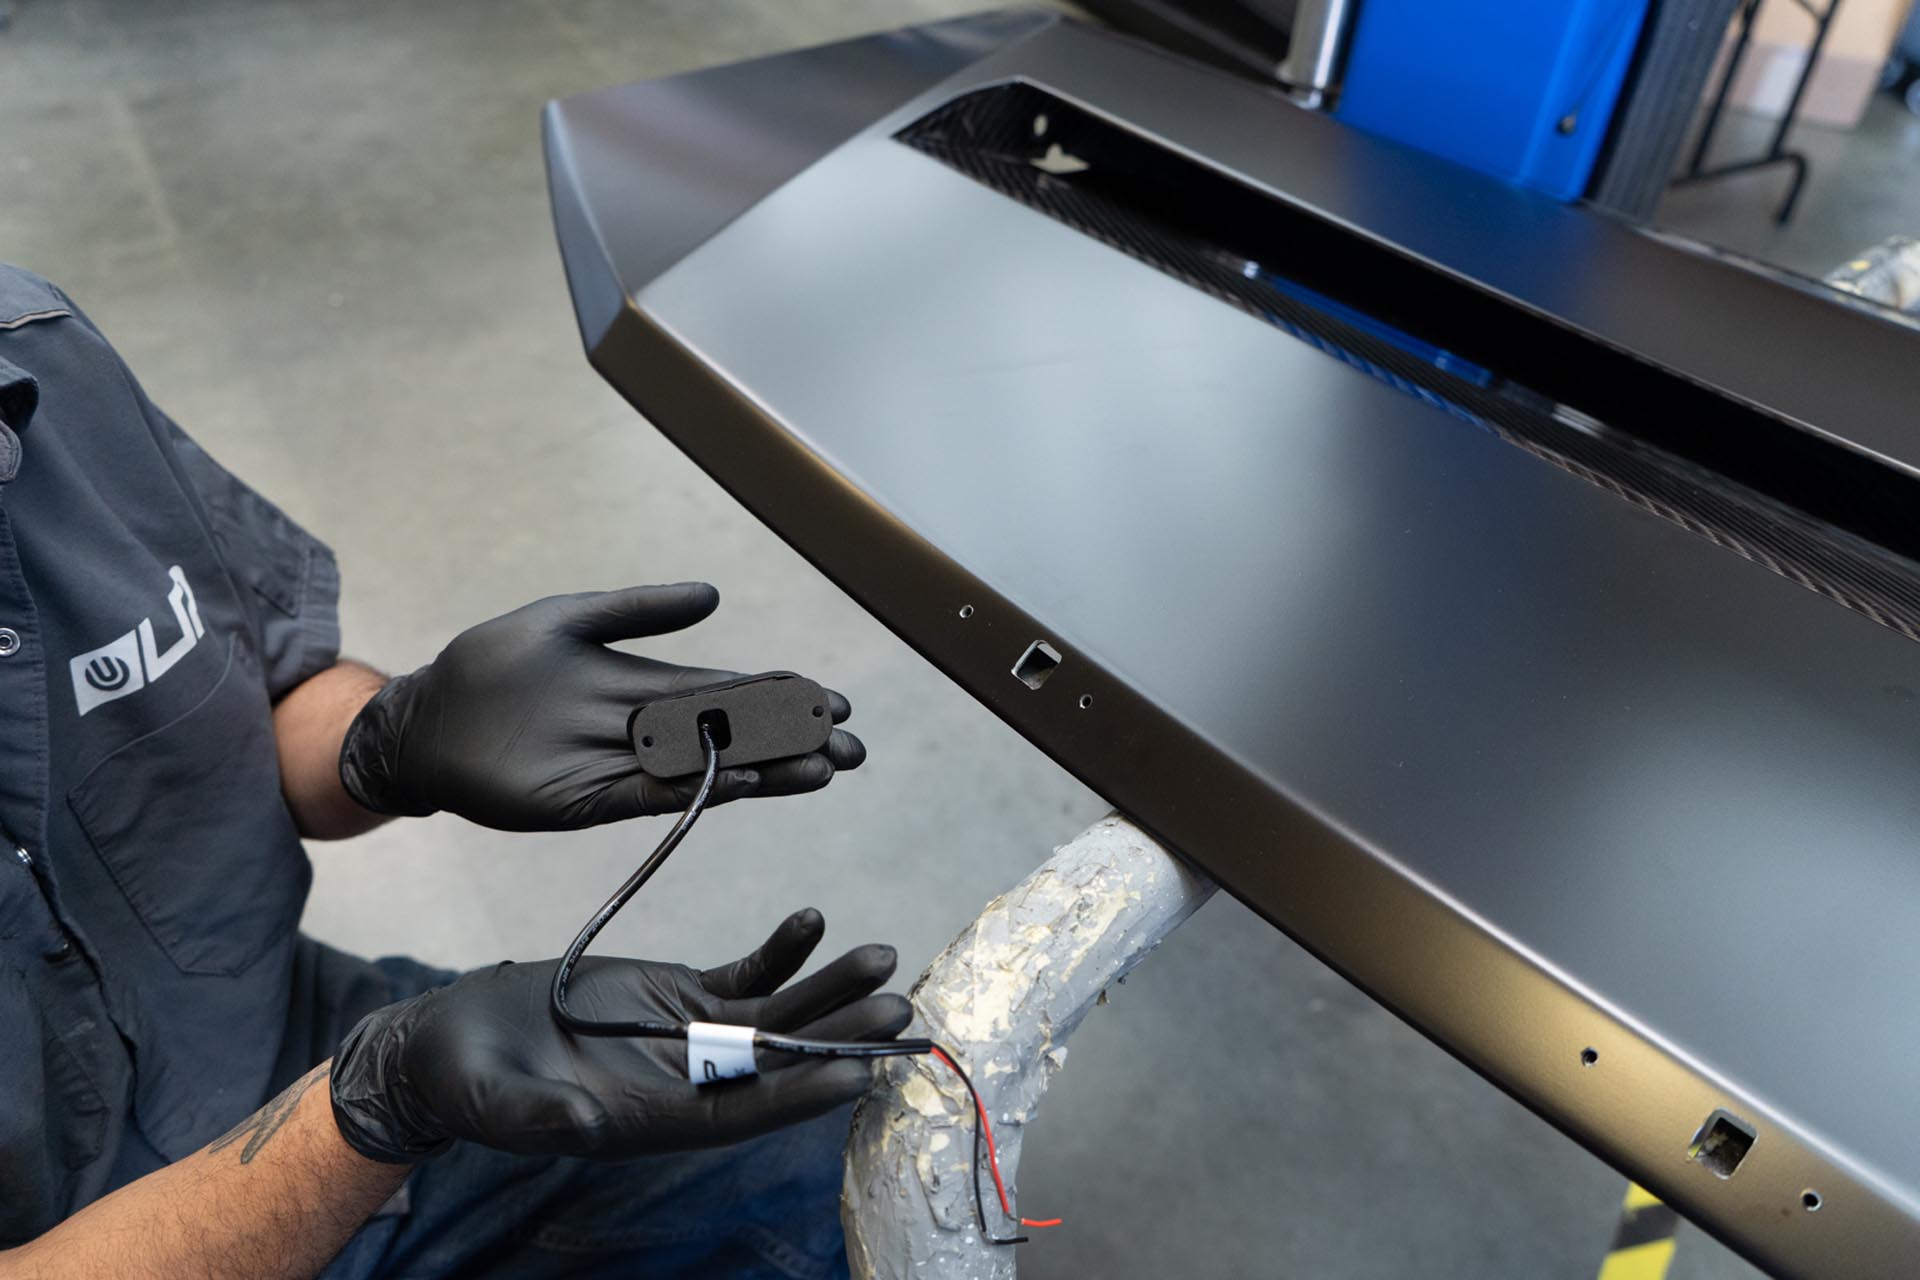
If you ordered a UP hood with amber lighting that are not preinstalled, proceed to install the amber lights onto your hood. If you have decided to install UP amber daytime running lights on a UP hood without predrilled holes and slots, reach out to support@unpluggedperofrmance.com for further instruction. If you have not purchased UP amber hood lights, proceed to step 3.
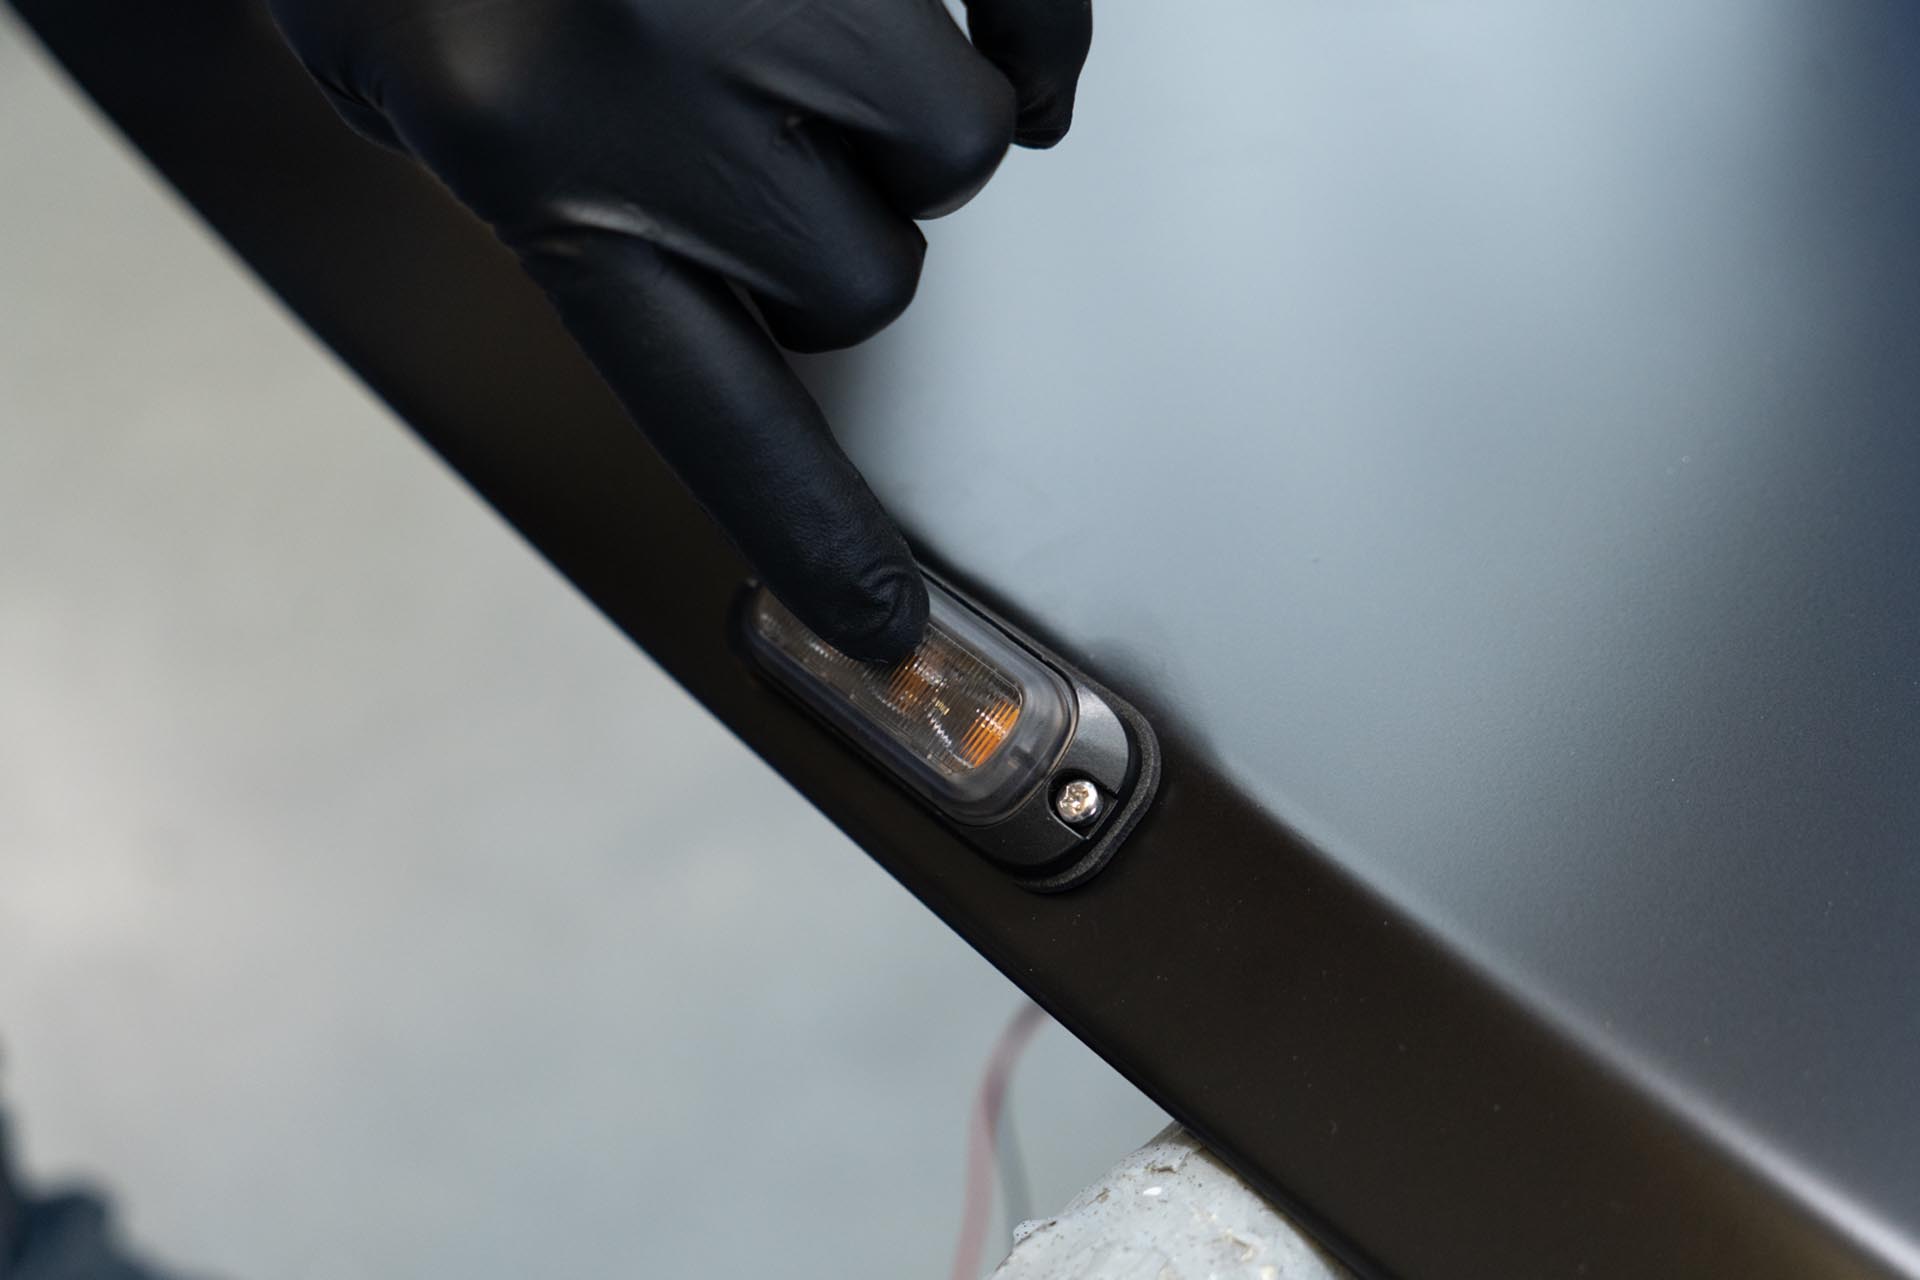
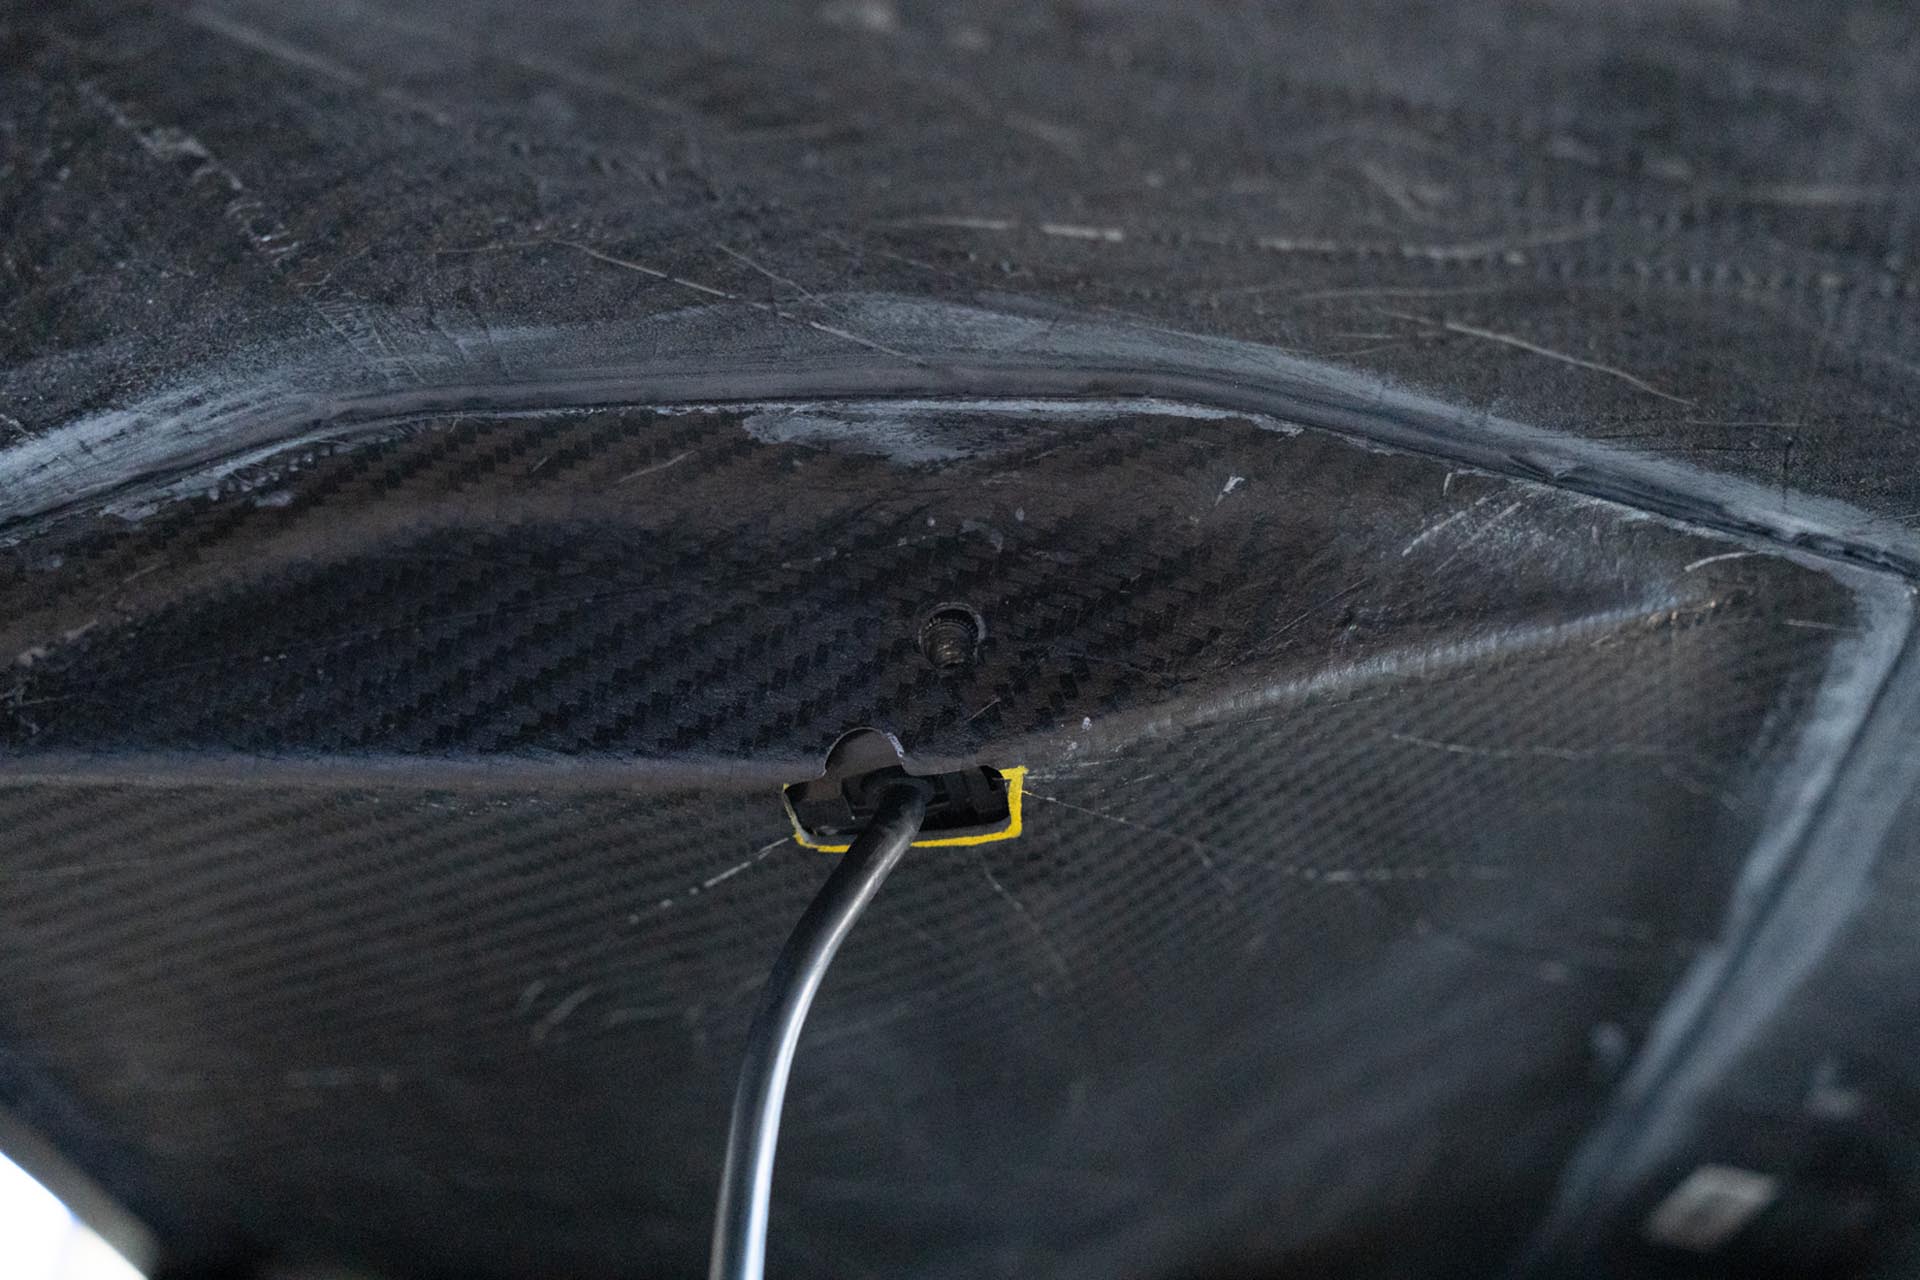
Test fit each amber light assembly in your hood as shown below.
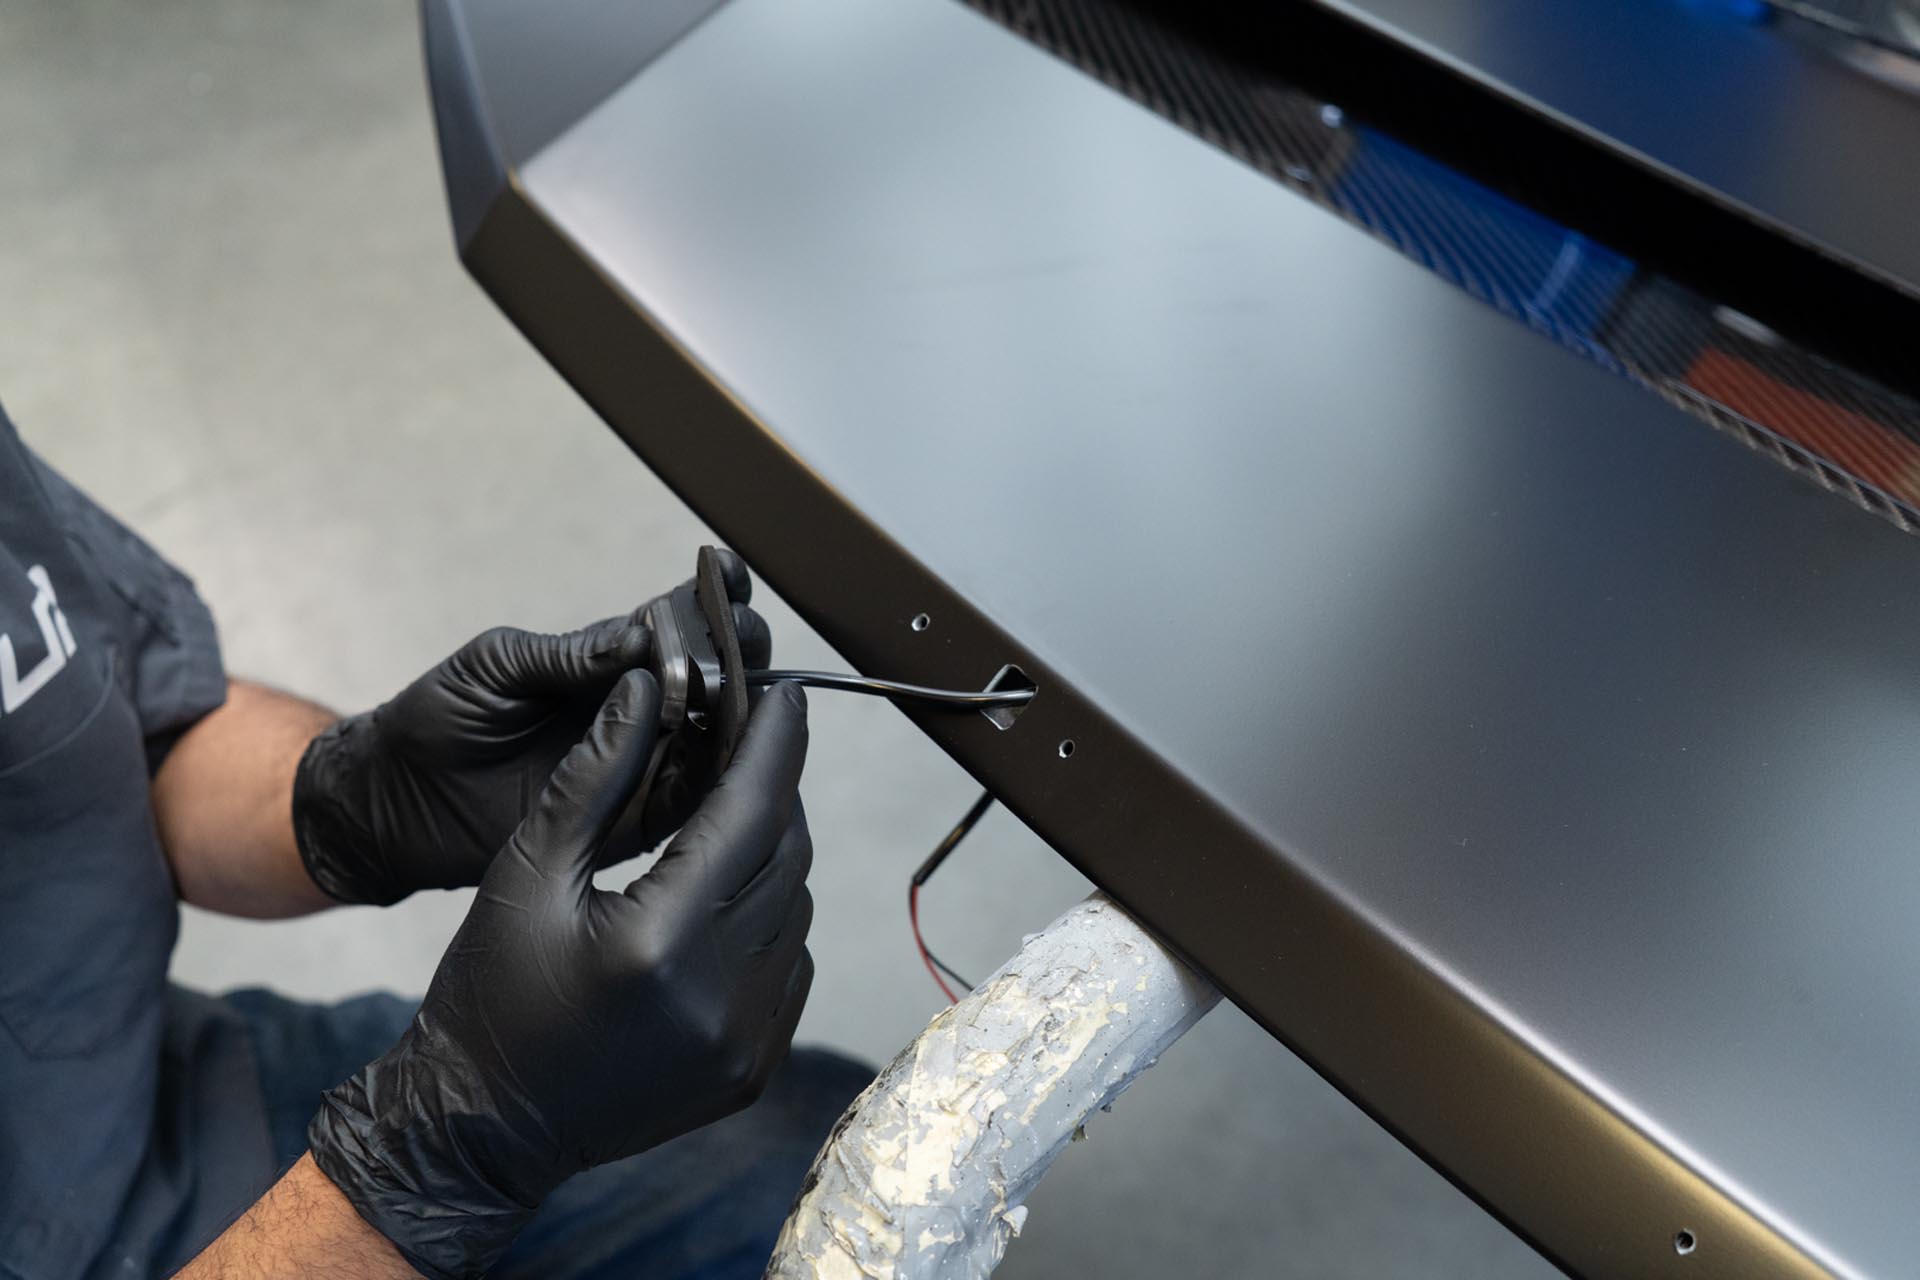
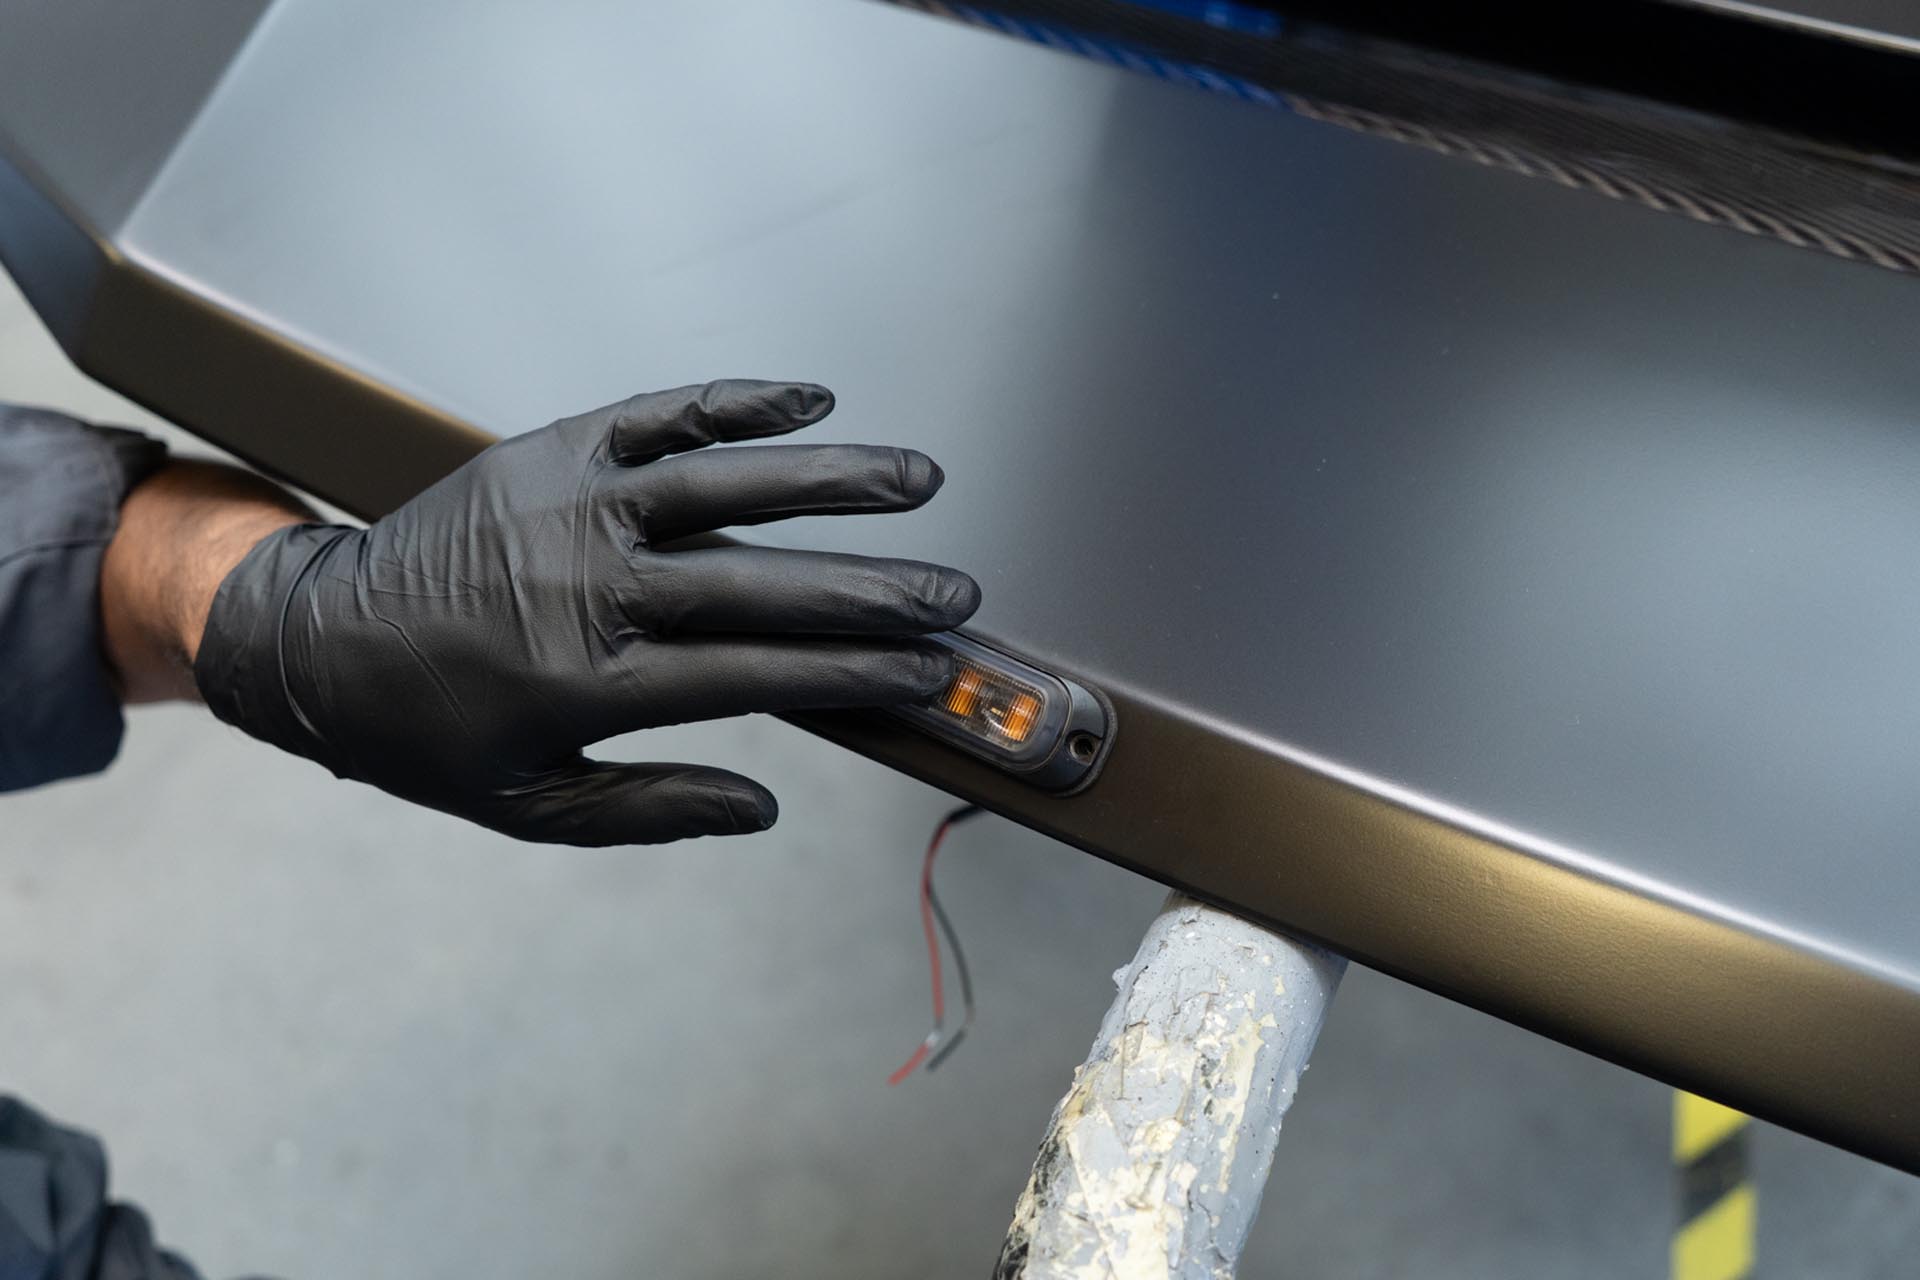
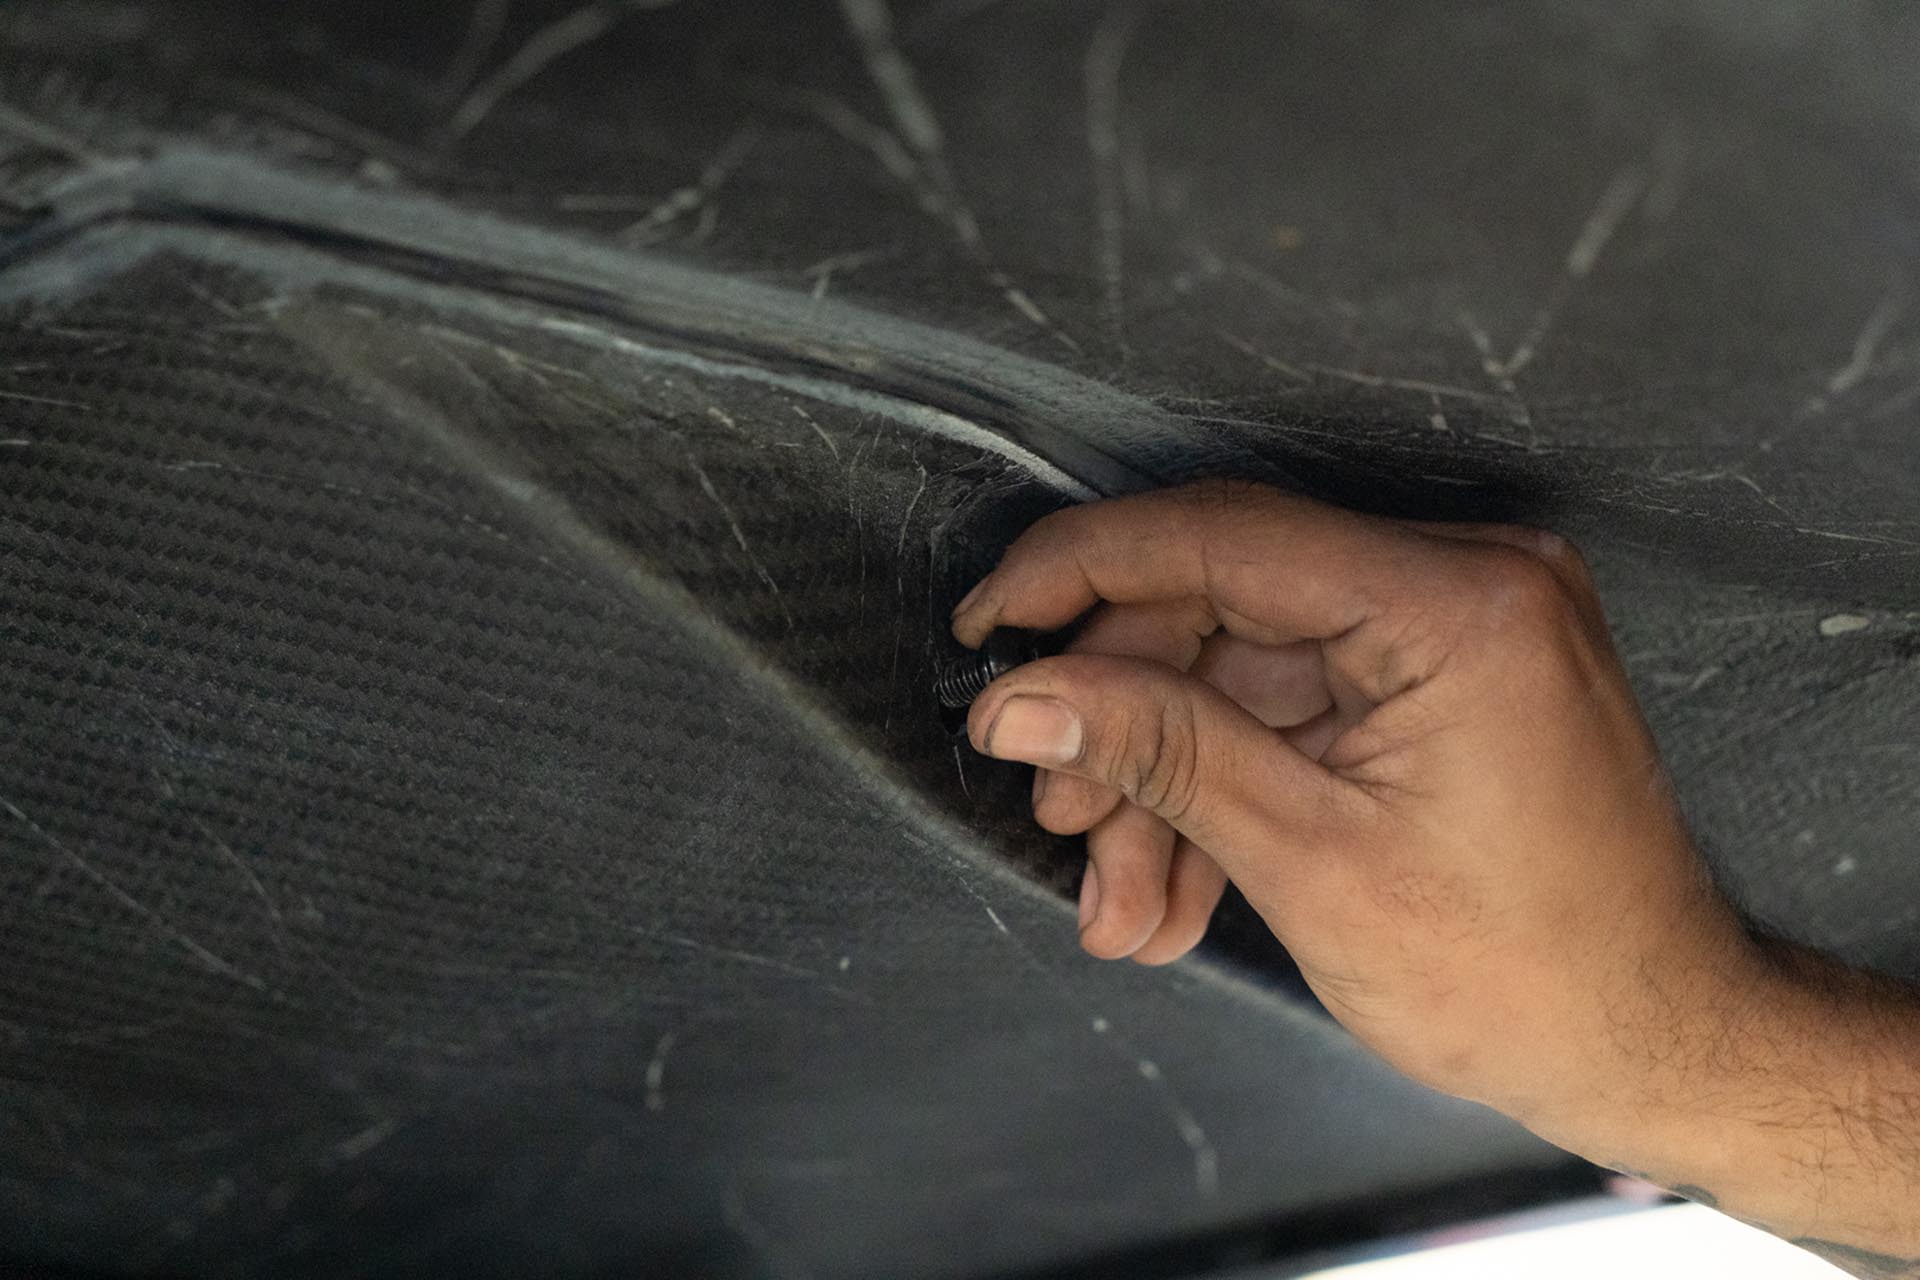
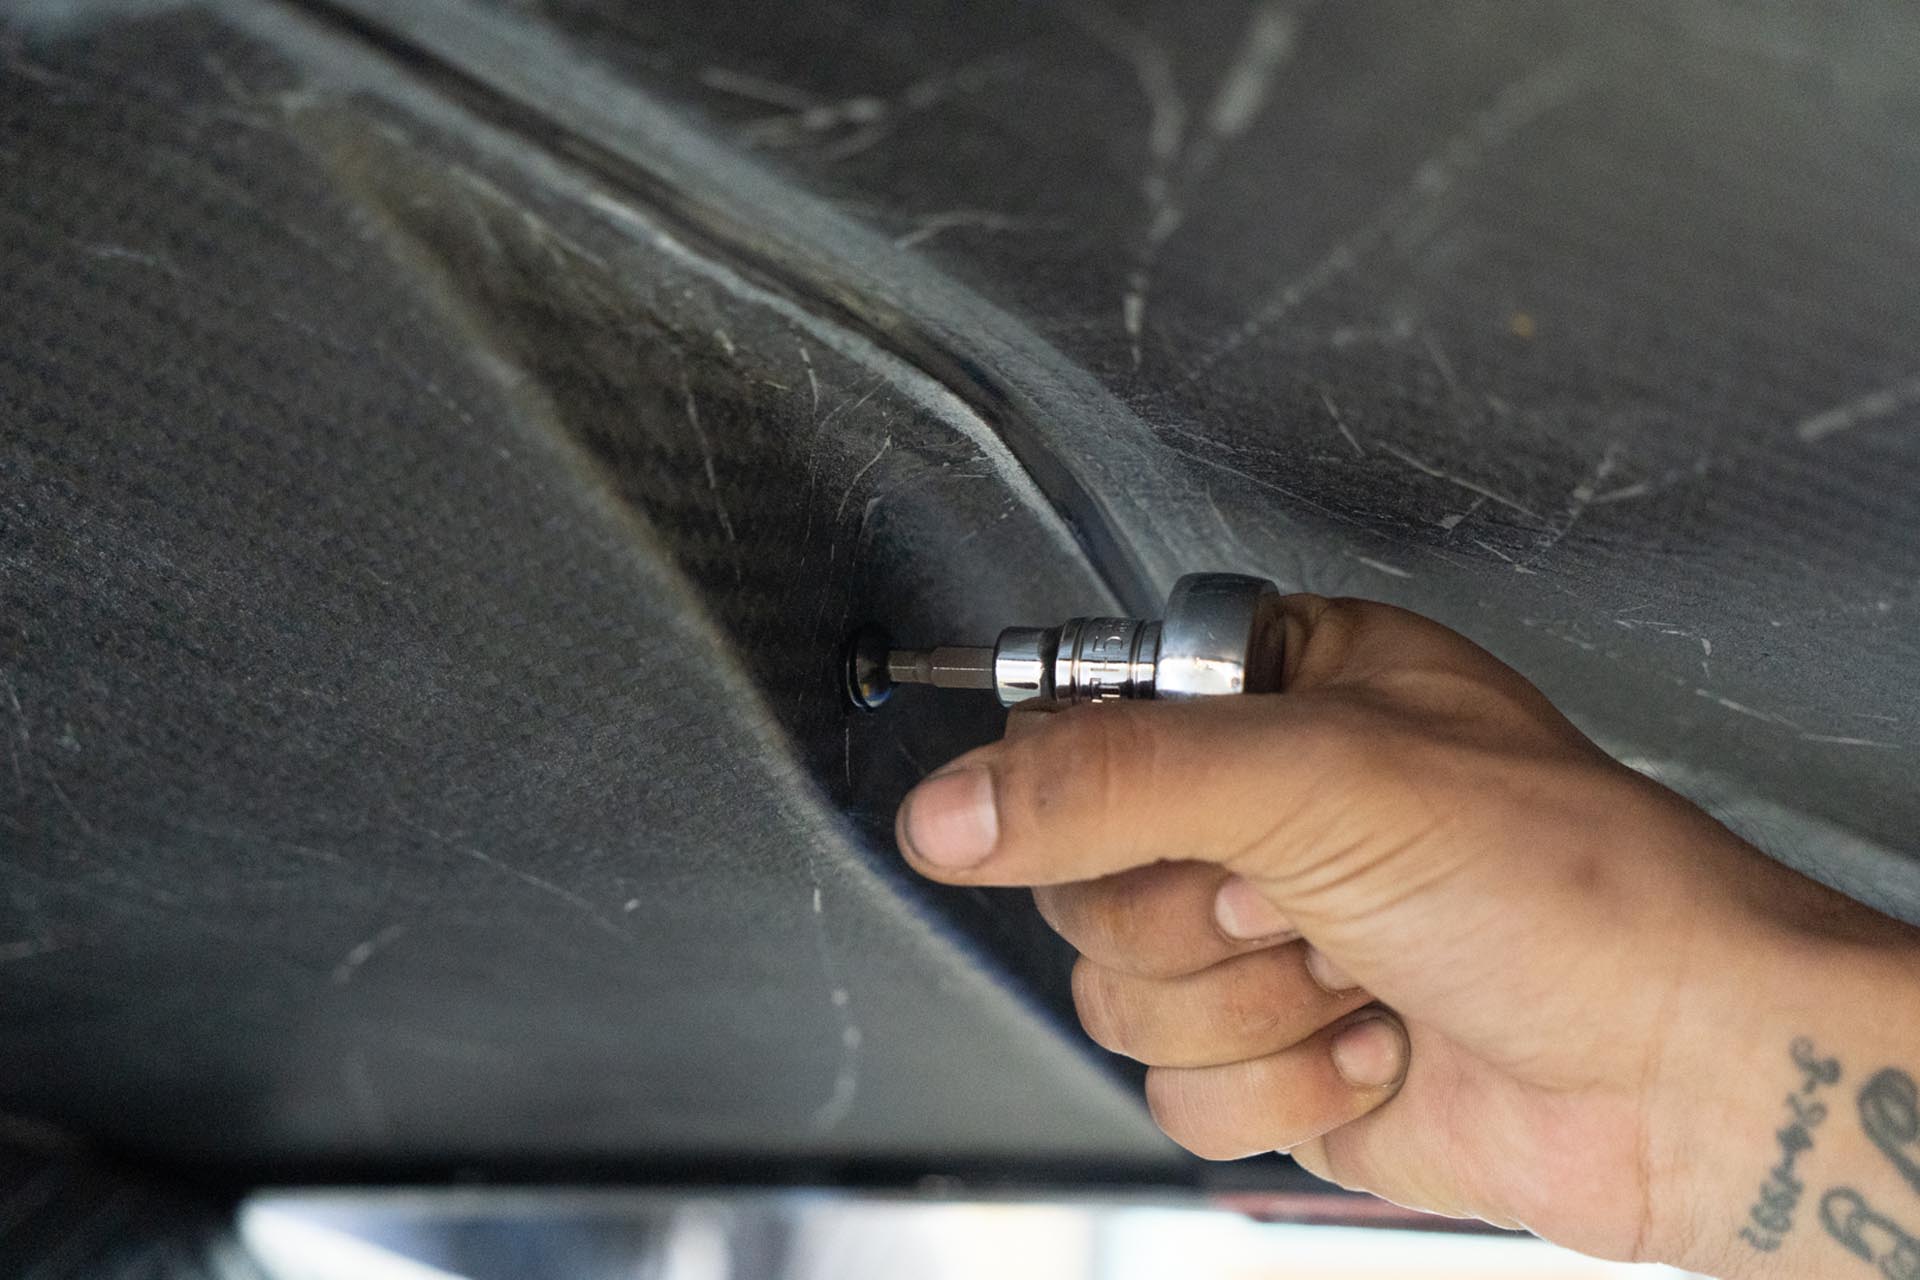
Using a philips screw driver, and a 8mm end wrench to counterhold, install the following hardware to secure each amber light to the hood. (2 fasteners per light in the same order) Be sure to carefully feed the power cables through the hood to mitigate any damages.
Once all of the amber day time running lights have been installed, you will leave the power cable lead ends facing inward. These will be tied together later on.
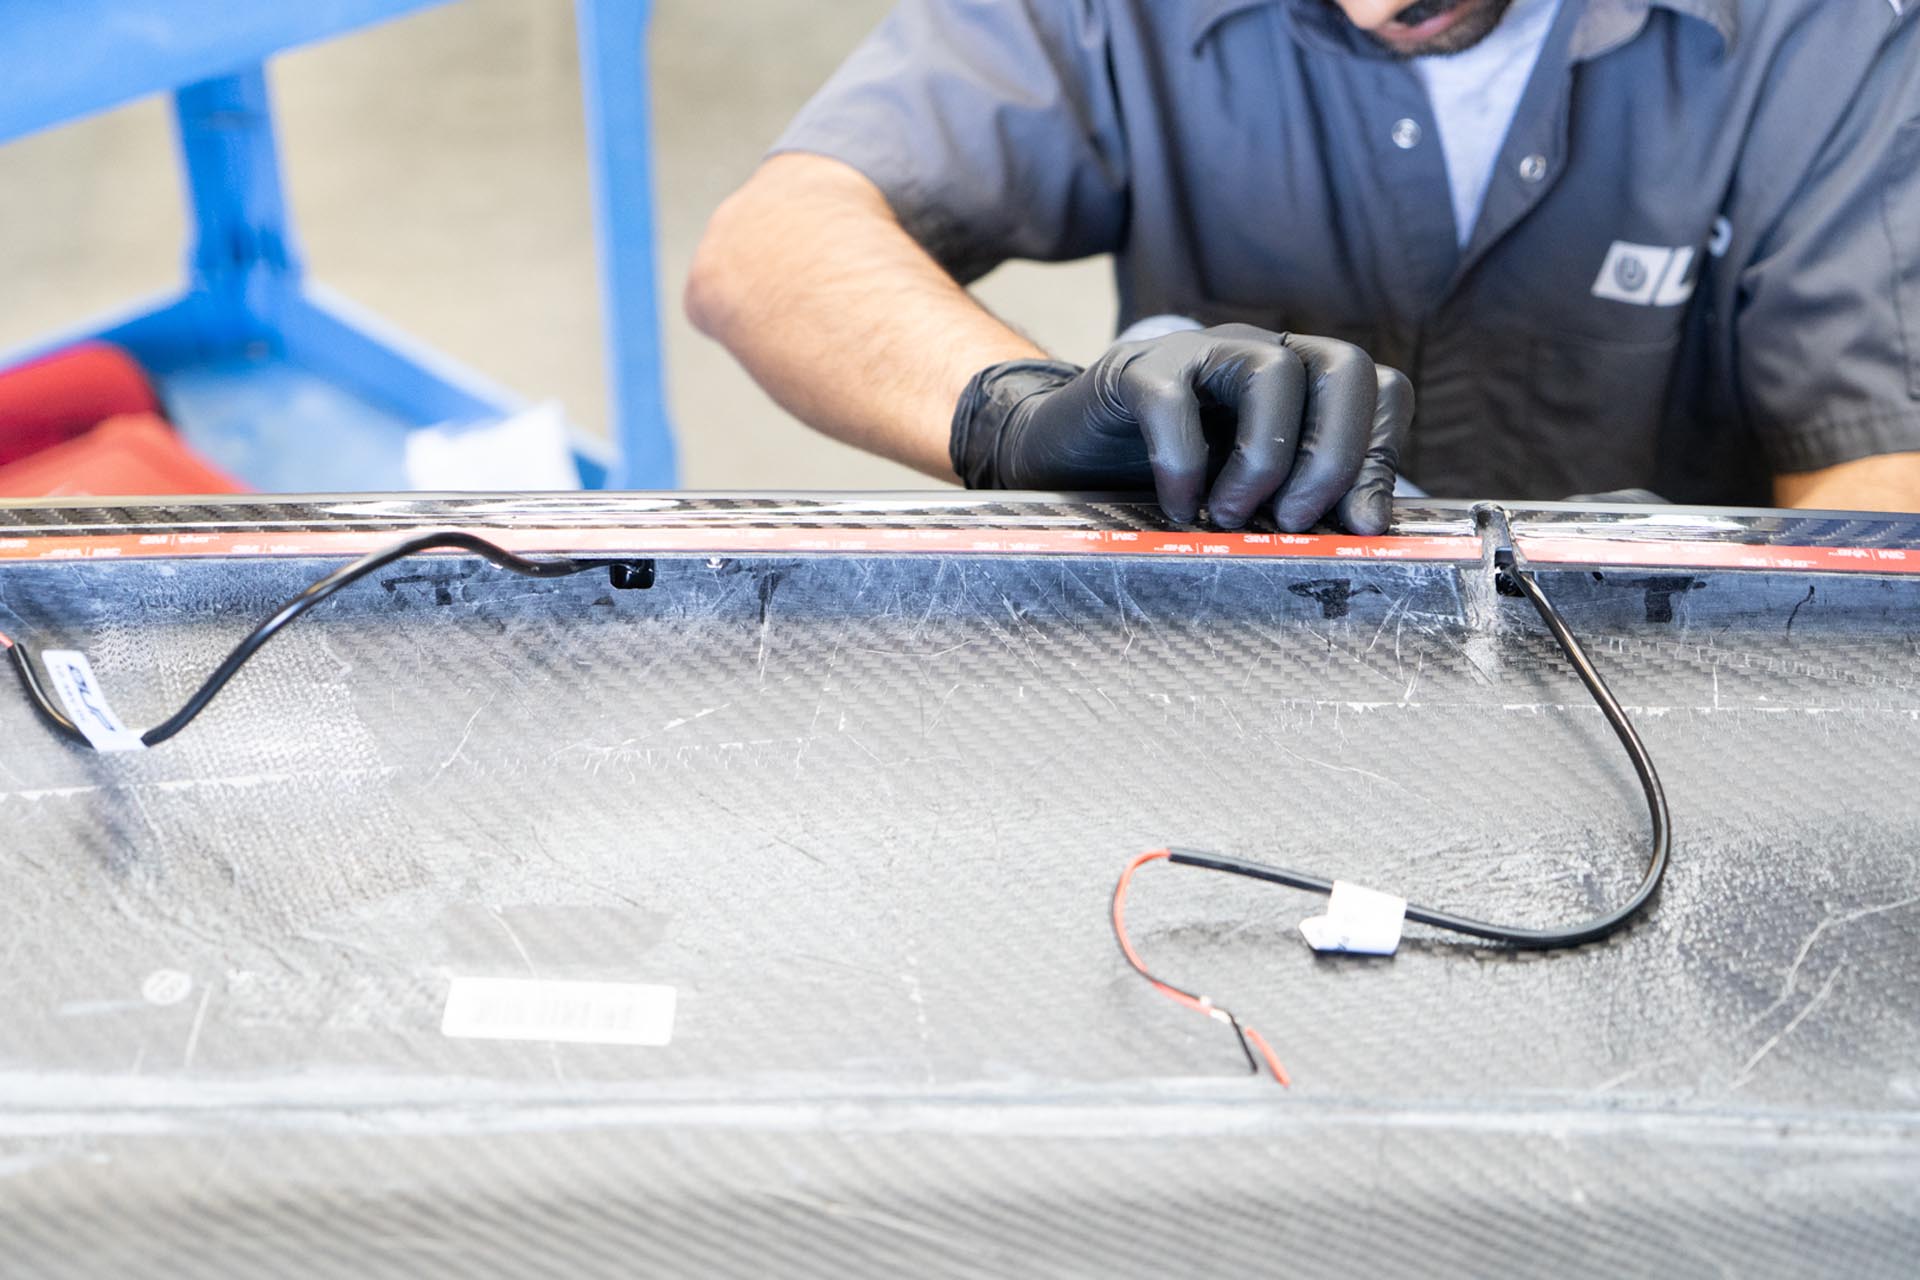
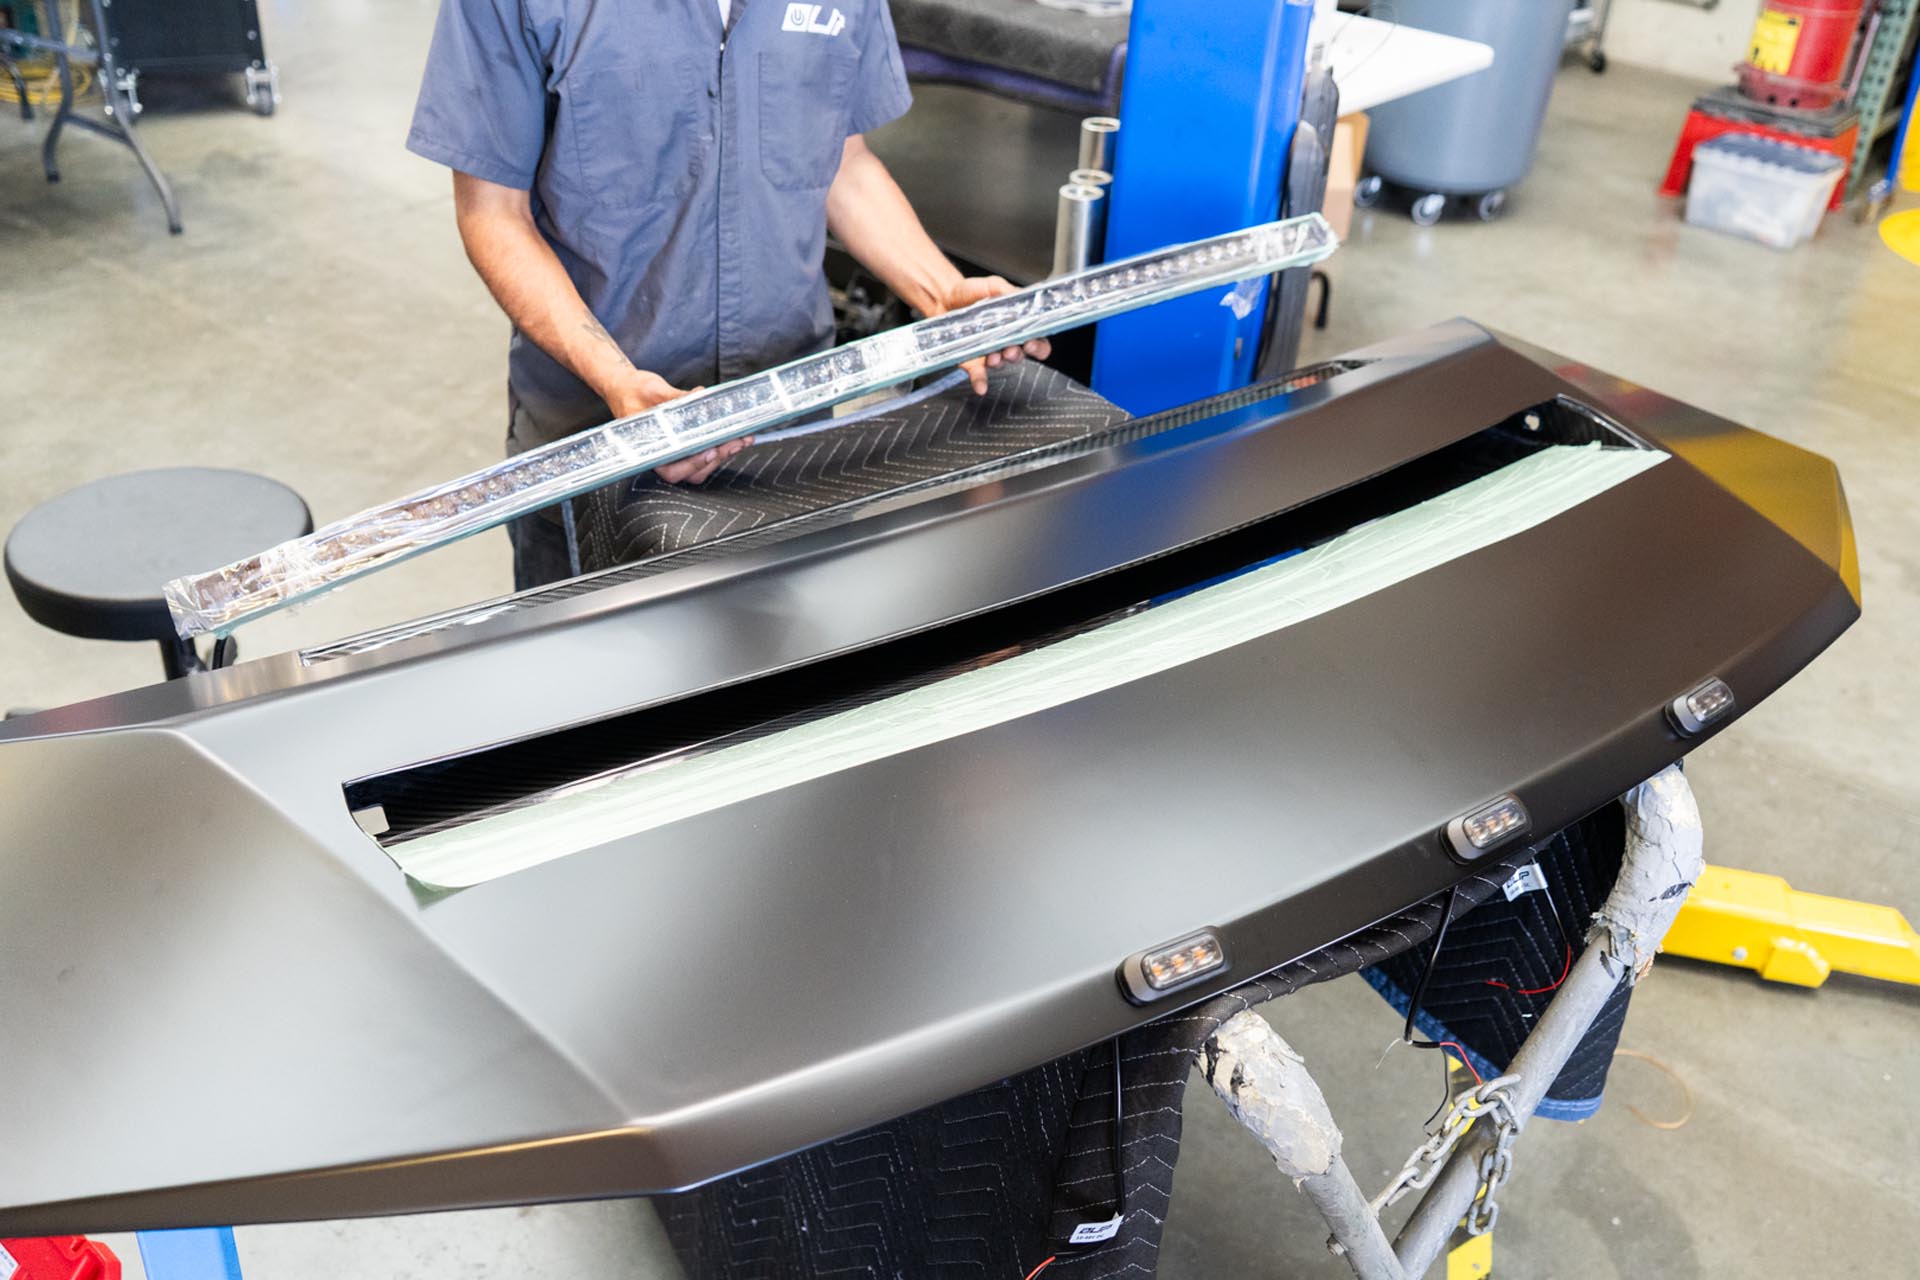
If your 50” double row light bar was not preinstalled in your hood, or you are looking to remove the light bar and reinstall it for any reason, follow the steps below. If your light bar is preinstalled, you can skip to step 5.
Apply masking tape on and around the slot for the curved light bar to ensure no surface damage occurs during the assembly stage.
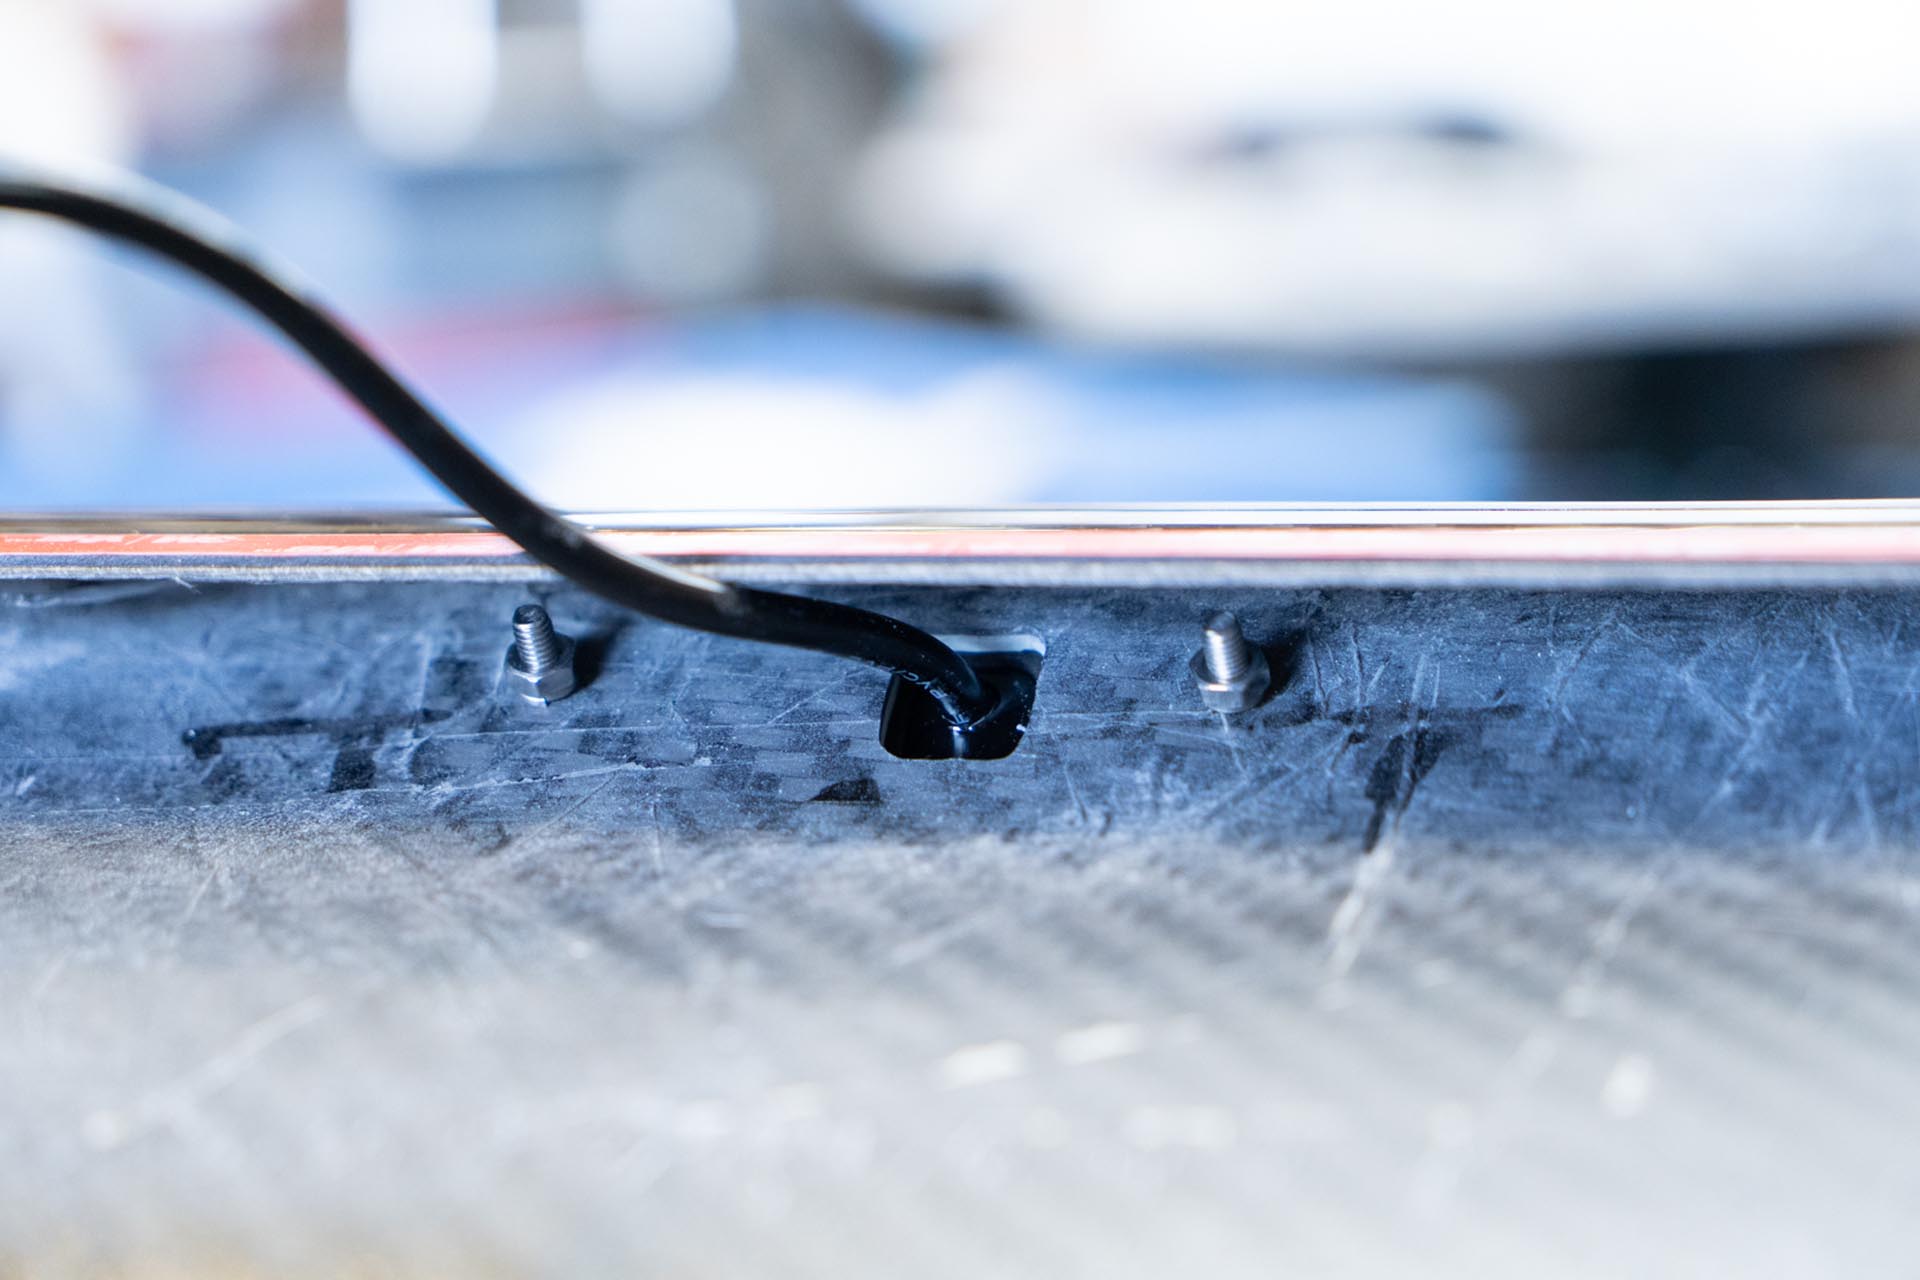
Next, feed the curved light bar power cable through the slot on the passenger side of the hood.
Continue to feel the power cable until the light bar is properly seated in the hood slot.

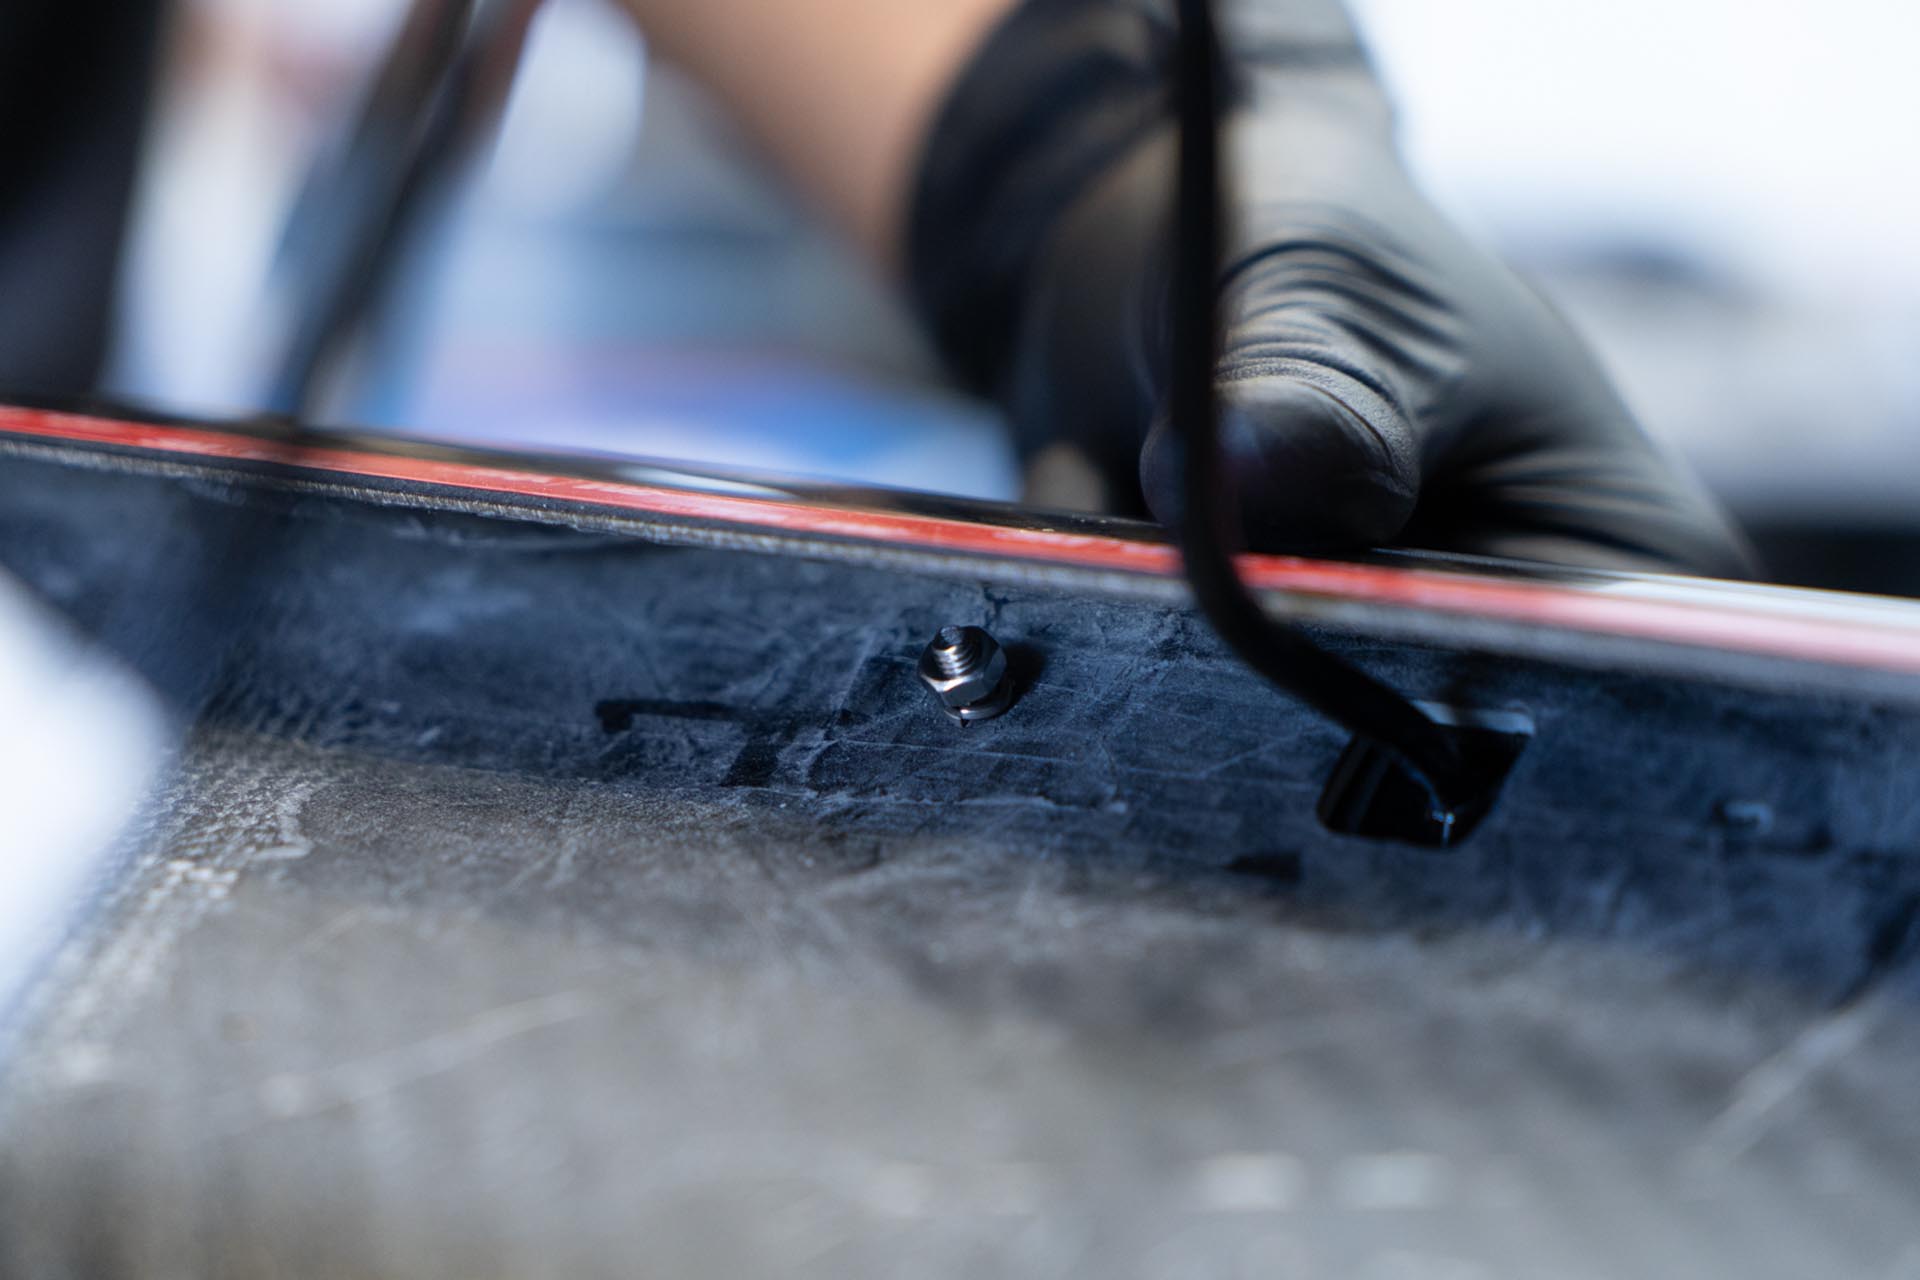
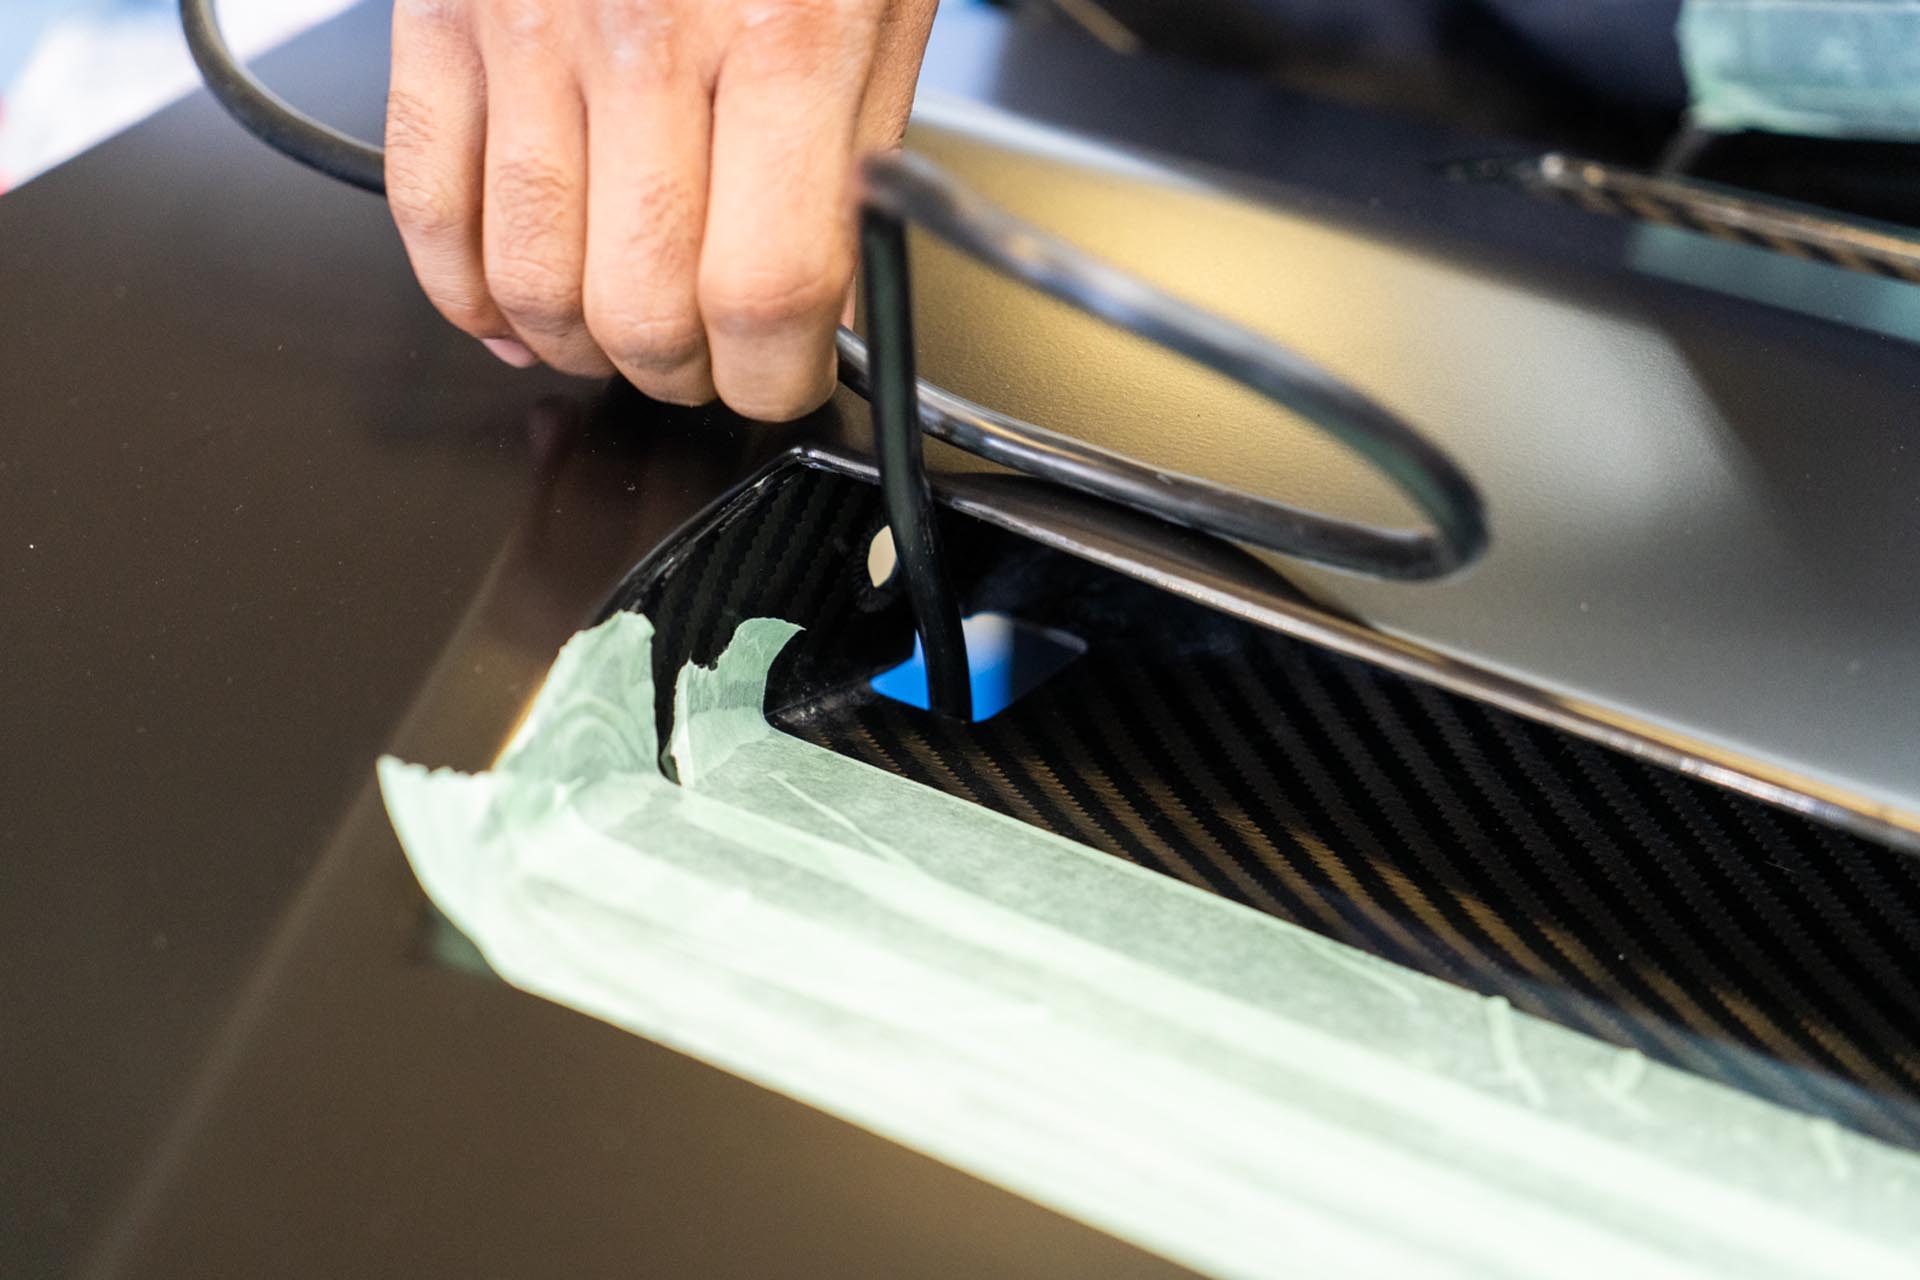
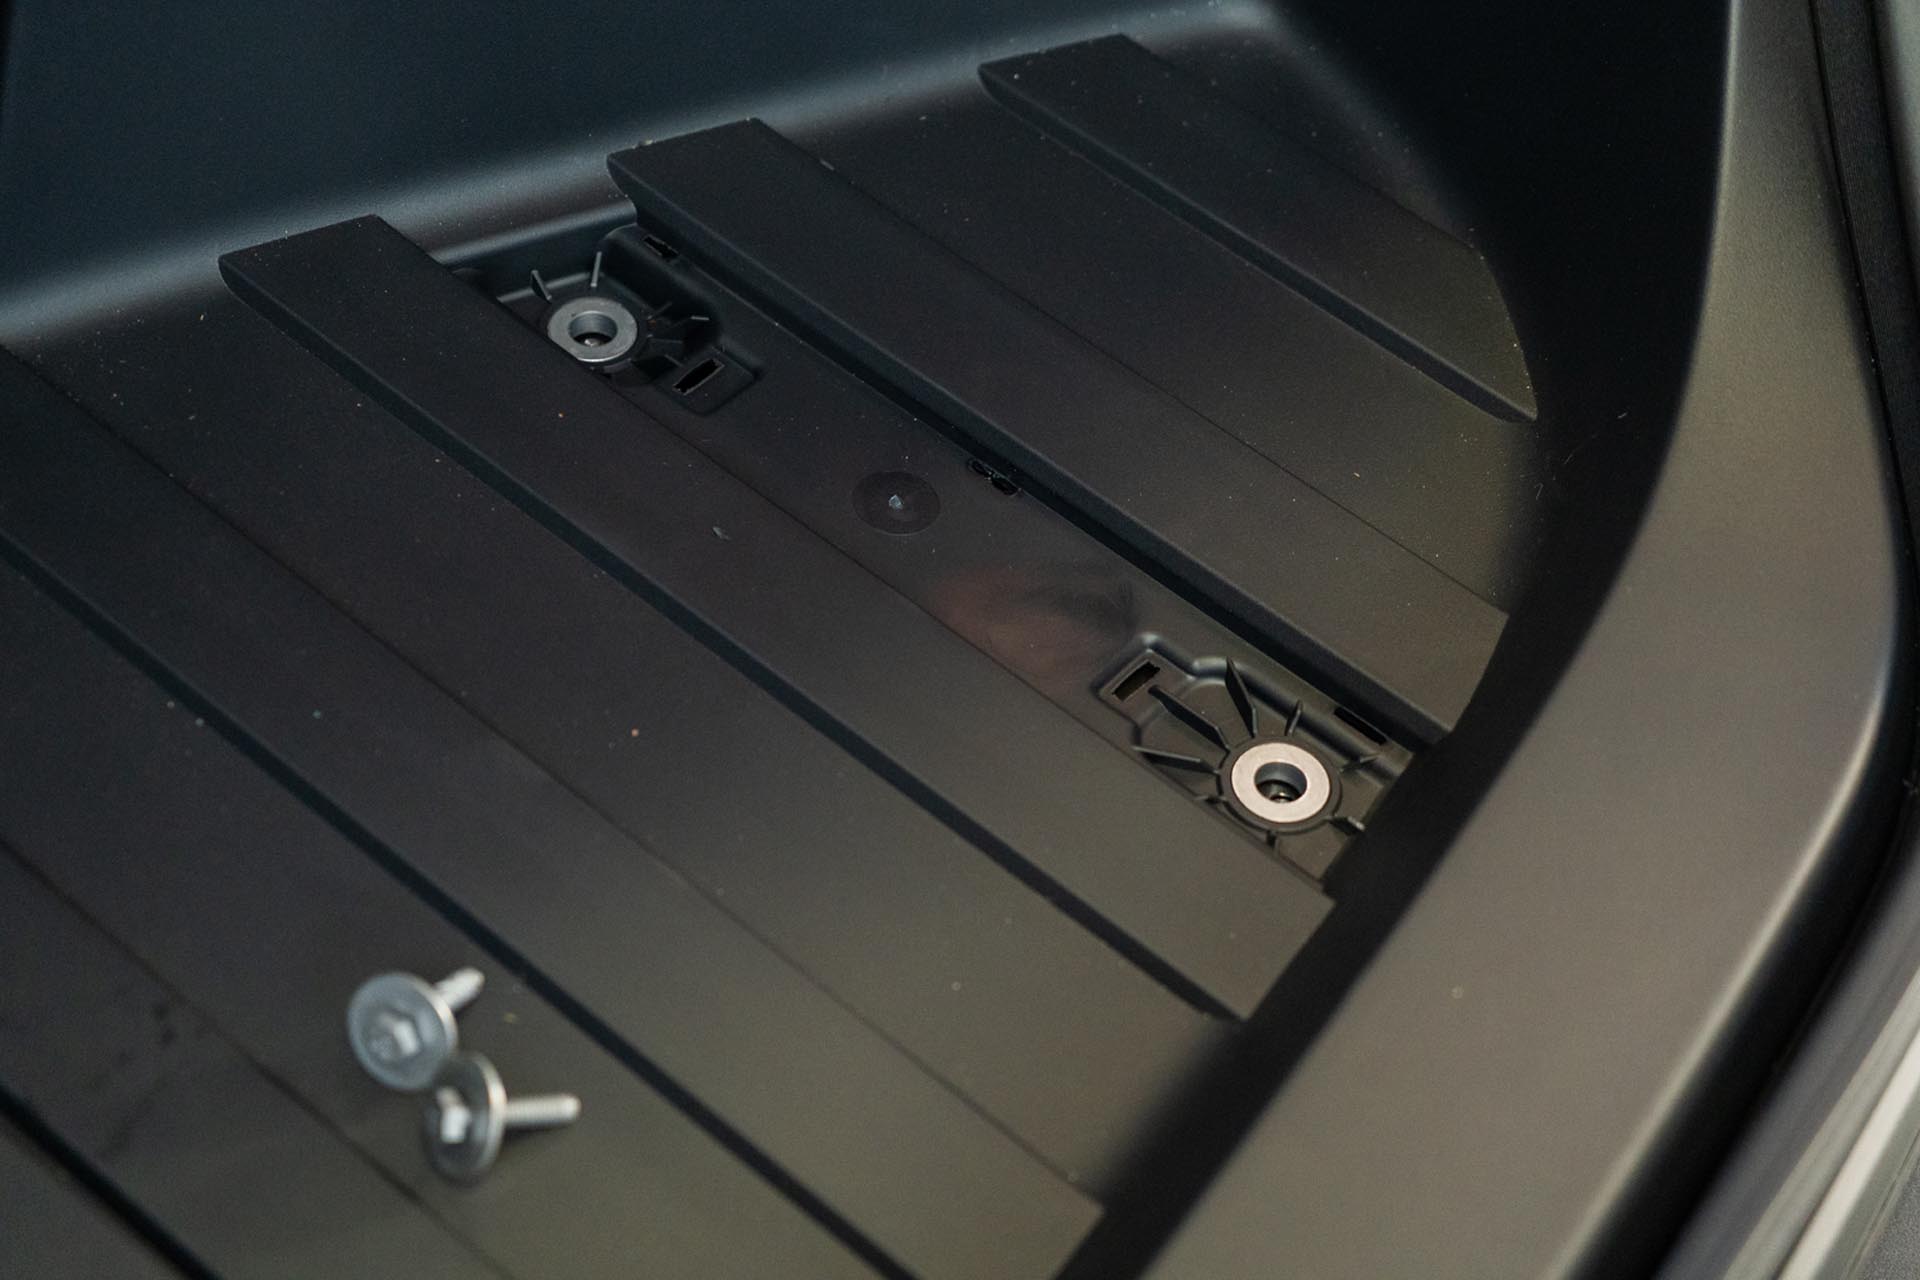
Once the light bar appears to be seated, verify placement by checking that the threaded insert on the side of the light bar is visible through the predrilled hole in the hood.
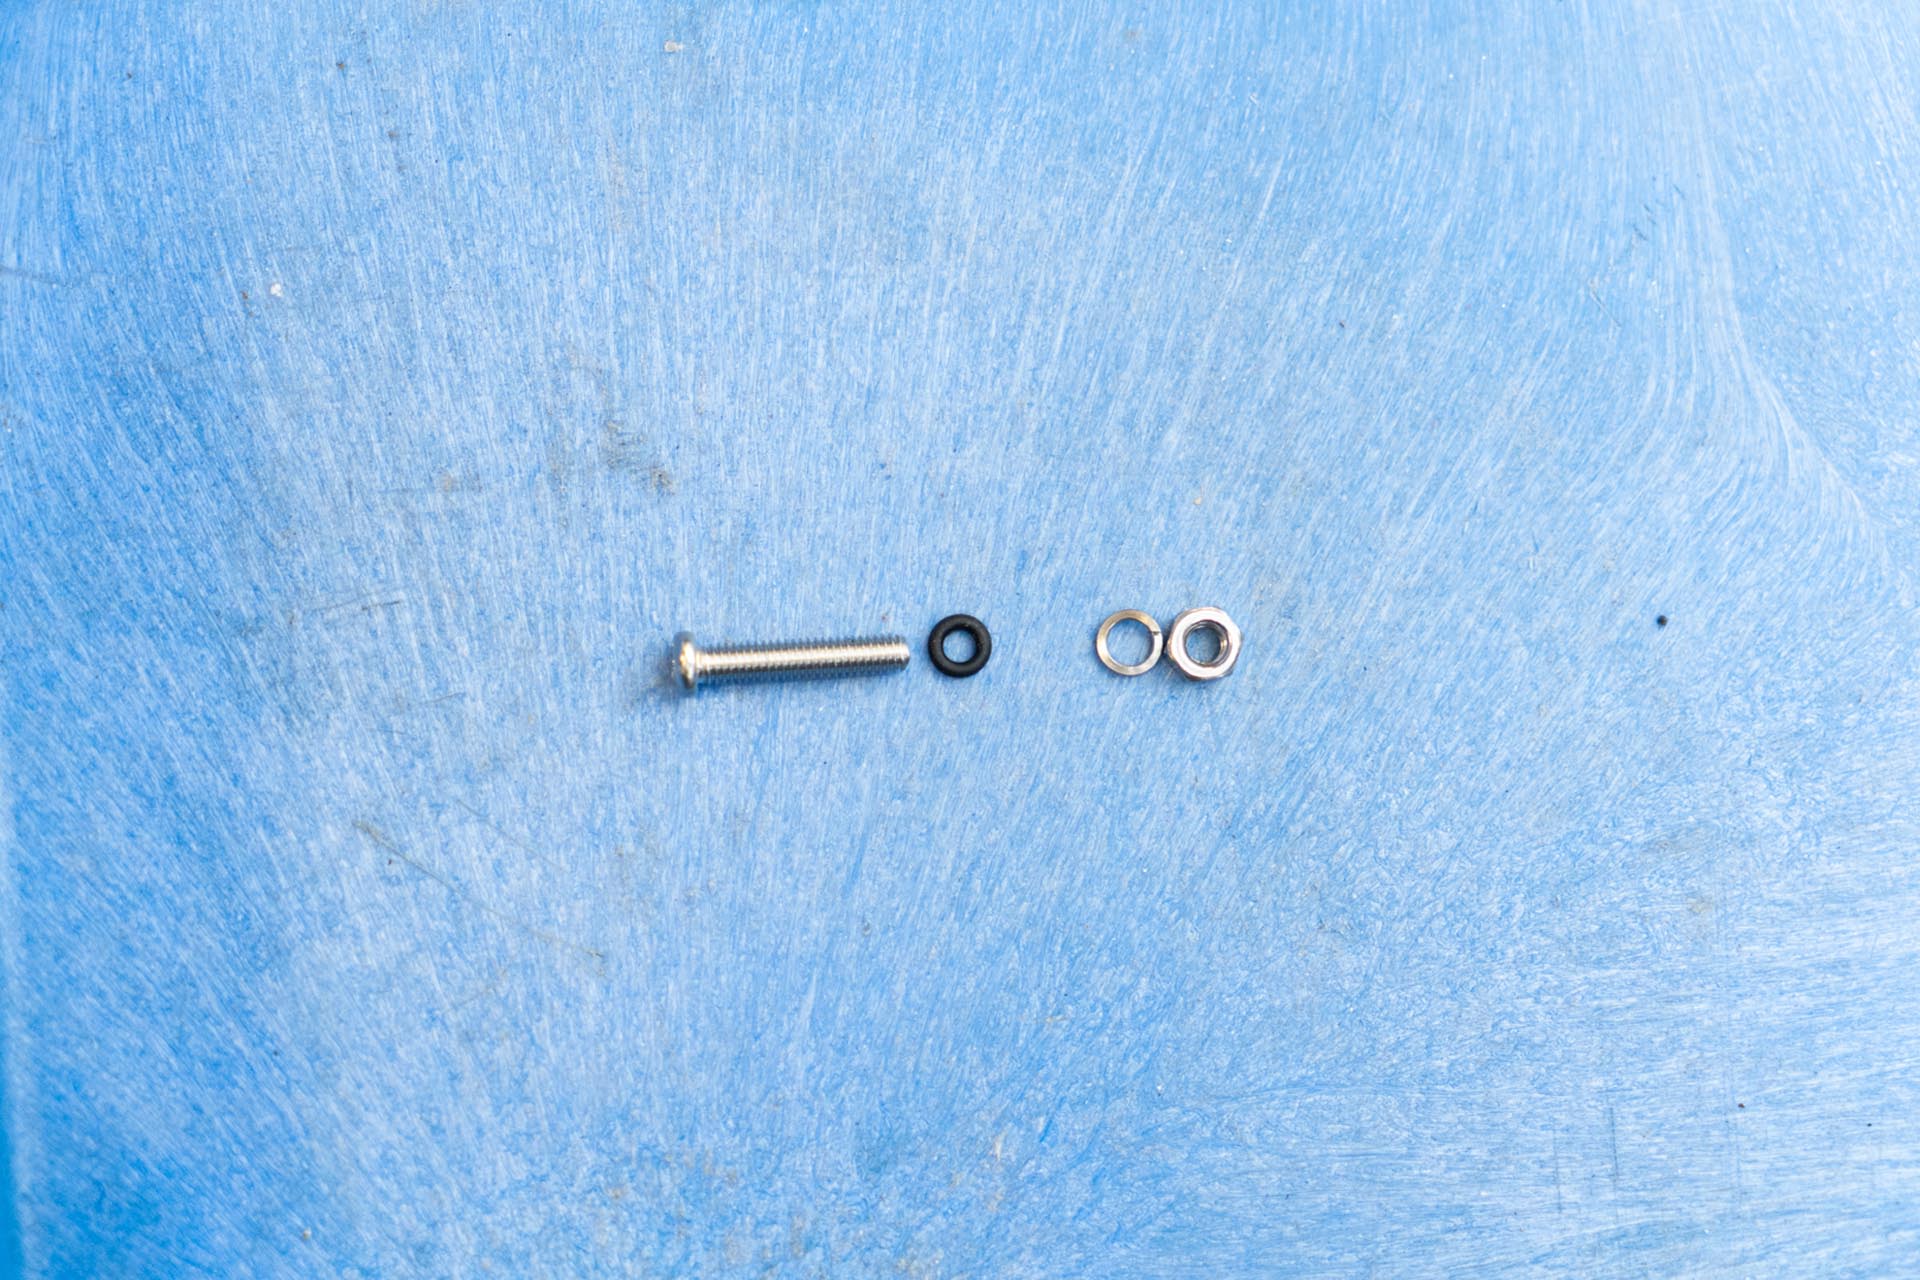
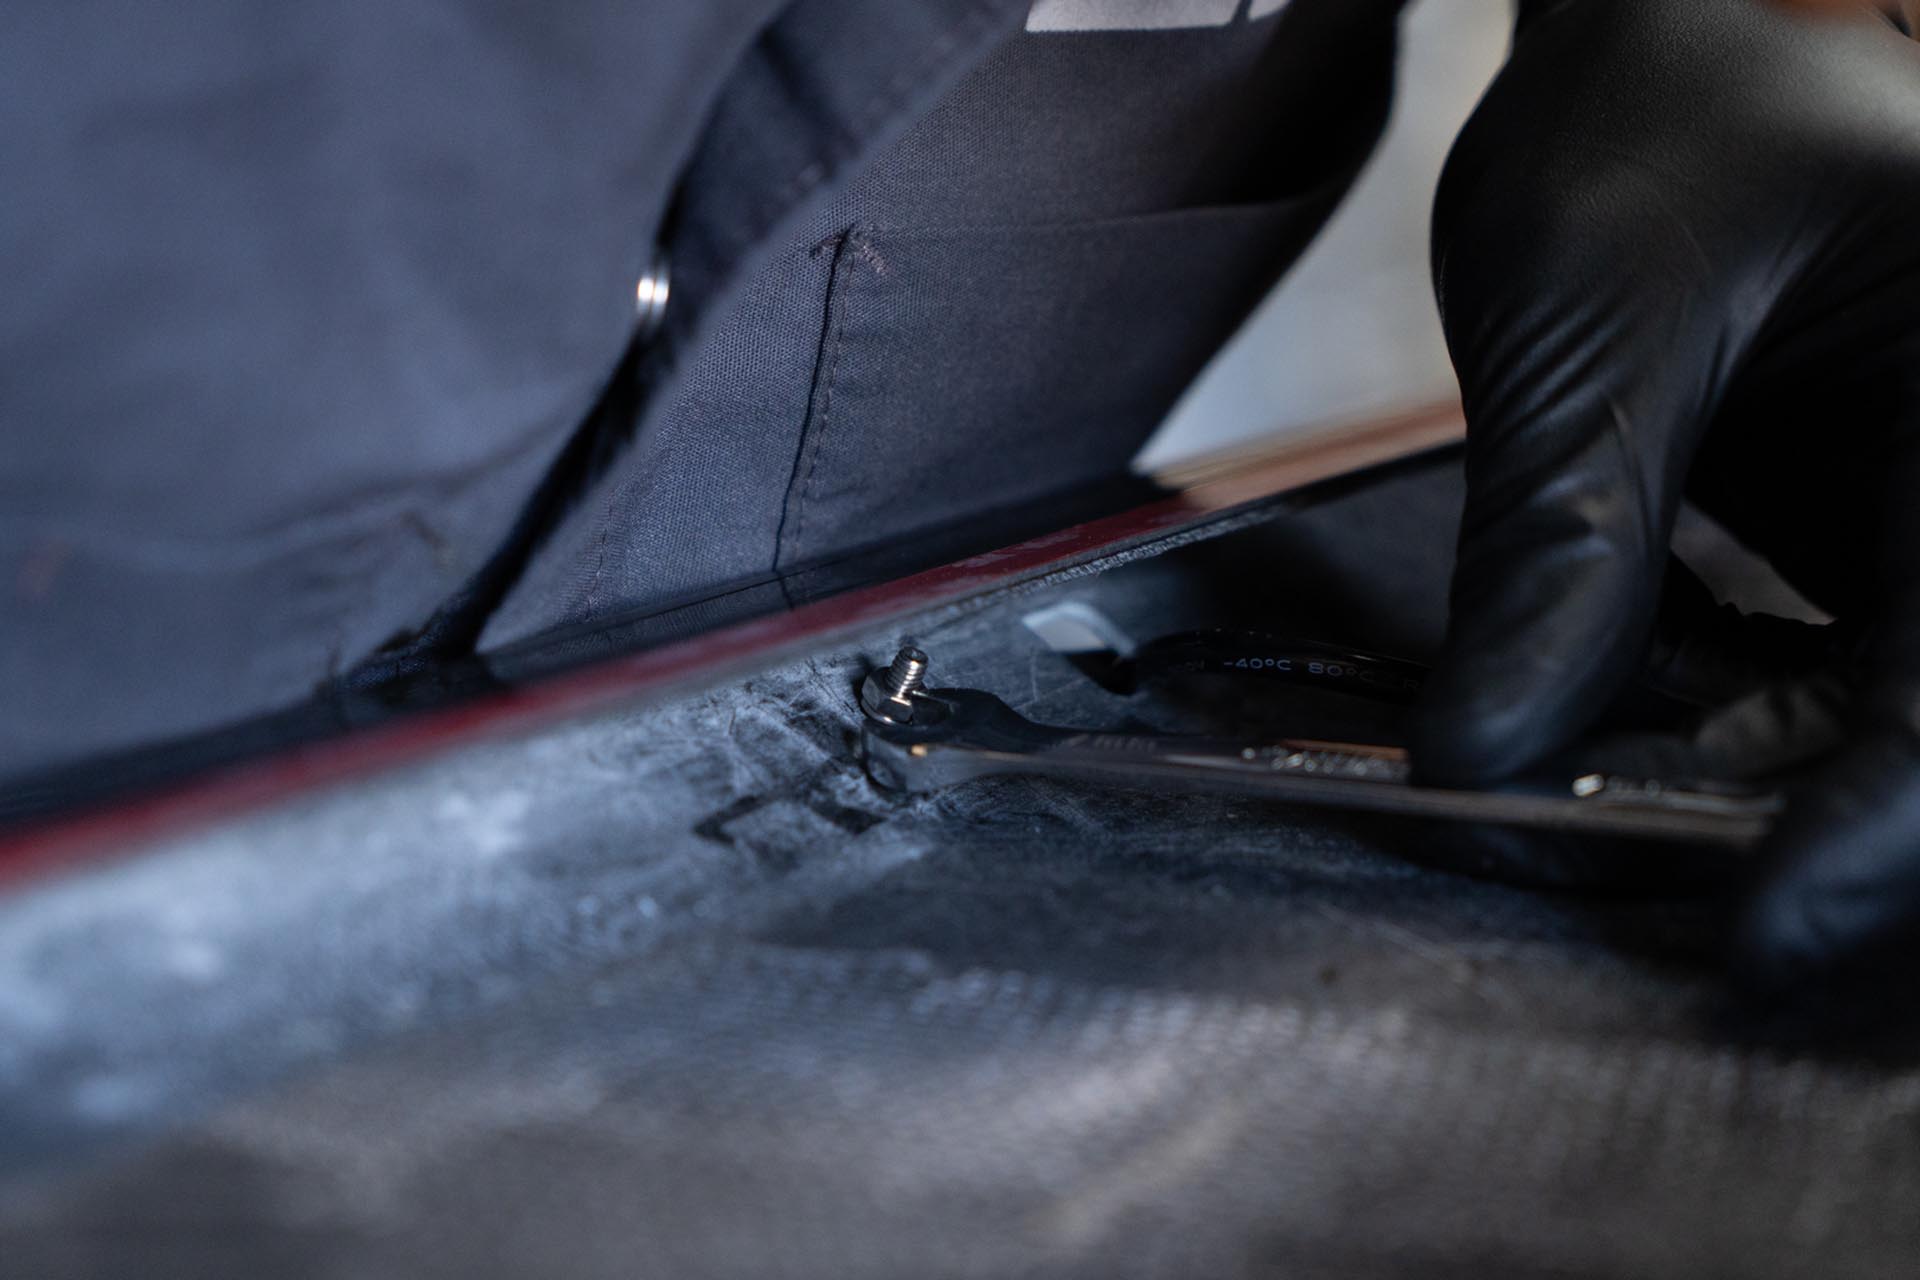
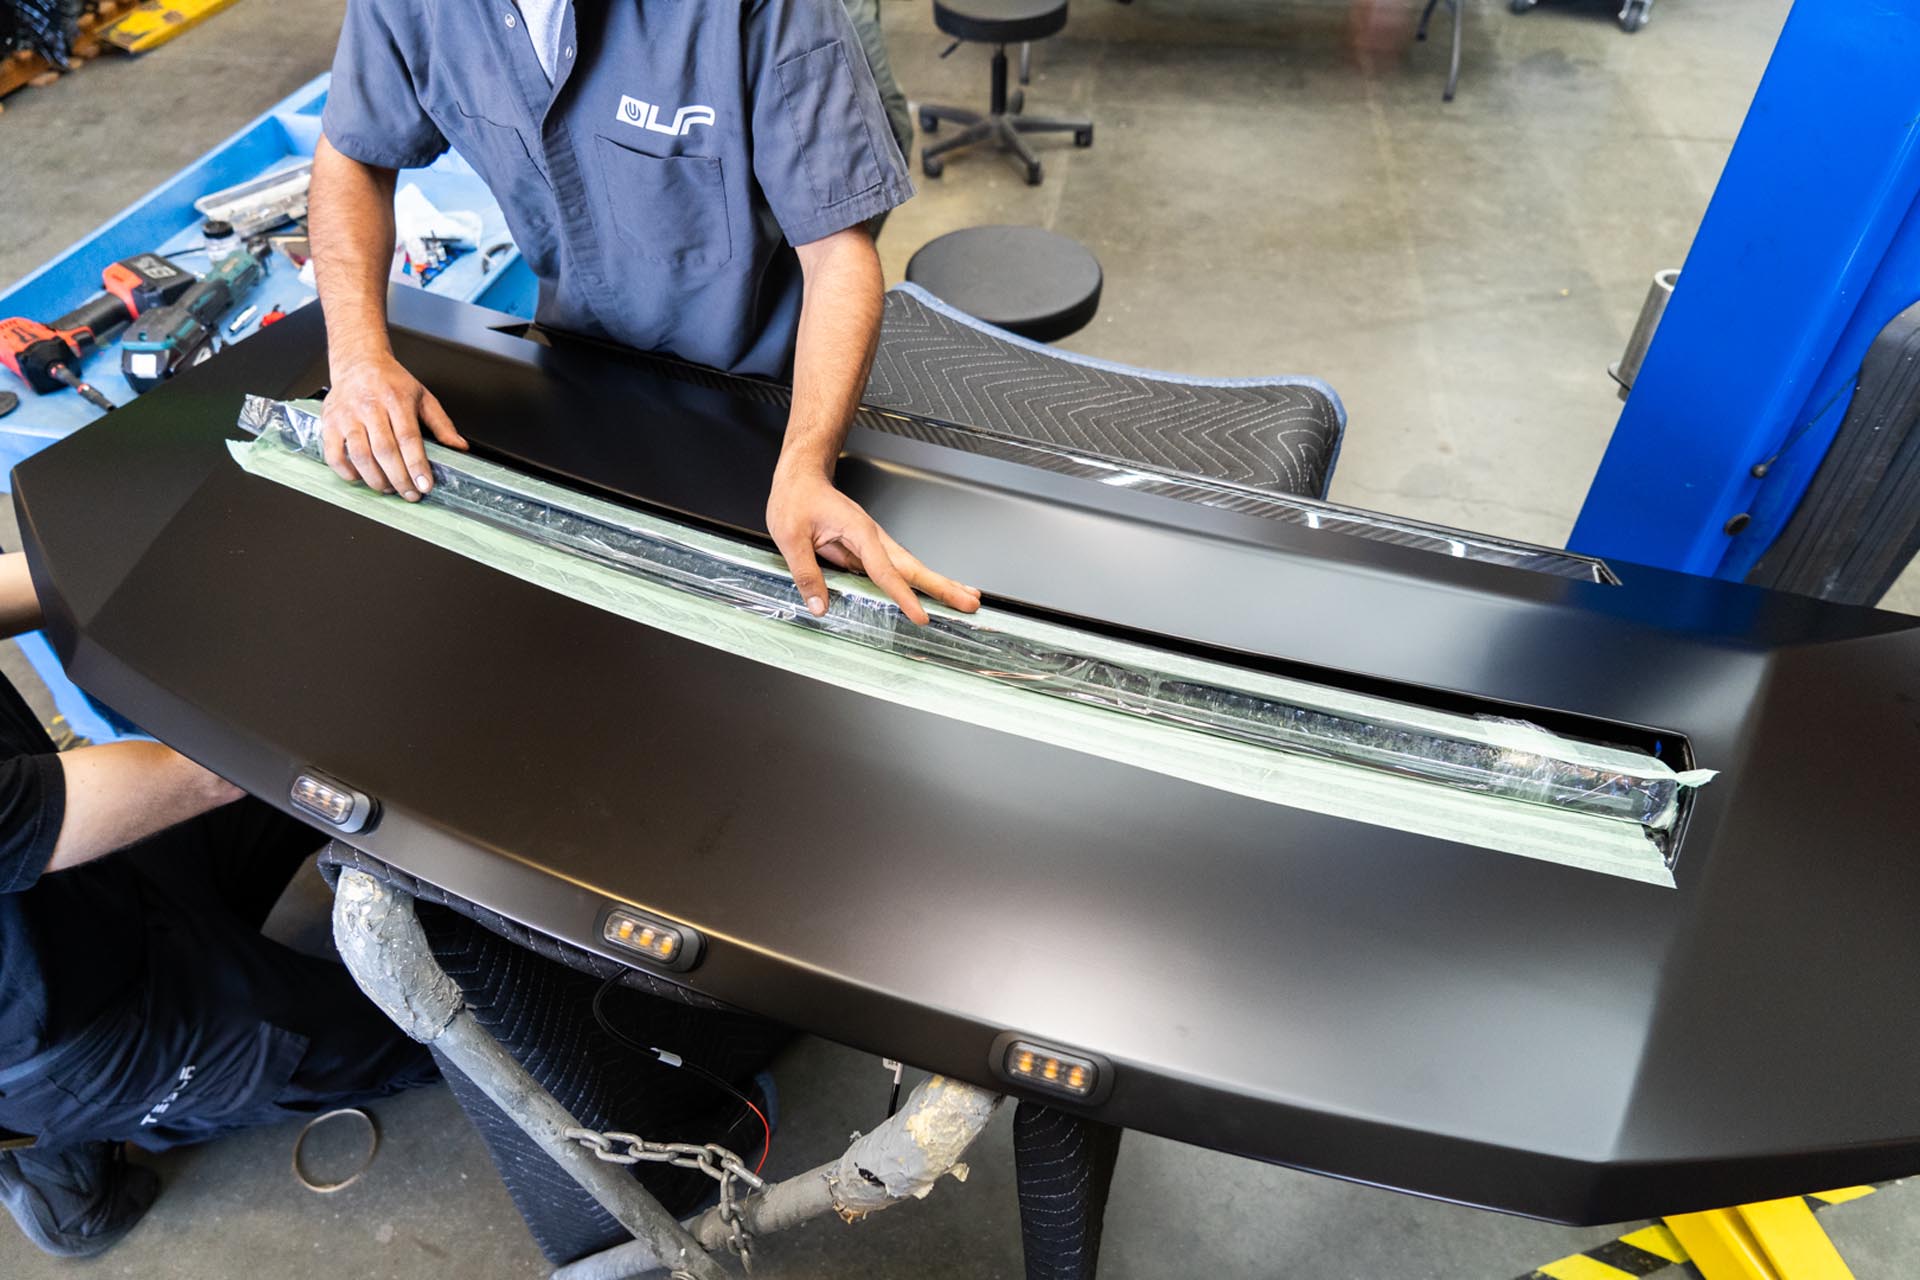
Using the provided 5mm allen bolt packages with the curved light bar, thread one bolt into each side of the light bar to secure it to the hood.
Using a 155 allen socket and a ratcheting wrench, lightly torque each bolt by hand.
Once the light bar has been fastened to the hood, you can remove the masking tape near the light bar.
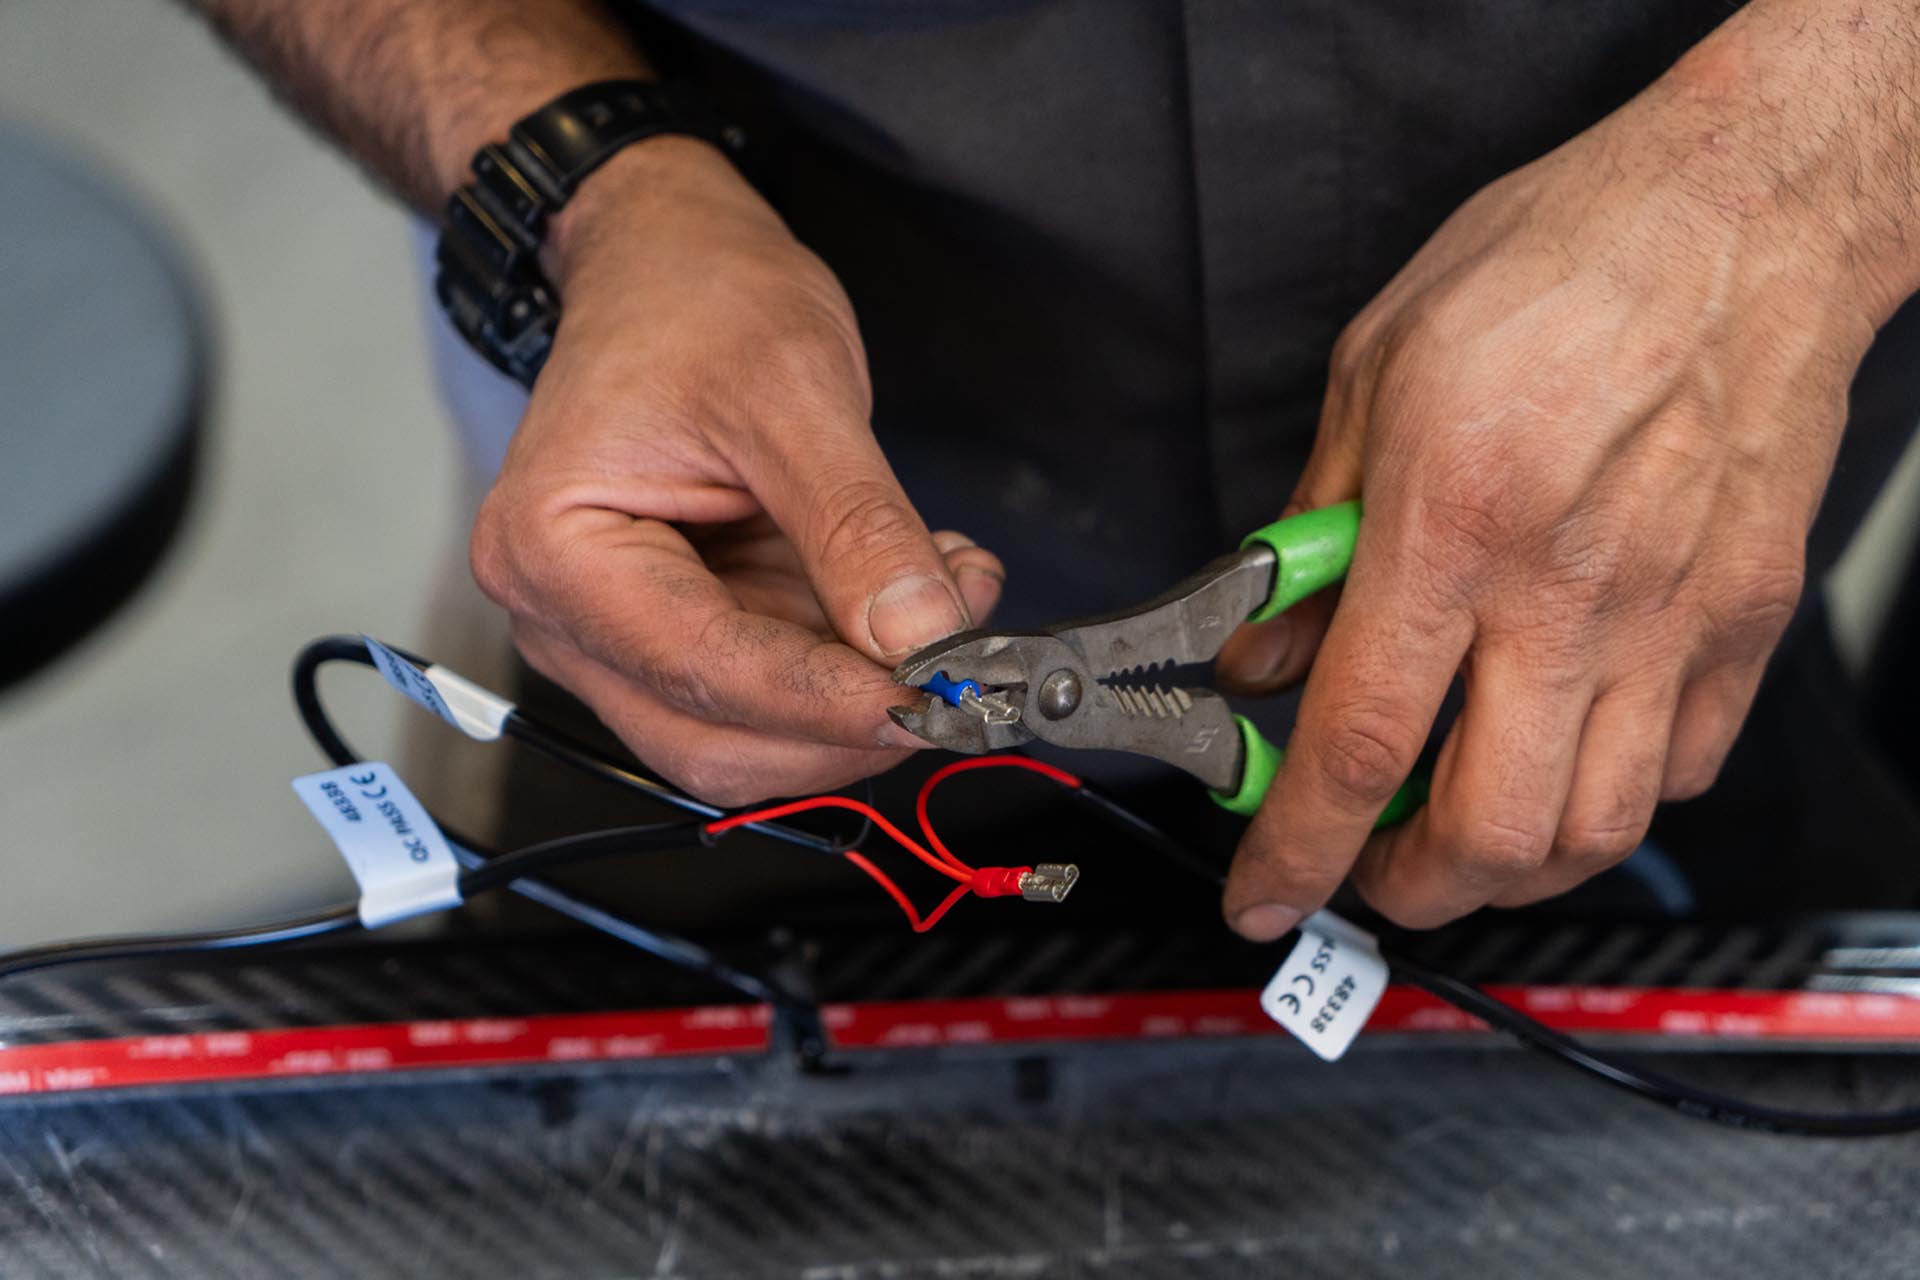
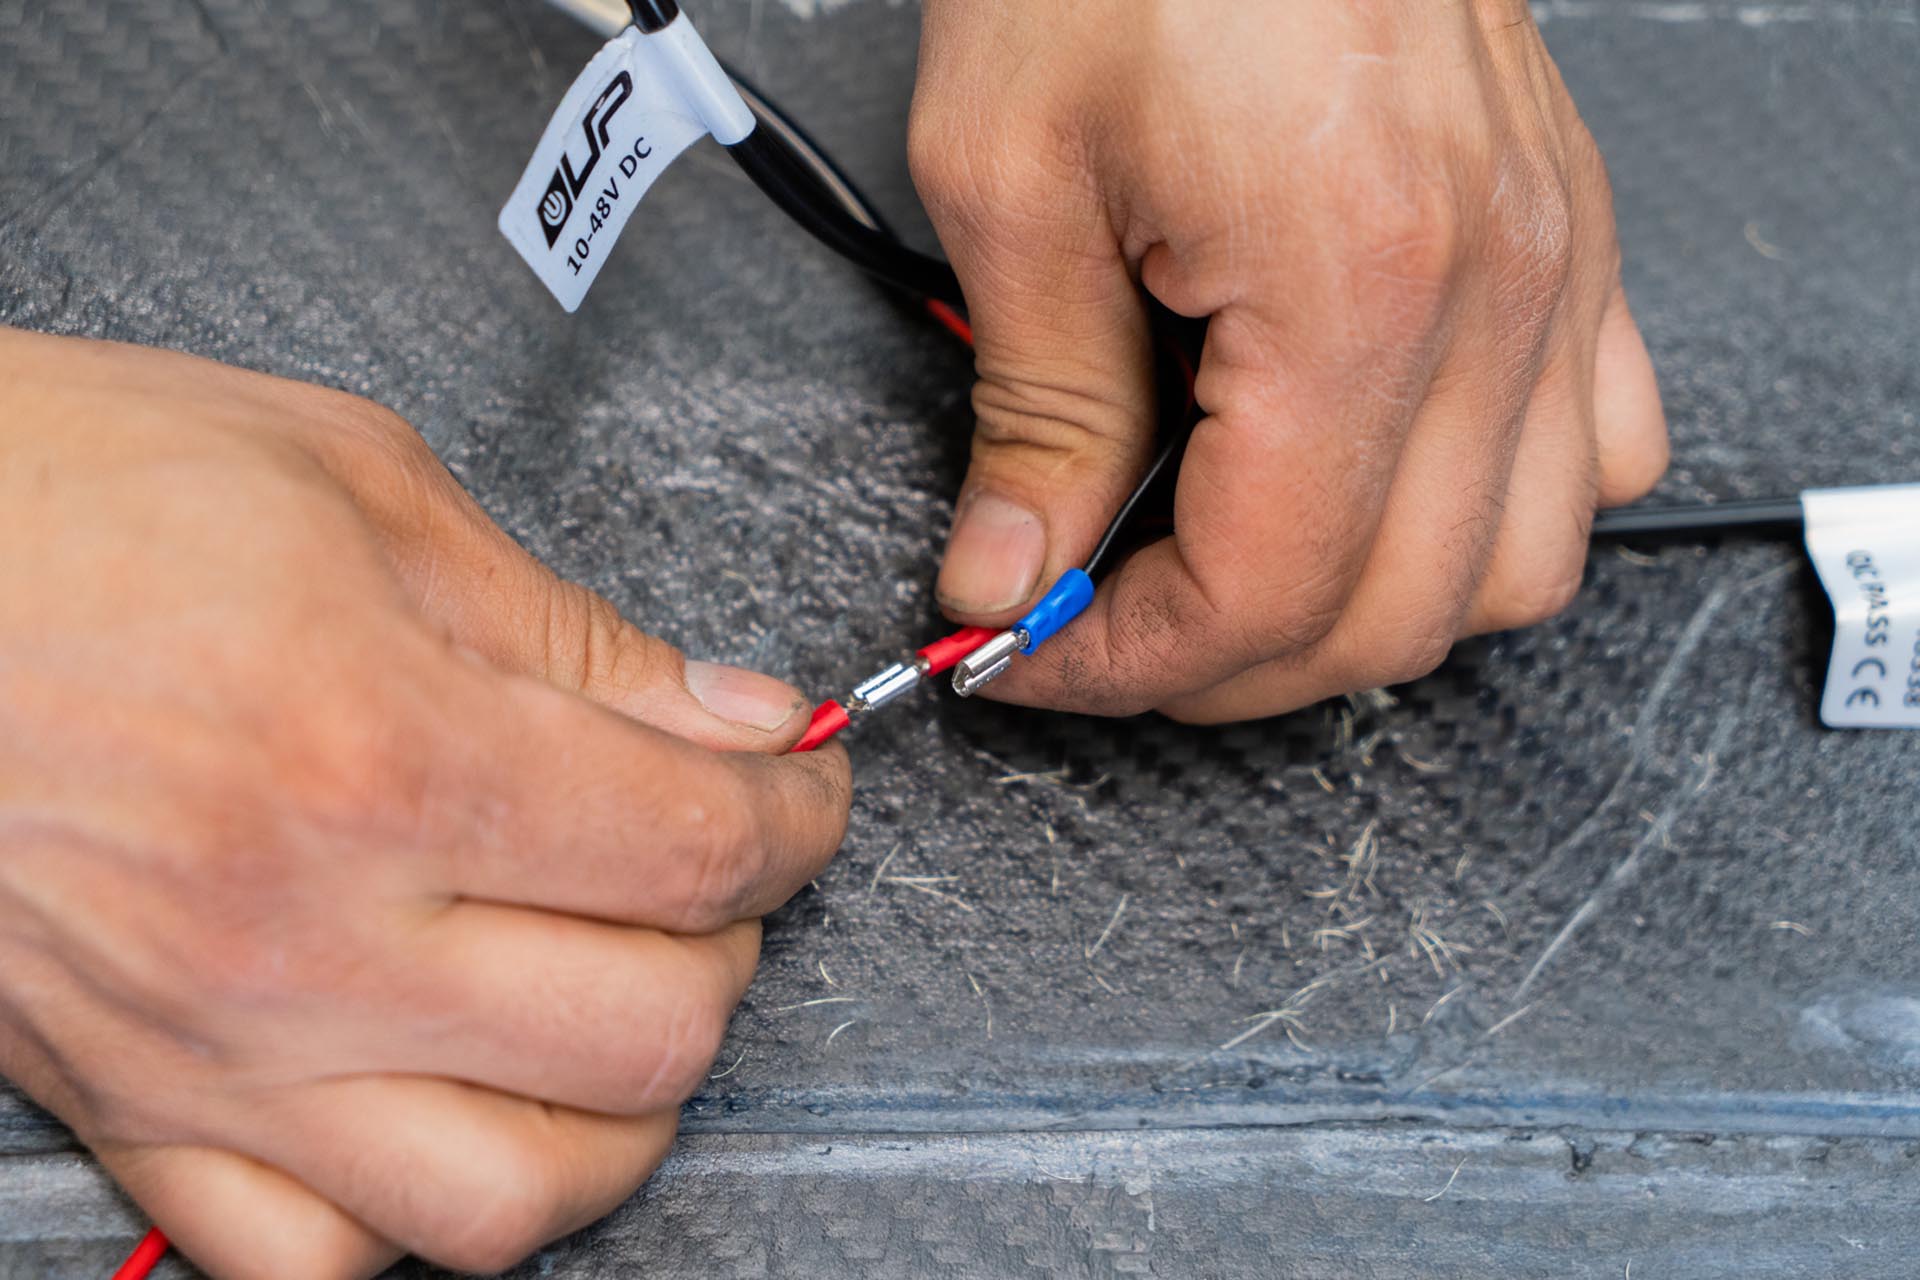
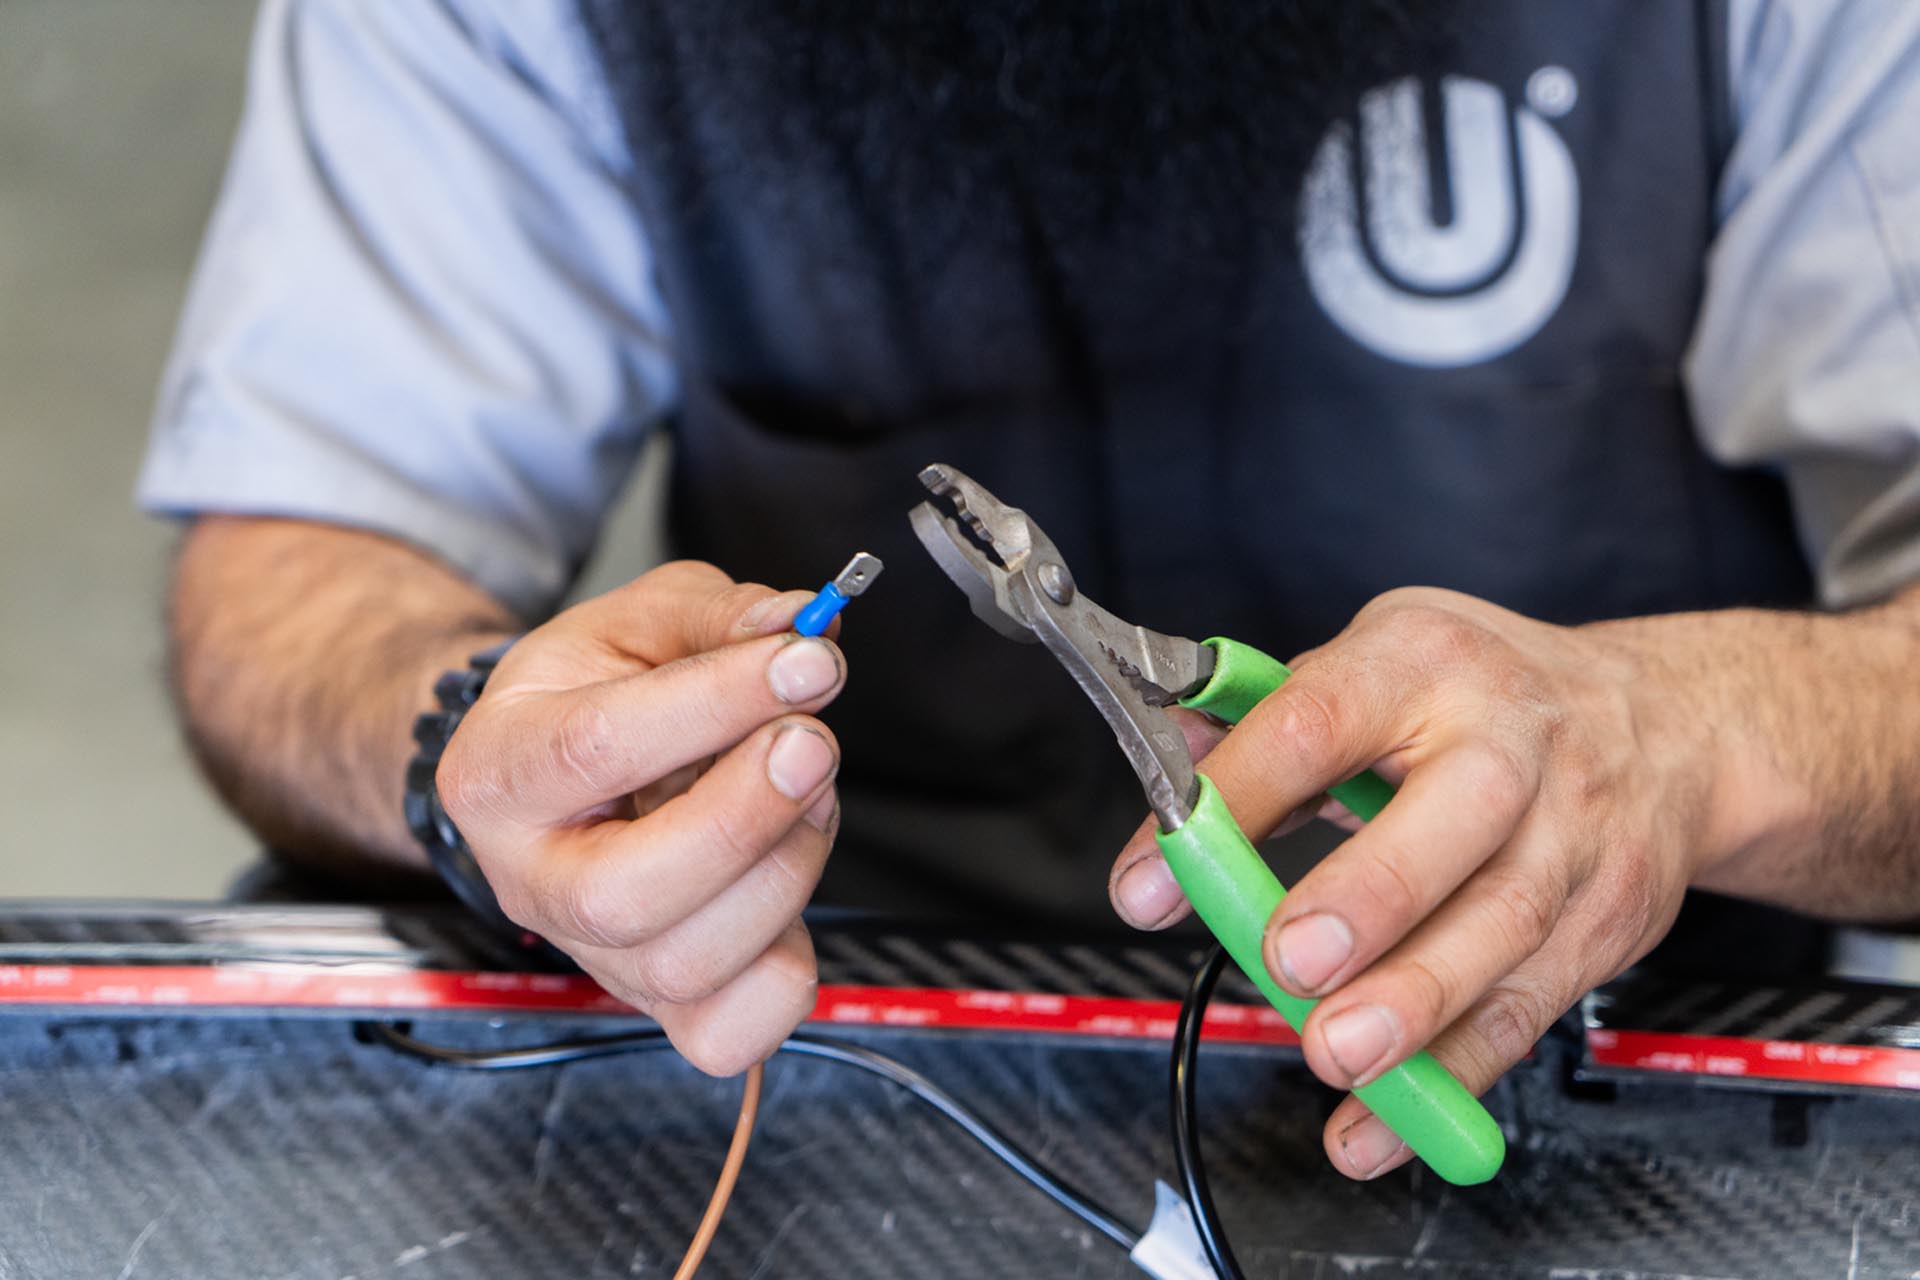
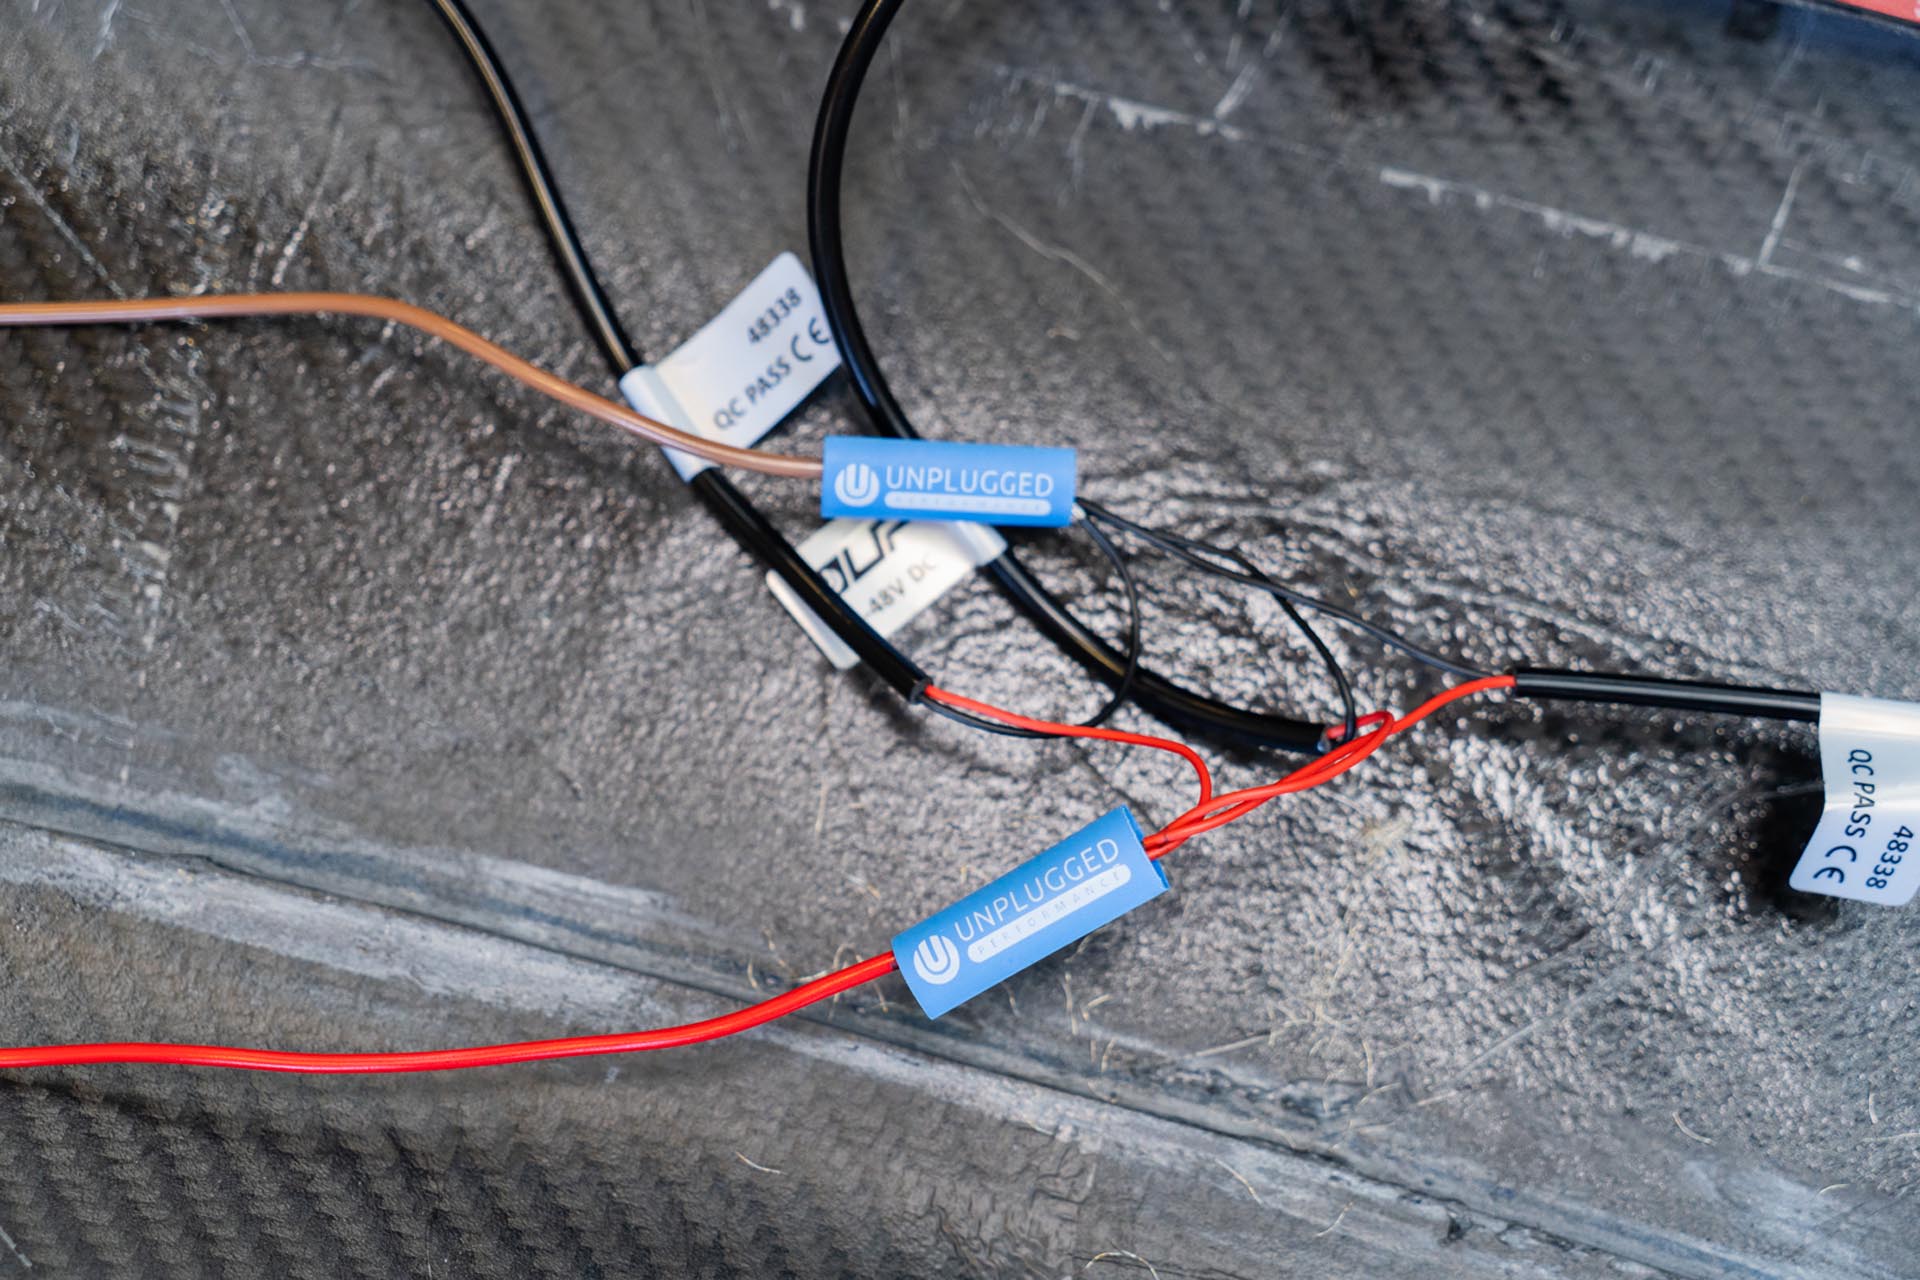
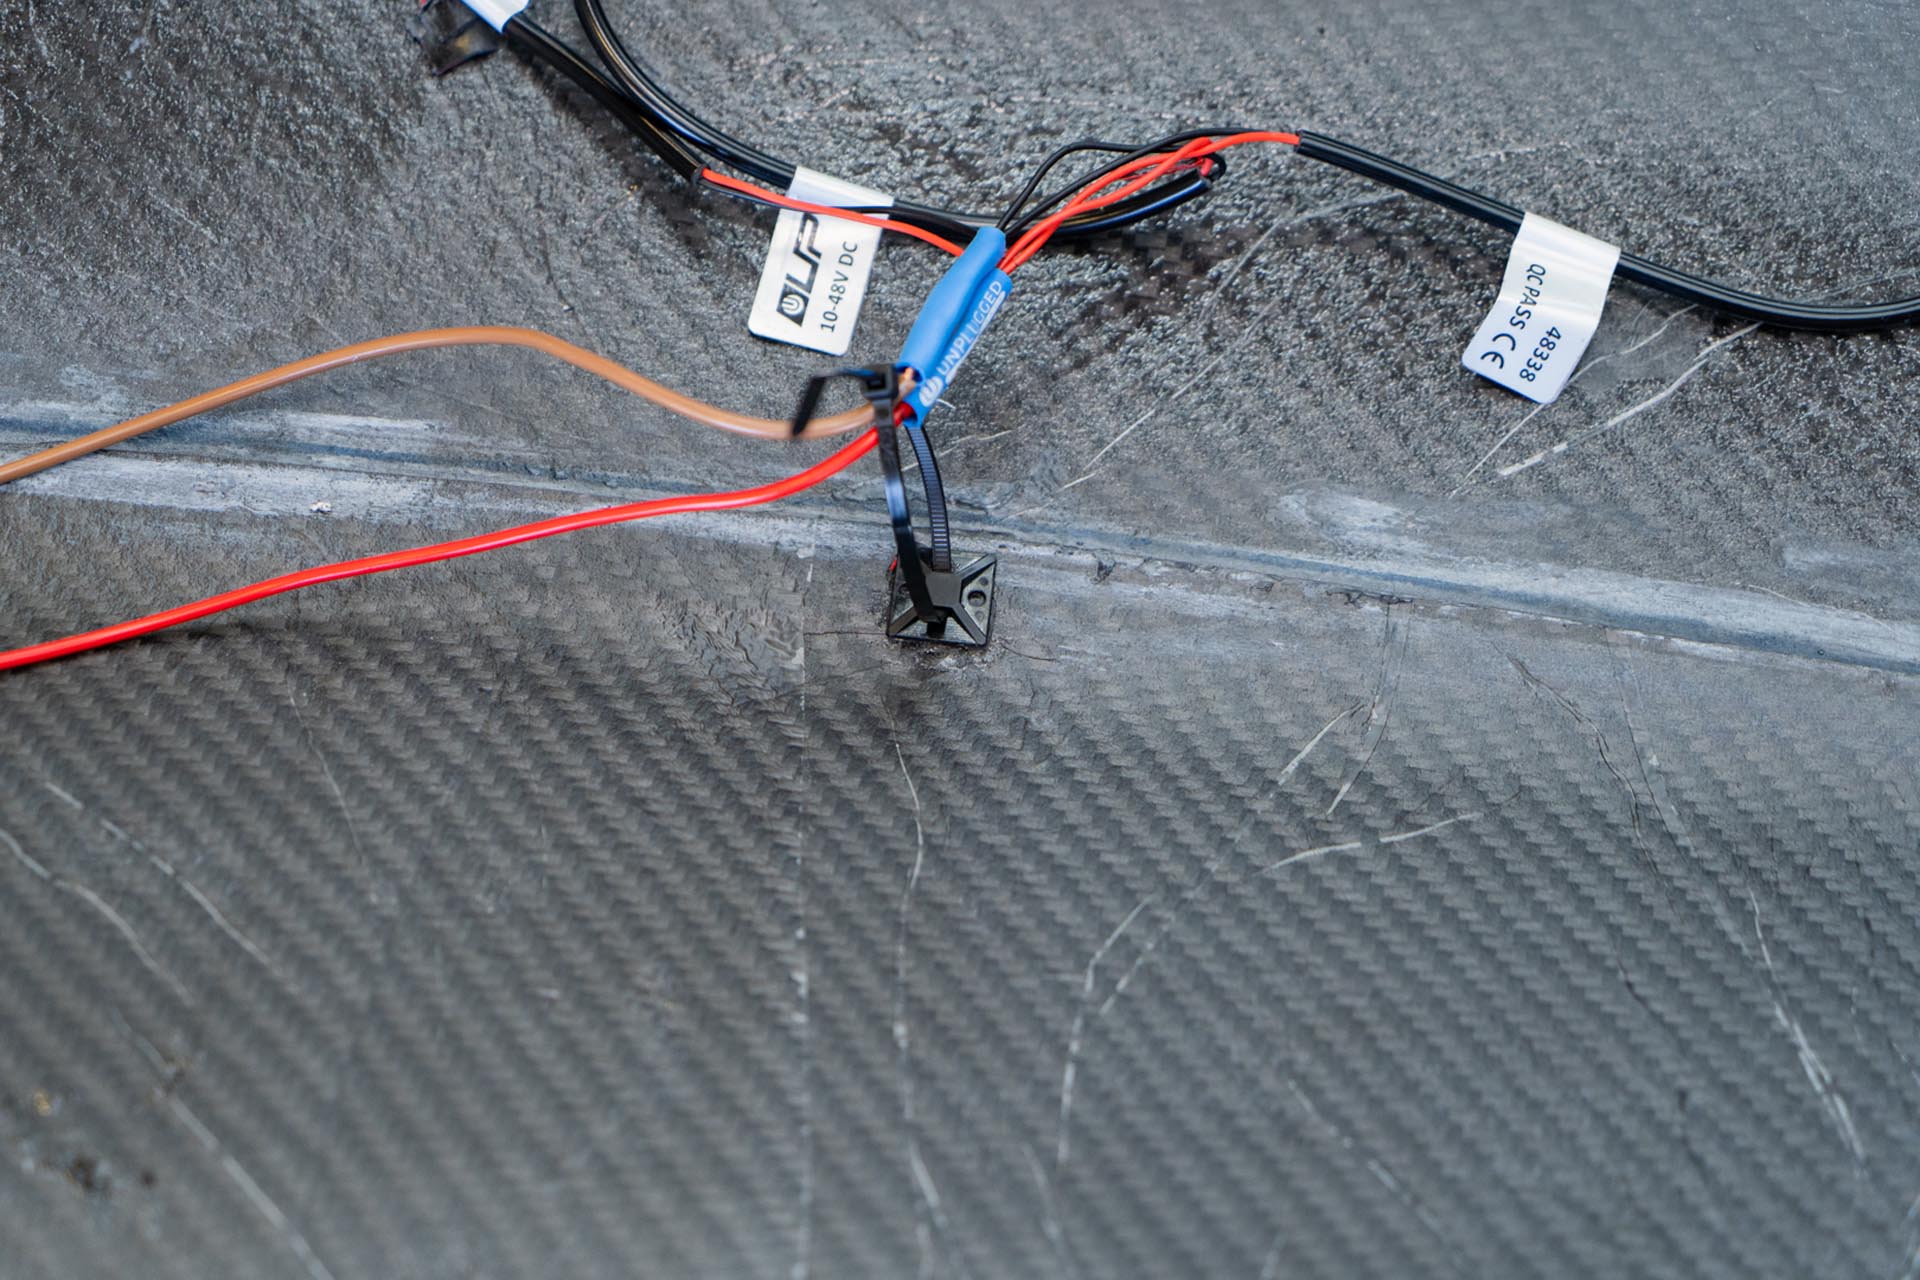
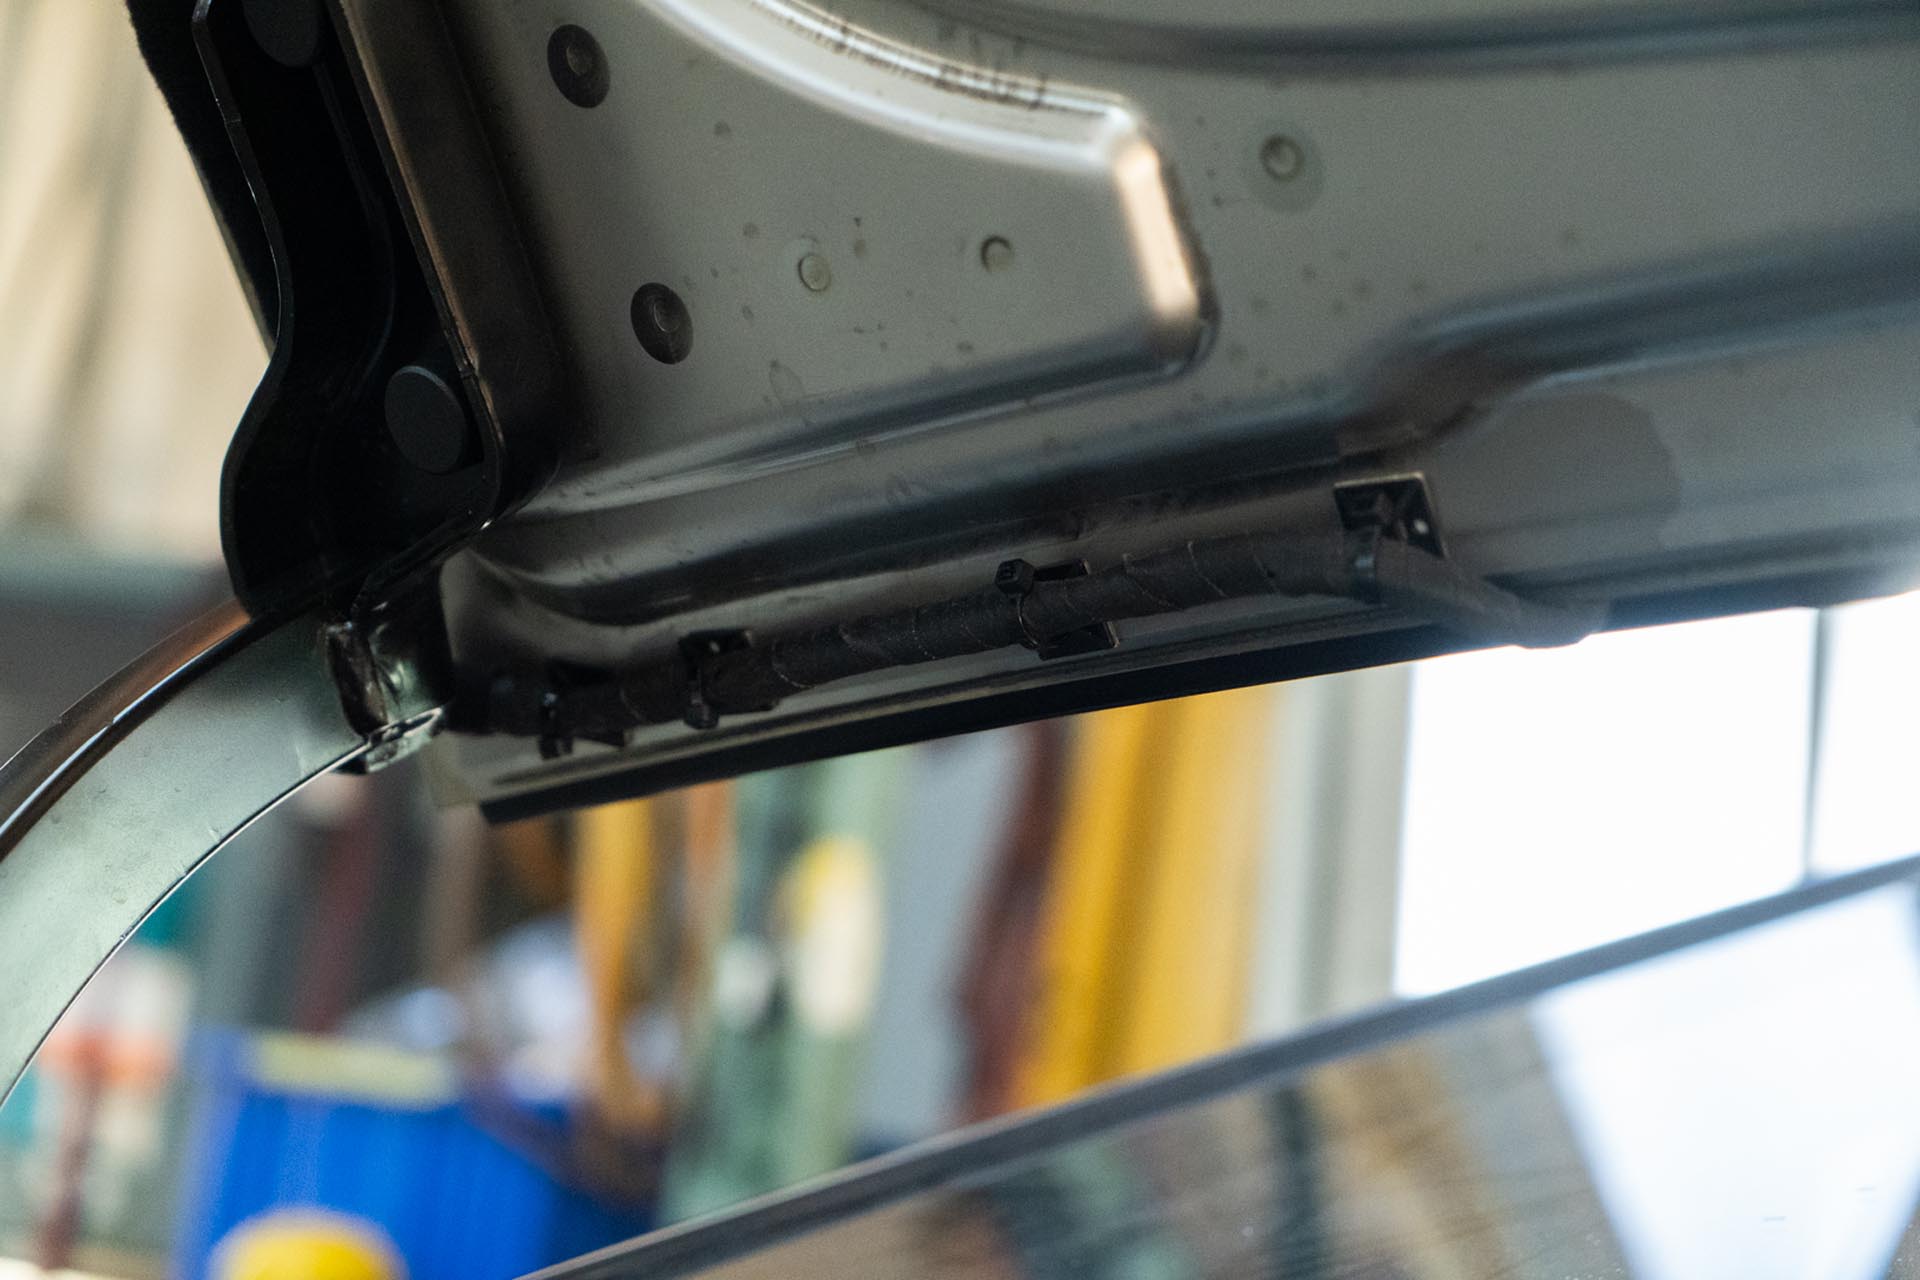
Using a set of wire strippers, expose the lead ends of the amber light power cables.
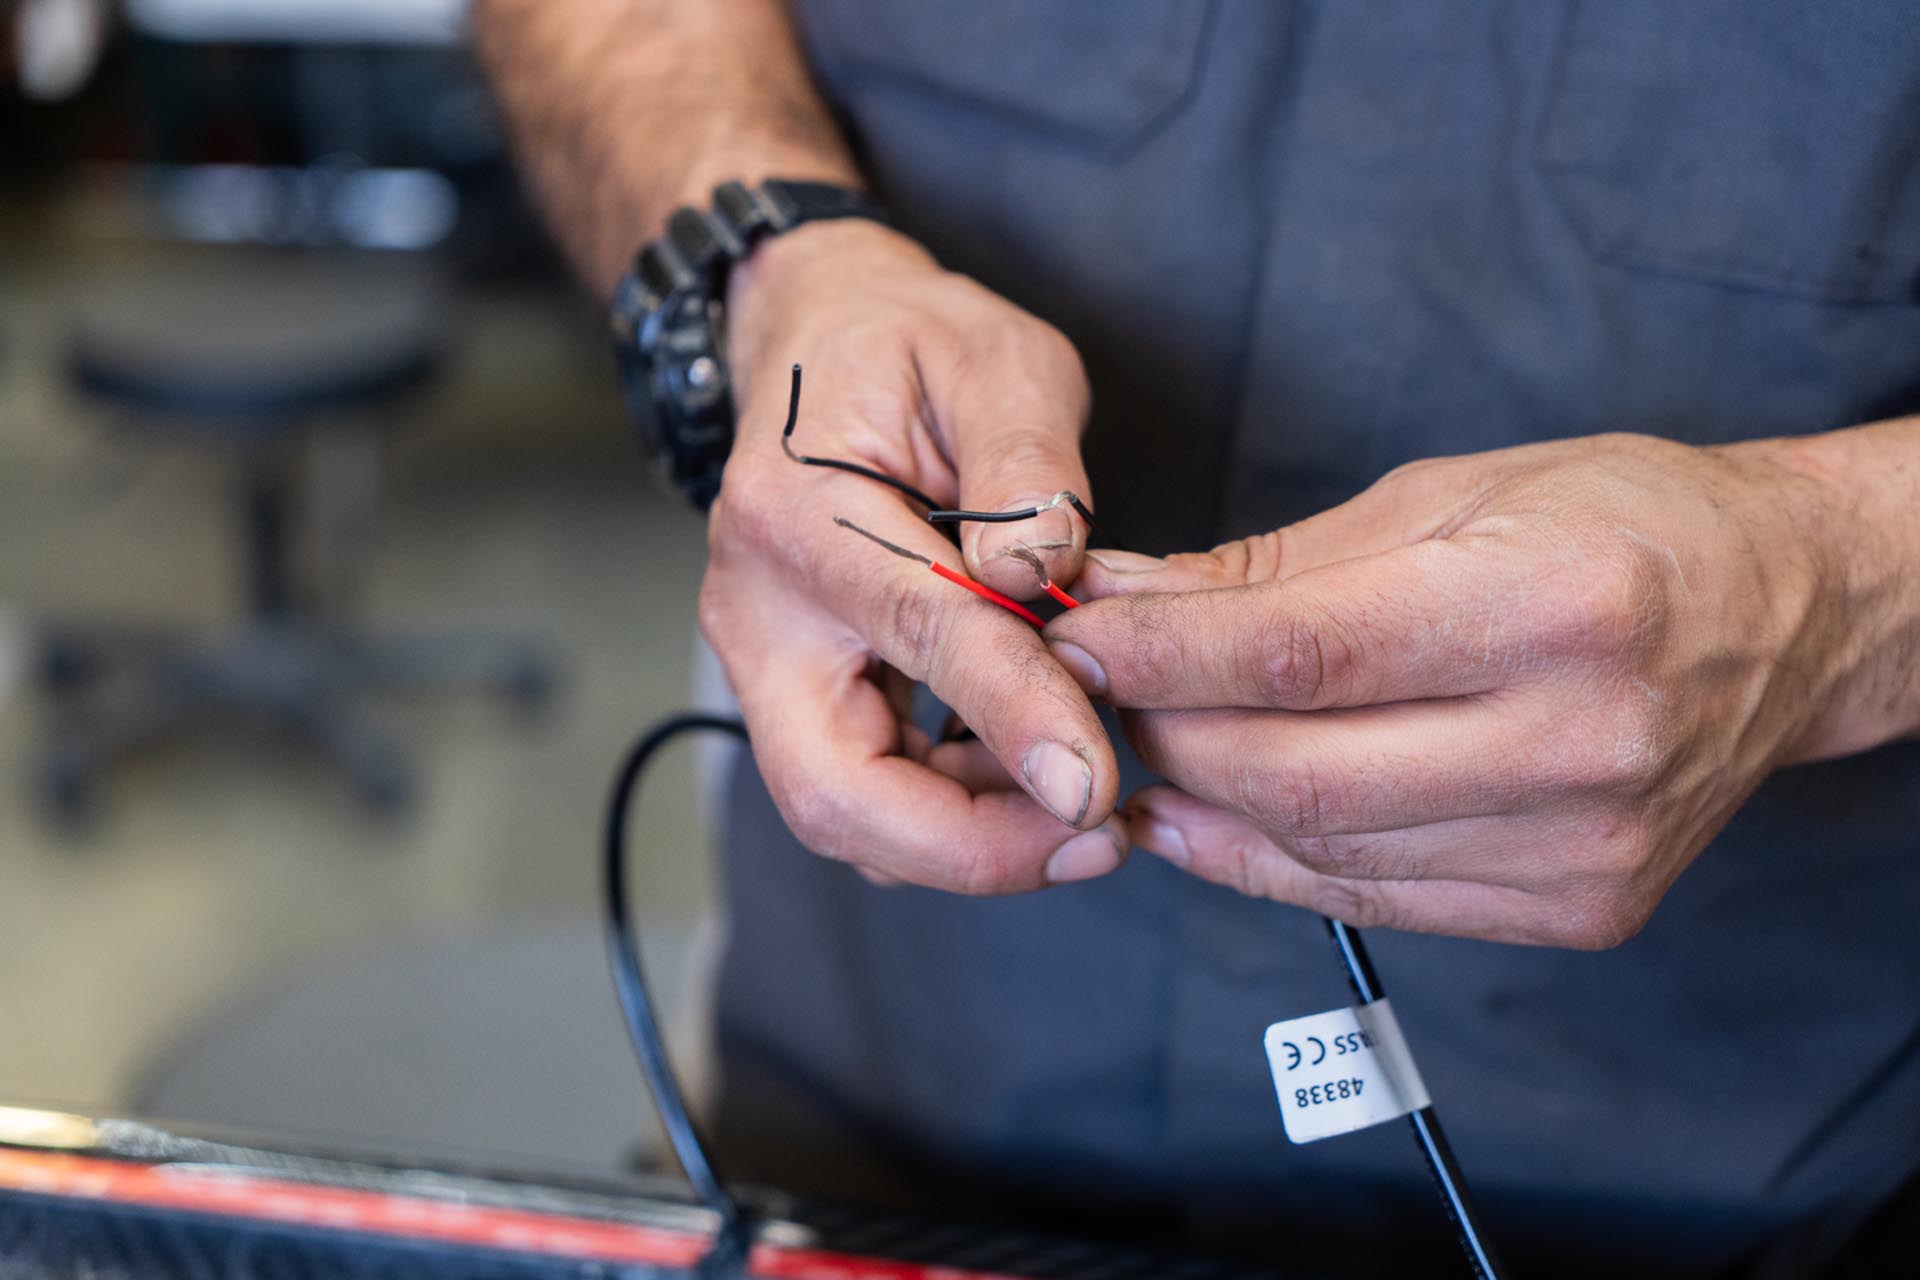
Using a set of wire strippers and a crimp, connect all of the positive lead ends together.

Using a set of wire strippers and a crimp, connect all of the positive lead ends together. You can also soldier the wires instead, however we are using crimps for general serviceability. (crimps not included).
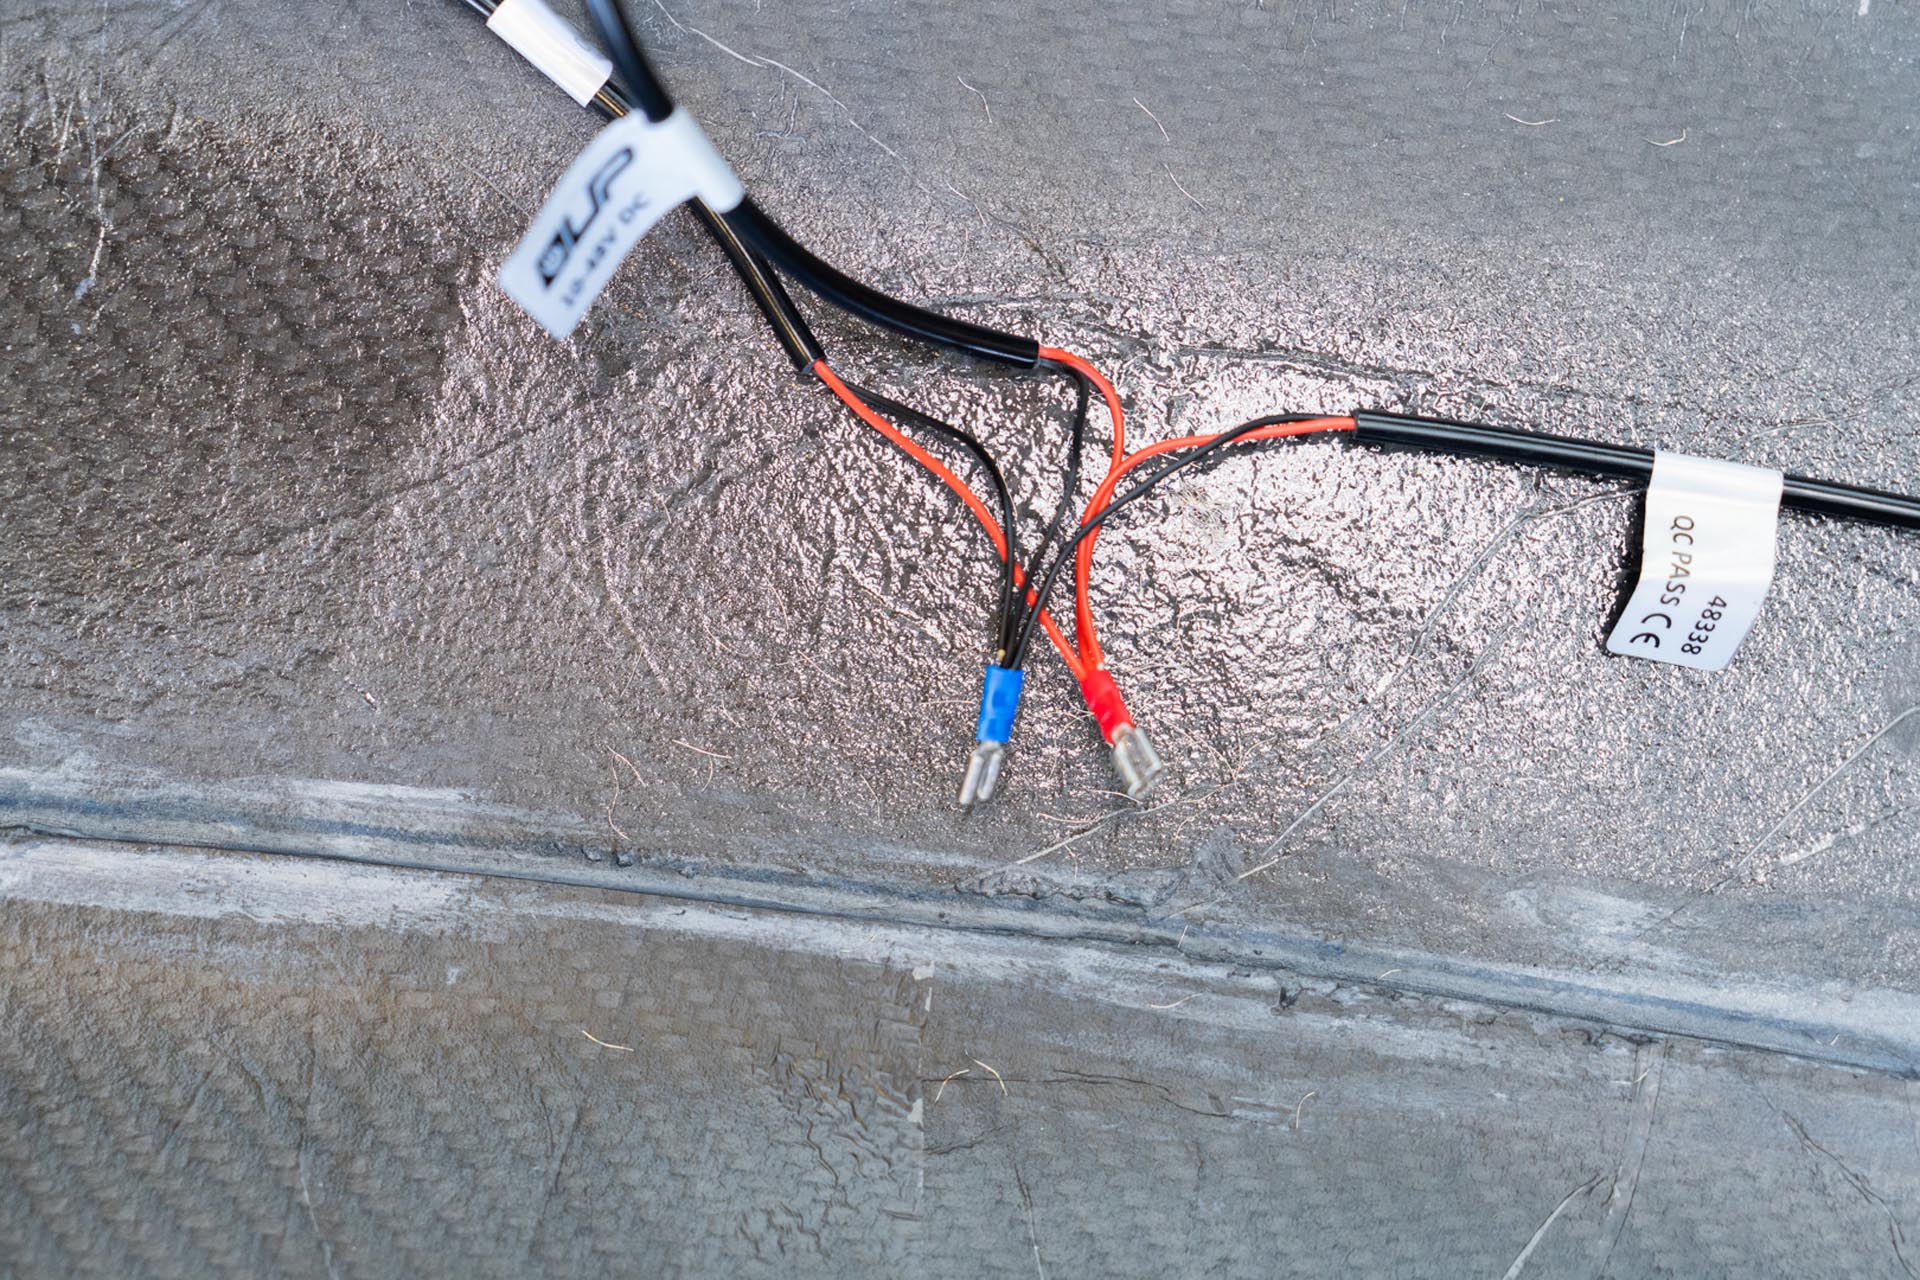
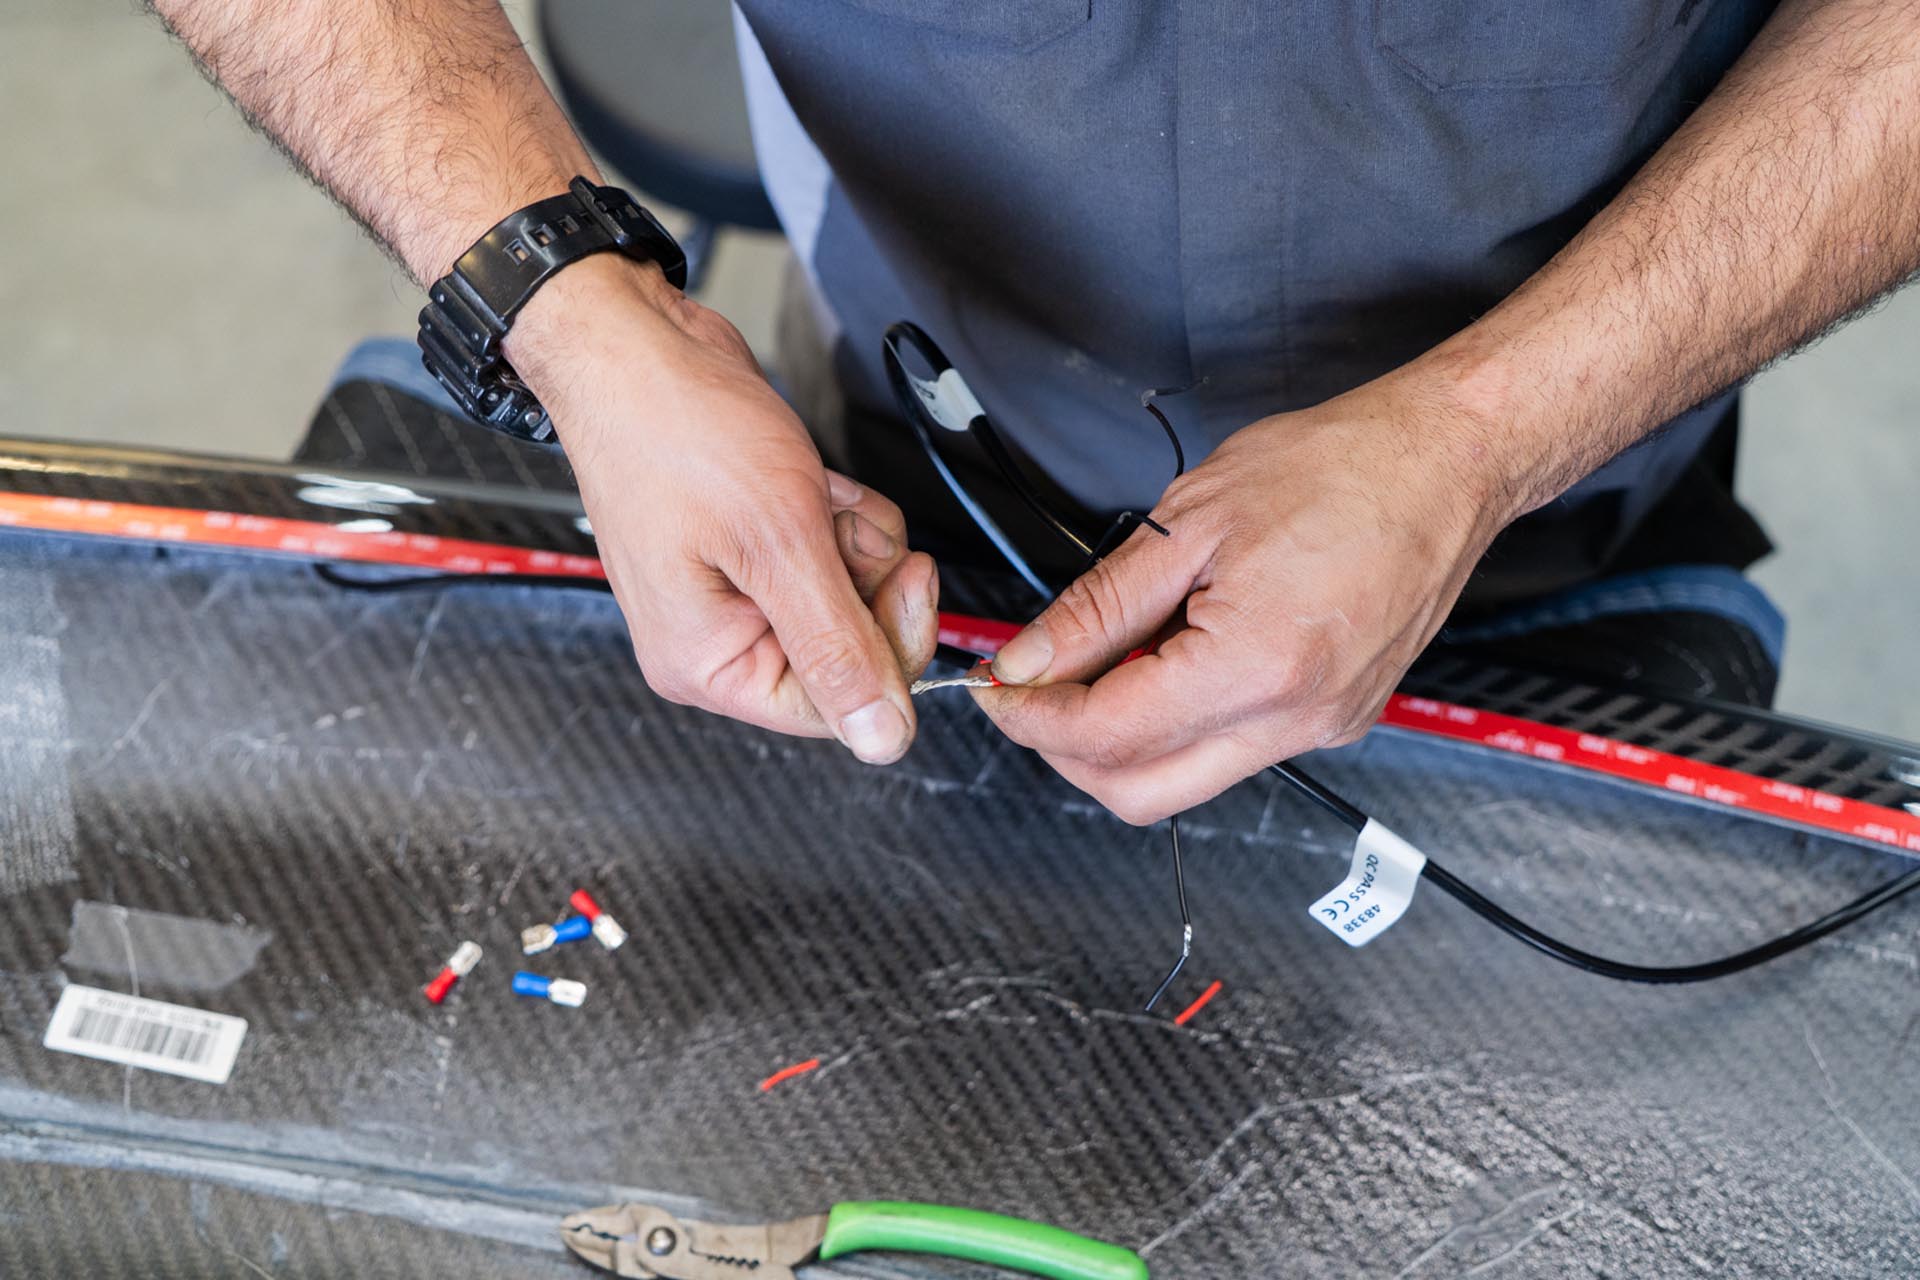
Next, cut a 3-4 foot section of positive excess wire lead, and add a wire crimp to one end, and secure it to the positive bus connection for the amber lights. (excess wire lead not included).
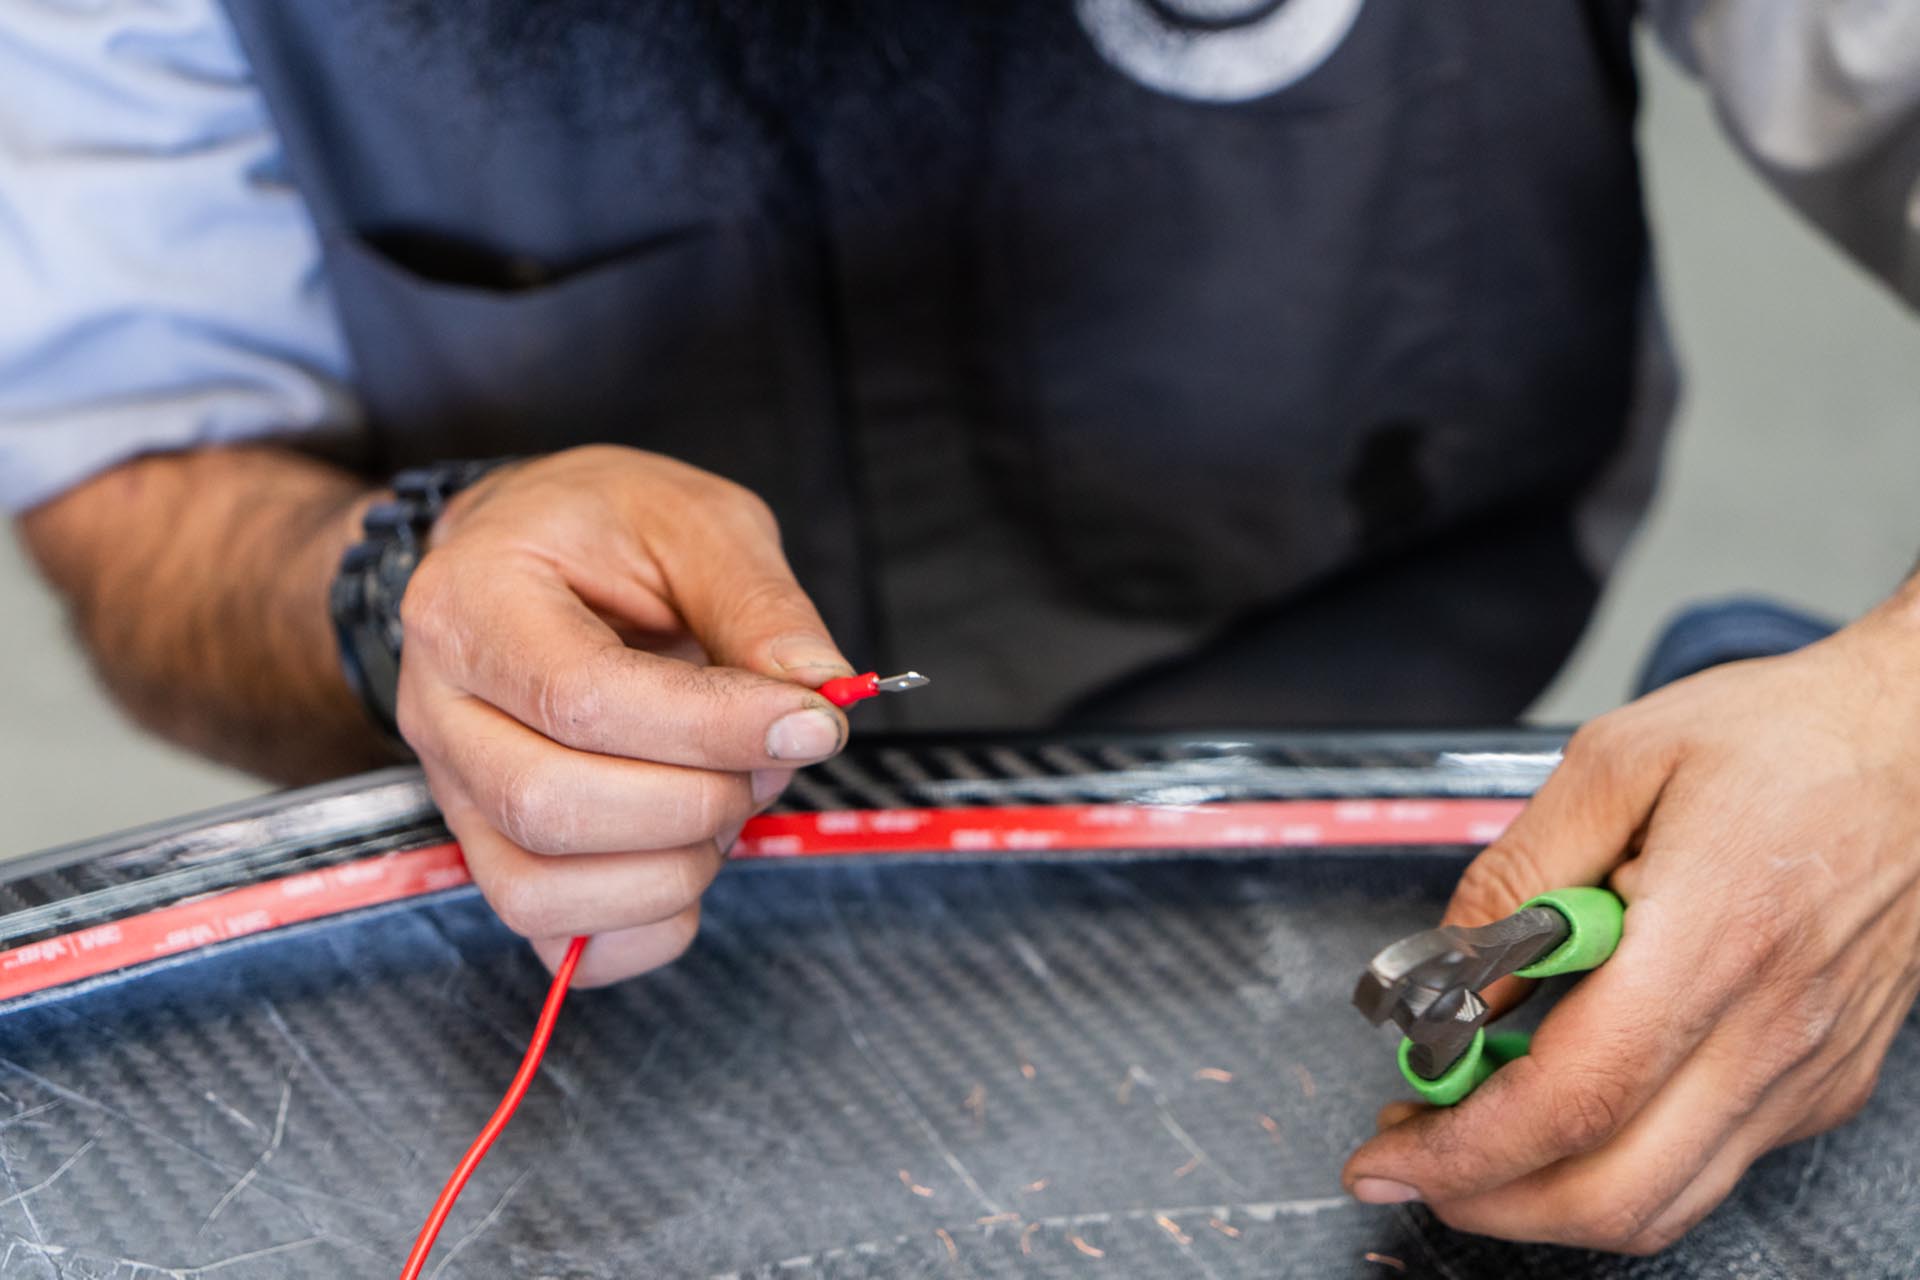
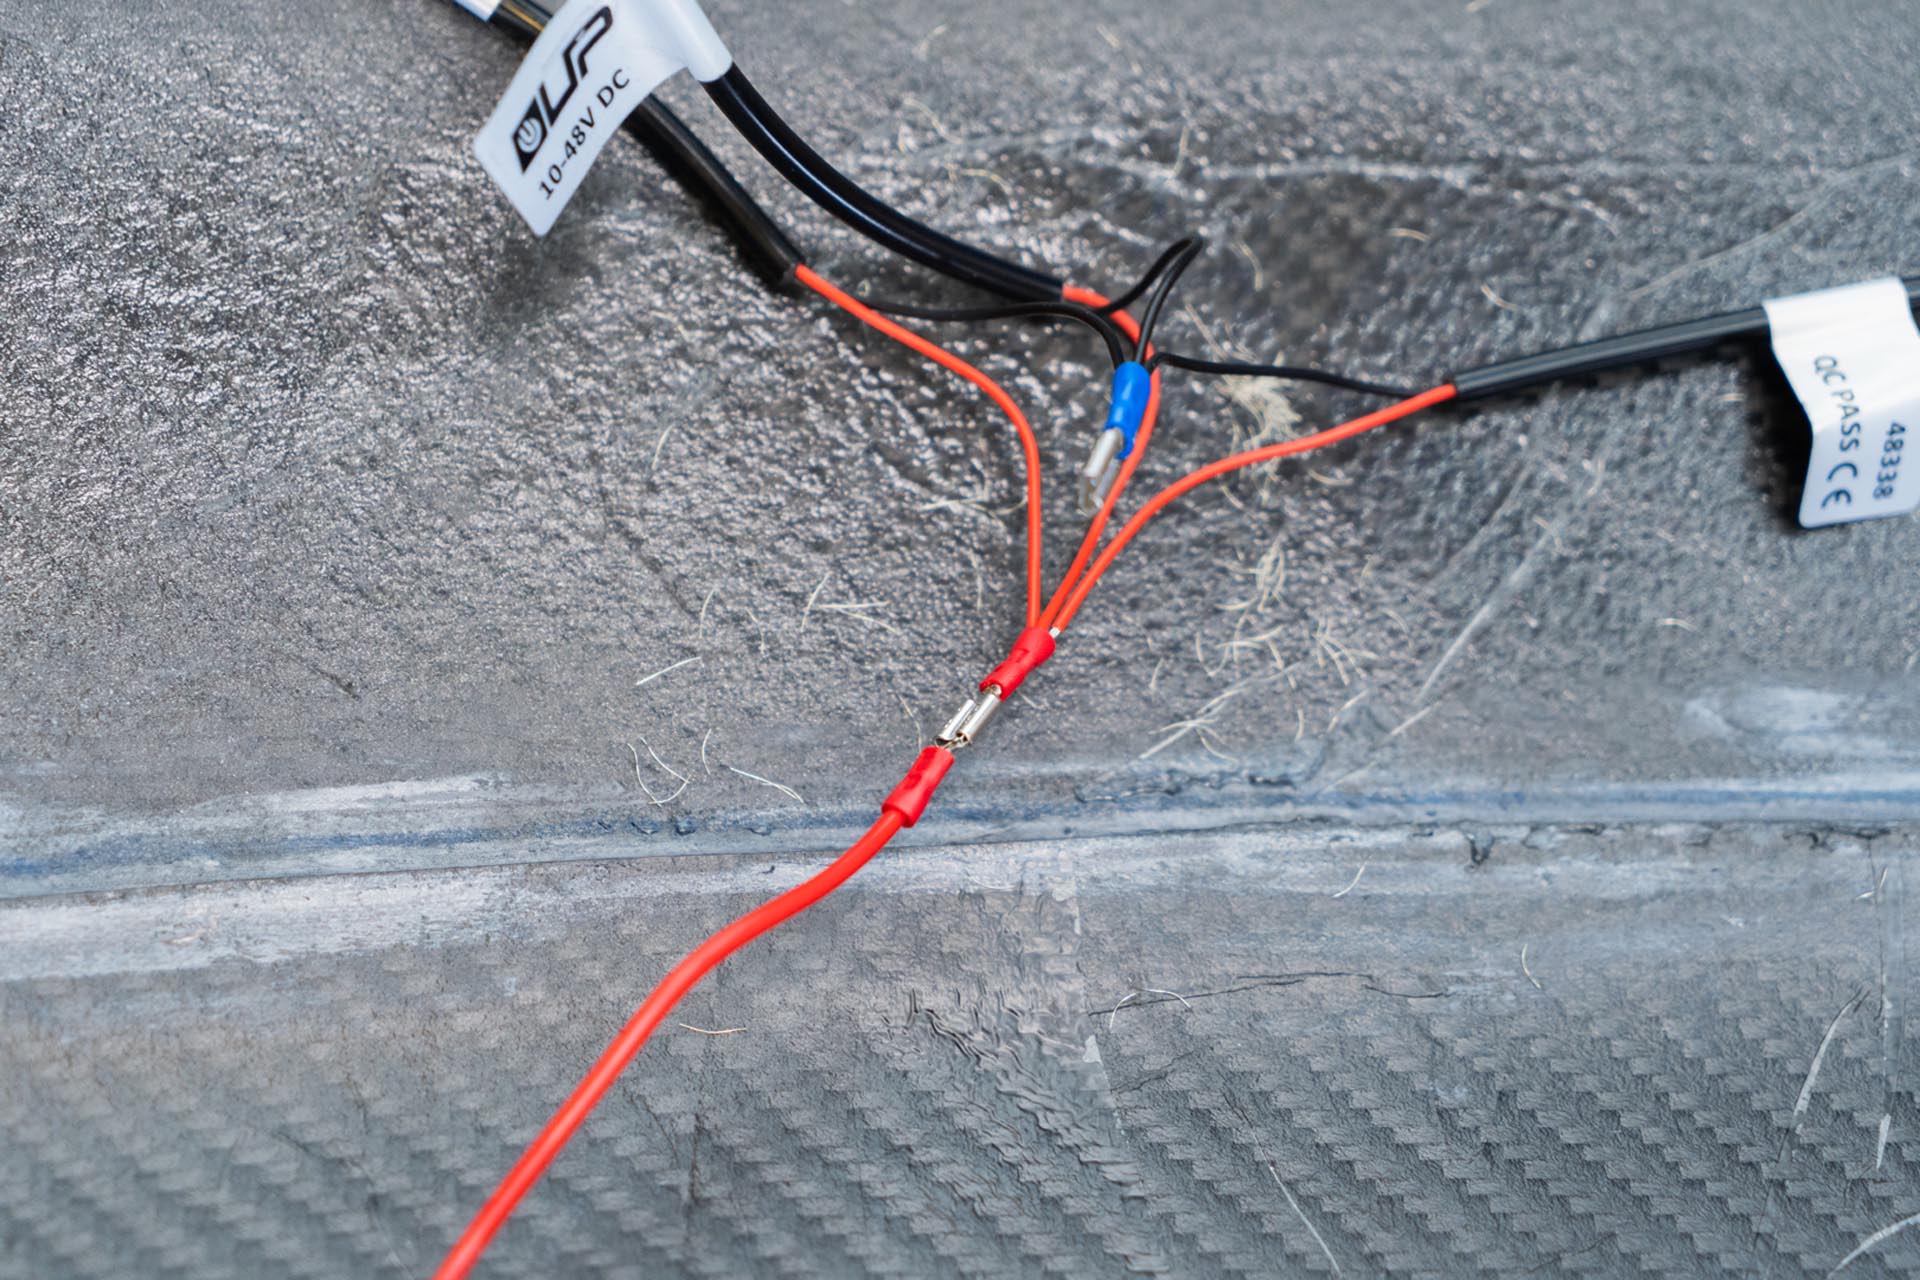
Proceed to cut a 3-4 foot section of negative excess wire lead, and add a wire crimp to one end, and secure it to the negative bus connection for the amber lights. (excess wire lead not included).
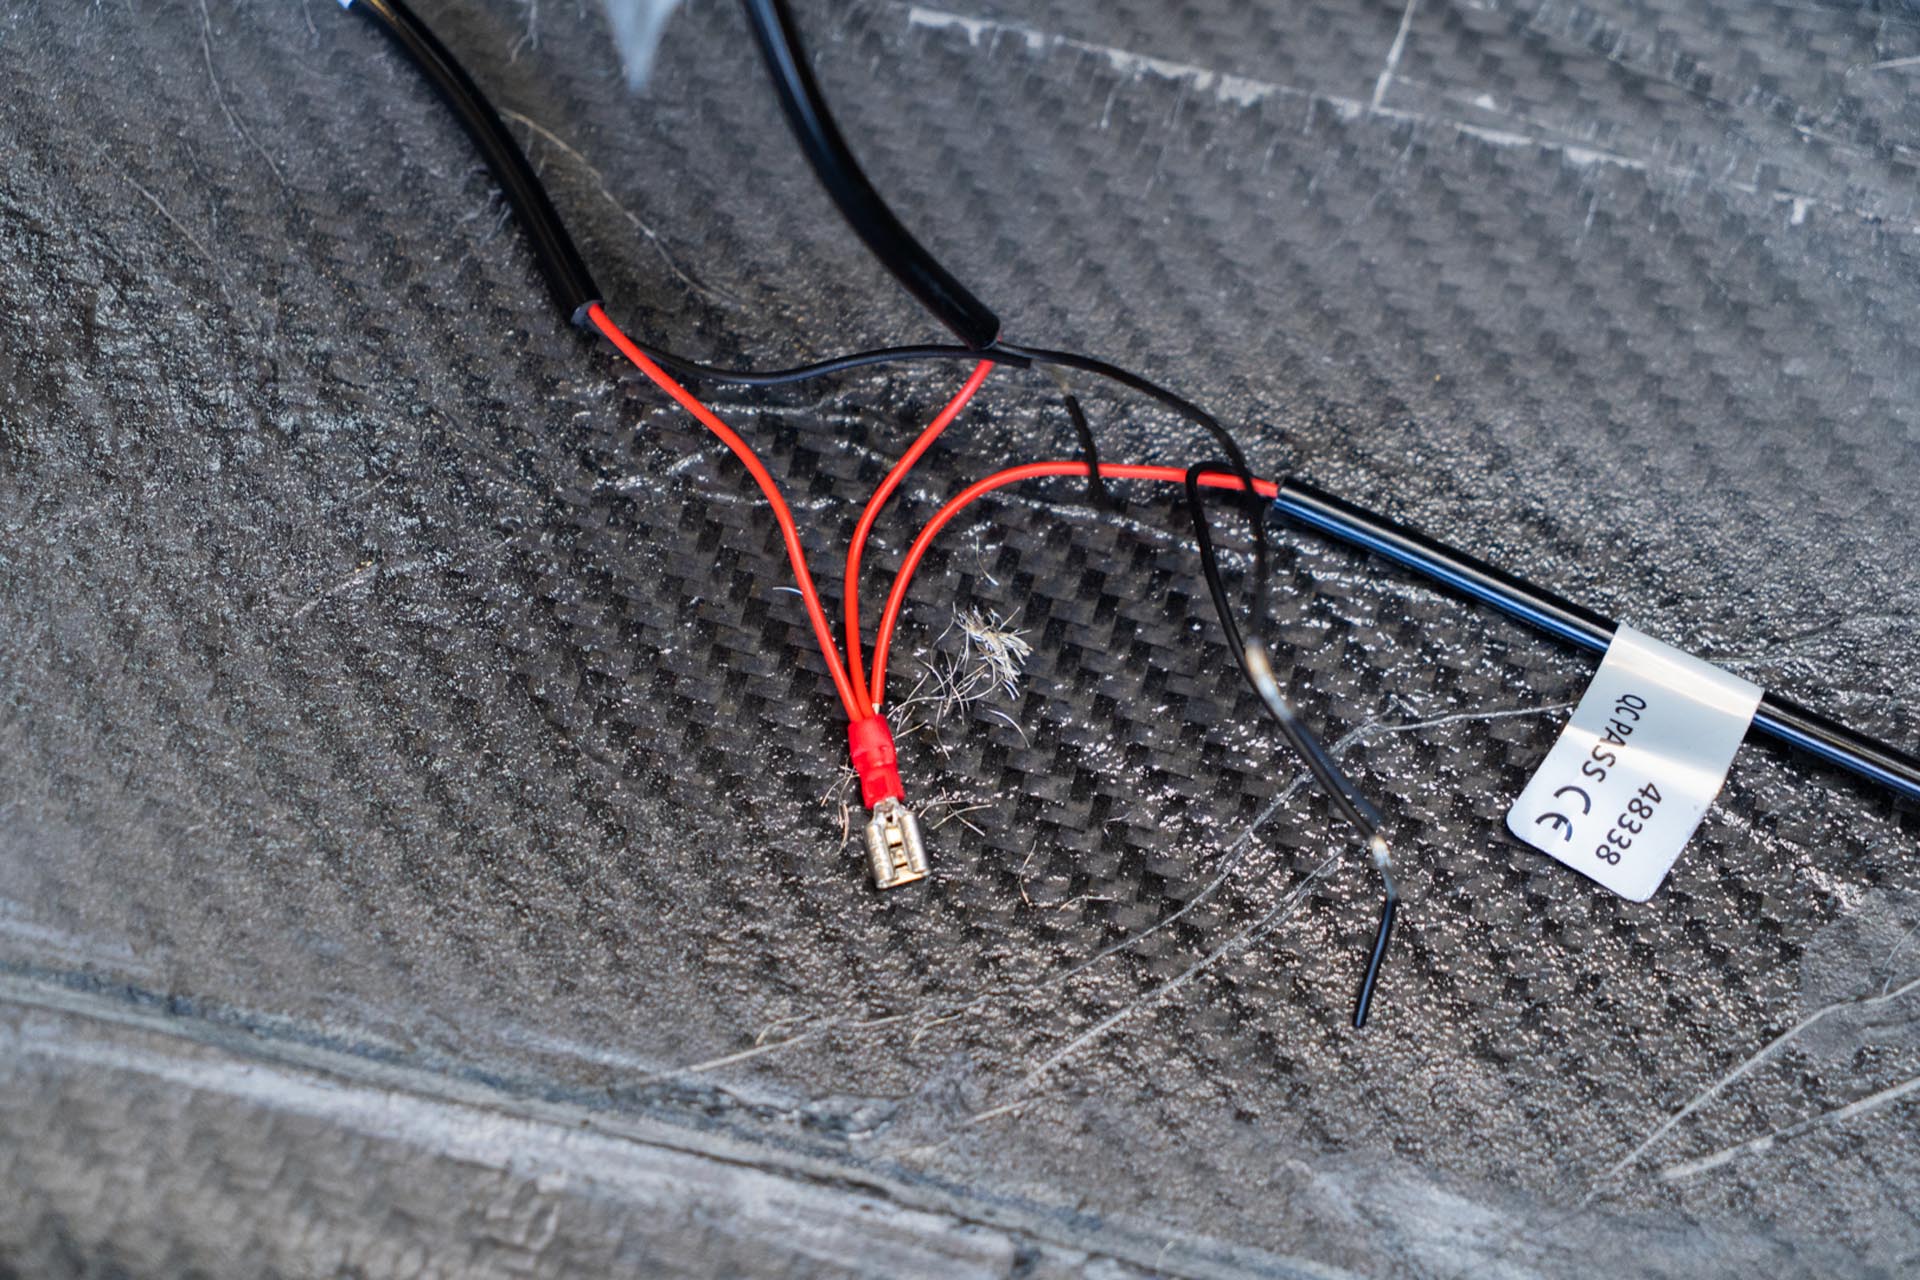
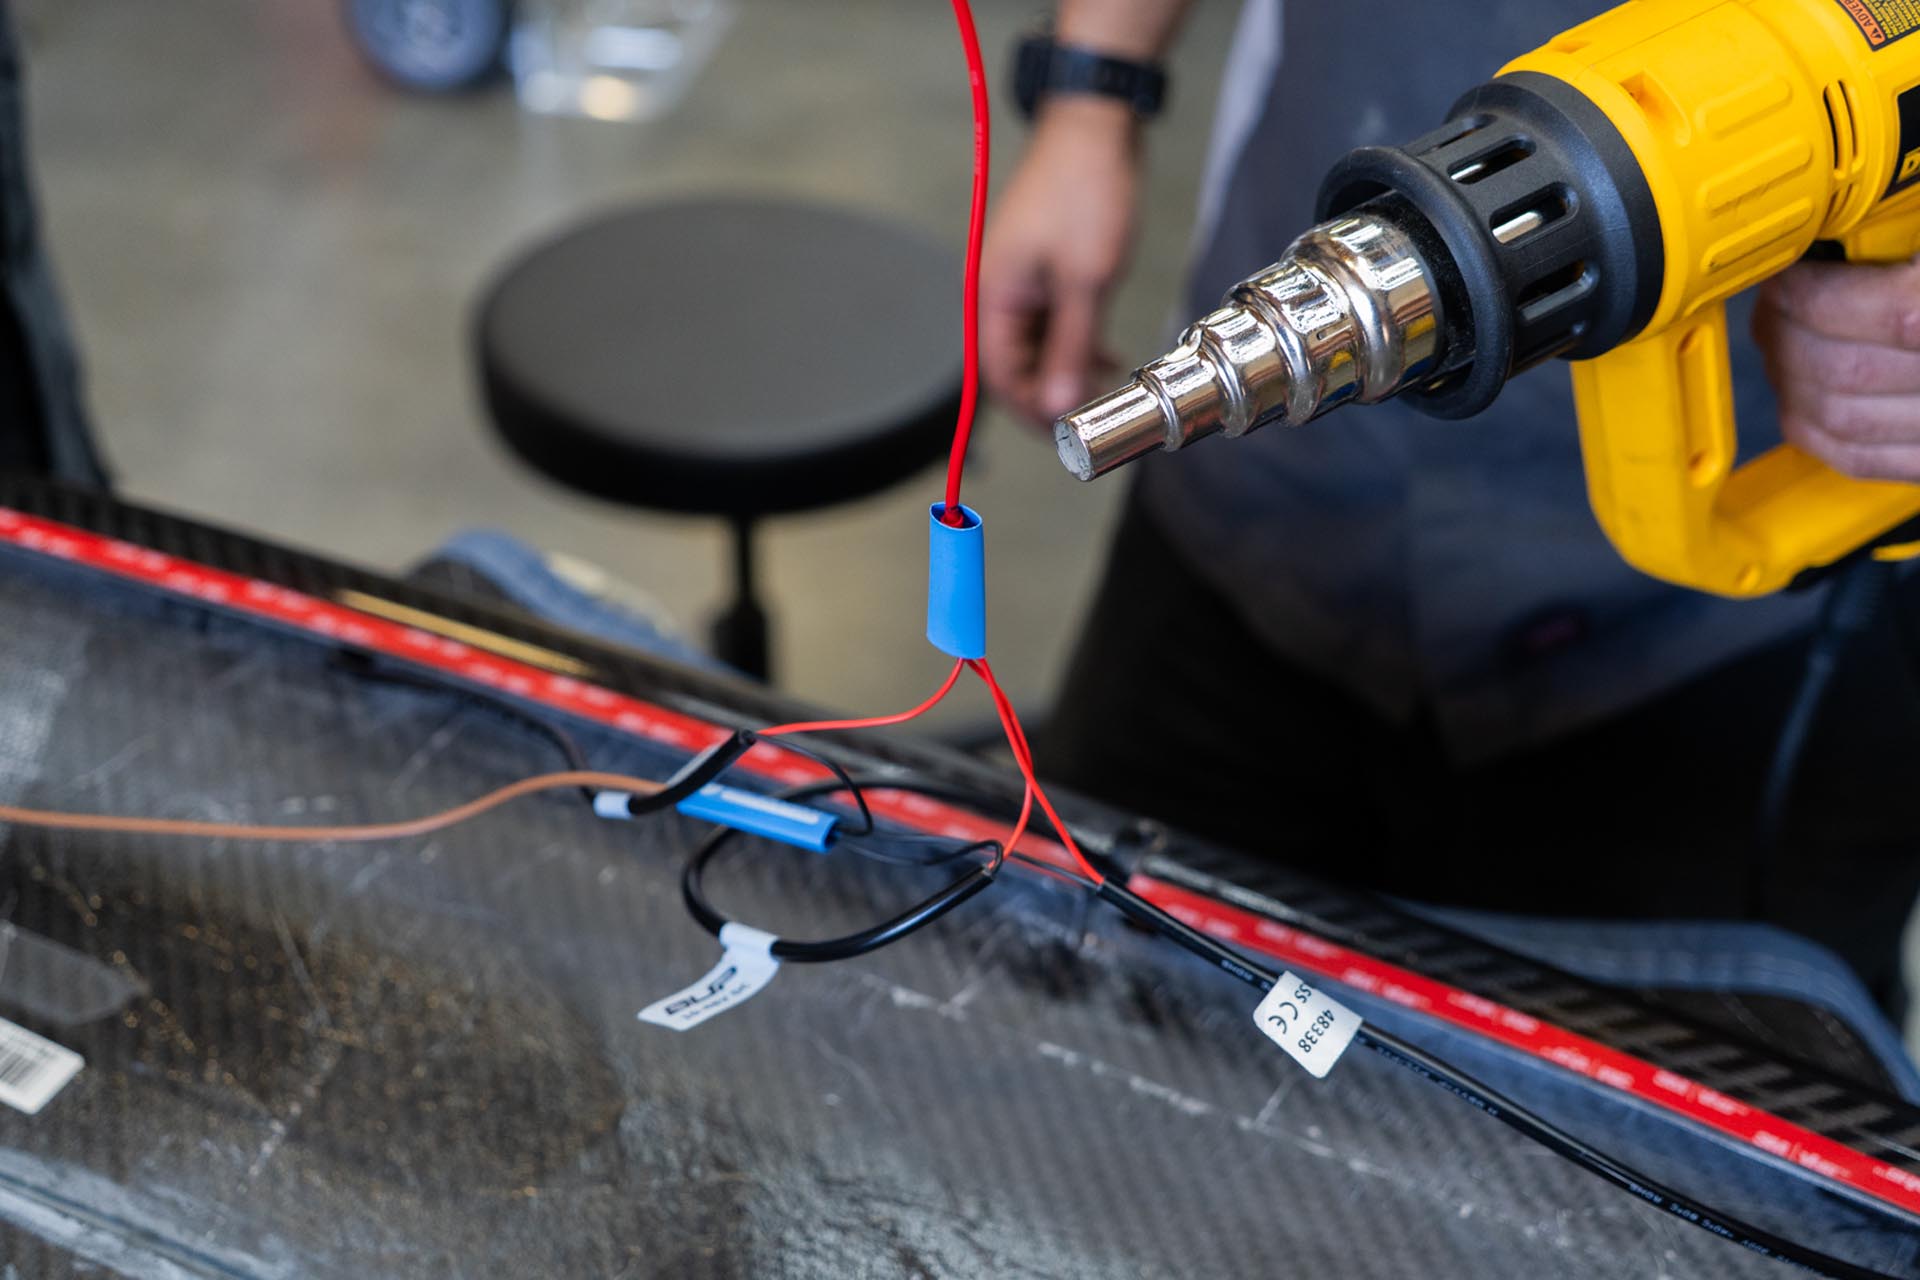
Next, apply electrical tape, or heat shrink tube to protect the power connection points.
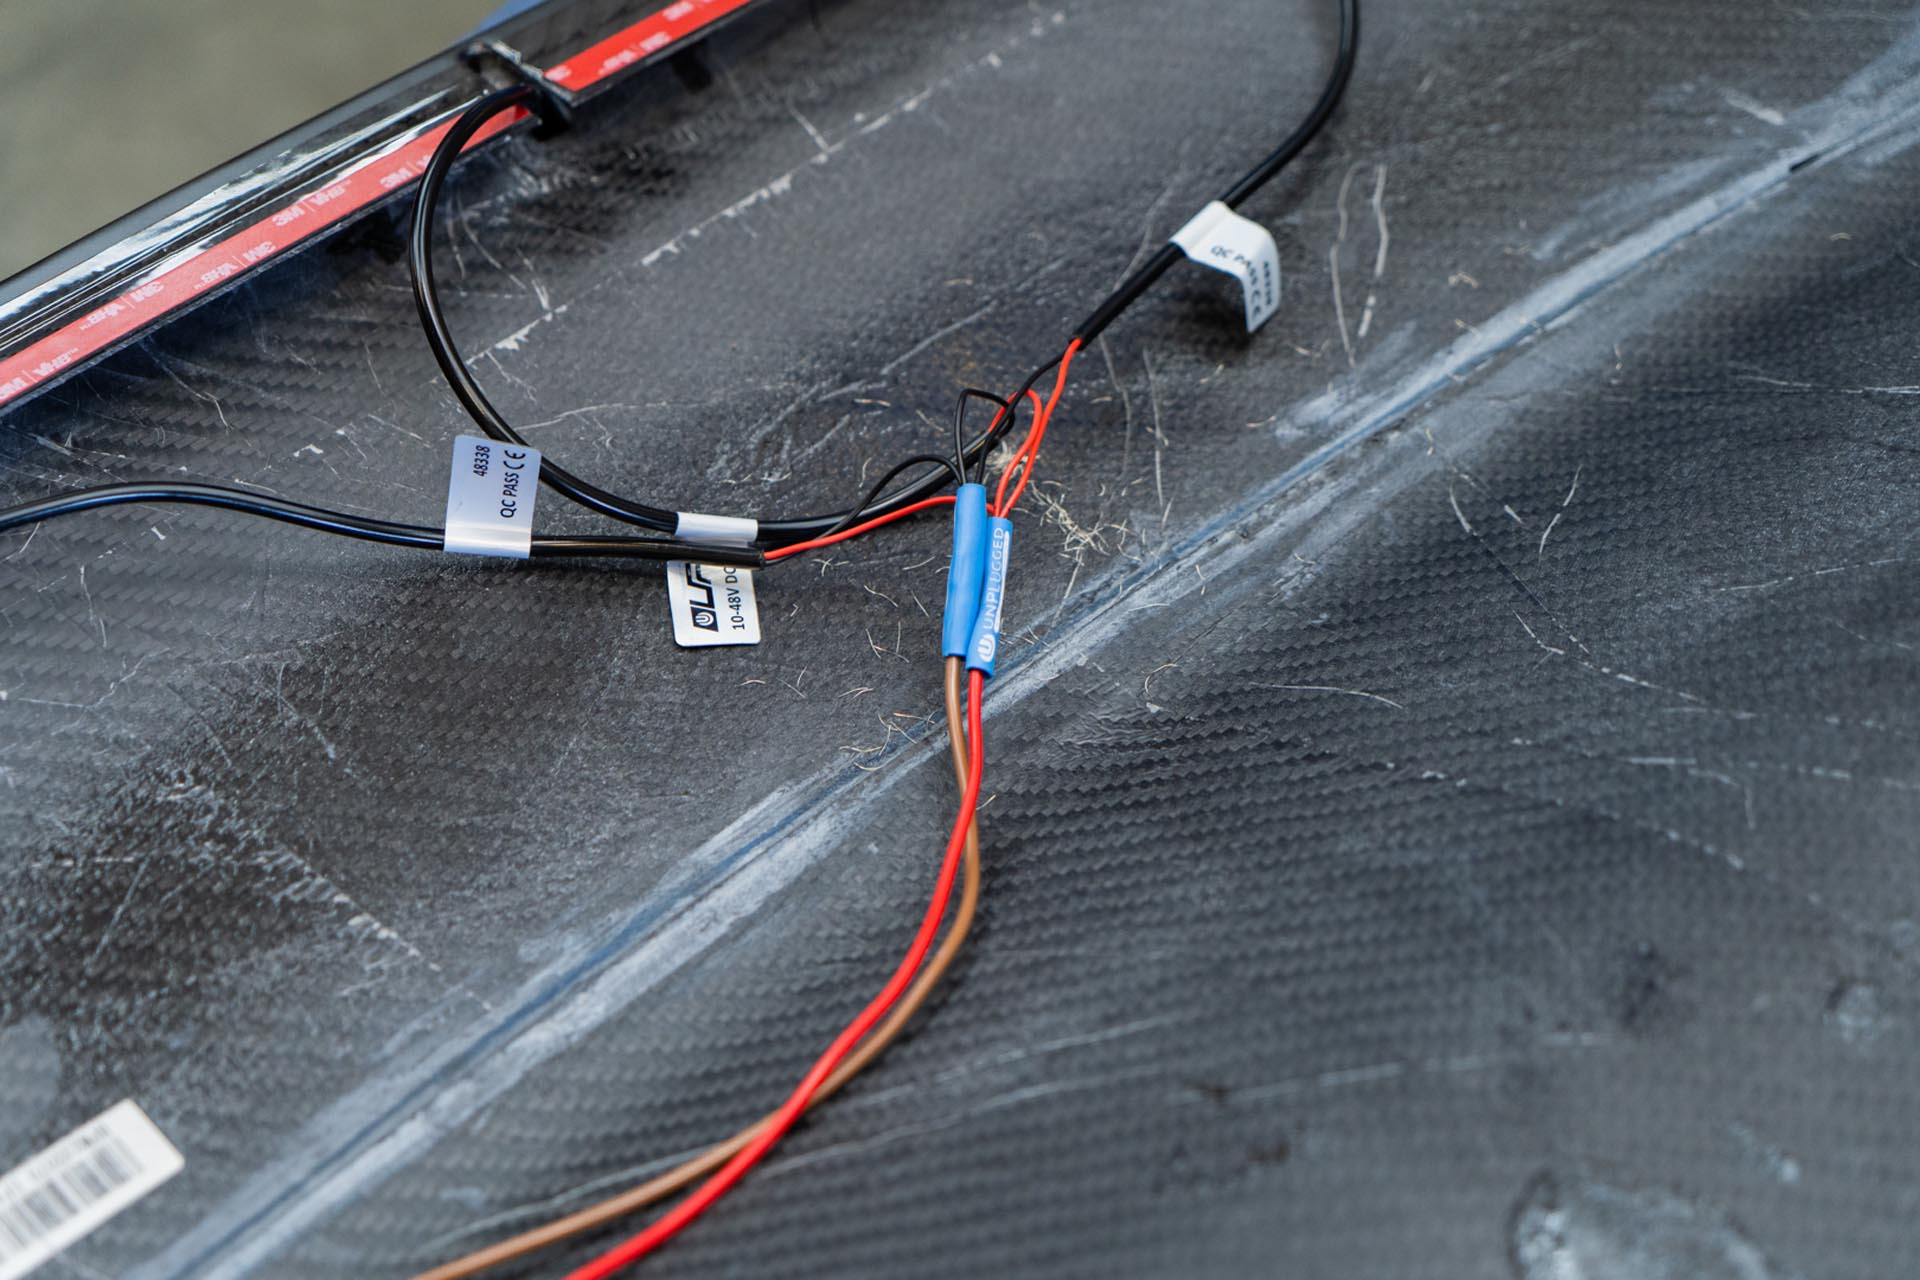
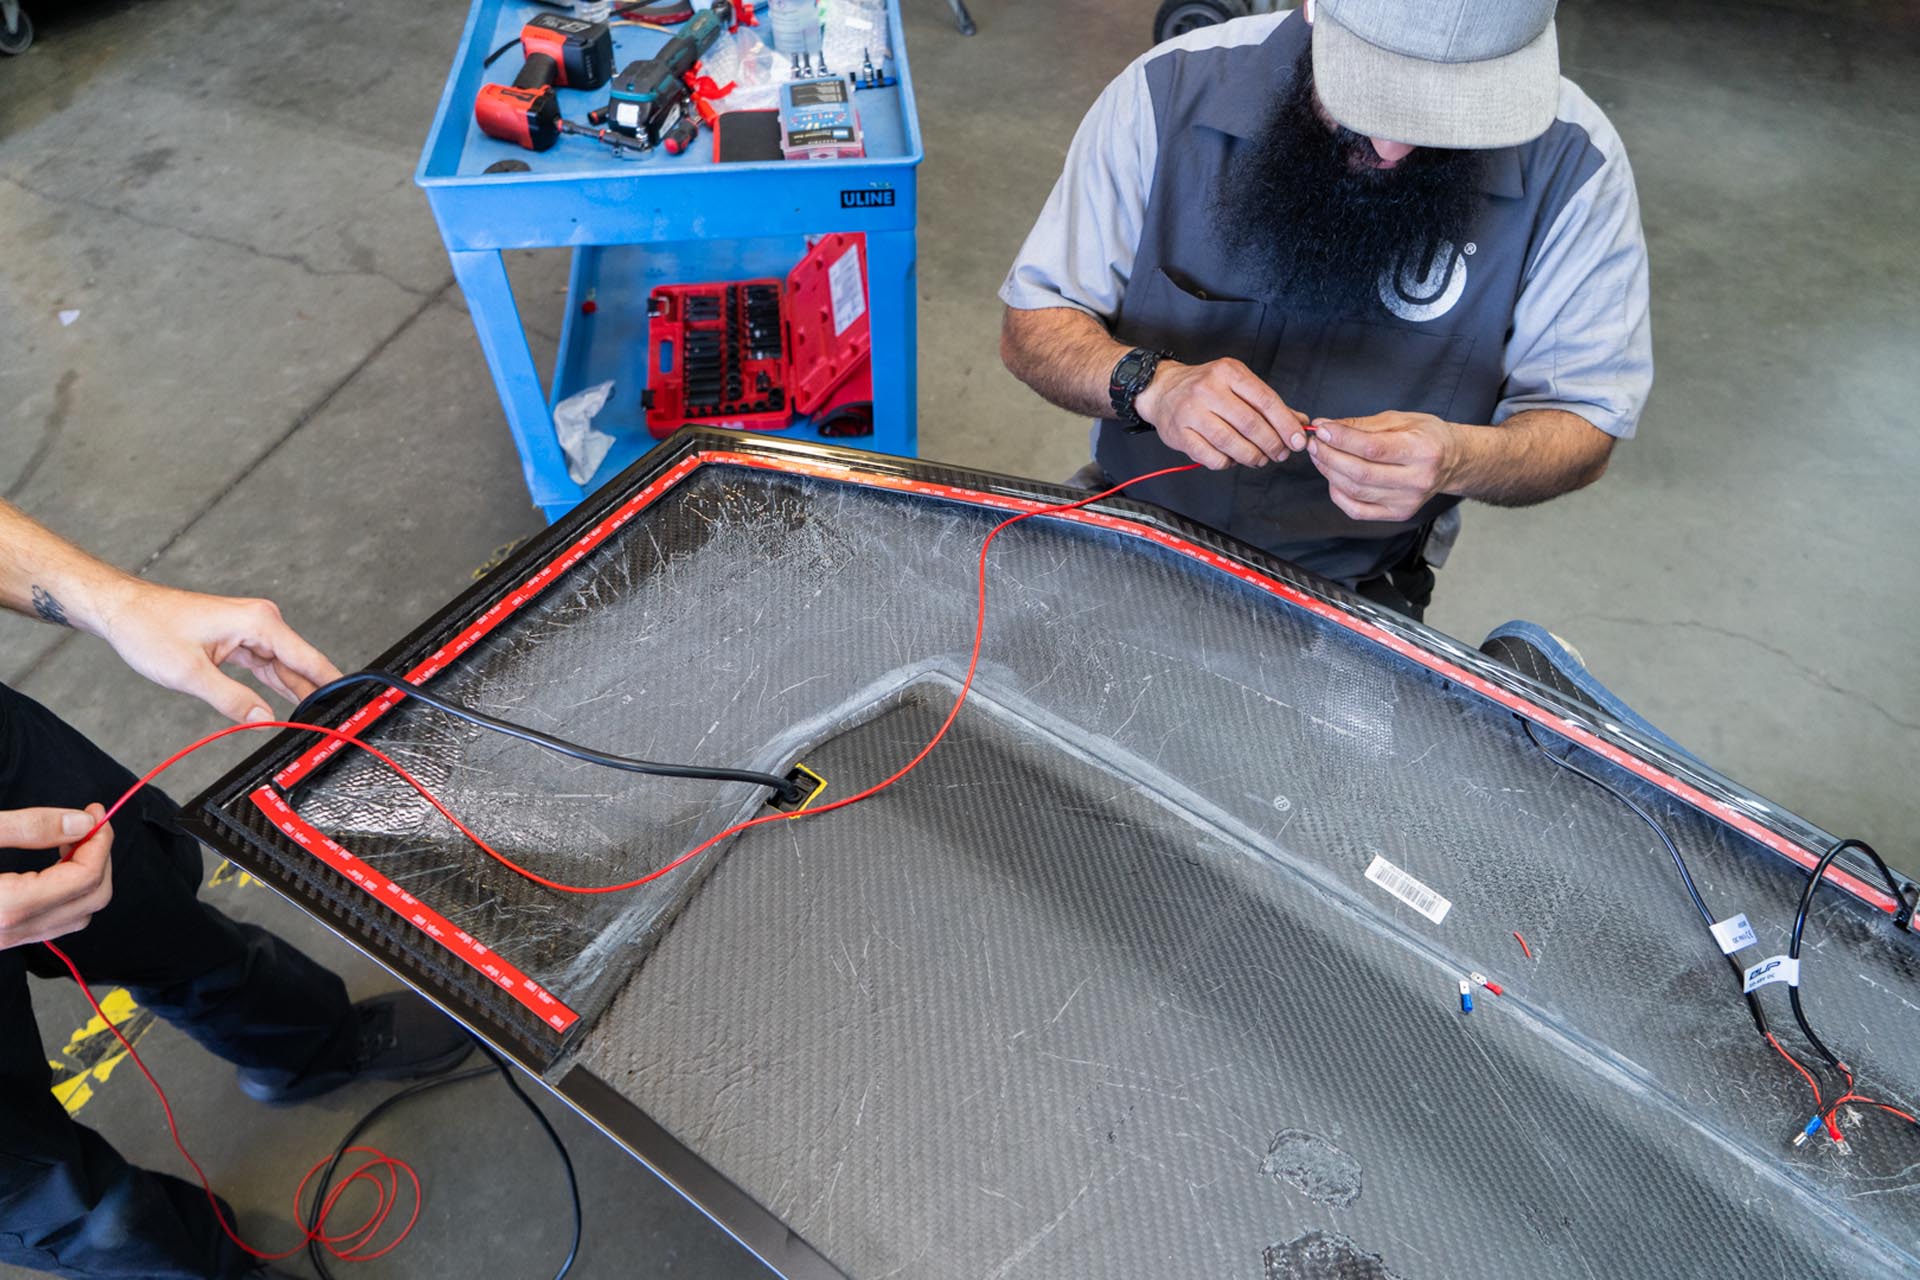
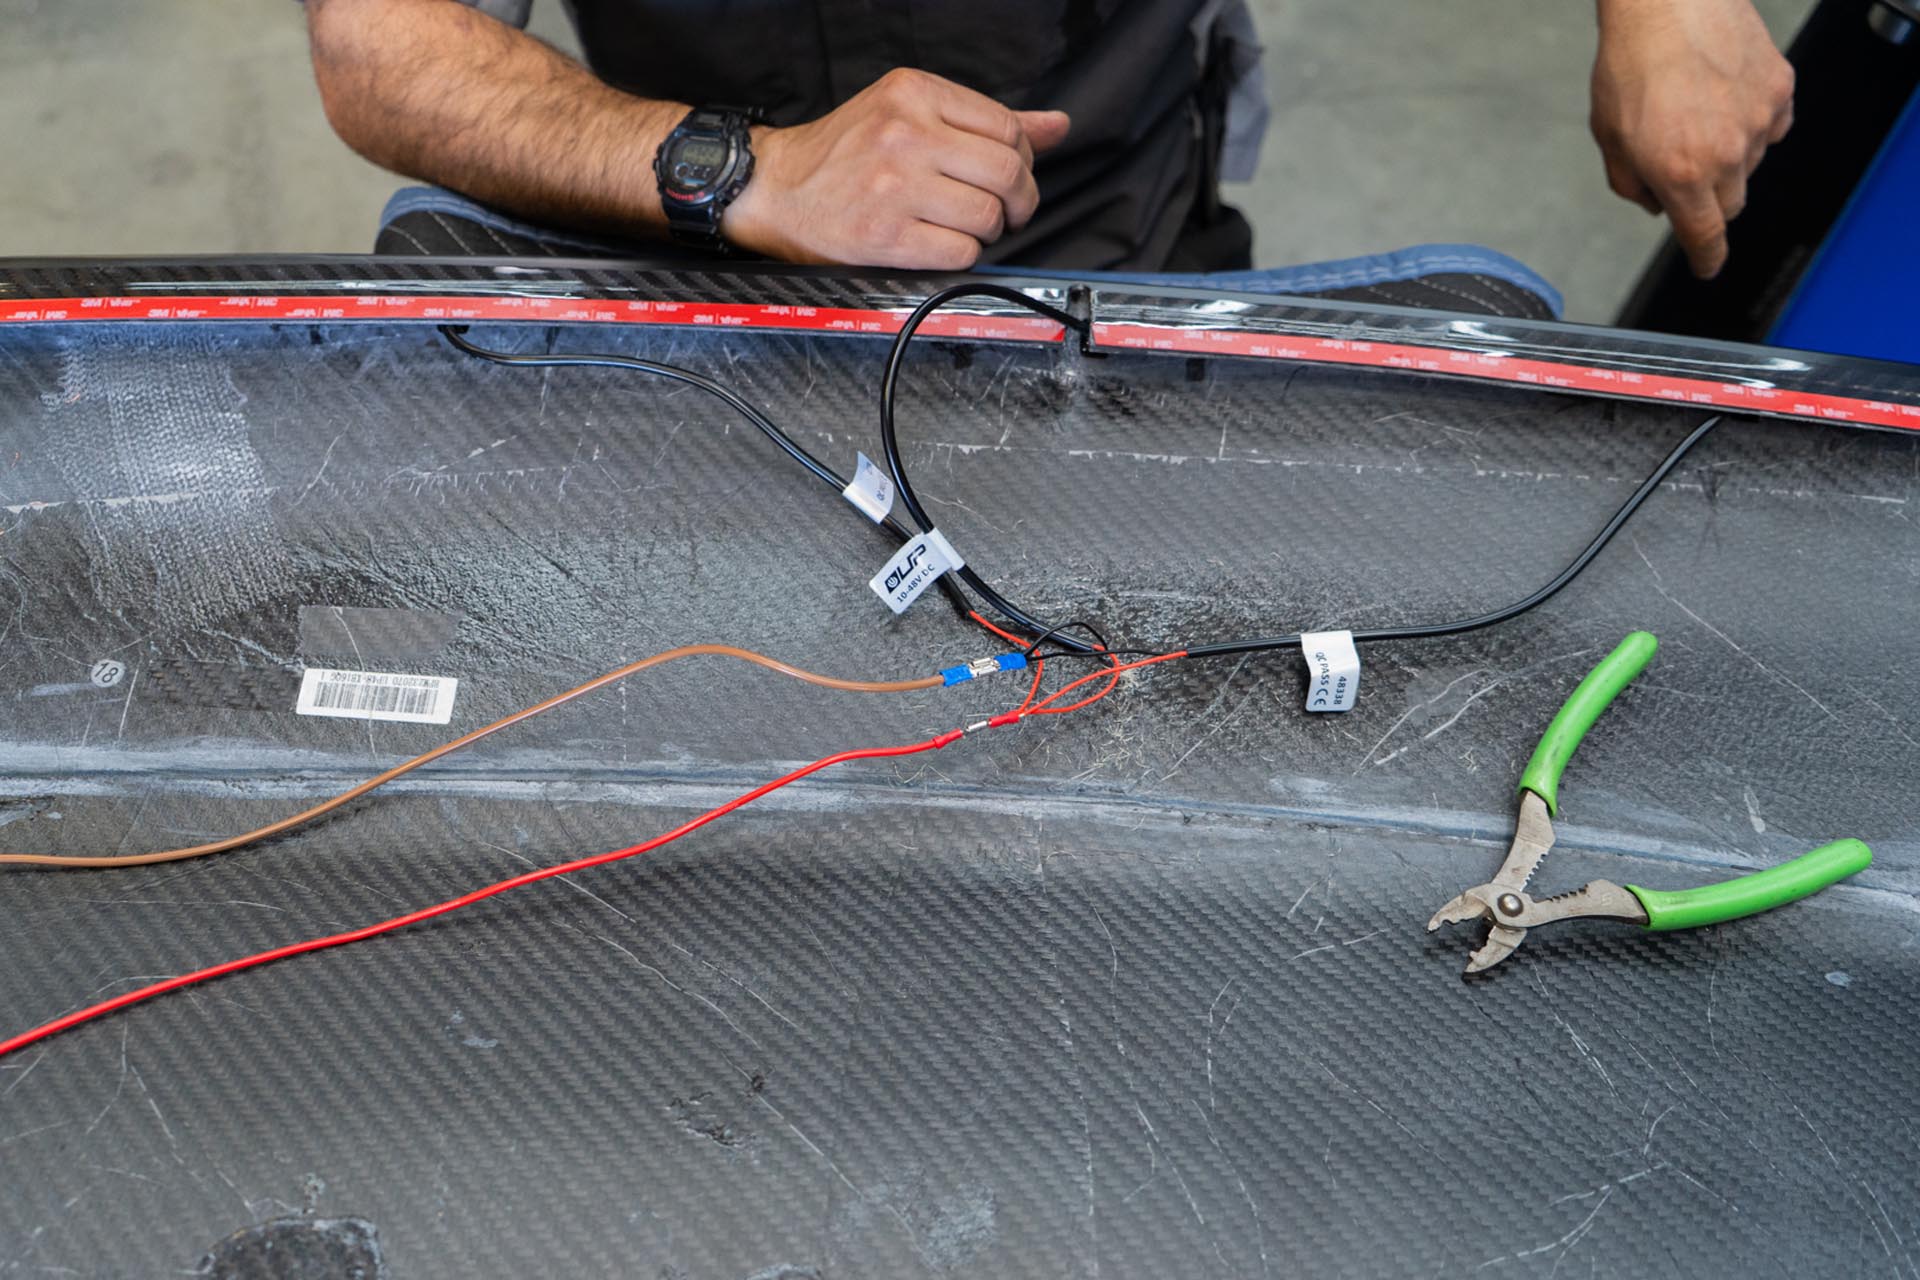
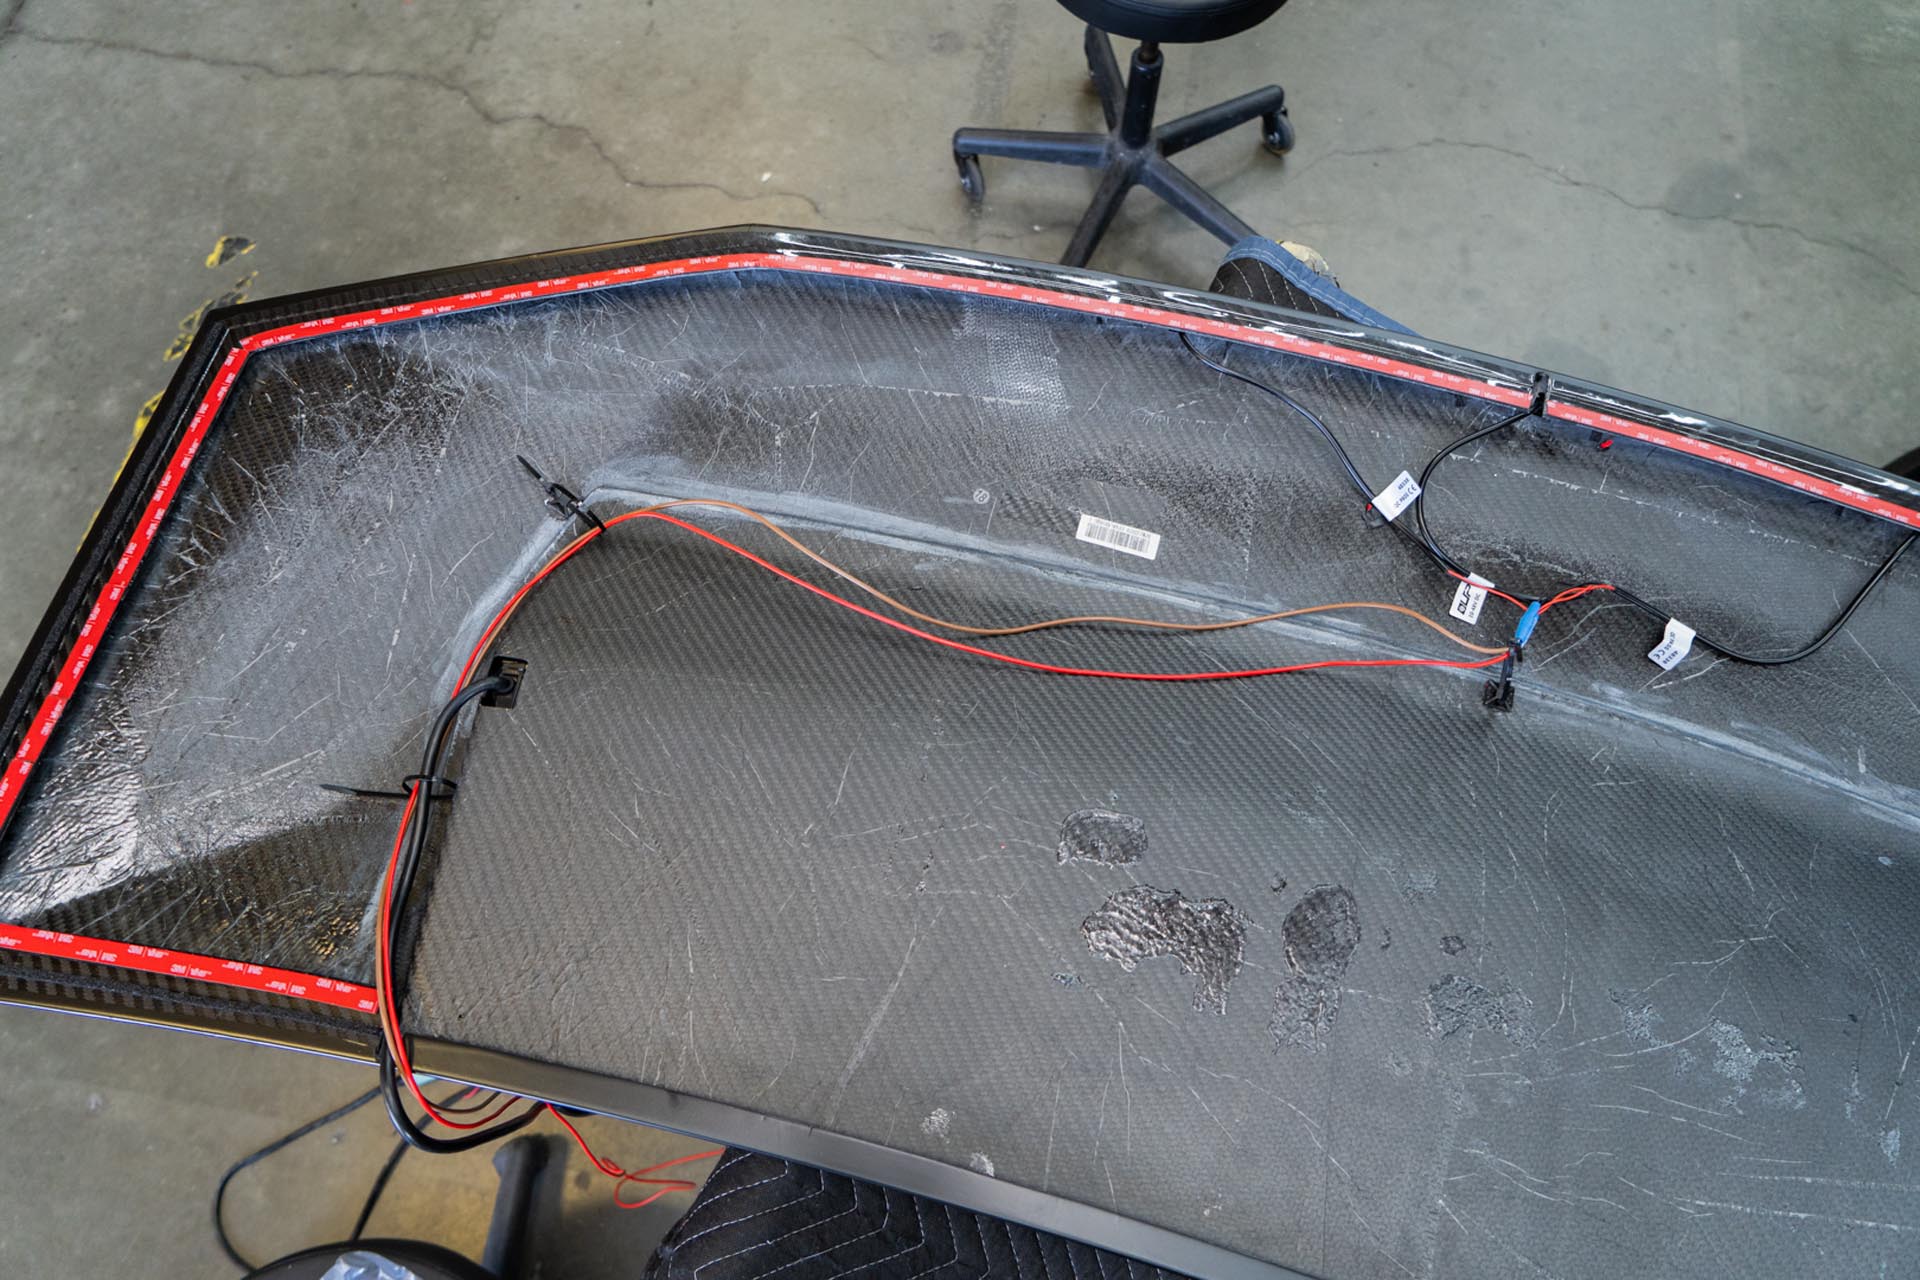
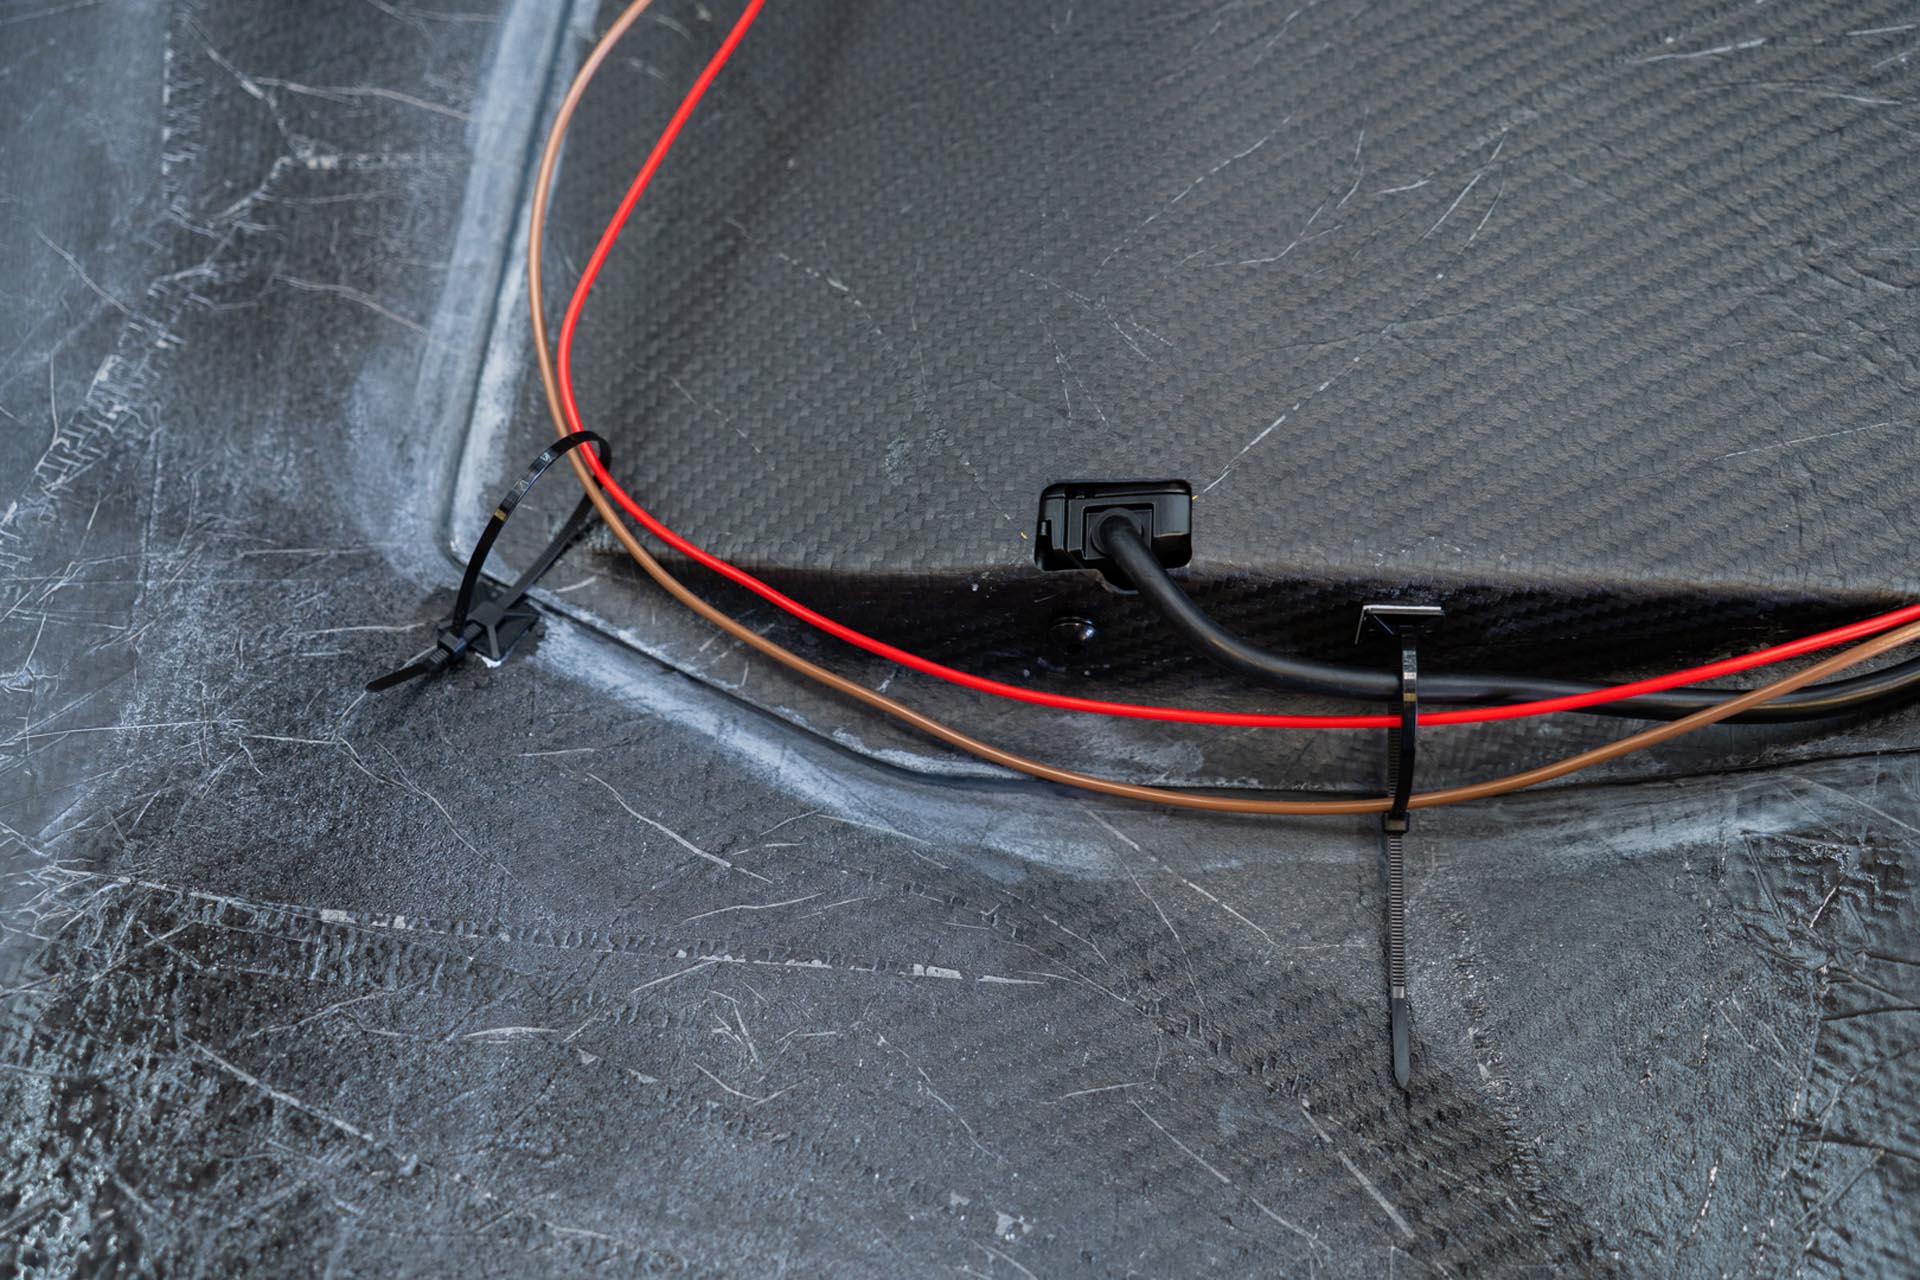
Next, using generic cable routing tie offs, secure the lead ends to the underside of the hood as shown below, with a goal of minimizing slack. (generic tie off’s not included).
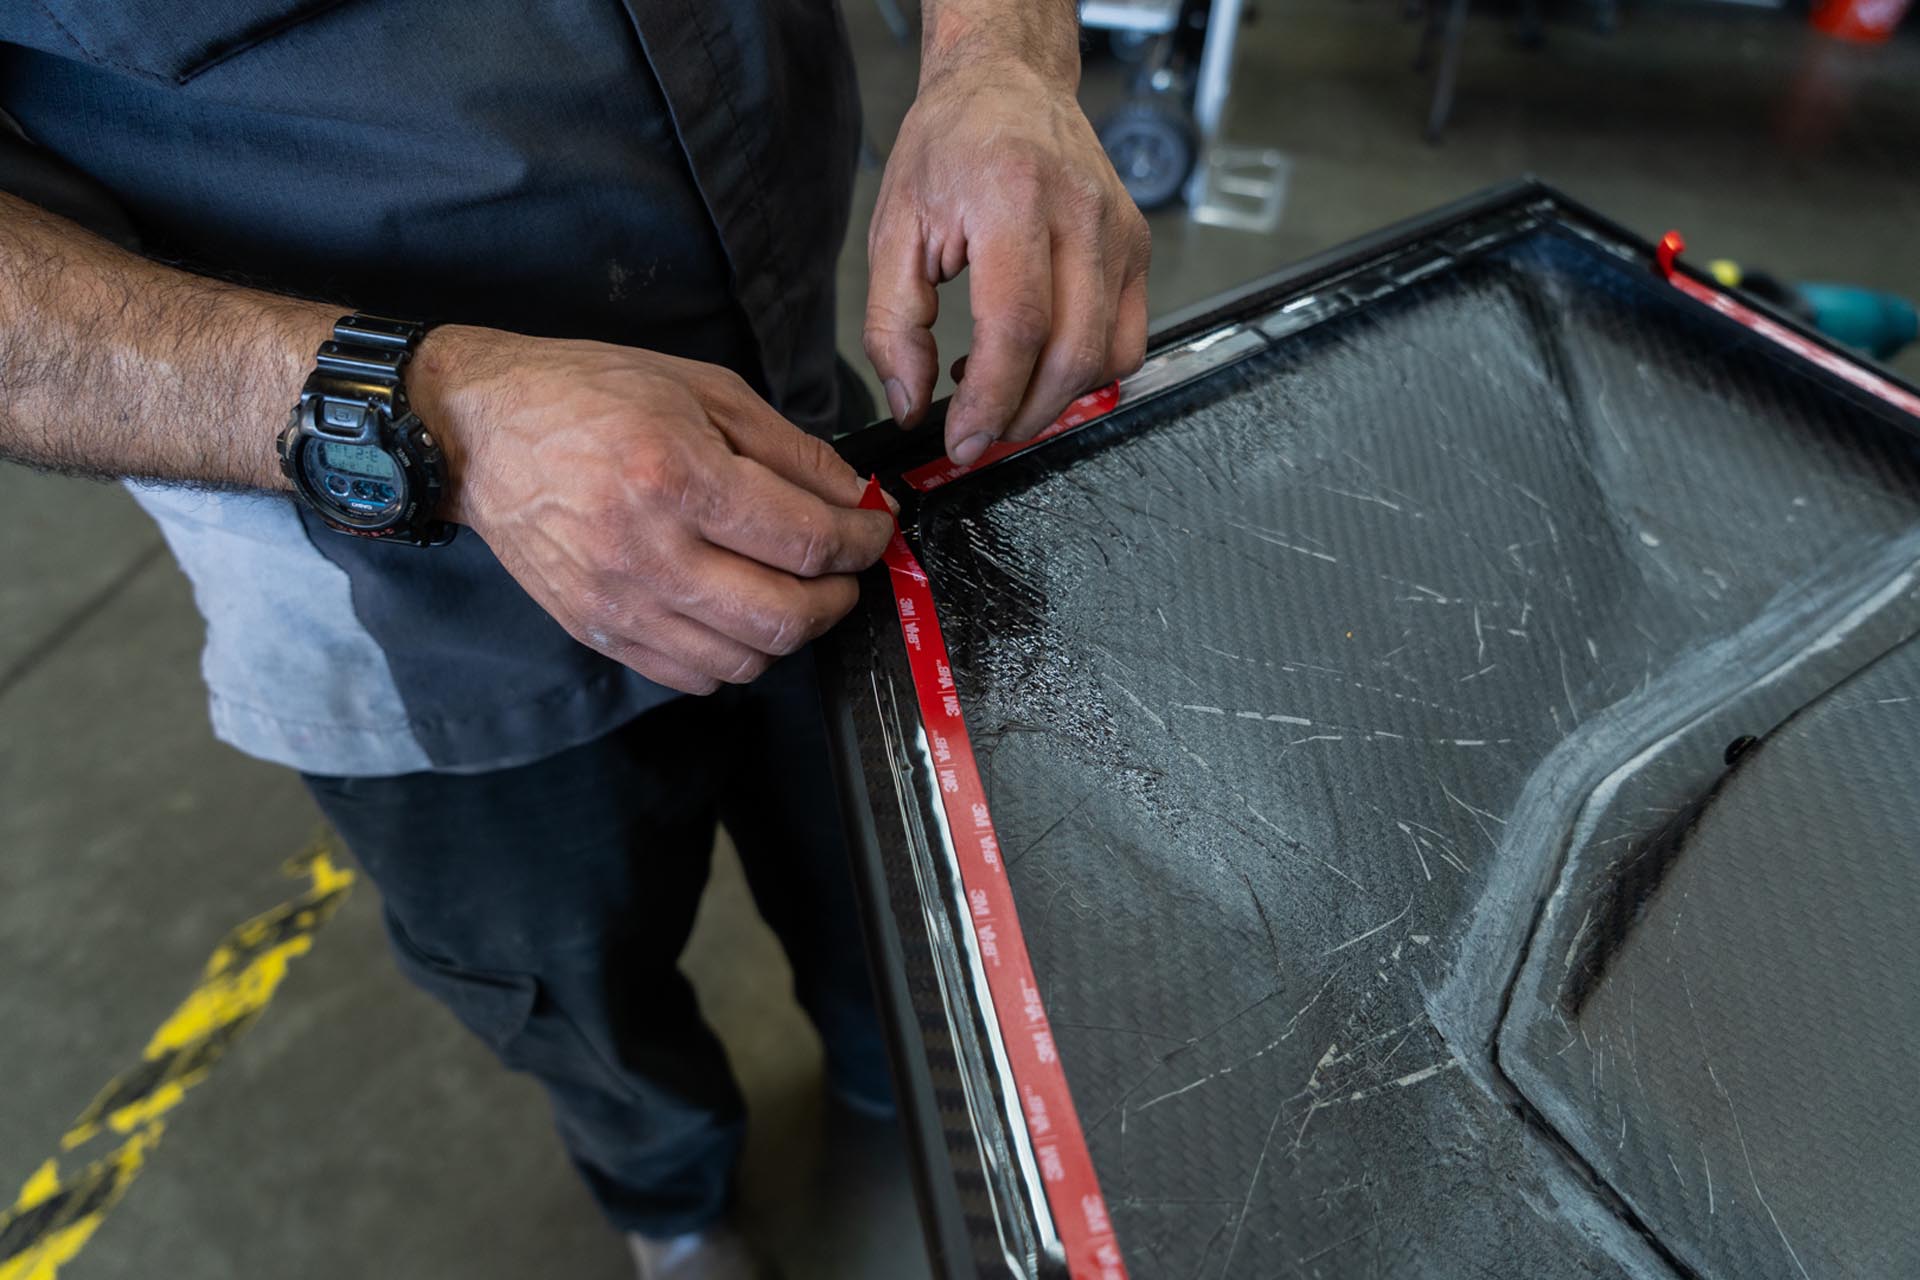
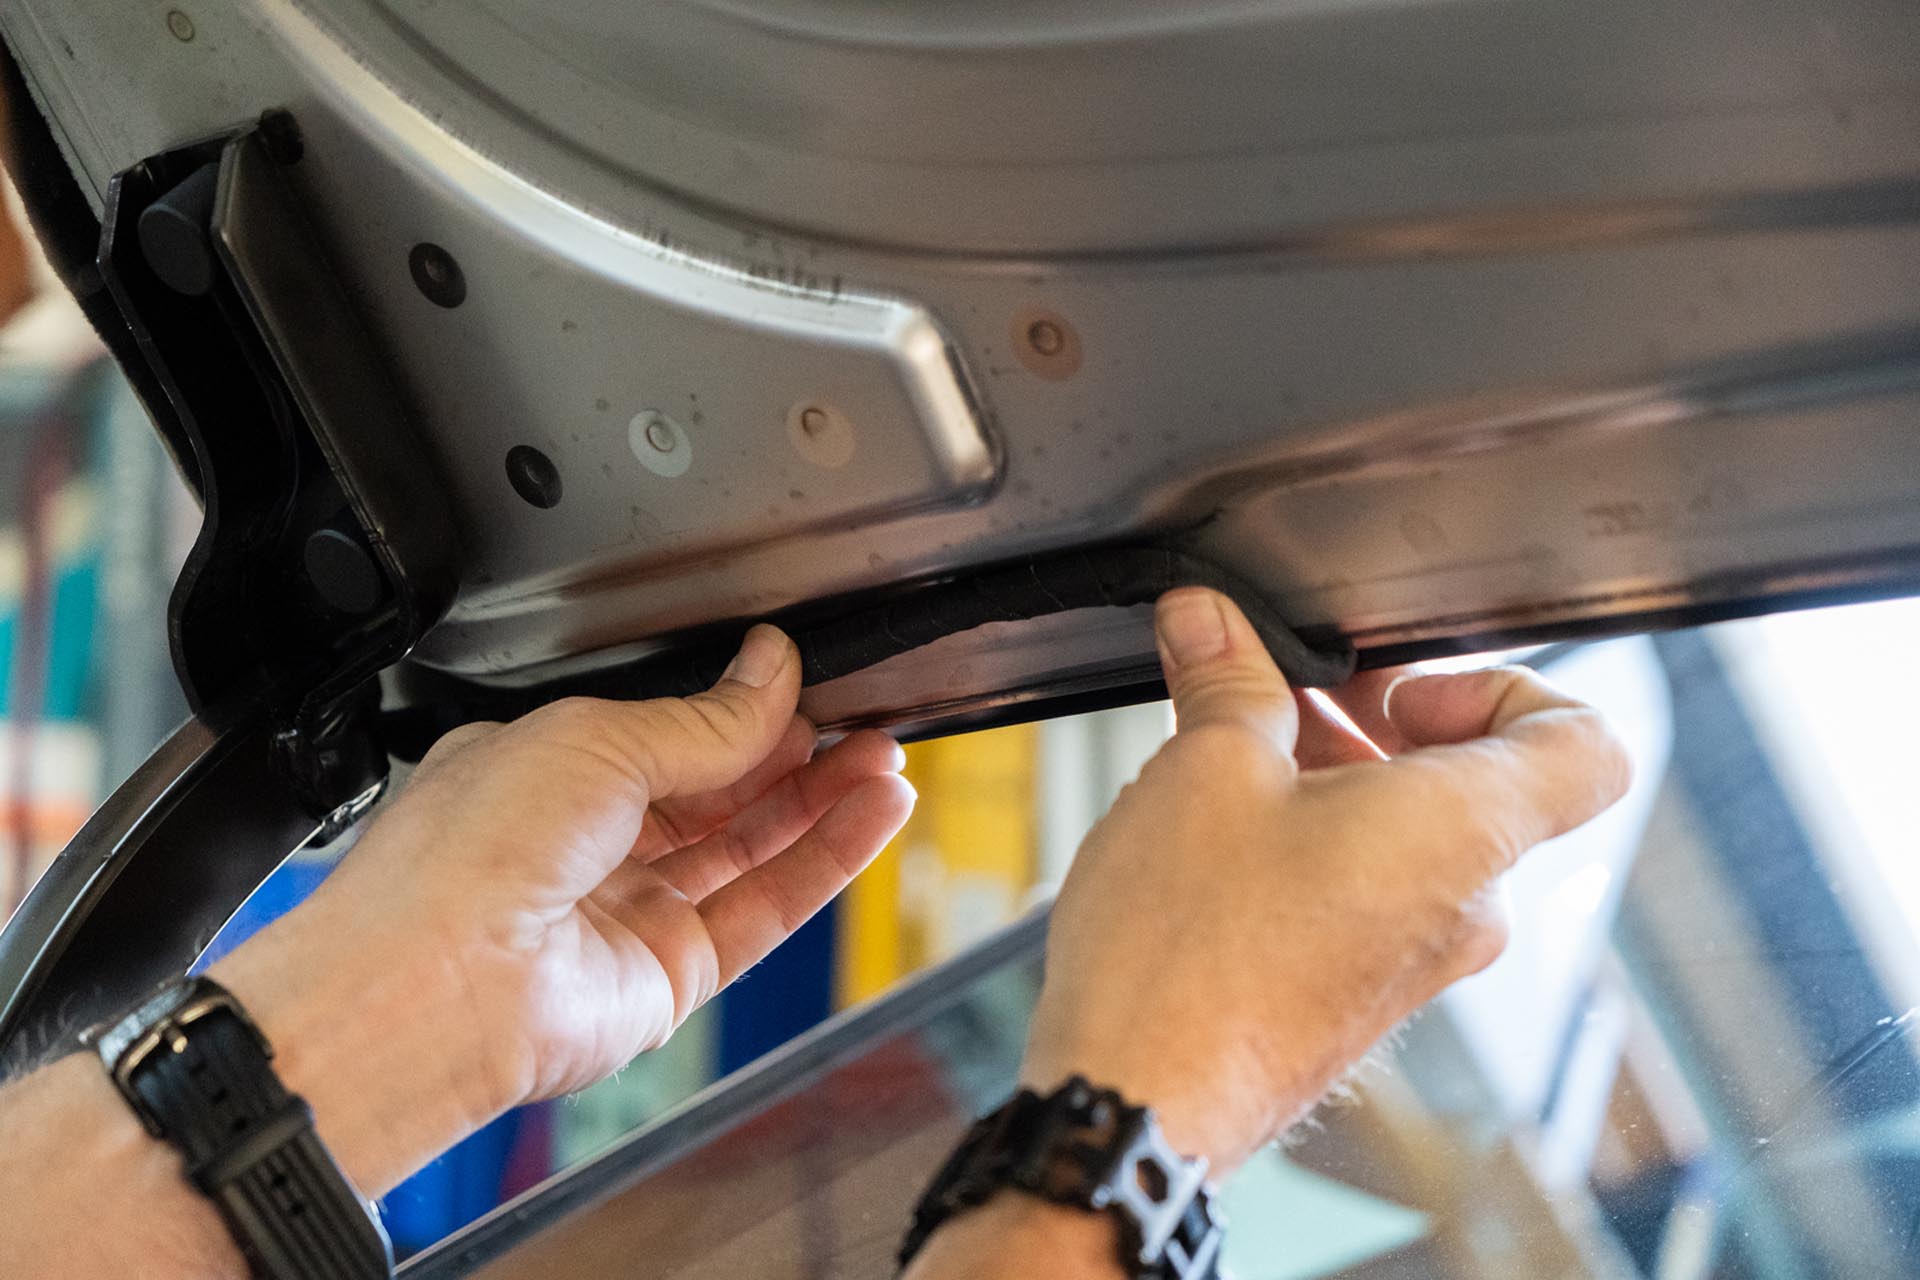
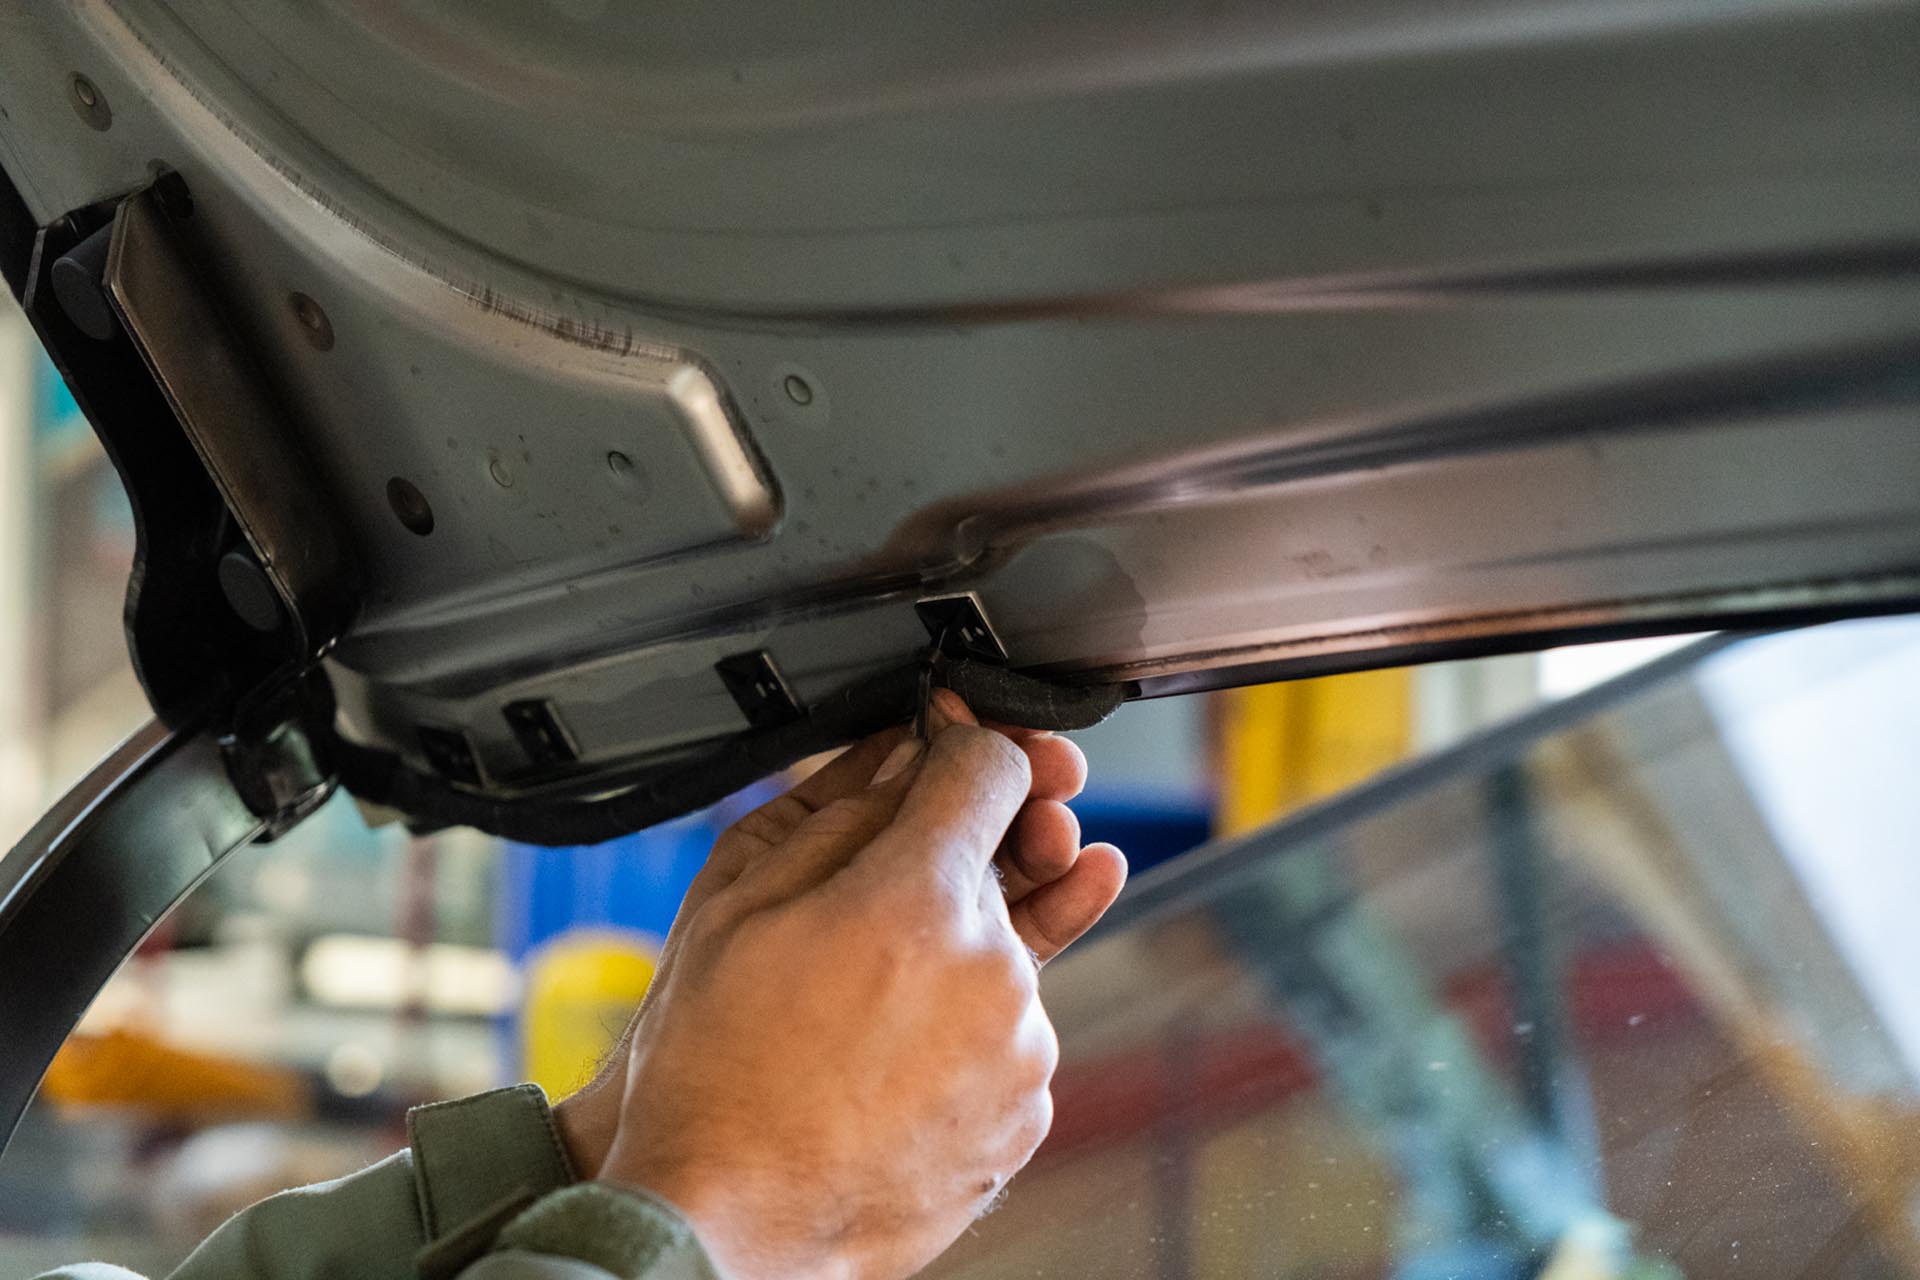
Be sure to prep the surface of the factory hood on your Cybertruck to ensure that a proper adhesive bond can form upon installation. Any PPF or ceramic coatings may hinder the adhesive’s ability to support the weight of the hood. In the example below, film over the factory surface has been removed where the adhesive bond will secure the hood to the vehicle.
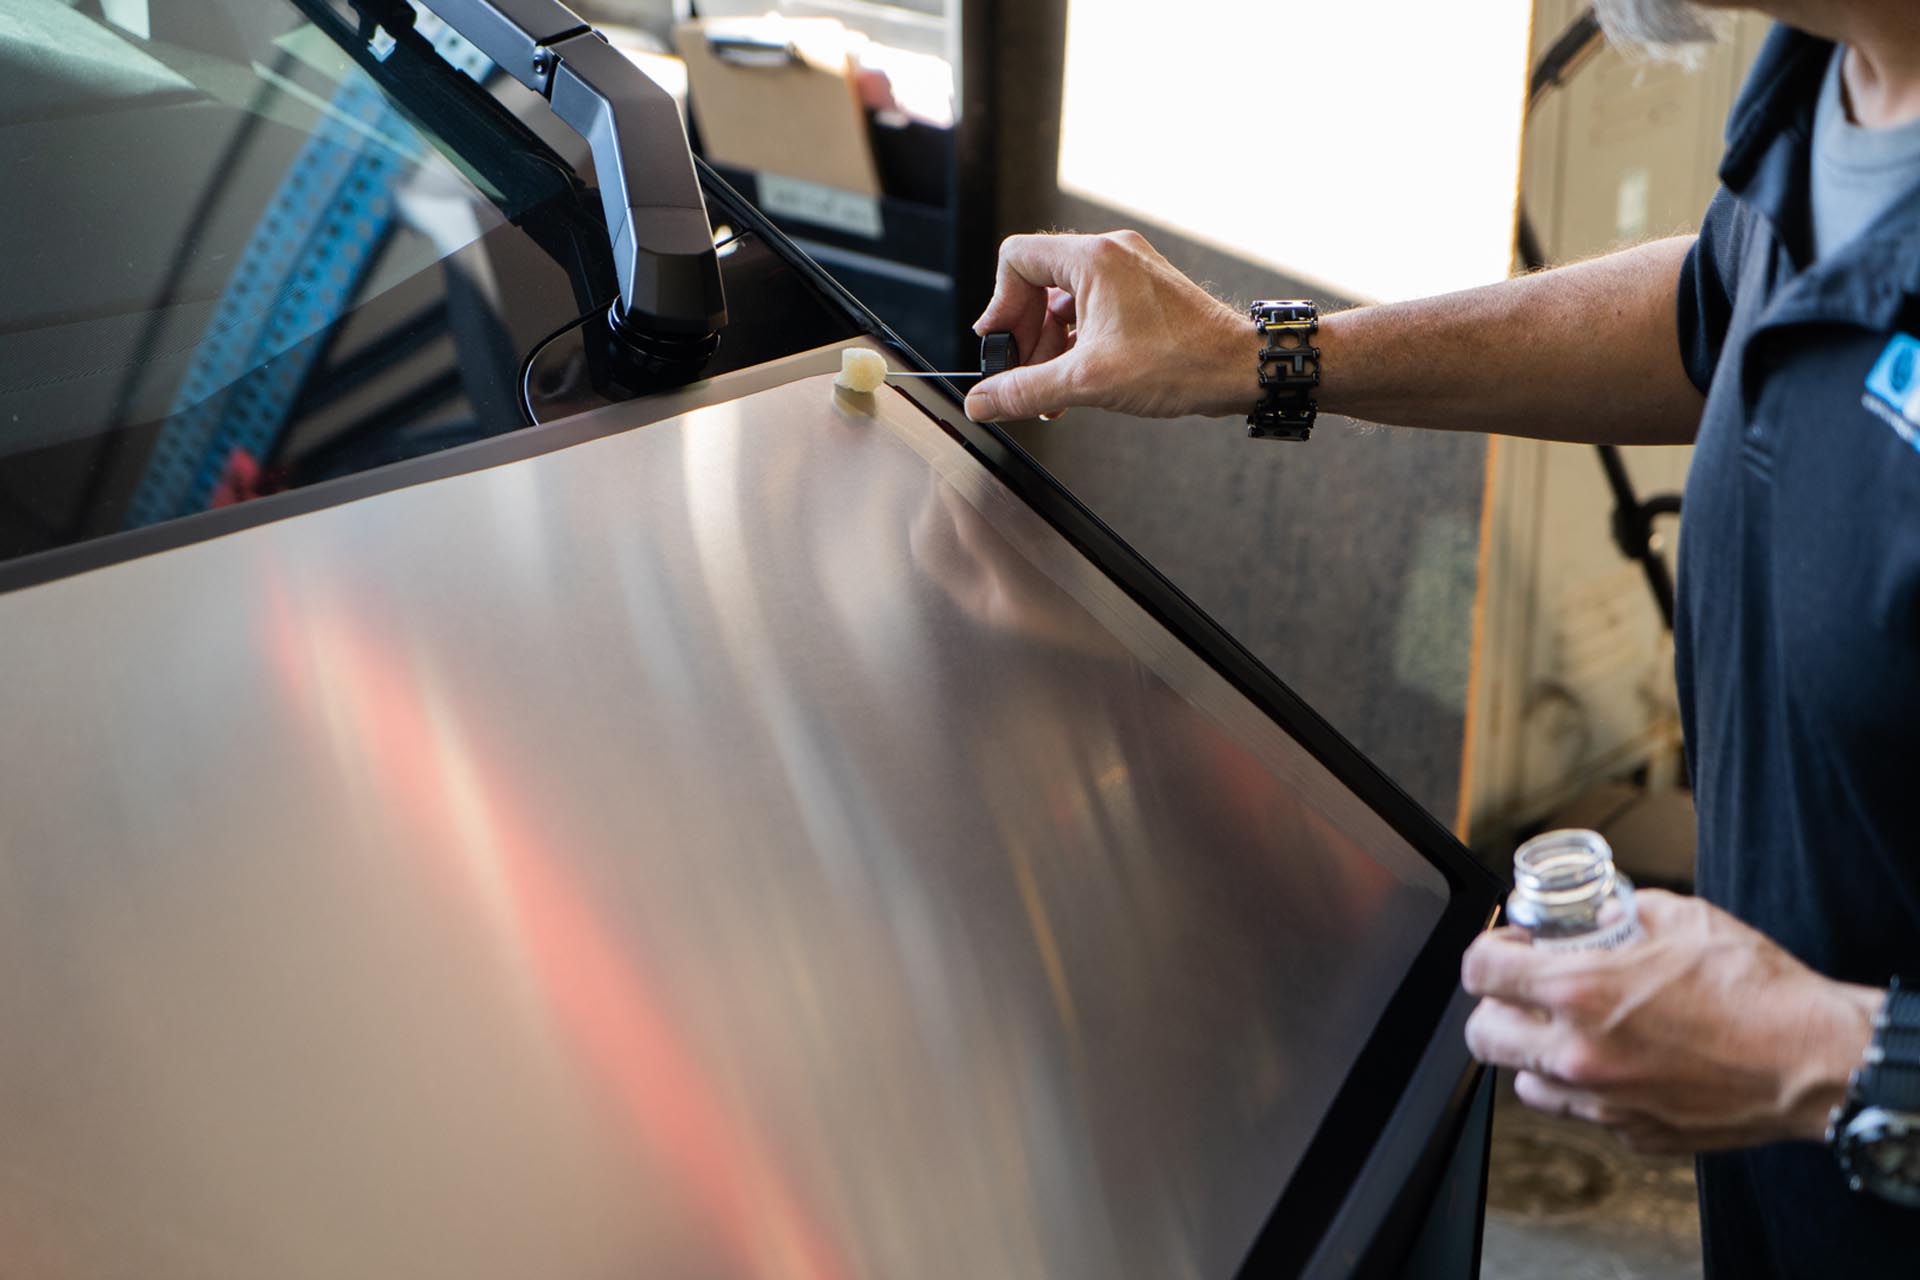
Using isopropyl alcohol, clean the surface of the factory hood around all of the edges.
Using the provided adhesive promoter packets, apply adhesive promoter where the adhesive on the UP hood will make contact. We recommend test fitting the UP hood at this stage to understand where adhesive will contact the factory surface.
Next, pull the lead ends of the adhesive on the UP hood to that they may be pulled once the hood reaches desired placement.
Proceed to place the UP hood on the factory surface.
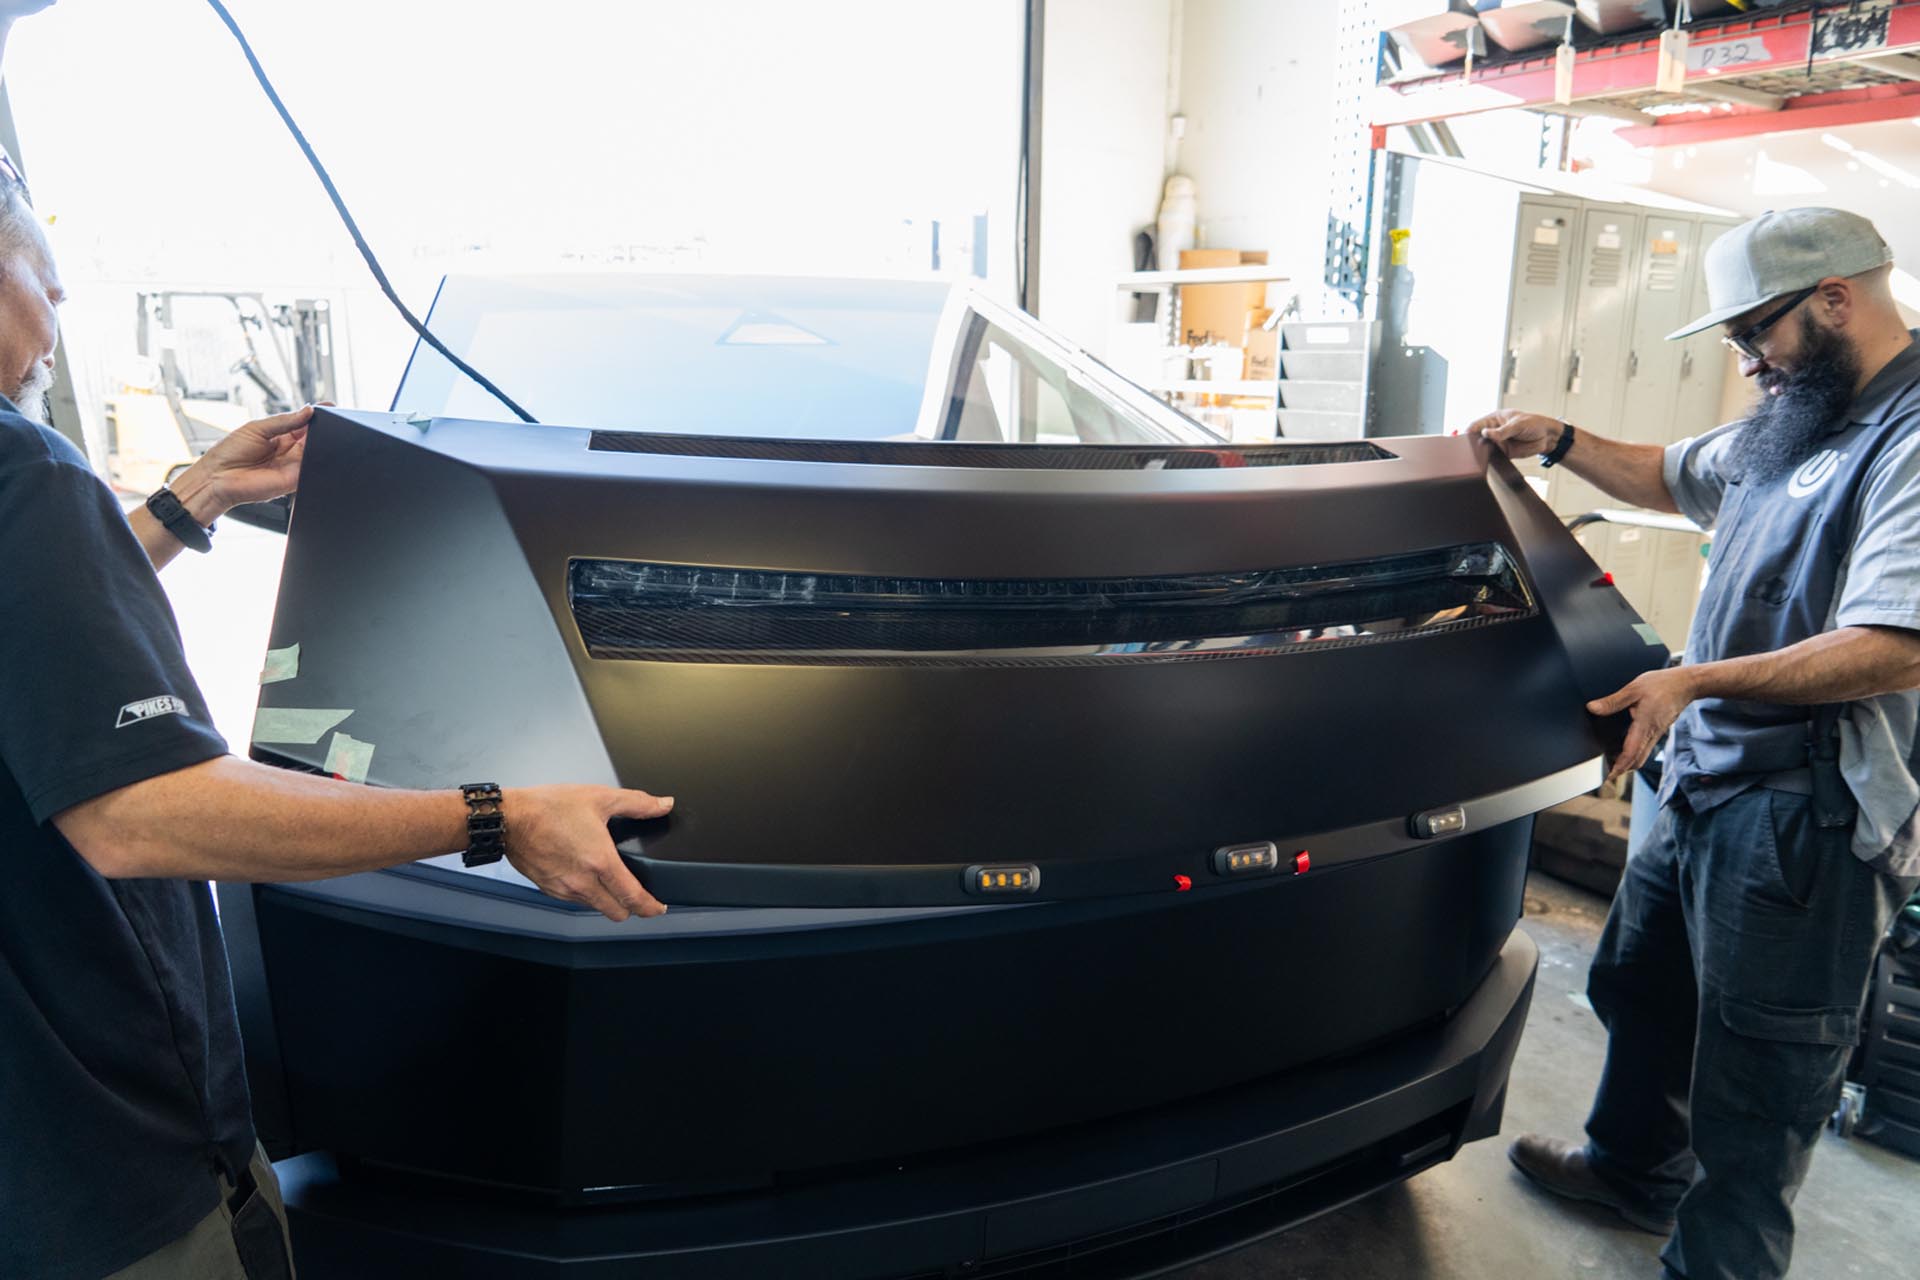
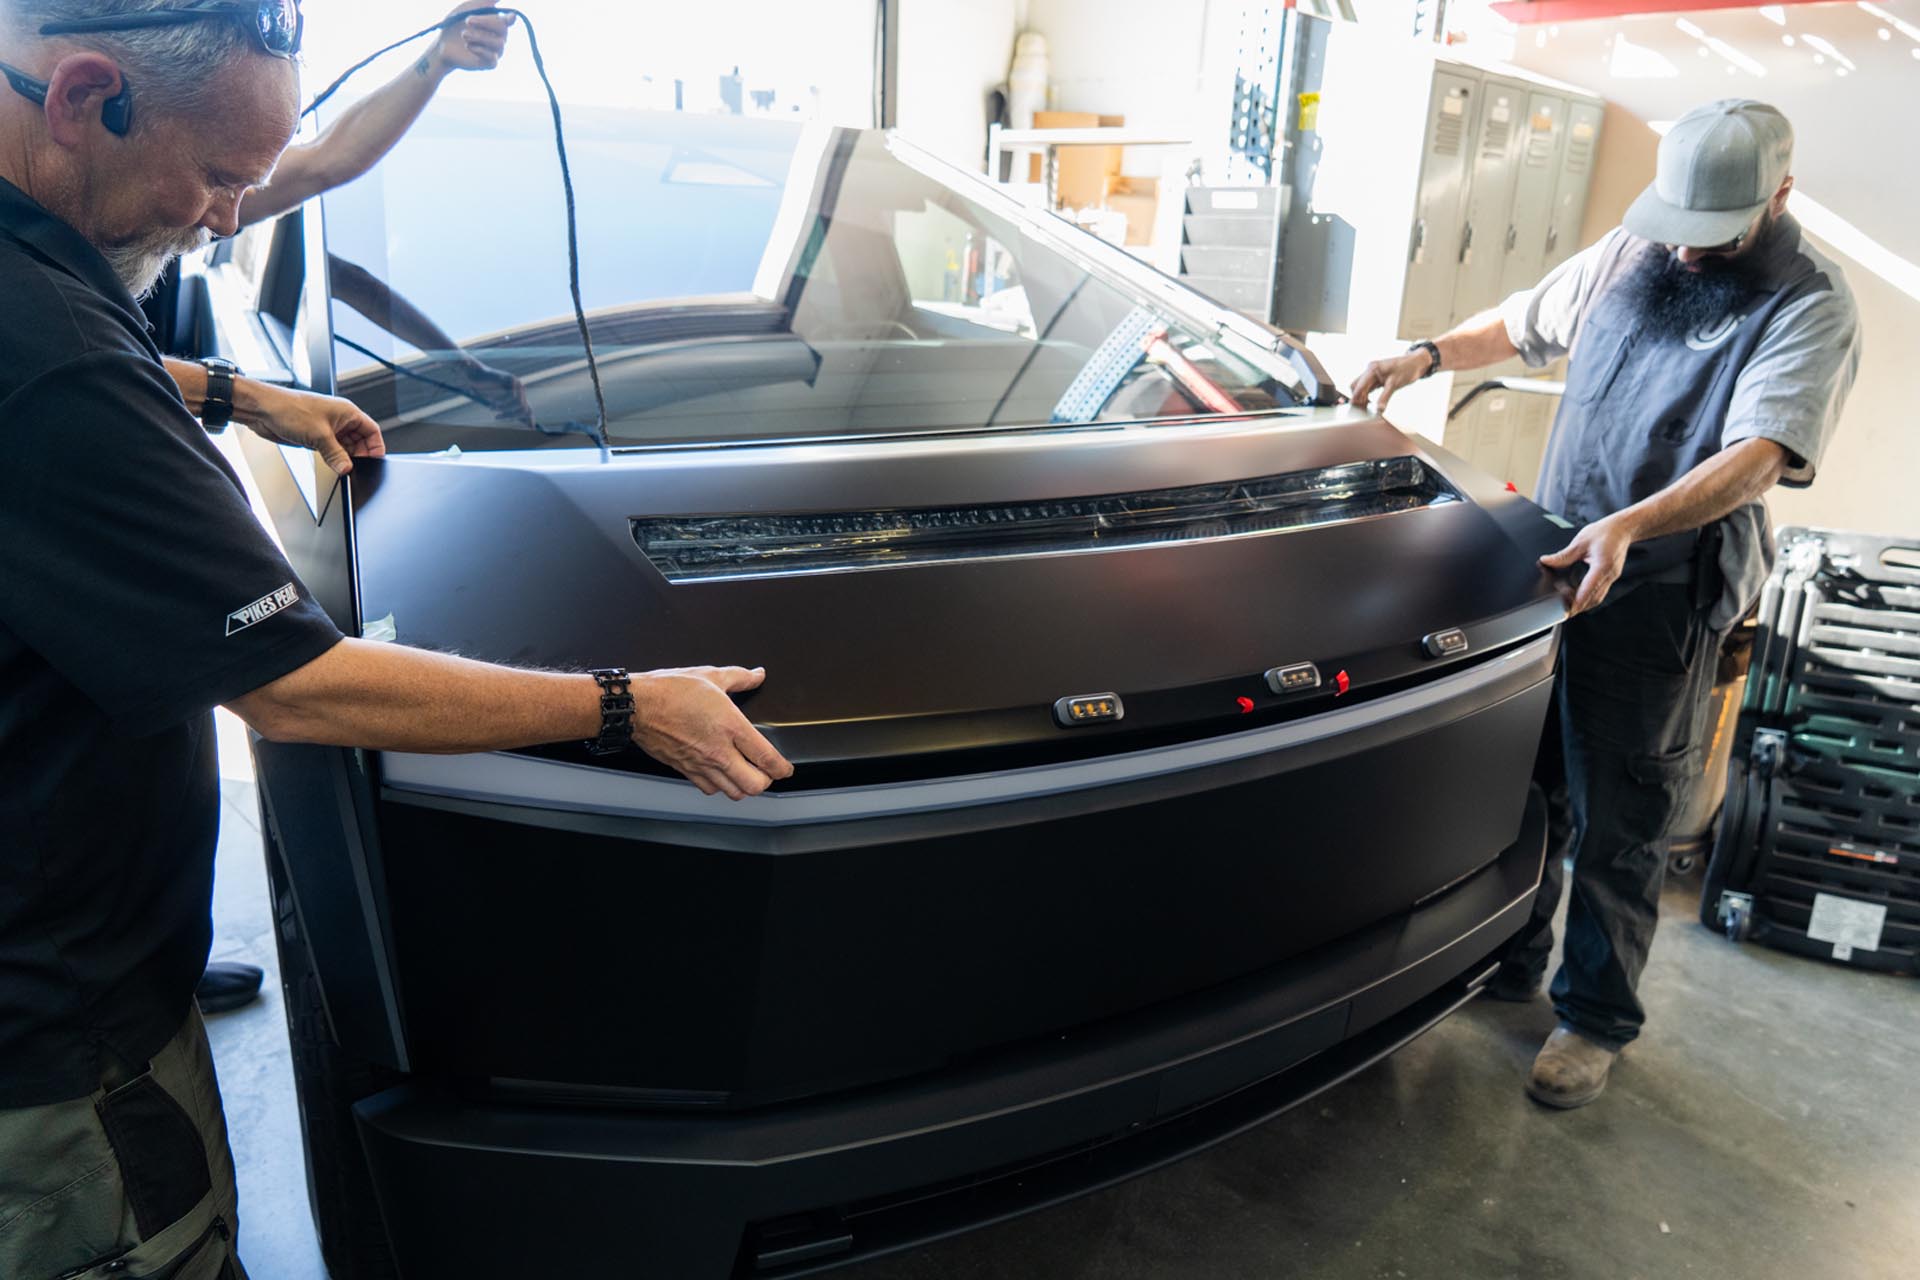
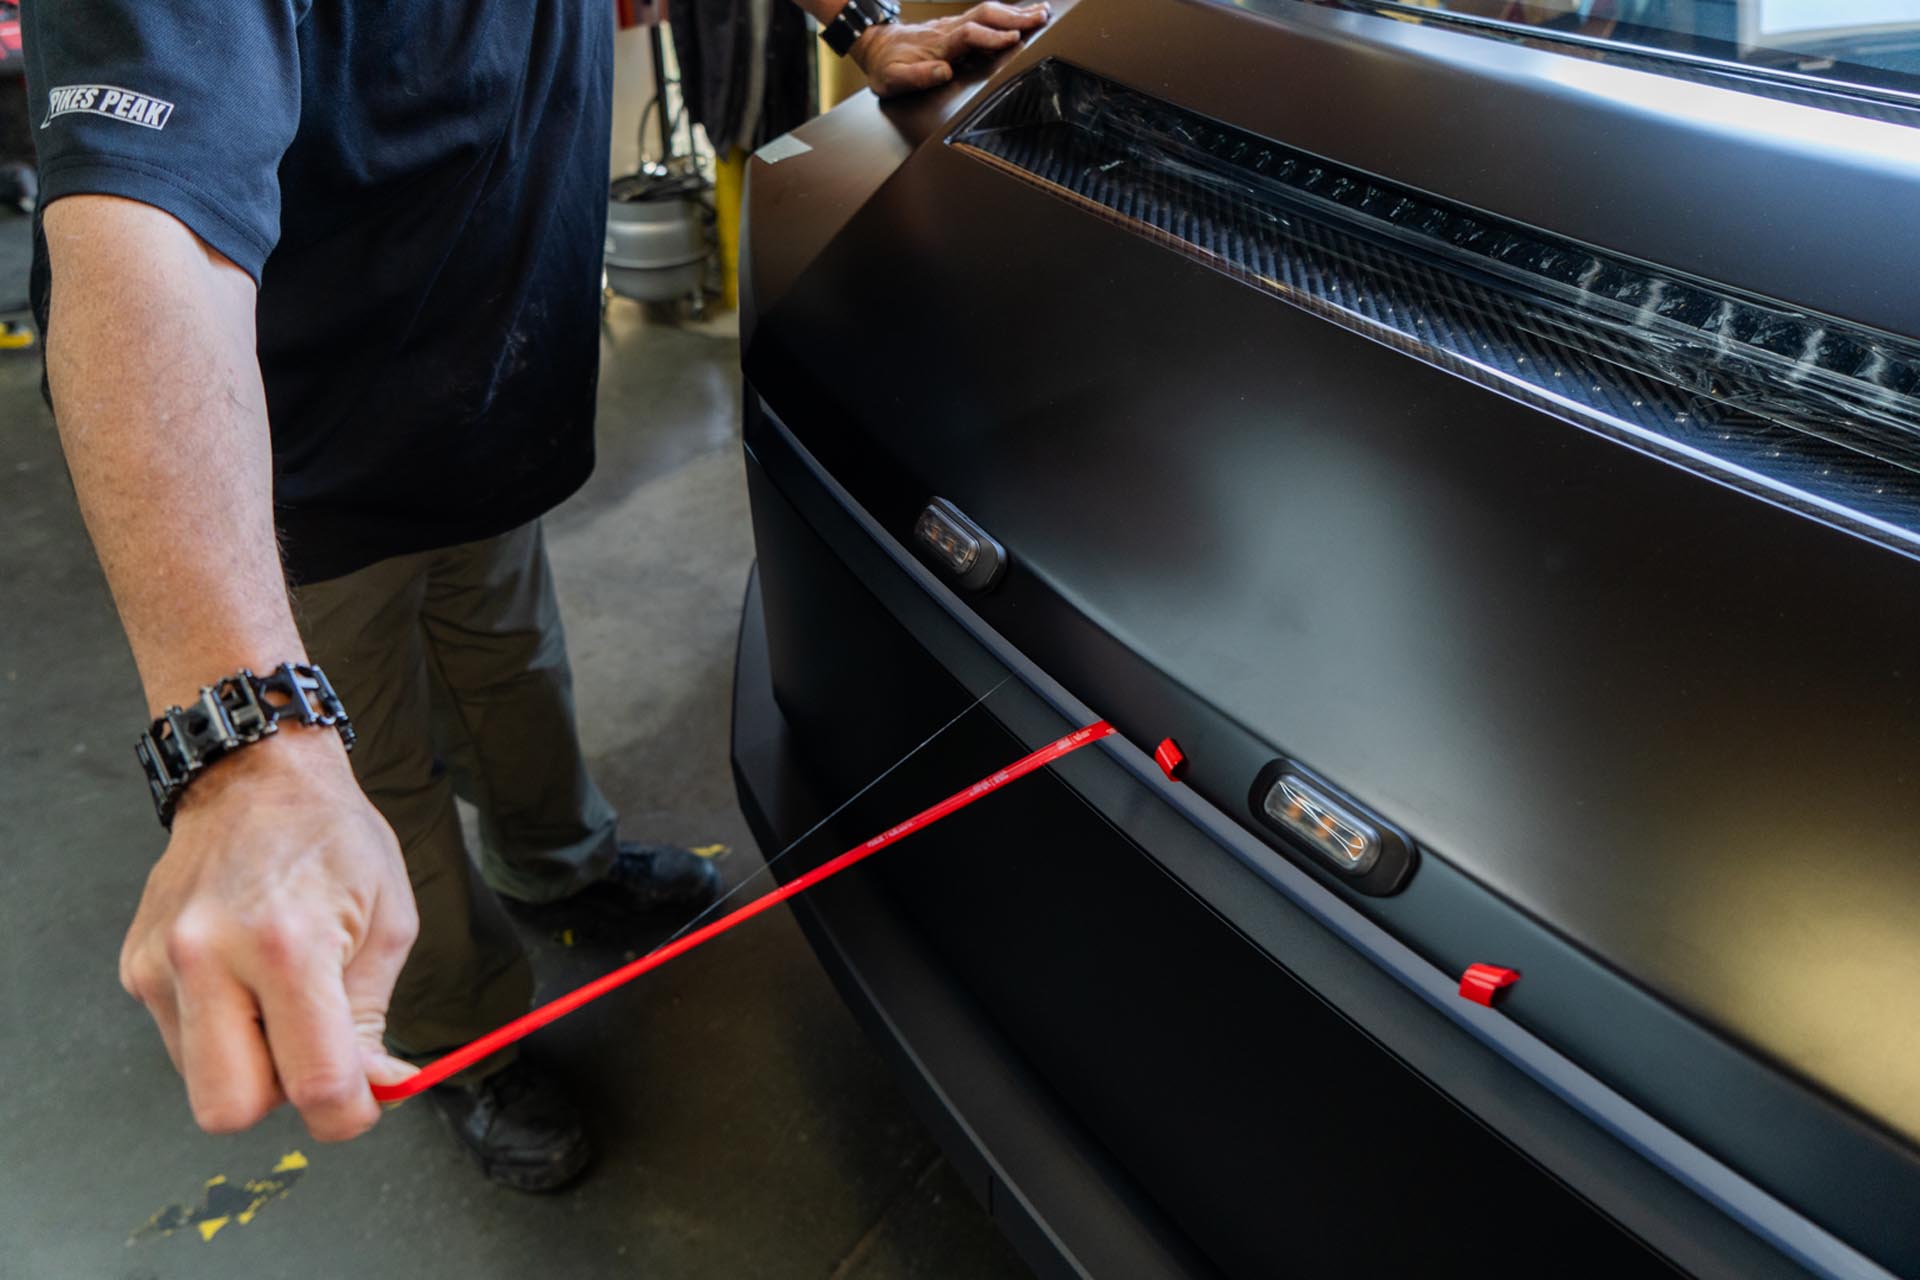
Once desired placement has been achieved, pull away the lead ends and apply downward pressure near the edges of the UP hood.
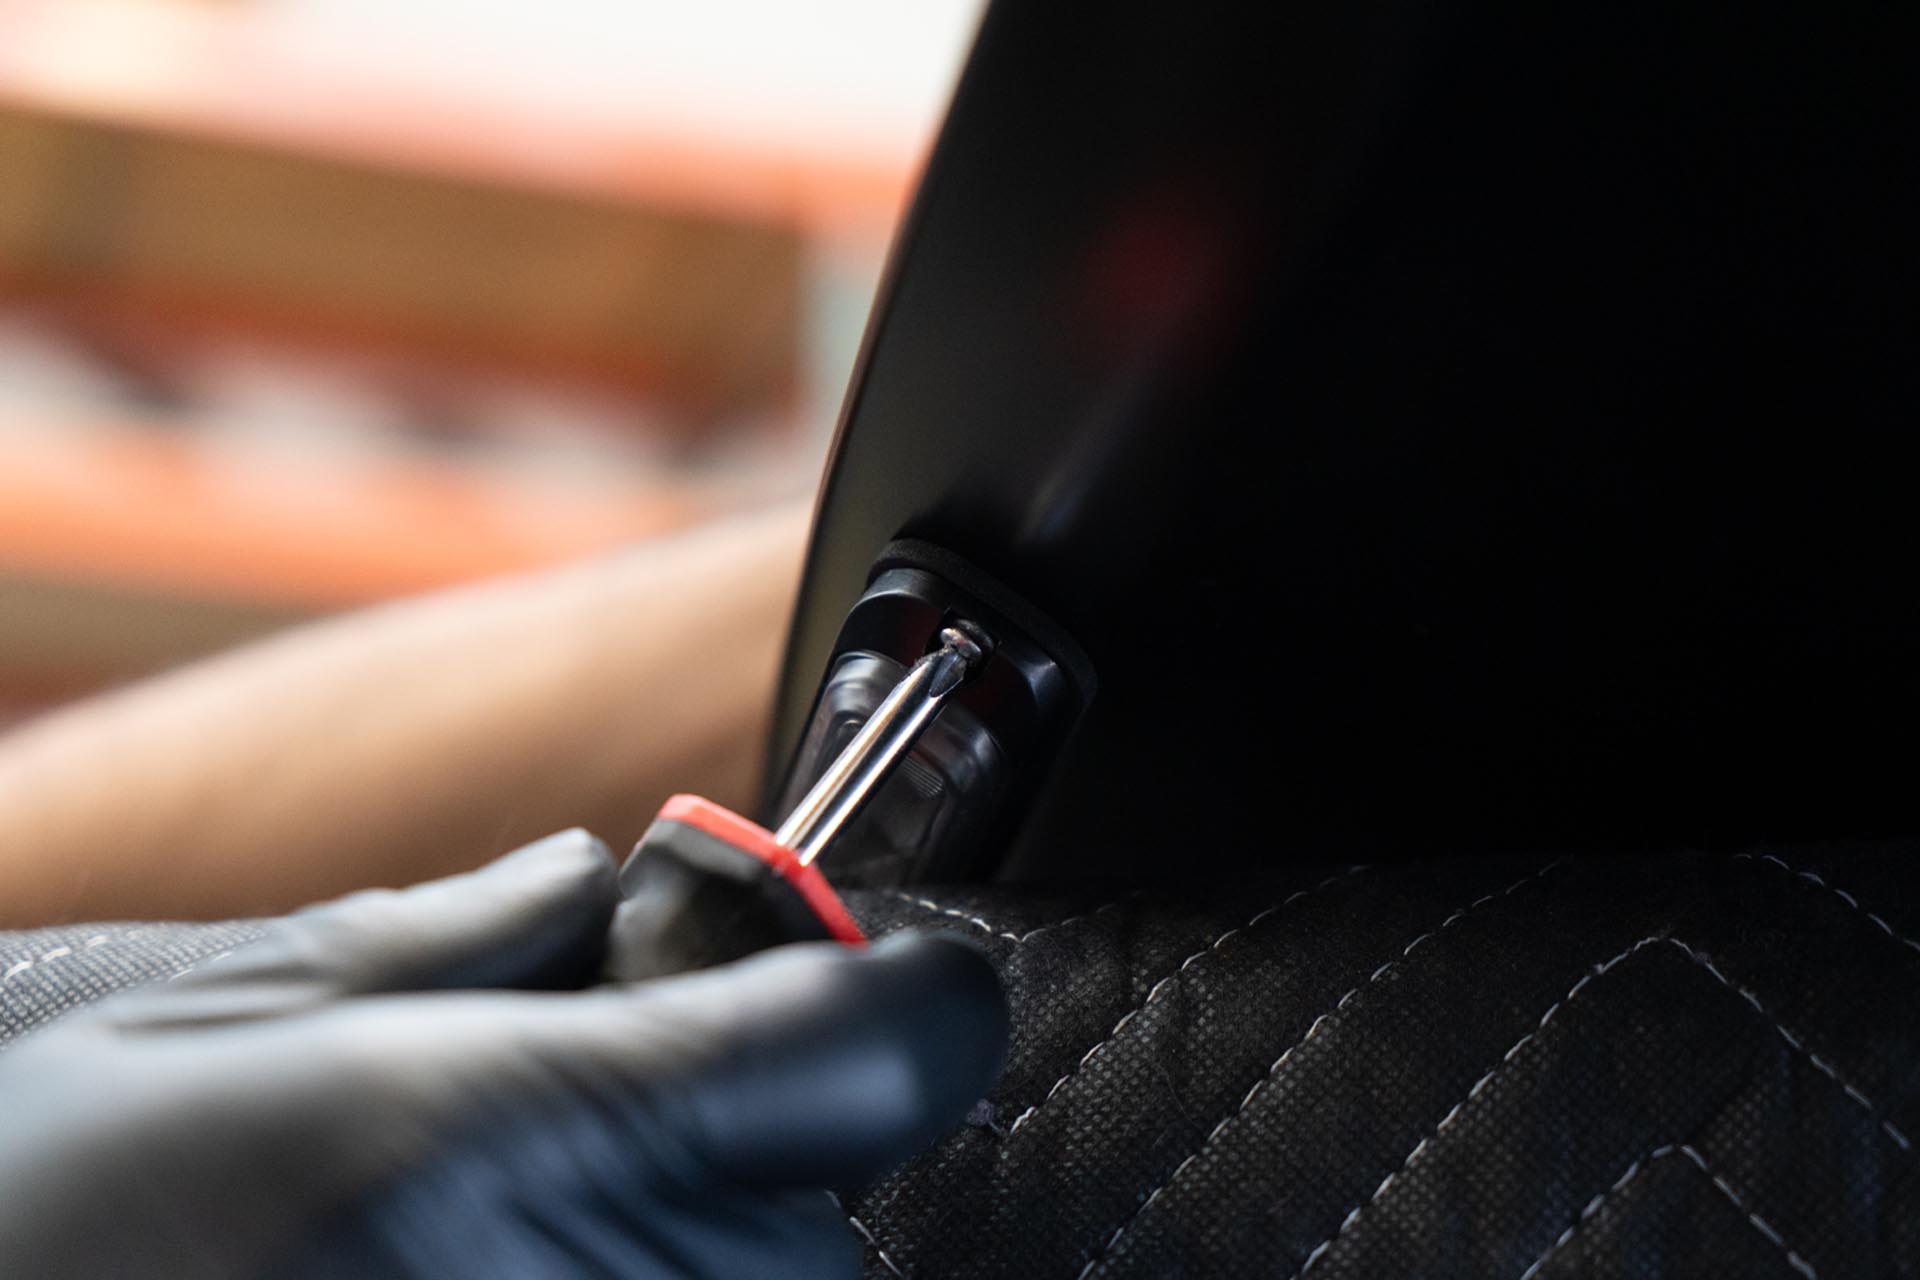
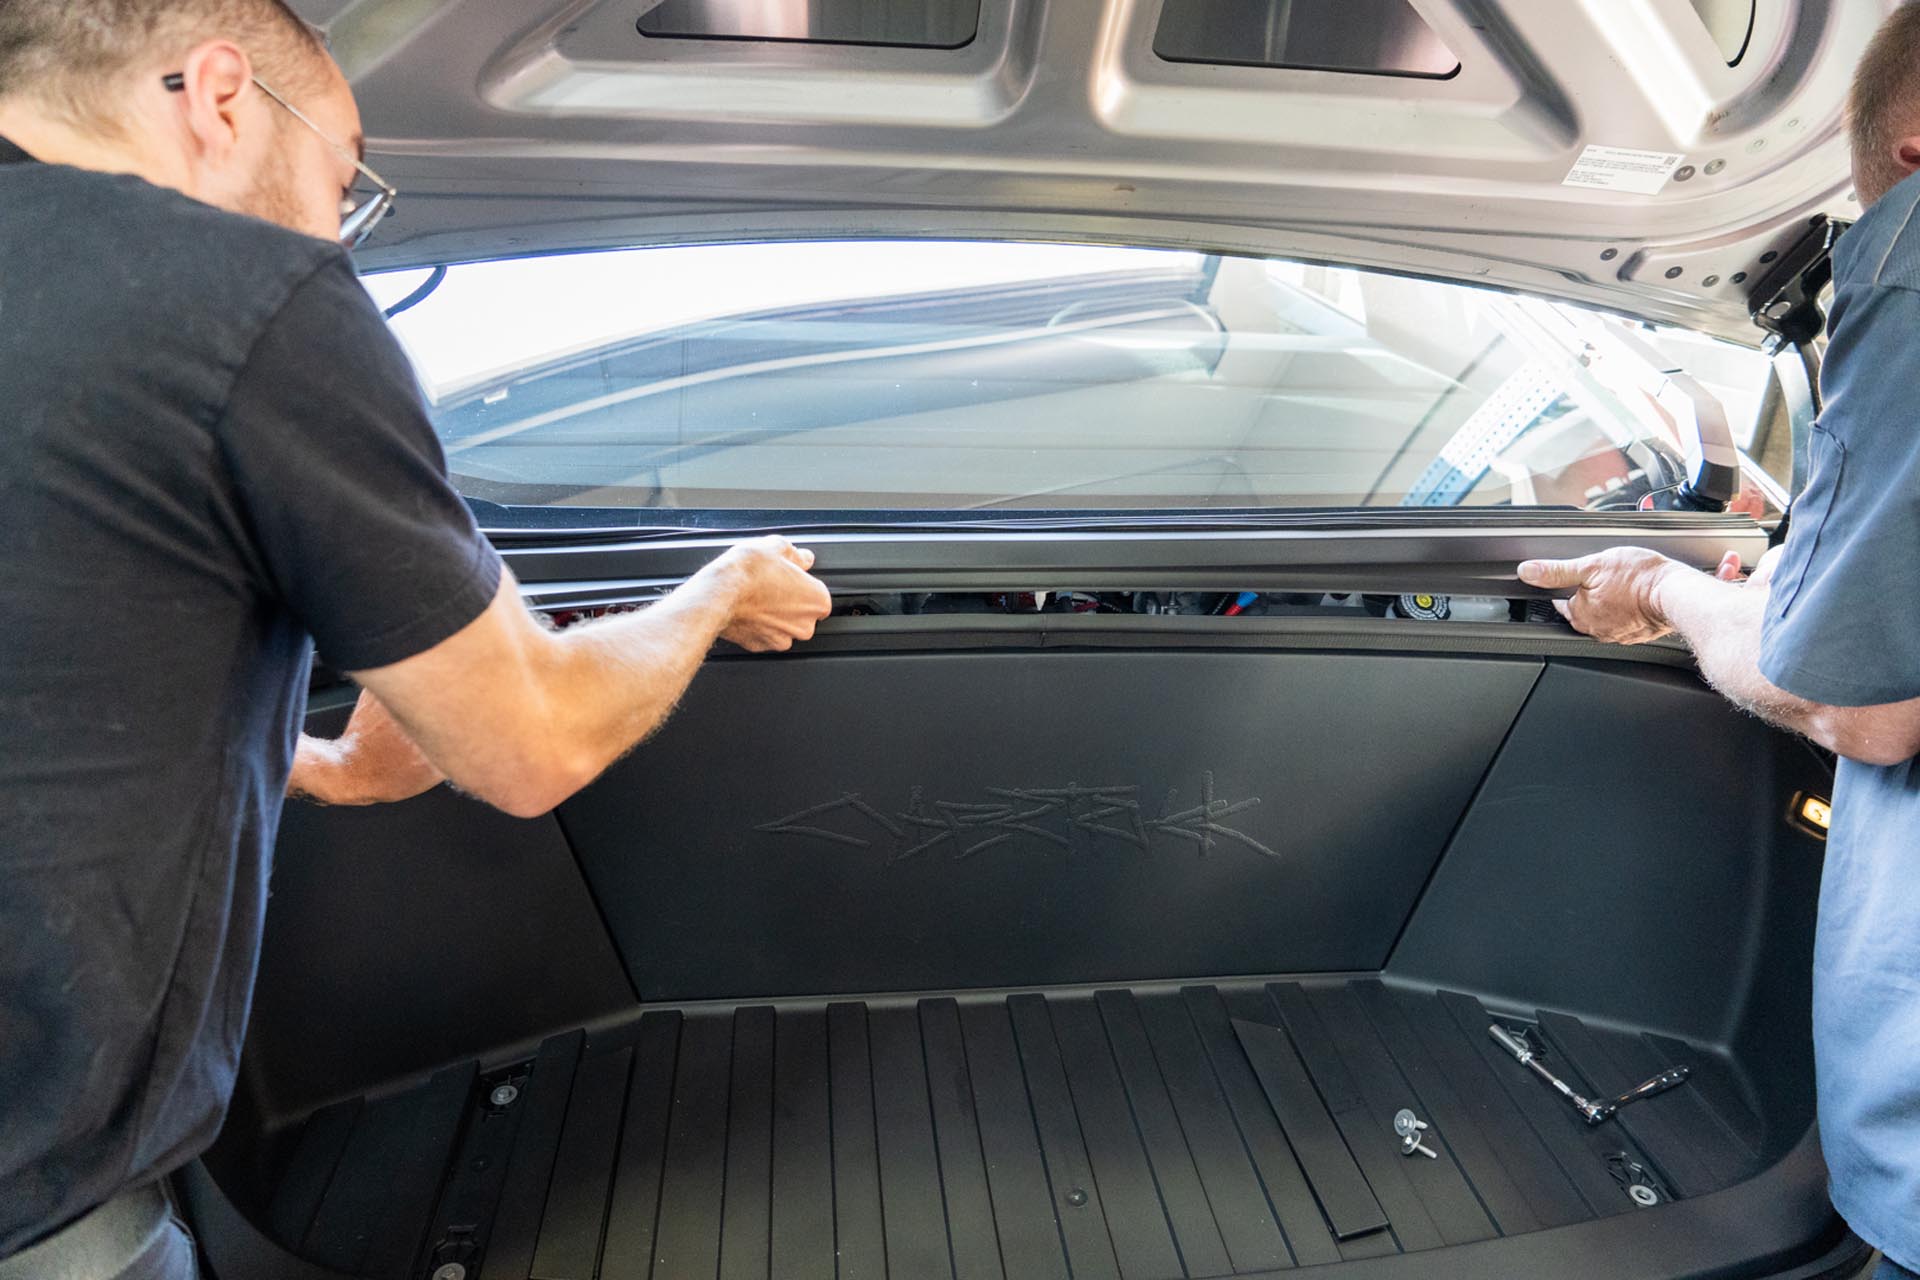
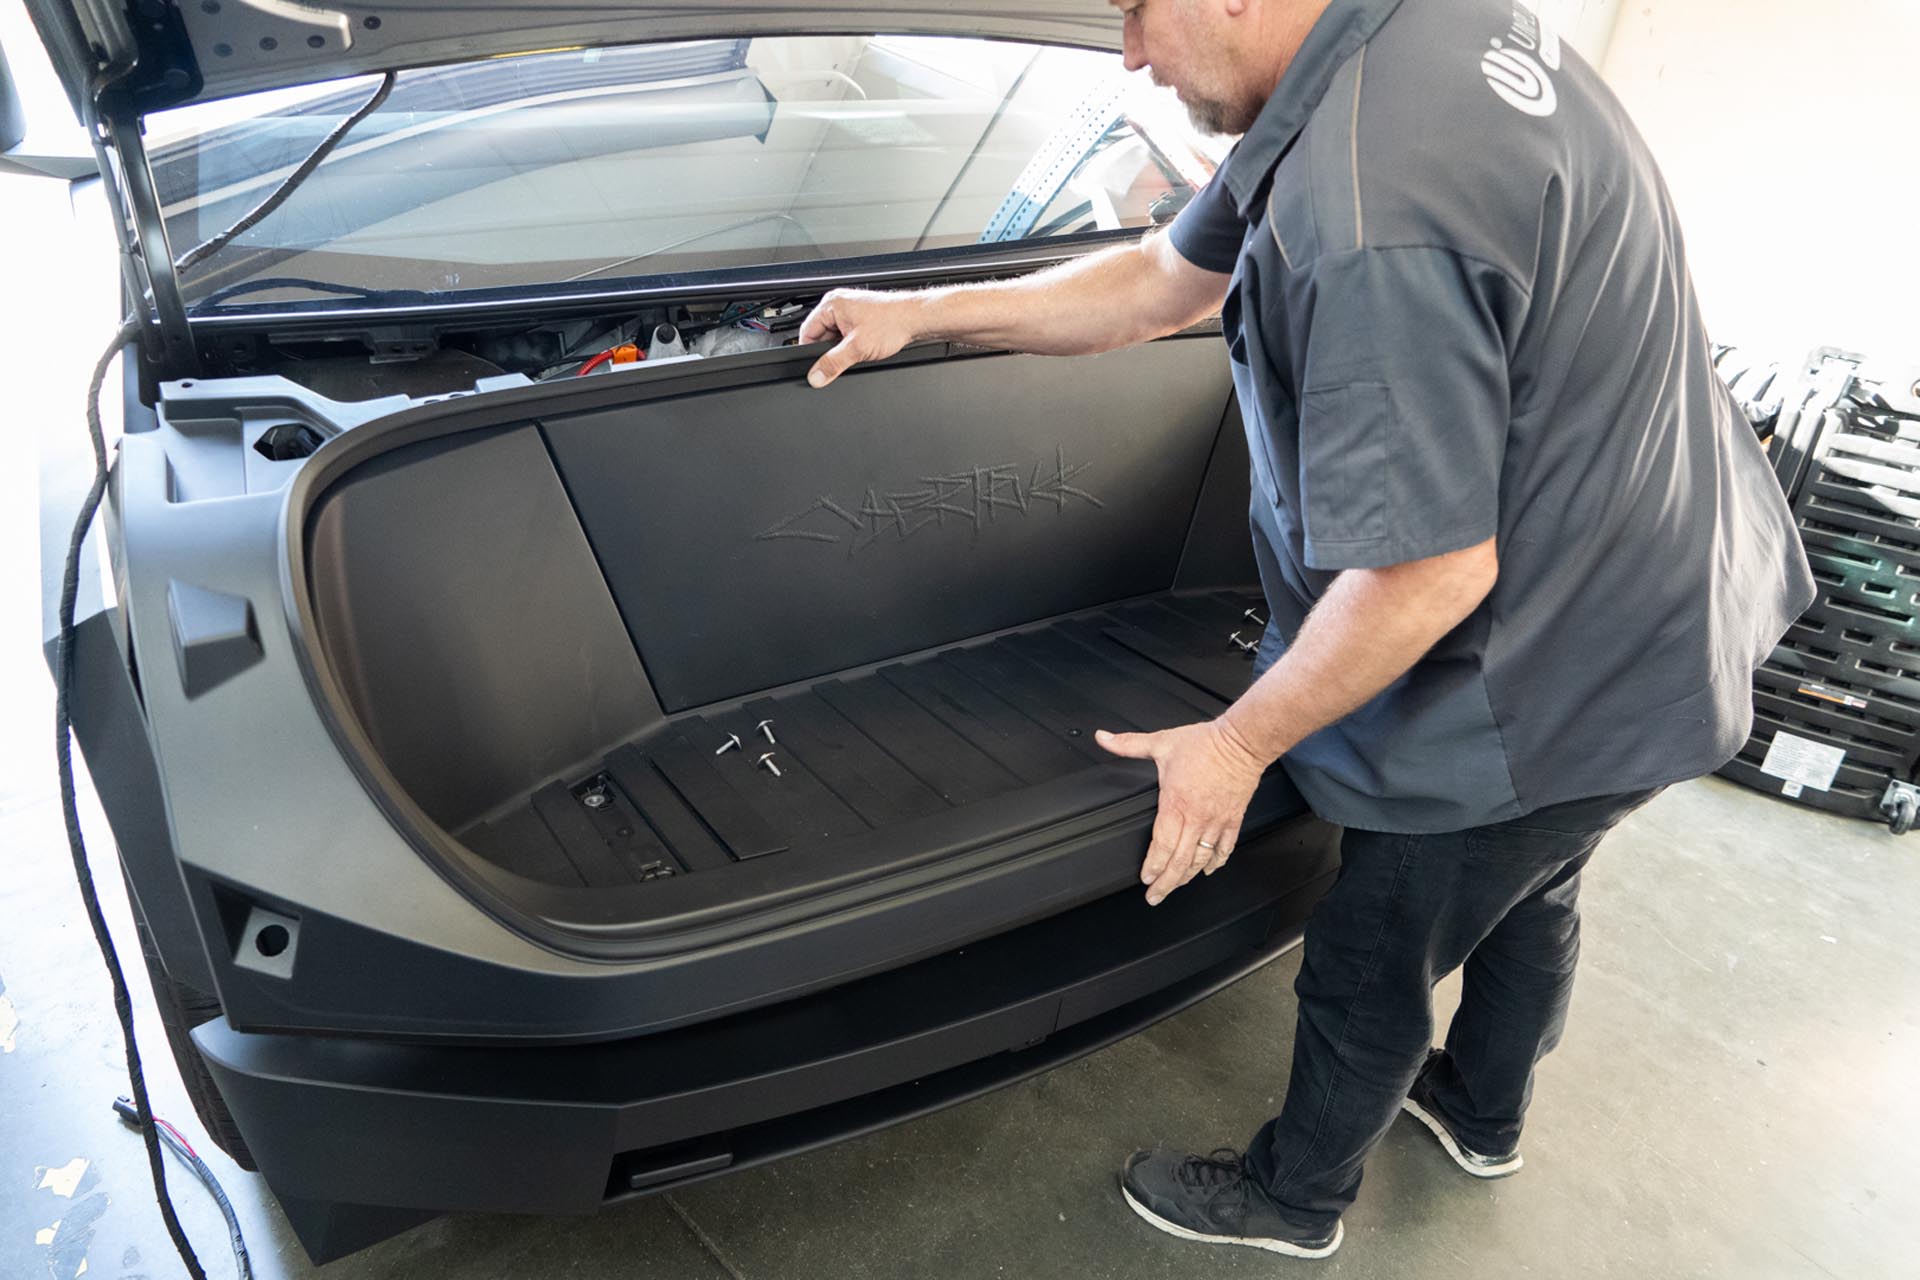
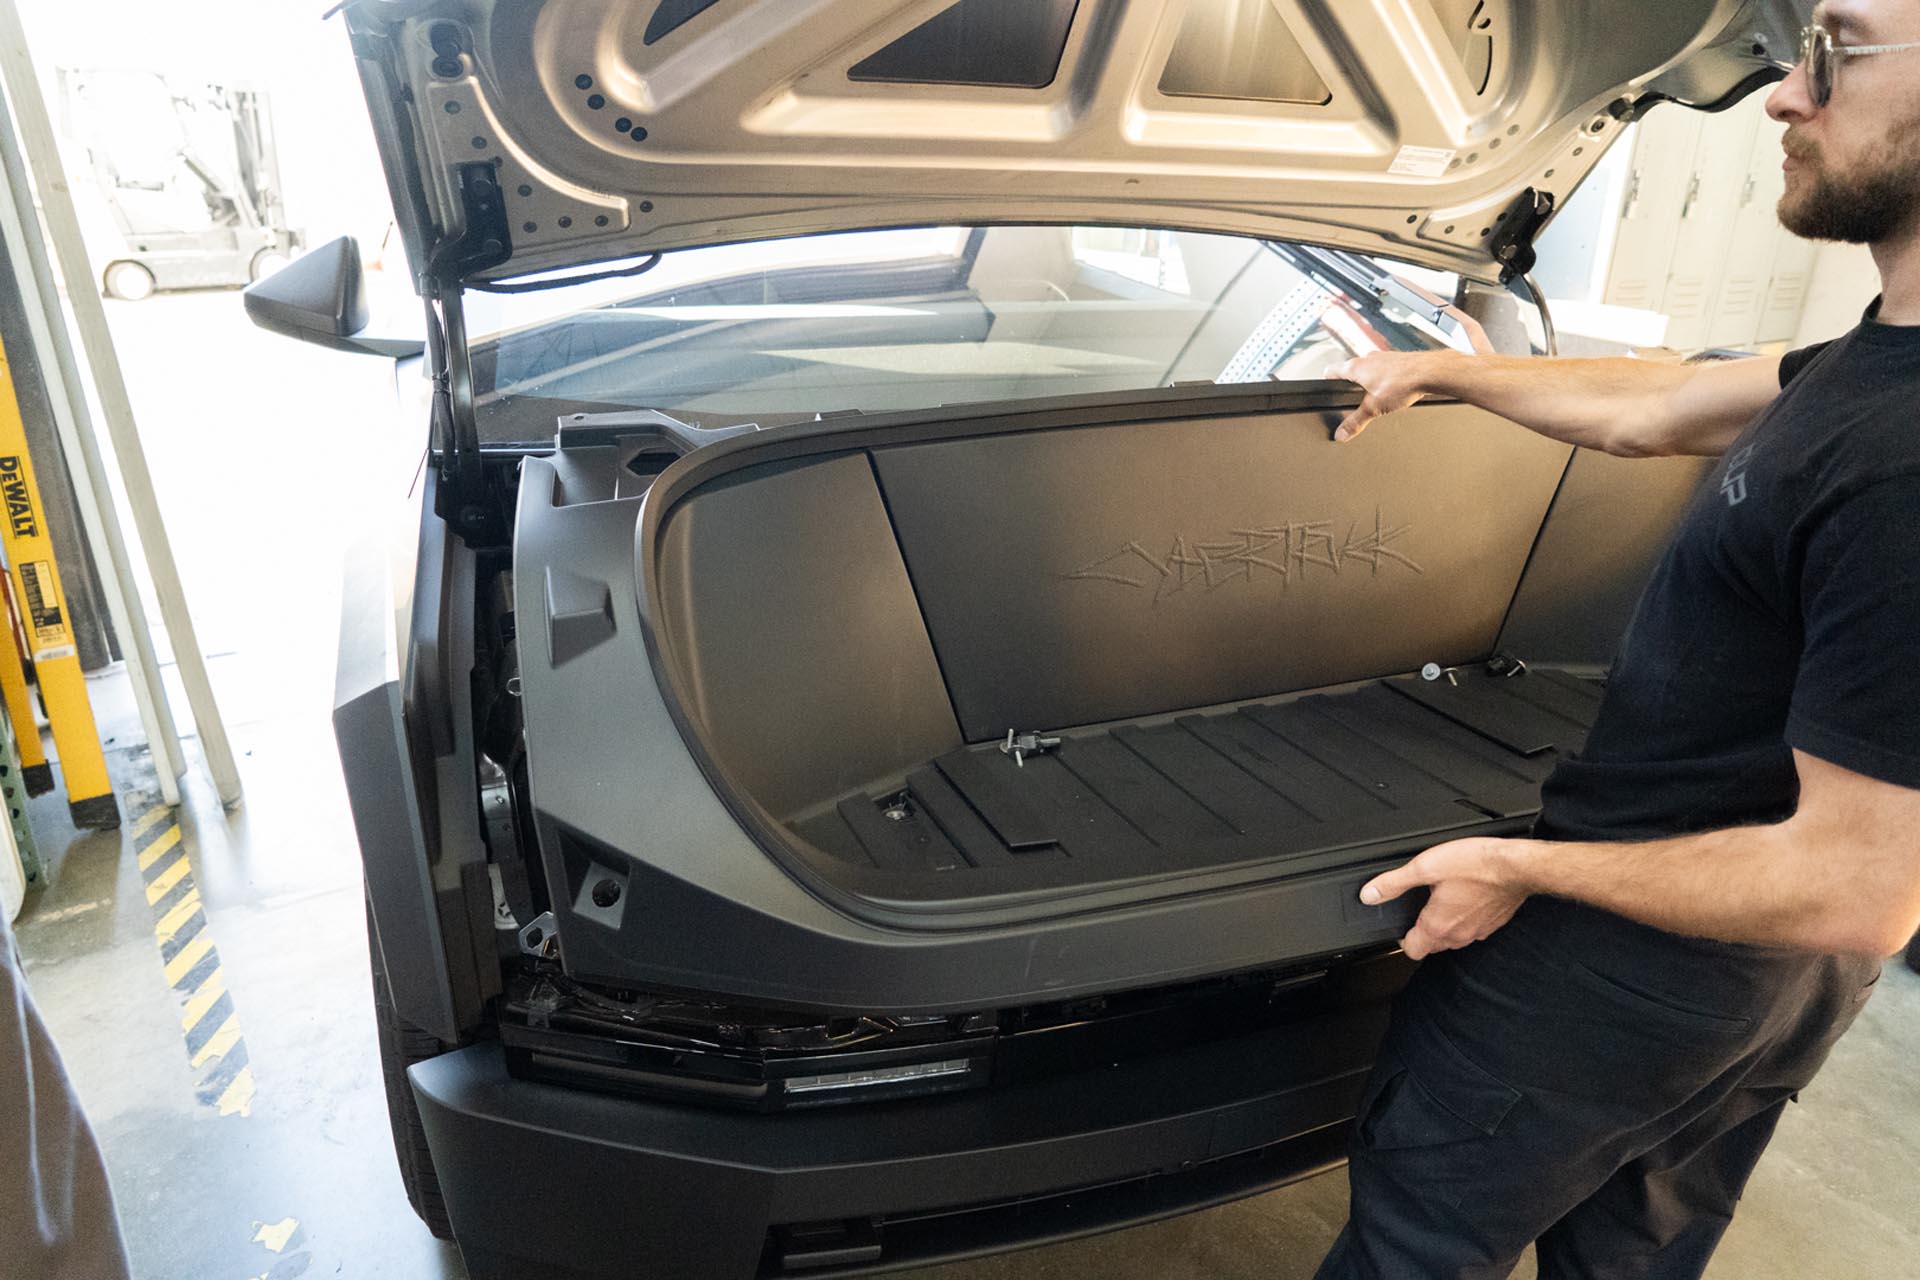
To access the factory power feed for the light bar, you’ll need to remove the front trunk tub assembly. Using a pry tool, remove the flap covers to expose (x4) 10mm bolts securing the front trunk tub to the vehicle.

Using a 10mm socket, remove the (x4) 10mm bolts.
Next, remove the upper tub applique by pulling upward in a swift motion.
Using a 10mm socket, remove the (x2) 10mm bolts securing the top of the tub to the vehicle.
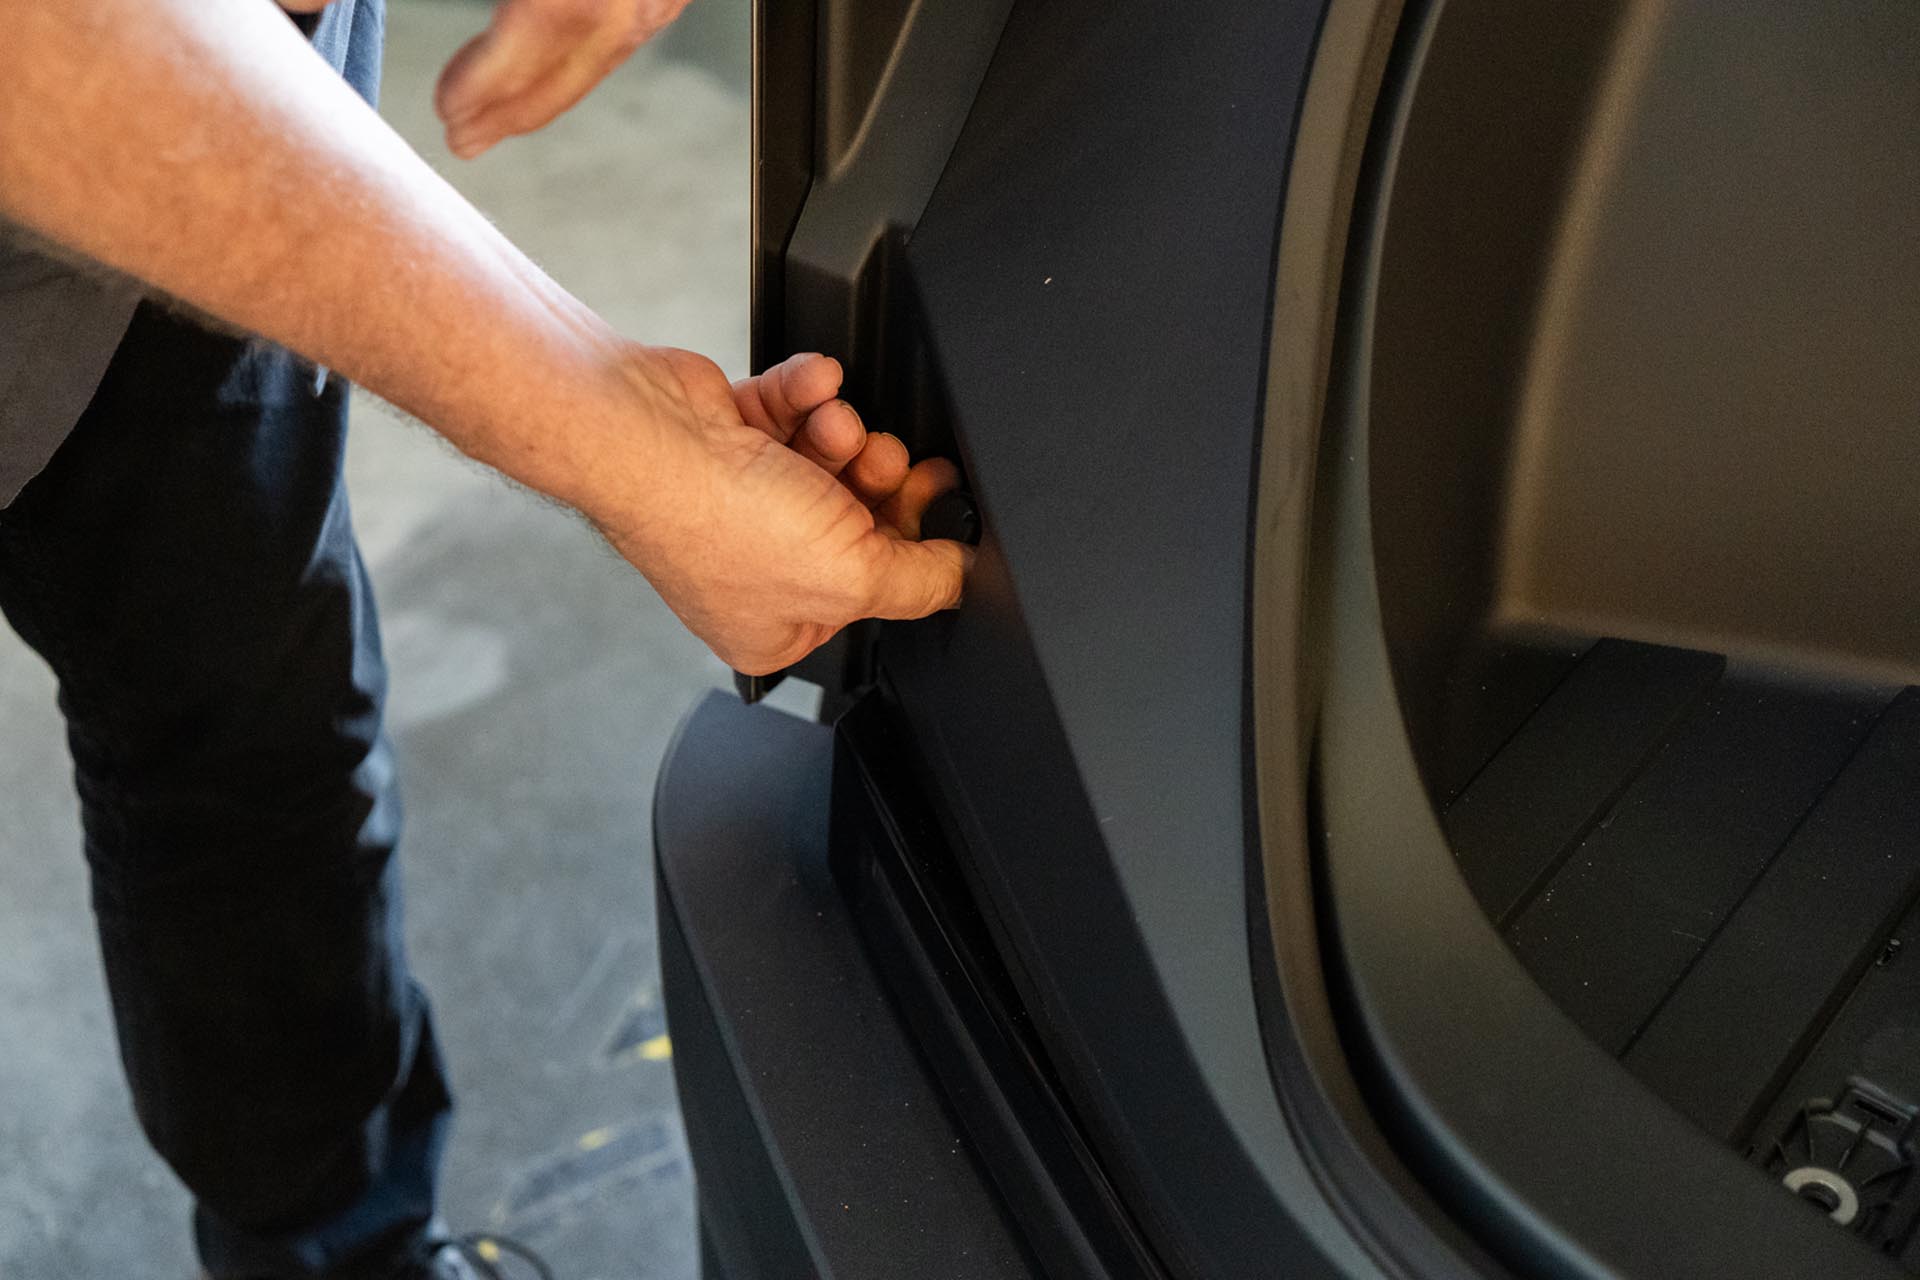
Next, rotate the retainers on either side of the front tub by a half turn to disengage the tabs. Pull the retainers away from the vehicle.

Next, disconnect the front trunk tub light power cable. This is right behind the driver-side tub edge.
Remove the front trunk tub assembly from the vehicle.
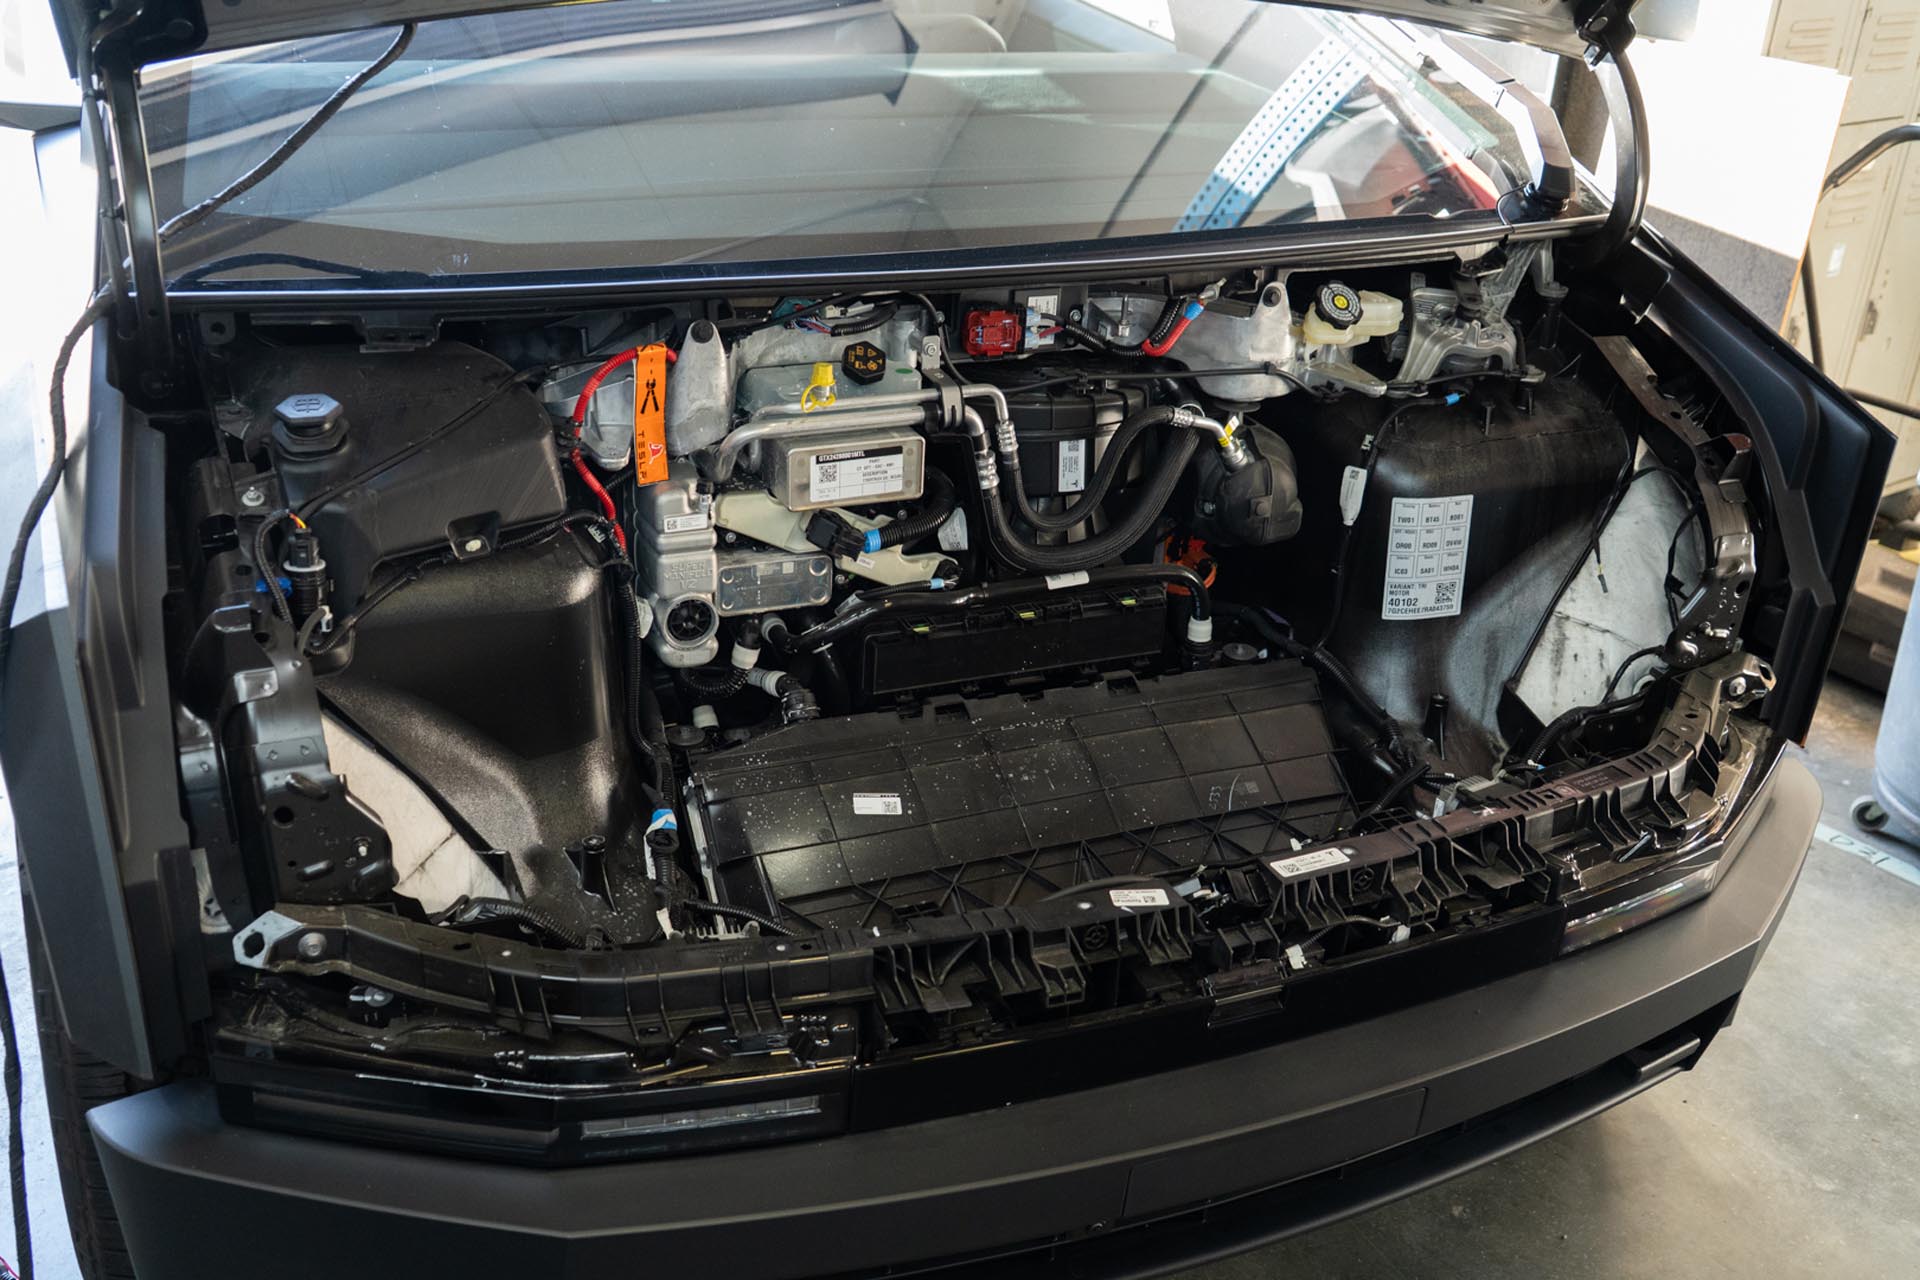
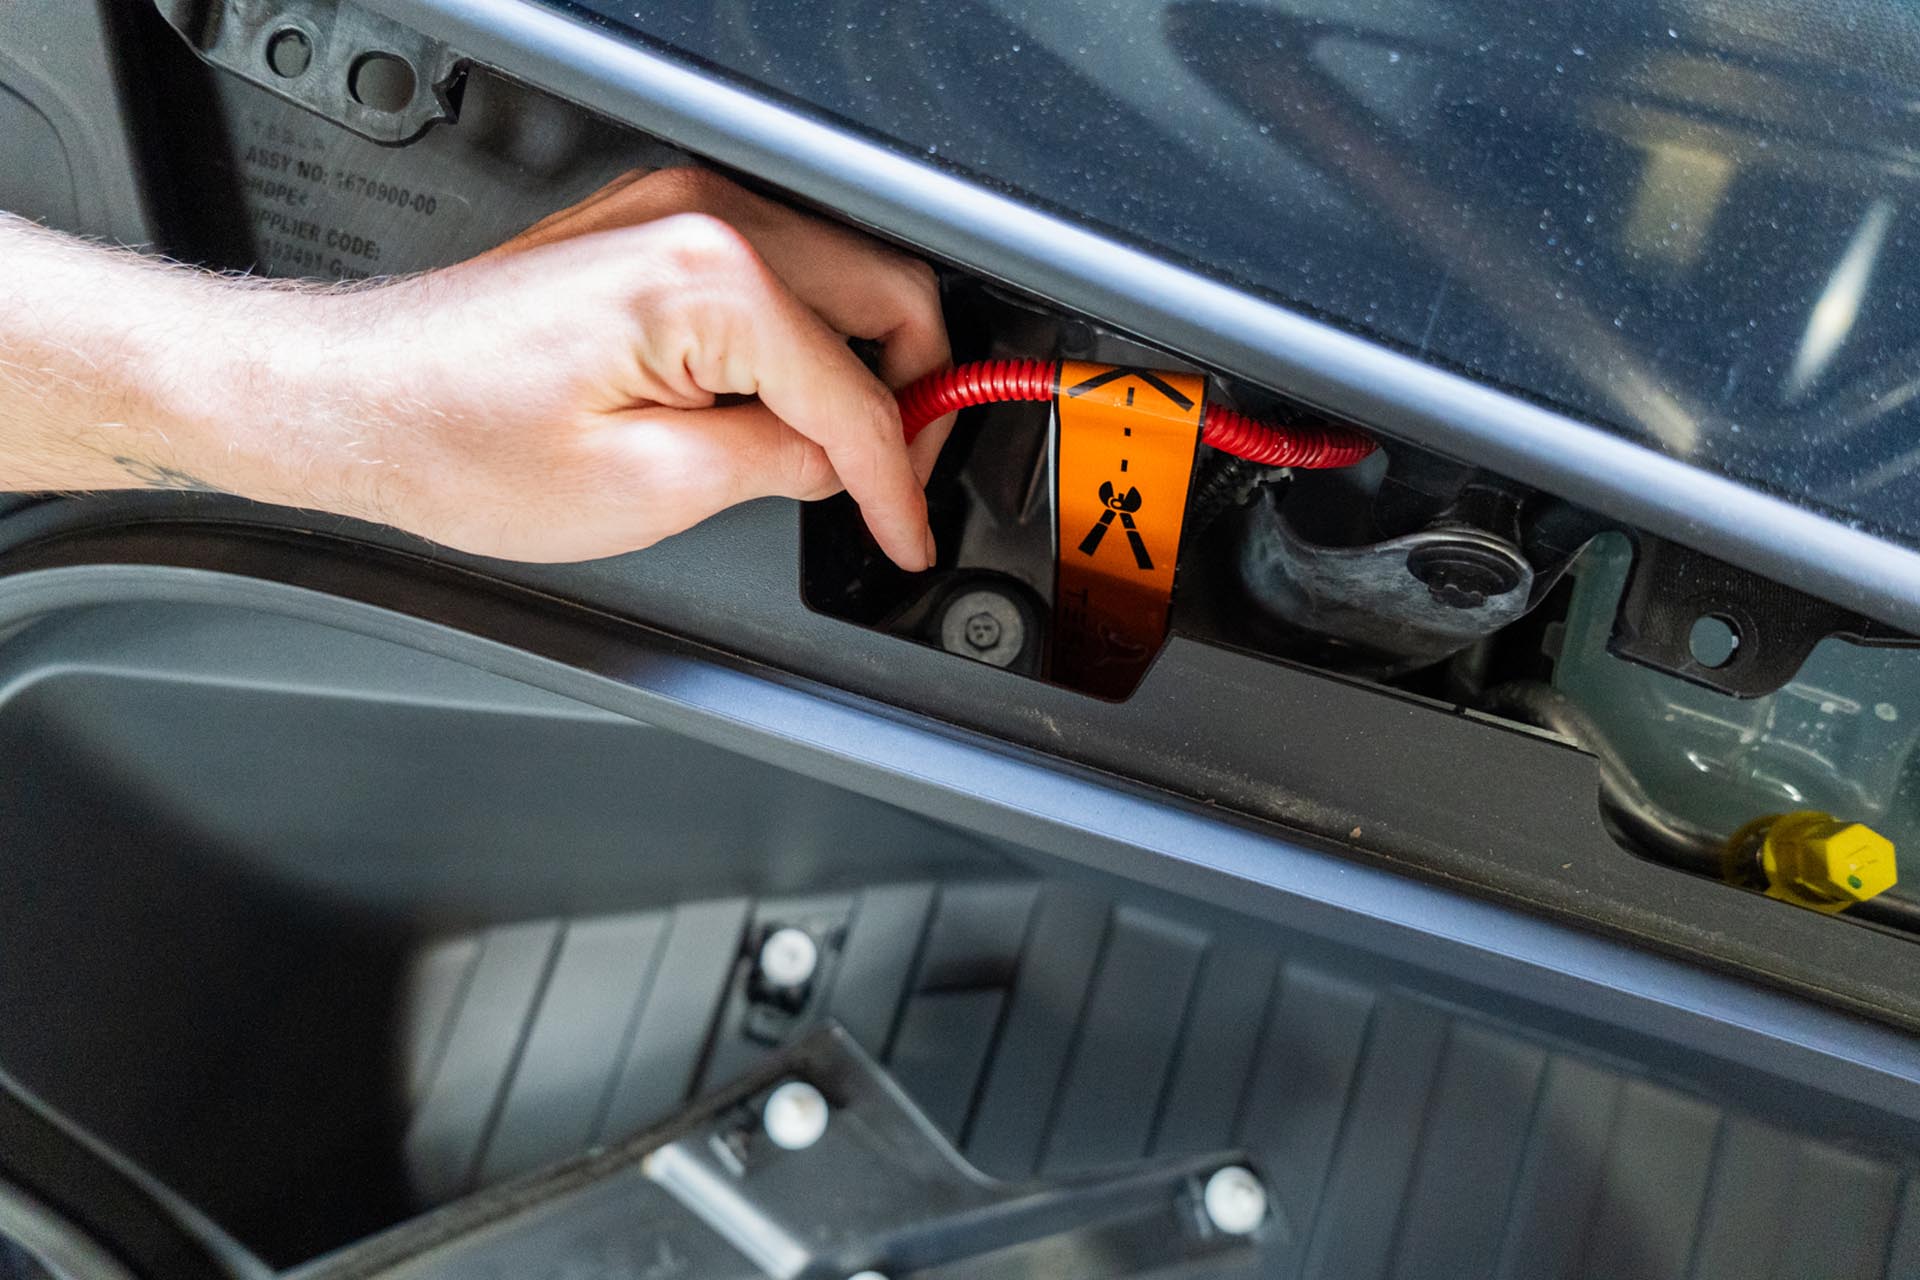
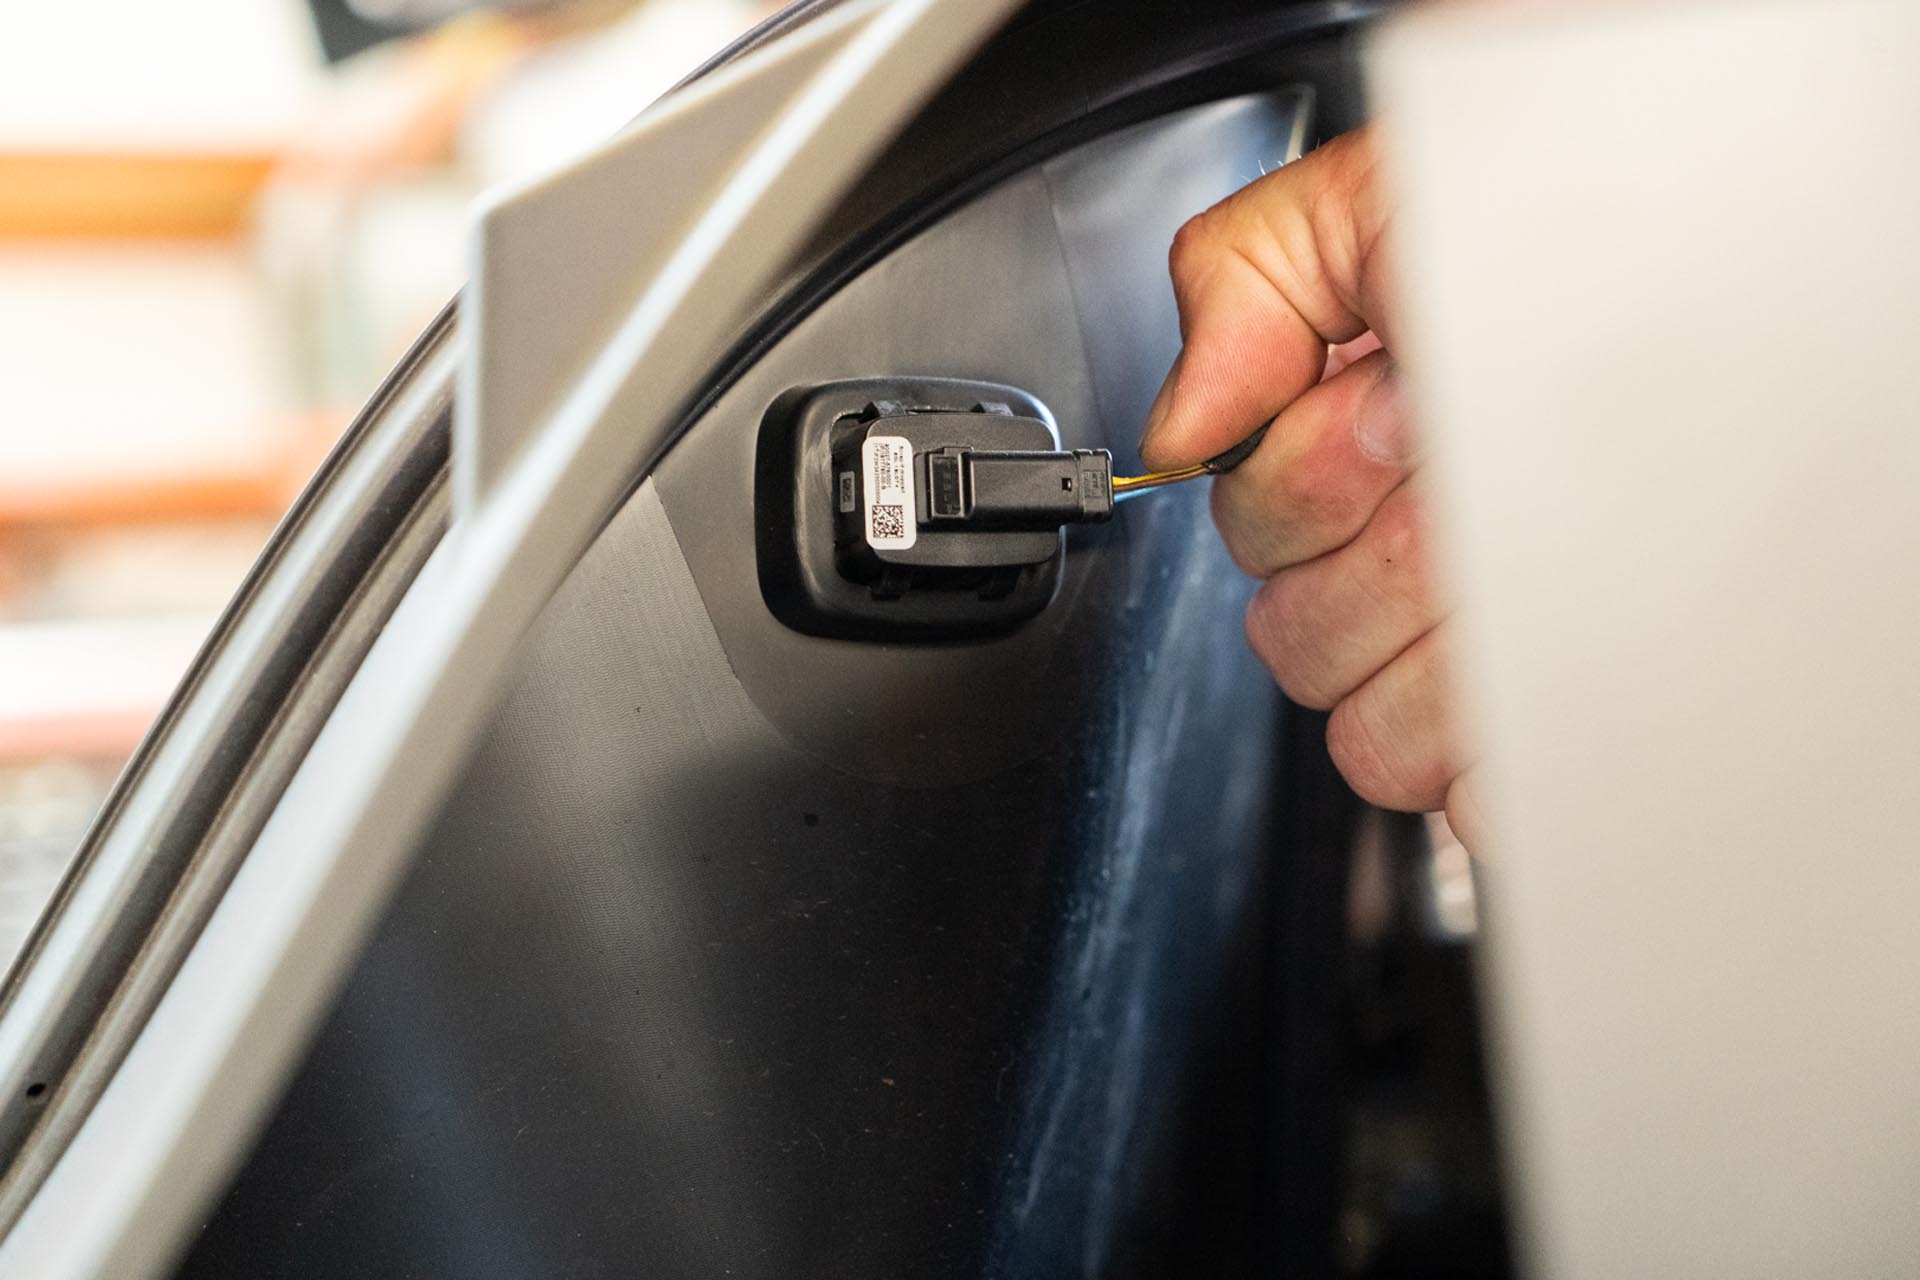
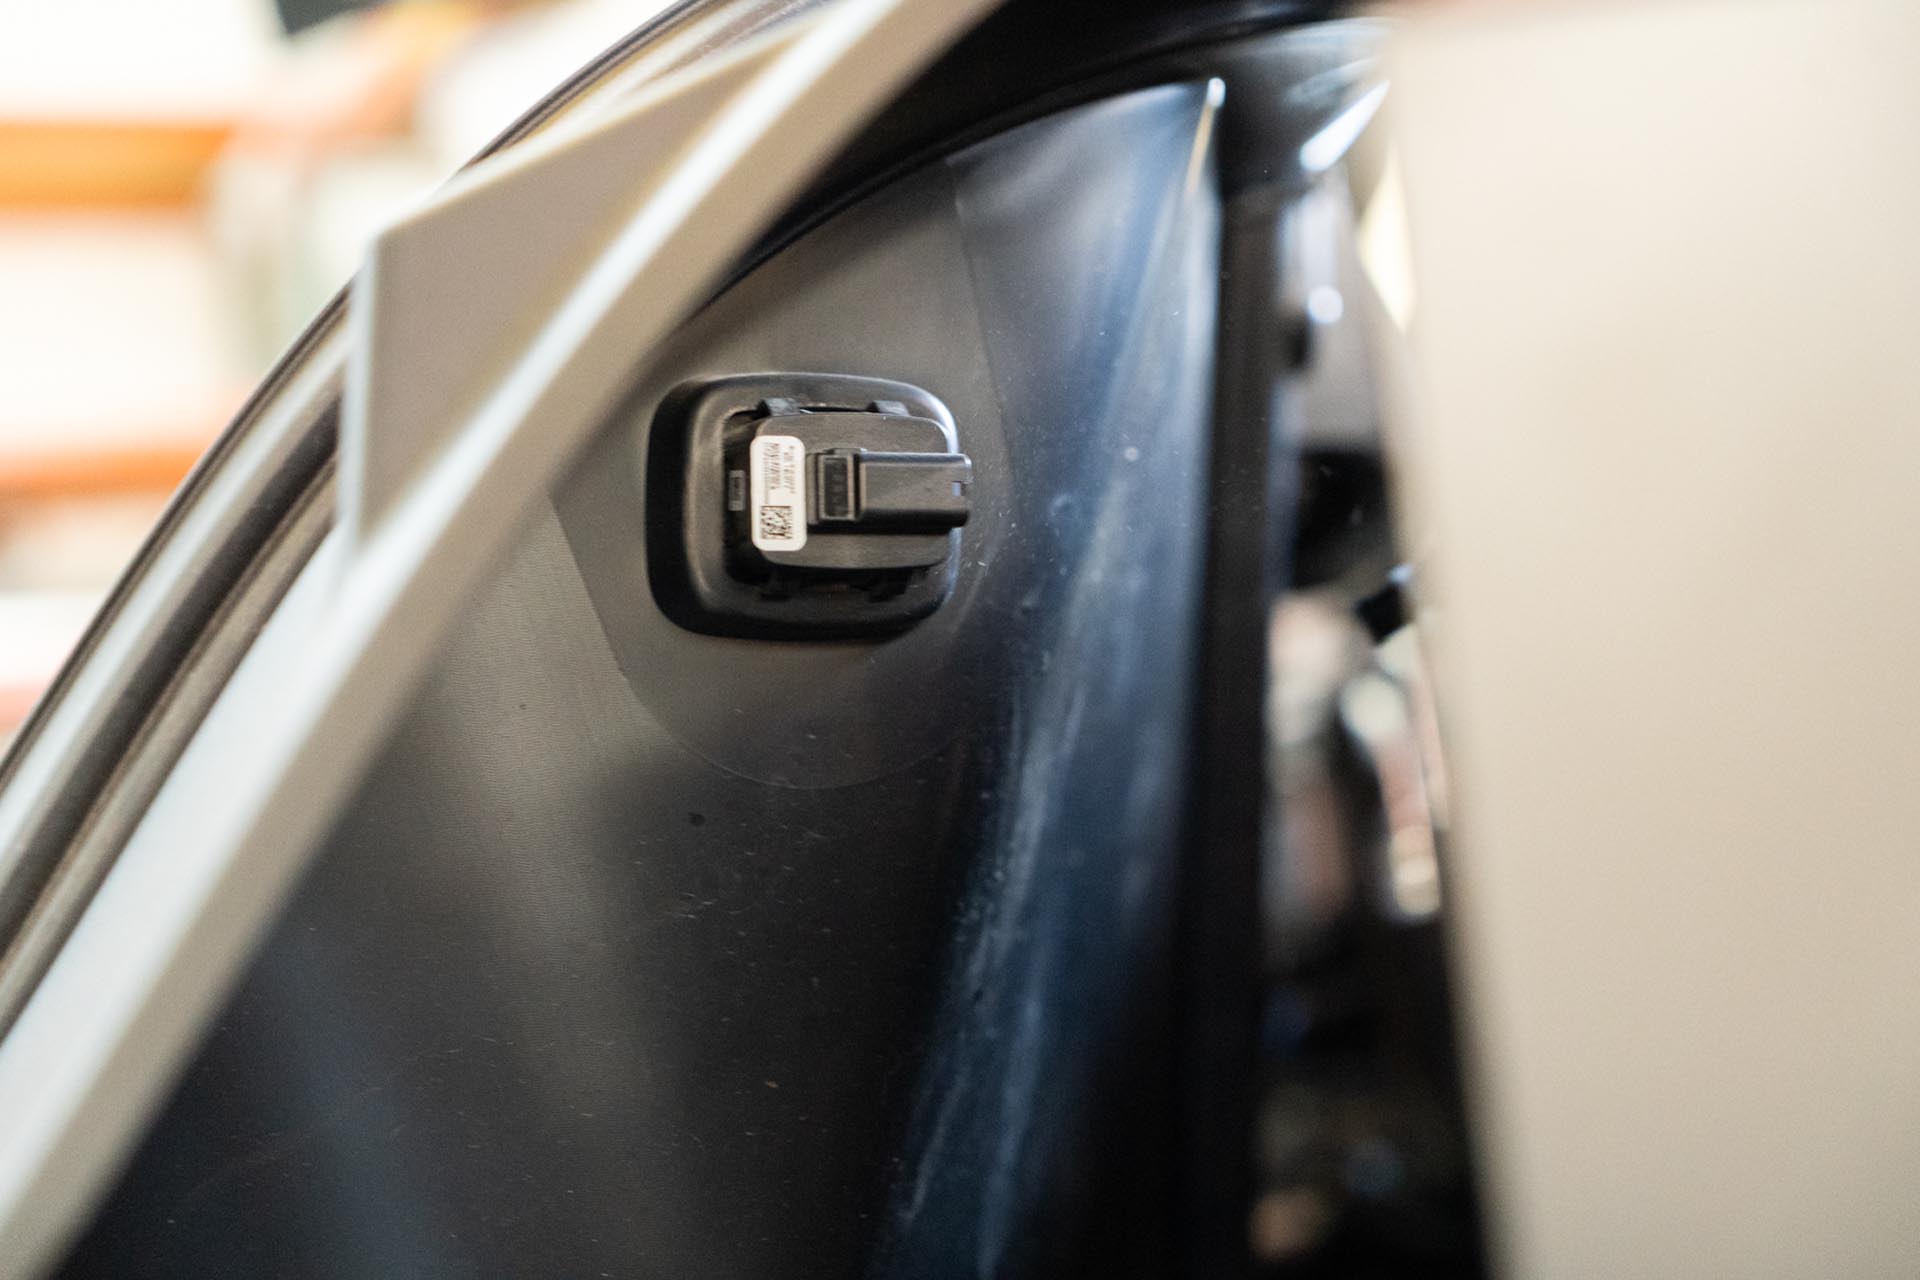
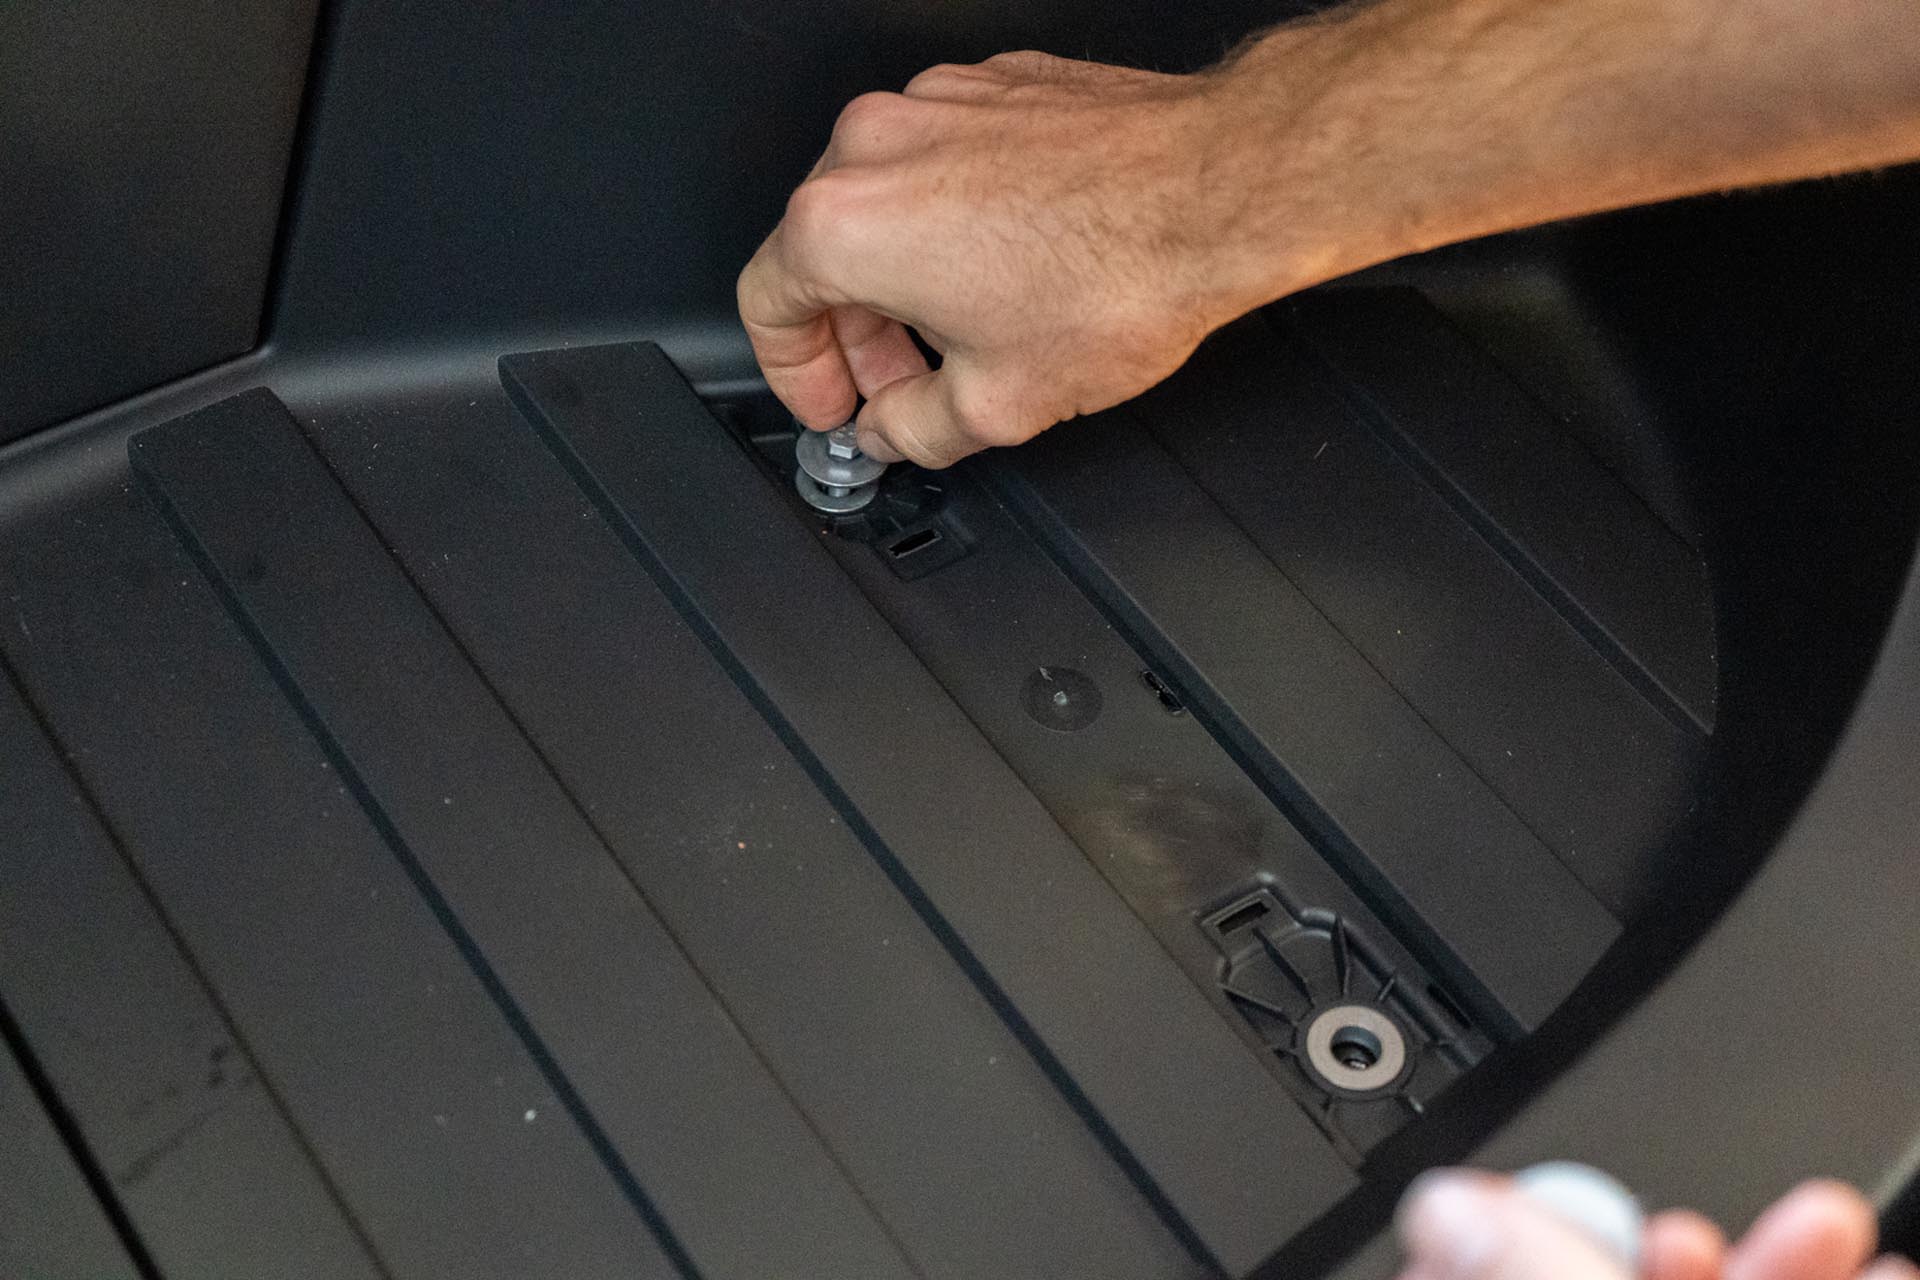
With the tub assembly removed from the vehicle, locate the following front power feed, often wrapped in blue tape from the factory.
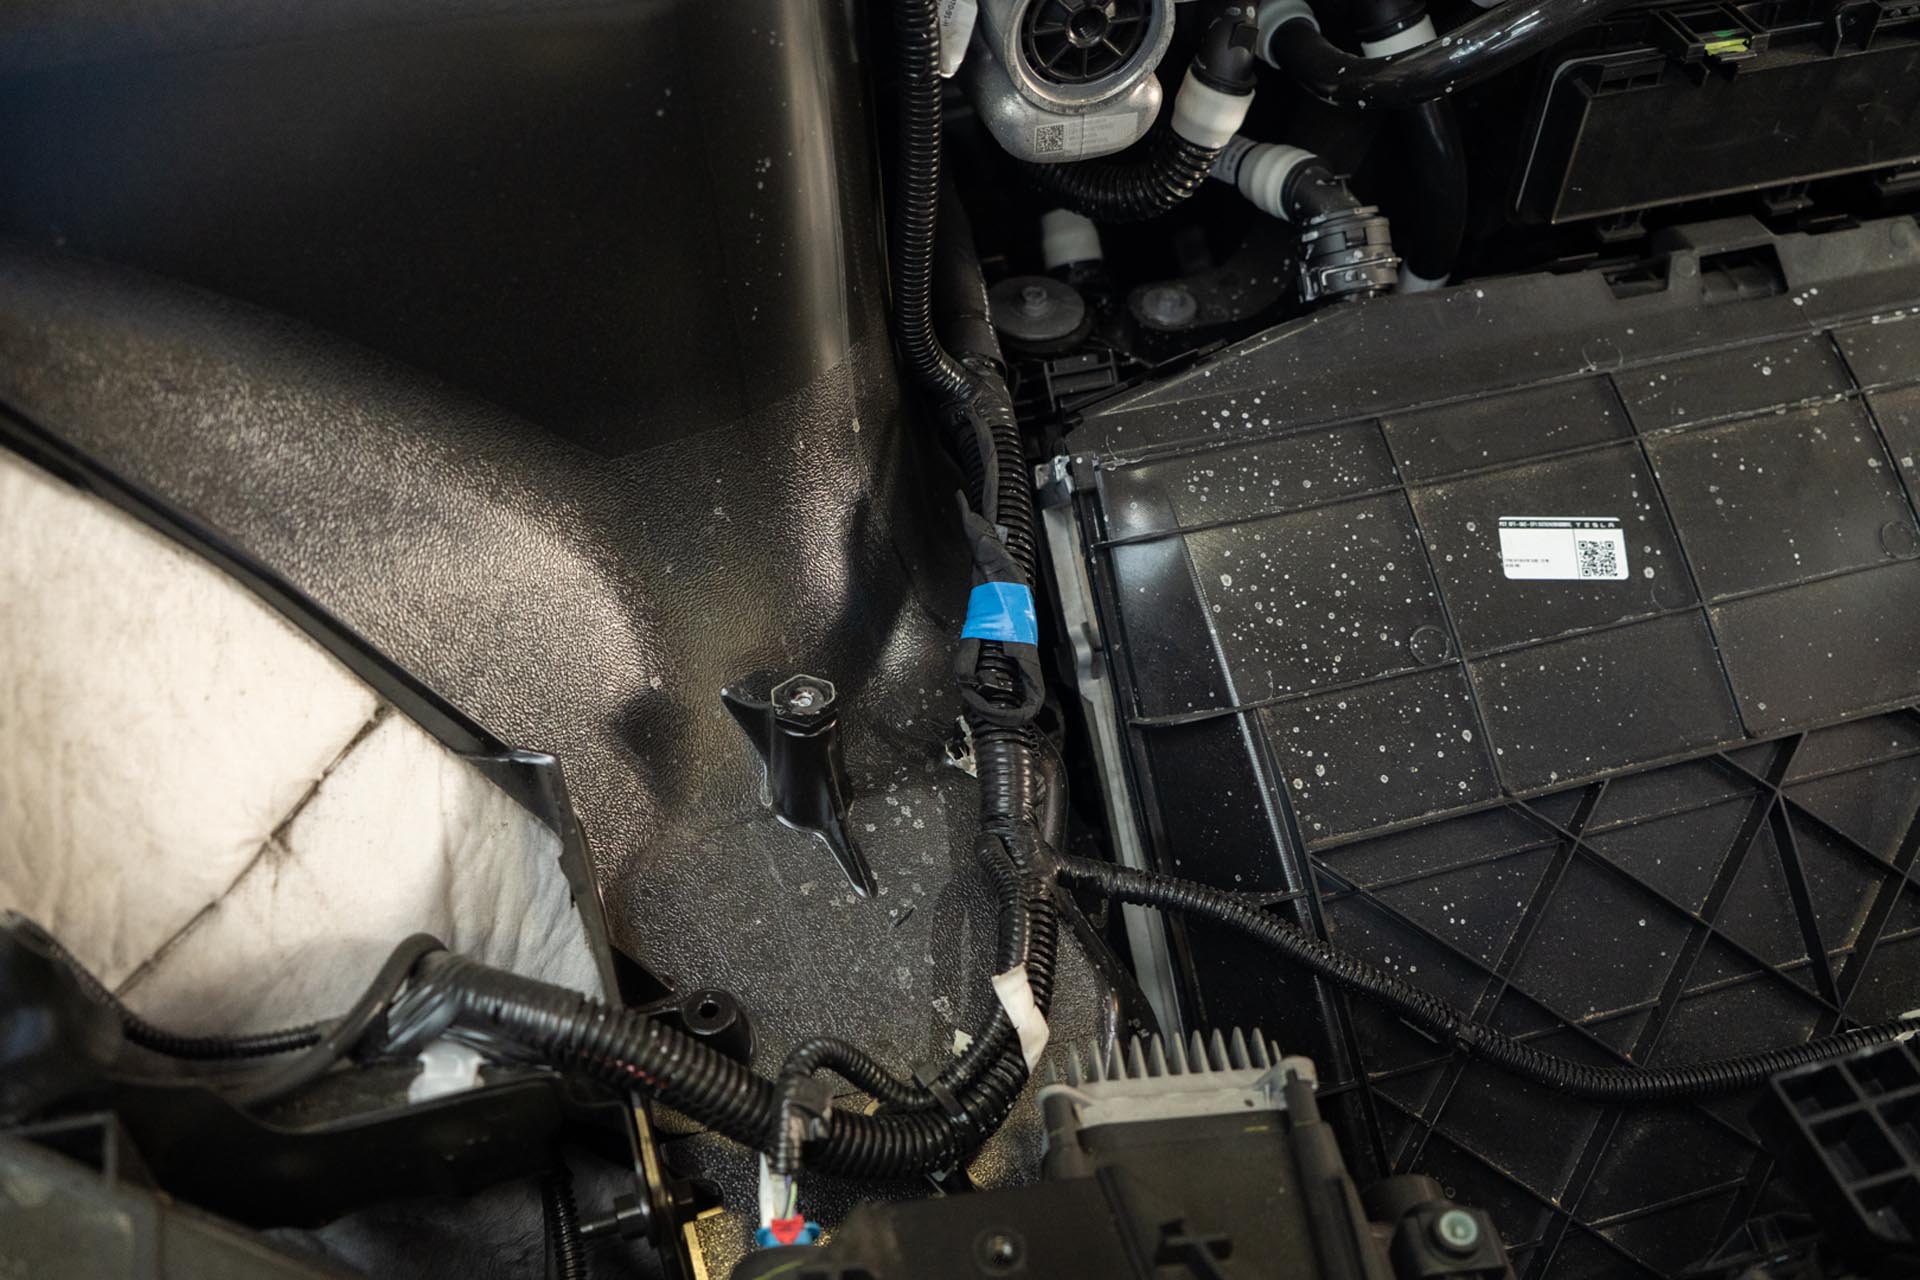
Unwrap and expose the factory front power feed.
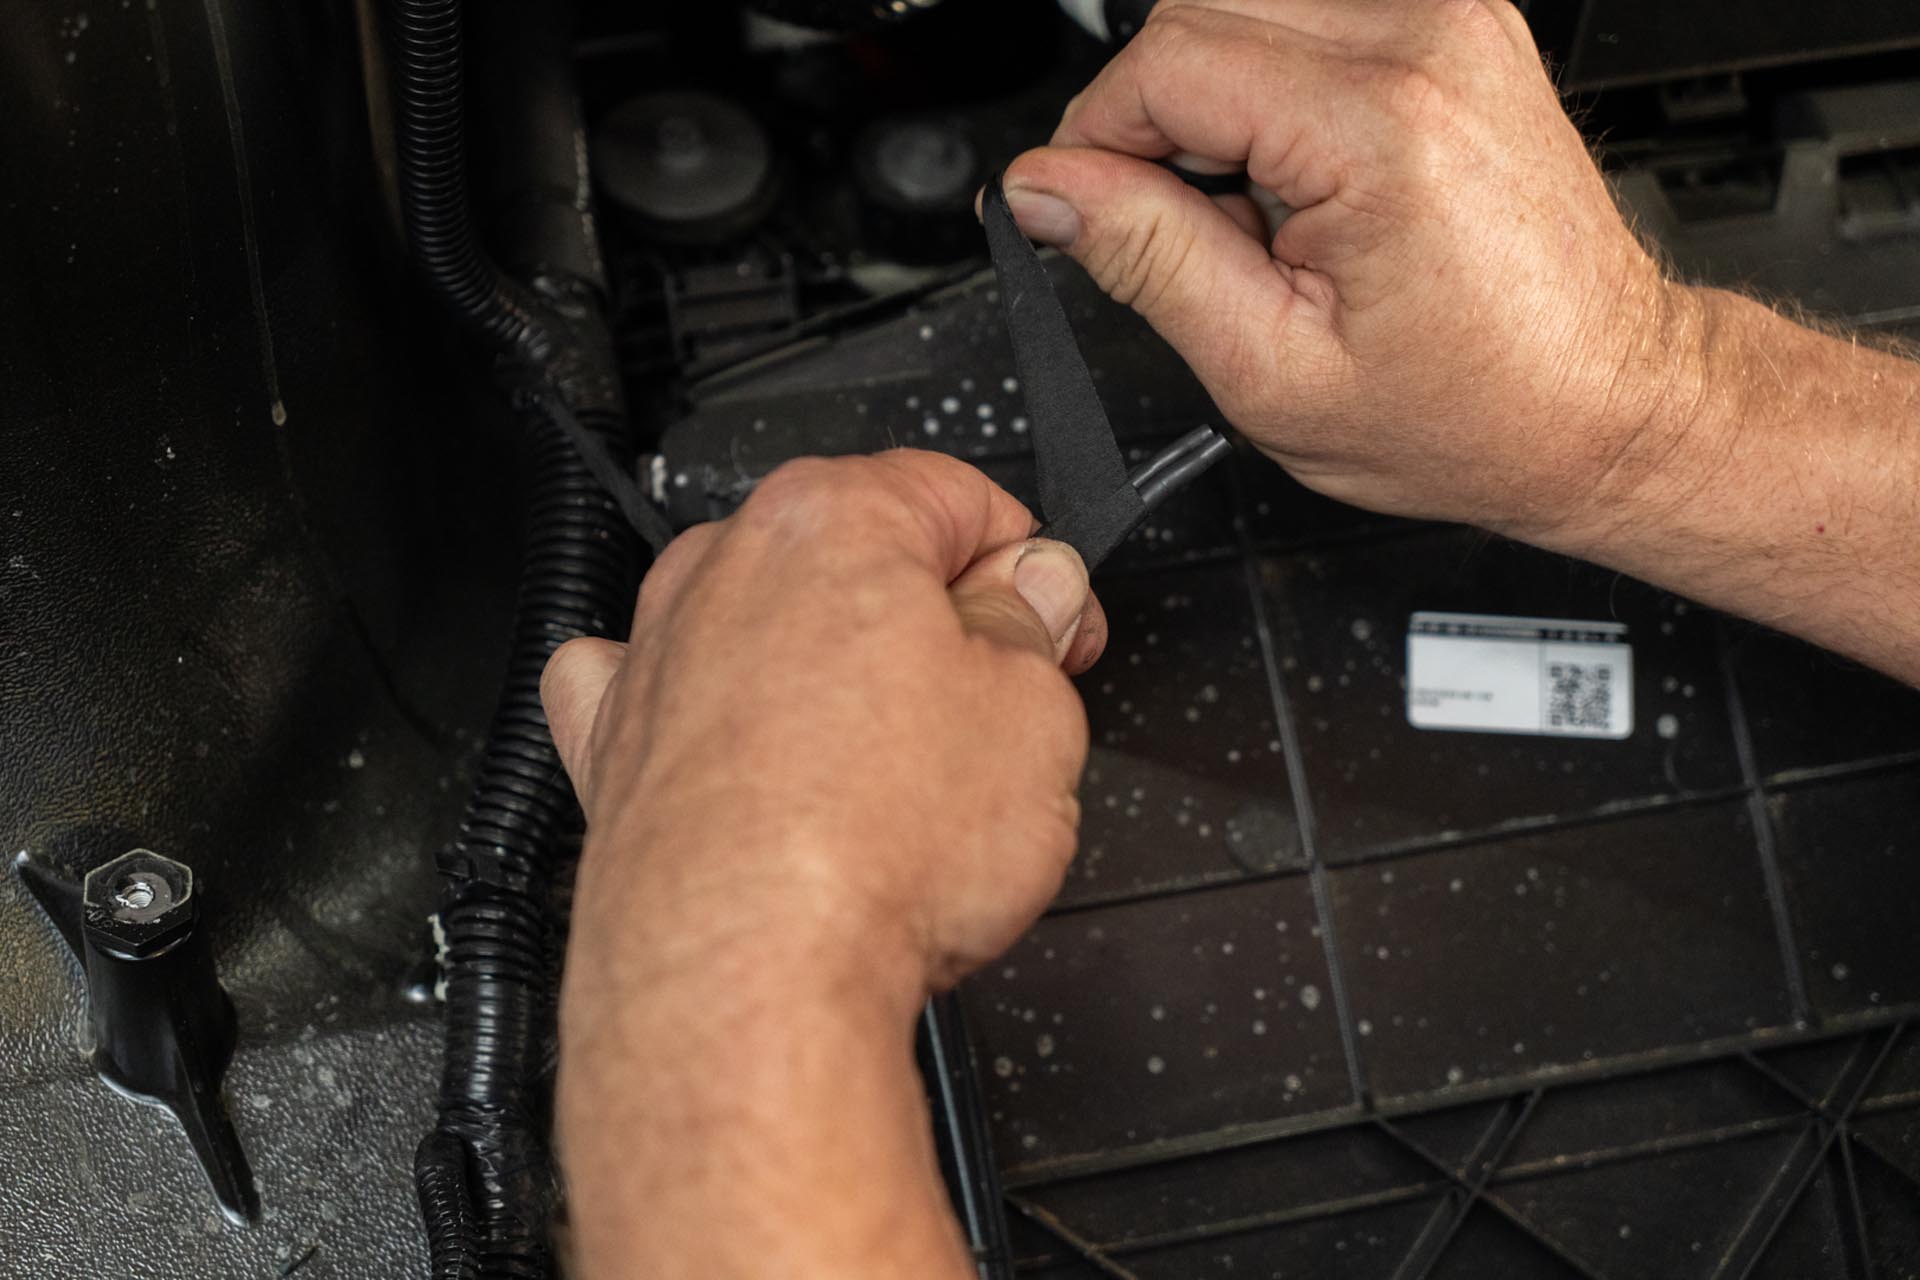
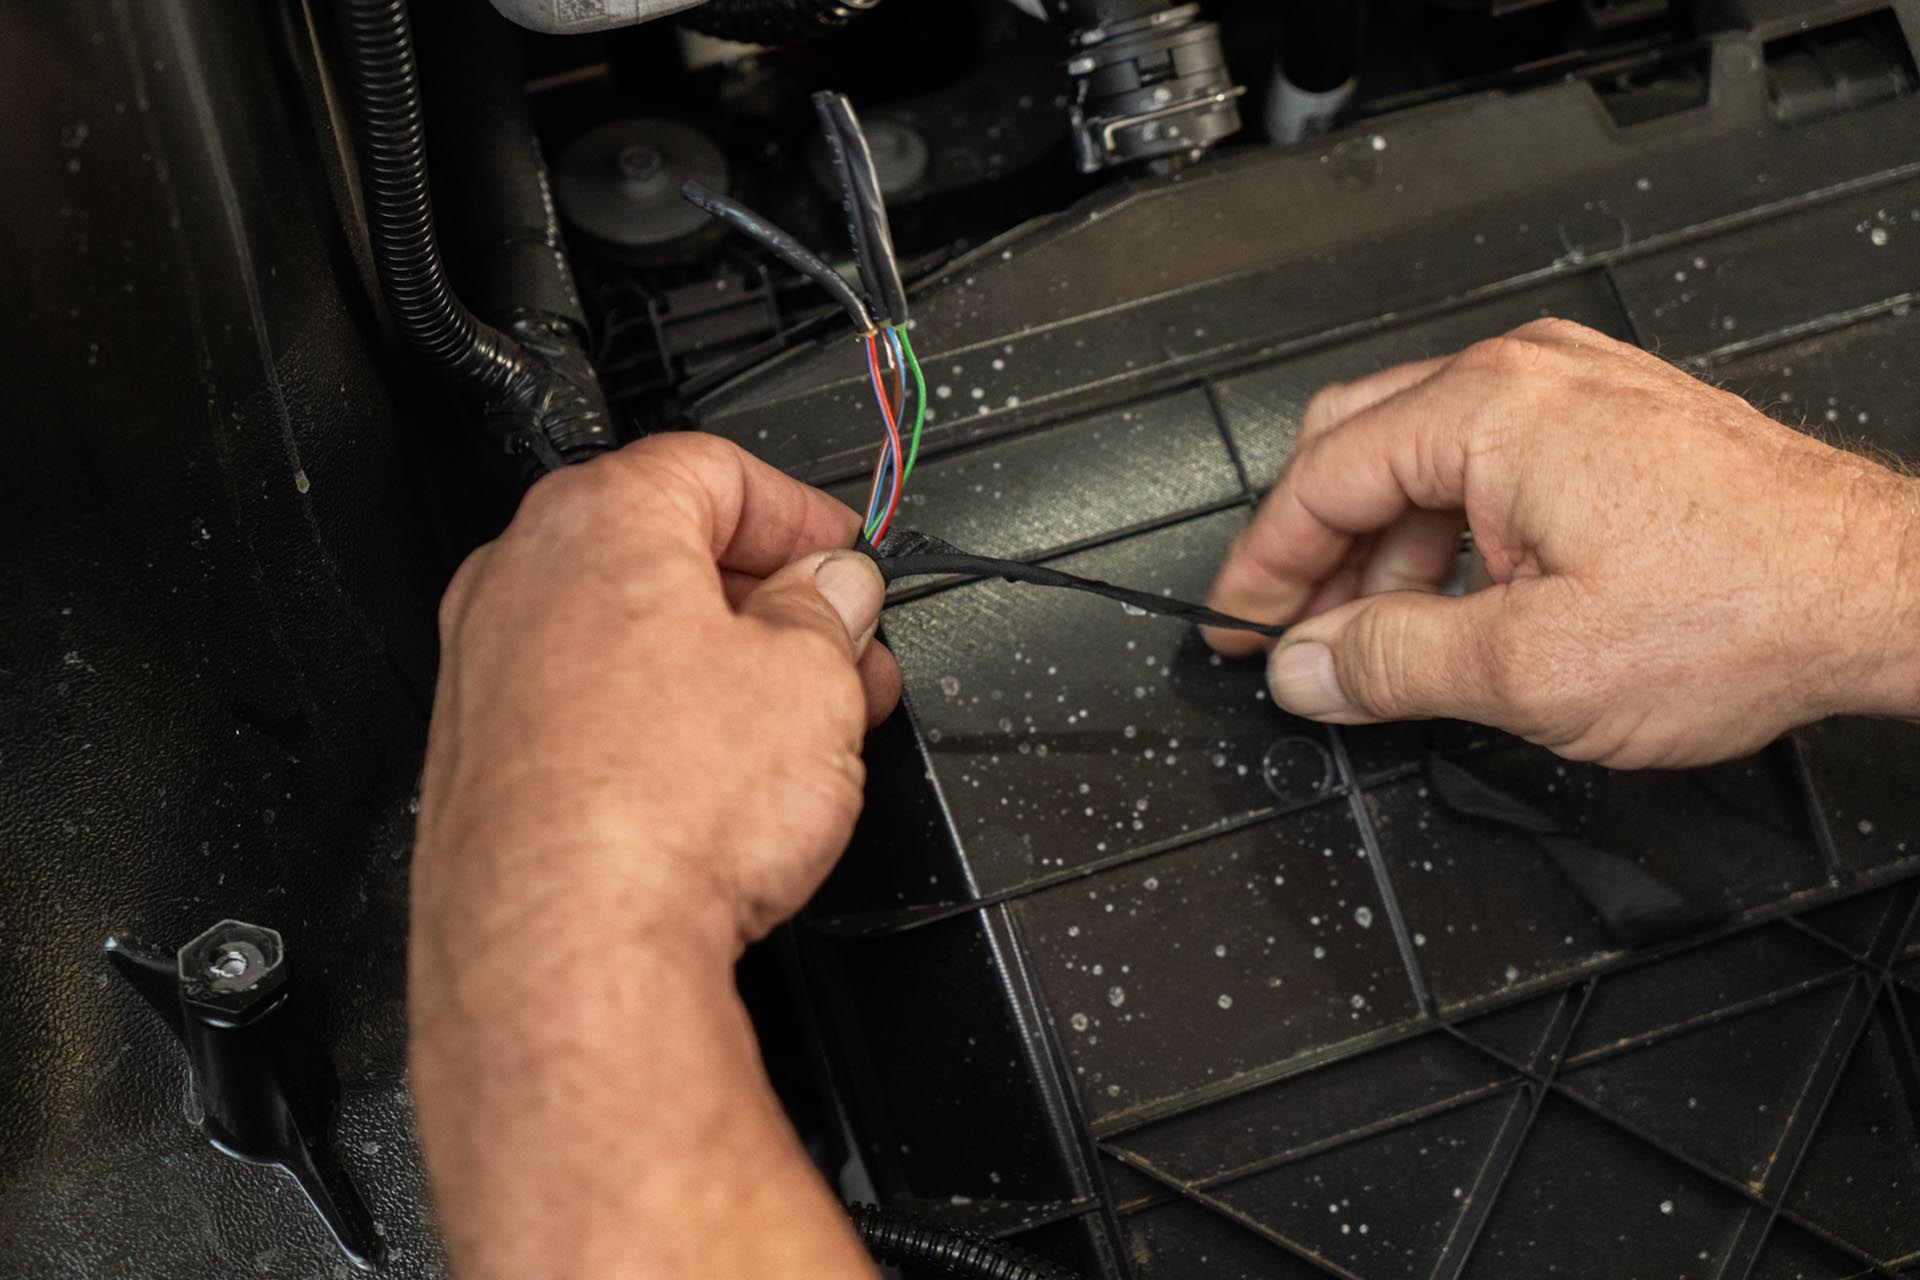
Using the provided 3 pin pigtail connector, sonnet the front power feed to the provided pigtail connector.
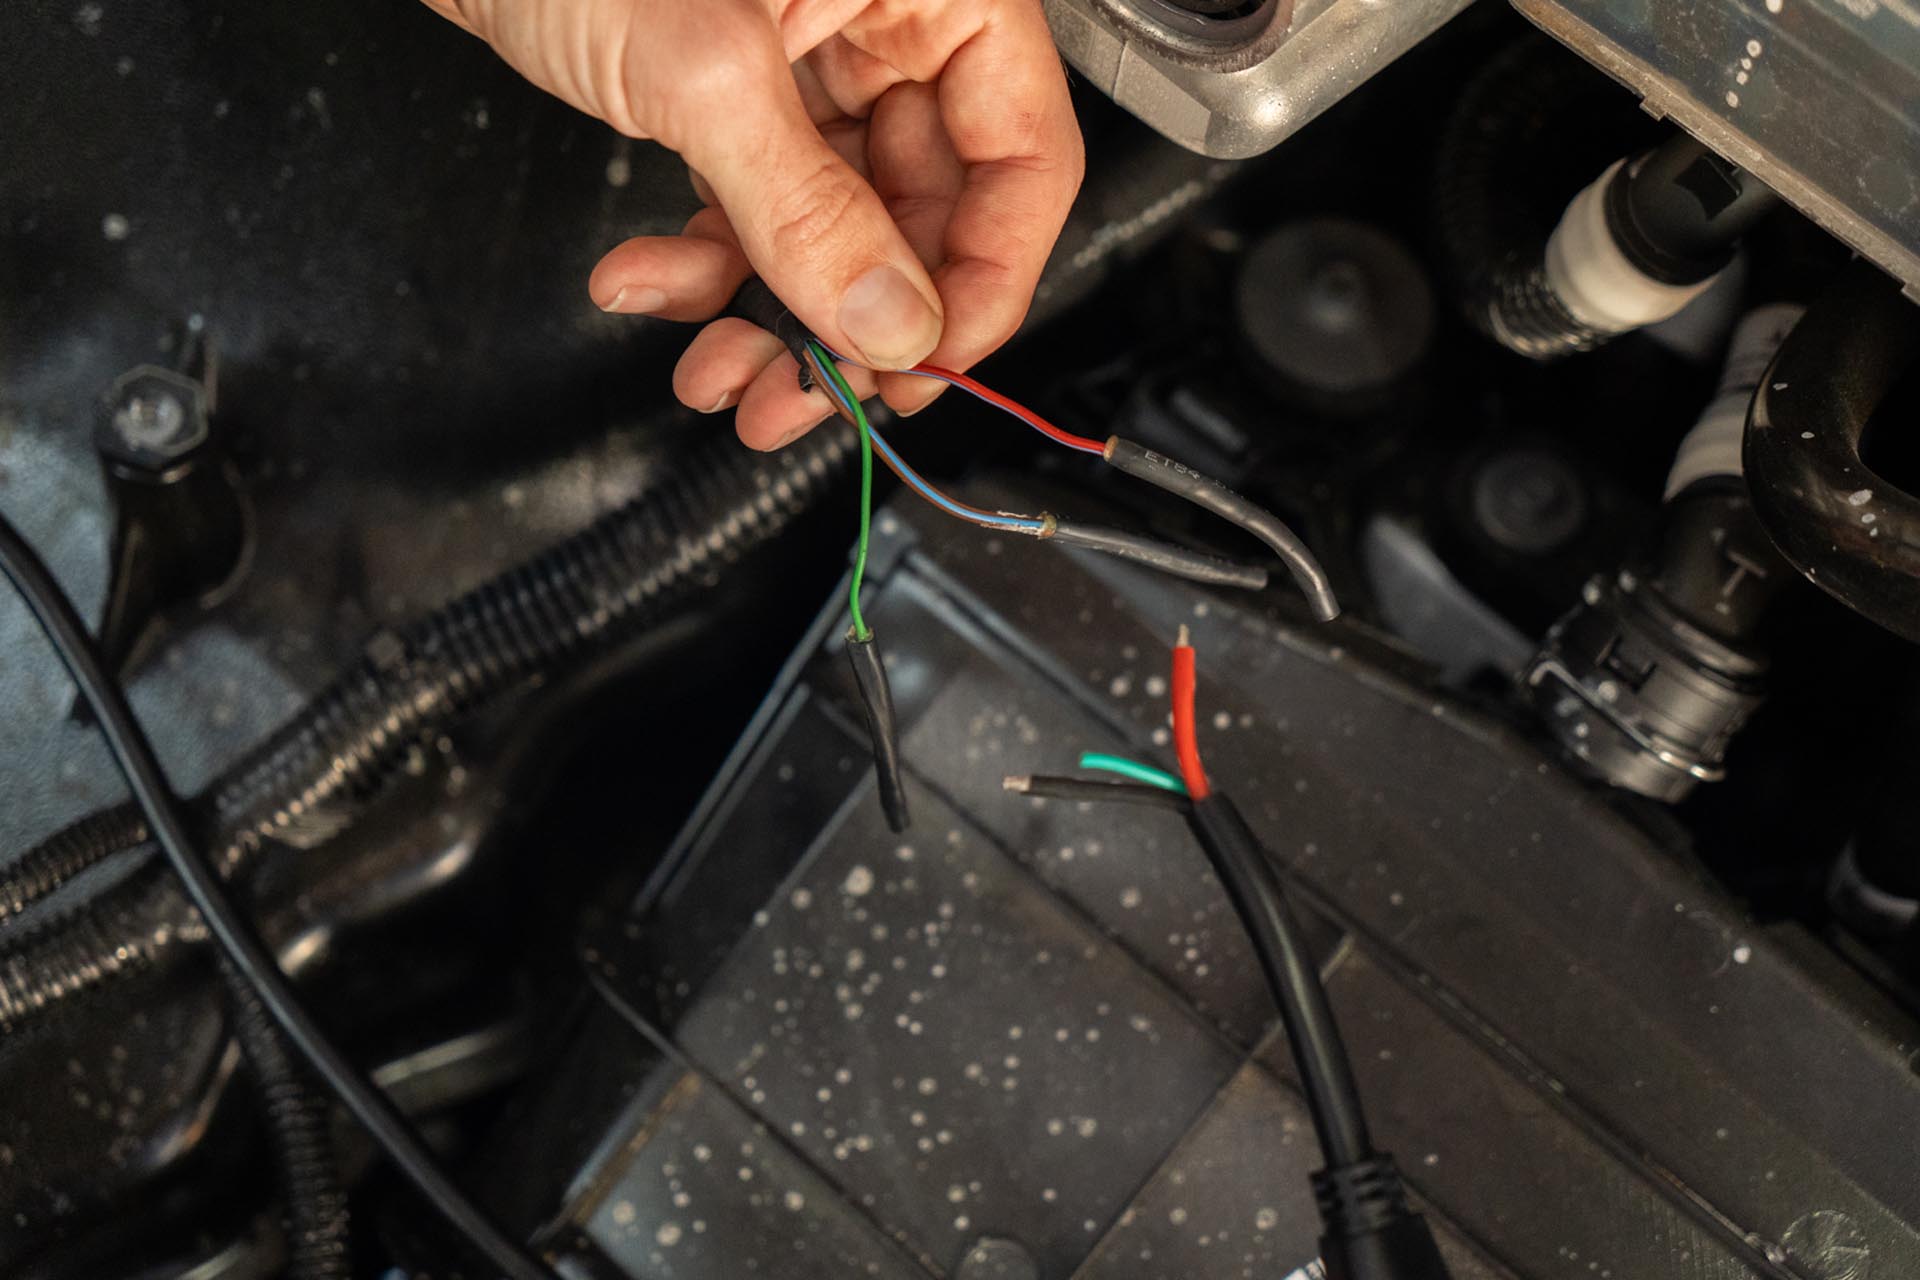
Secure the positive and negative lead ends to each other. Note that the green cable is a LIN control line intended as a multifunction communication style cable. The factory power feed option does not provide multifunction control at this time, so connecting that cable is not currently necessary.
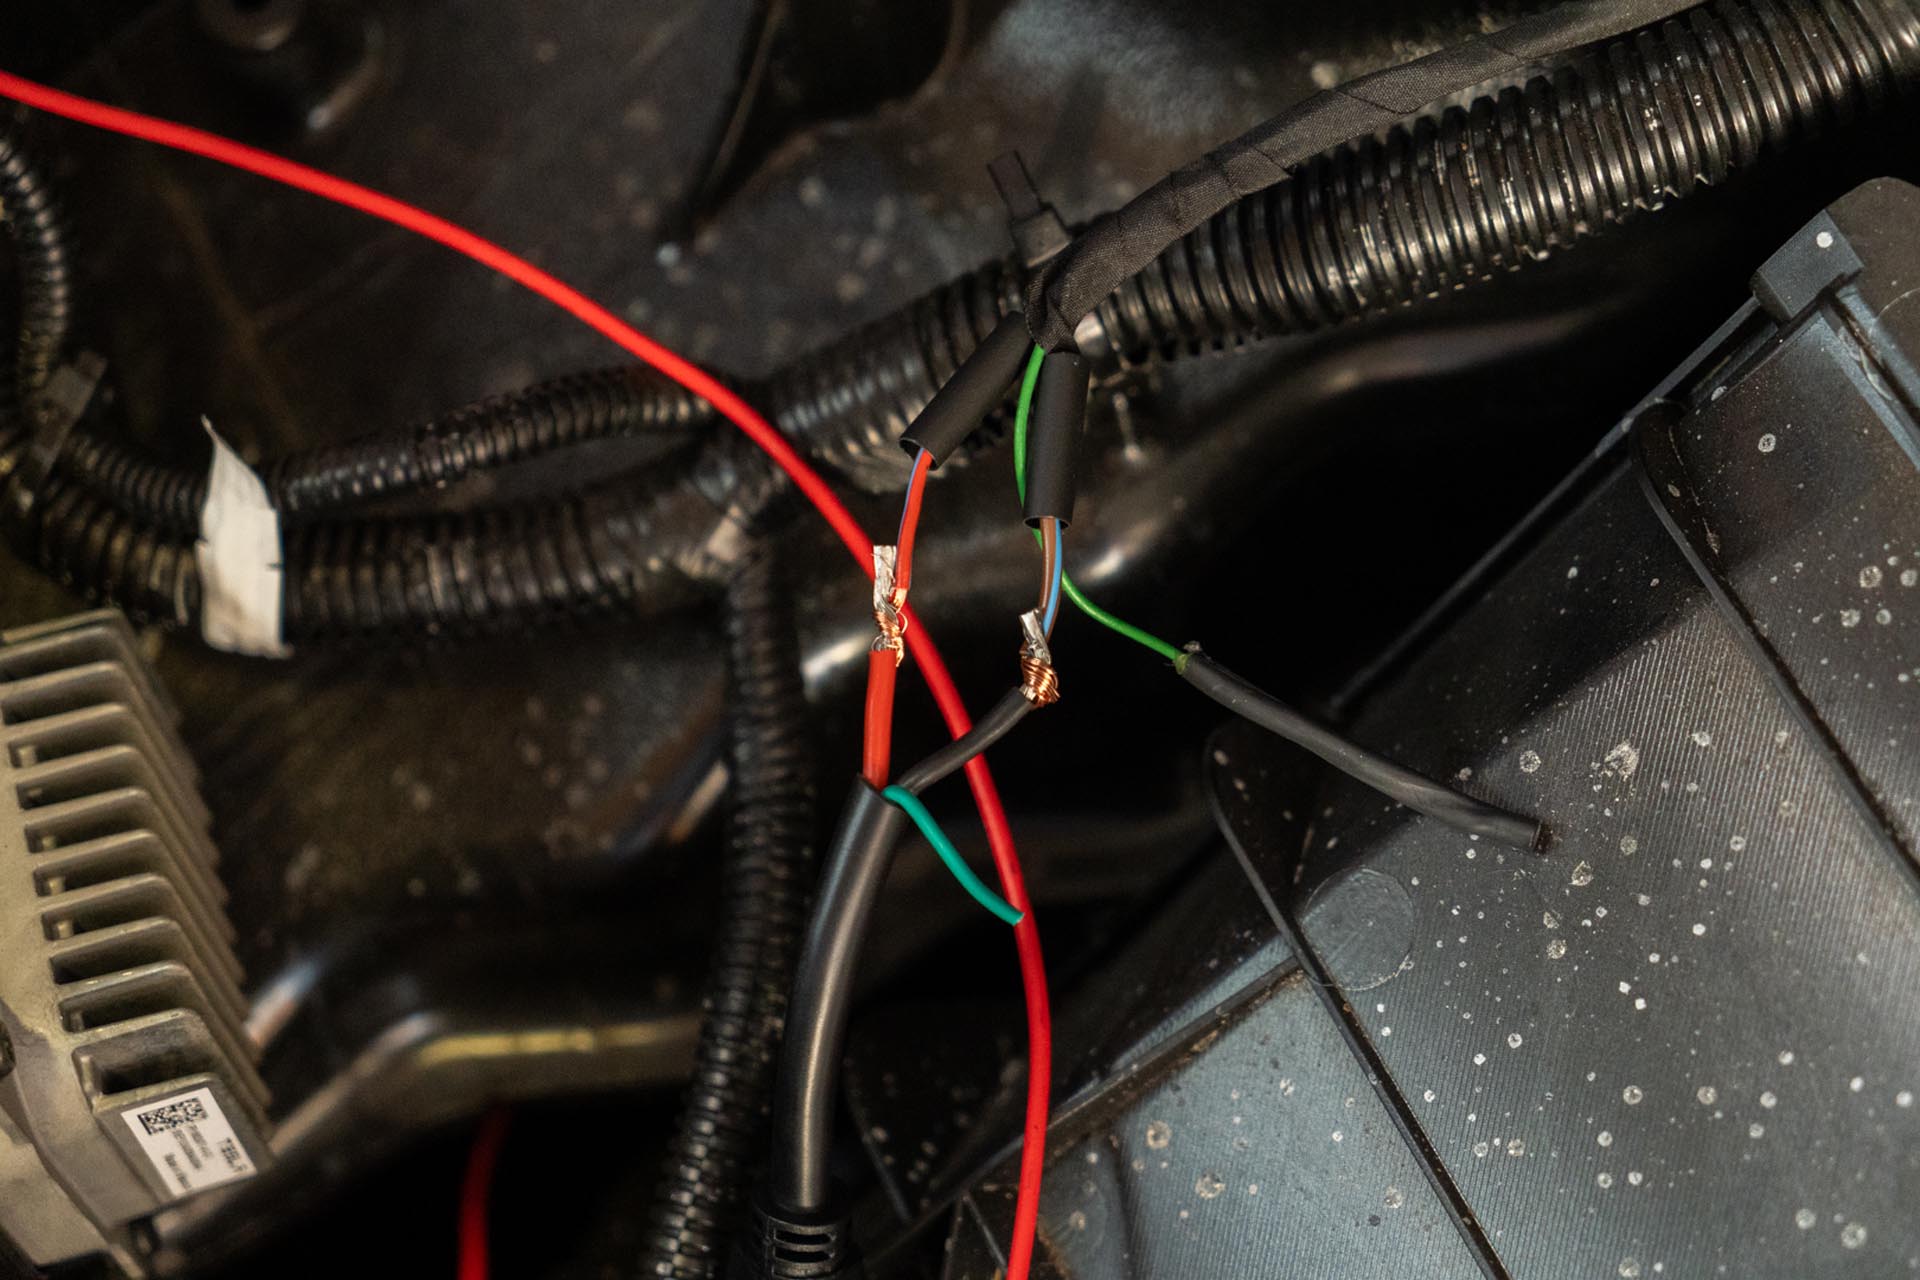

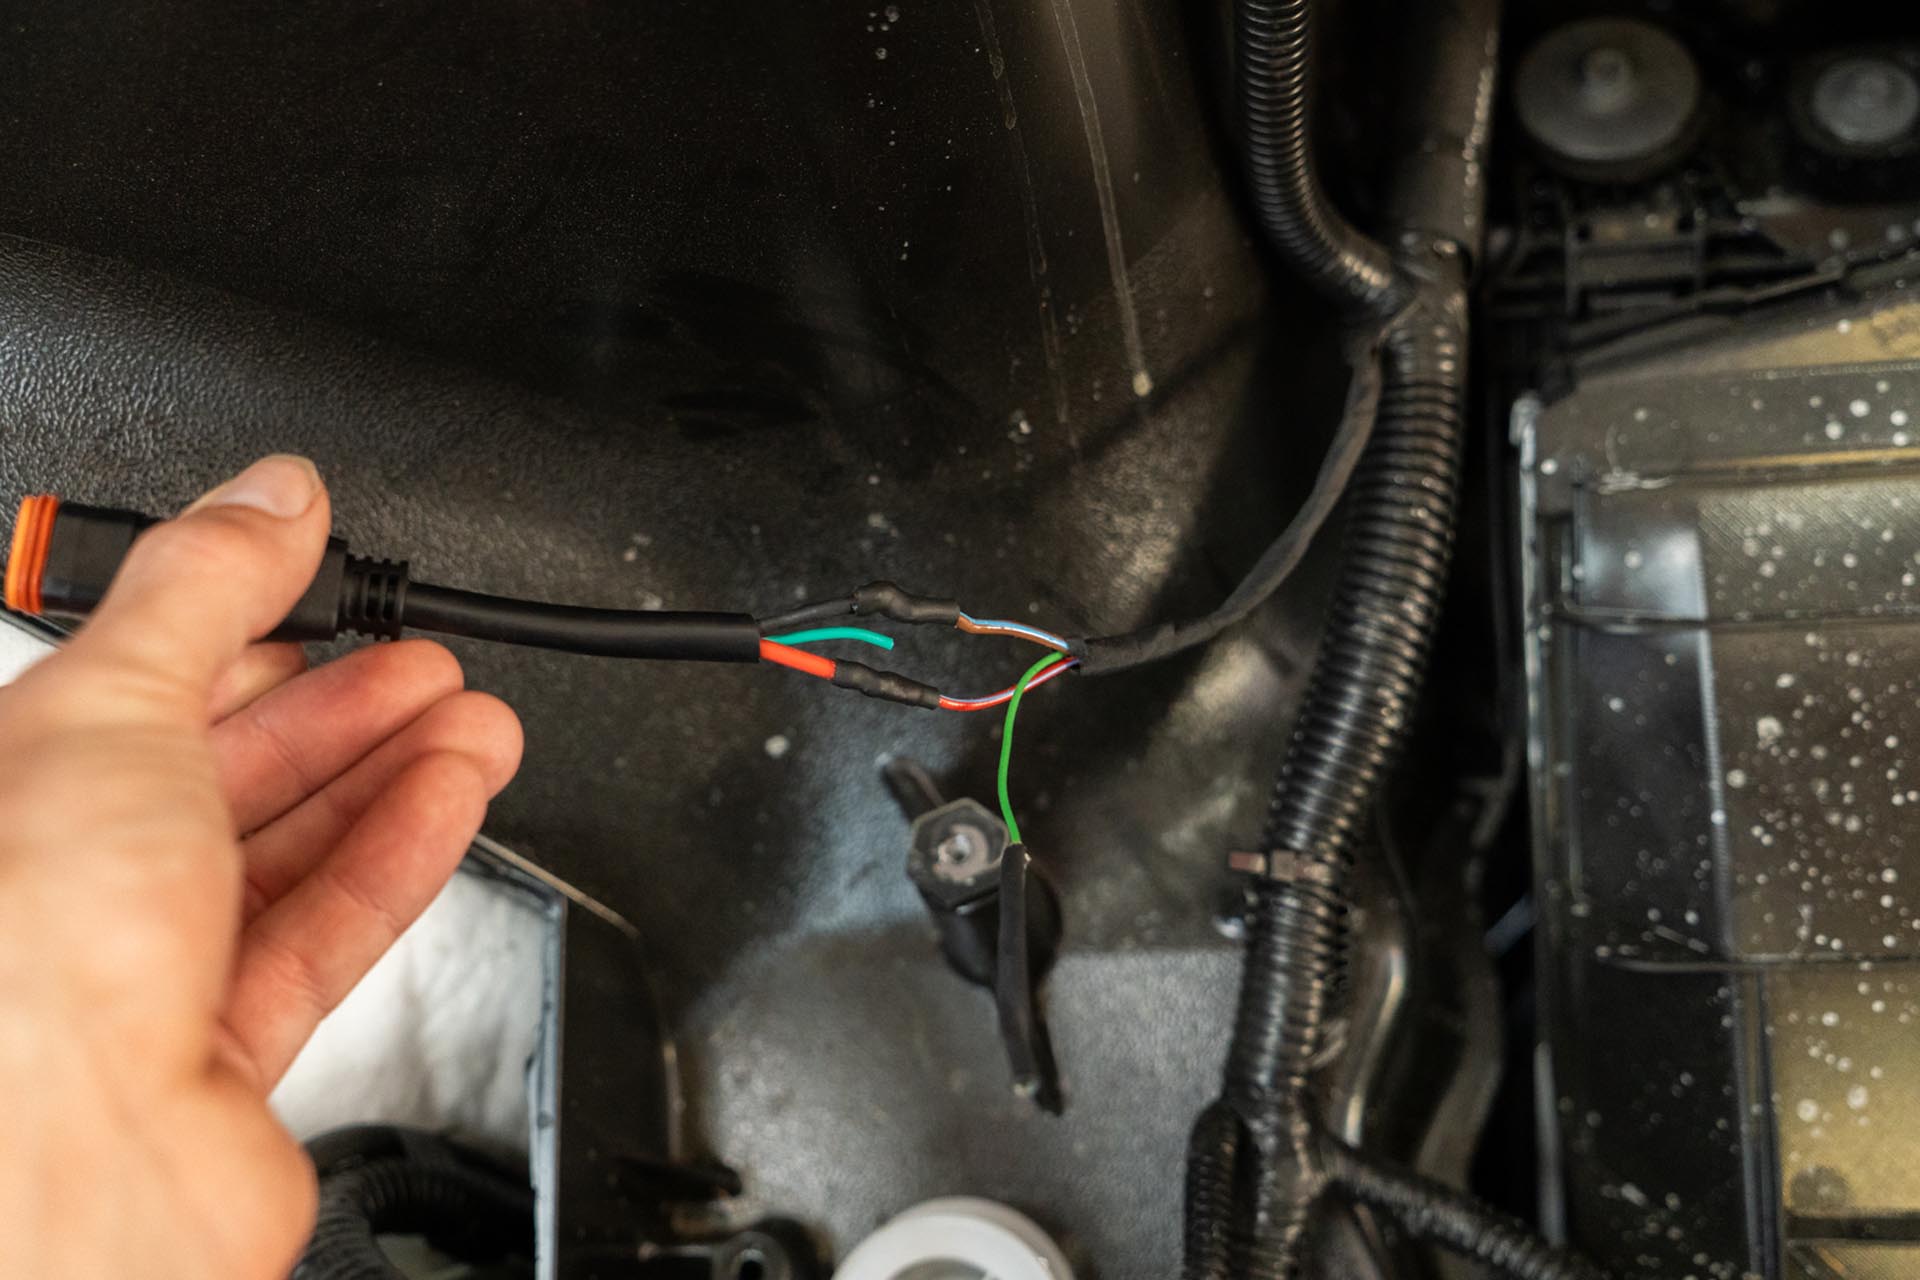
Once the positive and negative have been connected and have been protected from the elements, the light bar power cable can be connected to the truck’s front power feed pigtail.
Note that if you are using multiple front lights, you may need to splice multiple lights to te same factory power feed. In that case, you should use a provided 3-to-1 splitter, and your factory feed splitter should look something like the following photo. If you are missing that connector, please contact unplugged performance to source this component.
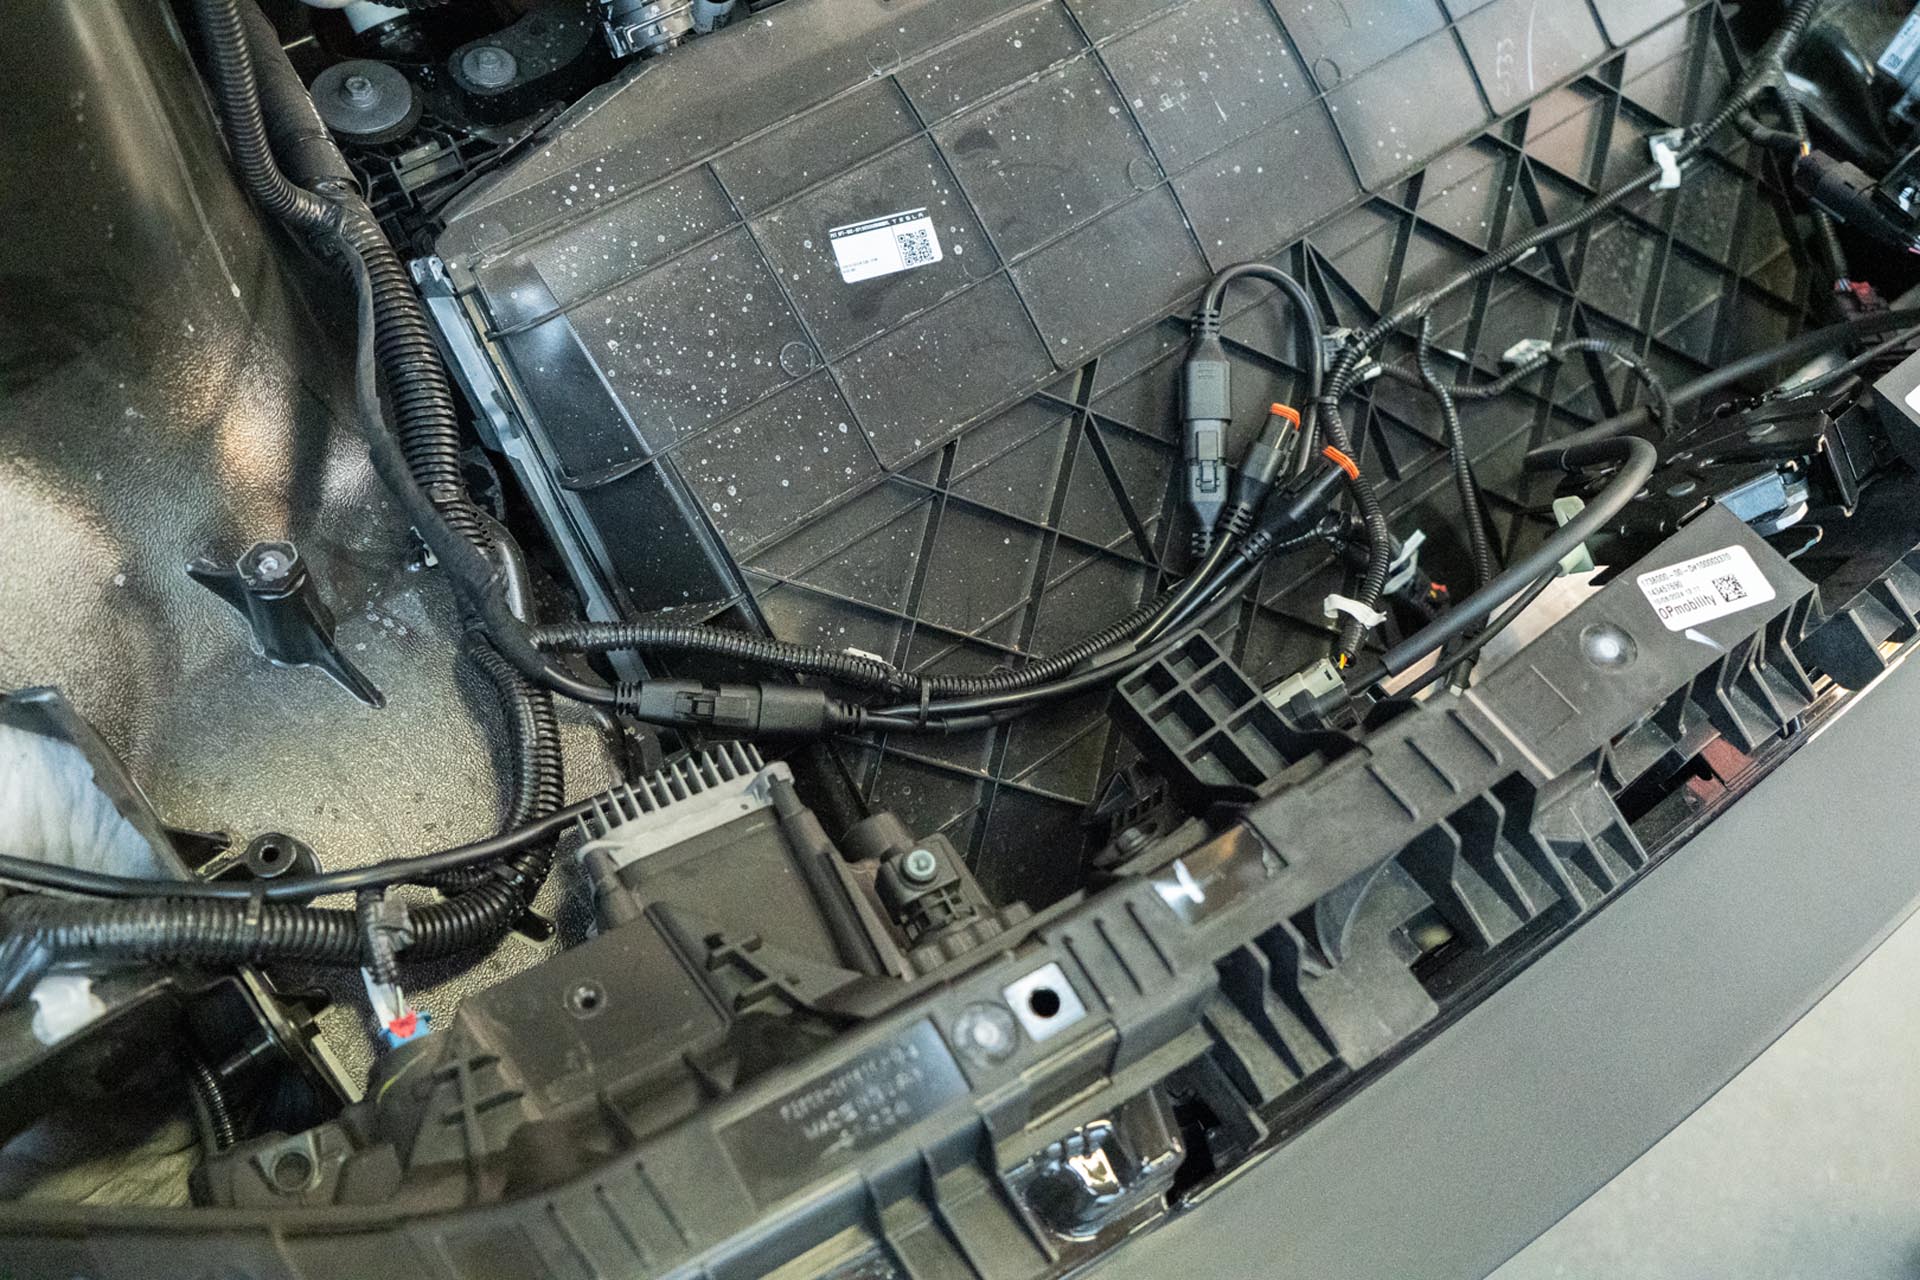
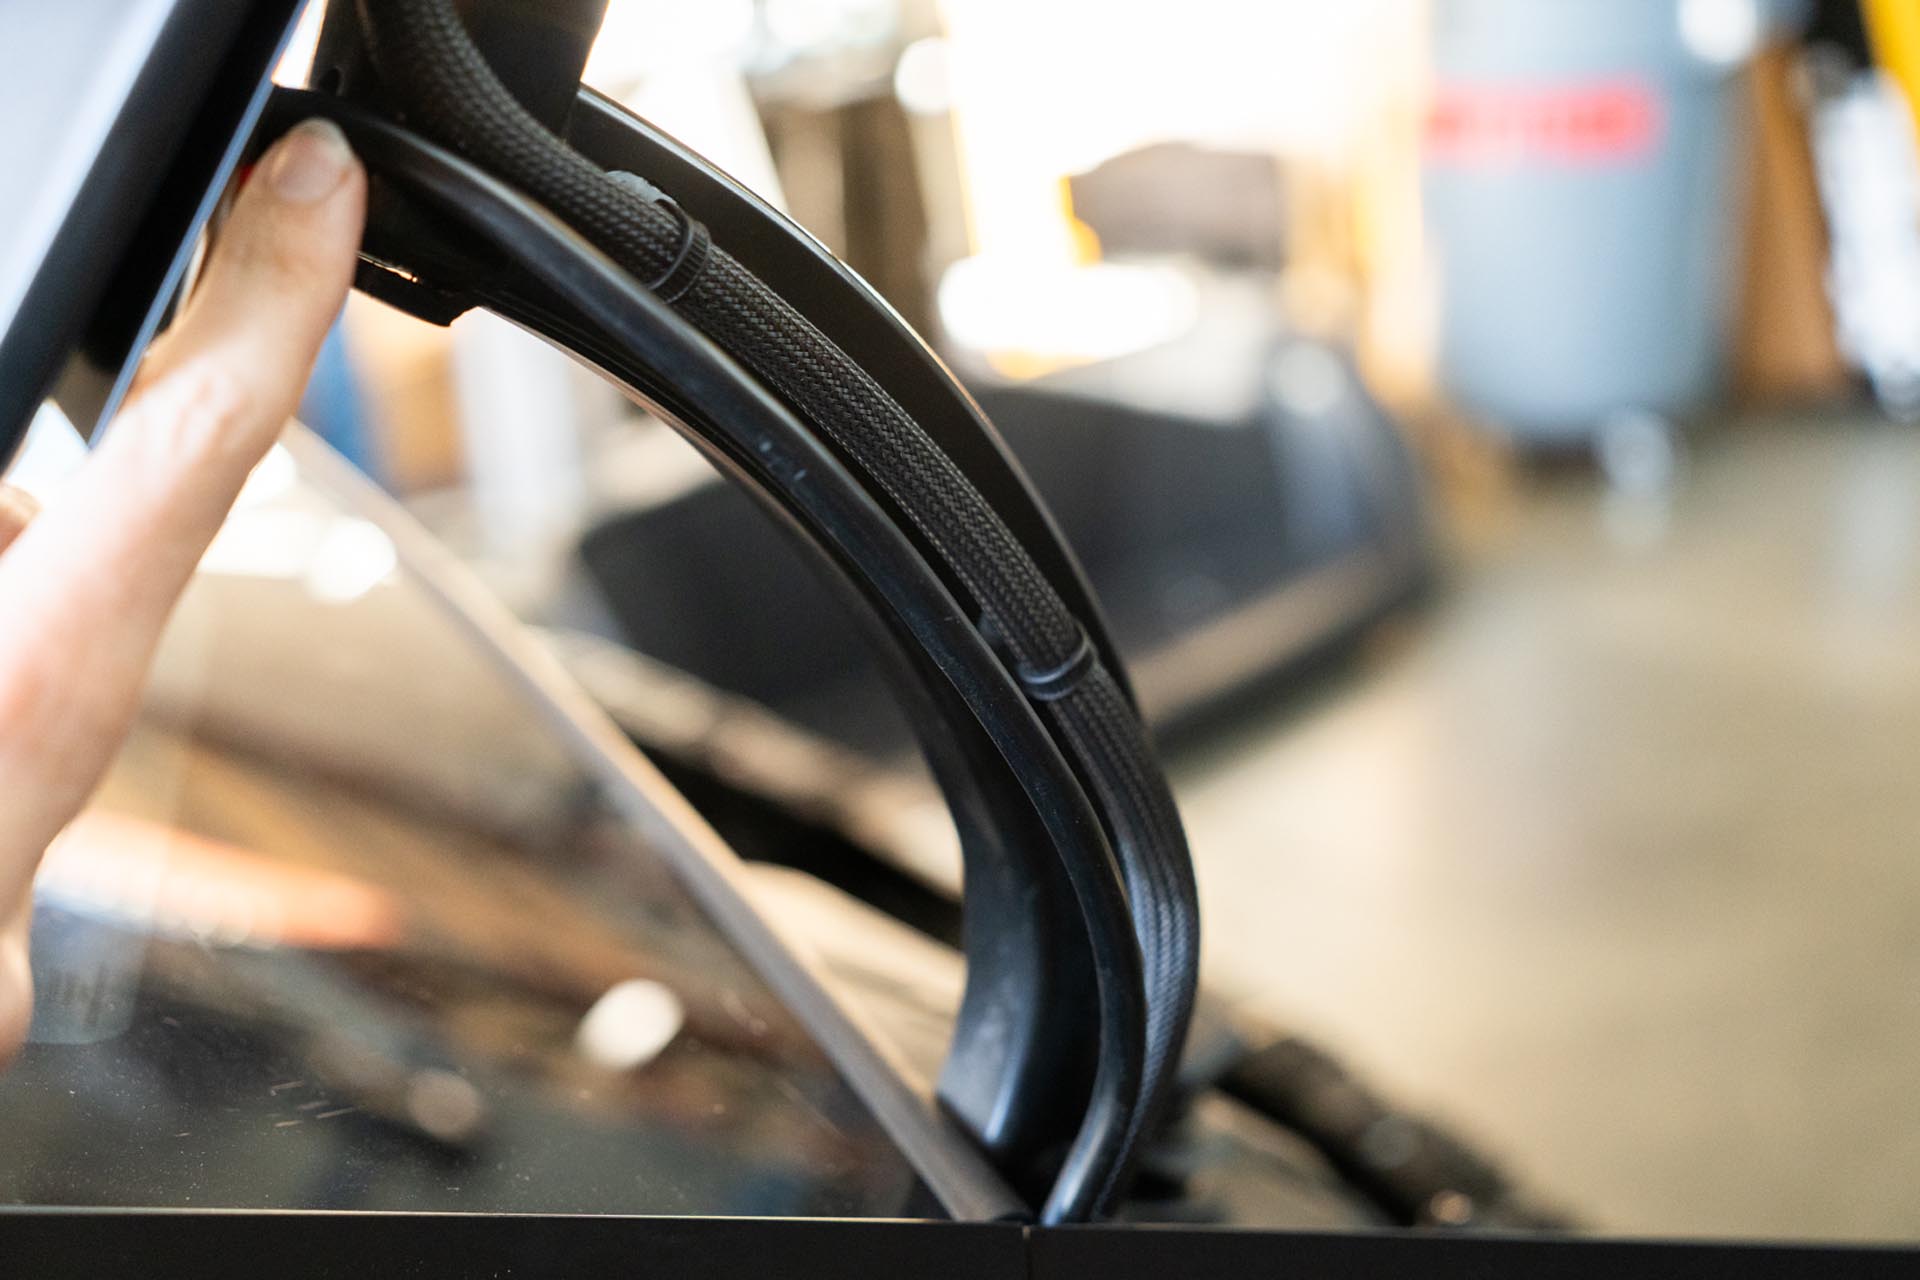
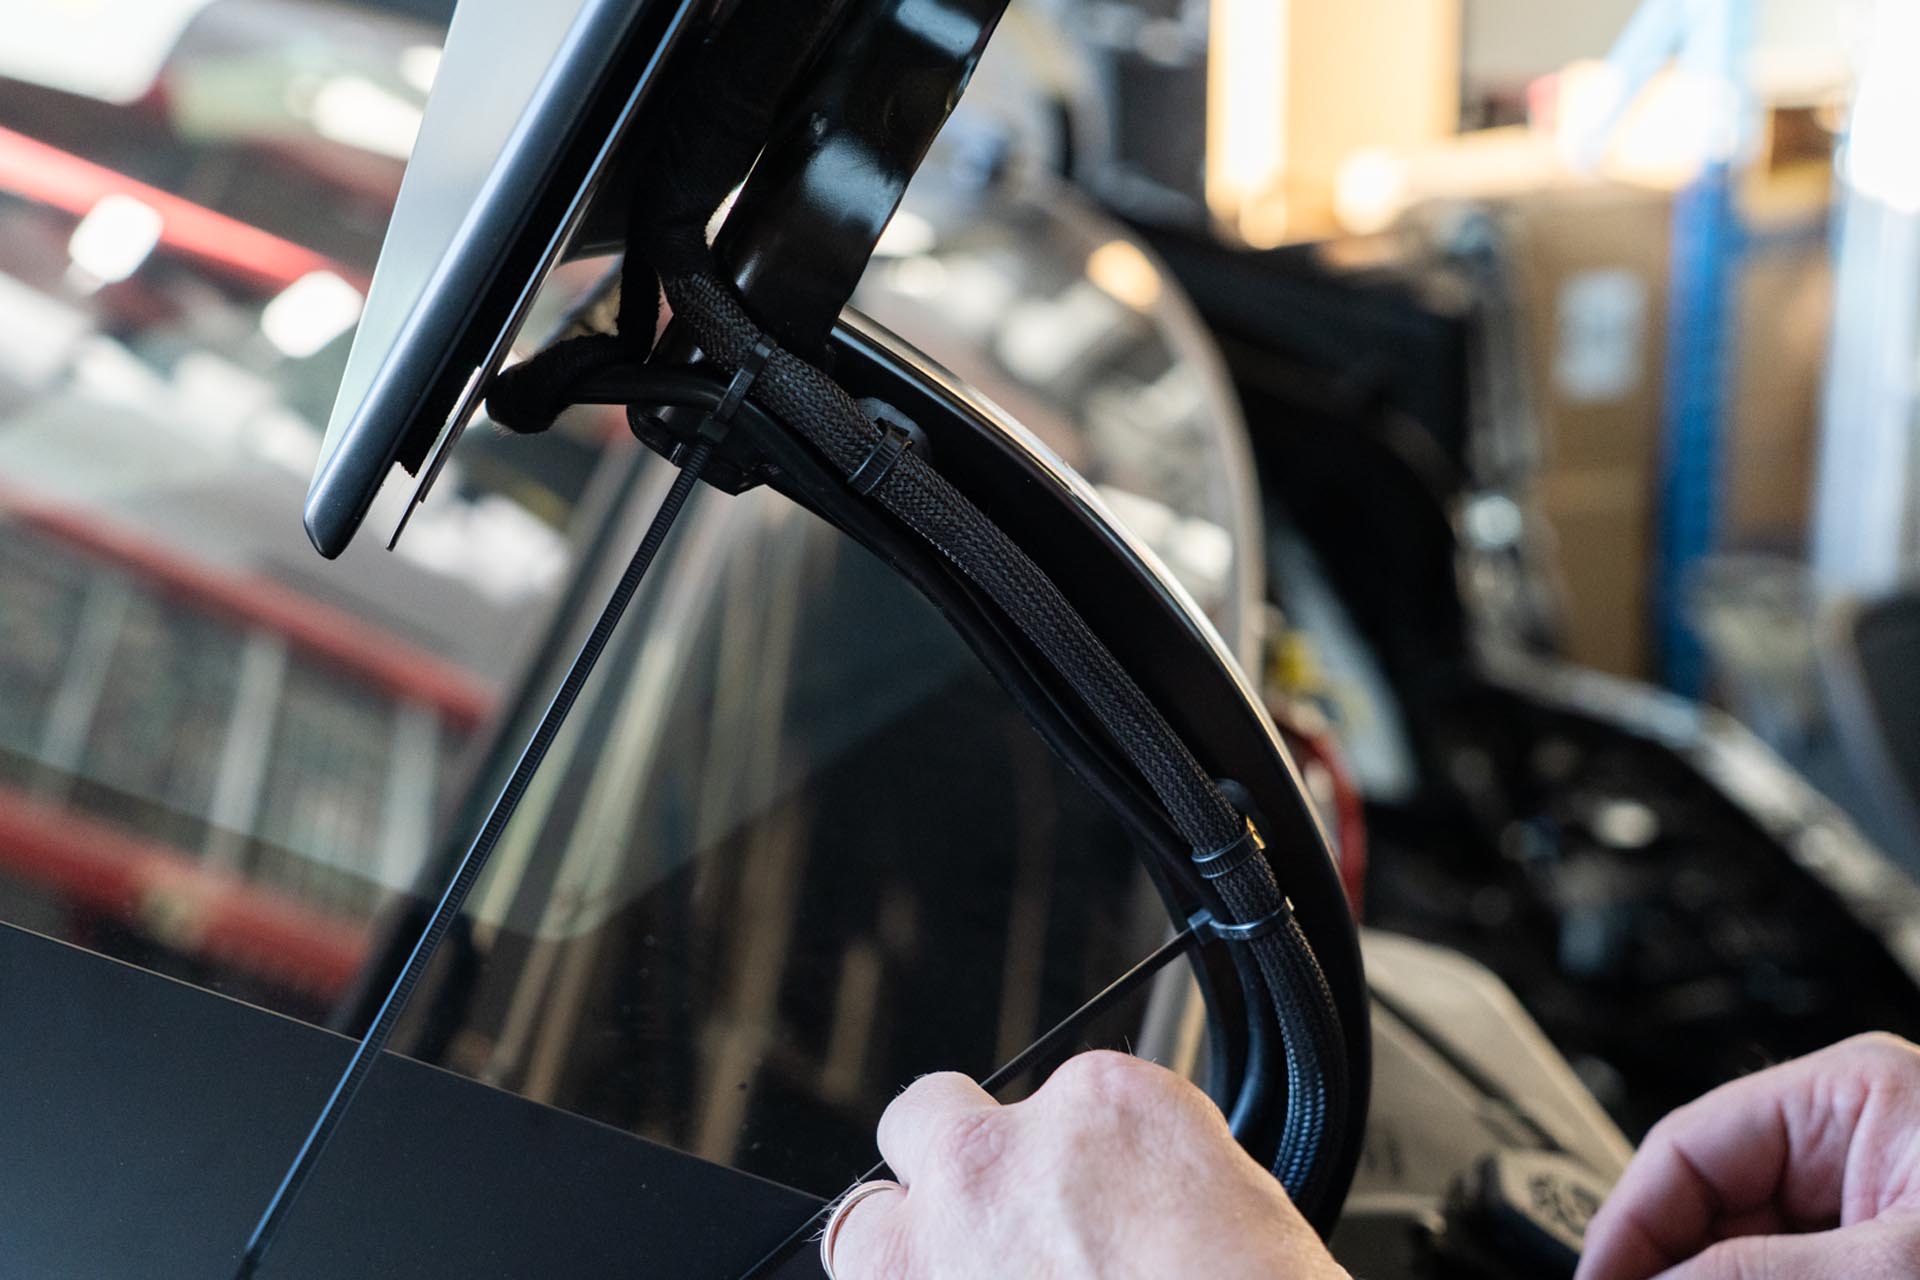
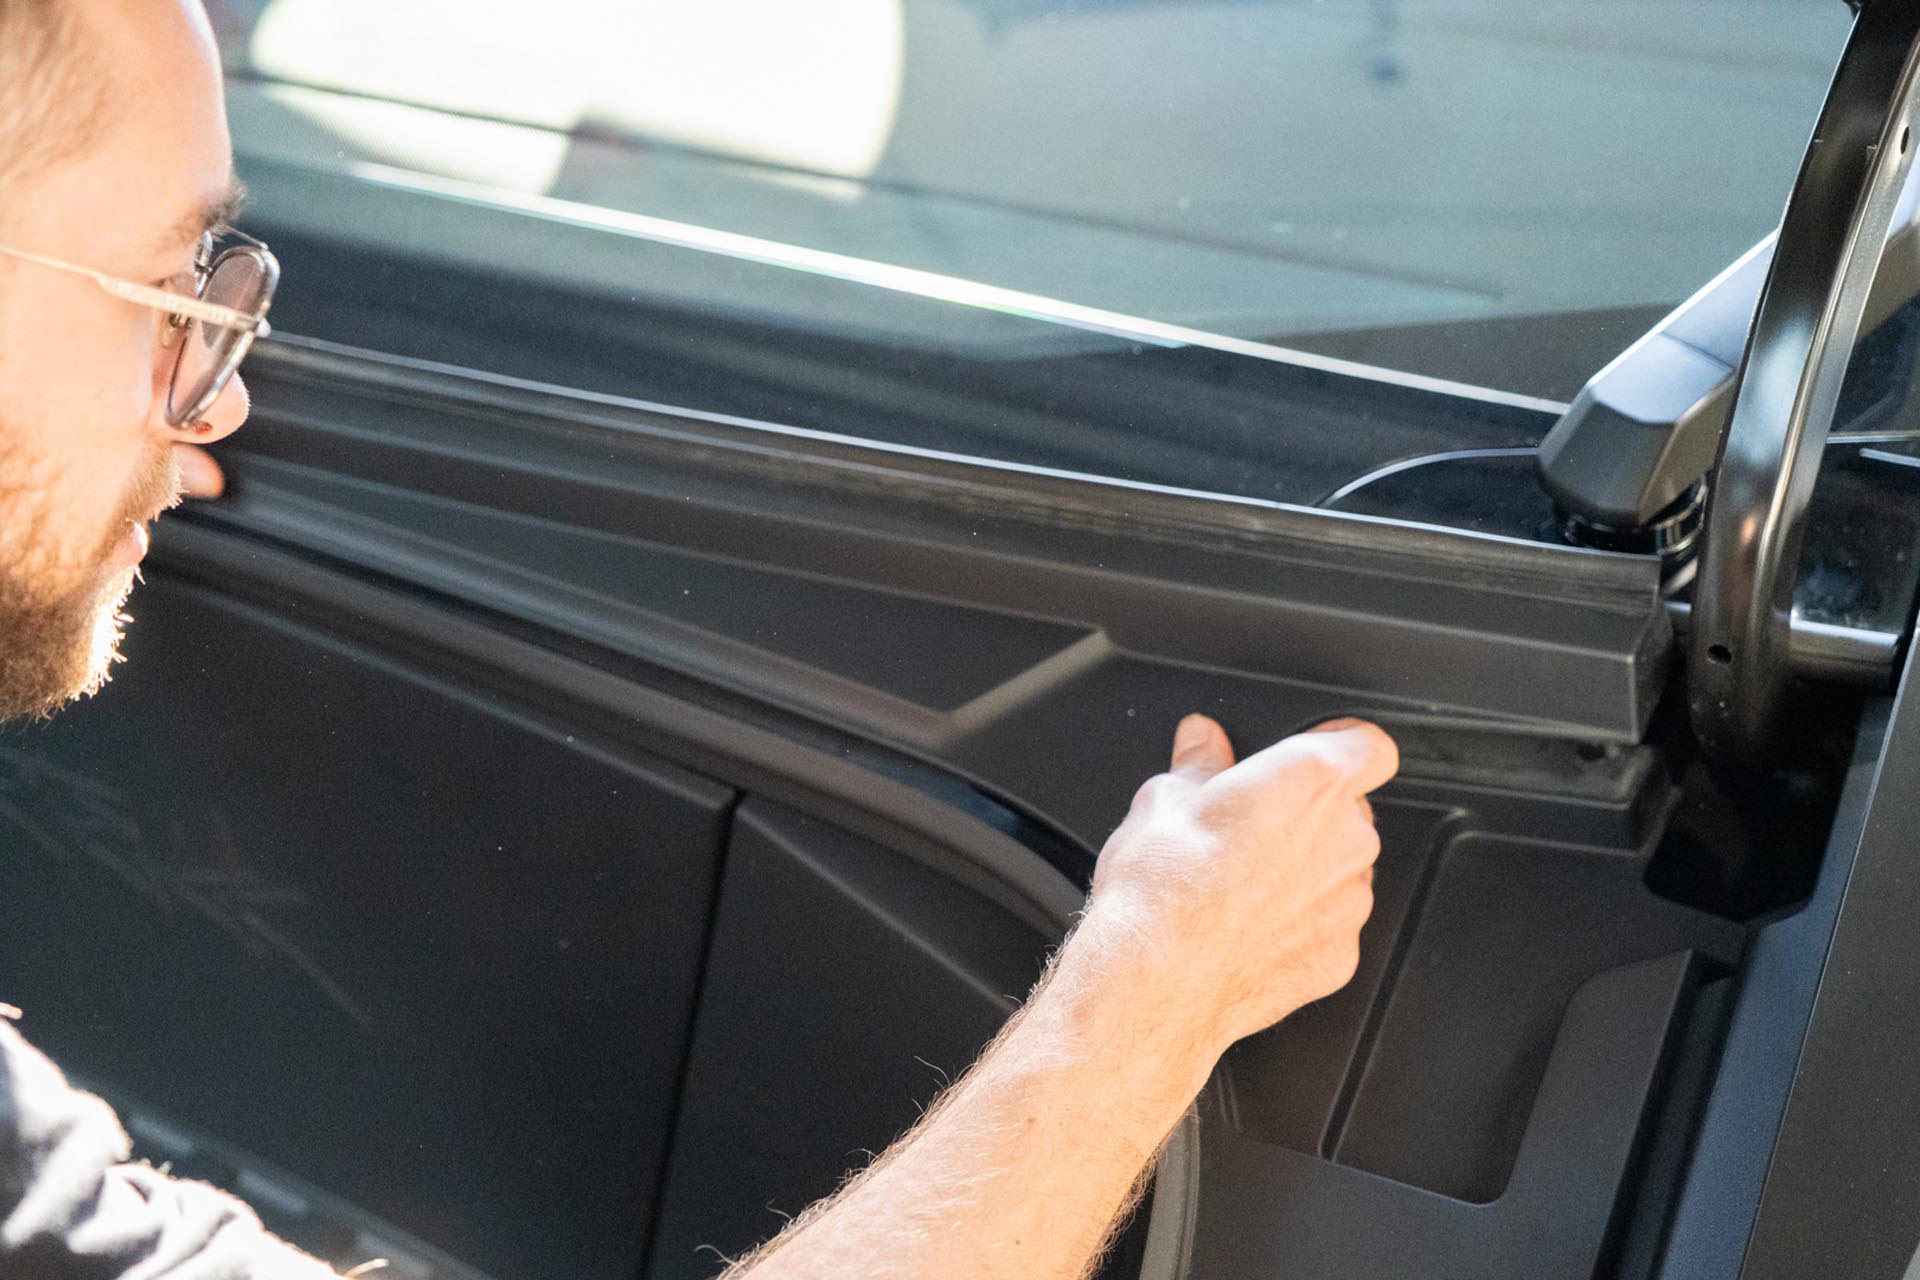
Next, ensure that the hood light bar power cable runs alongside the factory cable assembly on the passenger-side hood hinge as shown below.
Note that the factory mesh cable assembly contains the power cable for the daytime running lights. If you intend to run use your UP amber lights with the factory daytime running lights, you can utilize the following cables to source power and input from. Keep in mind that this is splicing into a factory bus assembly, and Unplugged Performance is not responsible for any damage, consequential damage, or voiding of any warranties.
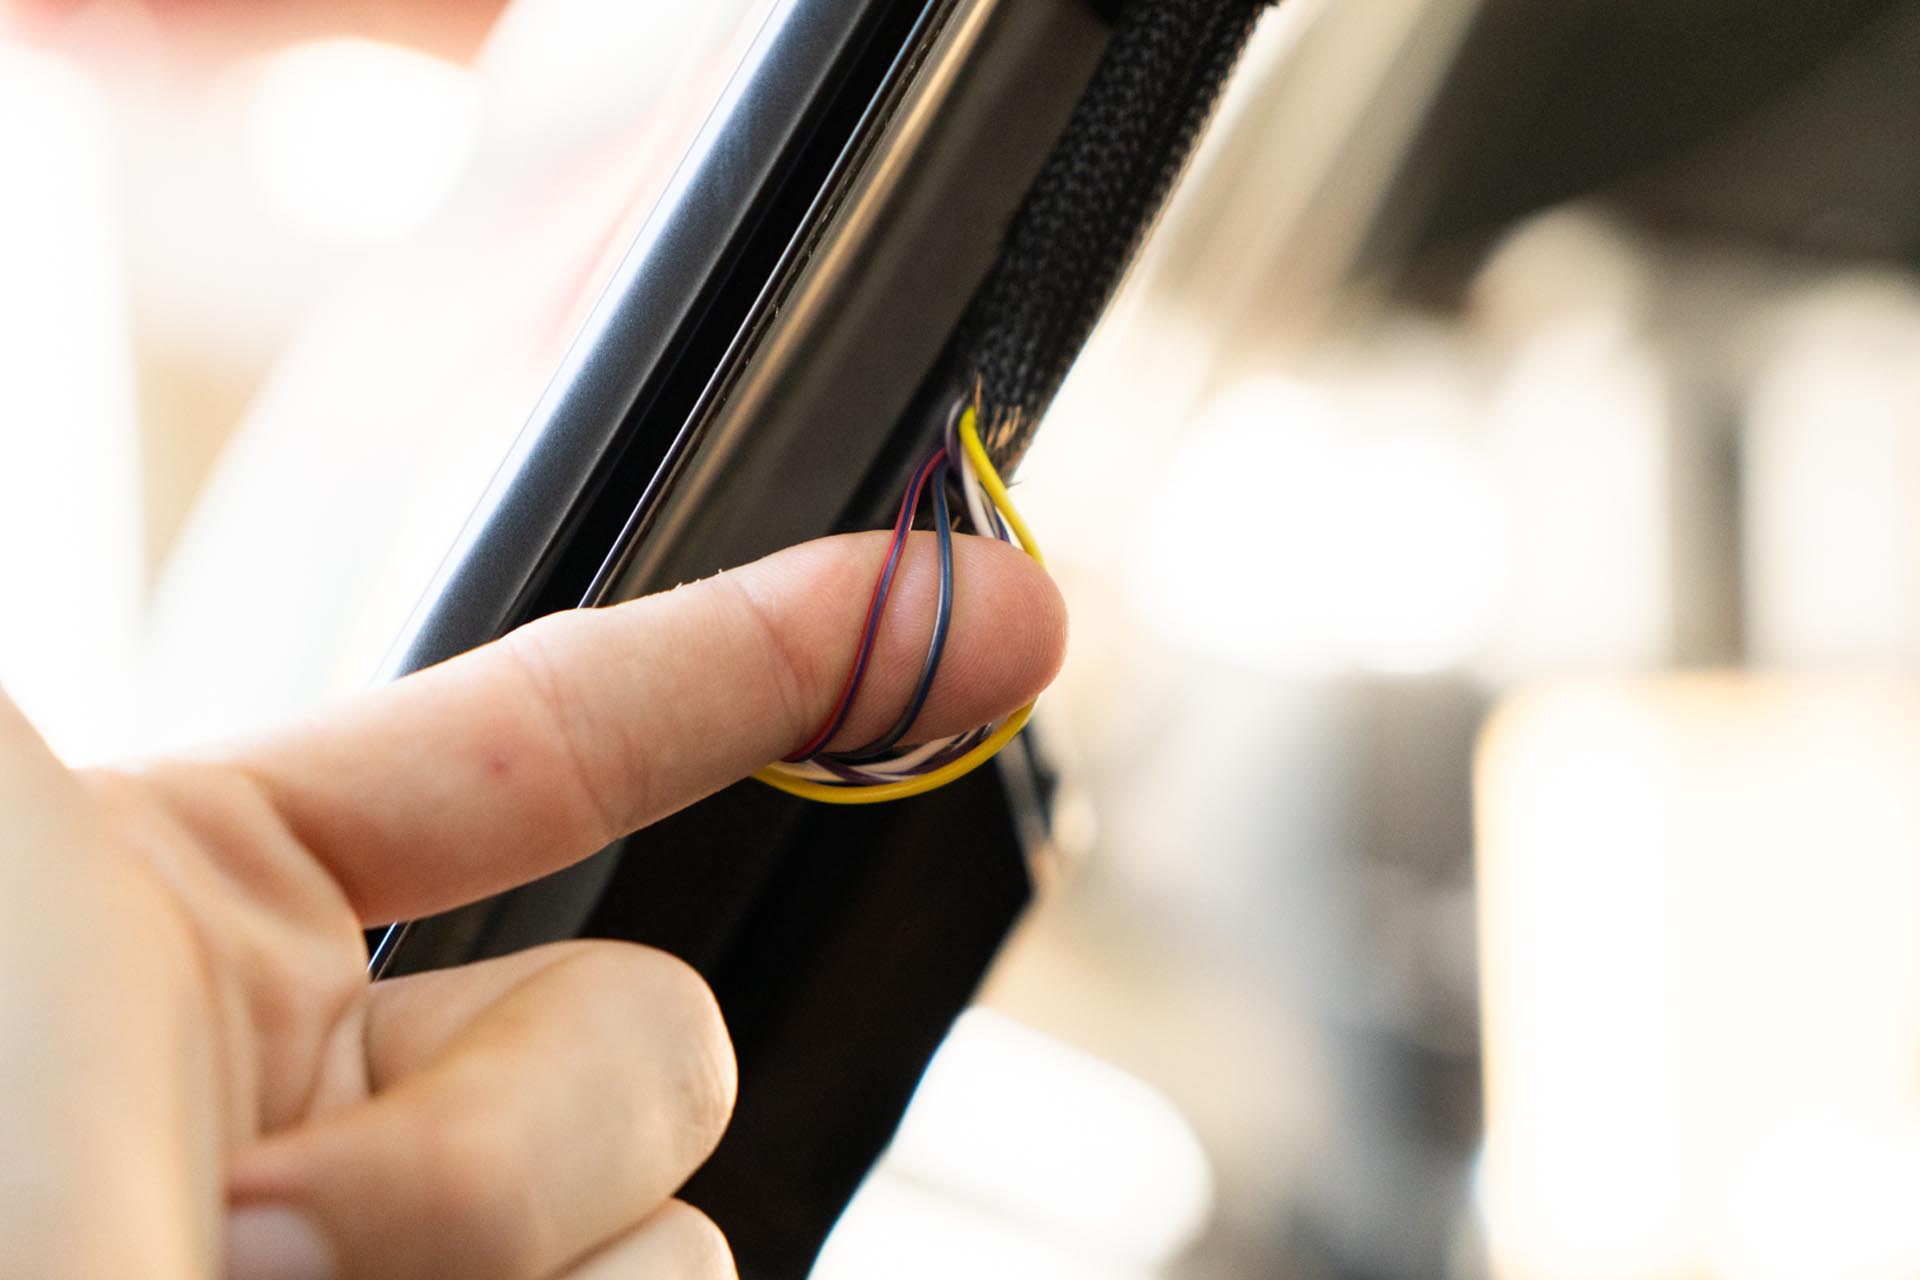
Should you choose to proceed, route your amber lead cables to tether to the factory DRL power feed. Be sure to route the cabe in a way where it is not impacted by the range of motion of the hood, nor pinched by the hood hinge.
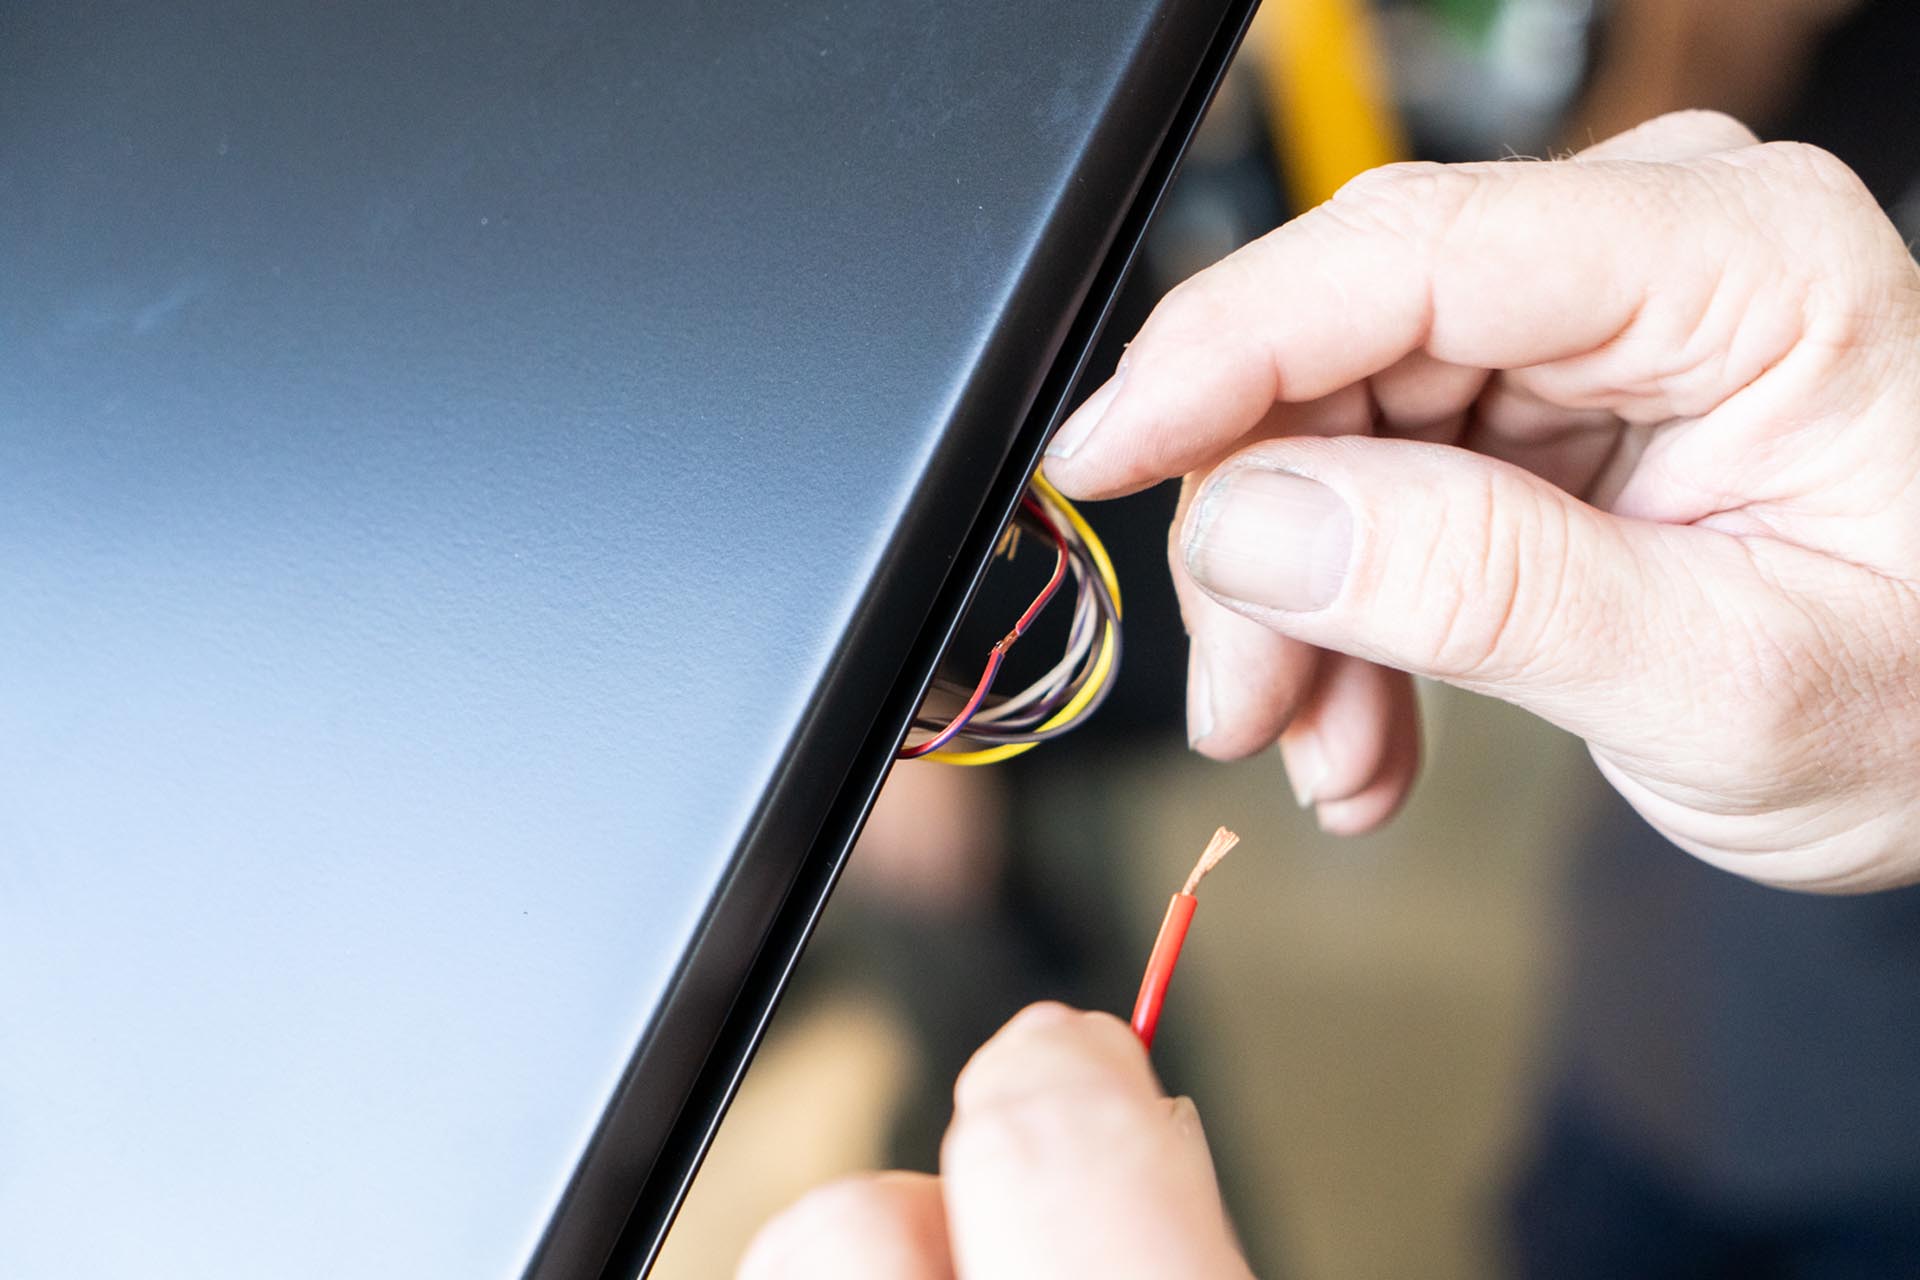
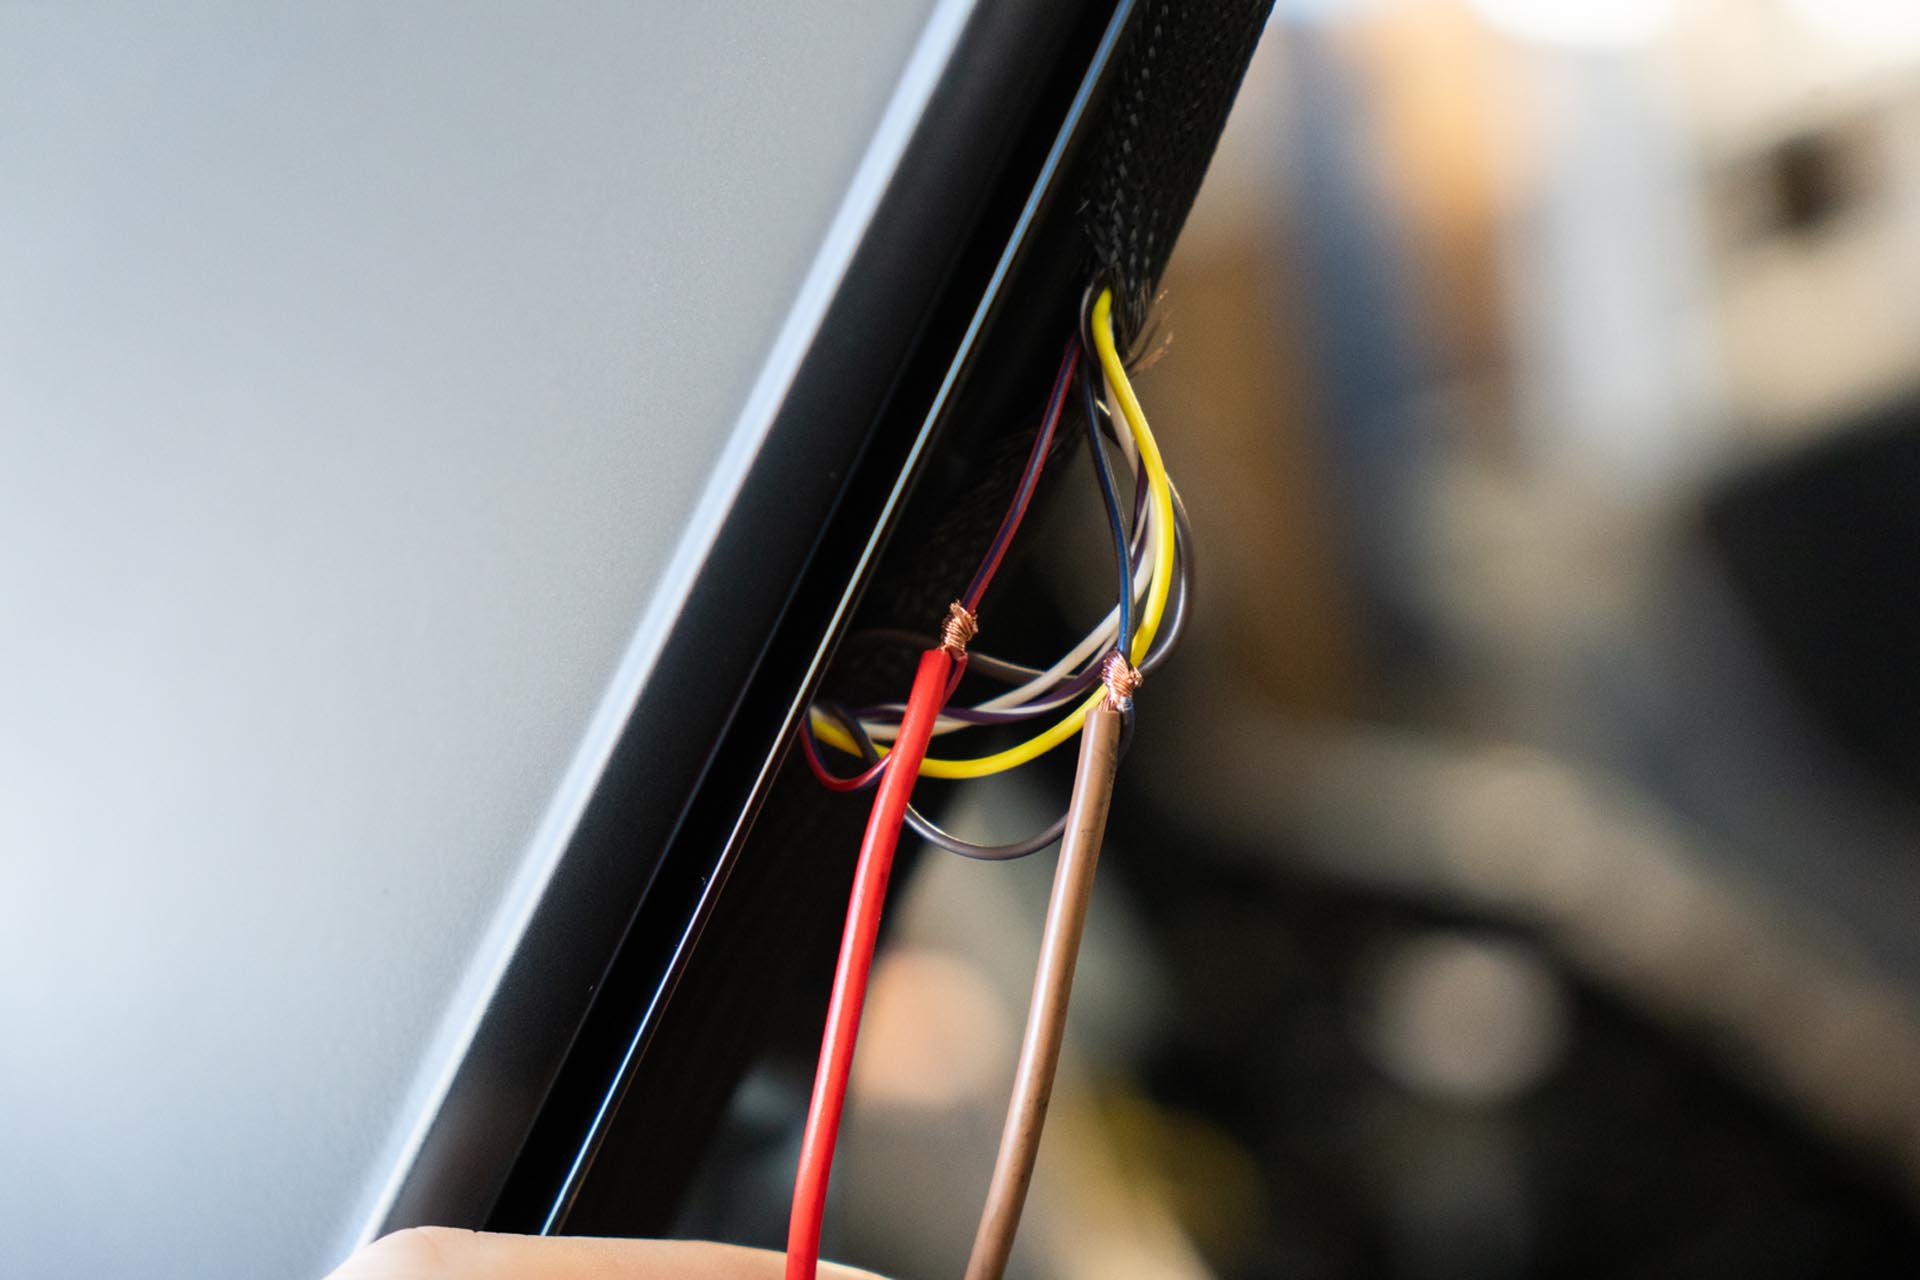
Be sure to use either electrical tape, or shrink wrap to protect the connection points.
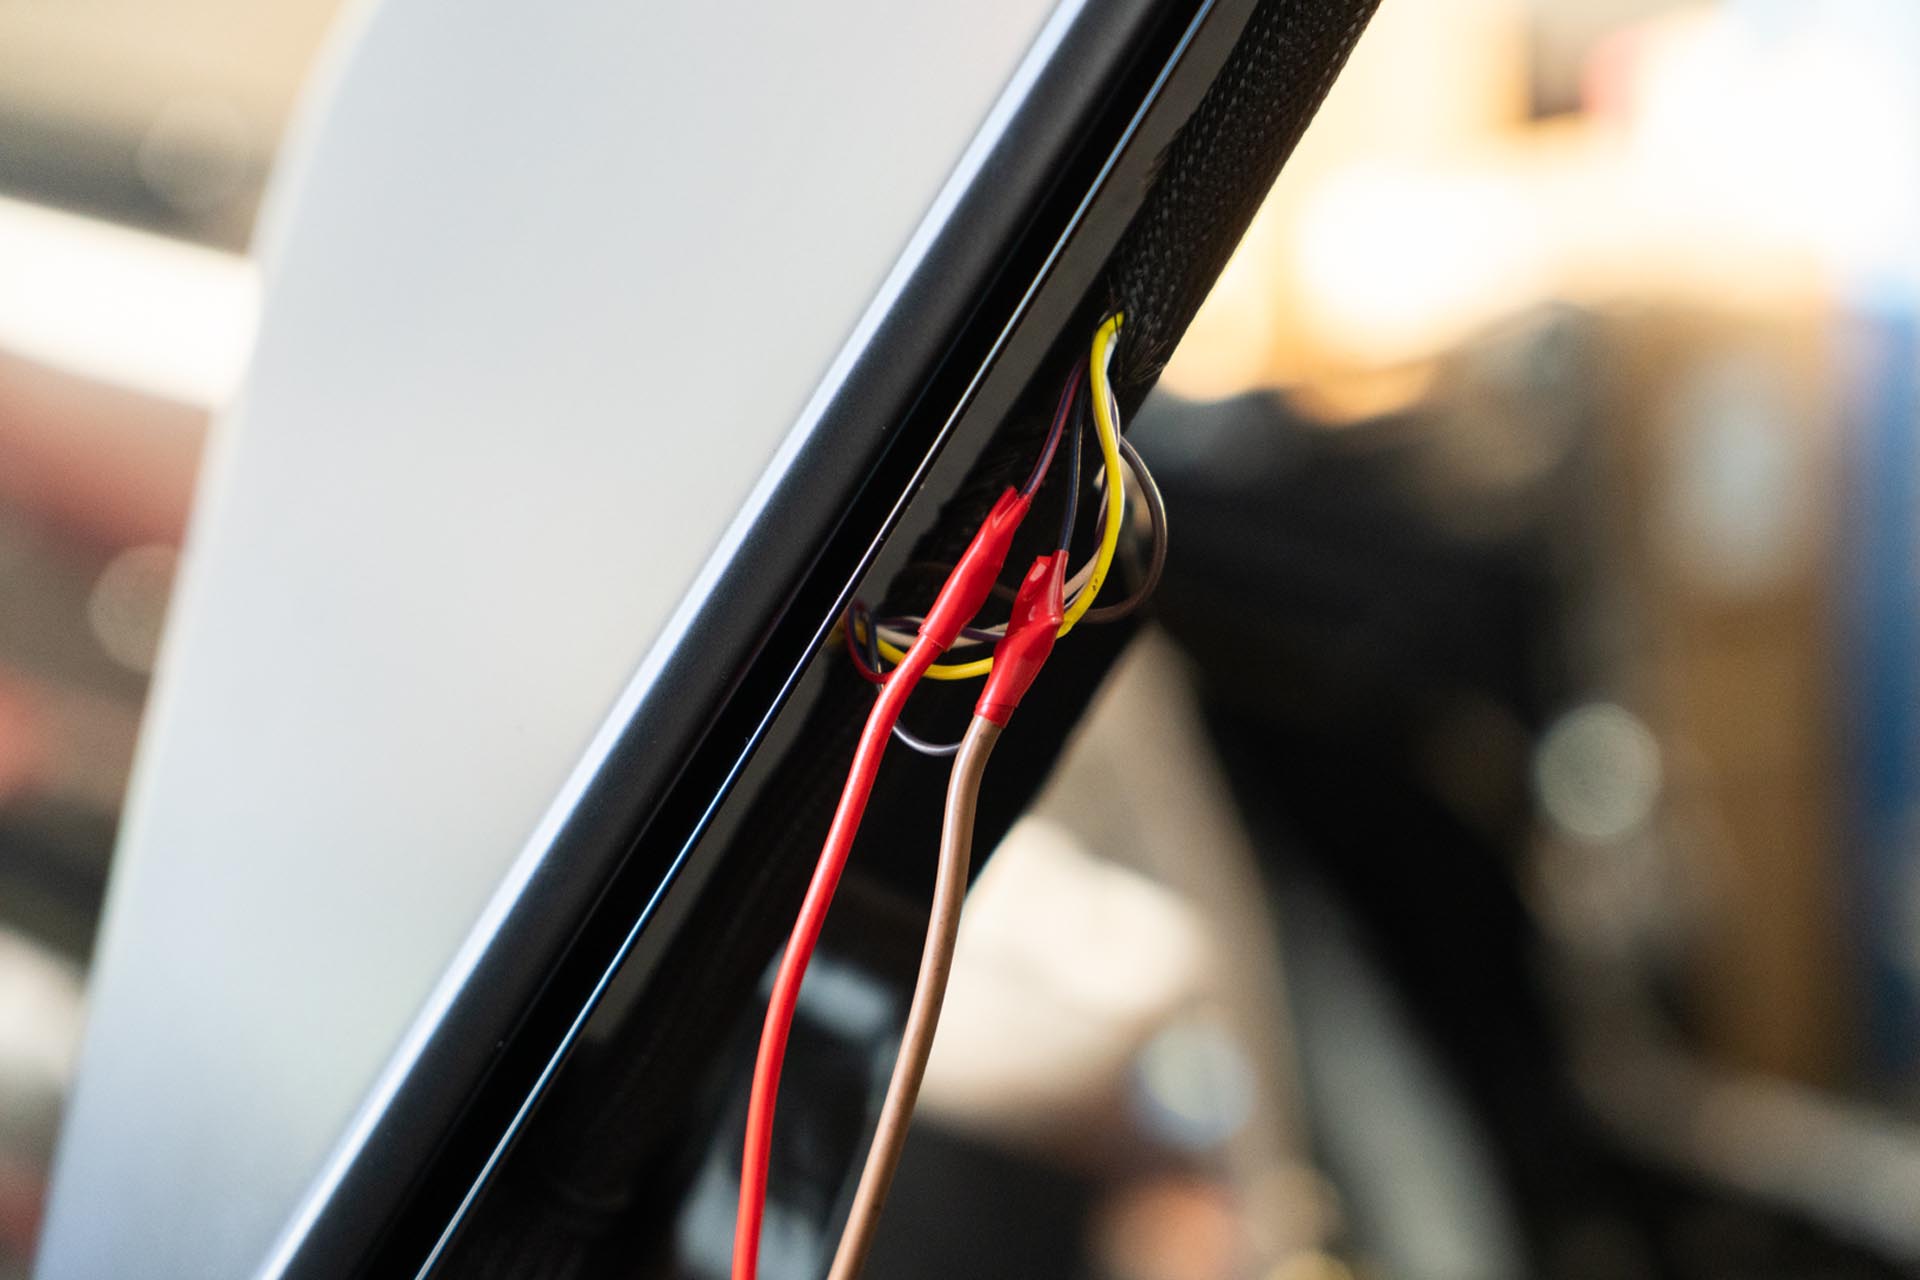
Proceed to manually open and close the hood to ensure that no tension is present in any of the added cable assemblies. Then using zip ties and tie offs, secure the new cables to the factory bus assembly.
Reinstall the front trunk tub and hardware in the reverse order it was removed from the vehicle.
Congratulations! Your Installation is complete! If you have any outstanding questions or concerns, please reach out to the Customer Support by calling 213-279-7420, OR by emailing us at support@unpluggedperformance.com with your name, order number, and context regarding your concerns.